Here Comes Summer: Grilled Sausage Kabobs with Farro “Risotto”

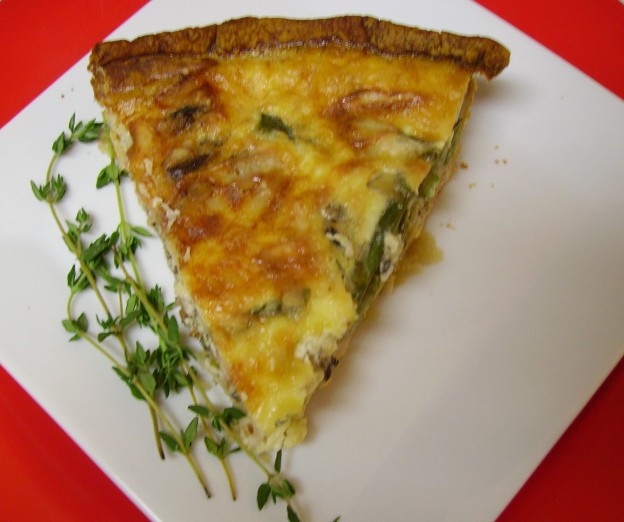
Looking out over our balcony, I get the feeling that we are inching ever closer to summer. Trees are now wearing lush green headdresses instead of sparse crowns of twigs. The grass is green and thanks to the gardeners always cut and lush. (the hubby has gone on record as not missing mowing in the least).

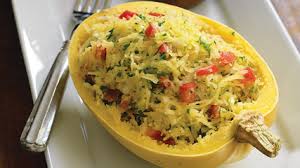
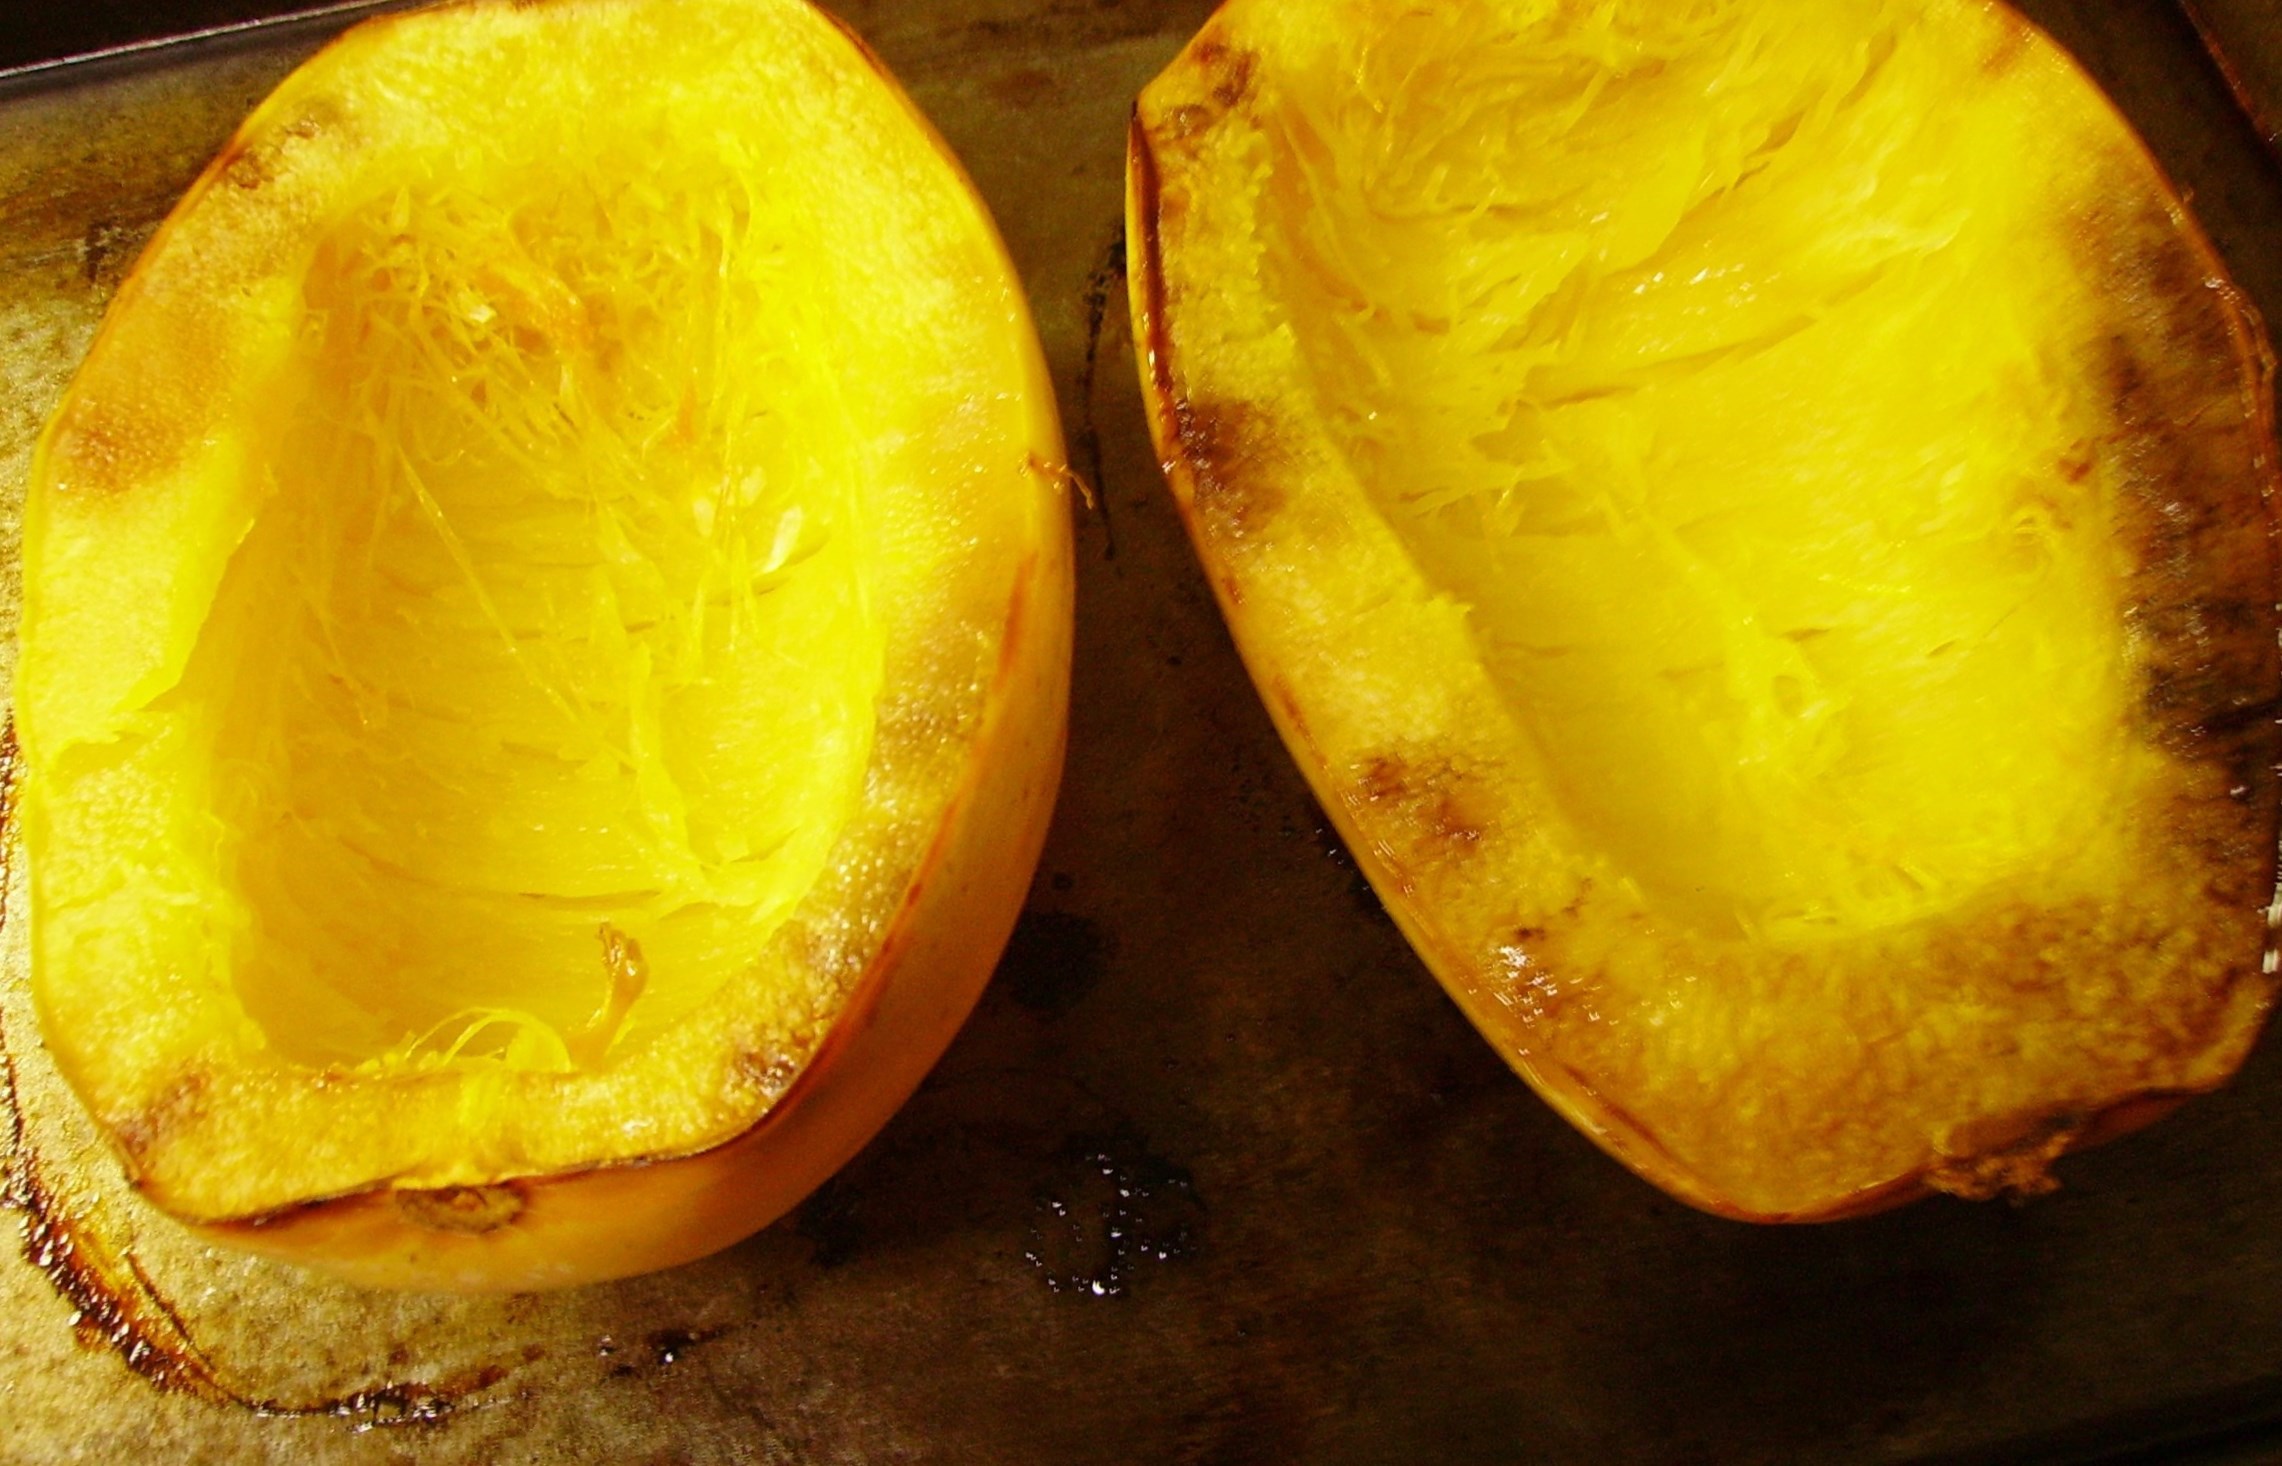
I’ve even ventured into the suburban farmer’s life by planting some things in our complex’s community garden. This large plot has been adopted by a dear woman named Lois. She is in her sophomore year in the garden and has sown quite an impressive variety of seeds, My meager contribution of tomatoes, peppers, spaghetti squash, and zucchini joined beans, carrots, onions, potatoes, and a mind-boggling variety of lettuce and greens.

DIGITAL CAMERA
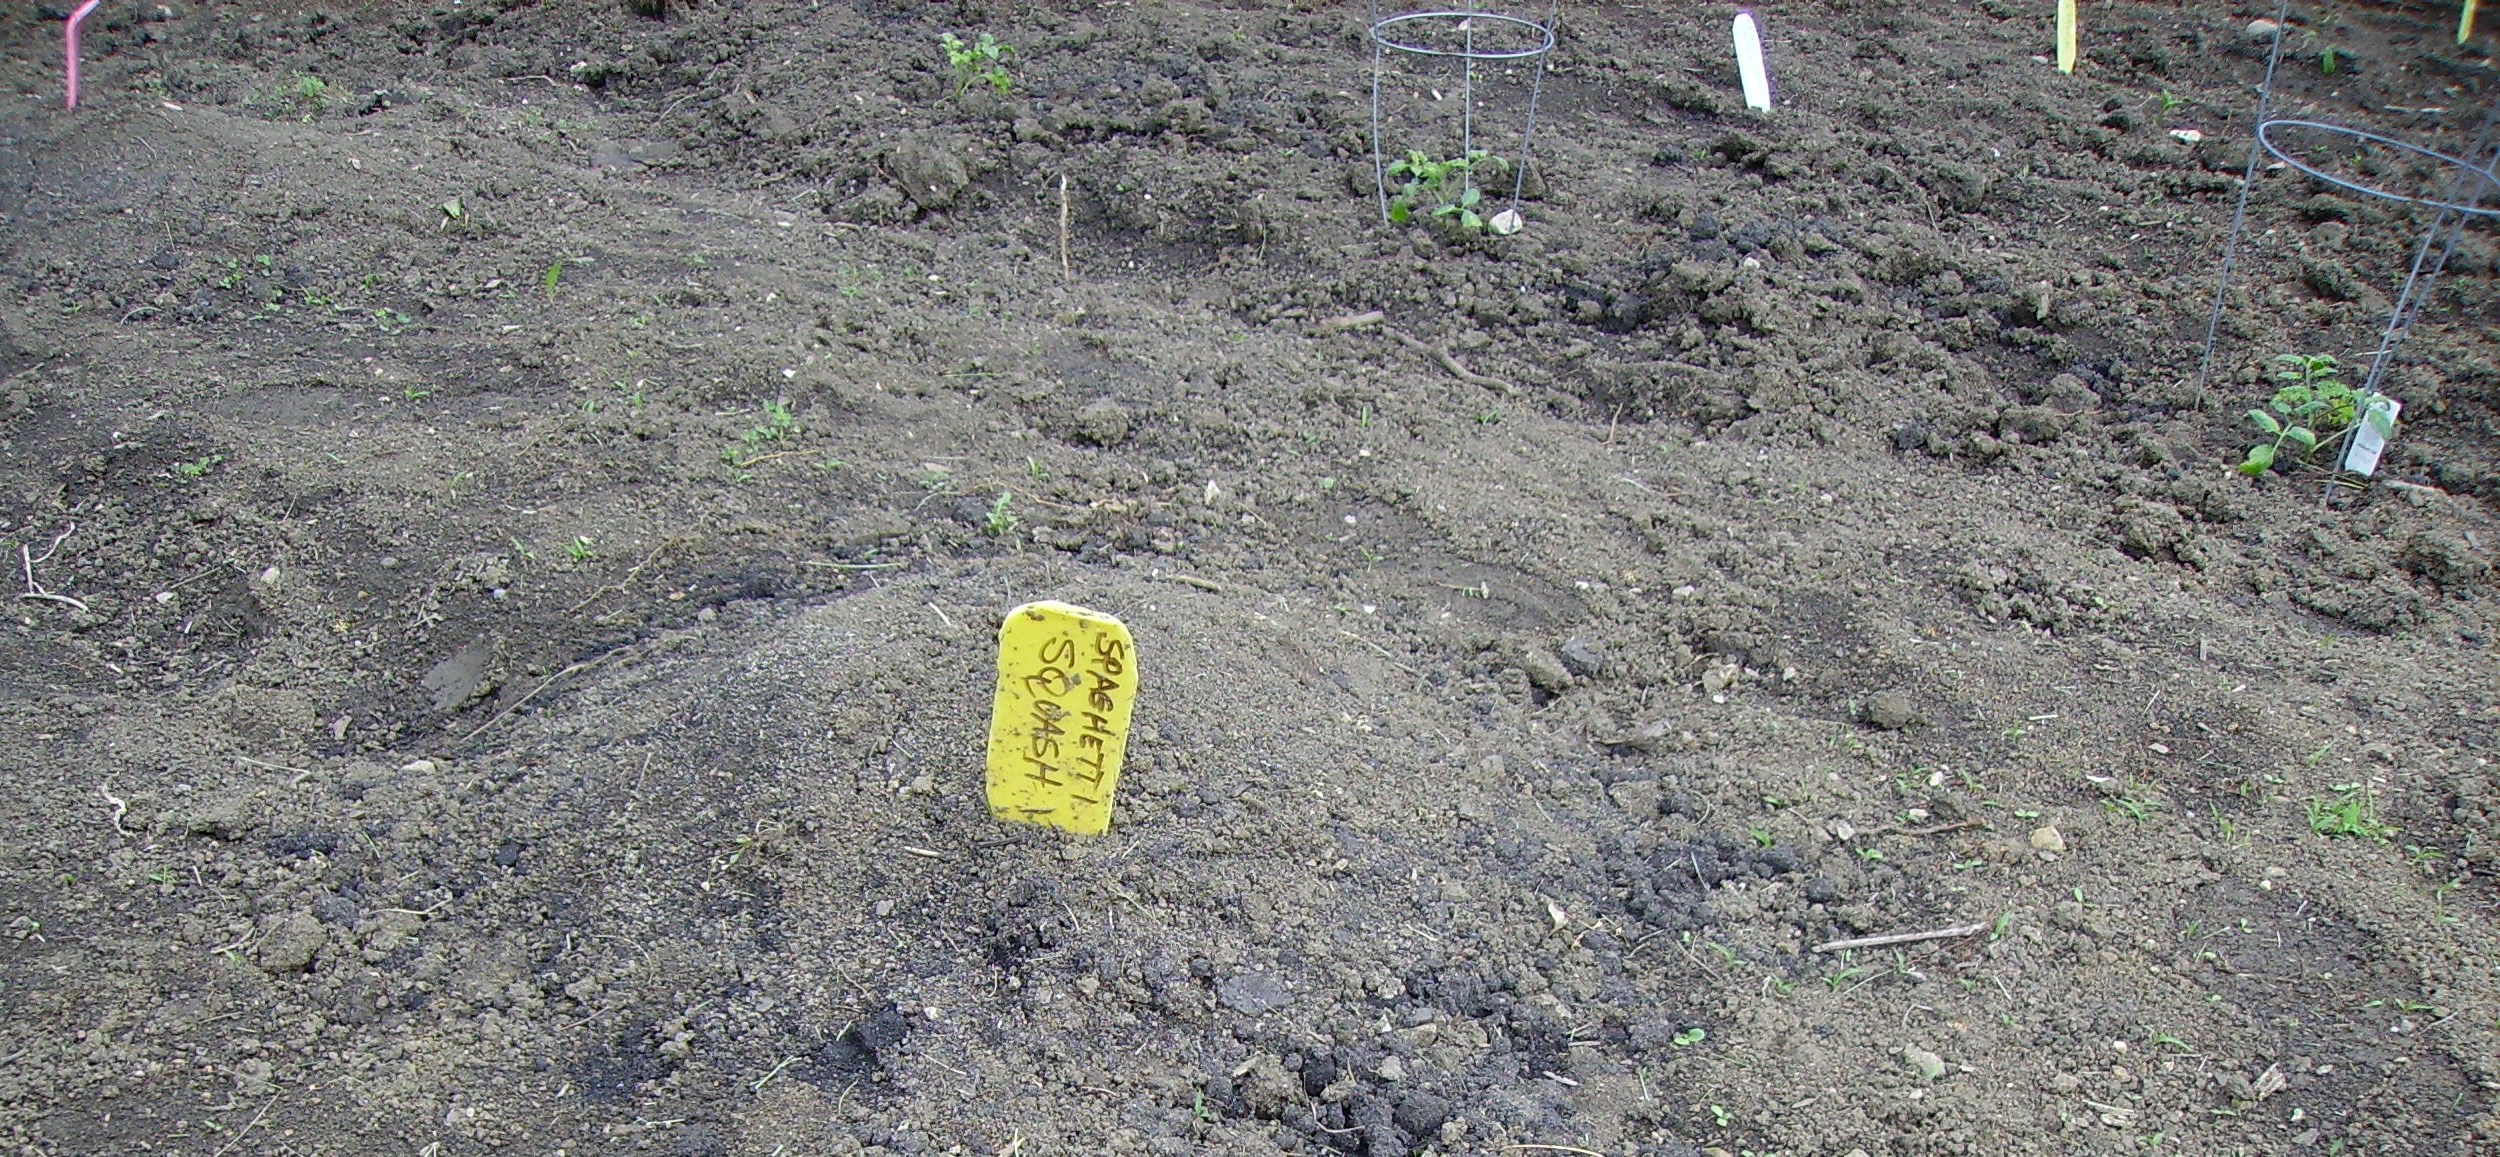
While it is little more than a rectangle of dirt with colorful signs and a few sprouts, our typical weather pattern of rain and sun will transform it into something green, beautiful, and delicious in the coming weeks. I can hardly wait!

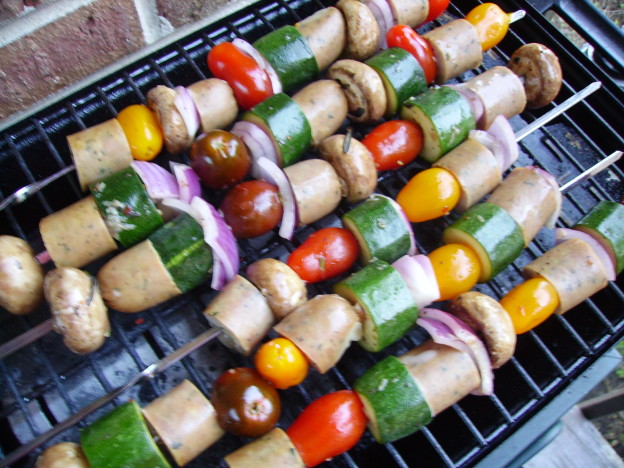
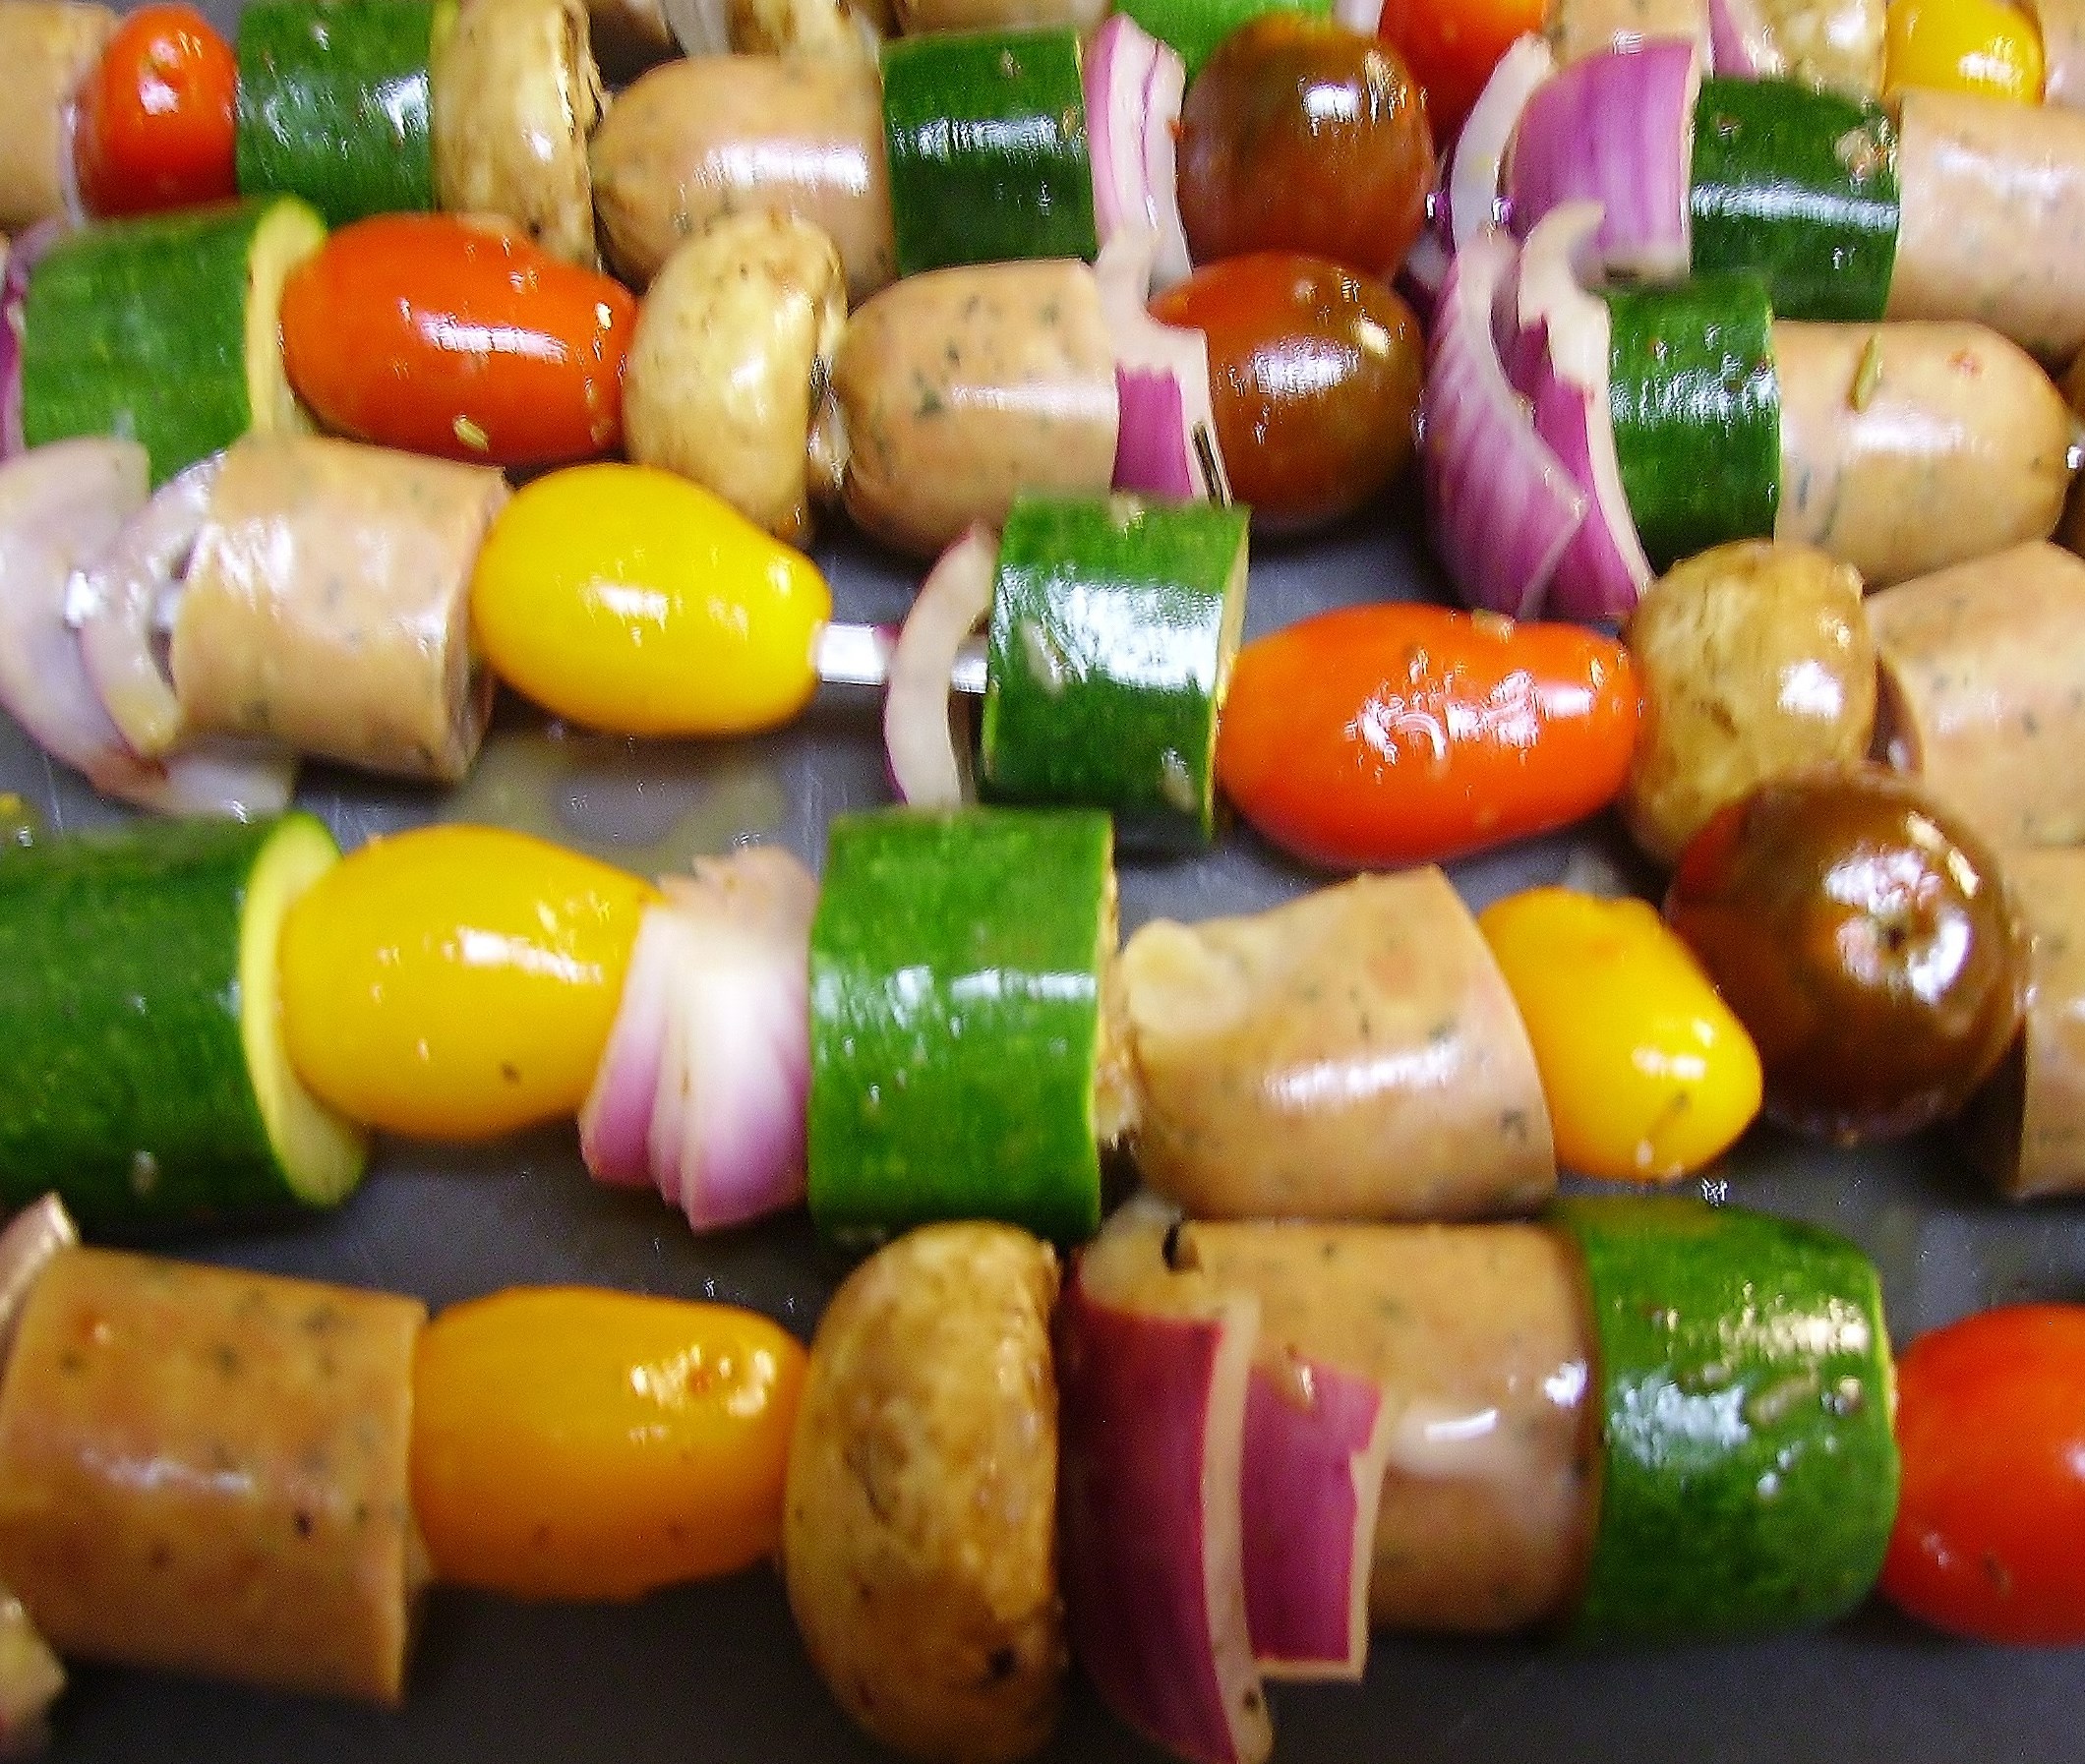
Our little grill on the balcony has been seeing a lot of action lately as we take advantage of the warmer weather. We are also experimenting to learn what it does best. These kabobs were a major success. Pre-cooked sausage and quick cooking veggies were the perfect match-up for the grill’s moderate heating abilities. Everything cooked together and there was even a distinct taste of the grill.

DIGITAL CAMERA
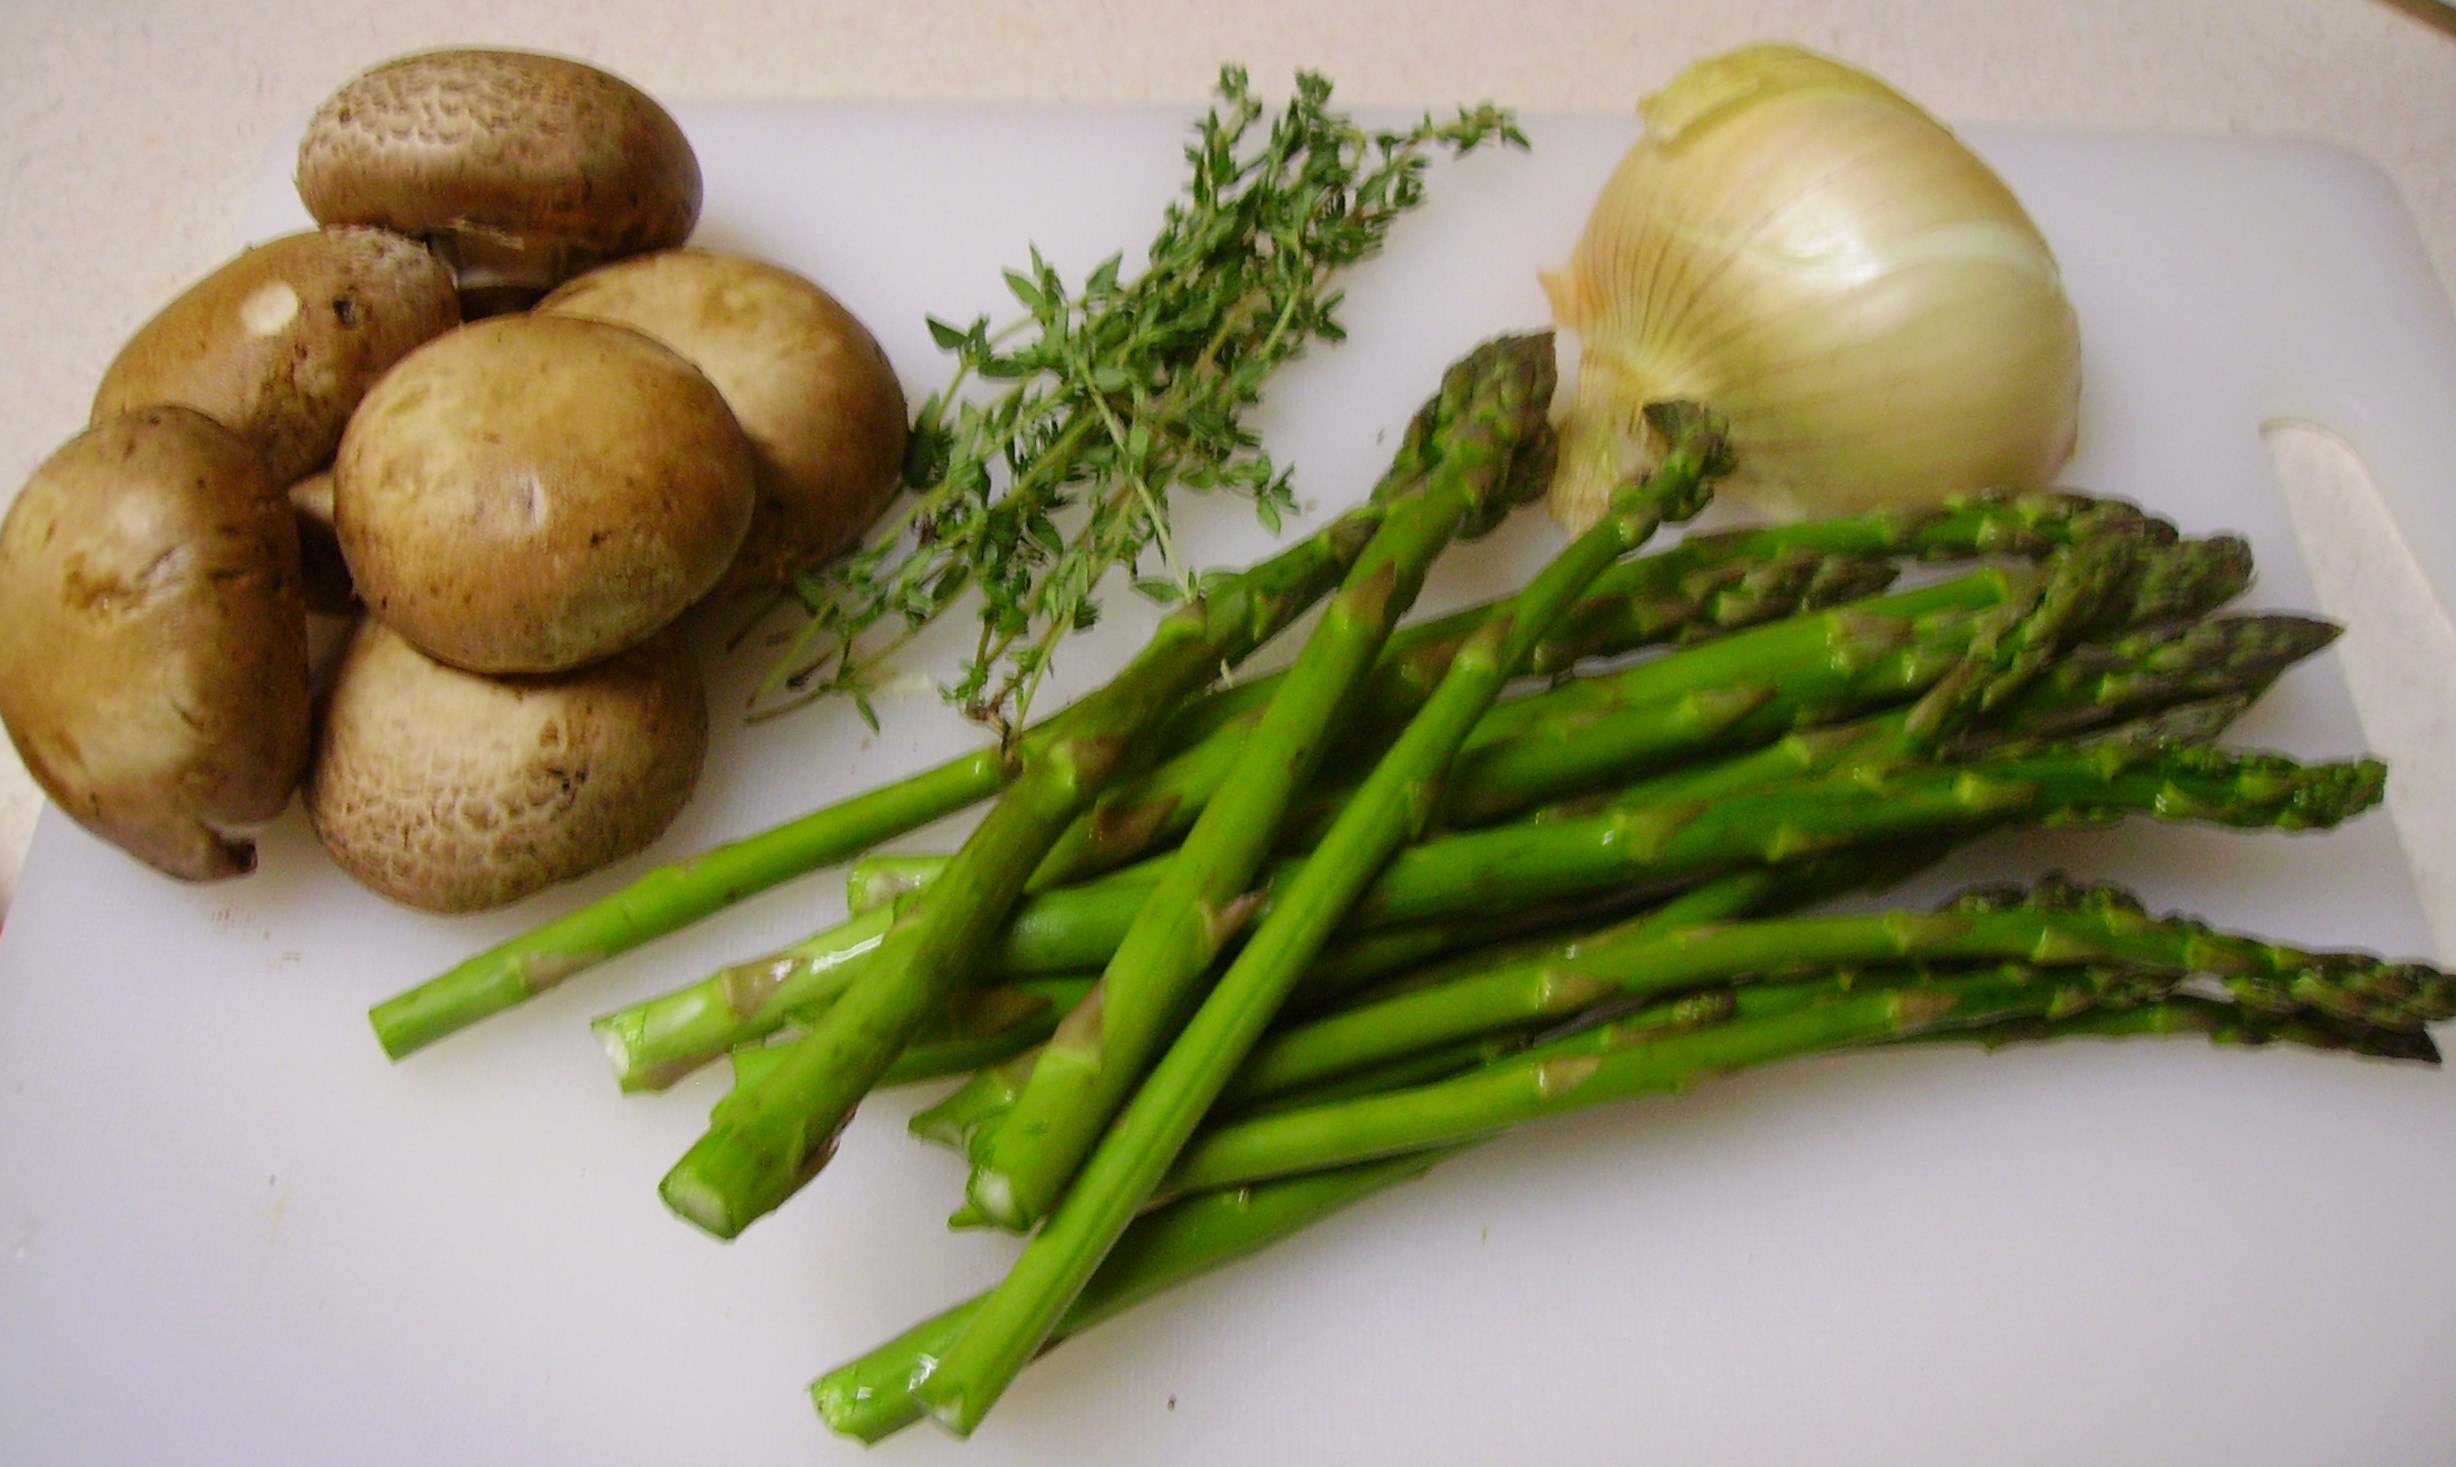
This dinner was a raid on the pantry, freezer and fridge. The variousDIGITAL CAMERA 
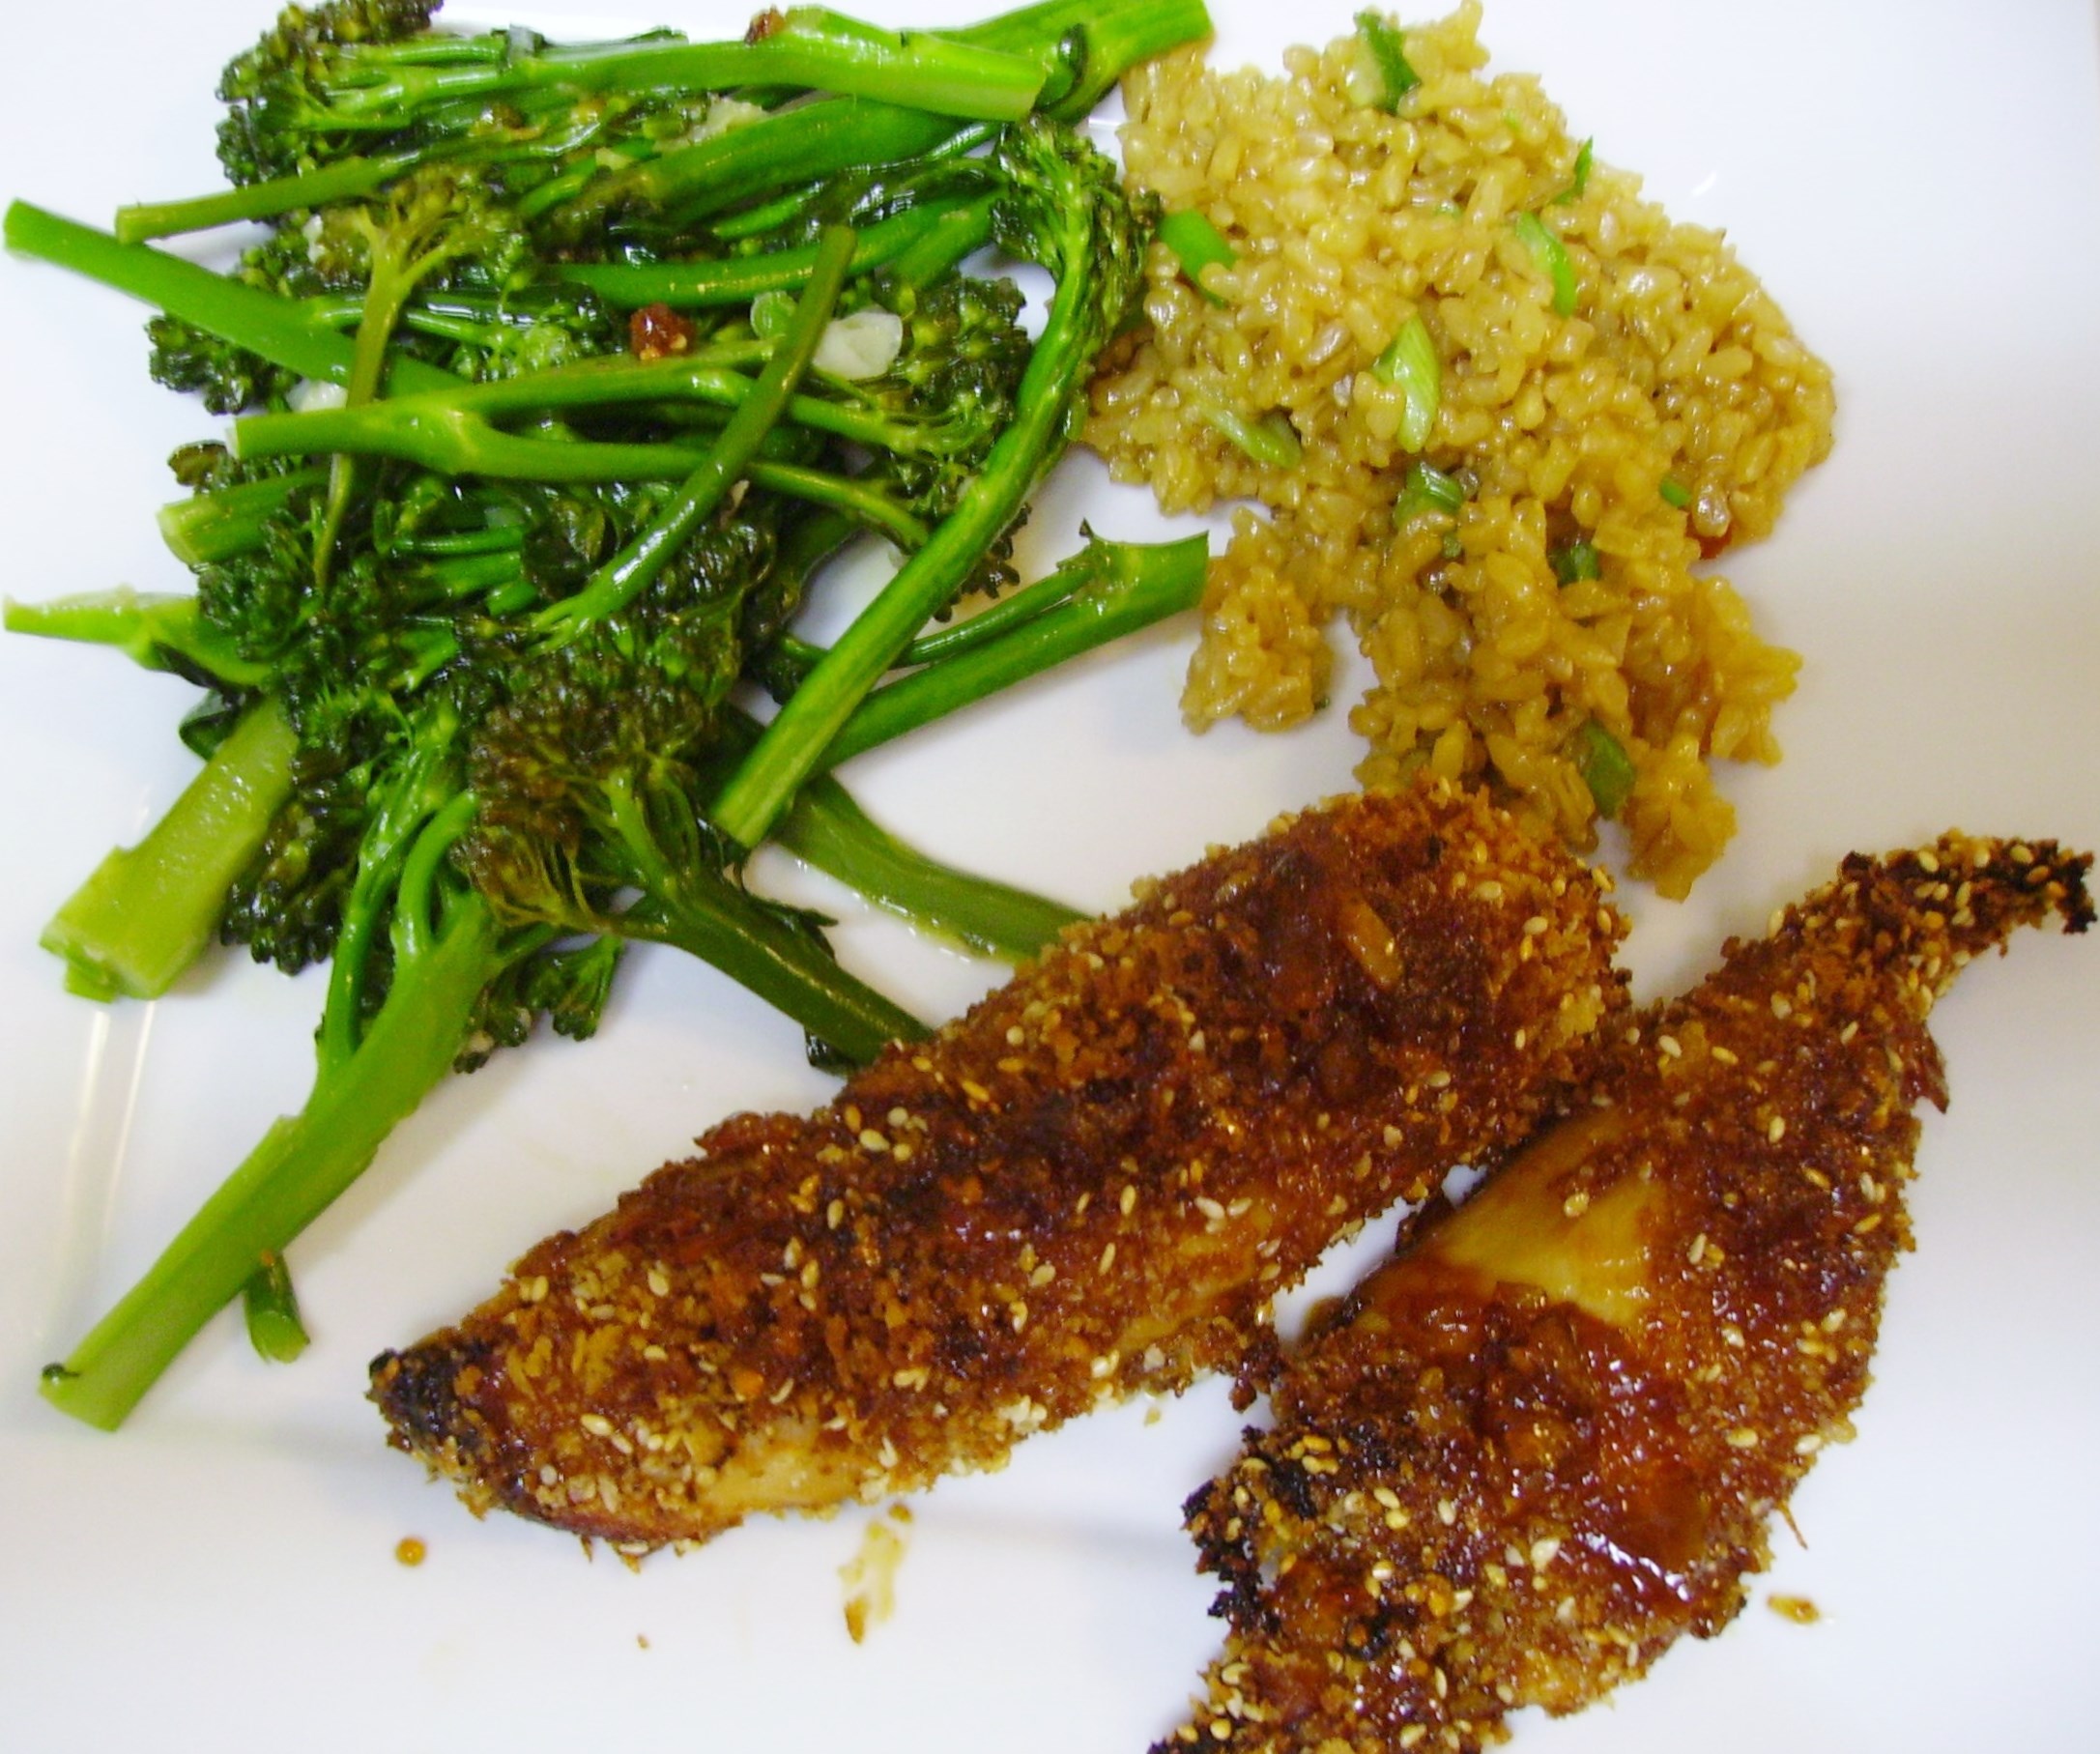
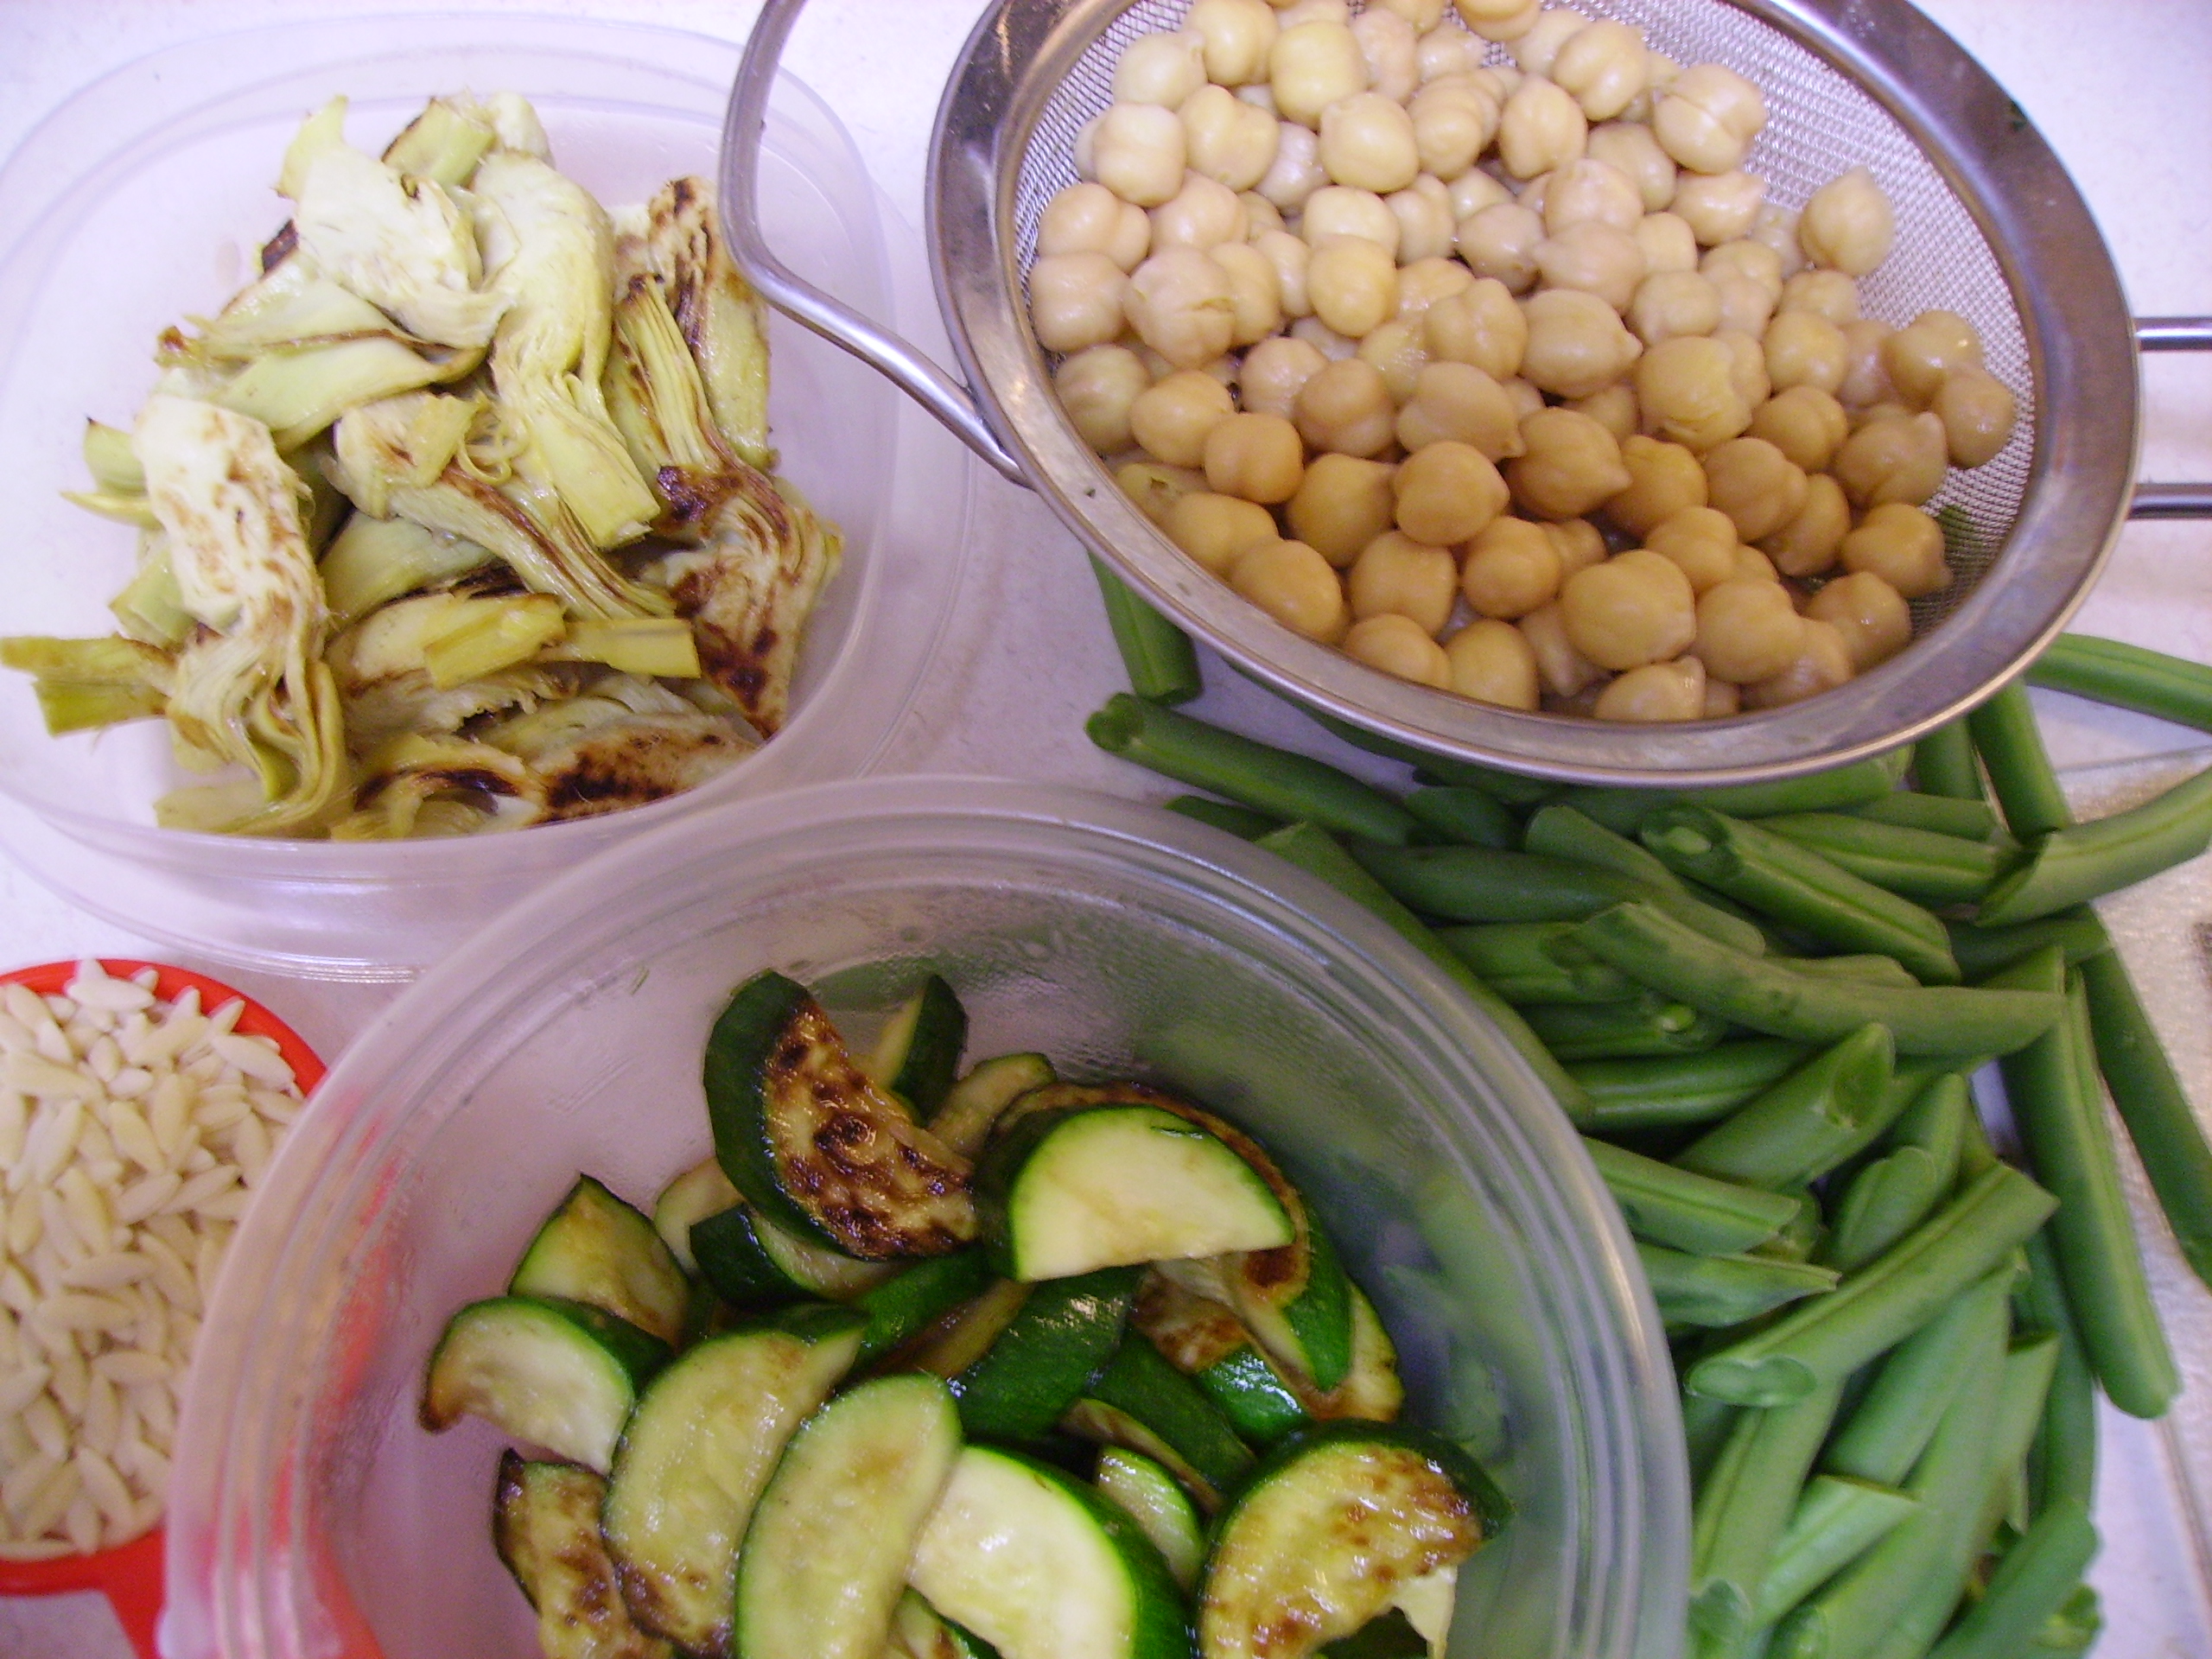
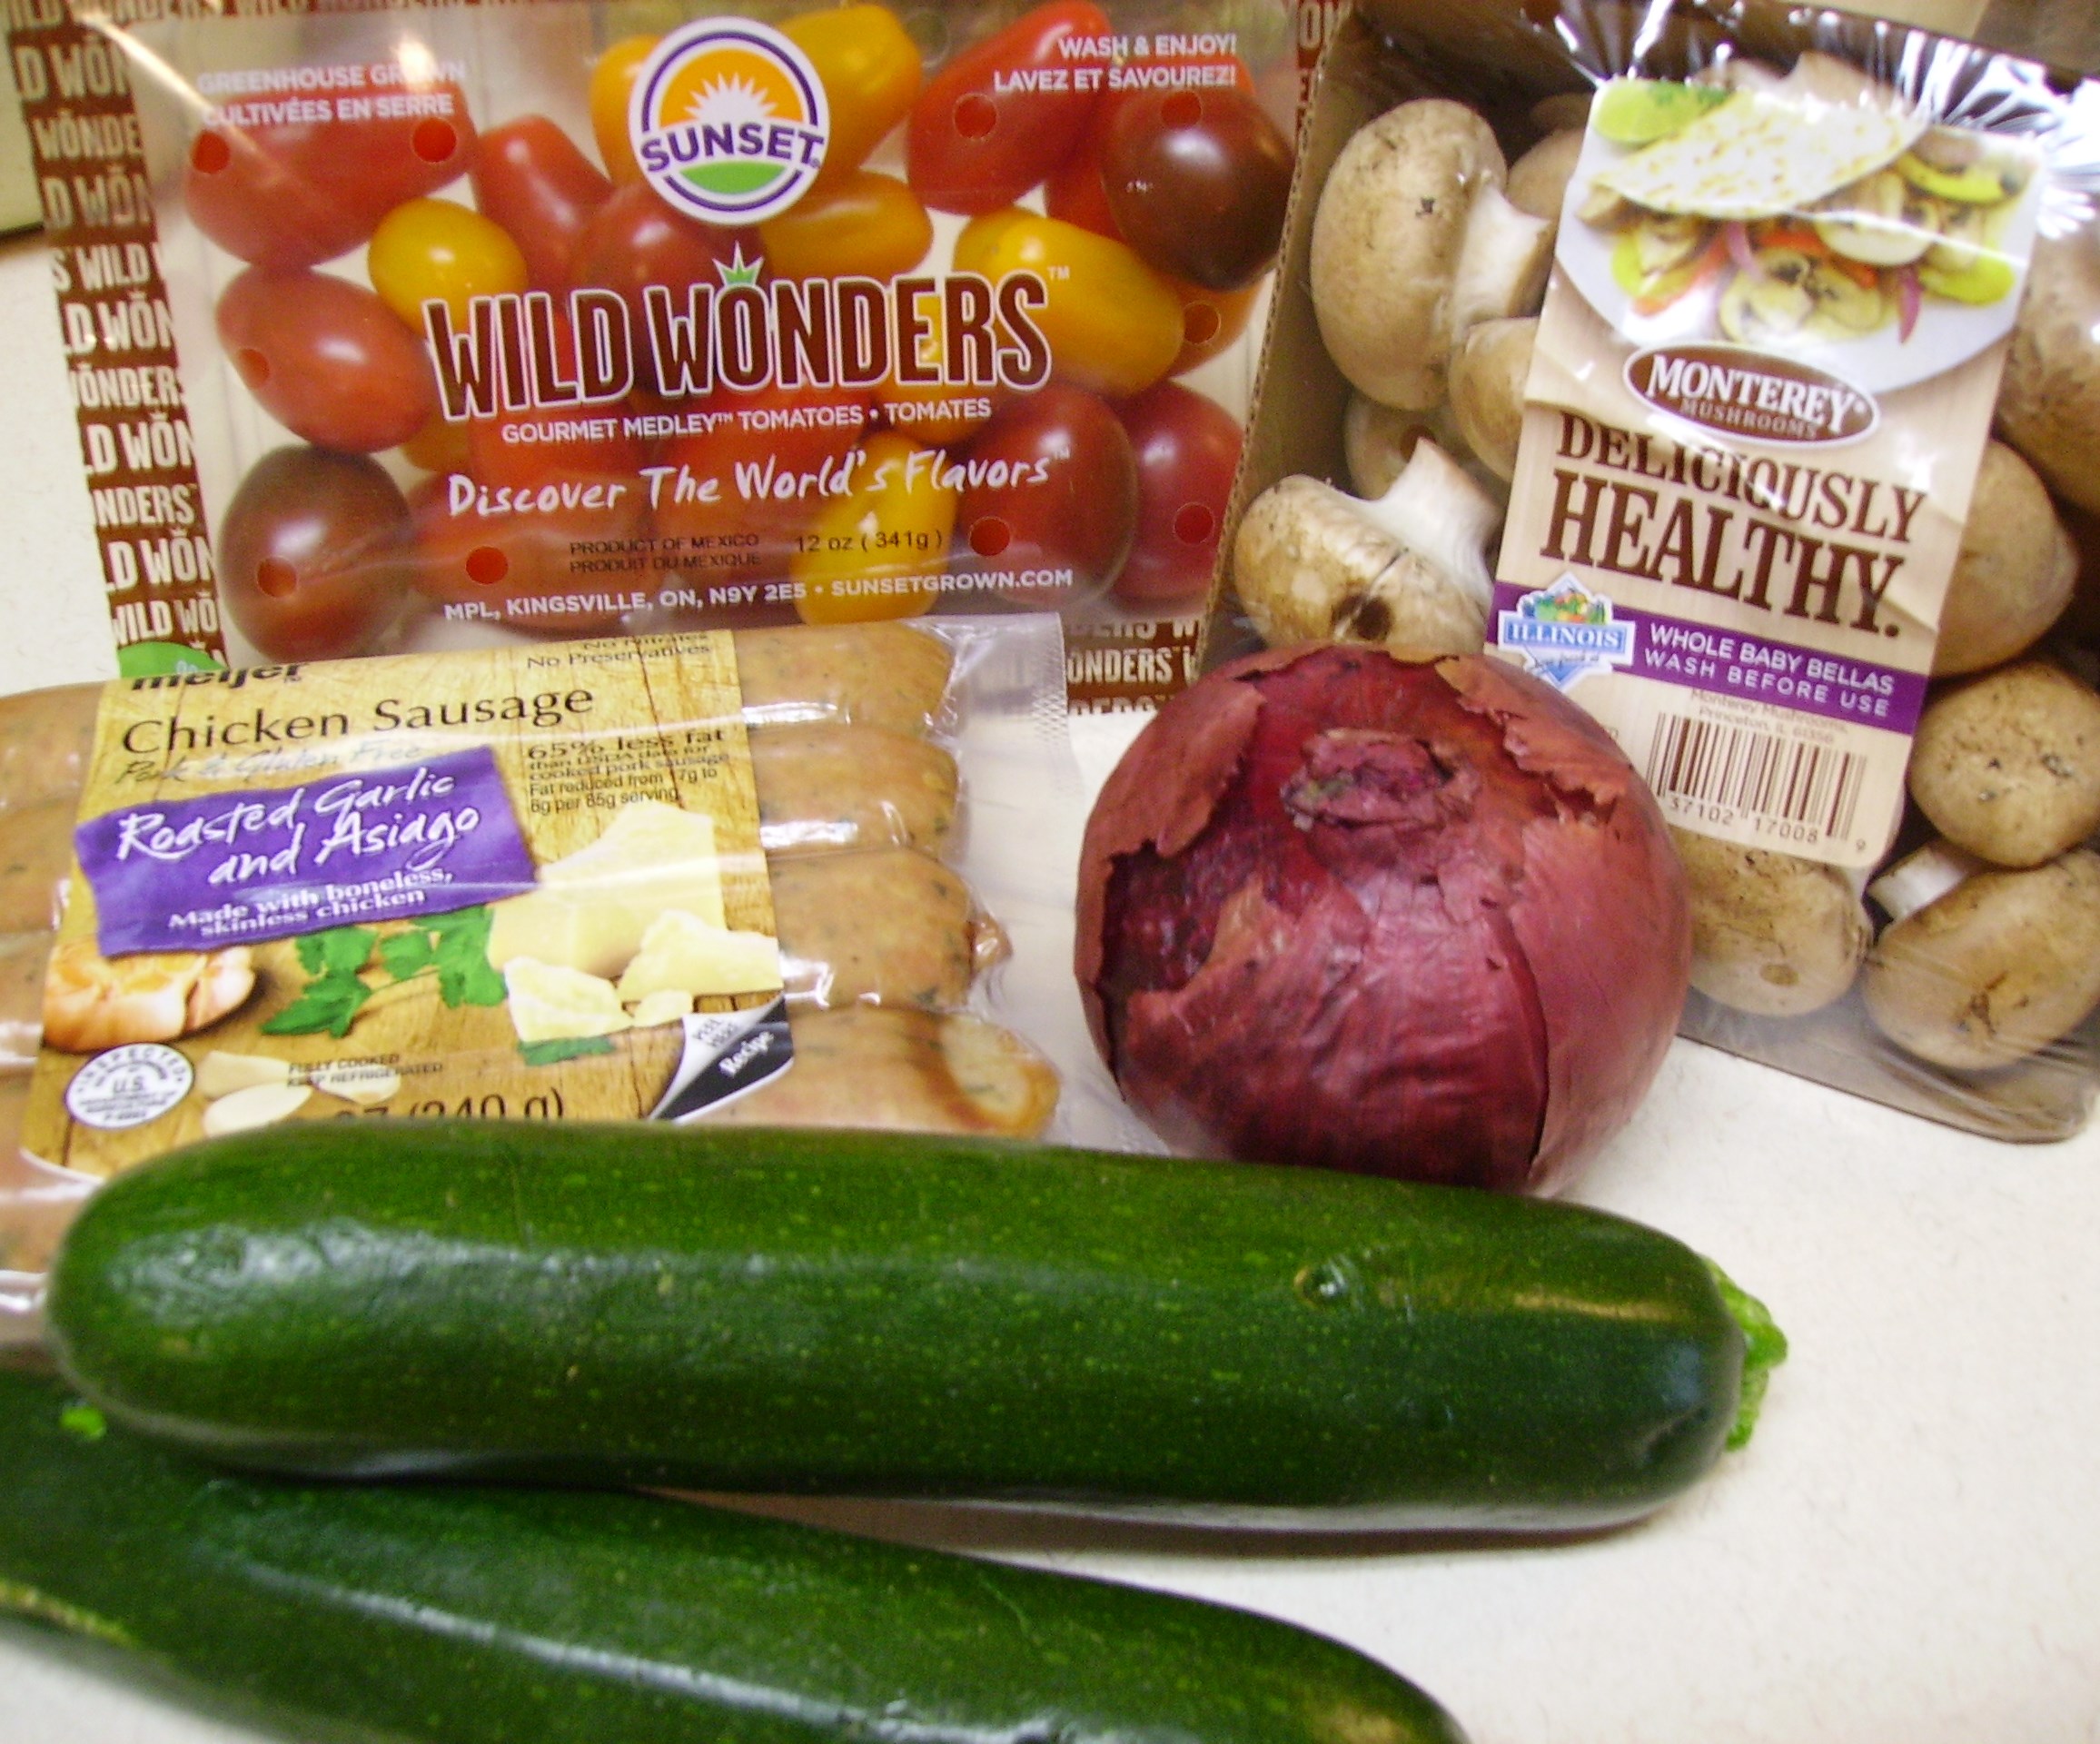
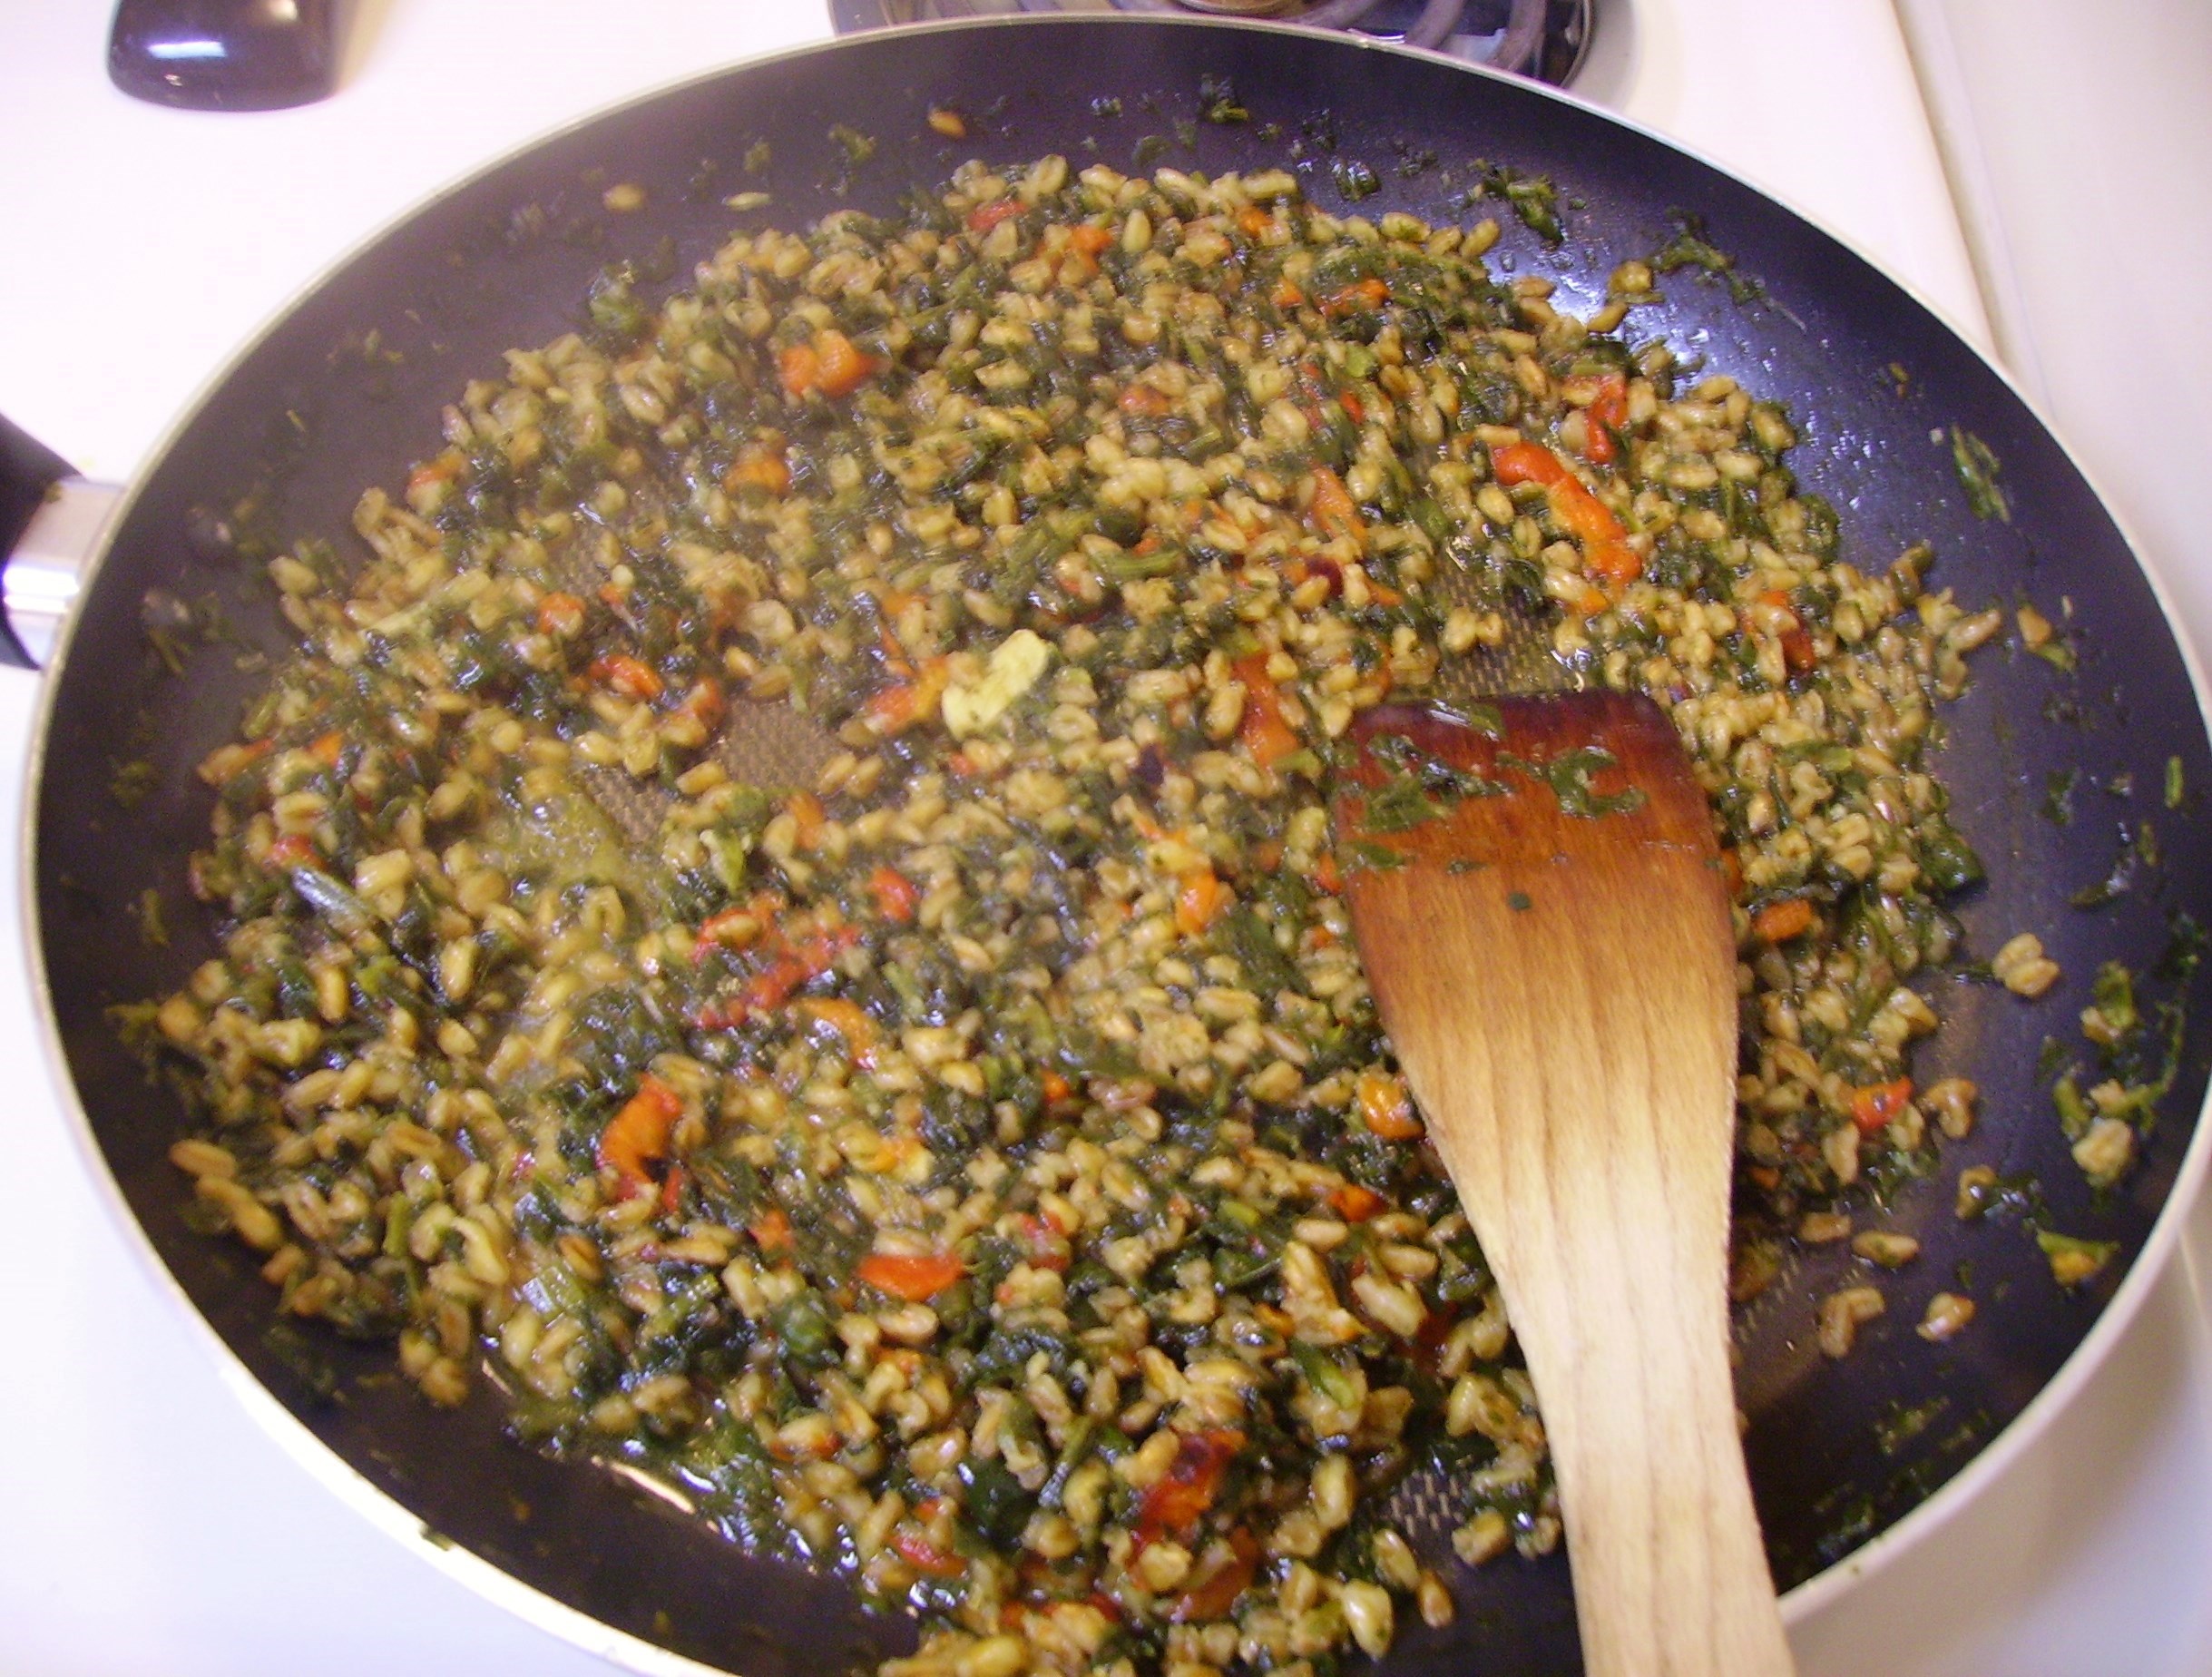
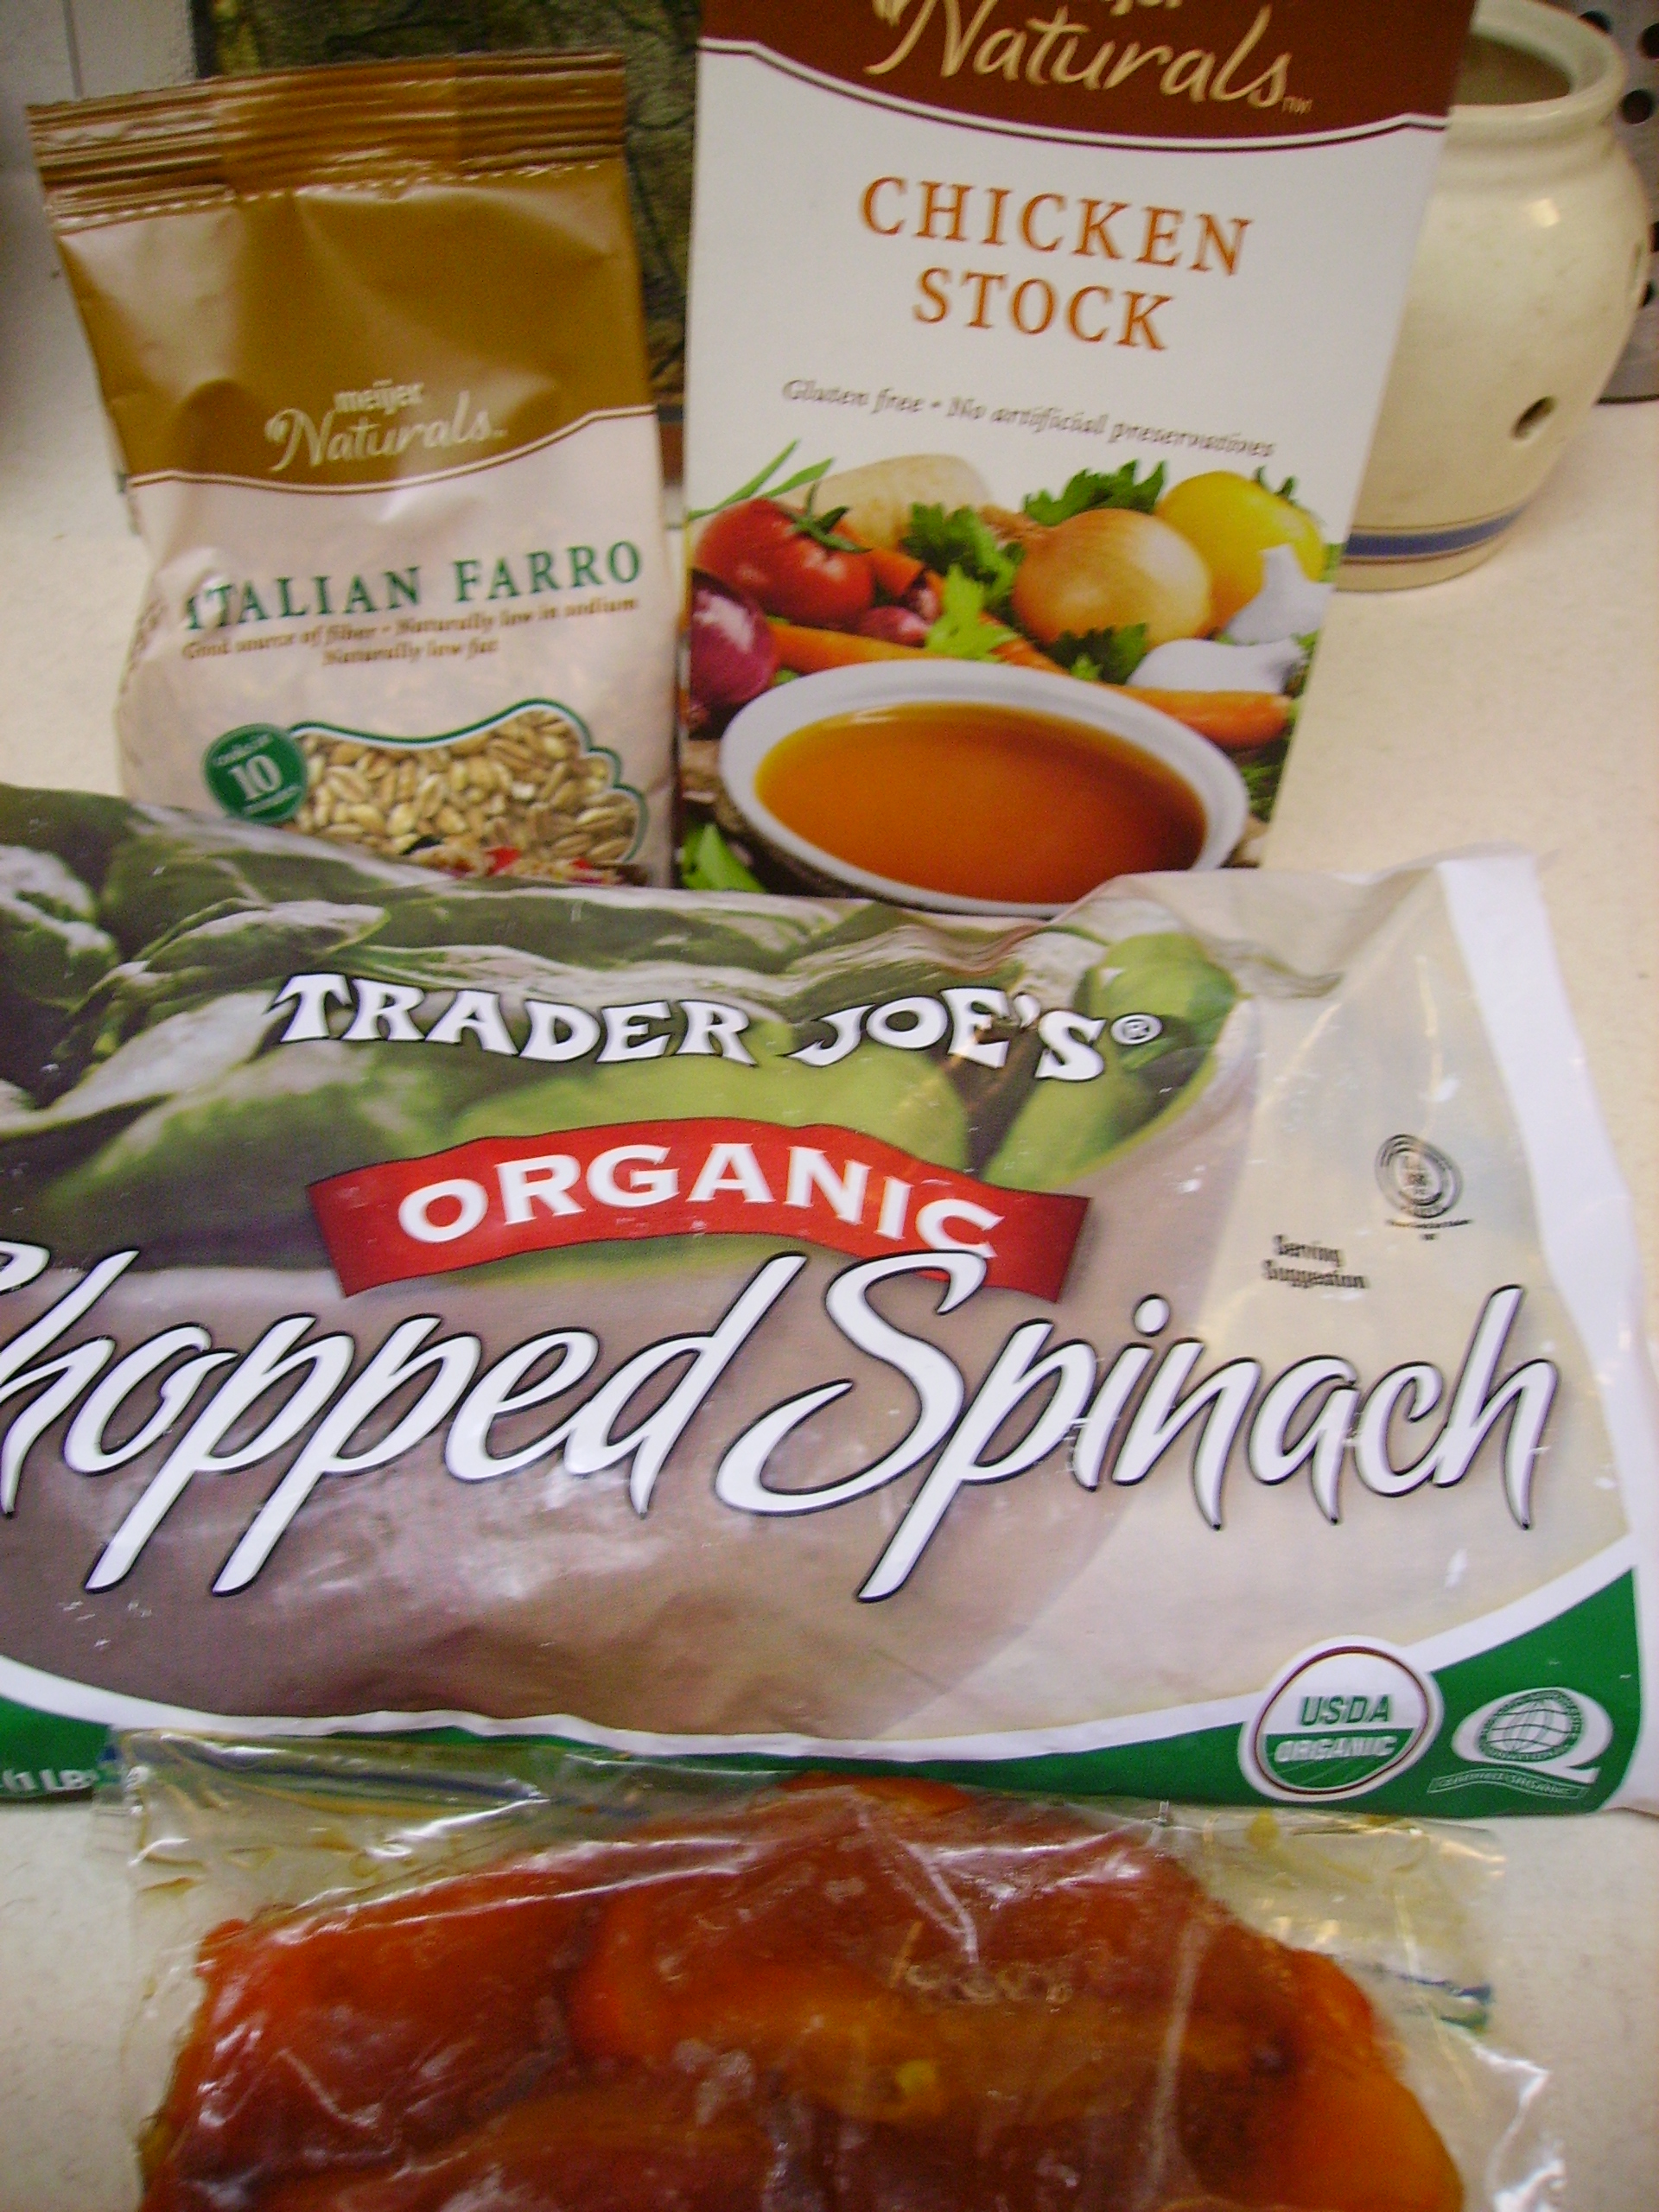
packages traveled from their homes and converged on the counter in vivid array. Mini tomatoes, crimini mushrooms, and zucchini joined red onion to create the kabobs. Farro, frozen chopped spinach, and roasted red peppers were simmered with chicken stock and garlic to create a toothsome side dish reminiscent of risotto. These simple ingredients resulted in 3 generous servings that made a wonderful dinner for two and a spectacular lunch for the cook.

The veggies marinated for the better part of the day in a simple vinaigrette. They joined the pre-cooked chicken sausage to create a patchwork quilt of colors on the skewers.

DIGITAL CAMERA
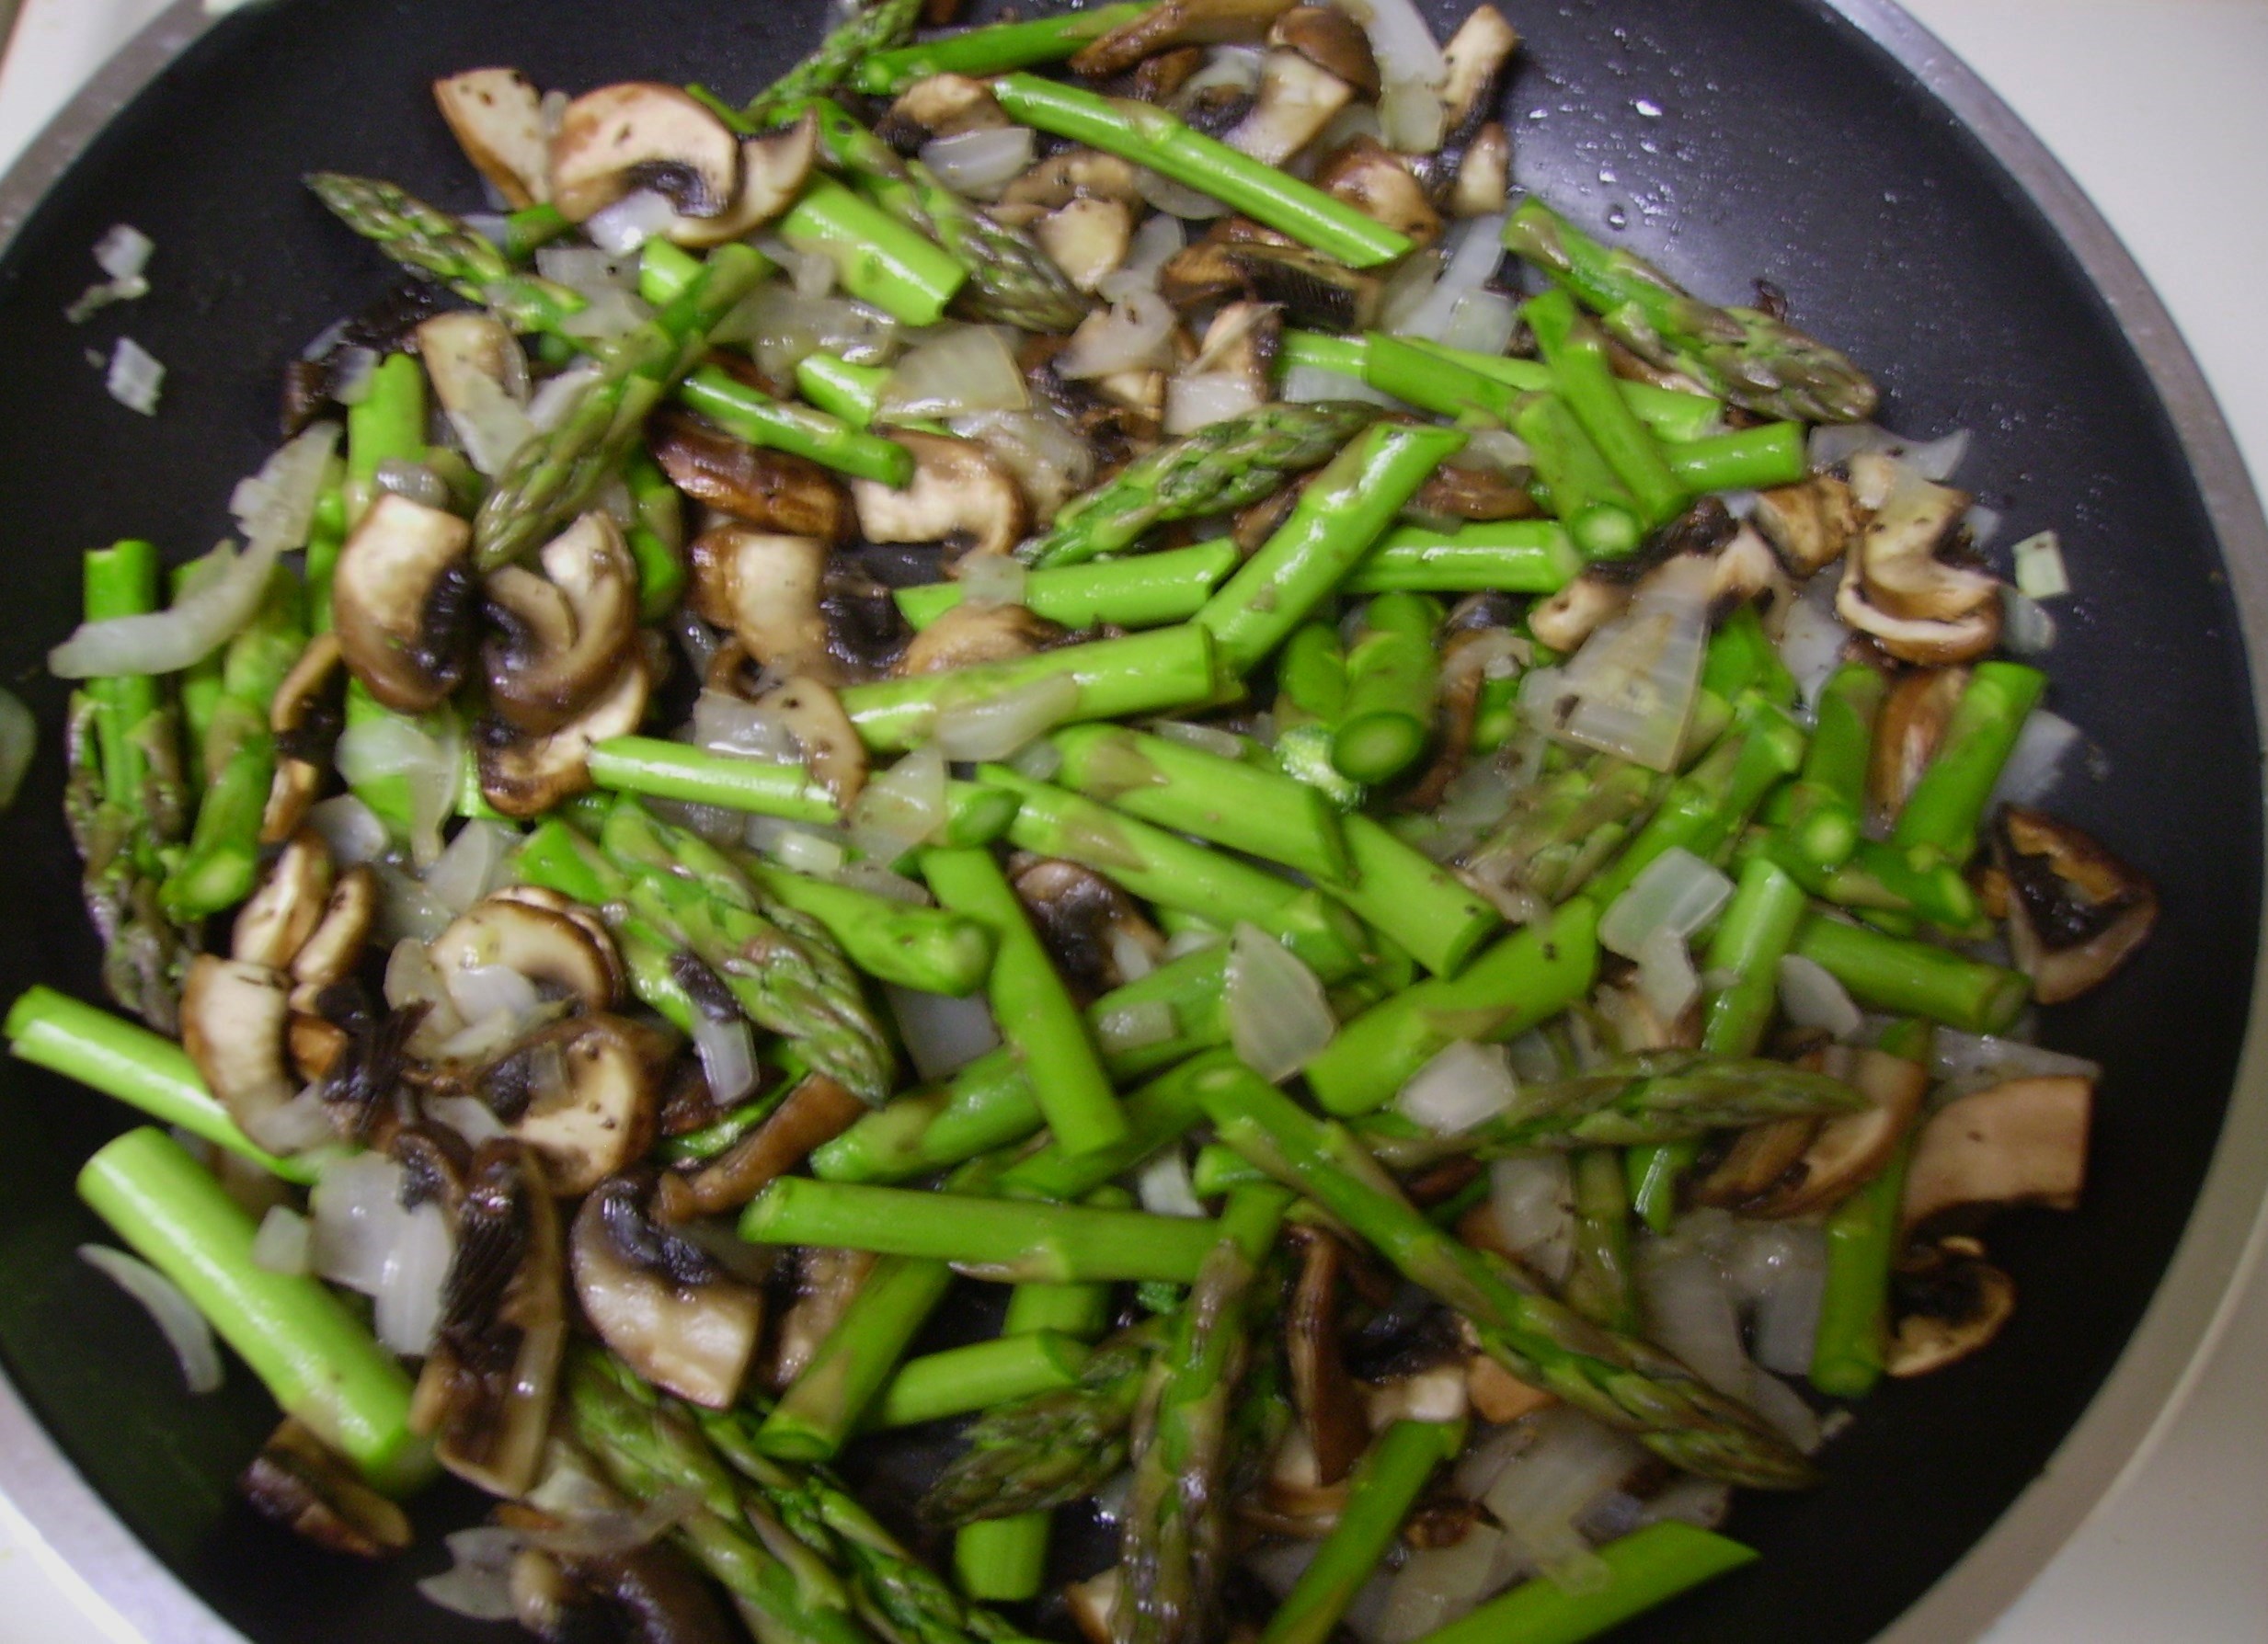
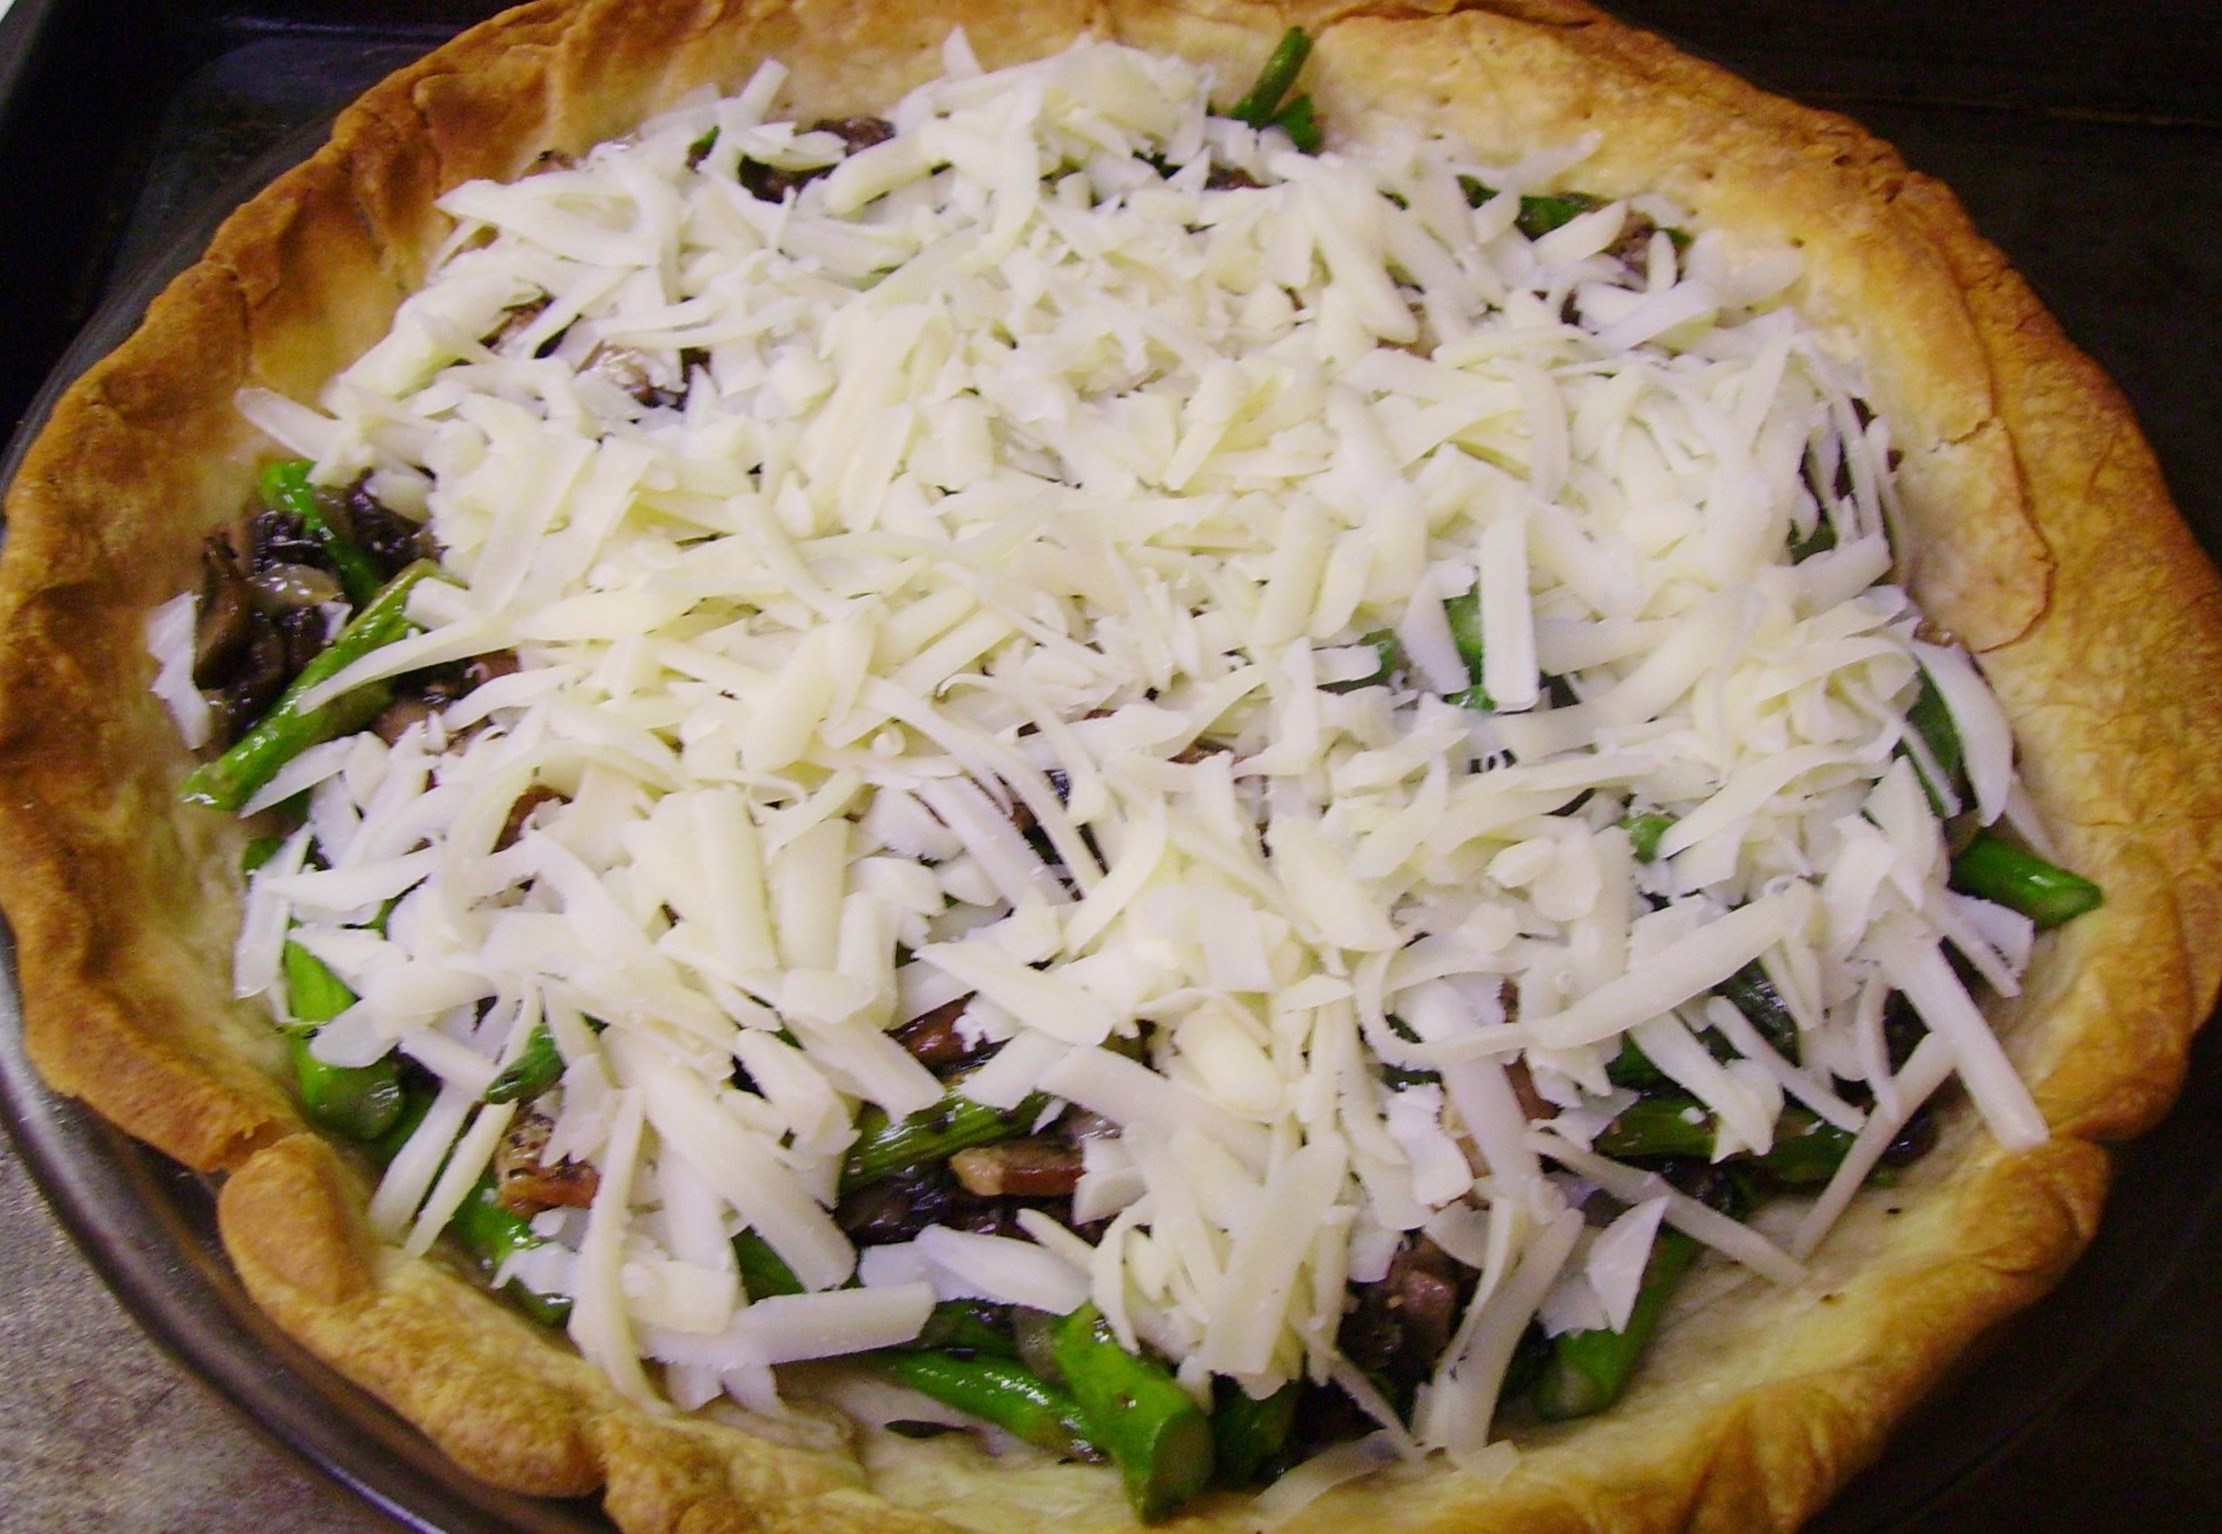
These took only a few minutes to cook so they waited in the wings while I made the farro. I’ve shared several farro adventures already and you know that it is one of my current favorites. This time I treated it like risotto. I sautĂ©ed it in some olive oil with a very generous amount of garlic then gradually added stock. I added spinach and roasted red peppers, both from the freezer. The whole process took about 35 minutes which as we all know is about the right amount of time to enjoy a glass of wine.

DIGITAL CAMERA

So, the kabobs took 20 minutes on the grill where they were frequently turned with love and basted with the vegetable marinade. Everything came together beautifully; a colorful and healthy dinner that hinted at the delights summer will soon deliver. I’m already looking forward to making this again, with a few homegrown veggies of my own.

DIGITAL CAMERA


Grilled Chicken Sausage Kabobs with Farro Risotto
Print Recipe
Servings
4
Servings
4
Grilled Chicken Sausage Kabobs with Farro Risotto
Print Recipe
Servings
4
Servings
4
Ingredients
Sausage Kabobs
Farro Risotto
Servings:
Instructions
Chicken Kabobs
  1. Combine the zucchini, whole tomatoes, onions, and whole mushrooms in a large container. You can use a skewer to create a "pilot hole" in the vegetables. This may help the marinade to penetrate more as well as make skewering easier later.
  2. In a jar with a tight fitting lid, combine the oil, vinegar, garlic, chili flakes, herbs, and salt. Cover tightly and shake to completely blend.
  3. Pour the dressing over the vegetables. Toss to coat and store covered in the refrigerator for at least 4 hours and as long as overnight.
  4. When you are ready to assemble the kabobs, slice the sausage into 1 inch chunks. Remove the vegetables from the marinade with a slotted spoon. Save the dressing to baste with later.
  5. Skewer the sausage and vegetables in random order. (Don't worry about a pattern unless that's your thing).
  6. Heat the grill to high ( or as high as it will go) and lightly coat with grill spray. Place the skewers on the grill and brush with the reserved dressing.
  7. Continue to grill, turn, and baste until everything is beginning to brown. This will take 15 - 20 minutes depending on the heat of your grill.
  8. Remove the kabobs from the grill and carefully slide the meat and veggies off the skewer.
Farro Risotto
  1. Heat the olive oil in a large fry pan, swirling to coat the bottom. Add the farro and cook for 5 minutes or so until it begins to brown. Add the garlic and cook another minute or so.
  2. Add the vermouth (or dry white wine) and cook for 2 - 3 minutes. Most of the wine should evaporate.
  3. Add the spinach and about 1 cup of the stock. Allow to simmer, stirring frequently until most of the stock has been absorbed.
  4. Add the red pepper and another cup of stock. Continue the simmering process allowing the stock to be absorbed.
  5. Give the farro a taste at this point. If you like the texture, it's done. If you like it softer, add a little more stock and continue to cook until the texture makes you happy.
  6. Season with salt and pepper to your taste and serve it with the kabobs.
Share this Recipe
Powered byWP Ultimate Recipe

Cleaning Out the Fridge Quiche

The refrigerator is a wonderful invention. It allows us to keep a supply of fresh food at the ready. It provides a safe haven for the treasures we find at the store, keeping them safe until we are ready to turn them into something wonderful. I confess that sometimes I buy a little more than I can chew and open the refrigerator to find an array of food that has begun to lose its luster.

What’s Mama D to do? I don’t have the heart or the budget to throw it all away, and it is still quite usable. The time has come to combine things into a delicious meal and quiche is a perfect solution. Flaky pie crust and creamy custard are the blank canvas that will hold the vegetables and meats that the fridge has to offer.

This adventure included some crimini mushrooms and asparagus along with some thyme and onion. They were a bit past their prime, but perfect for this quiche.

DIGITAL CAMERAMy protein of choice was peppered bacon.  I found three lonely slices that I chopped up and browned on the stove.

The veggies were chopped and cooked in the same pan (minus the drippings, but with the yummy brown bits) to give them a little extra love before they jumped into my “not home-made” crust. Yes, the crust came out of the fridge, too. Would homemade pastry make this dish better? Maybe, but I had a box of the pre-made variety and it needed to be used,too.

Whatever pastry crust you use always “blind bake” it before you add the fillings. Once the dough has been fit into your vessel of choice, line it with some parchment paper and fill it with dried beans. Bake it in the oven until it is nice and golden. A clear glass pan allows you to check the bottom as well. Remove the beans and paper and add your fillings. No soggy bottom crust here.I topped the sautĂ©ed goodies with some grated Swiss cheese. Any cheese will work here. Use what you love or what you have on hand. Only use about a cup. The custard is rich enough and you want the veggies to be the star here.

DIGITAL CAMERAEggs, cream, and milk create a luscious custard that only requires a little salt and coarse ground pepper. I’m not a fan of nutmeg, a traditional ingredient here, but add some if it floats your boat. In fact you can add any herb, spice, etc. It’s your quiche after all.

When you are ready to add the custard to the quiche, put it on a rimmed baking sheet. This too, is a required step. The pie will be very full and eggs being eggs, it will grow before it sets. A baking sheet is much easier to clean than an oven. I speak from experience.

DIGITAL CAMERAThe quiche needs to bake for 30 – 40 minutes then it needs to set for at least 20 minutes more. Add the blind baking step and you are approaching the 2 hour mark on prep time. If you like a late supper (and this is the perfect dish for that) make it part of your weeknight wonderland. I think it’s a delightful Sunday night supper that puts a delicious topper on the weekend.

DIGITAL CAMERA

Cleaning Out the Fridge Quiche
Print Recipe
This is my version of quiche. Feel free to use whatever fillings you want.
Servings
6
Servings
6
Cleaning Out the Fridge Quiche
Print Recipe
This is my version of quiche. Feel free to use whatever fillings you want.
Servings
6
Servings
6
Ingredients
Servings:
Instructions
Blind Bake the Crust
  1. Fit the pie crust into a pie or quiche pan. Use a fork to poke small holes all over the crust. Place a sheet of parchment paper into the crust (crumple it a bit to allow it to fit better). Pour dried beans onto the parchment paper. A pound of dried beans will fill a 9 inch pie plate nicely.
  1. Bake the crust in a preheated 350 degree oven for 20 - 30 minutes. The crust should be light golden all over. Do not rush this step; the non-sogginess of the crust depends on it. Remove the crust from the oven. Carefully remove the parchment paper and beans (these will become your official "blind baking" beans). Set the crust aside.
Filling
  1. Chop the bacon into thin pieces and cook in a medium fry pan over medium high heat. The bacon should be crisp. Transfer the bacon to paper towels to drain. Remove the drippings from the pan but leave the brown bits of deliciousness.
  2. Add the onions to the fry pan and cook for 4 minutes or so until they begin to soften.
  3. Add the mushrooms and continue to cook another 5 minutes until the mushrooms begin to brown. Add the asparagus and cook for a few more minutes until the asparagus is tender crisp.
  4. Add the reserved bacon bits back to the pan along with the thyme leaves and cook for 2 - 3 minutes more.
  5. Pour the vegetable/bacon filling into the pie crust. Sprinkle the grated cheese on top.
  6. Beat the eggs until the are very thick. Add the cream and milk and beat with a whisk until the mixture is light and fluffy. Add salt and pepper and any other spices or herbs you like.
  7. Place the filled pie crust on a rimmed baking sheet. Carefully pour the custard into the crust stopping when it is filled to the top. You may have a little custard left, but not much.
  8. Place in a 350 degree oven and bake for 30 - 40 minutes. The filling should be puffed and golden and a knife should come out clean when poked in the center.
  9. Remove the quiche from the oven and allow to cool for at least 20 minutes before cutting.
Share this Recipe
Powered byWP Ultimate Recipe

This is far from the traditional preparation for a quiche. It doesn’t however, make it any less delicious. This is a versatile recipe that can be adapted any number of ways. Have some fun with it and come up with your own fridge cleaning masterpiece.


Weeknight Wonderland- Orange Sesame Chicken Tenders

Some weeknights feel like dinner can’t get on the table fast enough. Other nights, a little delay of reinforcement can be a good thing, as long as it doesn’t take too long. It doesn’t matter which you choose, as long as you can get some of the prep done ahead of time. That’s where marinating comes in.

Marinades don’t always mean that something is going on the grill, in fact, this chicken bakes in the oven after an overnight soak in a citrusy and spicy marinade. It doesn’t go in the oven naked either. It is generously coated in crunchy toasted panko bread crumbs and sesame seeds. Sesame oil, sriracha, and soy sauce give this marinade a distinctly Asian flavor. Fresh orange juice and zest along with orange marmalade give it a citrus zing. Garlic makes it yummy and a little chicken stock helps you not miss the oil.

DIGITAL CAMERA

The recipe makes a lot of marinade, but it is going to do double duty, marinating the chicken and creating a wonderful glaze for the finished tenders. The do-ahead/time-saving feature here is that you can marinate the chicken for 24 hours. Make the whole batch of marinade and pour half of it over the chicken. It can relax in the fridge overnight along with the reserved marinade (in a separate covered container, of course). The longer marinating time lets the flavors really permeate the chicken.

About 30 minutes before show time, remove the tenders from their marinade and let them drain on a rack. Lightly toast the panko crumbs and sesame seeds in a dry pan then pour them in a shallow bowl. Clean and dry the rack and place it in a foil lined baking sheet. spray it lightly with cooking spray. Coat each tender with the crumb mixture and place on  the rack.

DIGITAL CAMERA

These will take about 20 minutes or less in the oven. While they bake, you can reduce the reserved marinade. This will take about the same amount of time that the tenders do. Isn’t that convenient?

DIGITAL CAMERA


Sesame Orange Chicken Tenders
Print Recipe
Servings
2
Servings
2
Sesame Orange Chicken Tenders
Print Recipe
Servings
2
Servings
2
Ingredients
Servings:
Instructions
  1. Combine the first six ingredients in a jar with a tight fitting lid. Shake well to mix things up completely.
  2. Put the chicken tenders into a zip-top bag. Add half of the marinade mixture and seal the bag. Put the chicken and the jar with the remaining marinade in the refrigerator. Allow the chicken to marinate for up to 24 hours.
  3. When you are ready to prepare the chicken, remove the tenders from the marinade and allow to drain briefly on a wire rack. Preheat the oven to 375 degrees.
  4. In a small dry fry pan over medium heat toast the panko and sesame seeds tossing often until the crumbs are light golden and the sesame seeds begin to become fragrant. Transfer the mixture to a shallow bowl and allow to cool slightly.
  5. Roll the tenders in the crumb mixture pressing the crumbs in to create a nice thick coat.
  6. Wash and dry the rack you drained the chicken on and put it on a foil lined rimmed baking sheet. Spray it all lightly with the cooking spray.
  7. Place the coated tenders on the rack leaving plenty of space in between. Bake for 15- 20 minutes. The chicken should be golden brown and feel firm. While the chicken bakes, cook the remaining marinade.
  8. In a small fry pan, heat the remaining marinade over medium high heat until it comes to a boil. Reduce the heat to medium and allow to simmer,thicken and reduce for about 15 - 20 minutes. If the glaze seems too thick add a little more stock. Continue to cook as necessary until the glaze is the consistency you like.
  9. Remove the tenders from the oven when they are ready . Transfer to serving or individual plates and drizzle with the glaze. Serve with sides of your choice.
Share this Recipe
Powered byWP Ultimate Recipe

DIGITAL CAMERA

Choose sides that are quick as well. A precooked rice pouch that you can add your own special touches to and a vegetable that stir fries quickly keep time within the 30 minute range. Another time saver is to have ingredients do double ( and even triple) duty. I sliced the whole bunch of green onions; the tops went in the rice, and the bottoms joined the broccolini. The carton of stock just stayed on the counter so I could add it to the veggies and the glaze as needed. It also served as the cooking liquid for my rice.

I opted for home cooked brown rice which added an extra 15 minutes or so to my prep time but it was the passive kind; the stove did the work. A little sesame oil and chicken stock perked up the flavor of the rice. I stir fried the broccolini with a little garlic and ginger that played very nicely  with the onions. Start to finish it took less than 15 minutes.

The combination of flavors and textures was amazing. The best part is that it was super easy and with a few do-ahead steps, quick to fix. It was a satisfying dinner that will appear again in Mama D’s Kitchen. Give it a try in your kitchen.


Weeknight Wonderland – a Meatless Minestrone for Mondays and Beyond

Even though our nest is now empty, sitting down at the end of a day with good food,  good wine and good company is the best. I’ve shared my crazy split shift life before and how it impacts everything, even cooking. Just as I’ve learned to create in a small kitchen, I am learning to create dinner in stages, and weekends are my favorite secret weapon. A little time spent cooking ahead on the weekend eases the time crunch Monday through Friday.

This soup was a Meatless Monday dinner, but it got its start on Sunday. That’s when I thawed out some of my homemade vegetable stock. I heated my trusty soup pot and used  it to sweat onions and carrots in a little olive oil.DIGITAL CAMERASome Italian seasoning, red pepper flakes, lots of garlic and a couple of bay leaves livened things up.DIGITAL CAMERAI added the thawed stock along with a can of fire roasted tomatoes and let everything get happy for twenty minutes or so.DIGITAL CAMERAOnce it cooled a bit, I stored it in the refrigerator until Monday night when I got home from work, An extra bonus here, the flavors had plenty of time to get well acquainted with each other at their sleepover in the fridge.

The vegetable medley that I chose included zucchini, green beans, and artichoke hearts. I decided to give the squash and hearts a little extra color so I lightly browned them. I liked the color it added and there was a richer depth of flavor that the quick saute imparted. I actually did this during my mid-day break so that they would be ready when I got home. The other late arrivals were a can of chickpeas and a little orzo pasta.DIGITAL CAMERAThe final cooking was easy peasy. Once the stock base came back to a simmer, I added the beans and pasta, followed shortly by the green beans, then the zucchini and artichokes. The whole process took about 20 minutes or so. I toasted slices of multigrain French bread and topped them with a blend of Italian cheeses. They made a lovely topping  for the soup.DIGITAL CAMERA

The short cooking time of the veggies kept them nice and crisp. I opted to cook the pasta directly in the soup. It added just the right amount of pasta to the soup. DIGITAL CAMERAIf you are going to make this farther ahead or plan on reheating it the next day, you may want to cook the pasta al dente in water, drain it and refrigerate it to add as the soup heats.  Pasta has a strong inclination to soak up as much liquid as it can hold, which is an amazingly large amount. What was soup the first time around becomes a much more pasta-centric dish after a day or two. I’m a “cook the pasta separately” kind of gal, but once in a while, I like to eat soup with a fork, but that’s me.


Meatless Minestrone for Mondays and Beyond
Print Recipe
Servings
4
Servings
4
Meatless Minestrone for Mondays and Beyond
Print Recipe
Servings
4
Servings
4
Ingredients
Servings:
Instructions
  1. Heat a large soup pot over medium high heat. Add the tablespoon of olive oil and swirl to coat the bottom of the pan. Add the onions and carrots and a pinch of salt. Cook for several minutes until the vegetables begin to soften.
  2. Add the garlic, red pepper flakes and the bay leaves to the pot and cook another minute or two, stirring frequently.
  3. Pour in the can of tomatoes, juice and all and the vegetable stock. Bring up to a boil over high heat. Reduce the heat to a simmer and cook covered for 20 minutes or so, stirring occasionally. At this point you can cool the stock and refrigerate until the next day. You can also complete the recipe at this time if you want.
  4. Coat a non-stick pan with olive oil cooking spray and heat over medium heat. Add the artichoke hearts and cook for 5 - 6 minutes or so turning once until lightly browned on both sides. Remove from pan and set aside.
  5. Repeat the above process with the zucchini slices.
  6. When you are ready to complete cooking the soup, (re)heat the stock to a simmer. Add the chickpeas ans pasta and cook for 5 minutes, stirring it once or twice.
  7. Add the green beans and cook for 4 minutes or until they are the amount of tender crisp you like.
  8. Add the browned artichokes and zucchini and simmer everything gently until it is all heated through. This should only take a couple of minutes. Taste and add salt and pepper as needed.
  9. Ladle into four soup bowls and top each with two of the toasted bead slices (recipe follows) and a drizzle of olive oil.
Cheese Toasts
  1. Heat oven to 375 degrees. Lightly coat the bread slices on both sides with olive oil cooking spray and place them on a foil lined baking sheet. Toast for 8 minutes, turning once. Top with the cheese and return to the oven set on broil and cook until the cheese is melted and slightly brown.
Share this Recipe
Powered byWP Ultimate Recipe

By now you should know that this recipe is just a guideline. Change up the beans, the pasta, and the vegetables too, for that matter. If you have the time, the whole soup can be made in one day…just continue the cooking steps once the stock is done. Monday will be here before you know it (damn it), so give this a try. Hey, live on the edge and make it on Tuesday or Thursday.


In Search of Inspiration and Spaghetti Squash Lasagna

All of us that love to cook find inspiration in many places. The most exciting inspiration is the kind that just pops into your head. You see a beautiful vegetable or a marvelous piece of meat and immediately begin to create a recipe around it. You rush home and begin to cook virtually by the seat of your pants. Most of the time it pays off, but once in a while it doesn’t. So you go back to the drawing board, changing an ingredient or adding another until you have the perfect dish. The result is something that you can call all your own.

There are many other sources for cooking inspiration. It could be one of the myriad cooking shows, a treasured cook book or a magazine featuring recipes of the season. While the idea may not be original, it is still a source of inspiration. When I see a recipe in one of these places, my first thought is how can I make it my own. I may occasionally make it as written, but more often I’ll substitute an ingredient or add something to the mix. The process is not too different from that of creating an original recipe, and the result is something that I can call my own.

Spaghetti-Squash-Pie-58829This recipe came to be in the latter way. I saw a recipe for Spaghetti Squash Lasagna in a Kraft Foods magazine. Ironically, when I spaghetti squash lasagnasearched for the recipe online to provide the above link, I found many recipes for the same dish. The variations were amazing. In the shell, out of the shell…who knew that so many great minds could think in such a similar manner. In the world of online recipes that is vast beyond ones imagination, finding a dish similar to your creation is pretty easy. The good news is there’s room for everyone’s ideas; the more the merrier I always say. So I’ll share my take on the recipe and you can do with it whatever strikes your fancy.

I liked the idea of cooking the filling right in the squash shell. It made for an interesting presentation. I found a smallish squash that once cut, seeded, and baked was the perfect size for two generous servings. DIGITAL CAMERA

I made the ricotta filling much like I would for a traditional lasagna, that is, I added spinach, garlic, and a little Pecorino Romano cheese along with an egg. The sauce started with sweet turkey Italian sausage links, casings removed. I added plenty of onions and garlic, of course before I added about a cup of pasta sauce, remnants of a previous adventure, that I found in the freezer.DIGITAL CAMERAI used a fork to loosen the squash strands. I thought this would allow the flavors to get better acquainted. I layered the ricotta, sauce, and Romano cheese before topping it all with a good handful of grated Italian cheese blend.DIGITAL CAMERA

It baked in the oven for about 30 minutes and spent a few minutes under the broiler. It came out crowned with a golden brown cheese crust, the bubbly filling peeking from beneath it.DIGITAL CAMERAIt tasted wonderful and I have to say we didn’t miss the pasta. I wanted this to be on the healthy side so I used part skim ricotta, minimal oil, and turkey sausage to cut some fat and calories. Use whatever you like. This would be great with ground beef, pork or even meatless. Use this as the source for your own inspiration and join the ranks of inspired cooks.

Spaghetti Squash Lasagna
Print Recipe
Servings
2
Servings
2
Spaghetti Squash Lasagna
Print Recipe
Servings
2
Servings
2
Ingredients
Servings:
Instructions
  1. Cut squash in half and the remove seeds. Spray a baking sheet with olive oil cooking spray. Spray the cut sides of the squash as well and place cut side down on the baking sheet. Bake at 375 degrees for 30 minutes. The shell should give slightly when pressed with a finger. Turn right-side up and allow to cool a bit.
  2. Heat 2 teaspoons of the olive oil in a medium fry pan. Add the onion and cook for 1 -2 minutes. Crumble the sausage into the pan and add the garlic. Cook 5 - 7 minutes until the sausage is cooked, stirring often.
  3. Add the tomato paste and raise the heat to medium high. Stir to coat the sausage mixture. Cook for 3 minutes adding chicken broth as needed to prevent scorching.
  4. Add the marinara sauce to the pan and reduce the heat to low. Simmer 15 minutes, stirring occasionally. Remove from heat
  5. In a small pan heat the remaining teaspoon of olive oil. Add the spinach and Italian herb blend. Cook stirring frequently until the spinach is wilted. This should take 2 - 3 minutes. Remove from heat and allow to cool.
  6. Combine the ricotta, egg, garlic powder, and 2 tablespoons of the Romano cheese in a small bowl. Stir in the cooled spinach.
To Assemble
  1. Use a fork to loosen the squash threads slightly. Divide the ricotta mixture between the two squash halves. Spoon the sausage mixture on top of the ricotta. Sprinkle with the remaining tablespoon of Romano Cheese. Top each half with the Italian cheese blend.
  2. Bake uncovered at 375 degrees for 20 - 25 minutes. If you prepared and assembled ahead of time increase the cooking time to 30 minutes or so. The mixture should be bubbling slightly.
  3. Turn oven to broil and cook until the cheese is light golden, about 2 -3 minutes. Remove from oven and allow to rest 5 minutes before serving.
Share this Recipe
Powered byWP Ultimate Recipe