Easter Pie (Calzone) Revisited


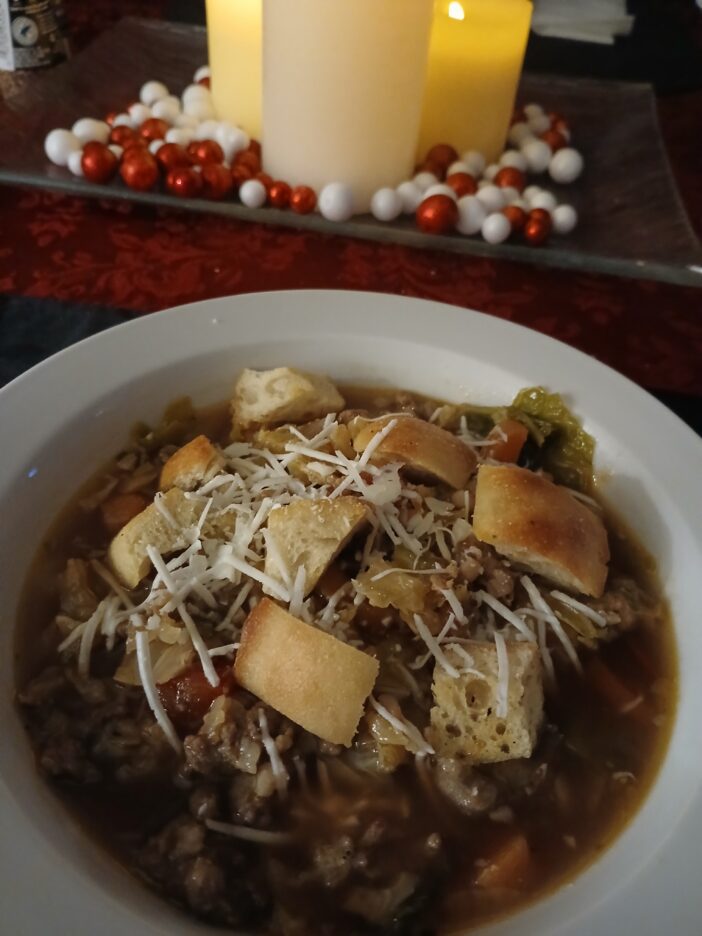
As Easter is just around the corner, in many Italian homes it is Calzone season. I shared my mother’s recipe a number of years ago and I thought it was time to make a few changes. Not to the recipe, that will never change, but to the presentation.

We always referred to it as Calzone (as a child I pronounced it “gout-zone”) but it is also known as Pizza Rustica, Pizzagaina, Torta Pasqualina or simply Easter Pie. Besides going by many names, there are easily hundreds of versions. My aunt always put hard boiled eggs and ham in hers. I’ve seen lots of recipes that use Touma Cheese and even some that don’t have meat. Every family and every region seems to have their own recipe. My mother’s is somewhere in the middle. It has a simple ingredient list of sausage, ricotta, and eggs. Pecorino Romano and parsley round out the ingredient list for the filling.

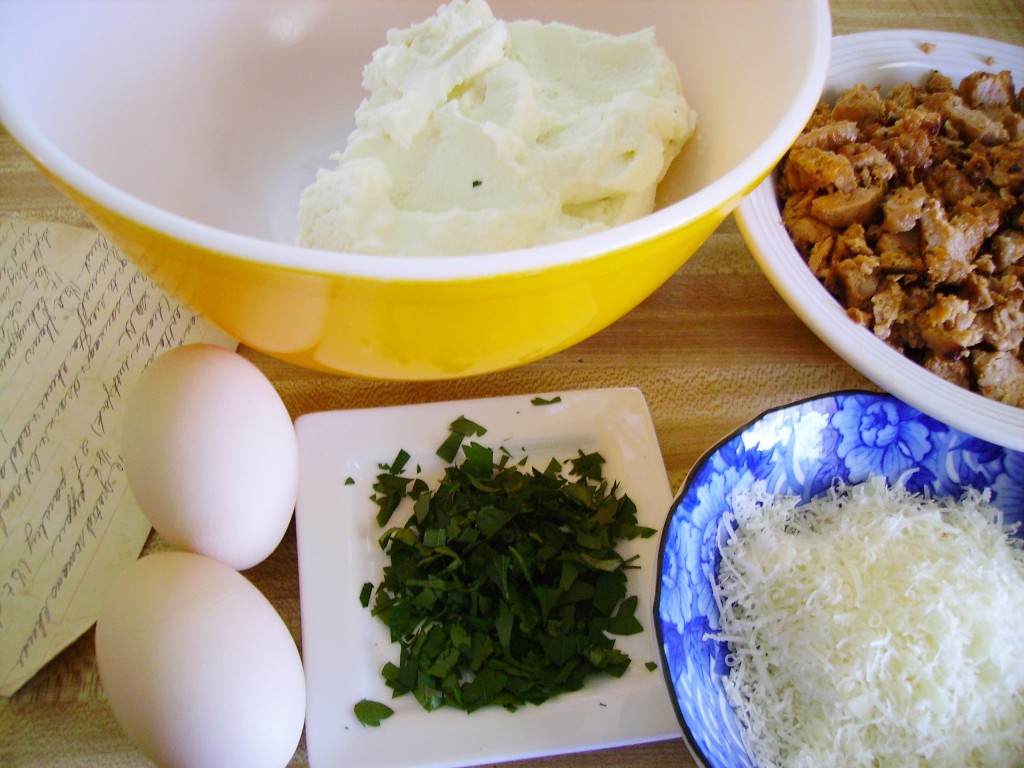
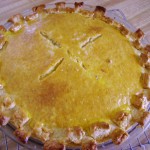
Her crust is heavenly, part pie crust part biscuit and 100% delicious.

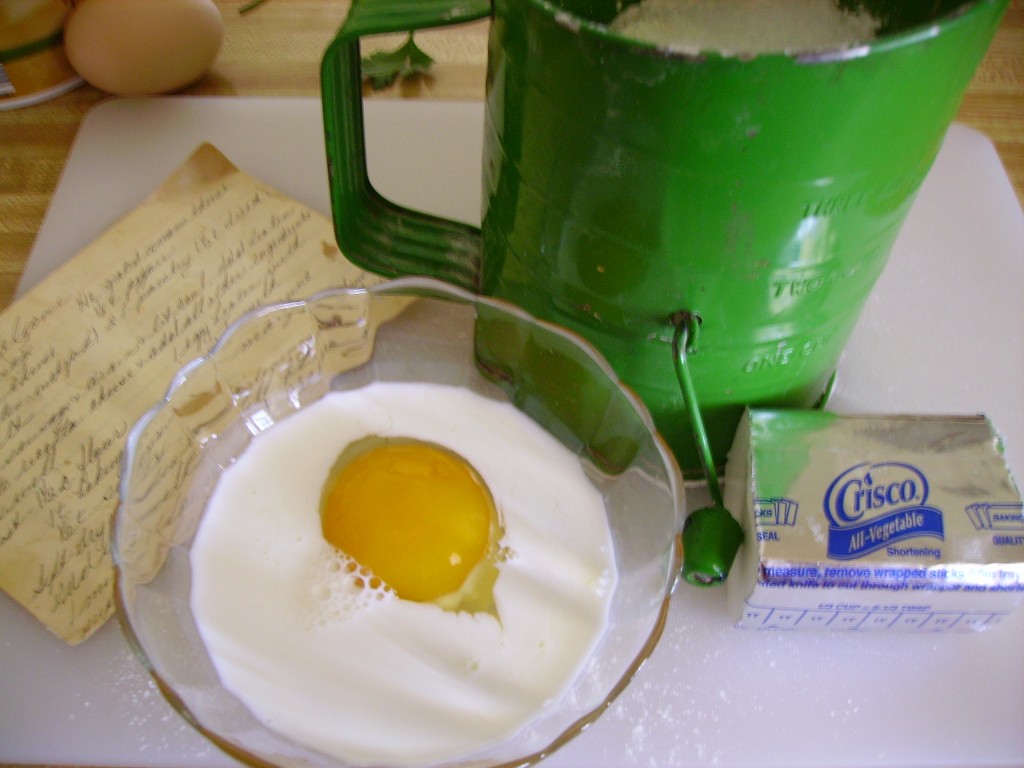
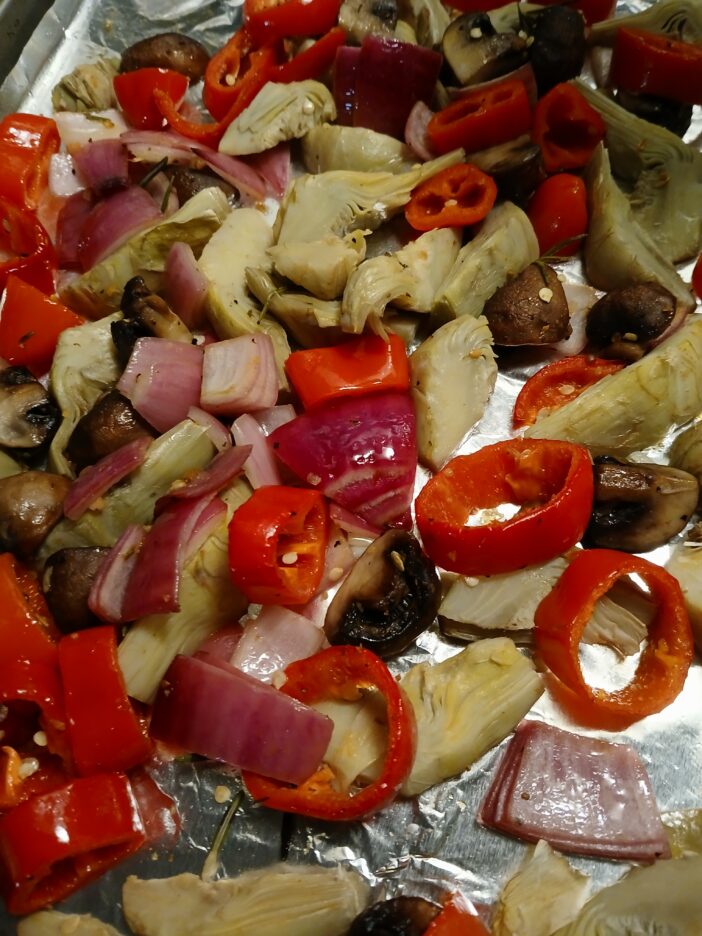
It all comes together in a pie plate and is topped with a crust. It heads into the oven.

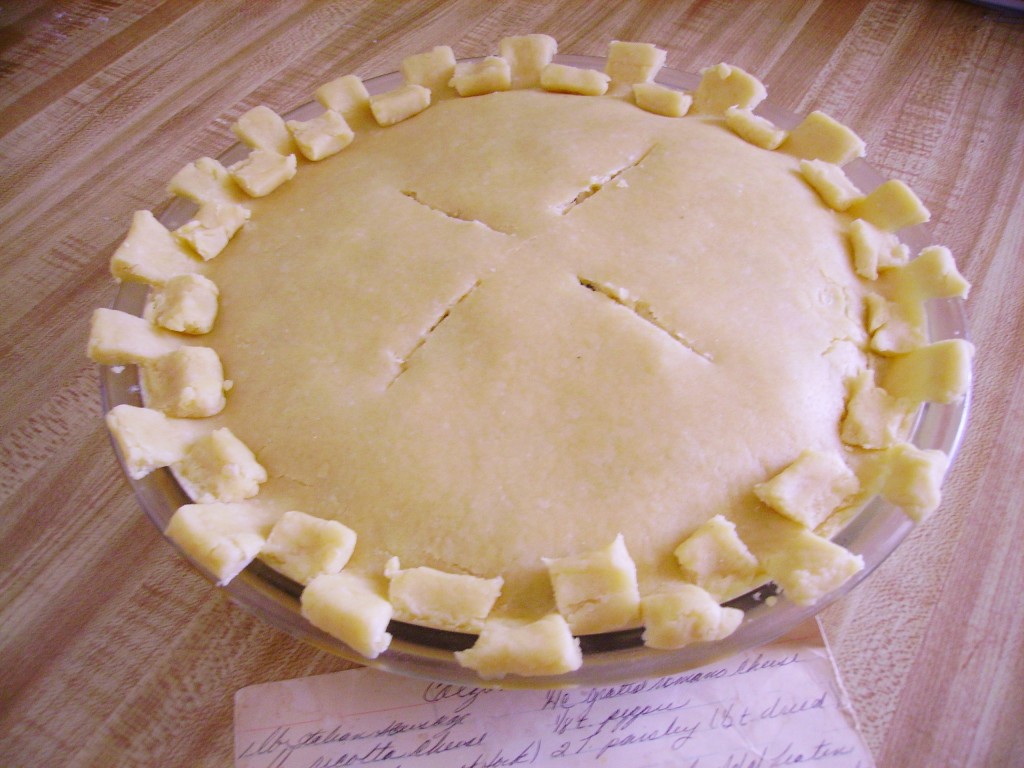
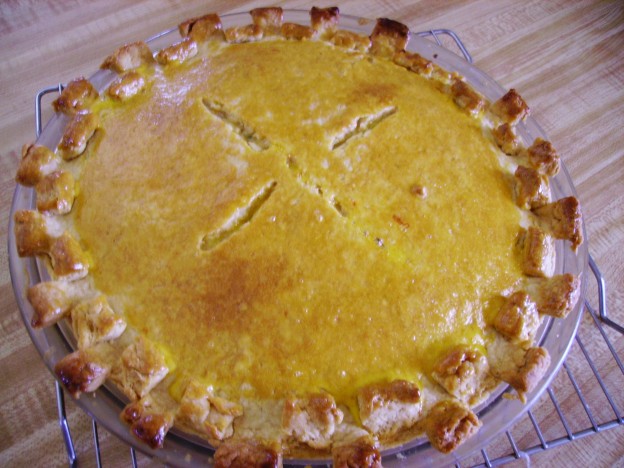
When it is almost baked it gets brushed with egg yolk to create the glossy golden crust that always made my heart sing.

Here is her recipe.

5 from 1 vote
Easter Pie (Calzone)

A tradition in many Italian homes, this is my mother's (and her family's)version.

Servings: 8
Author: binner216@comcast.net
Ingredients
Crust
  • 1-1/2 Cups Flour
  • 1 Tsp. Baking Powder
  • 1/2 Tsp. Salt
  • 1 Egg
  • 2 Tbsp. Milk
  • 1/2 Cup Shortening or Butter
Filling
  • 1 Lb. Italian Sausage Bulk is easiest
  • 1 Lb Ricotta Whole Milk
  • 2 Eggs Lightly beaten
  • 1/4 Tsp. Black Pepper
  • 1/3 Cup Pecorino Romano Grated
  • 2 Tbsp. Parsley Chopped
  • 1 Egg Yolk To glaze the crust
Instructions
Crust
  1. Sift the dry ingredients together in a large bowl. Cut in the shortening (or butter) until it is well blended

  2. Beat the egg and milk together and add to the dough mixture. Blend well and turn out on a floured surface and knead for one minute. Wrap in plastic and chill for about 30 minutes.

Filling
  1. Cook the sausage and drain on paper towels. Allow it to cool.

  2. Place the ricotta in a large bowl, add the beaten egg, cheese, parsley, pepper, and cooled sausage. Stir gently to blend.

Assembly
  1. Remove the dough from refrigerator. Lightly spray the pie pan with cooking spray and preheat the oven to 400 degrees.

  2. Divide the dough in half and roll one half out on a floured surface. Roll to a size that will cover the bottom of a 9 inch pie pan and extend up over the rim. Place the crust in the prepared pie pan.

  3. Spoon the filling into the crust smoothing it out evenly. Roll out the other half of the dough and place it on top of the filling. Cut several slits in the top crust to let steam escape. Crimp the edges to seal it well. If desired, snip the edges and fold the pieces in an alternating pattern.

  4. Bake in preheated oven for 30-35 minutes. About 15 minutes before the end of the baking time brush the top crust with beaten egg yolk. When the crust is golden brown remove it from the oven and allow to cool to room temperature. Serve for Easter breakfast or whenever you would like. Store leftovers in the refrigerator.


Have a joyful and blessed Easter.

Roasted Artichoke Salad (the easy way)

During our time in California, artichokes were a family favorite. We usually got them at roadside stands on Highway 1. Our favorite was an old man named Dutch who sold them out of the back of his station wagon. We’d bring them home and steam them whole with lemon and garlic. We all became expert at eating them leaf by leaf scraping the tender flesh with our teeth until we reached the heart. That best part, was relished last. Here is a link to another Artichoke post that features pictures, memories, and a tasty soup recipe.

https://mamadskitchen.net/2014/03/14/memories-of-highway-one-and-artichokes/ 

Artichokes are available here most of the year and we often get them. The problem is that they have to travel from California and sometimes arrive past their prime. Still we try to enjoy a perfectly steamed edible thistle whenever we can.

There are other ways to experience artichokes. They have come in cans and jars forever. These are convenient and versatile, but they lack the texture and frankly, some of the flavor of fresh. Then there are frozen artichoke hearts. They retain more taste and texture than their canned cousins. Unfortunately, they are not always available. For years, I relied on Trader Joe’s, but haven’t found them there recently. To my surprise, I have found them at Walmart (of all places). They are sold in 12 ounce bags for under $3.00 at certain stores. They are firm, large, and tasty, and they are the cornerstone for today’s recipe.

I think that this qualifies to be called a salad as it is filled with vegetables and is tossed with a dressing. While many salads are served cold, this one can be served warm or at room temperature as well as chilled, but I think that the flavors are best warm. It is a wonderful accompaniment to grilled proteins and could be a nice addition to a potluck table.  Another benefit with this salad is that it can be a meatless main dish thanks to the chickpeas (use the whole can if you are going meatless) and if you want a little more protein, add some crumbled feta cheese.

I used the little bell peppers (Lollipeppers are my current favorite) that can be found in every grocery store along with some crimini mushrooms and red onion. These along with the artichoke hearts were seasoned with salt and pepper and tossed with a little olive oil. Within 20 minutes in the oven they were lightly caramelized and tender.

As I said, this is salad done the easy way so, canned chickpeas, sun dried tomatoes, and olives joined the mix. If you have a Mediterranean olive blend available use that, but kalamata or even green or black olives would work.

When it comes to a dressing, use your favorite vinaigrette recipe or make it easy on yourself and use a bottled dressing that you love. I used a Mediterranean Dressing and Marinade from Aldi. I think it has a nice balance of flavor and have used it as a dressing as well as a marinade in various dishes.

All that is left to do is toss the roasted vegetables with the canned/jarred additions. To assure that the vegetables really absorb the dressing, add it while the roasted vegetables are warm. Then serve it, let it stand until dinner is ready, or chill it. This does get more flavorful with time so it can be made ahead and I think it tastes even better the second day

Here is the recipe as I have been making it and as always you are welcome to play with it however you choose.

Roasted Artichoke Salad

Hearty and healthy, the perfect salad to accompany grilled proteins.

Course: Salad
Cuisine: Mediterranean
Servings: 6
Author: binner216@comcast.net
Ingredients
  • 1 Pkg. Frozen Artichoke Hearts 12 oz. package
  • 1 Cup Baby Red Bell Pepper Rings About 4-6 peppers, sliced
  • 4-6 Ounces Crimini Mushrooms Halved or quartered
  • 1 Cup Chopped Red Onion Cut in about 1 inch pieces
  • 1 Tbsp. Olive Oil
  • 1/2 Cup Sun Dried Tomatoes Oil packed, drained
  • 1/3 Cup Kalamata or Mediterranean Olives Halved
  • 1 Cup Chickpeas Drained and rinsed
  • !/2 Cup Mediterranean Salad Dressing (more as needed) Store bought or homemade
  • Salt and Pepper To taste
  • 1/2 Cup Feta Cheese, crumbled Optional for garnish.
Instructions
  1. Preheat oven to 375 degrees. Line a large baking sheet with foil for easy cleanup and lightly coat with cooking spray. Combine the artichokes (no need to thaw), peppers, mushrooms, and onion in a large bowl. Add the oil to the bowl. Season lightly with salt and pepper and toss to coat. Spread out on the prepared baking sheet. Reserve the bowl and do not wipe it out.

  2. Roast in oven for 20 minutes or until everything is slightly caramelized and tender.

  3. While the veggies roast, Combine the chickpeas, sun-dried tomatoes, and olives in the bowl.

  4. When the vegetables are roasted, add them (and any pan drippings) to the bowl and gently toss to mix. Add the dressing and toss to coat evenly. If needed add more dressing to make it the consistency and flavor that you want.

  5. Transfer to a serving bowl and add some crumbled Feta Cheese if you desire. Serve warm, chilled, or at room temperature.

Have fun making this recipe to your own liking and I hope you enjoy these edible thistles as much as I do.

Savoy Cabbage and Sausage Soup

Winter is prime soup season and as we are in the thick of Winter here, it is time to share a favorite.  It is simple but satisfying, easy to make and provides multiple meals for a relatively low cost. The original recipe appeared on the Proud Italian Cook blog written by a friend and mentor, Marie. When I first started writing my blog she generously gave me advice and encouragement. She has shared wonderful recipes that highlight the beauty and simplicity of Italian cooking.

Her recipe is not that much different than the one that I am going to share. While Marie created a recipe that could easily be adapted to a variety of tastes. I tried it several ways and settled on one that features Italian sausage (a lot of it) and uses beef stock (a lot of it). The one constant is the Savoy Cabbage (a lot of it).

Savoy Cabbage is the ruffly cousin of Green Cabbage. Its leaves are crinkled and look a bit brain-like. It is slightly more tender than its cousin and has a milder taste. It is usually available in most grocery stores and is in season in Fall and Winter. It is perfect in this soup and plays well with the Italian Sausage. If Savoy is not available, green cabbage can be used.

The only other requirement is the largest soup pot that you have. Depending on how large you cabbage is, it will yield well over 8 cups of cabbage once it is chopped up. This will cook down to a reasonable amount eventually but with all of the other ingredients you will have at least 10-12 cups of soup.

If you have or can find them, Parmesan or Pecorino rinds add an incredible flavor.  I save them when I use up a block of either cheese. I have occasionally seen them in stores, but not very often. They are worth the effort to save or find.

As with any soup, this one benefits from long and slow cooking. It doesn’t require much in the line of garnishes either. I used some French bread croutons (from more than day old rolls I had on hand).

To make them; Cut stale bread into 1-1/2- 2 inch pieces. I usually spray them with some cooking spray and sprinkle them with a little seasoning, then let them toast in a 250 degree oven until they are dry and just barely turning golden.

I also like a sprinkling of Pecorino Romano cheese and a few red pepper flakes.

Here is the recipe as I like it. As always, play with it until it is yours alone. There is plenty of Winter left.

Savoy Cabbage and Sausage Soup

A hearty and comforting soup that will feed a crowd or keep on giving.

Course: Main Course
Cuisine: Italian
Servings: 10
Author: binner216@comcast.net
Ingredients
  • 2-1/2 Lbs. Savoy Cabbage Cored and chopped
  • 2 . Lbs. Italian Sausage Bulk is easiest
  • 1 Tbsp. Olive Oil
  • 2 Large Carrots Chopped
  • 1 Large Onion Chopped
  • 6 Large Garlic Cloves Finely Chopped
  • 1 14.8 oz Can Fire Roasted Chopped Tomatoes Juice Included
  • 2 Quarts Beef Broth or Stock More as needed
  • 1-2 Parmesan or Pecorino Rinds
  • 1-2 Tbsp. Italian Seasoning (like McCormick Italian Herb grinder) To taste
  • Grated Parmesan or Pecorino Cheese For Garnish
  • Red Pepper Flakes Optional
  • Salt and Pepper To taste
Instructions
  1. Heat your largest soup pot over medium/high heat and add the olive oil. Add the sausage meat to the pan and break up with a wooden spoon. Allow it to cook until it is no longer pink, stirring and breaking up as needed, about 15 minutes or so

  2. While the sausage cooks, chop the onions carrots and garlic. Set aside.

  3. When the sausage is cooked, remove it to a bowl with a slotted spoon. Pour off all but a smidge of the oil and return the pot to the stove. Add the onions, carrots and garlic to the pot with a pinch of salt, cover and sweat for 2-3 minutes then cook uncovered until slightly softened and fragrant. Add half of the Italian seasoning and let cook for a minute or so.

  4. Return the sausage to the pot and add the tomatoes. Add 1 quart of the stock and the cheese rinds. Begin to add the chopped cabbage. This will seem like a ridiculous amount, but it will shrink as it cooks. Add more stock as needed to allow for stirring in the cabbage. Cover the pot and simmer until the cabbage is soft. 20-40 minutes depending...

  5. Once the cabbage is soft, add as much stock as needed to make it a soup (2 quarts may not be enough.) Add the remaining Italian seasoning and add salt and pepper to taste. Let it simmer for a few more minutes until it is steaming hot.

  6. Serve with grated cheese, pepper flakes, and Italian seasoning to pass at the table.


Barese Sausage with Pasta and Green Bean Salad

It seems like it’s been years since I shared my thoughts and recipes here. I just checked and it has been just about 2 years. I haven’t stopped cooking, far from it, and I have shared a bit on Facebook, but even with all the time retirement and the pandemic gave me I never made it here. It does feel odd, and I am definitely a bit out of my comfort zone. Years ago, my Mary Kay director instilled the philosophy in me to “Feel the fear and do it anyway.” So, I am going to do just that (Thank you, Sarah Belle).

While I cook many different types of food, I am an Italian girl at heart, and as a good Italian girl I love Caputo’s,. (Check them out by clicking on the link above. )This small local chain of stores has been bringing a traditional taste of Italy to the Chicago suburbs since the 1950’s. The products and produce are marvelous with selections for every cuisine. Many have cafes that serve the best Calamari  (among other items) and reasonably priced Italian wines. You can even sip and shop while listening to Italian music from opera to the Rat Pack  They also feature imported pastas, tomato products and a variety of homemade sausages.  This little story is about how they came together to make a wonderful dinner.

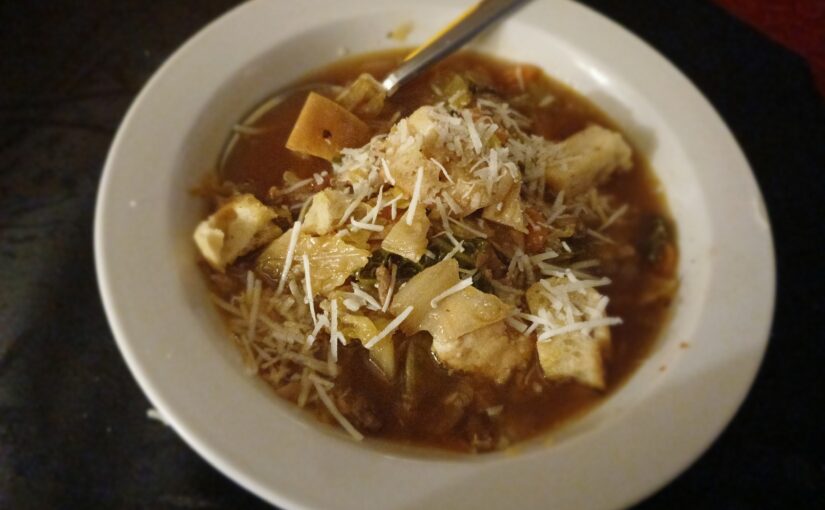
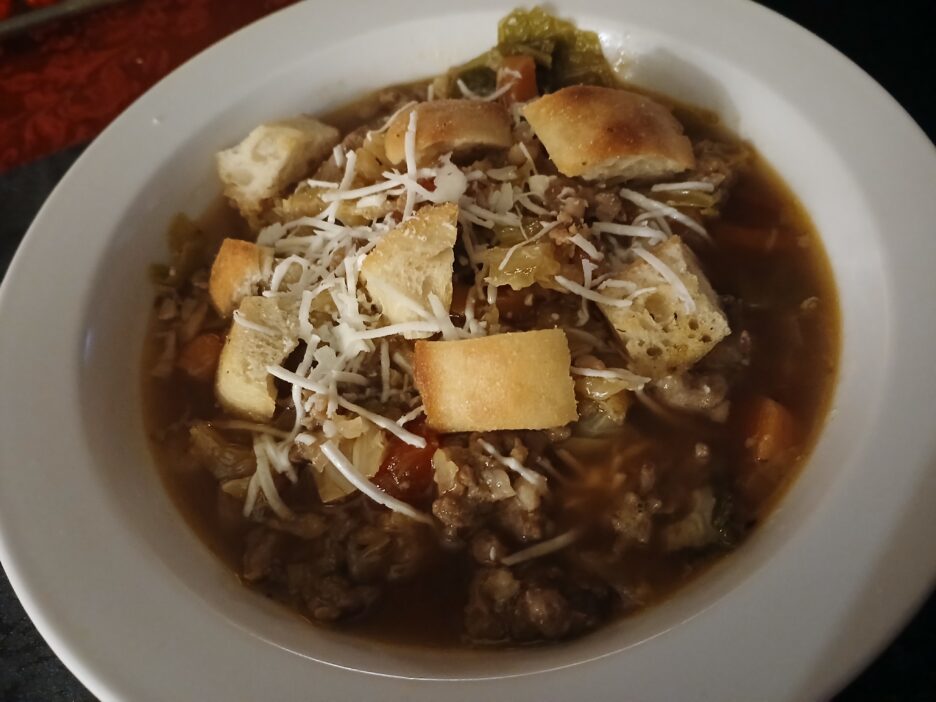
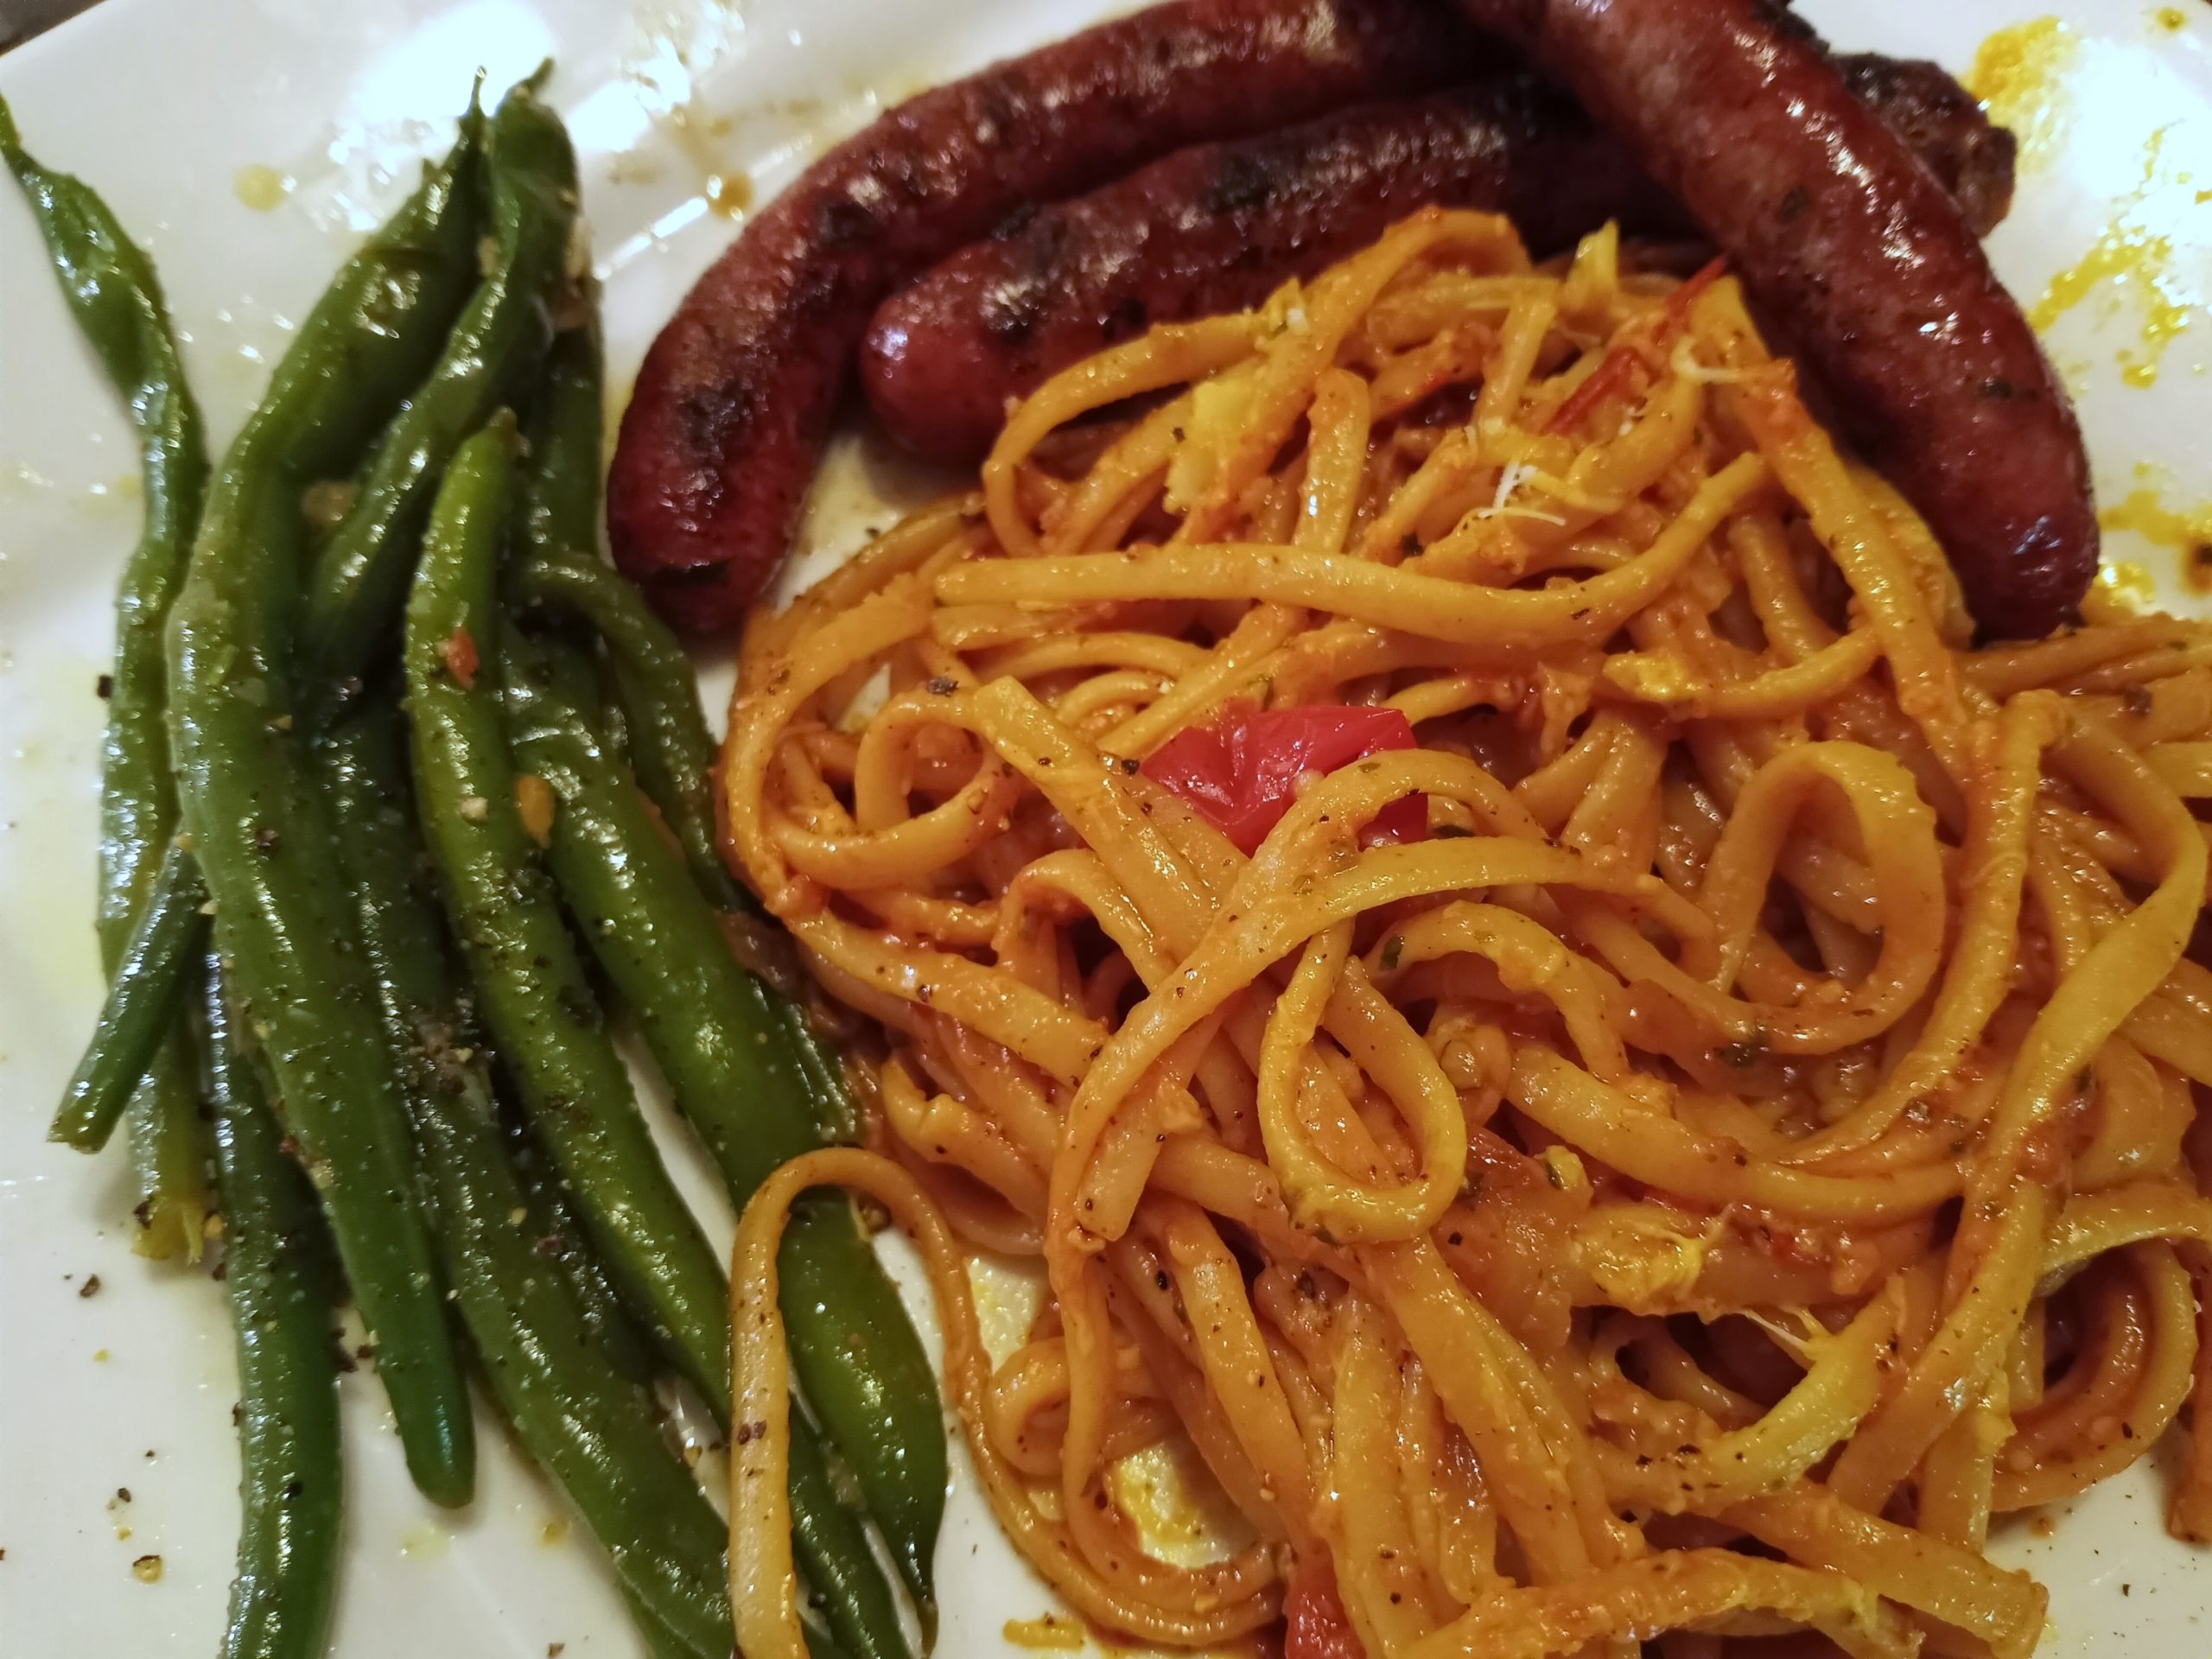
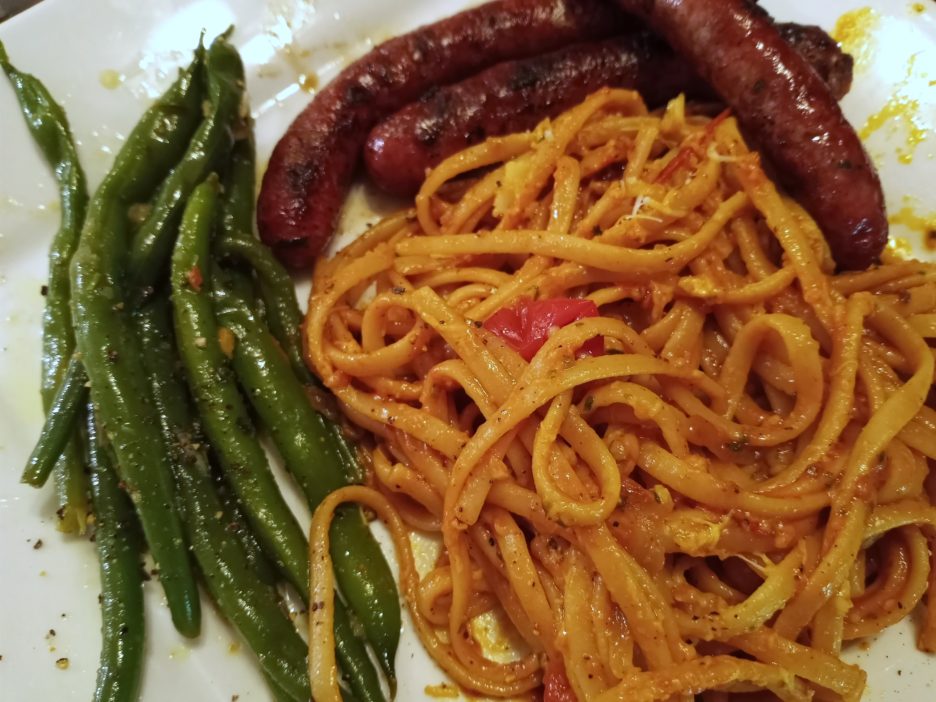
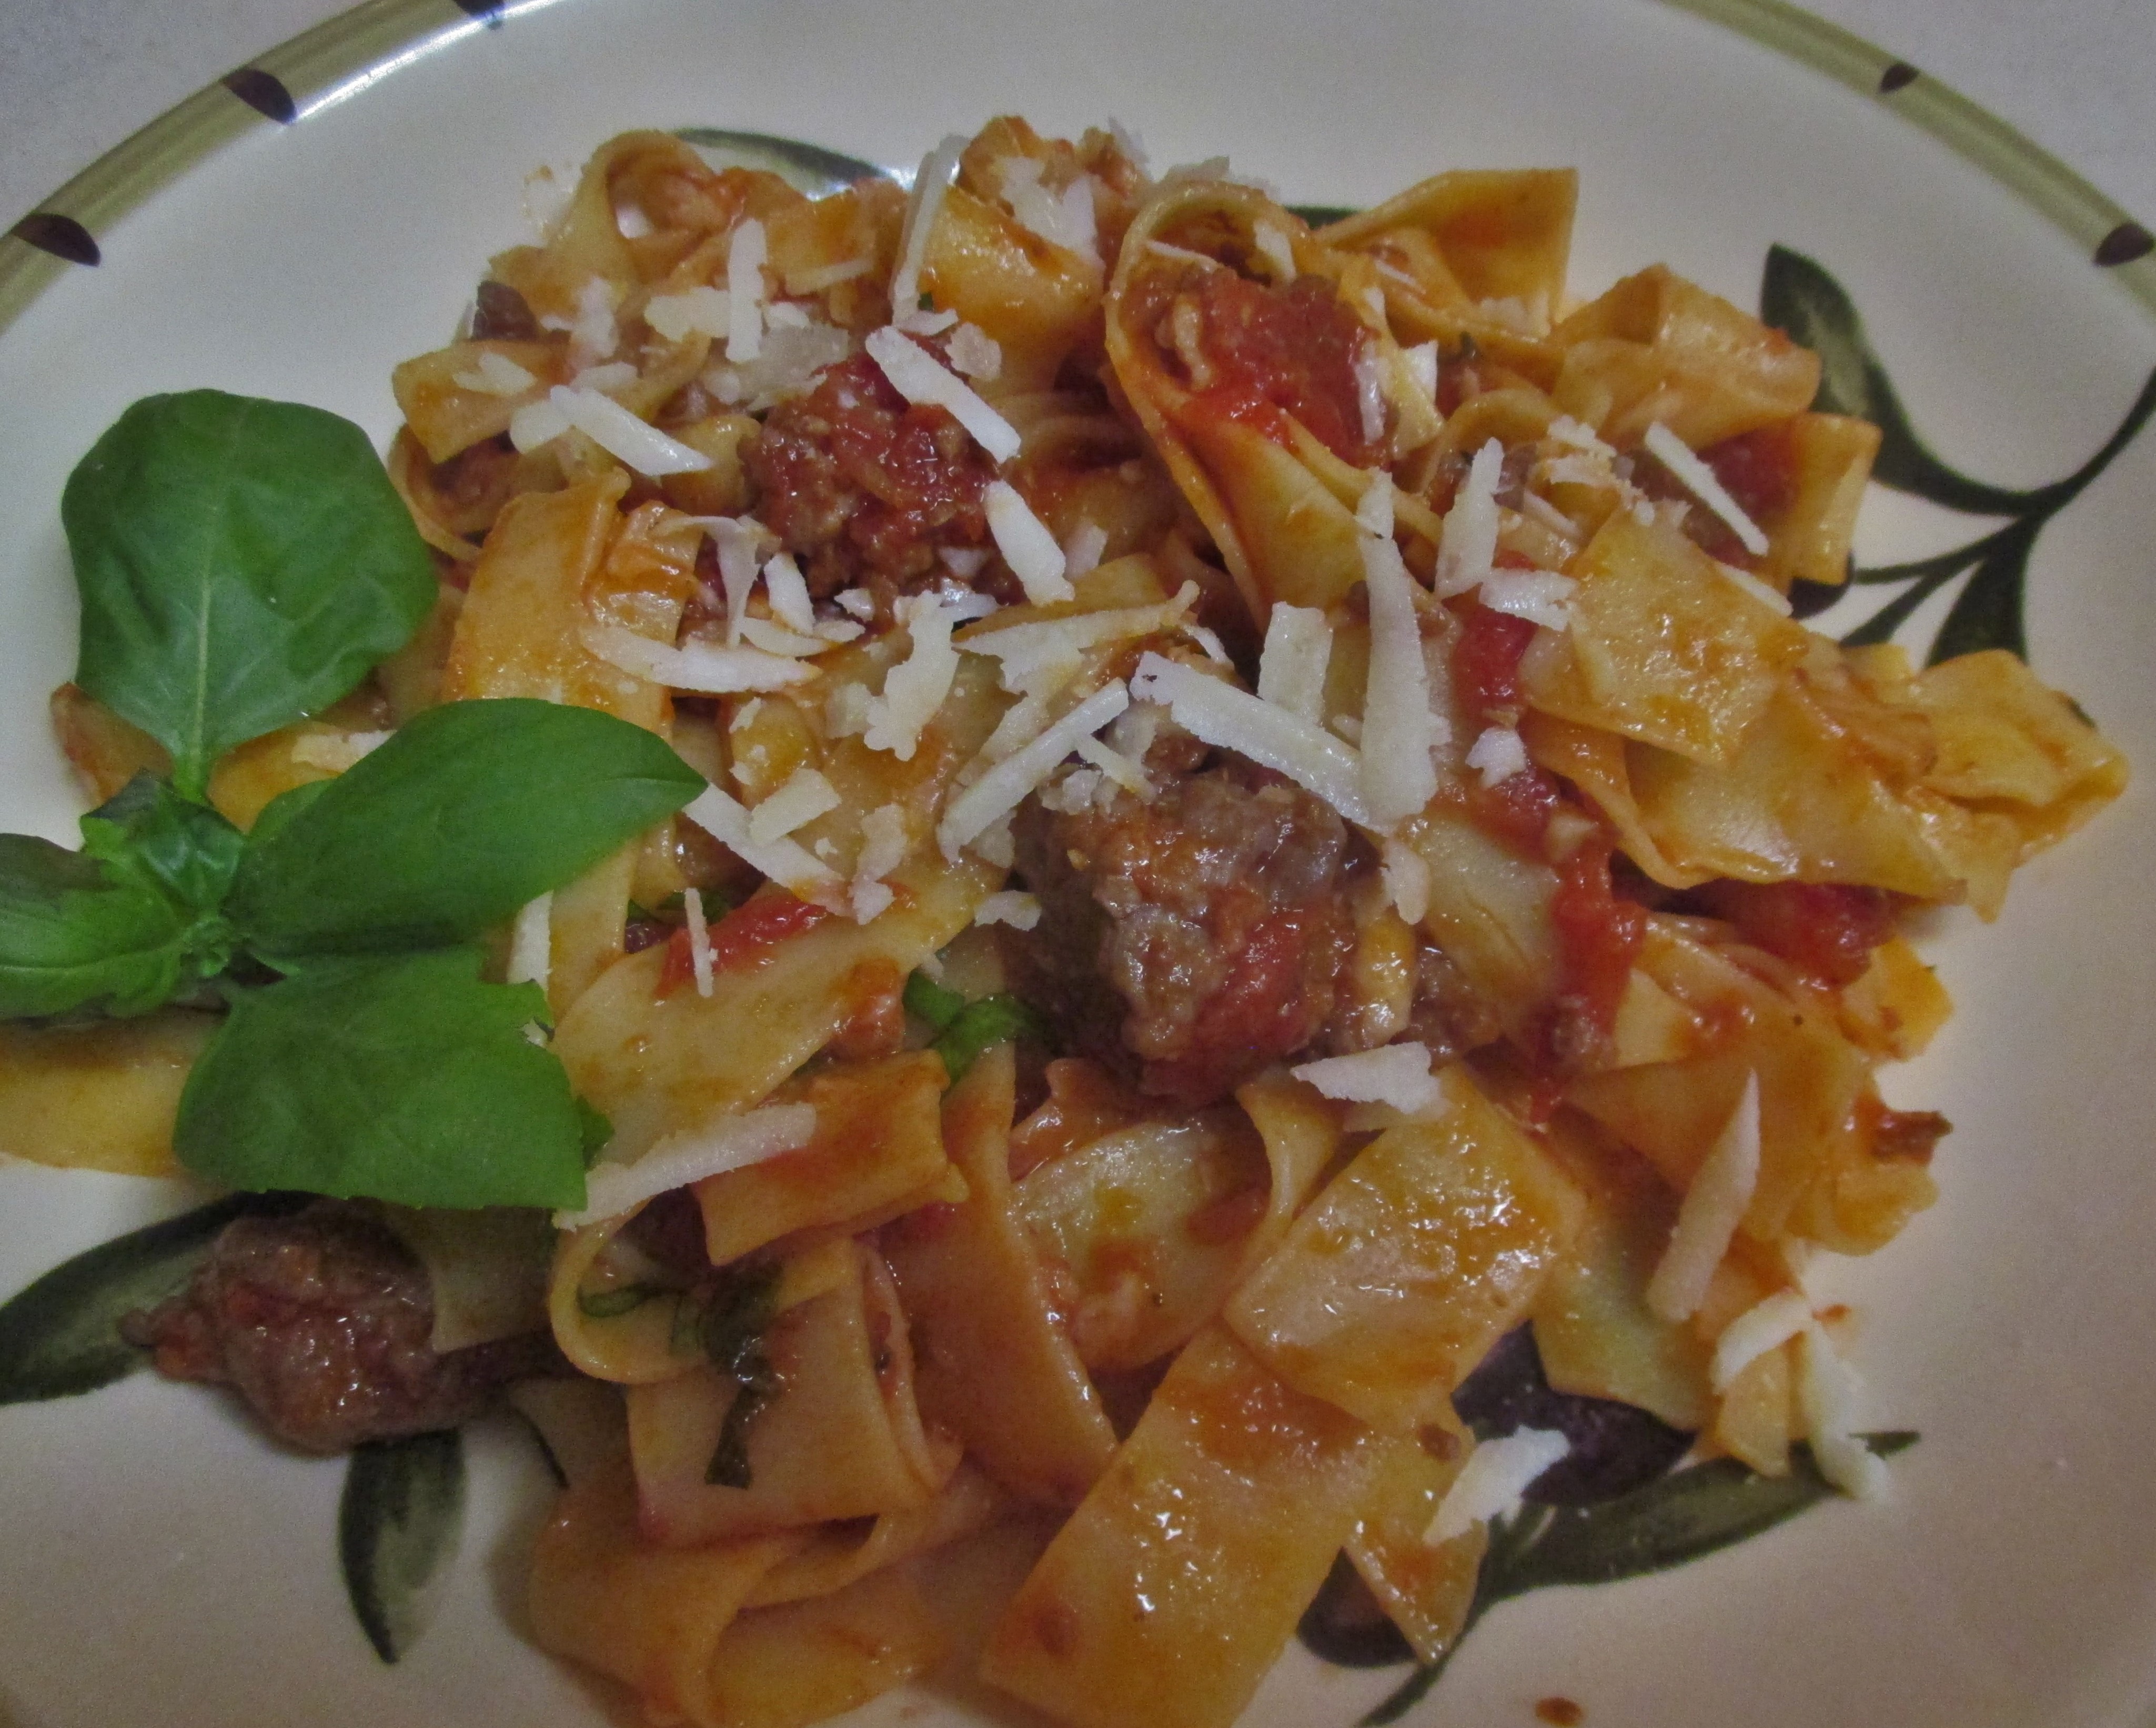
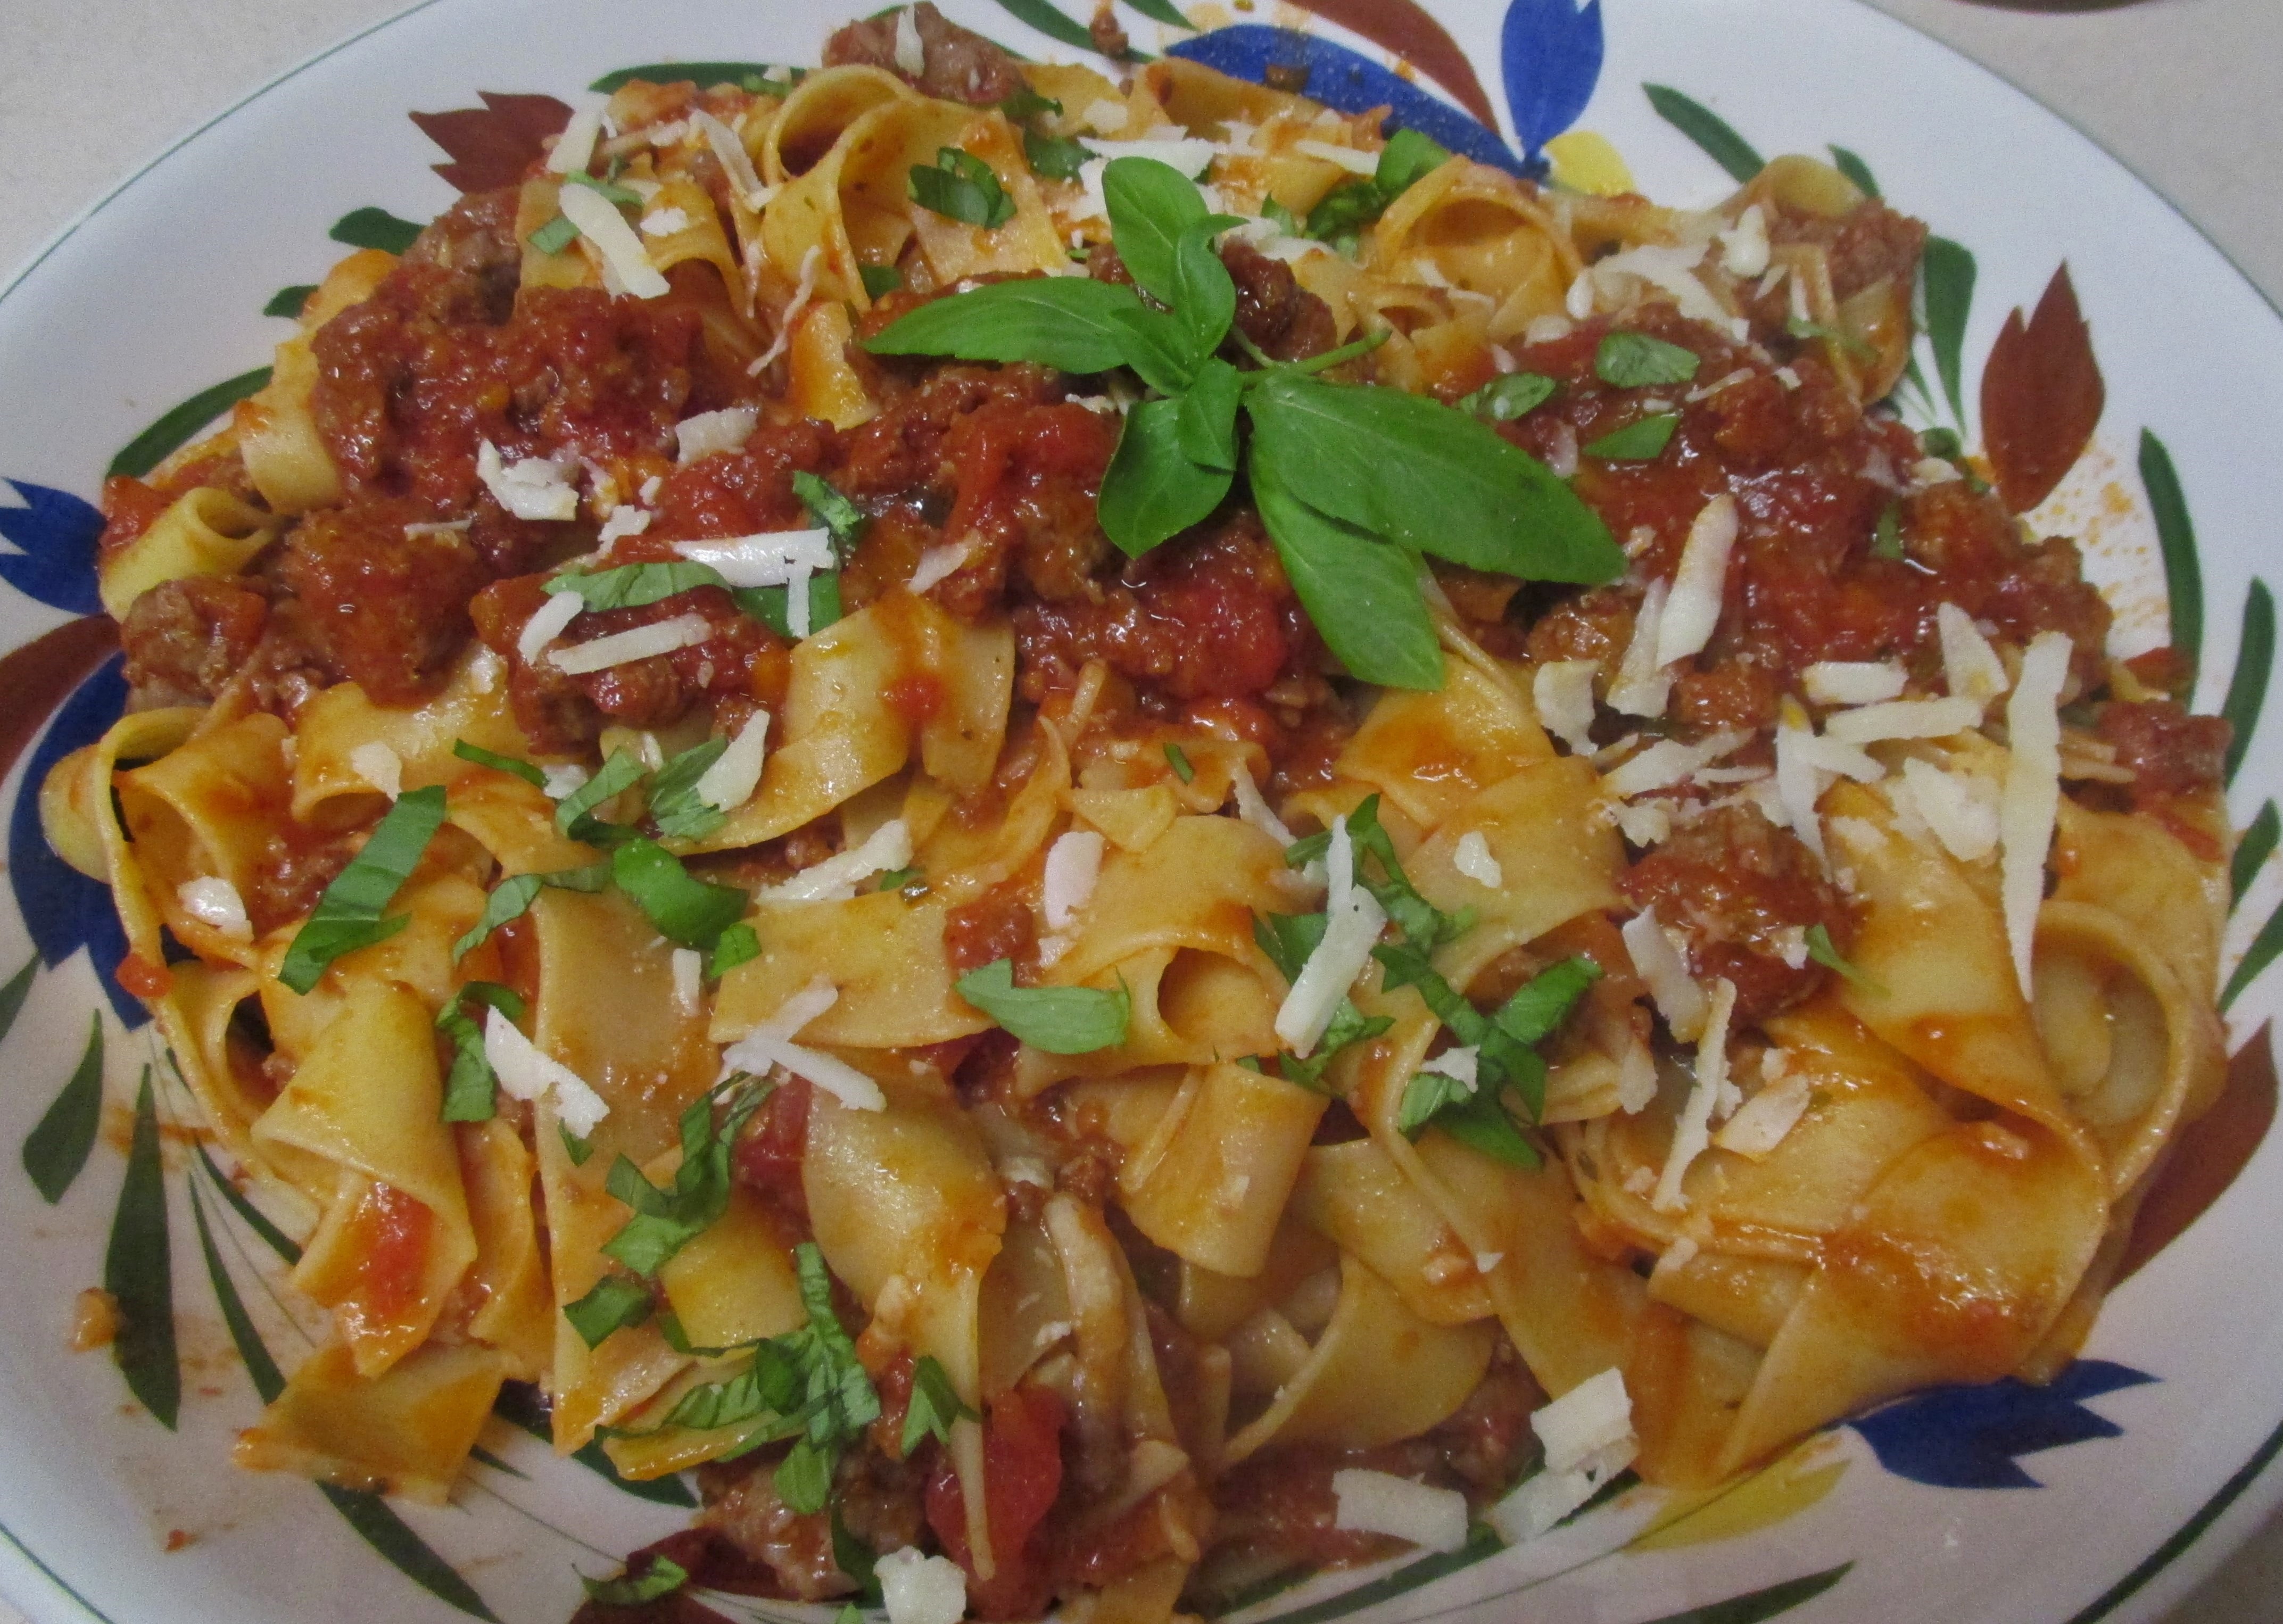
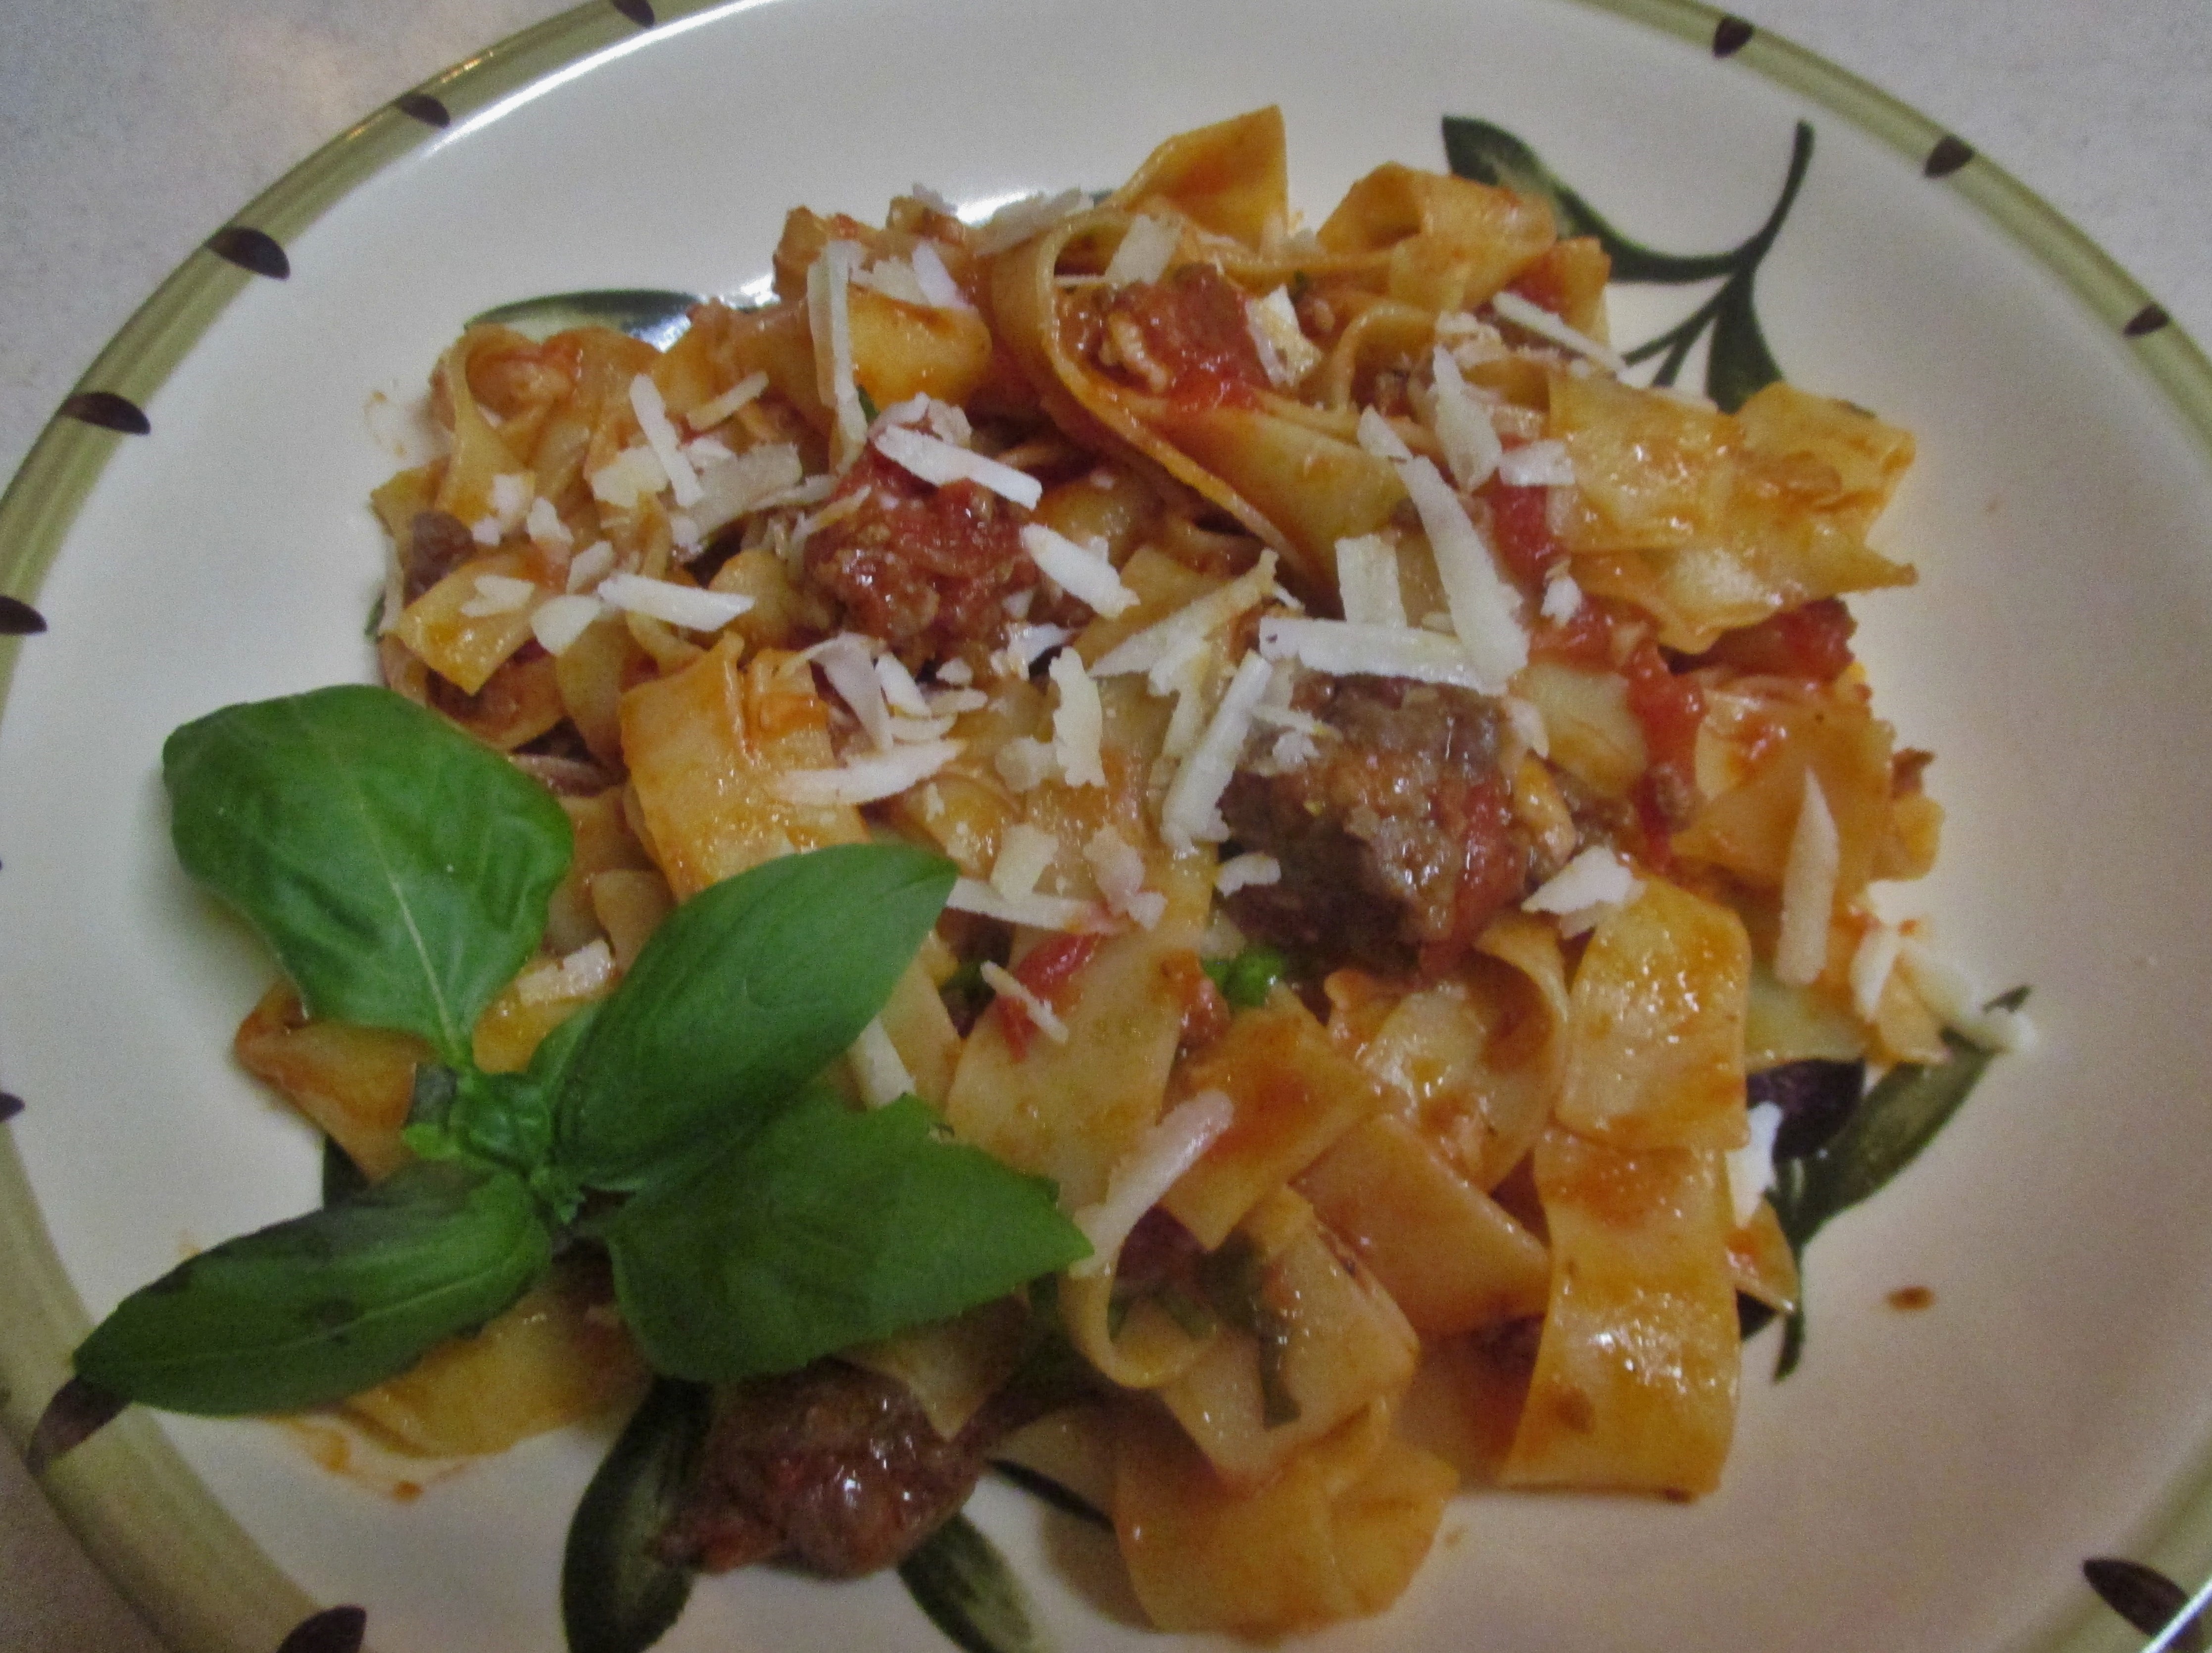
It started with Barese Sausage. These finger size sausages are made of beef, lamb, and pork, flavored with parsley, garlic, and pecorino cheese. They come linked together which makes them easier to grill, and this is my favorite way to cook them. They have a complex flavor that is not at all spicy, but still delights the palate.

I chose imported whole wheat linguine for the pasta portion of this meal. In a very small nod to healthier options I have been using whole wheat pastas more often. The taste Is a bit heartier and stands up well to bigger flavors.

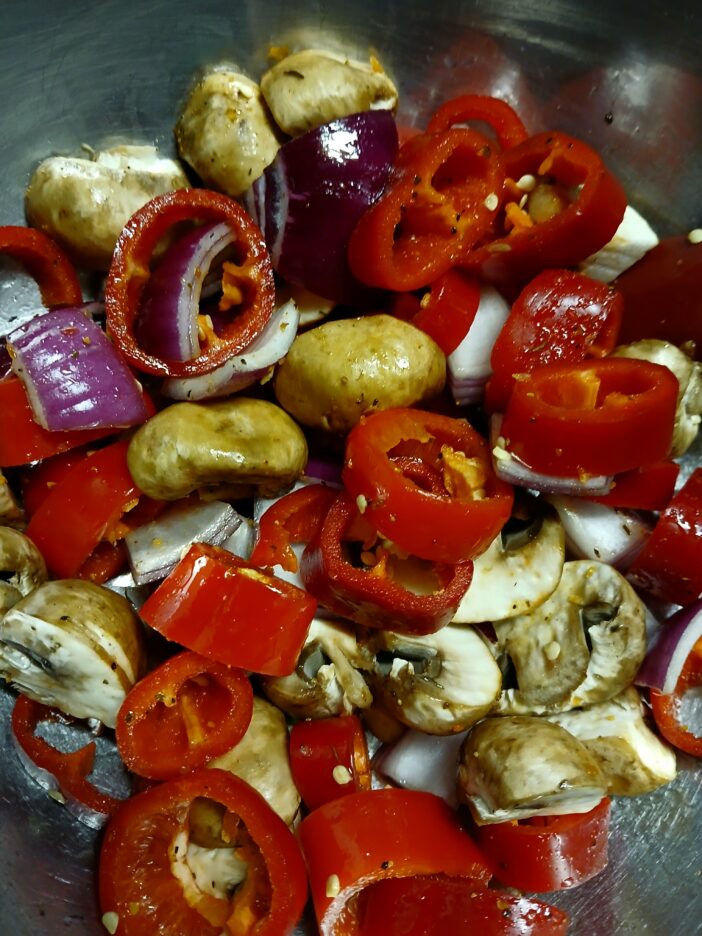
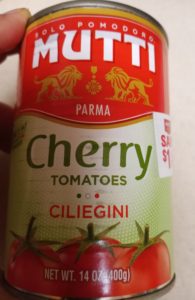
Finally, I used canned Italian Cherry tomatoes for the sauce. These sweet little nuggets are packed in tomato puree and have a convenient pop top can and the “just right for two” 14 ounce size. So, the starring players were in place and needed to meet their supporting actors. Onions and garlic of course, sauteed in olive oil laid the foundation. Once they were lightly caramelized the tomatoes went in. I gave them a gentle squish and let them simmer until they came together in a thick sauce.

It would have been wonderful to add some fresh basil and parsley, but my balcony herbs are having a slow start, so I used some of my homemade pesto, always ready in the freezer for just such occasions. Once the pasta had cooked to al dente, I added a ladle or two of the pasta water to the sauce  and finished with freshly grated Pecorino. I chose to serve the Barese along with the pasta so that we could fully enjoy its unique flavor.

This is what I call a “No recipe, recipe.” The description above and these few notes are all you need.

I used one small onion sliced lengthwise and two cloves of finely chopped garlic.  Use as much olive oil as you like (1 Tbsp or more) and one can of tomatoes to serve 2 with a little left over.

I cooked about 4 ounces of pasta in salted water. I saved about 3/4 cup of the water for the sauce. I added 1/4 cup of pesto, but more or less would be fine. I like a lot of grated Pecorino (1/3cup), but use as much or as little as you want.

The final touch was a Green Bean Salad. I made a variation of my Mom’s salad. Since I have returned to the blog, I feel the need to share an actual recipe. While my Mom’s used basil or mint and garlic, this time I used lemon zest, rosemary, and lemon thyme. I used a bit of lemon juice and some rosemary infused vinegar. Every recipe can be tweaked to suit any cooks whim.

Mom's Green Bean Salad
Print Recipe
Nothing says summer like fresh green bean salad. This is my mother's recipe. She always made it with mint, but I also like it with fresh basil. Either way it is the perfect companion to grilled chicken.
Mom's Green Bean Salad
Print Recipe
Nothing says summer like fresh green bean salad. This is my mother's recipe. She always made it with mint, but I also like it with fresh basil. Either way it is the perfect companion to grilled chicken.
Ingredients
Servings:
Instructions
  1. Blanch the green beans in salted boiling water for 3-4 minutes (until they are the tender crisp that you love.) Plunge in ice water to stop cooking and drain well.
  2. In a salad bowl combine the vinegars and olive oil. Stir in the garlic and add the drained green beans and basil (or mint).
  3. Toss to combine and season to taste with salt and pepper. Chill for at least an hour before serving.
Share this Recipe
Powered byWP Ultimate Recipe

It feels good to be back and much like riding a bicycle, I remembered how to do it, more or less.

Sunday Gravy By Any Other Name

Over the years I have shared memories and recipes about and for Sunday Gravy. Some call it Sauce, some call it Gravy,it is by definition a Ragu (not referring to the stuff in the jar here). I am Italian through and through and when it comes to this delicious staple, whatever you call it, another little pinch is always good.

This adventure involves lamb, possibly my favorite meat. I grew up eating lamb almost every week. It was always in the form of Lamb Chops; not the dainty Loin morsels, but the shoulder and round bone ones that were boulder in flavor and texture. My Mother broiled them with just a sprinkle of garlic salt and served them with pride. My father and I ate them with gusto. Mom did, too.

Now, I eat lamb in many other forms, although, I still love those chops of my youth. I have been known to throw a butterflied leg of lamb on the grill on occasion and I am very happy that Lamb Burgers are having their day on many restaurant menus. I make them at home from time to time and have even gotten Papa D to enjoy them. So, why not use some ground lamb in a Ragu?

This ragu features Ground Lamb combined with an equal amount of Italian Sausage. The base was onions, garlic, and carrots (I don’t do celery, it’s personal). Some pancetta and red pepper flakes were in there as well. Tomato Paste was added and allowed to cook out. Then some dry red wine went in for deglazing and flavor. San Marzano Tomatoes were added after they were hand crushed (it is so satisfying).

This glorious mixture simmered for an hour or so, perfuming the house exquisitely. Fresh woody herbs were added with some salt and the simmering went on for another hour. Finally the tender and dried herbs came into play. A bit longer on the stove and it was ready to spend the night in the refrigerator. It is my belief that Sunday Gravy is always better on Monday. And it was.

Lamb and Sausage Ragu

This meat based tomato sauce is the perfect partner for any cut or wide pasta. Gravy, Sauce, Ragu, whatever you call it, is delicious on Sunday or any other day of the week. It also freezes very well.

Servings: 8 or more
Author: Mama D
Ingredients
  • 2 Tbsp. Olive Oil
  • 1 Large Onion Chopped
  • 4-6 Cloves Garlic Finely chopped
  • 1/2 Cup Finely Chopped Carrot
  • 2-3 Oz. Pancetta Chopped
  • 1/2 Tsp. Red Pepper Flakes More or less to taste
  • 1 Pound Ground Lamb
  • 1 Pound Italian Sausage Hot or mild as you like it
  • 1/4 Cup Tomato Paste
  • 1 Cup Dry Red Wine
  • 2 Cans San Marzano Tomatoes 28 ounce size
  • 2-3 Tbsp. Fresh Chopped Woody Herbs Rosemary, Thyme, Oregano, etc.
  • 1 Tbsp. Dried Herbs An Italian blend works well
  • 1 Tsp. Salt More or less to taste
  • 1/3 Cup Chopped Fresh Basil
Instructions
  1. Heat the olive oil in a large pot over medium heat. Add the the onions, carrots, garlic, pancetta, and red pepper flakes. Allow to cook for 3-5 minutes until everything begins to soften and become fragrant.

  2. Crumble the sausage and lamb into the pot and stir to combine it with the vegetables. Cook until the meat has lost its pink color. This takes 8-10 minutes

  3. Mix in the tomato paste and let it cook out for at least 5 minutes. Add the wine and stir to loosen any browned bits. Continue to cook until the wine is almost evaporated.

  4. Crush the tomatoes and add them to the meat mixture. Bring the mixture just to a boil, then reduce the heat to medium low and allow to simmer partially covered for at least an 1 hour or so. You can add some stock if it seems to be getting too thick.

  5. Add the woody herbs and simmer for 30- 45 minutes. Add the salt and dry herbs and simmer for 30 minutes more. Taste and adjust seasoning. Add the chopped basil and cook for a few more minutes.

  6. If you can, refrigerate the ragu overnight.while it will be very tasty the day you make it, it will be even better the next day. Serve over a thick long pasta like tagliatelle or bucatini or a cut pasta like rigatoni.