Lemon Pesto Pasta with Shrimp

Summer is here and lighter, brighter food is always a welcome addition to the Kitchen of Love. This dish started with a new Aldi Find. Most people know about Aldi. They offer a finite selection of staples, but they also have their Specially Selected items. These can be all kinds of items from soup to nuts, from cheese to seafood. They are usually only around for a short time and once they are gone, they may never return.

As I glanced through the pasta and sauce aisle, I came upon a new and intriguing Pesto. This one was lemon and who doesn’t love the taste of lemon?

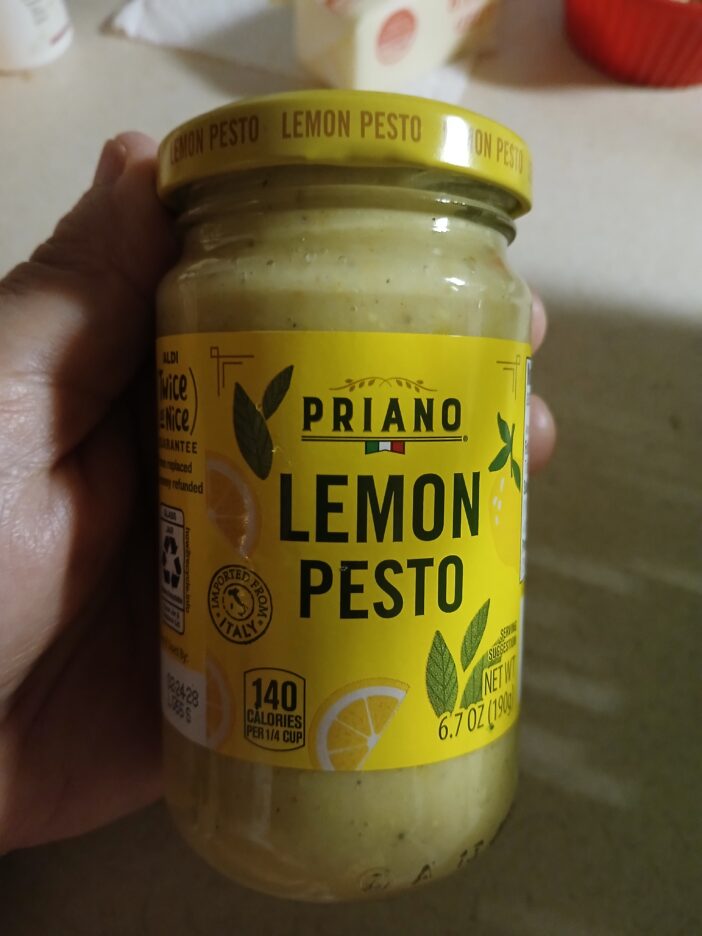
This little jar gave a hint of summer to the recipe that I am sharing. The lemon flavor was subtle, but there was a nice balance of herb and garlic and a very creamy texture that tasted of cheese and possibly ricotta. The dish I came up with used the whole jar and got some help from fresh lemon zest. So now, without further ado, let’s meet the rest of the players. Everything else in this dish came from my pantry, fridge, or freezer.

The Shrimp were Argentine Red (16-20 size). I have been liking these more and more lately. They have an almost lobster like flavor and are very tender when gently cooked.  The pasta was Whole Wheat from DeLallo probably around 8 ounces.

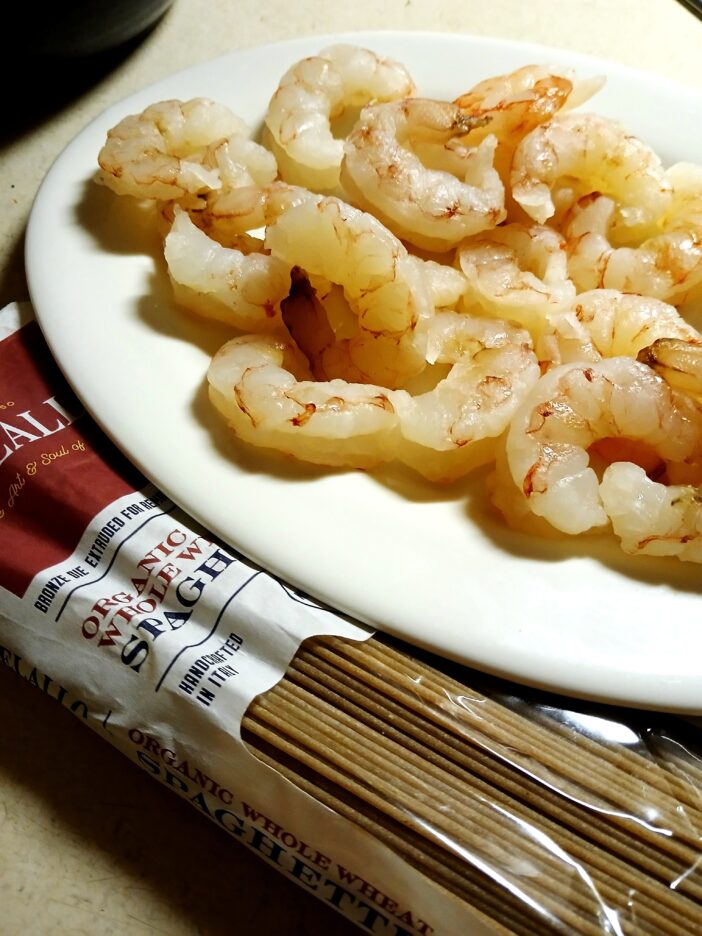
As this was a make do with what’s on hand dinner, I used a bag of frozen California Medley Vegetables. It’s a versatile blend of broccoli, carrots and cauliflower, but another vegetable blend would also work. This would also be very good with fresh vegetables of your choice.

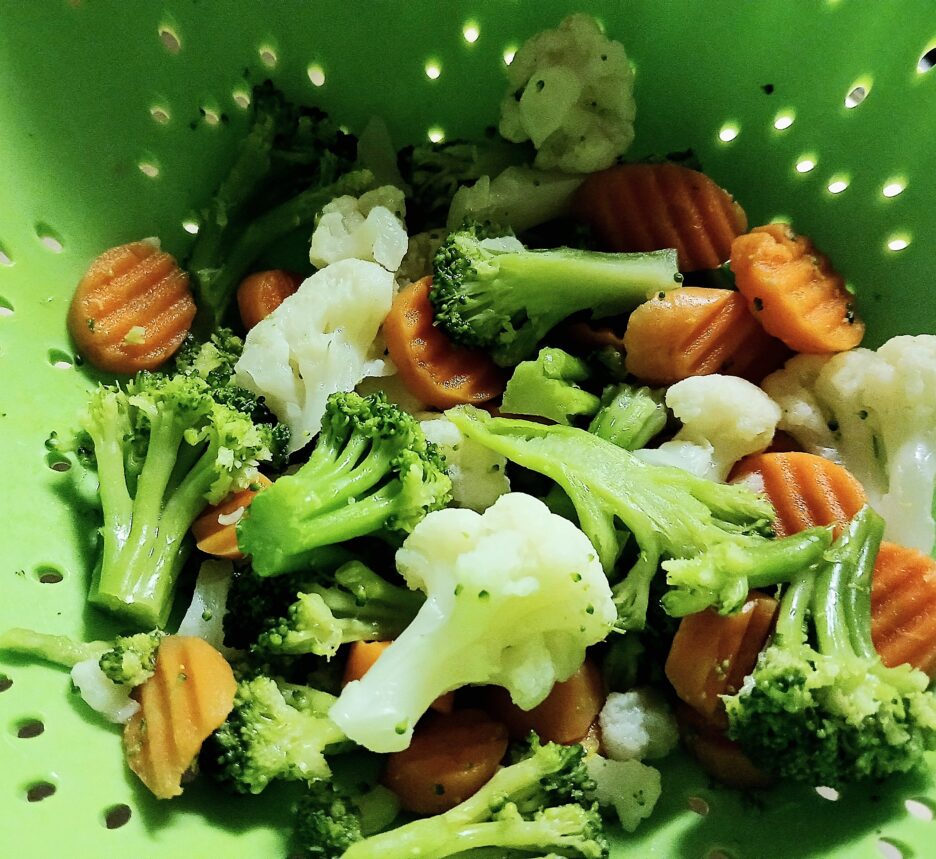
While the pasta was cooking, I prepped the Shrimp. I have been using this method of cooking shrimp lately. Thanks to Christine Pittman ‘s Cook the Story. https://cookthestory.com/garlic-butter-argentine-red-shrimp/. The shrimp  are gently cooked in garlic butter and always turn out tender and flavorful.  

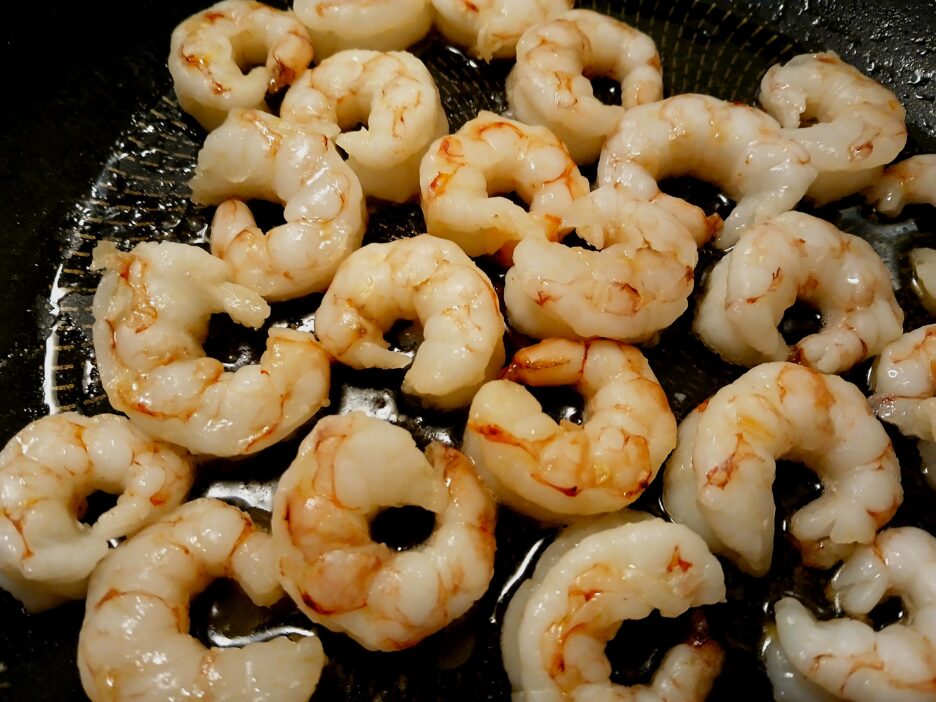
Once the shrimp were cooked, I transferred them to a plate and added the thawed and drained vegetables to the pan of garlic infused butter and let them gently cook to tender crisp. The addition of some lemon zest gave everything a little more zing.

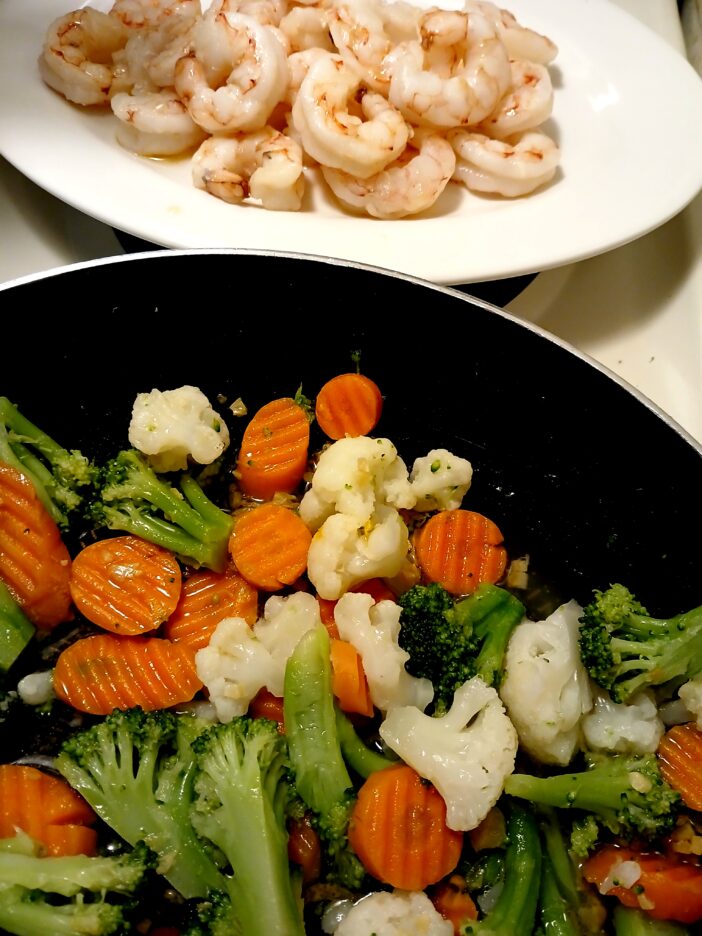
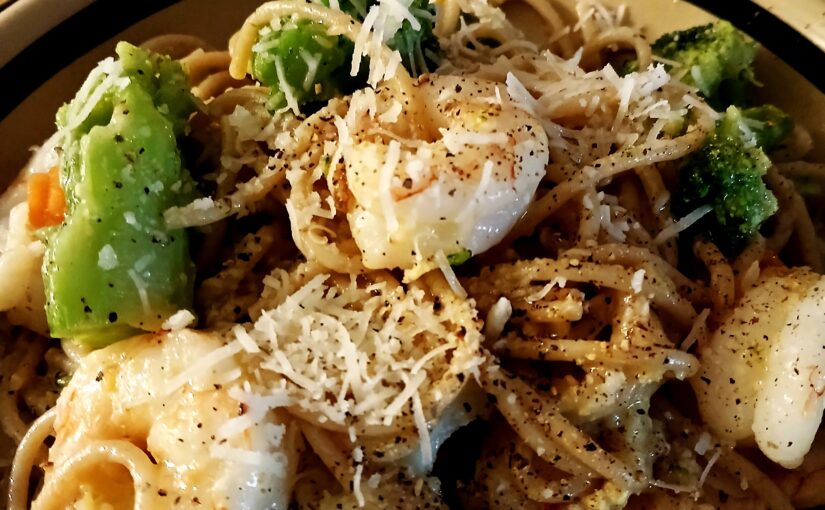
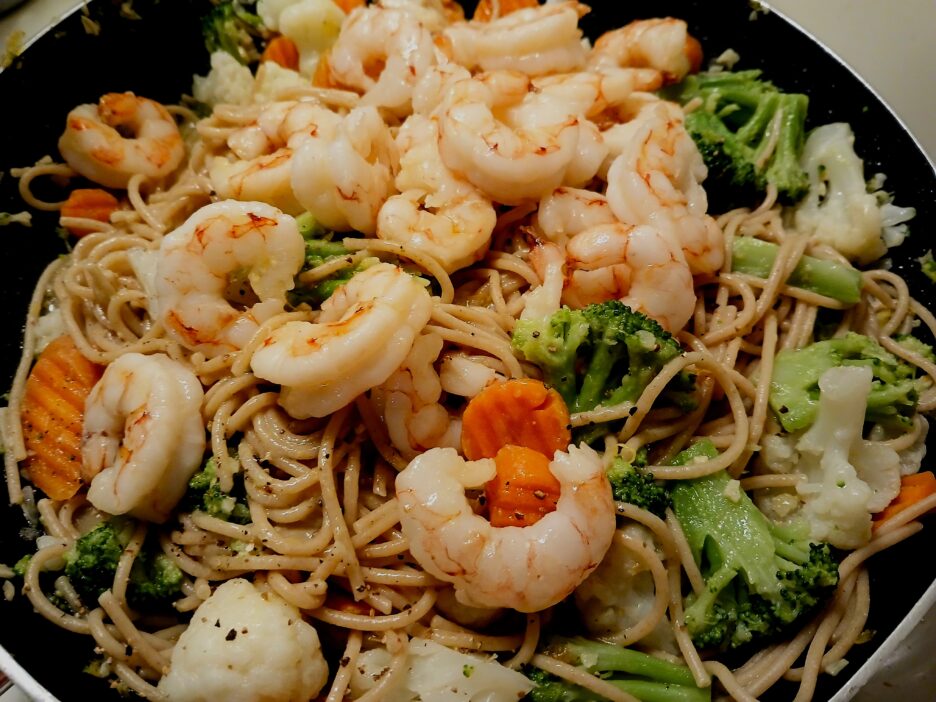
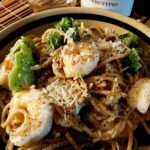
When the pasta was cooked, I drained it saving a generous half cup of pasta water. And now it was time to put the whole dish together. I added the pasta to the vegetables and then added the whole jar of lemon pesto. I tossed everything together adding enough of the reserved pasta water to create the perfect amount of sauciness. The shrimp came back into the pan and I added a good handful of Pecorino Romano. A few gentle tosses and a little heat and it was ready to eat.

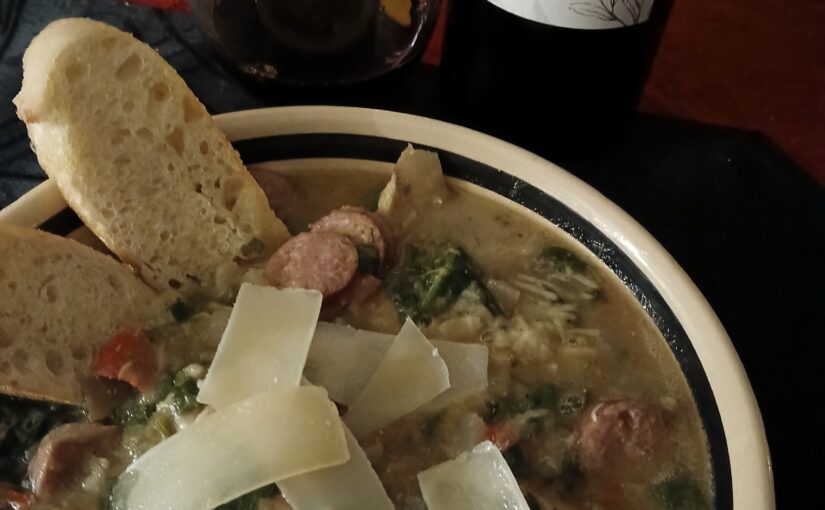
This was a quick and easy almost one pot meal. Perfect for a Summer supper.

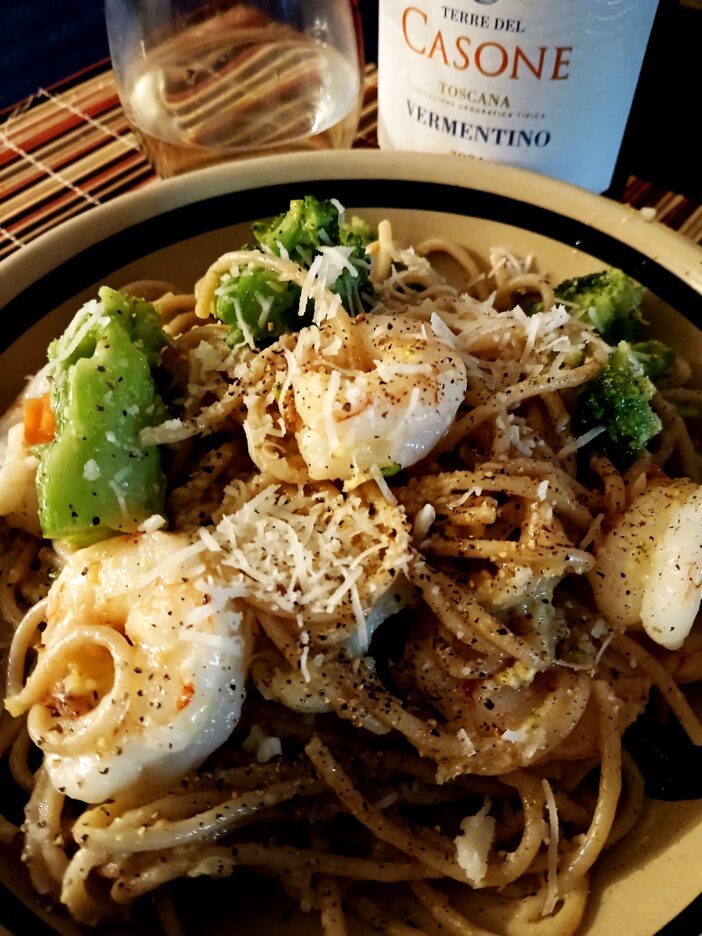
It paired perfectly with a light Italian Vermentino (this particular one came from Trader Joe’s, when I last checked it was not in stock). This varietal is available at larger wine and liquor stores.

Here is the recipe ready to be made to your liking.

Lemon Pesto Pasta with Shrimp
Course: Main Course
Author: binner216@comcast.net
Ingredients
  • 1 Pound Large Shrimp, peeled and deveined 16-20 size
  • 8 Ounces Spaghetti or Linguine
  • 4 Tbsp. Butter
  • 6 Cloves Garlic Minced
  • 1 Bag (10oz.) California Medley Vegetables Thawed and drained
  • 1-2 Tsp. Lemon Zest
  • 1 Jar Aldi Lemon Pesto
  • 1/3-1/2 Cup Pasta Water
  • 1/3 Cup Pecorino Romano Plus more for the table
  • Salt and Pepper to taste
Instructions
  1. Bring a large pot of salted water to a boil. Add the pasta and cook about 1 minute shy of done. While the pasta cooks, Cook the shrimp.

  2. Heat a large pan over medium heat. Add the butter and allow it to melt. Add the minced garlic and cook gently until it is soft and fragrant, but not browned.

  3. Add the shrimp and gently cook until they are just translucent and curling slightly. Remove the (and any clinging garlic) shrimp from the pan and set aside. Reserve the butter and some of the garlic in the pan.

  4. Add the thawed and drained vegetables to the pan. Toss with the butter and garlic and cook until they are tender crisp, about 5 minutes. Add the lemon zest and toss to combine

  5. When the pasta is cooked, reserve a half cup or so of the pasta water and drain the pasta.

  6. Return the shrimp and garlic to the vegetables in the pan. Add the pasta and the entire jar of the Lemon Pesto to the pan. Toss everything gently, adding pasta water to create a light creamy sauce..

  7. When everything is combined, add about half of the Pecorino and toss once more. Continue to cook until everything is hot and the cheese has melted. Taste and add salt and pepper if needed.

  8. Top with the remaIning cheese and serve.

Here’s to summer, lemons, and shrimp. Enjoy!

Easter Pie (Calzone) Revisited


As Easter is just around the corner, in many Italian homes it is Calzone season. I shared my mother’s recipe a number of years ago and I thought it was time to make a few changes. Not to the recipe, that will never change, but to the presentation.

We always referred to it as Calzone (as a child I pronounced it “gout-zone”) but it is also known as Pizza Rustica, Pizzagaina, Torta Pasqualina or simply Easter Pie. Besides going by many names, there are easily hundreds of versions. My aunt always put hard boiled eggs and ham in hers. I’ve seen lots of recipes that use Touma Cheese and even some that don’t have meat. Every family and every region seems to have their own recipe. My mother’s is somewhere in the middle. It has a simple ingredient list of sausage, ricotta, and eggs. Pecorino Romano and parsley round out the ingredient list for the filling.

Her crust is heavenly, part pie crust part biscuit and 100% delicious.

It all comes together in a pie plate and is topped with a crust. It heads into the oven.

When it is almost baked it gets brushed with egg yolk to create the glossy golden crust that always made my heart sing.

Here is her recipe.

5 from 1 vote
Easter Pie (Calzone)

A tradition in many Italian homes, this is my mother's (and her family's)version.

Servings: 8
Author: binner216@comcast.net
Ingredients
Crust
  • 1-1/2 Cups Flour
  • 1 Tsp. Baking Powder
  • 1/2 Tsp. Salt
  • 1 Egg
  • 2 Tbsp. Milk
  • 1/2 Cup Shortening or Butter
Filling
  • 1 Lb. Italian Sausage Bulk is easiest
  • 1 Lb Ricotta Whole Milk
  • 2 Eggs Lightly beaten
  • 1/4 Tsp. Black Pepper
  • 1/3 Cup Pecorino Romano Grated
  • 2 Tbsp. Parsley Chopped
  • 1 Egg Yolk To glaze the crust
Instructions
Crust
  1. Sift the dry ingredients together in a large bowl. Cut in the shortening (or butter) until it is well blended

  2. Beat the egg and milk together and add to the dough mixture. Blend well and turn out on a floured surface and knead for one minute. Wrap in plastic and chill for about 30 minutes.

Filling
  1. Cook the sausage and drain on paper towels. Allow it to cool.

  2. Place the ricotta in a large bowl, add the beaten egg, cheese, parsley, pepper, and cooled sausage. Stir gently to blend.

Assembly
  1. Remove the dough from refrigerator. Lightly spray the pie pan with cooking spray and preheat the oven to 400 degrees.

  2. Divide the dough in half and roll one half out on a floured surface. Roll to a size that will cover the bottom of a 9 inch pie pan and extend up over the rim. Place the crust in the prepared pie pan.

  3. Spoon the filling into the crust smoothing it out evenly. Roll out the other half of the dough and place it on top of the filling. Cut several slits in the top crust to let steam escape. Crimp the edges to seal it well. If desired, snip the edges and fold the pieces in an alternating pattern.

  4. Bake in preheated oven for 30-35 minutes. About 15 minutes before the end of the baking time brush the top crust with beaten egg yolk. When the crust is golden brown remove it from the oven and allow to cool to room temperature. Serve for Easter breakfast or whenever you would like. Store leftovers in the refrigerator.


Have a joyful and blessed Easter.

Artichoke & Spinach Soup with Chicken Sausage (The Update)

I recently posted about a Roasted Artichoke Salad and attached an earlier post that shared two other artichoke recipes. Time passes (10 years) and changes happen (downsizing) and those two recipes, while still viable as they are, have changed in how they are prepared in the Kitchen of Love. 

First off, I no longer have a microwave, so when I prepare whole artichokes these days I steam them on the stove.  Prep is still the same and the ingredients are also the same. The artichokes are trimmed washed and given a lemon massage. Now when it is time to cook them I place them in a steamer basket in a large pot of water laced with pieces of lemon and crushed garlic. The pot is covered and the heat is turned to medium high and the artichokes steam until tender, 20-30 minutes depending on the size. They still turn out beautifully cooked with lots of scrapable meat on the leaves and  tender and succulent hearts.

I confess that I had forgotten about the soup recipe and when I read through it, I thought it needed an update to the ingredients that I use in the Kitchen now. In particular my artichokes of choice are now the the frozen variety.

The spinach is now more often the fresh variety that is so conveniently available everywhere, clean and ready to use. 

These two changes have elevated the soup, in my opinion, to a new level. While I was experimenting, I also changed a bit of the prep. I find it easier to cook the artichokes in the pan after browning the sausage along with the onions and peppers (I used Lollipeppers). I did need to add a bit more olive oil to keep everything moving.

One thing I didn’t change was the preparation of the stock base. Sauteing thinly sliced leeks with garlic in some olive oil before adding the stock is a good beginning. When the stock is added and simmered for awhile, the use of an immersion blender creates a dairy free, creamy base that has a deeper flavor, especially if you are using ready made stock/broth. This technique could be a good addition to many other soup recipes that could benefit from a little more body and flavor. I have also kept the McCormick Italian Herb Grinder in the mix. It is an aromatic blend that you can grind as needed that feels a little fresher than regular dry Italian blends.

While the stock is simmering, the other ingredients go through their pre-soup prep. This involves browning the of the sausage, artichokes, onions and peppers. This deepens the flavor of the finished soup and in my opinion is worth the extra time.

First into the pan is the sausage. Cut in chunks, they brown up quickly then leave the pan to make way for the artichokes. I lay them in an even layer to start and left them pick up some color on one side before flipping them over. Once they vacate the pan, the onions, peppers and garlic take their turn to get some extra flavor.

Once everything is ready, it is time to get everything acquainted. So the sausage and vegetables go into the pot with the stock and the spinach. Now, all that is left is some together time ( say 15-20 minutes) and we can call it soup.

Here is the new and, I think, improved recipe.

Artichoke and Spinach Soup with Chicken Sausage
Course: Soup
Cuisine: Mediterranean
Author: binner216@comcast.net
Ingredients
  • 2 Tbsp. Olive OIl Divided, more as needed
  • 1 Large Leek, thinly sliced
  • 5 Cloves Garlic, chopped Divided
  • 1 Quart Chicken Stock
  • McCormick Italian Herb Blend Or seasoning of your choice
  • 1 12 Oz. Pkg. Frozen Artichoke Hearts Thawed
  • 12 Ounces Chicken Italian Sausage (precooked) Sliced
  • 3/4 Cup Chopped Onion
  • 3/4 Cup Colored Baby Bell Peppers Chopped
  • 4 Cups Fresh Spinach Chopped
  • Red Pepper Flakes Optional
  • Grated Parmesan Cheese For serving
Instructions
  1. For the Stock Base: Heat 1 tablespoon of olive oil in a soup pot. Add 2/3 of the garlic and the leeks and cook, stirring frequently until the leeks are soft and fragrant. Add the stock to the pot and raise the heat to medium high and bring to a boil. Lower the heat to maintain a good simmer and cover. Cook for 15 minutes or so until the leeks are very tender. Allow it to cool for a few minutes (to reduce hot splashing). Using an immersion blender, puree until very smooth. Stir in the herb blend to you taste and set aside.

  2. While the stock is cooking brown the other ingredients. Add a tablespoon of olive oil to a large fry pan, heating over medium heat. Add the sausage in a single layer and cook for 5 minutes until lightly browned, turn and brown other side. Remove from the pan. If your stock is ready add them to the pot.

  3. If needed, add a bit more Olive Oil. Add the artichokes in a single layer and brown them on one side until they have picked up a bit of color. Flip over and brown the other side. Remove from the pan and add to the pot.

  4. Add the onions peppers and reaining garlic to the fry pan, adding a bit more olive oil if necessary. Cook until just beginning to soften. Remove from pan and add to the pot.

  5. Add the chopped spinach and as many grinds as you want of the herb seasoning to the pot and give everything a good stir. Simmer over medium heat at a simmer for 15-20 minutes to give all the flavors a chance to blend.

  6. Give it a taste and add more herb blend, salt, or pepper to your taste, and if it's how you roll, some red pepper flakes. Serve with grated parmesan cheese and some crusty bread.

I hope that you will give this recipe a try, and as always, make it your own.

Savoy Cabbage and Sausage Soup

Winter is prime soup season and as we are in the thick of Winter here, it is time to share a favorite.  It is simple but satisfying, easy to make and provides multiple meals for a relatively low cost. The original recipe appeared on the Proud Italian Cook blog written by a friend and mentor, Marie. When I first started writing my blog she generously gave me advice and encouragement. She has shared wonderful recipes that highlight the beauty and simplicity of Italian cooking.

Her recipe is not that much different than the one that I am going to share. While Marie created a recipe that could easily be adapted to a variety of tastes. I tried it several ways and settled on one that features Italian sausage (a lot of it) and uses beef stock (a lot of it). The one constant is the Savoy Cabbage (a lot of it).

Savoy Cabbage is the ruffly cousin of Green Cabbage. Its leaves are crinkled and look a bit brain-like. It is slightly more tender than its cousin and has a milder taste. It is usually available in most grocery stores and is in season in Fall and Winter. It is perfect in this soup and plays well with the Italian Sausage. If Savoy is not available, green cabbage can be used.

The only other requirement is the largest soup pot that you have. Depending on how large you cabbage is, it will yield well over 8 cups of cabbage once it is chopped up. This will cook down to a reasonable amount eventually but with all of the other ingredients you will have at least 10-12 cups of soup.

If you have or can find them, Parmesan or Pecorino rinds add an incredible flavor.  I save them when I use up a block of either cheese. I have occasionally seen them in stores, but not very often. They are worth the effort to save or find.

As with any soup, this one benefits from long and slow cooking. It doesn’t require much in the line of garnishes either. I used some French bread croutons (from more than day old rolls I had on hand).

To make them; Cut stale bread into 1-1/2- 2 inch pieces. I usually spray them with some cooking spray and sprinkle them with a little seasoning, then let them toast in a 250 degree oven until they are dry and just barely turning golden.

I also like a sprinkling of Pecorino Romano cheese and a few red pepper flakes.

Here is the recipe as I like it. As always, play with it until it is yours alone. There is plenty of Winter left.

Savoy Cabbage and Sausage Soup

A hearty and comforting soup that will feed a crowd or keep on giving.

Course: Main Course
Cuisine: Italian
Servings: 10
Author: binner216@comcast.net
Ingredients
  • 2-1/2 Lbs. Savoy Cabbage Cored and chopped
  • 2 . Lbs. Italian Sausage Bulk is easiest
  • 1 Tbsp. Olive Oil
  • 2 Large Carrots Chopped
  • 1 Large Onion Chopped
  • 6 Large Garlic Cloves Finely Chopped
  • 1 14.8 oz Can Fire Roasted Chopped Tomatoes Juice Included
  • 2 Quarts Beef Broth or Stock More as needed
  • 1-2 Parmesan or Pecorino Rinds
  • 1-2 Tbsp. Italian Seasoning (like McCormick Italian Herb grinder) To taste
  • Grated Parmesan or Pecorino Cheese For Garnish
  • Red Pepper Flakes Optional
  • Salt and Pepper To taste
Instructions
  1. Heat your largest soup pot over medium/high heat and add the olive oil. Add the sausage meat to the pan and break up with a wooden spoon. Allow it to cook until it is no longer pink, stirring and breaking up as needed, about 15 minutes or so

  2. While the sausage cooks, chop the onions carrots and garlic. Set aside.

  3. When the sausage is cooked, remove it to a bowl with a slotted spoon. Pour off all but a smidge of the oil and return the pot to the stove. Add the onions, carrots and garlic to the pot with a pinch of salt, cover and sweat for 2-3 minutes then cook uncovered until slightly softened and fragrant. Add half of the Italian seasoning and let cook for a minute or so.

  4. Return the sausage to the pot and add the tomatoes. Add 1 quart of the stock and the cheese rinds. Begin to add the chopped cabbage. This will seem like a ridiculous amount, but it will shrink as it cooks. Add more stock as needed to allow for stirring in the cabbage. Cover the pot and simmer until the cabbage is soft. 20-40 minutes depending...

  5. Once the cabbage is soft, add as much stock as needed to make it a soup (2 quarts may not be enough.) Add the remaining Italian seasoning and add salt and pepper to taste. Let it simmer for a few more minutes until it is steaming hot.

  6. Serve with grated cheese, pepper flakes, and Italian seasoning to pass at the table.


Pork and Green Chili Stew with a Chilaquiles Topper

January brings a new year, but here in the Midwest it also brings winter at its most aggressive. This is shaping up to be a winter that is unpredictable. We got our first snow (a major 12 inches, not a late Fall dusting) for Halloween, since then we have had temperatures ranging from the upper 50’s to well below zero (don’t get me started on wind chill).

Through all of these fluctuations, hearty bowls of love that simmer for hours, filling the house with delicious smells are a must. This is a recipe that I found at Eating Well. This site features an enormous variety of recipes that are geared towards various diets and nutritional needs. It is a simple recipe that starts with pork shoulder and comes together in the crock pot with corn, potatoes, and a lot of green chilies.

https://www.eatingwell.com/recipe/269916/pork-green-chile-stew/

That was a solid foundation, but I wanted to to make it a bit more interesting. I upped the spices which included ancho chili powder and cumin; easily going to a tablespoon of each. The oregano was Mexican, a fruity more complex flavor than its European cousin. I opted for fire roasted corn, more onions, and fresh chopped garlic. The result was flavorful and comforting. Use the above recipe and make the adjustments that make it sing to you.

One thing that I like about a slow cooker for soups and stews  is that you can generally dump all the ingredients and forget about it until it starts to smell amazing. The Slow Cooker holds a lot which means for our household of two there will always be at least one more meal. This was no exception. I froze half and pulled it out of the freezer just the other day. While it heated on the stove, I came up with an idea to create a topping to elevate it a bit more.

Enter the Chilaquiles Topper. Chilaquiles are a Mexican breakfast staple. Fried corn tortilla chips are cooked in a chili sauce until they are soft and have absorbed tons of flavor. They are often topped with an egg to make one of my favorite breakfasts. They are so tasty that they shouldn’t be relegated only to breakfast. Why not top a steaming bowl of pork stew (or chili or any other hearty soup that has a slightly southwestern flavor) with some Chilaquiles?

The ingredients are simple. Tortilla chips are the basis. You can fry them yourself or buy some really good quality ones, like these that came from a local market. They were perfect. Sturdy and unsalted with a full corn flavor. Just roughly crumble a good handful for each bowl of soup or stew that you want to top . You can make your own chili sauce or use some good fresh salsa.

Put the chips in a pan and add enough salsa to coat the chips. Heat over a medium flame until the chips are beginning to soften. I found that adding a small amount of water helped the whole process.

When the stew was piping hot, I spooned it into oven safe bowls and topped each with the warm chilaquiles. I also sprinkled a little cheese on the top. I used a pre-packaged Mexican cheese blend, but whatever kind of cheese you like will work. I put the bowls on a baking sheet and slid them into the oven (about 375 degrees). In a matter of minutes the cheese melted and the edges of the chilaquiles were golden brown. Finally, right before serving, I added a dollop of sour cream (Mexican crema would also be great) and it was ready to serve.
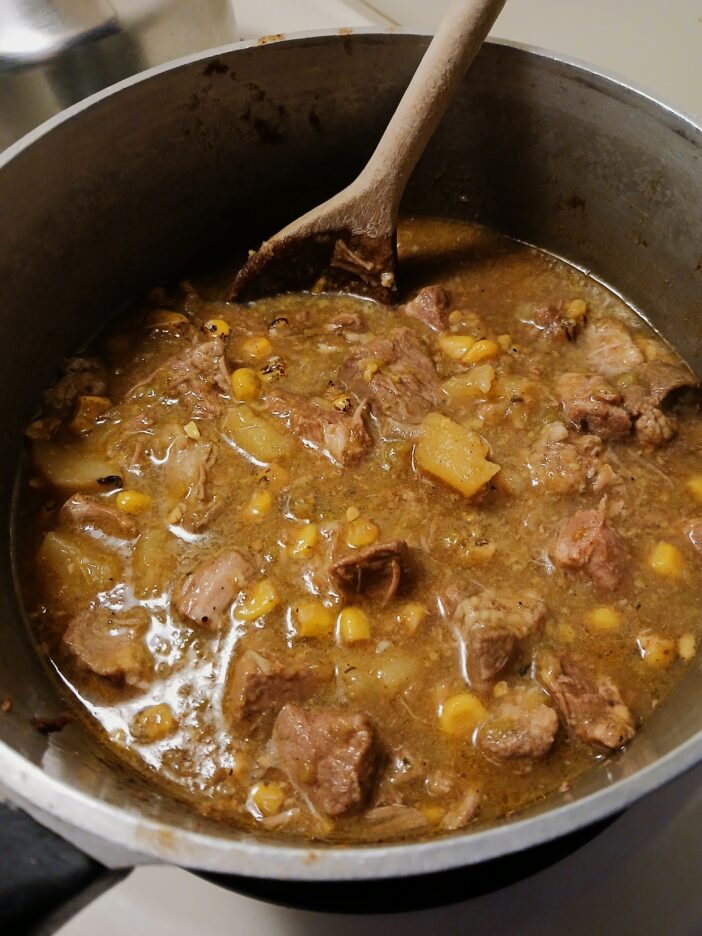
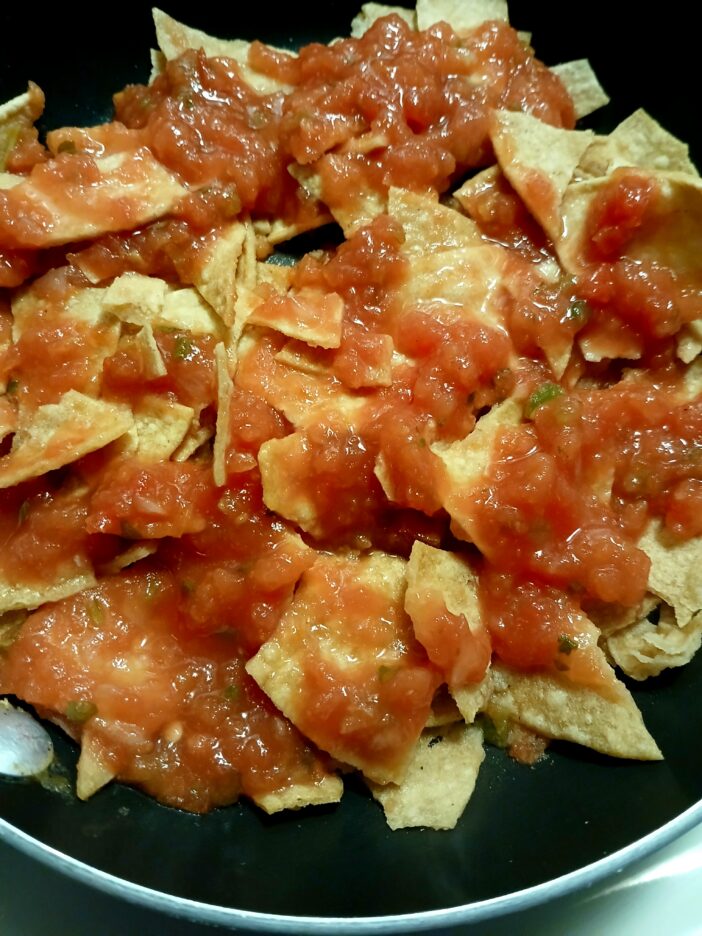
Flavorful and satisfying Pork and Green Chili Stew with Chilaquiles Topper

Happy New Year from The Kitchen of Love.