Is It Soup (time) Yet?

I don’t think of summer as the prime time to have soup. It is a comfort food that can take away the chill on a wintry evening or make a satisfying lunch in the fall. I have to admit that I haven’t made much lately even though I love to make soup.

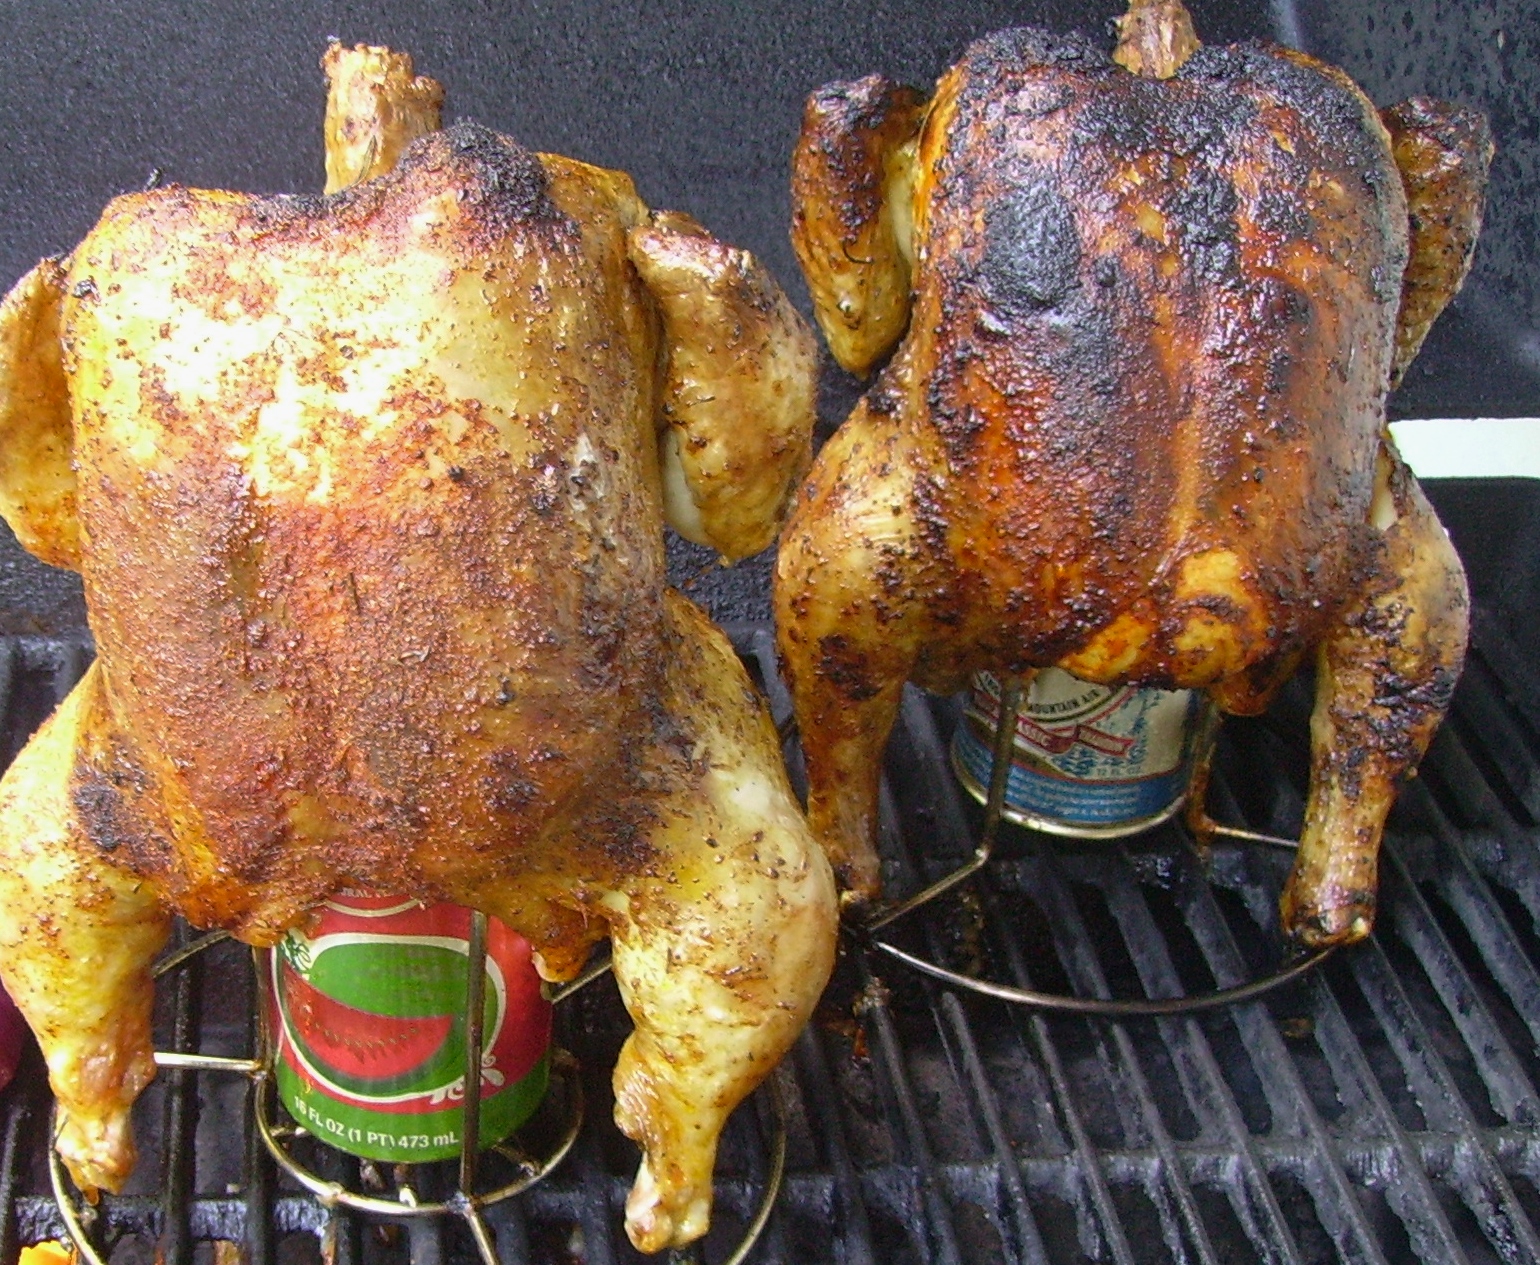
Then last week, I decided to make soup. It started with the chicken carcasses that were left from a beer can chicken meal. Using carcasses for chicken stock isn’t how I usually roll. I’m more of a whole chicken or collected necks kind of gal. The chicken was delicious and the bones really did smell good and had a fair amount of meat on them so I thought I’d give it a whirl, or simmer to be more accurate.

I started the way I start most stock with onions celery and carrots sweated in a little olive oil. Then I added the bones and about 3 quarts of water (there were a lot of bones). I let it simmer for a couple of hours and was pleasantly surprised at the wonderful smokey aroma that permeated the house. Upon tasting it, the smokiness carried through in the flavor which was coupled with the herbs and spices I had originally used to season the chicken.

What to do with the resulting stock? Soup it is.  In my ongoing quest to use and often reuseDIGITAL CAMERA the food I have on hand I added some leftover chicken from the aforementioned dinner and some grilled artichoke hearts that had also made an appearance at the same time.  Onion and garlic were also part of the flavor profile. Topped with a few croutons it was a most satisfying supper.

Now that the soup gates were opened, I had to make another. I had a small head of cauliflower that was in dire need of being eaten. I also had several containers of vegetable stock I had made earlier in the summer.

DIGITAL CAMERAI went to an old standby and made Cauliflower & Cheddar Cheese Soup. This soup combines potatoes,  cauliflower, onions and garlic simmered together and then spun into a  puree. The addition of some extra sharp cheddar cheese created a creamy and rich bowl of goodness. Topped with bacon (the drippings were used as the base of the soup) and fresh chives, it was delicious. So soup, it’s not just for cold weather any more. In fact, there is Fresh Corn Chowder in my not so distant future….stay tuned.

There’s got to be a lot of soup fanatics out there. Please share your creativity with me…Fall is just around the corner!!

Chicken + Brine + Grill = Moist and Tender Results


Chicken seems to be everyone’s favorite protein. It comes in assorted sizes and parts that can be boneless and skin-less or not. It fits into everyone’s budget even in the most inflated of times. It is extremely versatile and is at home on the stove, in the oven, and on the grill.

I cook a lot of chicken. I have planked it, sautéed it, diced and sliced it, I’ve even stuck a beer can up it’s butt. Chicken is easy to cook, but can go south just as easily, especially on the grill.  That’s where brining comes in.DIGITAL CAMERA

A brine is a liquid that has a lot of salt in it. It may have other ingredients, but salt and liquid are in  the majority. Brine imparts moisture to chicken which can go a long way to keeping it juicy and tender when grilled. Traditionally the liquid is water, but when it comes to chicken I’ve found that other liquids can work magic when combined with salt.

file000675254120

Number one on my hit parade is buttermilk. It gives  flavor and the acidity tenderizes the chicken. Chicken breasts brined for several hours in a mixture of buttermilk, salt, onion, garlic and smoked paprika will hit the grill and come off of it juicy and flavorful.

To this basic brine you can add herbs and spices of your choice or leave anything out that doesn’t float your boat. Just keep in mind that the acidity in the buttermilk can begin to break down the chicken if it is left on for too long (keep it to 4 hours or so)

Beer can be an excellent brine base as well.  Again, the flavor of the beer will soak into theOLYMPUS DIGITAL CAMERA chicken, give it a moisture boost and result in a tender and juicy piece of poultry. Chilis, onions, garlic, sugar, even a little lime (remember limes are acidic so keep brining time within that 4 hour limit).

Last but not least there’s water. I guess you could call it the traditional brine ingredient. Anything you put into beer or buttermilk can also be added to water, but don’t stop there.  No ingredients are off-limits. Use your personal favorites  and let your imagination run wild.

Now for the how to’s:

You will need a container that will hold the chicken ( whatever pieces you use) and enough brine to cover it completely. Oh, and it should seal tightly. Brine is not fun to clean out of the nooks and crannies in your refrigerator. Zip top plastic bags work well for breasts and thighs. For whole chickens and even turkeys, trash bags can get the job done.

The amount of salt also depends on how much chicken you’re brining. One tablespoon will do the trick for 3 -4 boneless chicken breasts. You will increase the amount according to how much liquid you need to cover your chosen poultry. Use Kosher salt if you can, it is additive free.

Brining time for non-acidic mixtures can be up to 24 hours…whole chickens and turkeys can soak even longer.

When you are ready to grill, remove the chicken from it’s salt bath and pat it dry. Throw the bath water away.  Powder the chicken with your favorite seasoning and grill. One more thing…because the chicken has absorbed some of the salt in the brine go easy on any salt you add before grilling. 20130625_172131 (1)

There’s still a lot of grill time left this summer, so dive into brine and come up with delicious chicken

Coopers Hawk Winery and Restaurant

Woman can’t live by cooking alone. Every once in a while it’s nice to go somewhere and have the work done for you. My husband Jeff and I  lived in the San Fransisco area for almost 20 years and spent a good deal of time in the Northern California  wine regions. We aren’t “wine snobs” but, when we do go out, we like to have wine with what we are eating.

About 4 years ago we happened on Coopers Hawk Winery and Restaurant in South Barrington. We had never heard of  it, but were intrigued  so we went in. We tasted the wine which was quite good and even joined the Wine Club.

Since then, we’ve visited all of the Illinois locations and also the one in Milwaukee,  tasting the wines and enjoying many items from the menu.

Besides offering an extensive catalog of wines (the varietal grapes come from California, Washington, and Oregon and occasionally internationally) that are blended to create consistently drinkable wines that do not require much cellering, they feature a casual contemporary food that is consistently good.

Our 4 year membership has given us lots of perks,free birthday dinners, bonus coupons for points earned, and a reason to go out to lunch one Sunday a month.

Our routine has become to visit one of the locations and enjoy a monthly wine tasting (free with our 2 bottle membership) and then enjoy lunch in the restaurant. Lunch is always the same, well sort of.  It is the Wine and Cheese Pairing.

Each month the executive chef creates a five  item cheese board that is paired with 4 wines.  While not an inexpensive proposition ($18.99 each) it is very satisfying. We always manage to get good bang for the buck because this spread is designed to be lingered over and savoured. We  leave comfortably full as we carry out our 2 bottles of wine and 40 points toward our next dining coupon(remember we’re club members).

This is the pairing for August which included fresh goat cheese with honey as well as  a Gruyère, a Havarti, and a ( 4  year) aged cheddar. The wines included Gewürztraminer, Chardonnay, Pinot Noir, and the wine of the month, a Syrah/Cabernet Franc blend. My favorite was the goat cheese paired with the Gewürztraminer.

DIGITAL CAMERA

What Is It About Basil? (part 2)

DIGITAL CAMERAI’ve talked about basil at length before, but I love this herb enough to do it one more time. As the summer moves on, the basil gets bigger and more fragrant. The flowers haven’t quite started yet, but the leaves are getting more fragrant and just stepping in the yard reveals a hint of the smell (if your mind is feeling right). We are still using it in a variety of recipes, but the time for Pesto making is drawing near.

I will be the first to admit that Pesto is an acquired taste. For me, I love the smell, texture, and taste of pesto. My digestive system, however, has issues….it gives me heartburn. I was faced with the quandary of how to enjoy Pesto, but not have to pay the price afterwards. I experimented with a few ideas and finally came up with what, for me, is the perfect solution: Roasted Garlic Pesto.

My interpretation of the classic Genovese recipe uses the usual gallery of ingredients, I just treat them a little differently.

First there’s the garlic. Most recipes call for several cloves of raw garlic which will send my digestive juices to a very ugly place. I opt to take a whole head (yes, a whole head) whack off the top, drizzle it  with olive oil, wrap it in foil, and stick it in the oven (350 degrees)until it gives off a sweet garlic aroma which can take 30 – 40 minutes.

While that’s happening, I like to toast the pine nuts. This is usually about 3 ounces of raw nuts. I toast them on top of the stove until they are lightly golden and smell, well, like pine trees( yes, they  are aptly named).

Basil and parsley in about a 4 to 1 ratio are combined in the processor with the garlic and pine nuts. They are processed until they are of a medium texture.  I drizzle in the olive oil until a  chunky paste forms.

No Pesto is complete without cheese. I use Pecorino Romano. This is a pungent sheep’s milk cheese, that has a slightly creamier texture than Parmesan. It is the cheese that I grew up with.  We would buy it by the half wheel and grind it in our Mouli Grater.te4867a If you haven’t tried this cheese, I would encourage you to give it a shot.  Another plus, it’s about half the price Parmagiano Reggiano.

So, I use about 3/4 of a cup of the grated cheese. This is added to the paste in the processor. Everything is blended until the paste is slightly chunky  (more olive oil can be added at this point if it seems like it’s dry) with a creamy look.

It is now ready to use in your favoite recipe or it can also be frozen in 1/4 to 1/3 cup portions for future uses that will keep for up to 6 months in freezer tolerant packaging.

Pasta and Pesto go together like Laurel and Hardy. It is wonderful on Fetuccinni or Liguine (mixed with a little heavy cream or even some red sauce). It can top fish or chicken, even a grilled steak would be happy to have it as its crowning glory.

One of my favorite ways to use it is in a Pesto Pasta Salad.Pesto Pasta Salad  I use Farfalle or Cavatapi pasta because it has lots of nooks and cranies to hold the Pesto. I toss the cooked pasta lightly with olive oil, then add the pesto a little at a time until the pasta is nicely coated. This can be served at room temperature or it can be chilled. The chilling lets the flavors get to know each other, but may require a little milk or olive oil to moisten it before serving.

So, Pesto –  the recipe isn’t an exact one, but that allows for indivdual interpretation. I hope you will find your own perfect Pesto recipe. Let me know what it is.

Jambalaya – “Gonna Have Big Fun” In the Midwest

I love New Orleans. In years past I had the privilege of visiting several times. I was always impressed by the food, and the drink, for that matter. My visits, which were to catch up with my best friend who lived there for 7 years, usually consisted of going to the local (read little known hole in the wall) blues clubs and restaurants for awesome red beans and rice, muffaletas and fresh oysters( the best of these were where  the”shuckers” were right below the stage in the same kind of focused groove the musicians above them were). In my visits there I never had jambalaya. I never even thought about until we went to   Heaven on 7 in Chicago. I didn’t eat it there either, but it put Cajun and Creole food on my radar. It is my opinion that this cuisine is very labor intensive, but the results are more than worth the effort.

I recently discovered a fantastic recipe for jambalaya in a magazine. It was wonderful even though it was very labor intensive (cooking a whole chicken to create the stock and chicken for the dish – btw totally worth it) and I wasn’t able to get every ingerdient…who knew that Tasso is not a Midwestern commodity. For the record, I created what I think was an acceptable substitute: A thick slab of the smokiest ham the deli carried, rubbed with creole seasoning, white and black pepper and cayenne. But I digress…

Having made the traditional Jambalya I had the thought that the basic ingredients would make a good soup. That’s where this recipe came from. I was in possession of some fabulous andouille sausage from the Wurst Kitchen in Aurora Illinois. I also had chicken thigh trimmings in the freezer. Another digression: When I’m prepping boneless skinless chicken thighs for the grill, I trim the  ends that are barely connected as well as doing some trimming to create a more even thickness on each piece. I save these in the freezer to use in things, well, like soup….

Jambalaya Soup

1 T. vegetable oil

1 ½ pound andouille Sausage, chopped                                  Creole Seasoning, cayenne, white

1 pound chicken thighs cut in bite size pieces                       &  black pepper to taste

2 cups chopped onion                                                                       1 quart chicken stock

1 cup green bell pepper, chopped                                              1 cup  vegetable stock

1 C. celery, chopped                                                                             ½ C.  rice

5 – 6 garlic cloves, chopped                                                       Crushed Ritz Crackers (yup)

  1. Heat oil in large soup pot. Add the chopped andouille and cook until lightly browned and some fat has been rendered. Remove from pan.
  2. Add chicken to pot and cook, stirring occasionally until lightly browned. Remove from the pan.
  3. Add the onion, green pepper, and celery (a.k.a. The Trinity) to the pan and cook over medium heat until softened and beginning to brown. Add the garlic and cook for 3 – 4 minutes longer.
  4. Add approximately ½ cup of stock to the pan to de-glaze and loosen everything
  5. Add the rice and saute for 2 – 3 minutes. Add the rest of the stock and bring to a boil. Reduce heat to simmer, cover and cook for 15 – 20 minutes.
  6. Ladle into bowls and top with crushed Ritz Crackers.

This recipe makes 4 – 6 servings

NOTE: Okay, I know there is no ham in this recipe, and ham is key in any jambalaya recipe (I think “jam” means ham) but you can definitely add it to your version and who knows, I may add it to mine the next time I make it.