Savoy Cabbage and Sausage Soup

Winter is prime soup season and as we are in the thick of Winter here, it is time to share a favorite.  It is simple but satisfying, easy to make and provides multiple meals for a relatively low cost. The original recipe appeared on the Proud Italian Cook blog written by a friend and mentor, Marie. When I first started writing my blog she generously gave me advice and encouragement. She has shared wonderful recipes that highlight the beauty and simplicity of Italian cooking.

Her recipe is not that much different than the one that I am going to share. While Marie created a recipe that could easily be adapted to a variety of tastes. I tried it several ways and settled on one that features Italian sausage (a lot of it) and uses beef stock (a lot of it). The one constant is the Savoy Cabbage (a lot of it).

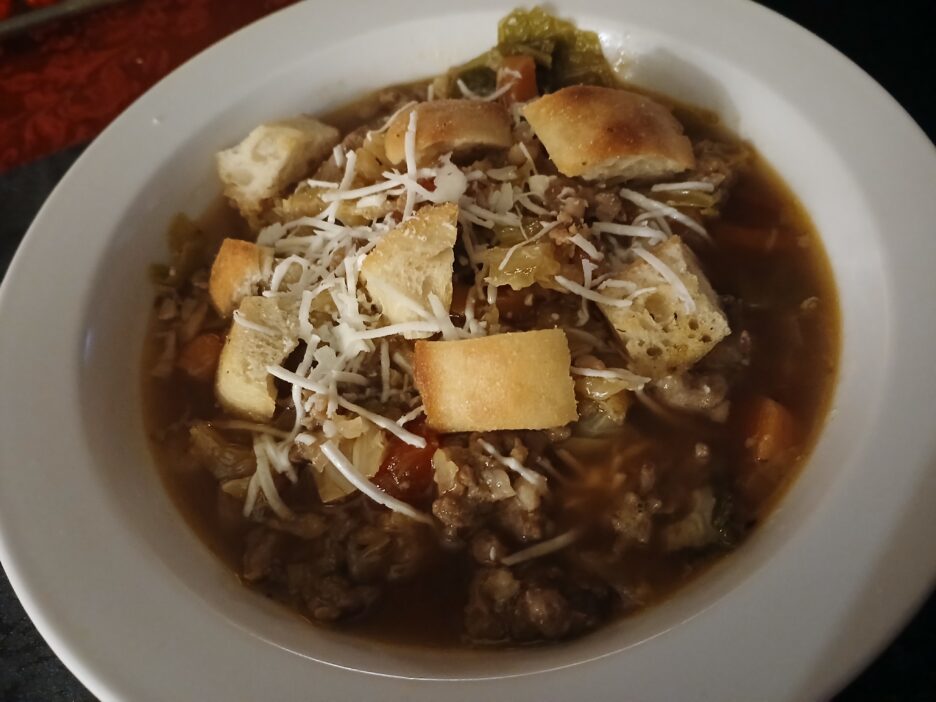
Savoy Cabbage is the ruffly cousin of Green Cabbage. Its leaves are crinkled and look a bit brain-like. It is slightly more tender than its cousin and has a milder taste. It is usually available in most grocery stores and is in season in Fall and Winter. It is perfect in this soup and plays well with the Italian Sausage. If Savoy is not available, green cabbage can be used.

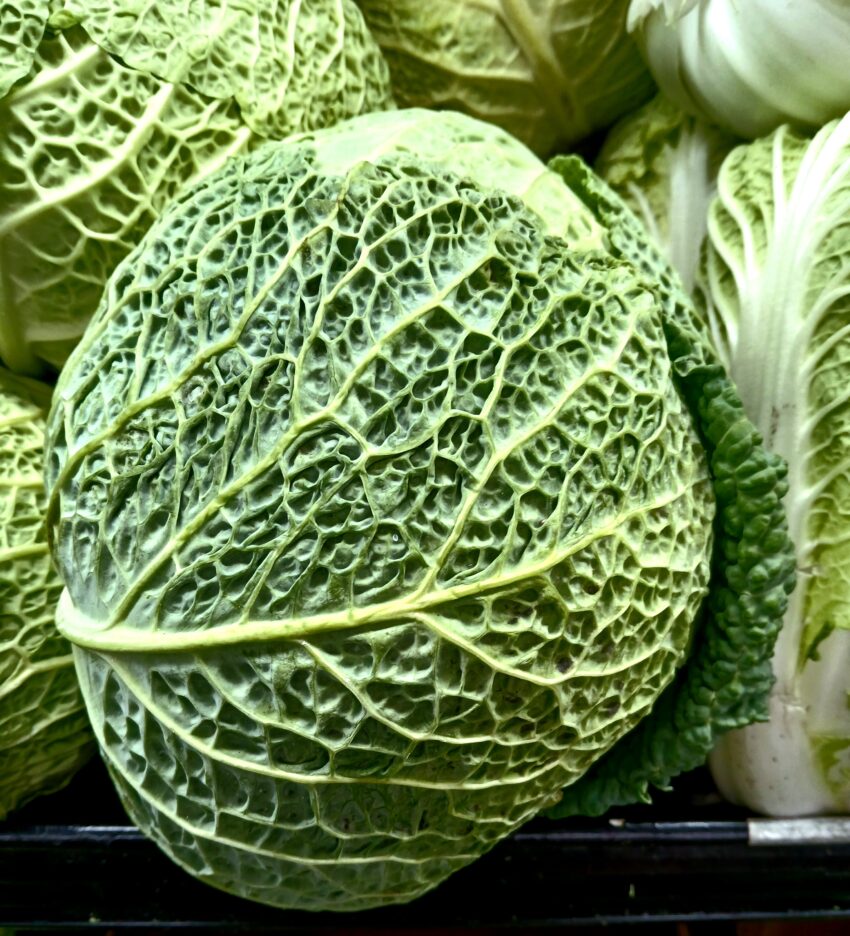
The only other requirement is the largest soup pot that you have. Depending on how large you cabbage is, it will yield well over 8 cups of cabbage once it is chopped up. This will cook down to a reasonable amount eventually but with all of the other ingredients you will have at least 10-12 cups of soup.

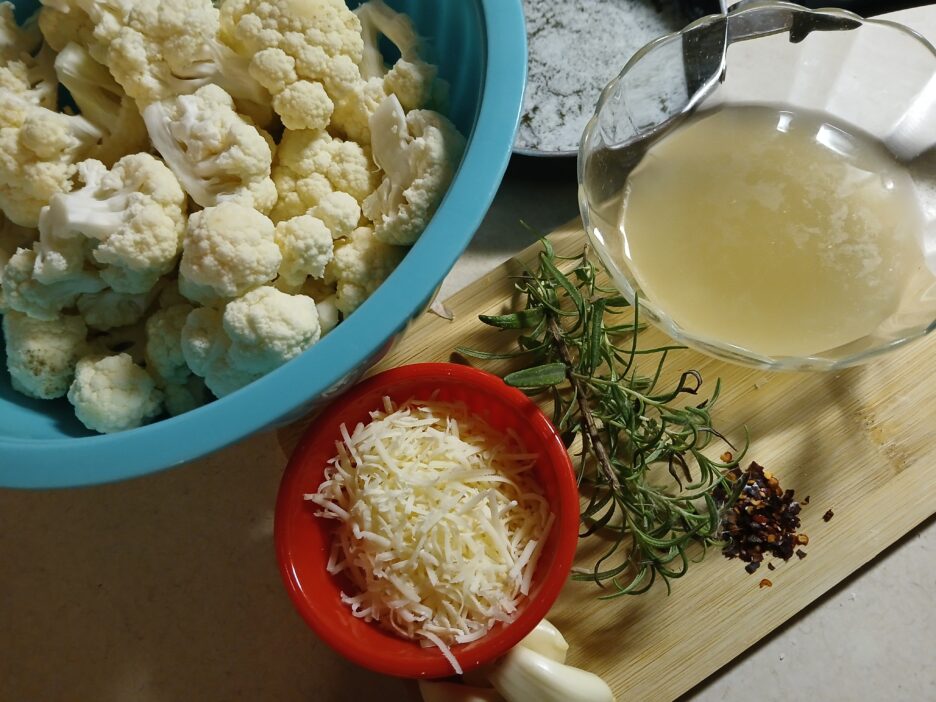
If you have or can find them, Parmesan or Pecorino rinds add an incredible flavor.  I save them when I use up a block of either cheese. I have occasionally seen them in stores, but not very often. They are worth the effort to save or find.

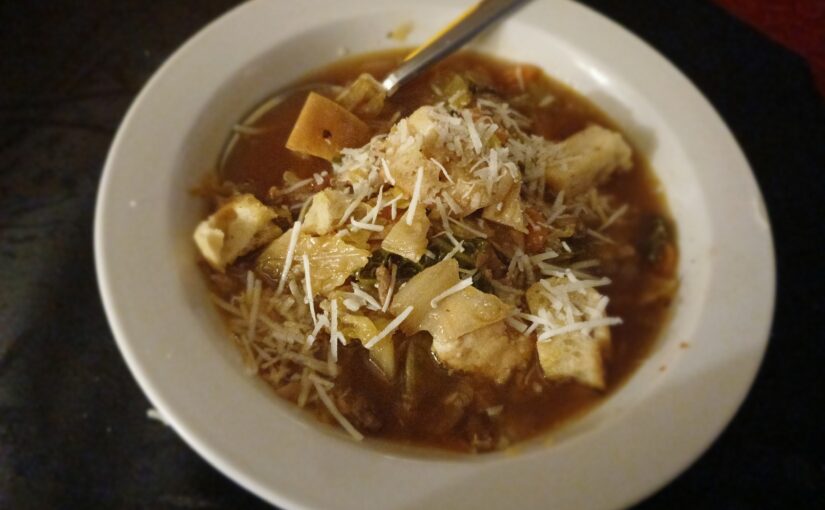
As with any soup, this one benefits from long and slow cooking. It doesn’t require much in the line of garnishes either. I used some French bread croutons (from more than day old rolls I had on hand).

To make them; Cut stale bread into 1-1/2- 2 inch pieces. I usually spray them with some cooking spray and sprinkle them with a little seasoning, then let them toast in a 250 degree oven until they are dry and just barely turning golden.

I also like a sprinkling of Pecorino Romano cheese and a few red pepper flakes.

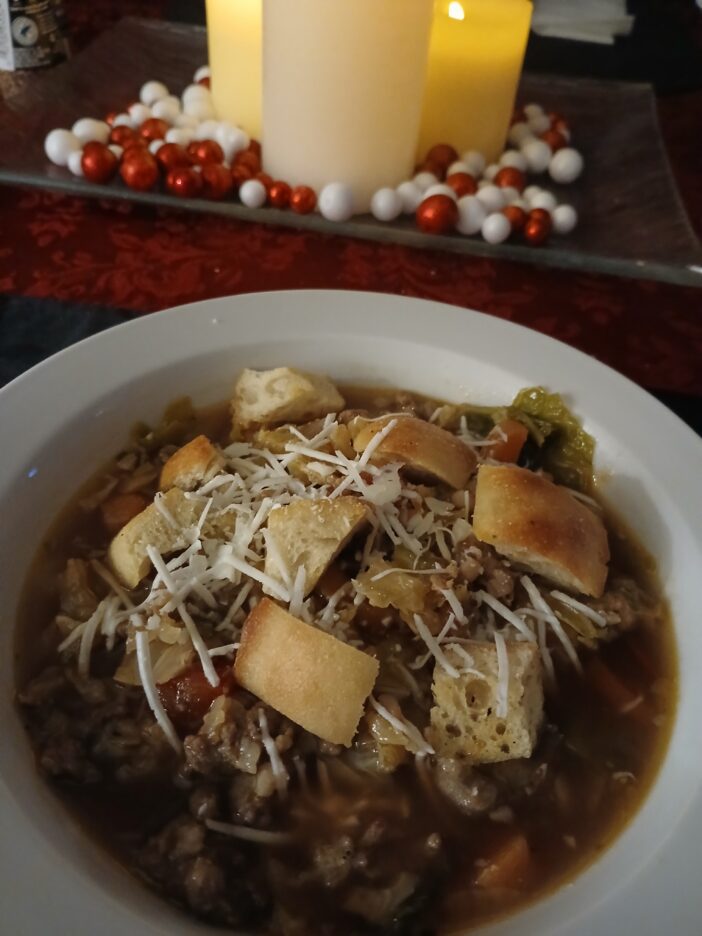
Here is the recipe as I like it. As always, play with it until it is yours alone. There is plenty of Winter left.

Savoy Cabbage and Sausage Soup

A hearty and comforting soup that will feed a crowd or keep on giving.

Course: Main Course
Cuisine: Italian
Servings: 10
Author: binner216@comcast.net
Ingredients
  • 2-1/2 Lbs. Savoy Cabbage Cored and chopped
  • 2 . Lbs. Italian Sausage Bulk is easiest
  • 1 Tbsp. Olive Oil
  • 2 Large Carrots Chopped
  • 1 Large Onion Chopped
  • 6 Large Garlic Cloves Finely Chopped
  • 1 14.8 oz Can Fire Roasted Chopped Tomatoes Juice Included
  • 2 Quarts Beef Broth or Stock More as needed
  • 1-2 Parmesan or Pecorino Rinds
  • 1-2 Tbsp. Italian Seasoning (like McCormick Italian Herb grinder) To taste
  • Grated Parmesan or Pecorino Cheese For Garnish
  • Red Pepper Flakes Optional
  • Salt and Pepper To taste
Instructions
  1. Heat your largest soup pot over medium/high heat and add the olive oil. Add the sausage meat to the pan and break up with a wooden spoon. Allow it to cook until it is no longer pink, stirring and breaking up as needed, about 15 minutes or so

  2. While the sausage cooks, chop the onions carrots and garlic. Set aside.

  3. When the sausage is cooked, remove it to a bowl with a slotted spoon. Pour off all but a smidge of the oil and return the pot to the stove. Add the onions, carrots and garlic to the pot with a pinch of salt, cover and sweat for 2-3 minutes then cook uncovered until slightly softened and fragrant. Add half of the Italian seasoning and let cook for a minute or so.

  4. Return the sausage to the pot and add the tomatoes. Add 1 quart of the stock and the cheese rinds. Begin to add the chopped cabbage. This will seem like a ridiculous amount, but it will shrink as it cooks. Add more stock as needed to allow for stirring in the cabbage. Cover the pot and simmer until the cabbage is soft. 20-40 minutes depending...

  5. Once the cabbage is soft, add as much stock as needed to make it a soup (2 quarts may not be enough.) Add the remaining Italian seasoning and add salt and pepper to taste. Let it simmer for a few more minutes until it is steaming hot.

  6. Serve with grated cheese, pepper flakes, and Italian seasoning to pass at the table.


Pork and Green Chili Stew with a Chilaquiles Topper

January brings a new year, but here in the Midwest it also brings winter at its most aggressive. This is shaping up to be a winter that is unpredictable. We got our first snow (a major 12 inches, not a late Fall dusting) for Halloween, since then we have had temperatures ranging from the upper 50’s to well below zero (don’t get me started on wind chill).

Through all of these fluctuations, hearty bowls of love that simmer for hours, filling the house with delicious smells are a must. This is a recipe that I found at Eating Well. This site features an enormous variety of recipes that are geared towards various diets and nutritional needs. It is a simple recipe that starts with pork shoulder and comes together in the crock pot with corn, potatoes, and a lot of green chilies.

https://www.eatingwell.com/recipe/269916/pork-green-chile-stew/

That was a solid foundation, but I wanted to to make it a bit more interesting. I upped the spices which included ancho chili powder and cumin; easily going to a tablespoon of each. The oregano was Mexican, a fruity more complex flavor than its European cousin. I opted for fire roasted corn, more onions, and fresh chopped garlic. The result was flavorful and comforting. Use the above recipe and make the adjustments that make it sing to you.

One thing that I like about a slow cooker for soups and stews  is that you can generally dump all the ingredients and forget about it until it starts to smell amazing. The Slow Cooker holds a lot which means for our household of two there will always be at least one more meal. This was no exception. I froze half and pulled it out of the freezer just the other day. While it heated on the stove, I came up with an idea to create a topping to elevate it a bit more.

Enter the Chilaquiles Topper. Chilaquiles are a Mexican breakfast staple. Fried corn tortilla chips are cooked in a chili sauce until they are soft and have absorbed tons of flavor. They are often topped with an egg to make one of my favorite breakfasts. They are so tasty that they shouldn’t be relegated only to breakfast. Why not top a steaming bowl of pork stew (or chili or any other hearty soup that has a slightly southwestern flavor) with some Chilaquiles?

The ingredients are simple. Tortilla chips are the basis. You can fry them yourself or buy some really good quality ones, like these that came from a local market. They were perfect. Sturdy and unsalted with a full corn flavor. Just roughly crumble a good handful for each bowl of soup or stew that you want to top . You can make your own chili sauce or use some good fresh salsa.

Put the chips in a pan and add enough salsa to coat the chips. Heat over a medium flame until the chips are beginning to soften. I found that adding a small amount of water helped the whole process.

When the stew was piping hot, I spooned it into oven safe bowls and topped each with the warm chilaquiles. I also sprinkled a little cheese on the top. I used a pre-packaged Mexican cheese blend, but whatever kind of cheese you like will work. I put the bowls on a baking sheet and slid them into the oven (about 375 degrees). In a matter of minutes the cheese melted and the edges of the chilaquiles were golden brown. Finally, right before serving, I added a dollop of sour cream (Mexican crema would also be great) and it was ready to serve.Flavorful and satisfying Pork and Green Chili Stew with Chilaquiles Topper

Happy New Year from The Kitchen of Love.

Incredible Melting Vegetables: An Adventure in Love and Yum

If you spend more time than you should browsing recipe sites, you have probably encountered more than a few recipes for “Melting” vegetables of one variety or another. I have too, and I confess that it has become a bit of an obsession in the Kitchen of Love.

It is a technique that involves roasting vegetables at a very high heat until they begin to caramelize, then adding a broth or other flavorful liquid along with flavor enhancing additions and continuing to roast until the liquid is mostly absorbed. The result is very tender vegetables that virtually melt in your mouth and have been known to result in sighs and the utterances of “yum.”

My obsession started with potatoes. Almost creamy and bursting with flavors they became my side of choice. Now I am branching out to other vegetables. The newest favorite is Butternut Squash which is incredible with a maple syrup infused broth. So perfect for Fall.

The squash is peeled and sliced at least an inch thick, tossed with oil and butter, sprinkled with salt and pepper and roasted at a heart stopping 500 degrees. Then the magic happens.

A base of broth (in this case chicken, but vegetable would work) is combined with White Balsamic, Dijon Mustard, Maple Syrup, and more Butter is poured carefully over the squash before it returns to the oven. It roasts until most of the liquid has evaporated. It is ready for its closeup embellished with an herb of your choice. In this case it was Sage, though thyme or even rosemary would work.

I adapted this recipe from Eating Well and with a few tweaks to suit my taste (more maple syrup and white balsamic) and made it my own. As I always say, it is your dish and your prerogative.

https://www.eatingwell.com/melting-butternut-squash-with-maple-butter-11785095

But, I am determined to not stop there. A quick search resulted in recipes for melting vegetables from Beets to Zucchini ( I may try artichoke bottoms to make the alphabet analogy complete).

There are some vegetables that probably wouldn’t work. Tomatoes and peppers would probably melt into mush with this technique, but firmer, heartier vegetables like cauliflower, sweet potatoes, onions, and broccoli could withstand the heat and come out melty and delicious. So let the experiment begin…

Cauliflower is one of my favorite vegetables and when it is given the “melting method” it is sure to make the pickiest veg eater happy. This is my adaptation of a recipe from Eating Well. It starts with florets mostly the same size. This recipe calls for butter for the initial cooking along with some salt and pepper. For the second go round it is bathed in stock (chicken or vegetable) infused with garlic rosemary and yes, more butter.

Once the second roast is finished, the cauliflower lily is guiled with parmesan cheese and a sprinkle of red pepper flakes.


Melting Cauliflower

A simple spin on making cauliflower your new favorite vegetable

Course: Side Dish
Servings: 4
Calories: 140 kcal
Author: binner216@comcast.net
Ingredients
  • 1 Head Cauliflower Broken into similar sized florets (Approx.8 cups)
  • 4 Tbsp. Butter (melted) Divided
  • Salt and Pepper To taste
  • 4 Cloves Garlic Grated
  • 1/2 Cup Vegetable or Chicken Broth
  • 1 Tbsp. Fresh Rosemary (or herb of your choice) Chopped
  • 2 Tbsp. Grated Parmesan More if you dare
  • 1/4 Tsp. Red Pepper Flakes
Instructions
  1. Preheat the oven to 400 degrees. Spray a metal 13X9 inch pan with cooking spray. Toss the Cauliflower with 2 tablespoons of the melted butter and spread out in the prepared pan, season with salt and pepper. Place the pan in the oven and roast about 20 minutes, turning the florets once. They should lightly browned in spots.

  2. In a small bowl, whisk together the broth, remaining butter, grated garlic and about half the rosemary. Carefully pour it over the cauliflower and return the pan to the oven. roast for another 10 minutes or so until the liquid is reduced by half.

  3. Remove from the oven and sprinkle with the parmesan and gently mix. Transfer to a serving bowl and sprinkle with the remaining rosemary and the red pepper flakes. Serve hot.

As Fall slips into Winter, Melting Vegetables will be recurring visitors to the Kitchen of Love. Maybe they will visit you kitchen and table as well.


Chicken Pot Pie Soup with Puff Pastry Croutons

Fall is sharing her last glimpse of color and the calendar is inching ever closer to Thanksgiving. Soon we will be decking the halls. Where has this year gone? It has been a good one, even if I haven’t shared much here. There has been lots of time with the “Littles” who are quickly growing out of that nickname. There has been a bit of traveling and some adventures closer to home. I confess that most of my sharing has been on Facebook and you can check it out there :

https://www.facebook.com/MamaDisKitchen/

https://www.facebook.com/jolynn.brunodiehl

Now, for a recipe. Once the weather starts to turn cooler, the kitchen turns to making soup. I love the warmth of a bowl of soup. It can feel like a hug that warms the body and soul. This is a simple soup that uses simple ingredients, most coming out of the pantry or refrigerator. Stock in a box and cooked chicken combine with frozen vegetables and milk to create a creamy yet light soup that can be considered to be on the side of healthy.

You can use Rotisserie Chicken or cook your own (to be shared in a future post), substitute other vegetables and add herbs of your choice. Make it richer with cream or leave the dairy out. Whatever you do, please make the Puff Pastry Croutons. As soup toppers go, it may change your life.

Chicken Pot Pie Soup with Puff Pastry Croutons
Prep Time
1 hr 45 mins
 

This is a wonderfully comforting soup, perfect for those cooler evenings. It is a more or less healthy version of a classic that can be made more luxurious by substituting heavy cream for the milk. As always, make it your own and please add, subtract or substitute as you wish.

Course: Main Course, Soup
Servings: 4
Calories: 400 kcal
Author: binner216@comcast.net
Ingredients
  • 1 Cup Chopped Onion
  • 2 Cloves Garlic, finely chopped
  • 1-1/2 Cups Cremini Mushrooms, Sliced
  • 1-1/2 Cup Yukon Gold Potatoes 1/2 - 3/4 inch dice
  • 1 Tbsp. Butter
  • 1 Tbsp. Olive Oil
  • 1 Quart Chicken Stock
  • 1 Small Bunch Fresh Thyme
  • 2 Cups 2% Milk
  • 2-3 Tbsp, Cornstarch
  • 2 Cups Cooked Chicken Breast
  • 2 Cups Frozen Mixed Vegetables Thawed
  • 1 Tbsp. Seasoning Blend of your choice I used Montréal Chicken
  • 1/3 Cup Parsley, chopped
Puff Pastry Croutons
  • 1 Sheet Puff Pastry
  • Olive Oil Cooking Spray
  • Salt and Pepper To taste
Instructions
  1. Heat a soup pot over medium heat. Add the butter and olive oil. Once the butter has melted, add the onions. Sweat the onions until they begin to wilt. Add the potatoes, garlic, and mushrooms and continue to cook until everything is softening and smelling wonderful. This whole step should take around 10 minutes or so.

  2. Add the stock and the small bunch of Thyme. Bring up to a simmer and cook for about 5 minutes. Add the milk and return to a simmer.

  3. Make a slurry out of the cornstarch with a little water. Add to the pot and bring just to a boil. Reduce the heat and stir frequently until the soup begins to thicken. If you want a thicker soup, add another batch of the slurry.

  4. Add the chicken, mixed vegetables, and the seasoning. You could also add chopped fresh herbs along with or instead of the seasoning blend. Let everything simmer for a few minutes. Stir in the parsley and serve. Pass the croutons at the table.

  5. Puff Pastry Croutons: Cut the pastry sheet into 1 inch squares (or whatever size you want) Lay on a parchment lined baking sheet (make sure they are not touching). Spray lightly with the Olive Oil spray and sprinkle with Coarse Salt and Freshly Ground Pepper. Bake in preheated 400 degree oven until puffed and golden, 9-10 minutes. Serve as a topping for the soup.

A New Car and a Visit to The Laurent House

This is a bit of a different kind of post. It isn’t really about food though we did eat and drink. It is about a travel adventure. It is, I think, an interesting story worth sharing.

We (very) recently bought a new car. Our former car had seen many travel adventures and was letting us know that she was tired by displaying a new warning light almost daily. We bit the car payment bullet and came home with a brand new Kia Forte. Besides providing safe transportation for ourselves and the grandkids, we wanted it to be the vehicle for new road trip adventures. First we had to learn about all of its “special features.” The learning curve has been a bit steep, but we are getting there. We decided to put our still limited knowledge to the test this past weekend.

It was another oppressively hot and humid day, one of too many we have had this summer. We wanted to go somewhere far enough to feel away (and see how the car performed), but close enough to make it home before dark. Our destination also needed to be mostly indoors, because, as noted, it was hot and humid. Rockford came to mind. It’s about 70 miles away and has a few museums we have not been to. There were also some interesting dining and brewery possibilities ( see the end of this story). After scrolling through a number of museums, I came to the Laurent House. Not a museum in the literal sense, but a house designed by Frank LLoyd Wright. There were tickets available for a tour that afternoon, so off we went.

We have visited a number of FLW buildings, but this one might be our new favorite. It is a Usonian design completed in 1952. It is unique for several reasons; most importantly, it is the only home to be designed by Frank Lloyd Wright as wheelchair accessible. I also think it is unique in the fact that FLW allowed clients (Kenneth and Phyllis Laurent) to dictate their needs and wants (that was never Mr. Wright’s strong suit). The result is as FLW called it a “Little Gem.”

The home originally only 1400 square feet feels much larger. Several additions were made at the request of the Laurent Family and approved and designed by FLW. These were to create a bedroom for their adopted daughter at one end of the original house.An expanded dining space for entertaining was also added. The Laurent’s welcomed visitors from all over the world to see what FLW had created for them (many invited by the architect himself).Kenneth Laurent wanted a house that focused on his capabilities not his disability. He also wanted to be the “tallest man in the room”. One of the things that I love about this house is that all of the furniture is  the original built in and most of the movable pieces are original as well. Very few FLW homes I have seen, can claim this.

Heights of closets, tables, and chairs were adjusted to accommodate a wheel chair. Even some of the windows  were placed high so that Kenneth in his wheelchair would see the trees and plants instead of the traffic. It seems that every possible limitation was addressed and adjusted (40 years before ADA). Even the grid design of the floor(a feature of all Usonian designs) was adjusted to not catch the wheels of the chair.

The living space featured a wall of floor to ceiling windows that let in the light and showcased the beautiful simplicity of a Japanese inspired garden and pond surrounded by the third element, stone.The banquette offered a tranquil place to reflect on the beauty of nature and was used by the Laurent’s daily. Kenneth Laurent lived in the house until he died at the age of 91. Perhaps the tranquility and accessibility of this “Little Gem” prolonged his life.

I

If you plan on visiting Rockford (and it is not 95 degrees and humid) here are some ideas for points of interest, food, and drink.

Find places that interest you in Rockford:  Rockford Visitor Information:

Unique Beers and friendly people: Urban Forest Brewery

Locally sourced food in an upscale environment: Green Fire