Another Meatless Monday Creation (yeah, really) – Zucchini Pasta Frittata

We are still enjoying Meatless Mondays in Mama D’s Kitchen. I’ve shared many meatless recipes here and not to flog the proverbial dead horse, but one more is about to be shared. You can consider this your spoiler alert. My feelings will only be hurt a little if you choose to bypass this offering, but before you turn away, give this little treasure a “lookie see”, you may be impressed.069

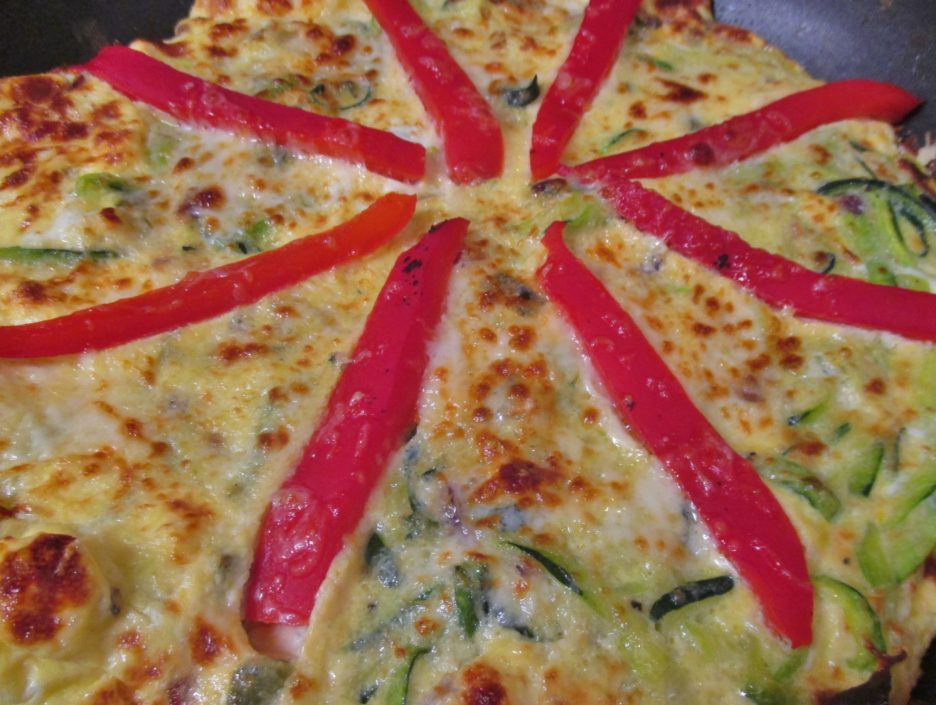
Eggs were speaking to me one recent Monday and they were telling me that they wanted to be a frittata when they grew up. That seemed like a reasonable request, so I embarked on a search to find worthy companionship for them. The refrigerator yielded several zucchini and a jalapeno, the pantry offered a jar of roasted red peppers, and onions and garlic left their place of honor on the counter to join in the merriment. I even found a lonely sliver of mozzarella cheese that begged to tag along.

I wanted to do something different with the zucchini, after all it is pretty standard fare in the frittatas that come out of the kitchen. I remembered seeing several recipes for Pasta Frittatas that made use of left over spaghetti. I had no left over pasta and it being Monday and all, I was trying to get things on a less “carb heavy” track after the weekend. We all know that “Zucchini Pasta” is a current darling of lighter cooking, so it was a natural leap to get out the spiralizer and crank out a pile of green (and white) goodness to replace the starchy alternative.049
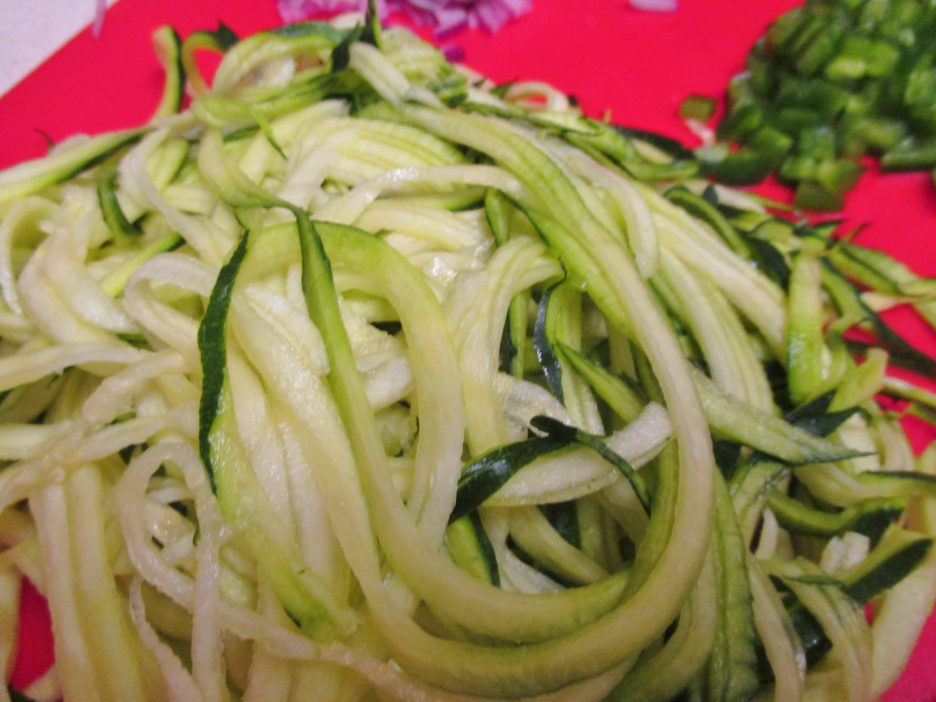
As with any good fritatta, it is at its best when layers of flavor come together. Mama D’s Trinity (Garlic-Onions-Olive Oil) was joined by the chopped jalapeno. They cooked to golden loveliness before I added the zucchini.057
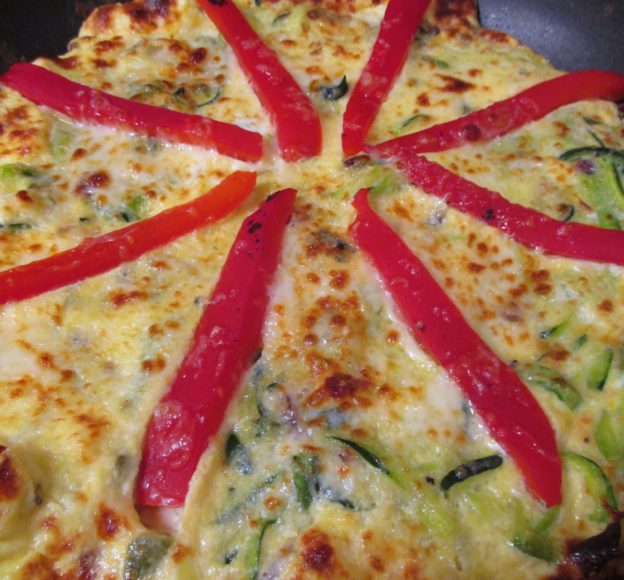
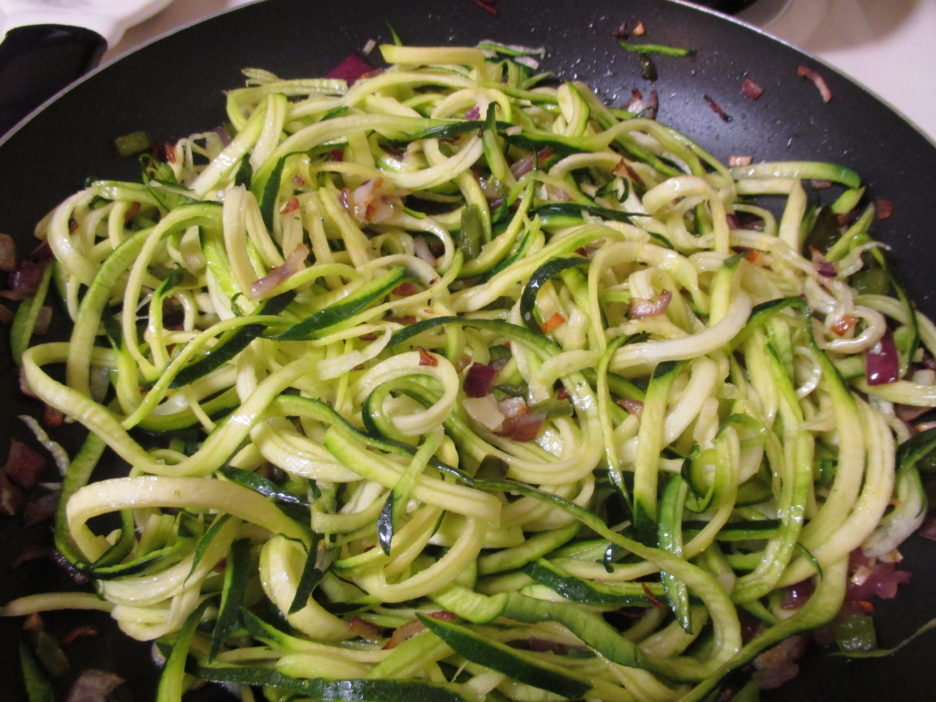
The zucchini took mere minutes to cook to “al dente” creating a bed of veggie delight ready for their egg bath. The eggs were gently cooked to the point of almost being set. everyone has their own technique for cooking a frittata. I’m of the shake, lift, and be patient school. All of this paid off, and the eggs cooked to almost set perfection. As a crowning touch, I added some shredded mozzarella and roasted red pepper strips before dispatching it to the broiler.

A quick note here: I do not have an “oven friendly” medium skillet. I know, shame on me. I did however, have a skillet with a non-ovenproof handle and some foil.  Wrapping the foil tightly around the handle made the pan more or less oven safe. See, it was worth reading this just for that handy little tip.  070
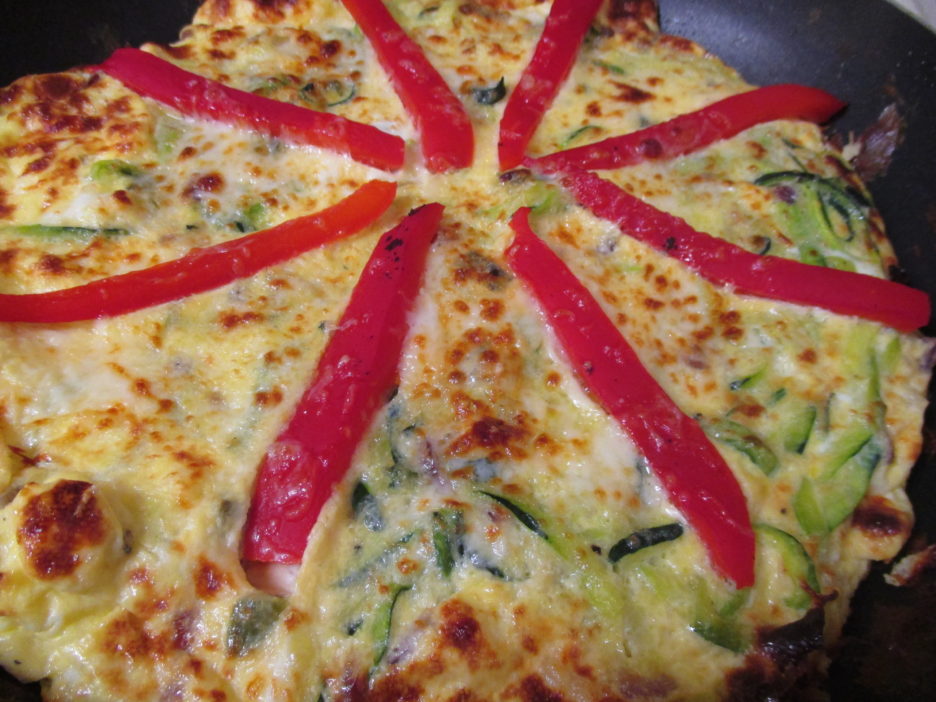
The magic happened and the frittata came out golden and bubbly. This was the perfect  size for two (we’re talking Mama D size servings here), but it could easily serve three or maybe four if you added some crusty bread, a nice salad and a killer dessert. 073

Zucchini Pasta Fritatta
Print Recipe
Servings
3
Servings
3
Zucchini Pasta Fritatta
Print Recipe
Servings
3
Servings
3
Ingredients
Servings:
Instructions
  1. Heat the olive oil in a medium oven friendly skillet. If you don't have one, wrap the handle of a non-oven friendly one tightly with foil.
  2. Add the onion and jalapeno and cook for 3 minutes or so until things get soft and fragrant.
  3. Add the garlic and cook for a few minutes until everything is golden and smells heavenly.
  4. Add the zucchini and toss to combine with the oil and veggies already in the pan. Cook for 3 to 4 minutes until the zucchini begins to wilt and takes on some color.
  5. Beat the eggs in a medium bowl with the half & half. Add a little salt and pepper or any other seasoning of your choice.
  6. Pour the egg mixture over the vegetables in the pan and shake the pan to distribute the eggs and begin the "not sticking" process.
  7. As the eggs cook around the edge, lift gently with a spatula to allow the uncooked egg to get to the bottom. Continue to cook, shake, and lift until the eggs are almost set.
  8. Top with the red pepper strips and the grated cheese. Place the pan under the broiler and allow to cook until the top is set and the cheese is melted and golden.
  9. Remove from the oven and allow to sit for 5 minutes before cutting and serving.
Share this Recipe
Powered byWP Ultimate Recipe

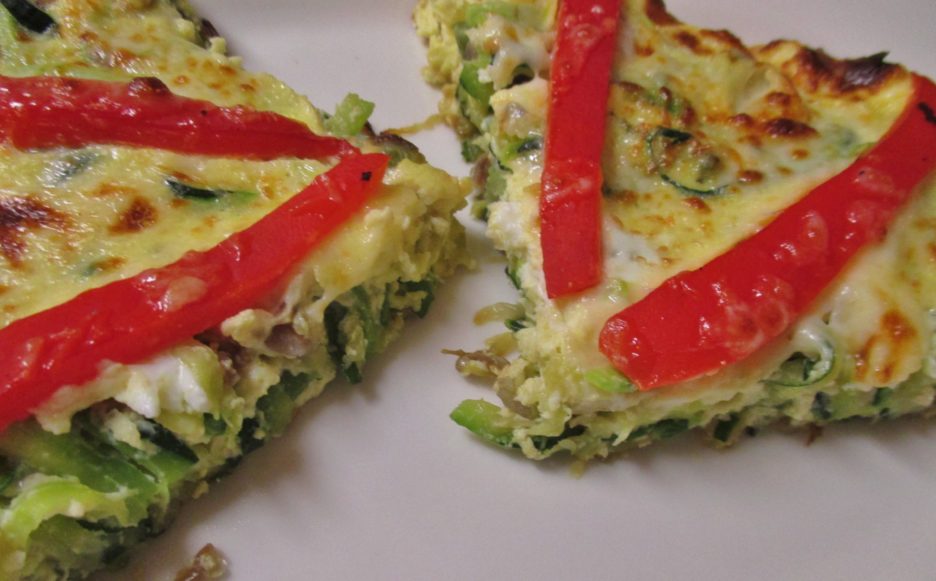
With warmer weather more or less coming to stay (except for the almost frost last night), light suppers will be occurring more often. Eggs are such a versatile base and the choice of vegetables, herbs, and seasonings are as wild as your imagination. Give a frittata a try. It’s easy, quick and almost foolproof.

Cleaning Out the Fridge Quiche

The refrigerator is a wonderful invention. It allows us to keep a supply of fresh food at the ready. It provides a safe haven for the treasures we find at the store, keeping them safe until we are ready to turn them into something wonderful. I confess that sometimes I buy a little more than I can chew and open the refrigerator to find an array of food that has begun to lose its luster.

What’s Mama D to do? I don’t have the heart or the budget to throw it all away, and it is still quite usable. The time has come to combine things into a delicious meal and quiche is a perfect solution. Flaky pie crust and creamy custard are the blank canvas that will hold the vegetables and meats that the fridge has to offer.

This adventure included some crimini mushrooms and asparagus along with some thyme and onion. They were a bit past their prime, but perfect for this quiche.

DIGITAL CAMERAMy protein of choice was peppered bacon.  I found three lonely slices that I chopped up and browned on the stove.

The veggies were chopped and cooked in the same pan (minus the drippings, but with the yummy brown bits) to give them a little extra love before they jumped into my “not home-made” crust. Yes, the crust came out of the fridge, too. Would homemade pastry make this dish better? Maybe, but I had a box of the pre-made variety and it needed to be used,too.

Whatever pastry crust you use always “blind bake” it before you add the fillings. Once the dough has been fit into your vessel of choice, line it with some parchment paper and fill it with dried beans. Bake it in the oven until it is nice and golden. A clear glass pan allows you to check the bottom as well. Remove the beans and paper and add your fillings. No soggy bottom crust here.I topped the sautéed goodies with some grated Swiss cheese. Any cheese will work here. Use what you love or what you have on hand. Only use about a cup. The custard is rich enough and you want the veggies to be the star here.

DIGITAL CAMERAEggs, cream, and milk create a luscious custard that only requires a little salt and coarse ground pepper. I’m not a fan of nutmeg, a traditional ingredient here, but add some if it floats your boat. In fact you can add any herb, spice, etc. It’s your quiche after all.

When you are ready to add the custard to the quiche, put it on a rimmed baking sheet. This too, is a required step. The pie will be very full and eggs being eggs, it will grow before it sets. A baking sheet is much easier to clean than an oven. I speak from experience.

DIGITAL CAMERAThe quiche needs to bake for 30 – 40 minutes then it needs to set for at least 20 minutes more. Add the blind baking step and you are approaching the 2 hour mark on prep time. If you like a late supper (and this is the perfect dish for that) make it part of your weeknight wonderland. I think it’s a delightful Sunday night supper that puts a delicious topper on the weekend.

DIGITAL CAMERA

Cleaning Out the Fridge Quiche
Print Recipe
This is my version of quiche. Feel free to use whatever fillings you want.
Servings
6
Servings
6
Cleaning Out the Fridge Quiche
Print Recipe
This is my version of quiche. Feel free to use whatever fillings you want.
Servings
6
Servings
6
Ingredients
Servings:
Instructions
Blind Bake the Crust
  1. Fit the pie crust into a pie or quiche pan. Use a fork to poke small holes all over the crust. Place a sheet of parchment paper into the crust (crumple it a bit to allow it to fit better). Pour dried beans onto the parchment paper. A pound of dried beans will fill a 9 inch pie plate nicely.
  1. Bake the crust in a preheated 350 degree oven for 20 - 30 minutes. The crust should be light golden all over. Do not rush this step; the non-sogginess of the crust depends on it. Remove the crust from the oven. Carefully remove the parchment paper and beans (these will become your official "blind baking" beans). Set the crust aside.
Filling
  1. Chop the bacon into thin pieces and cook in a medium fry pan over medium high heat. The bacon should be crisp. Transfer the bacon to paper towels to drain. Remove the drippings from the pan but leave the brown bits of deliciousness.
  2. Add the onions to the fry pan and cook for 4 minutes or so until they begin to soften.
  3. Add the mushrooms and continue to cook another 5 minutes until the mushrooms begin to brown. Add the asparagus and cook for a few more minutes until the asparagus is tender crisp.
  4. Add the reserved bacon bits back to the pan along with the thyme leaves and cook for 2 - 3 minutes more.
  5. Pour the vegetable/bacon filling into the pie crust. Sprinkle the grated cheese on top.
  6. Beat the eggs until the are very thick. Add the cream and milk and beat with a whisk until the mixture is light and fluffy. Add salt and pepper and any other spices or herbs you like.
  7. Place the filled pie crust on a rimmed baking sheet. Carefully pour the custard into the crust stopping when it is filled to the top. You may have a little custard left, but not much.
  8. Place in a 350 degree oven and bake for 30 - 40 minutes. The filling should be puffed and golden and a knife should come out clean when poked in the center.
  9. Remove the quiche from the oven and allow to cool for at least 20 minutes before cutting.
Share this Recipe
Powered byWP Ultimate Recipe

This is far from the traditional preparation for a quiche. It doesn’t however, make it any less delicious. This is a versatile recipe that can be adapted any number of ways. Have some fun with it and come up with your own fridge cleaning masterpiece.