
We are still enjoying Meatless Mondays in Mama D’s Kitchen. I’ve shared many meatless recipes here and not to flog the proverbial dead horse, but one more is about to be shared. You can consider this your spoiler alert. My feelings will only be hurt a little if you choose to bypass this offering, but before you turn away, give this little treasure a “lookie see”, you may be impressed.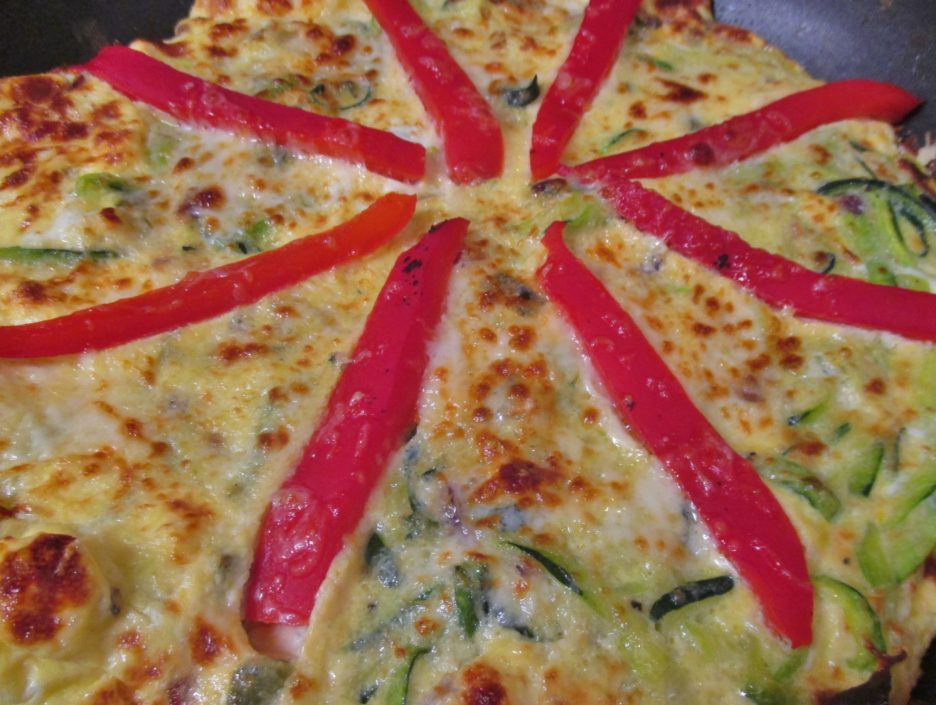
Eggs were speaking to me one recent Monday and they were telling me that they wanted to be a frittata when they grew up. That seemed like a reasonable request, so I embarked on a search to find worthy companionship for them. The refrigerator yielded several zucchini and a jalapeno, the pantry offered a jar of roasted red peppers, and onions and garlic left their place of honor on the counter to join in the merriment. I even found a lonely sliver of mozzarella cheese that begged to tag along.
I wanted to do something different with the zucchini, after all it is pretty standard fare in the frittatas that come out of the kitchen. I remembered seeing several recipes for Pasta Frittatas that made use of left over spaghetti. I had no left over pasta and it being Monday and all, I was trying to get things on a less “carb heavy” track after the weekend. We all know that “Zucchini Pasta” is a current darling of lighter cooking, so it was a natural leap to get out the spiralizer and crank out a pile of green (and white) goodness to replace the starchy alternative.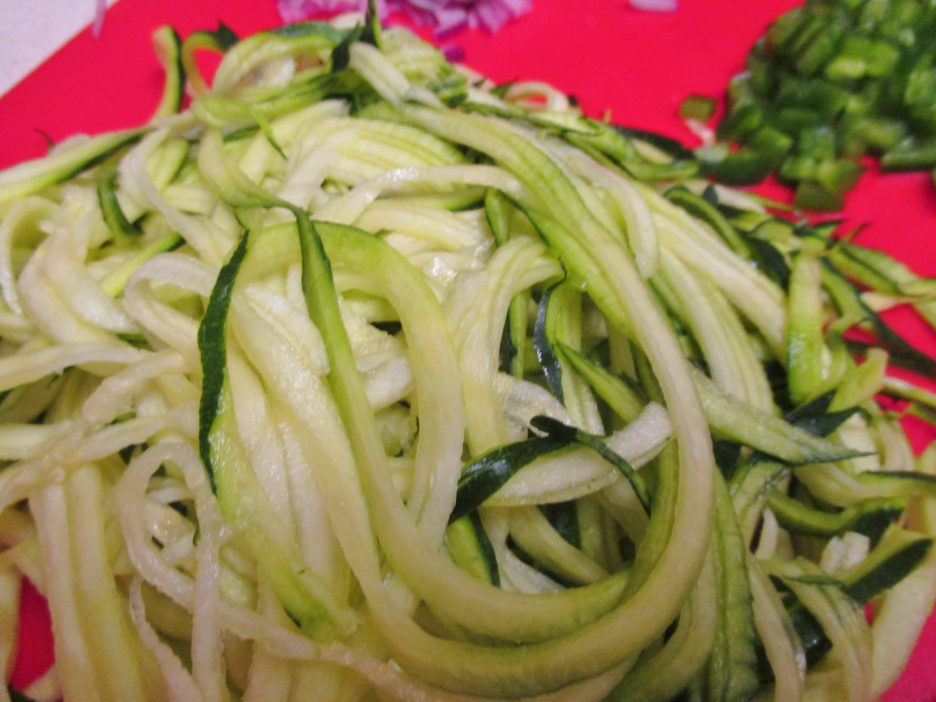 As with any good fritatta, it is at its best when layers of flavor come together. Mama D’s Trinity (Garlic-Onions-Olive Oil) was joined by the chopped jalapeno. They cooked to golden loveliness before I added the zucchini.
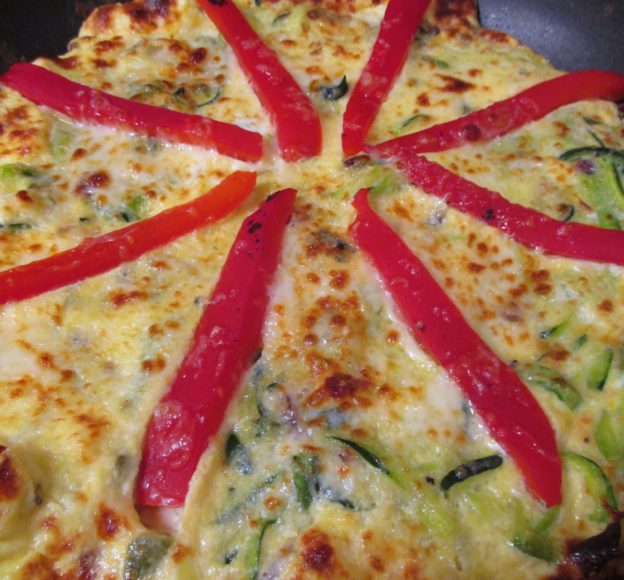
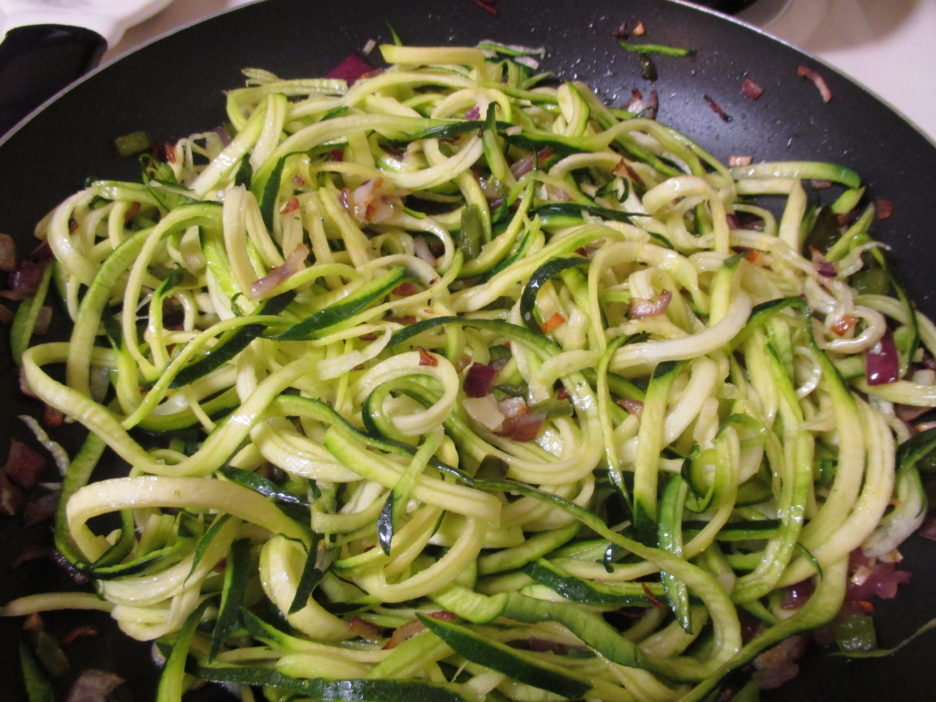 The zucchini took mere minutes to cook to “al dente” creating a bed of veggie delight ready for their egg bath. The eggs were gently cooked to the point of almost being set. everyone has their own technique for cooking a frittata. I’m of the shake, lift, and be patient school. All of this paid off, and the eggs cooked to almost set perfection. As a crowning touch, I added some shredded mozzarella and roasted red pepper strips before dispatching it to the broiler.
A quick note here: I do not have an “oven friendly” medium skillet. I know, shame on me. I did however, have a skillet with a non-ovenproof handle and some foil. Wrapping the foil tightly around the handle made the pan more or less oven safe. See, it was worth reading this just for that handy little tip. 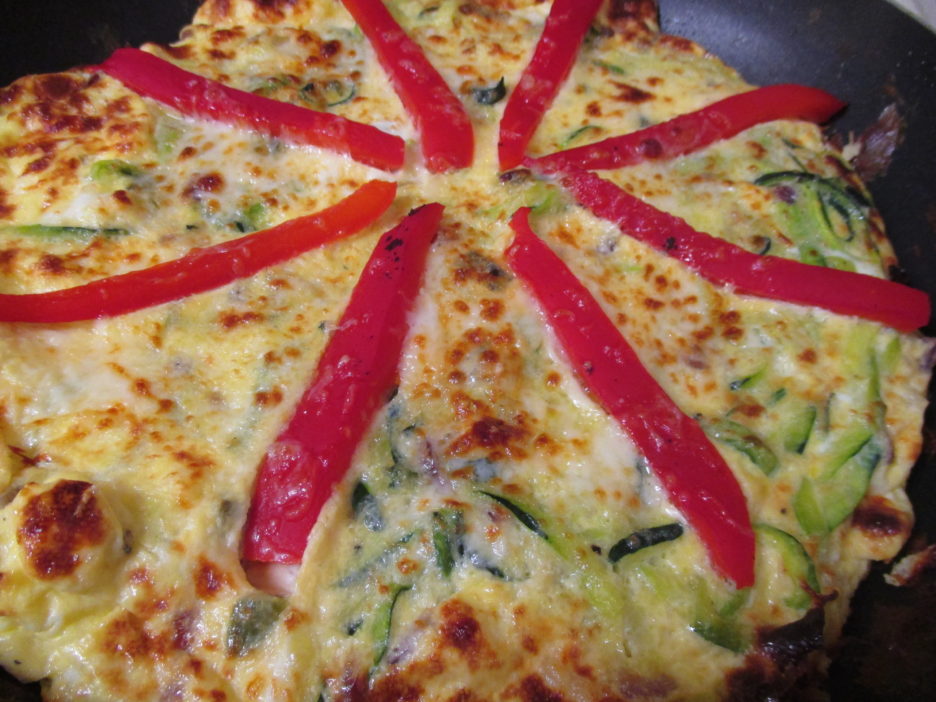 The magic happened and the frittata came out golden and bubbly. This was the perfect size for two (we’re talking Mama D size servings here), but it could easily serve three or maybe four if you added some crusty bread, a nice salad and a killer dessert.
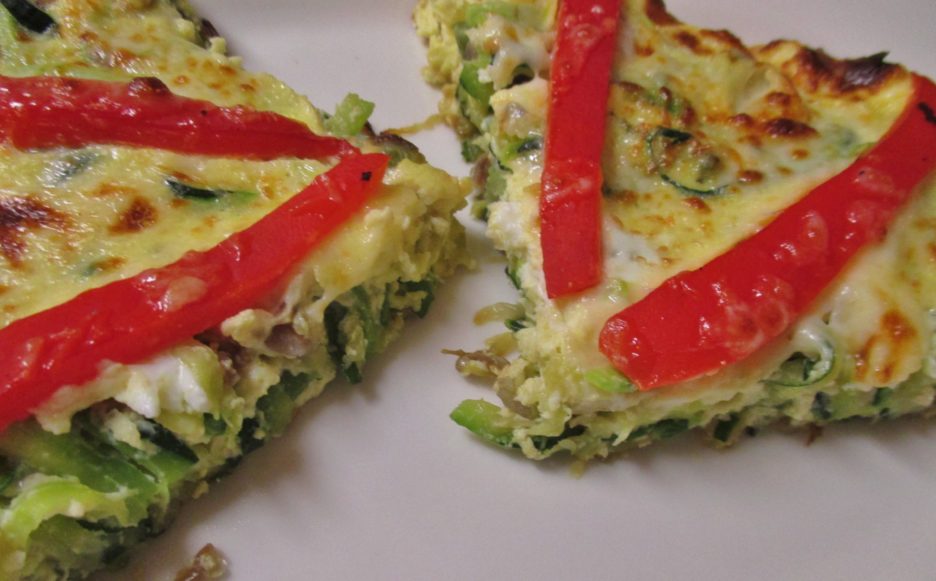

With warmer weather more or less coming to stay (except for the almost frost last night), light suppers will be occurring more often. Eggs are such a versatile base and the choice of vegetables, herbs, and seasonings are as wild as your imagination. Give a frittata a try. It’s easy, quick and almost foolproof.
Share this:


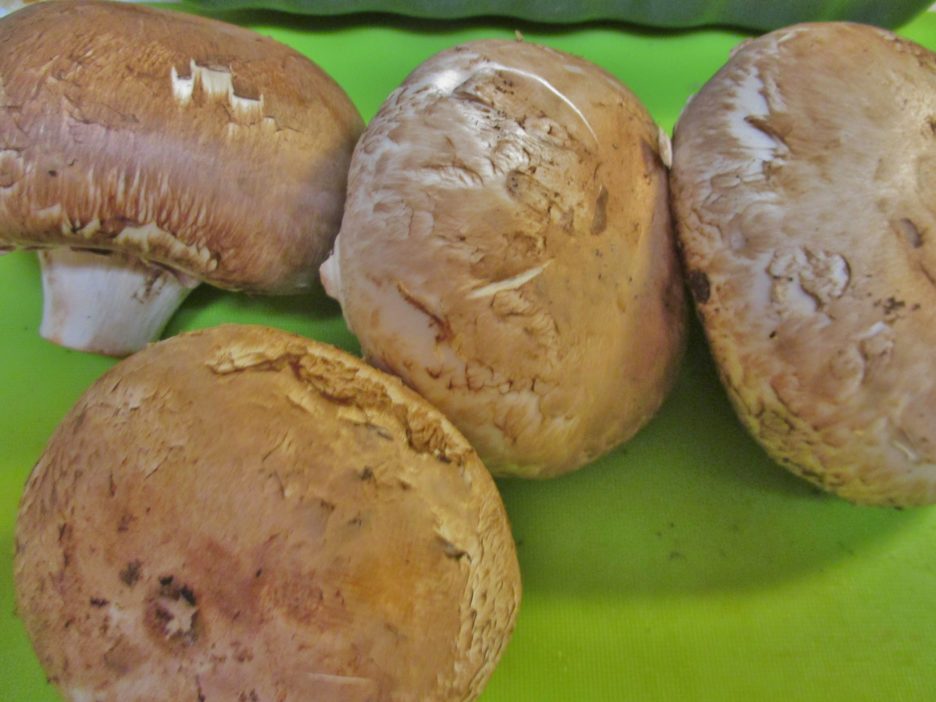 These were an interesting size, labeled “Mini” Portobello, they were more like “Giant” Crimini. Whatever the nomenclature, they were the perfect size to create a base for the veggie stacks once the were stripped of their gills and given a little wipe down. The rest of the veggies were cut in thick chunks to fit nicely in the caps. Everything got popped into zip top bags and marinated in a Balsamic Vinaigrette. Any marinade of your choosing will be perfect.
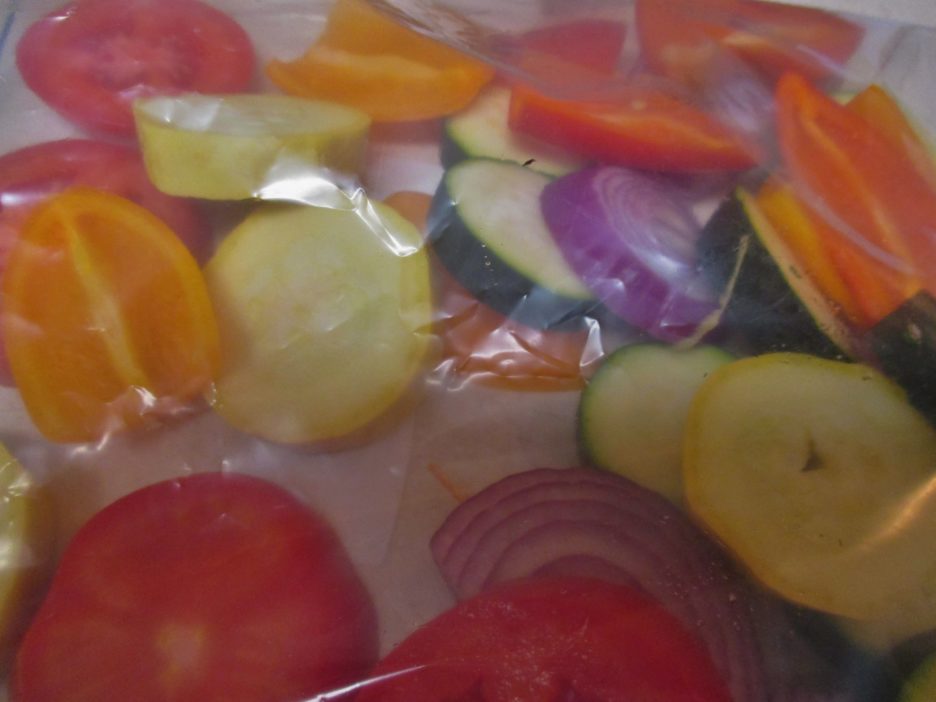
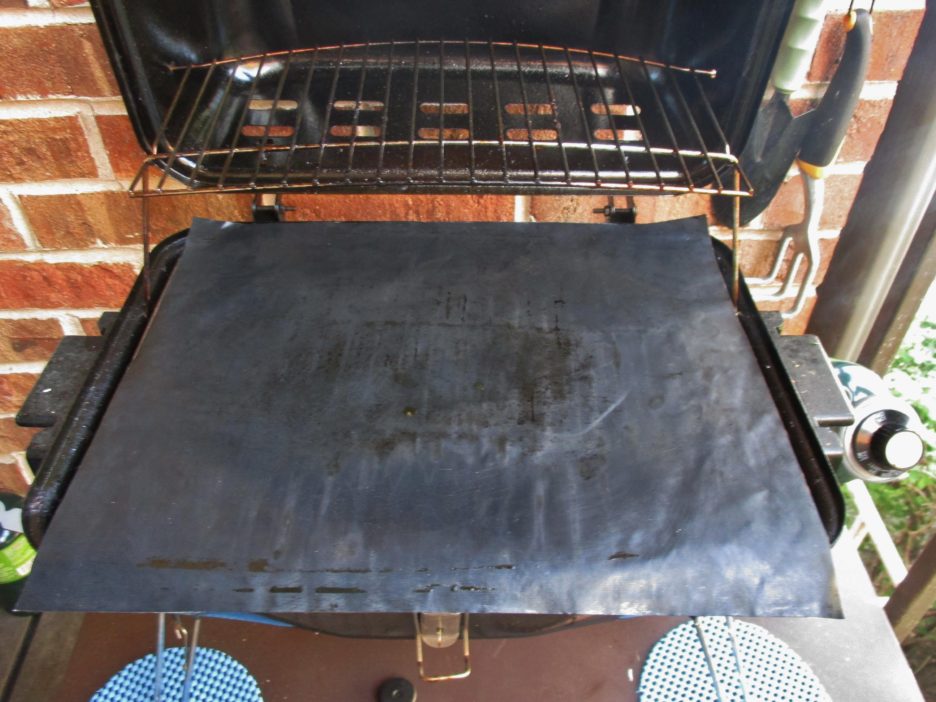 There is an infomercial that offers these, but I know that mine came from a Groupon offer (thank you Loren) that is unfortunately no longer available. If you don’t have these mats, I would strongly recommend a grill pan.
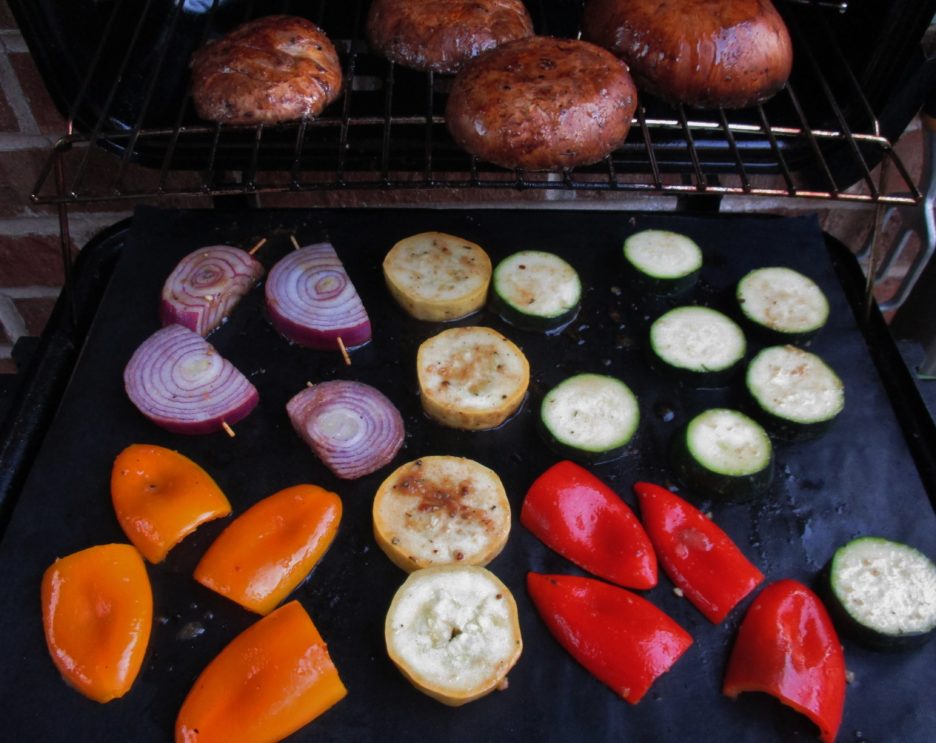 This is where the time to sip wine and tend to the grill come into the picture. The veggies seem to require almost constant moving, turning, and otherwise attending too, but on a beautiful spring evening it’s a perfect excuse to spend time outside. You may notice that the onions are sporting the latest in toothpick accessories. This isn’t just for show, the picks help keep the onions together, the better for them to be a stable layer in the stack. Just remember to take them out before assembling.
 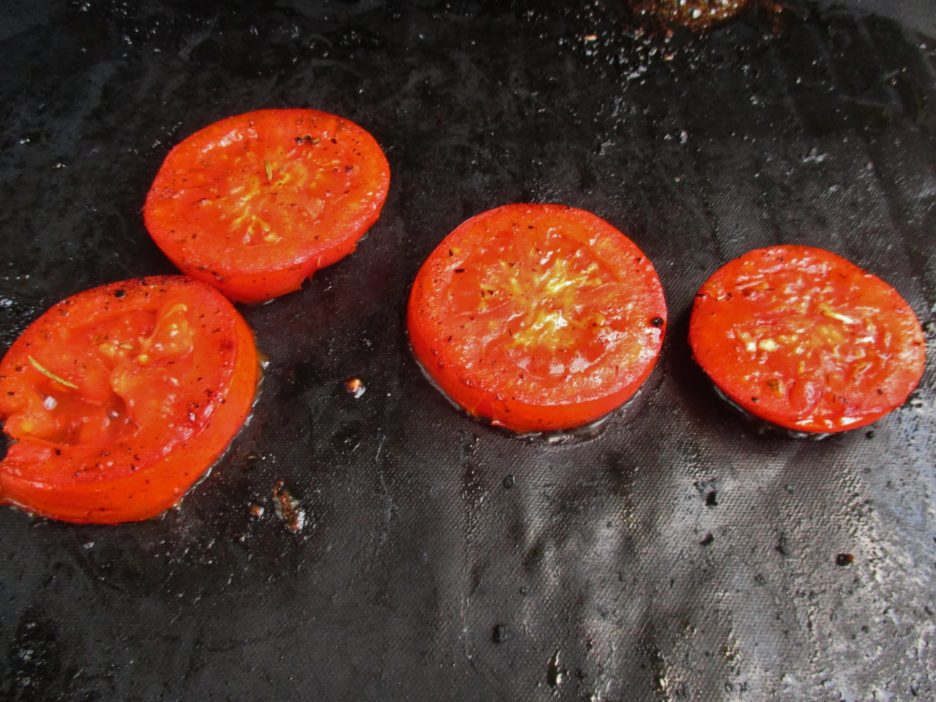 Toothpicks again came to the rescue again. Once the stacks were assembled complete with their lovely mozzarella hats, I used the picks to give them and me an extra level of security.
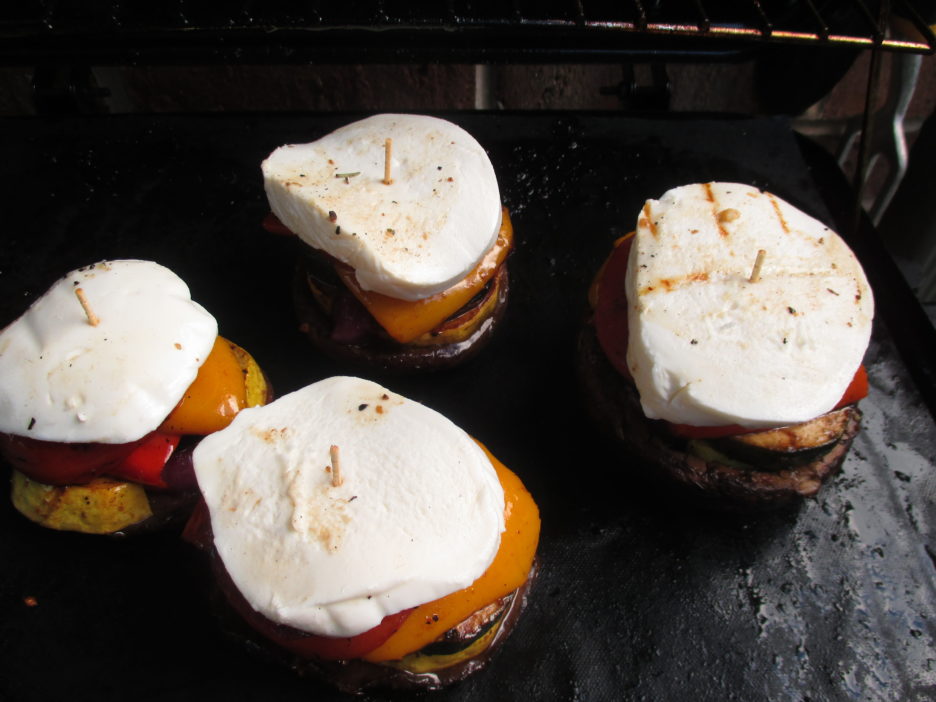 It was worth the effort and use of wood, not a single stack was lost. They were beautiful and ever so tasty.


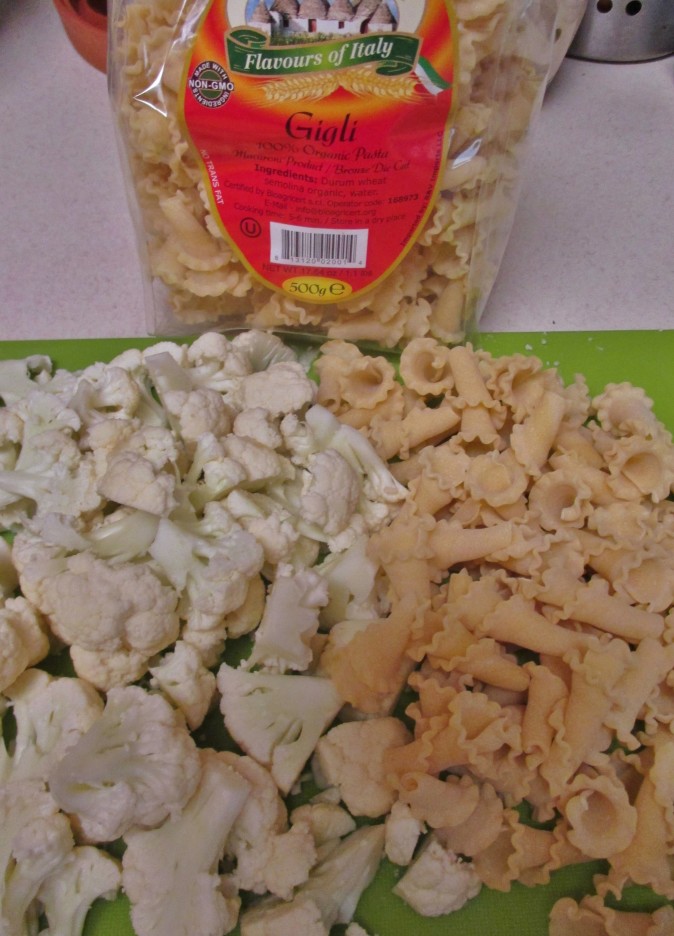 This started with equal parts of pasta and cauliflower. The “Gigli” looked a bit like the cauliflower and the combination lightened the carb load a bit. This could also be a great disguise for vegetables if that is an issue in your family. Any way, the pasta cooked to almost al dente before I added the cauliflower. I drained it all and set it aside.
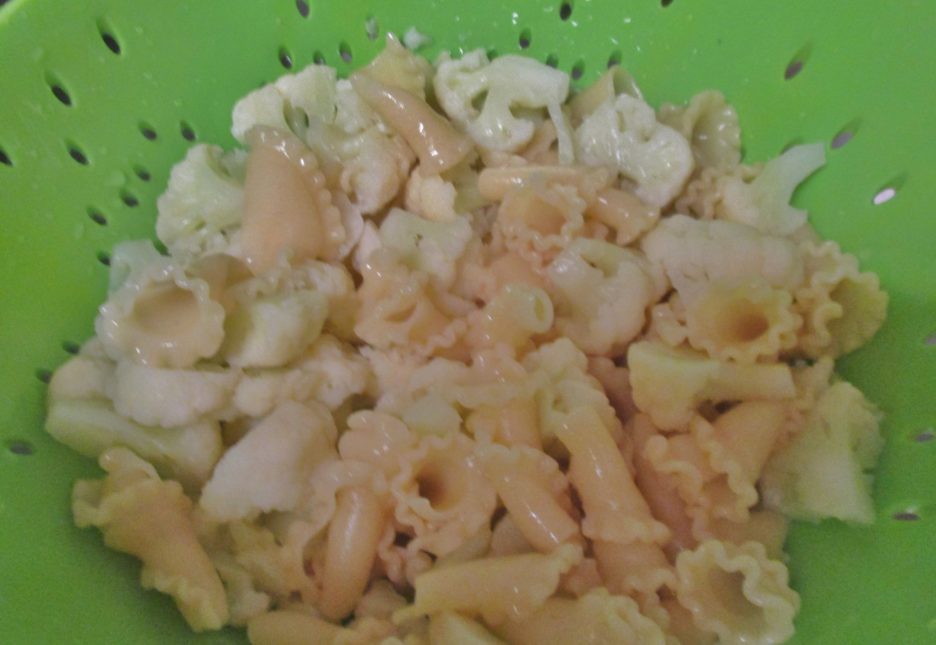
 I combined equal parts of Black Pepper Toscano ( this wonderfully
  creamy Parmesan cheese has made several appearances in Mama D’s recipes) and Olive Oil Rosemary Asiago cheeses (Another Mama D favorite with just the right sharpness and plenty of rosemary kick). Both of these cheeses come from Trader Joe’s, but any sharp Italian cheese would work. Emphasis on the “sharp”…a little goes a long way to create big flavor in a small package. I used about 1/2 cup shredded of each cheese and the flavor was more than satisfying.
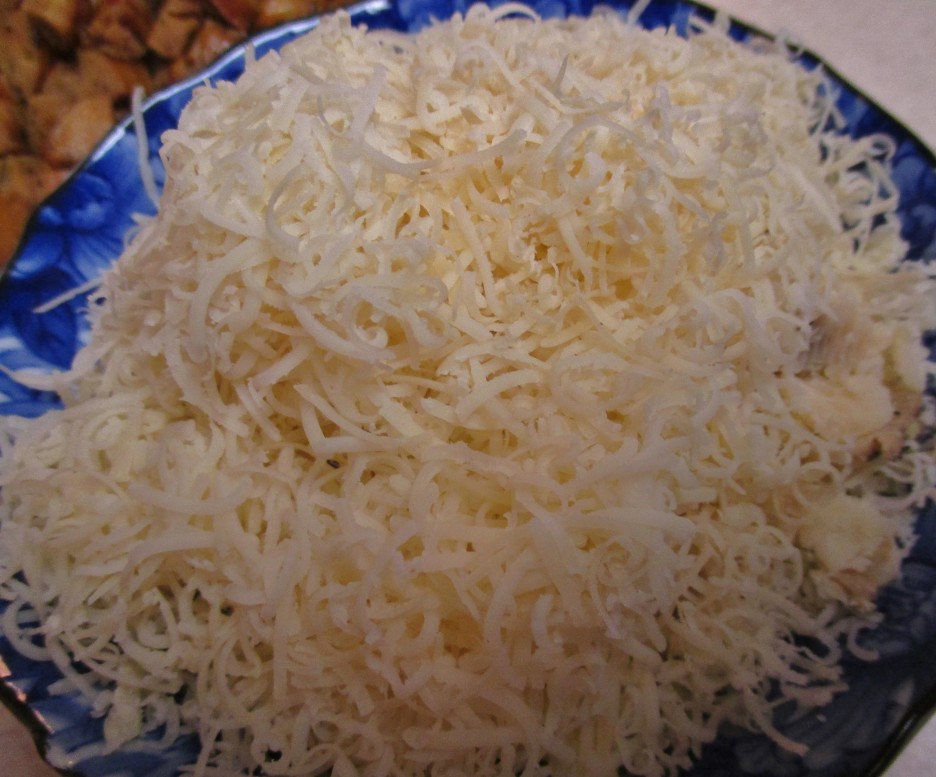
 It had the creaminess of a full dairy cheese sauce, but the chicken stock lowered the fat content nicely. While it wasn’t completely guilt free, it was darn close. This could easily serve six people, but in reality it is more like four servings, but even at that it still won’t totally break the fat and calorie bank.

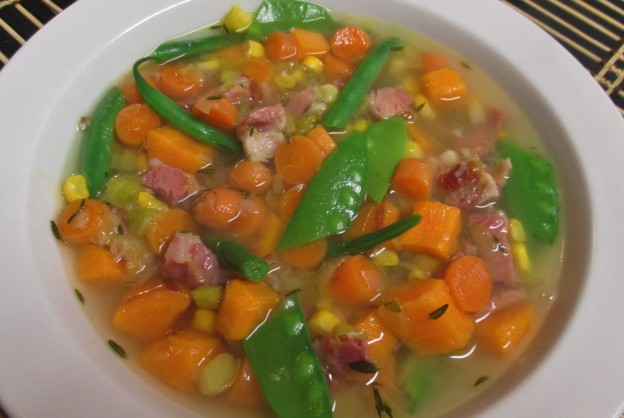

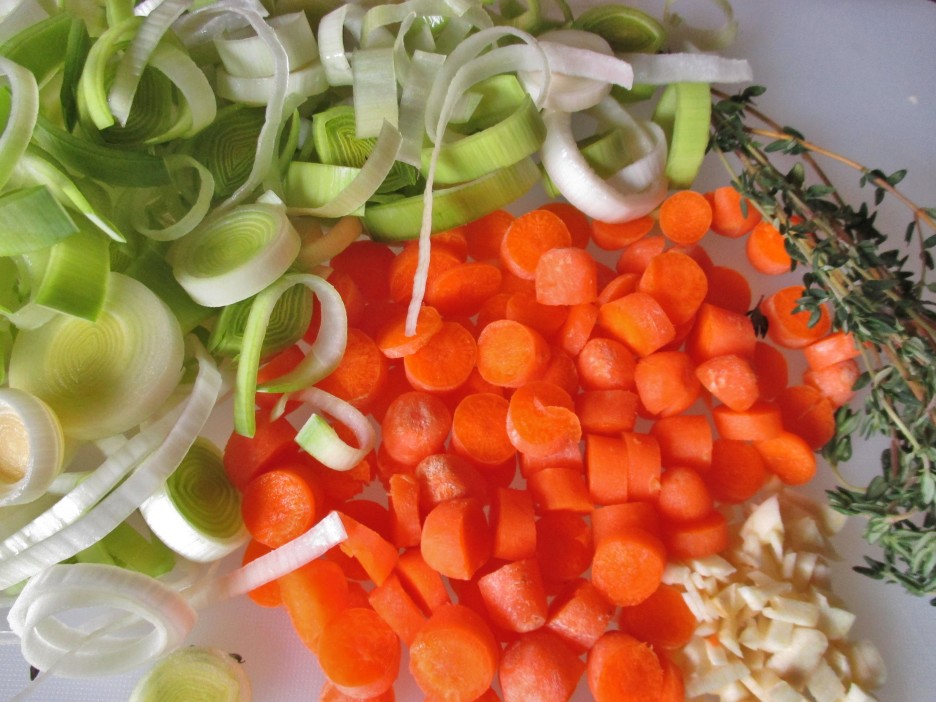
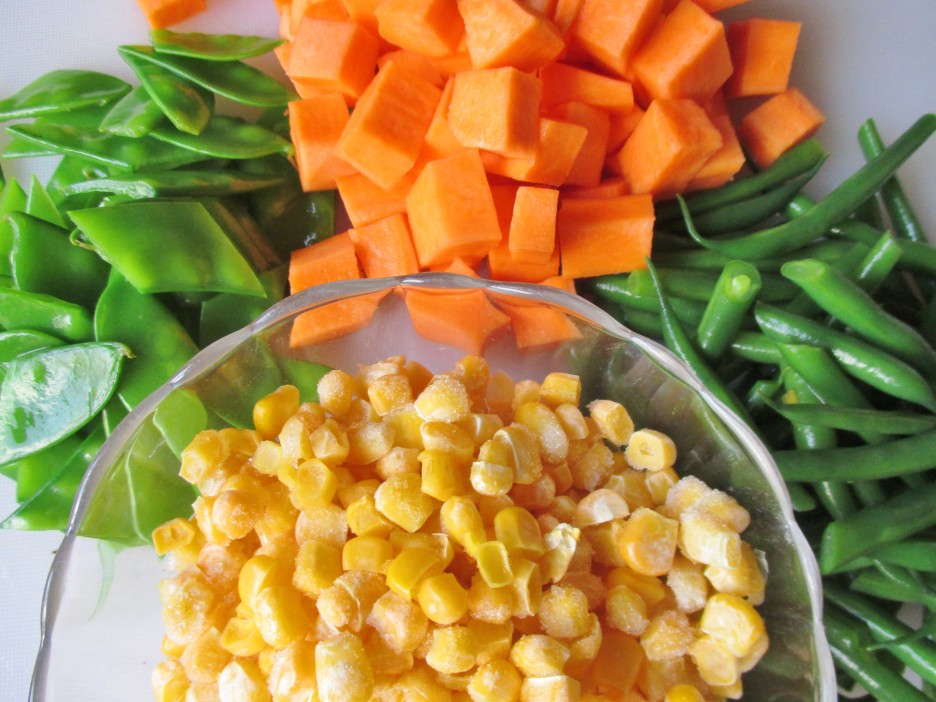
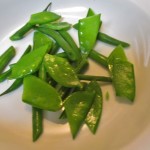 It wouldn’t be ham soup with out ham so I added a generous cup of the ham bone trimmings. This meat is a little heartier and stands up to the long simmer that soup takes. Speaking of long simmering soup, the haricot vert and snow peas take only minutes to cook and can quickly turn dull, so I added them at the end. I actually blanched them and added them to the bowls before I ladled in the soup. The piping hot soup warmed them up and the crunch they gave to the soup was a bonus in flavor and texture. This soup was the perfect blend of light yet filling and comforting. Adding a grilled cheese sandwich to the meal would make it a perfect Supper.
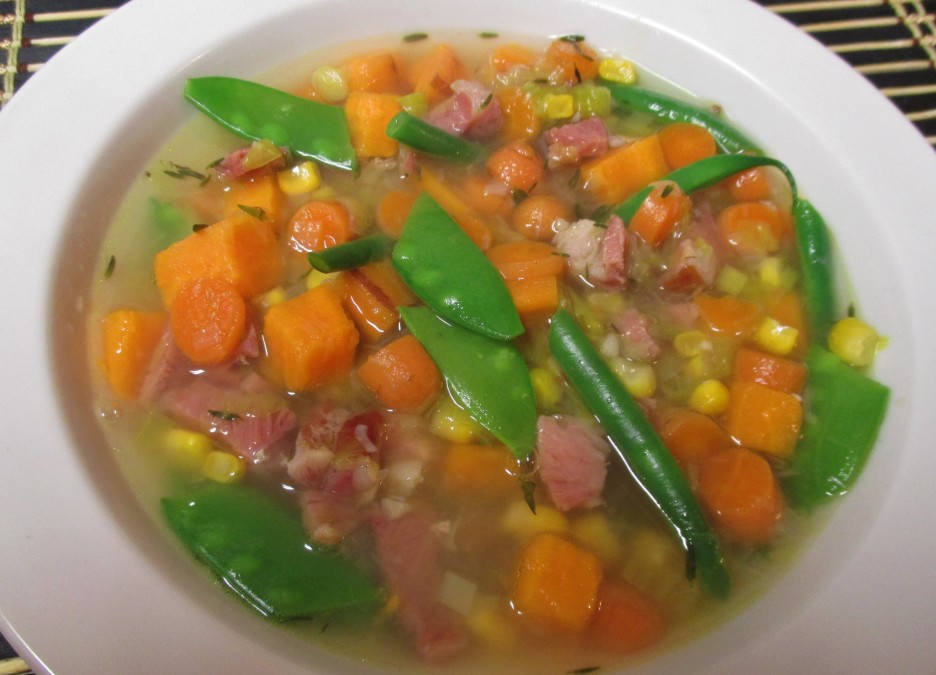


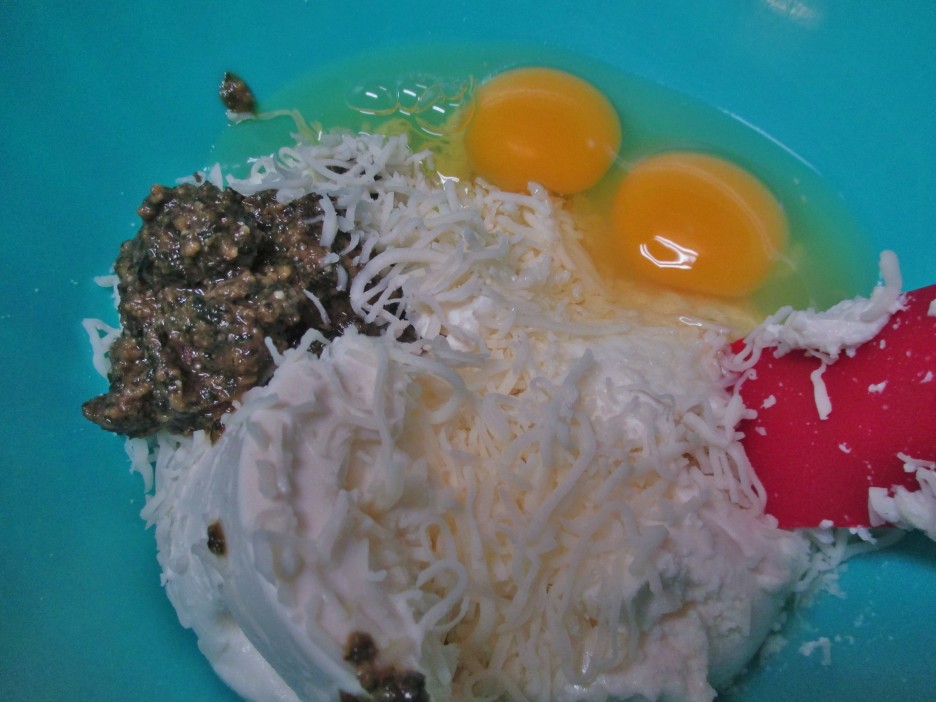 I combined the vegetables with this and the result was a creamy filling ready to hold its own in my lasagna.
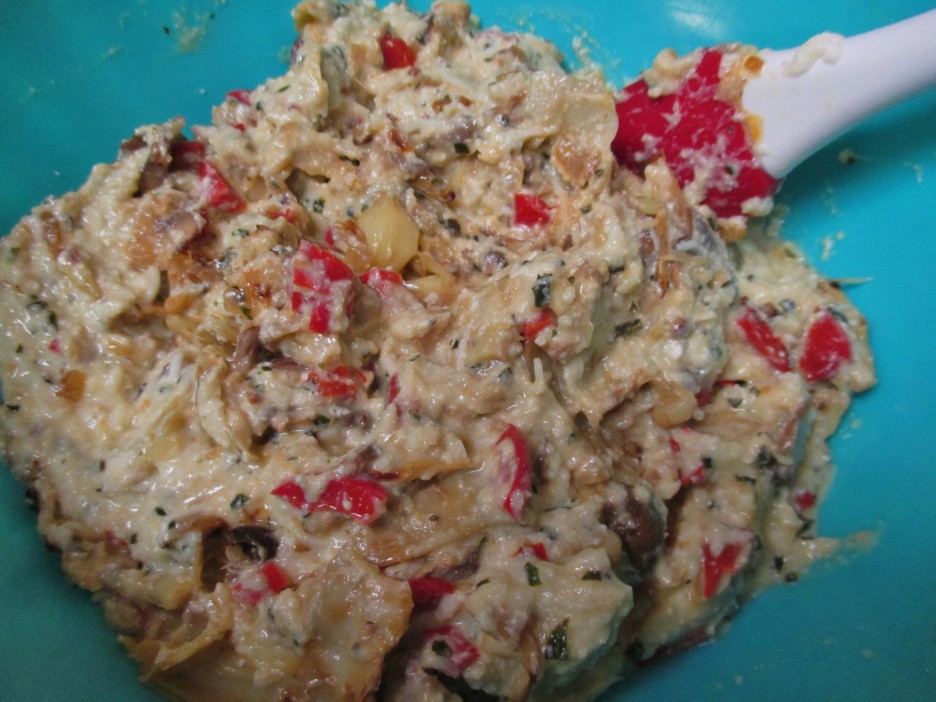 I decided to try whole grain lasagna and I can highly recommend it. The nutty flavor and sturdy texture added to the lasagna’s taste.
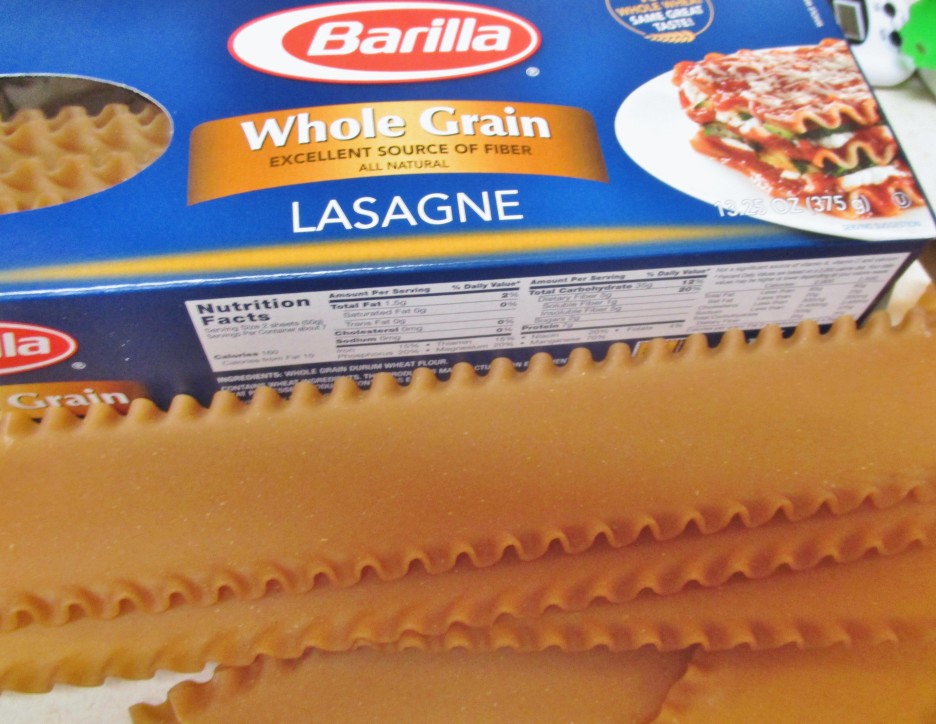 The lasagna went together in the usual way; layers of noodles, filling and cheese.
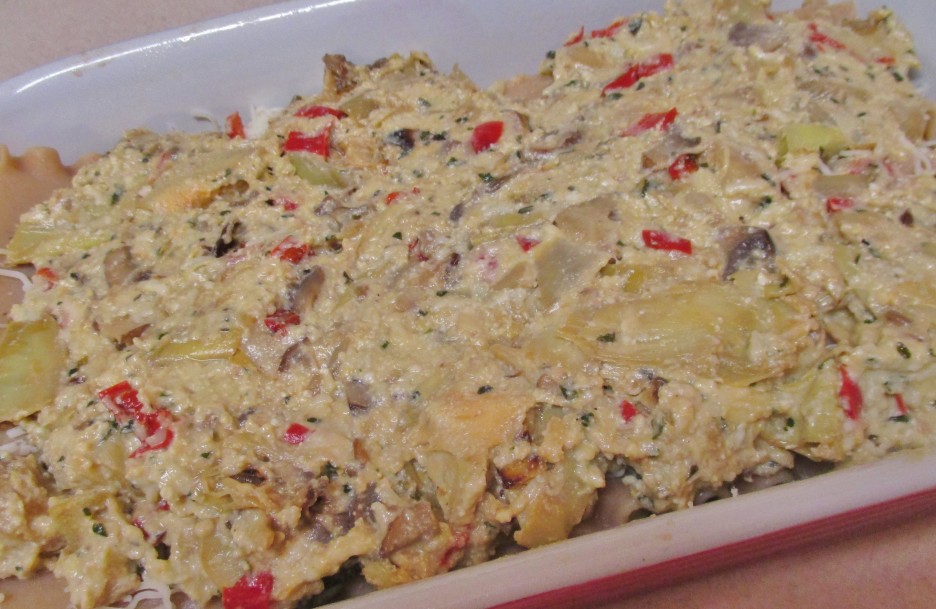 I topped it off with a Bechamel Sauce that I made with fat-free half & half and Cracked Pepper Toscano Cheese. This is one of my favorite Trader Joe’s items. It’s a creamy Parmesan type cheese that is coated in black pepper. Wonderful in cooking and a delicious addition to a cheese plate.
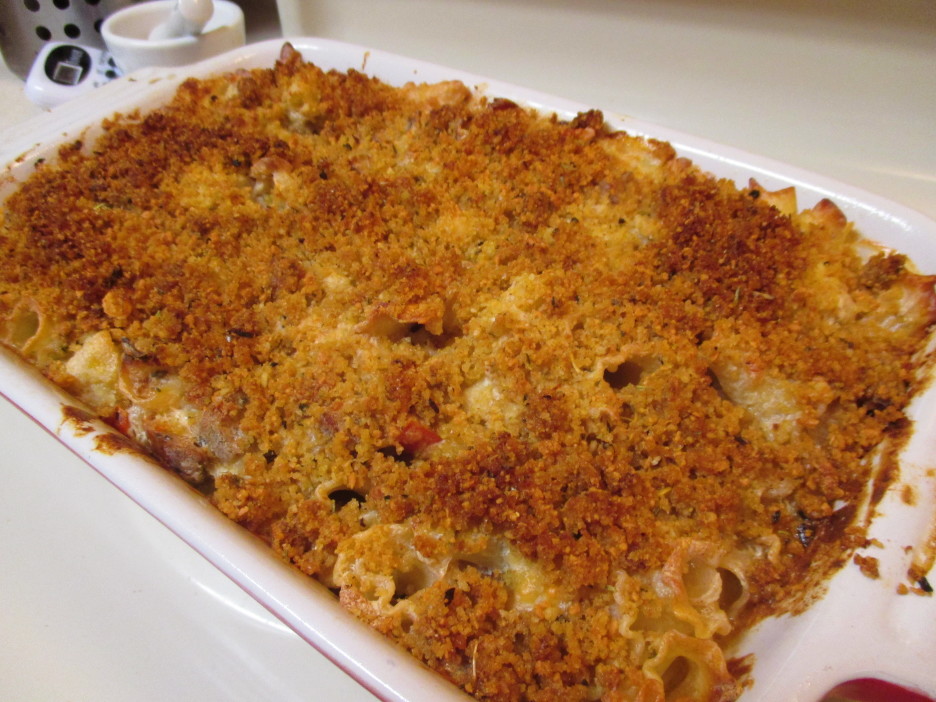
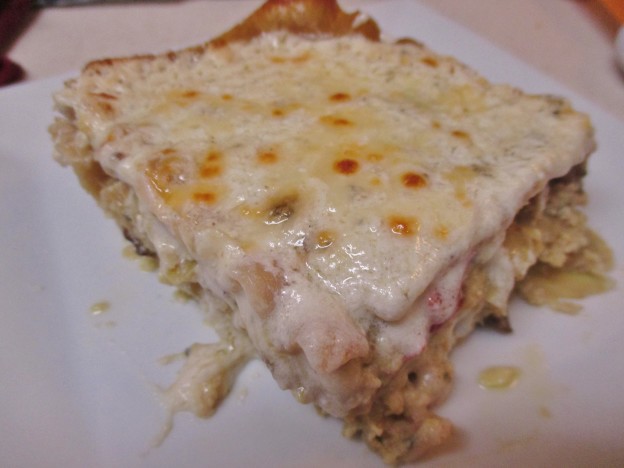
 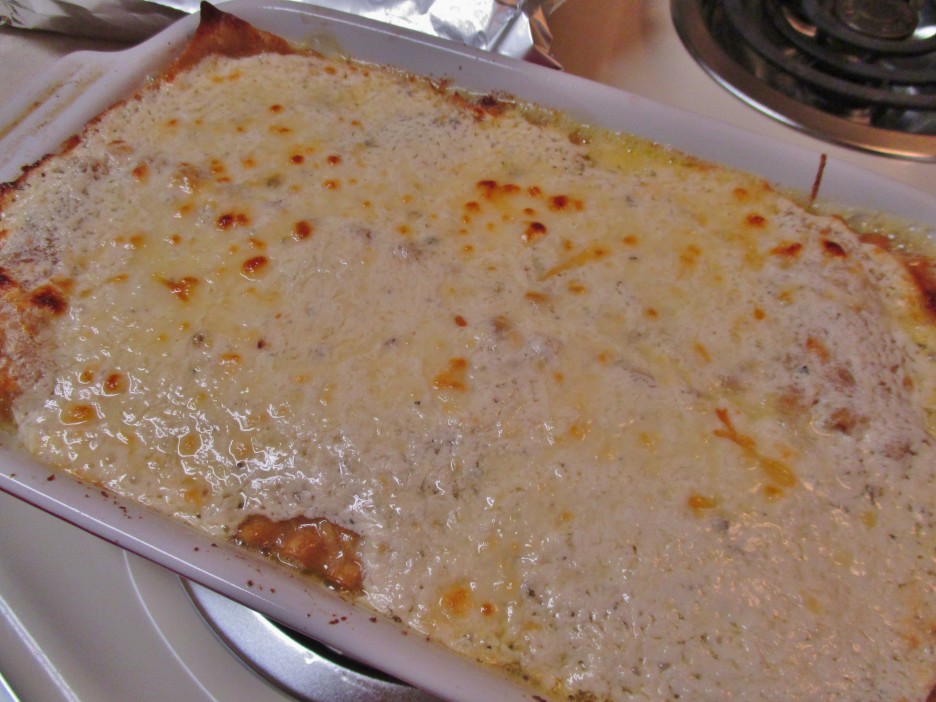 The lasagna emerged from the oven bubbly and golden as every lasagna should. After a waiting period that seemed endless, but was really about 15 minutes, it was ready to cut and serve.
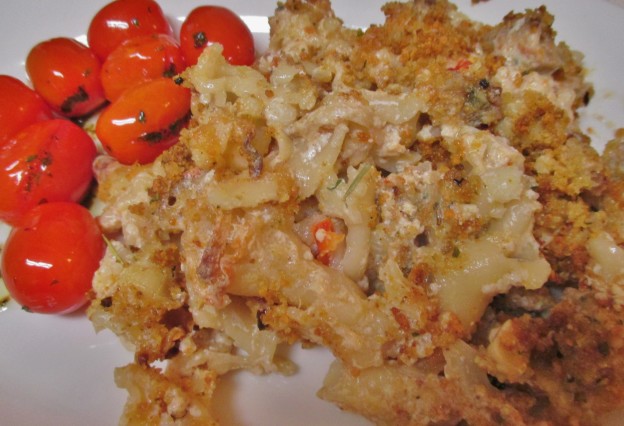
 This was a win win for stolen inspiration and conscious en”light”enment. The filling was creamy and filled with veggie goodness. The six generous servings had plenty of cheesy goodness from modest amounts of ricotta and Italian Cheese Blend and of course, that killer Bechamel.
