Downsizing the Freezer and Stuffed Peppers

Our efforts to downsize are paying off. One garage sale has been held with respectable success. Closets are devoid of useless clothes and there are spaces were small pieces of furniture used to be. One of the tasks as we prepare to move is using up what is in the freezer and pantry. Of course our new digs will have a freezer and if I’m creative in space usage, a pantry, but it’s a good excuse to clean things out a bit. A recent exploration of the freezer revealed a small portion of Italian Meatloaf and a quart bag of Vegetable Stock. The recipes for both of these have appeared in earlier posts  You can access them on the RECIPES  page. Just search by the recipe title.

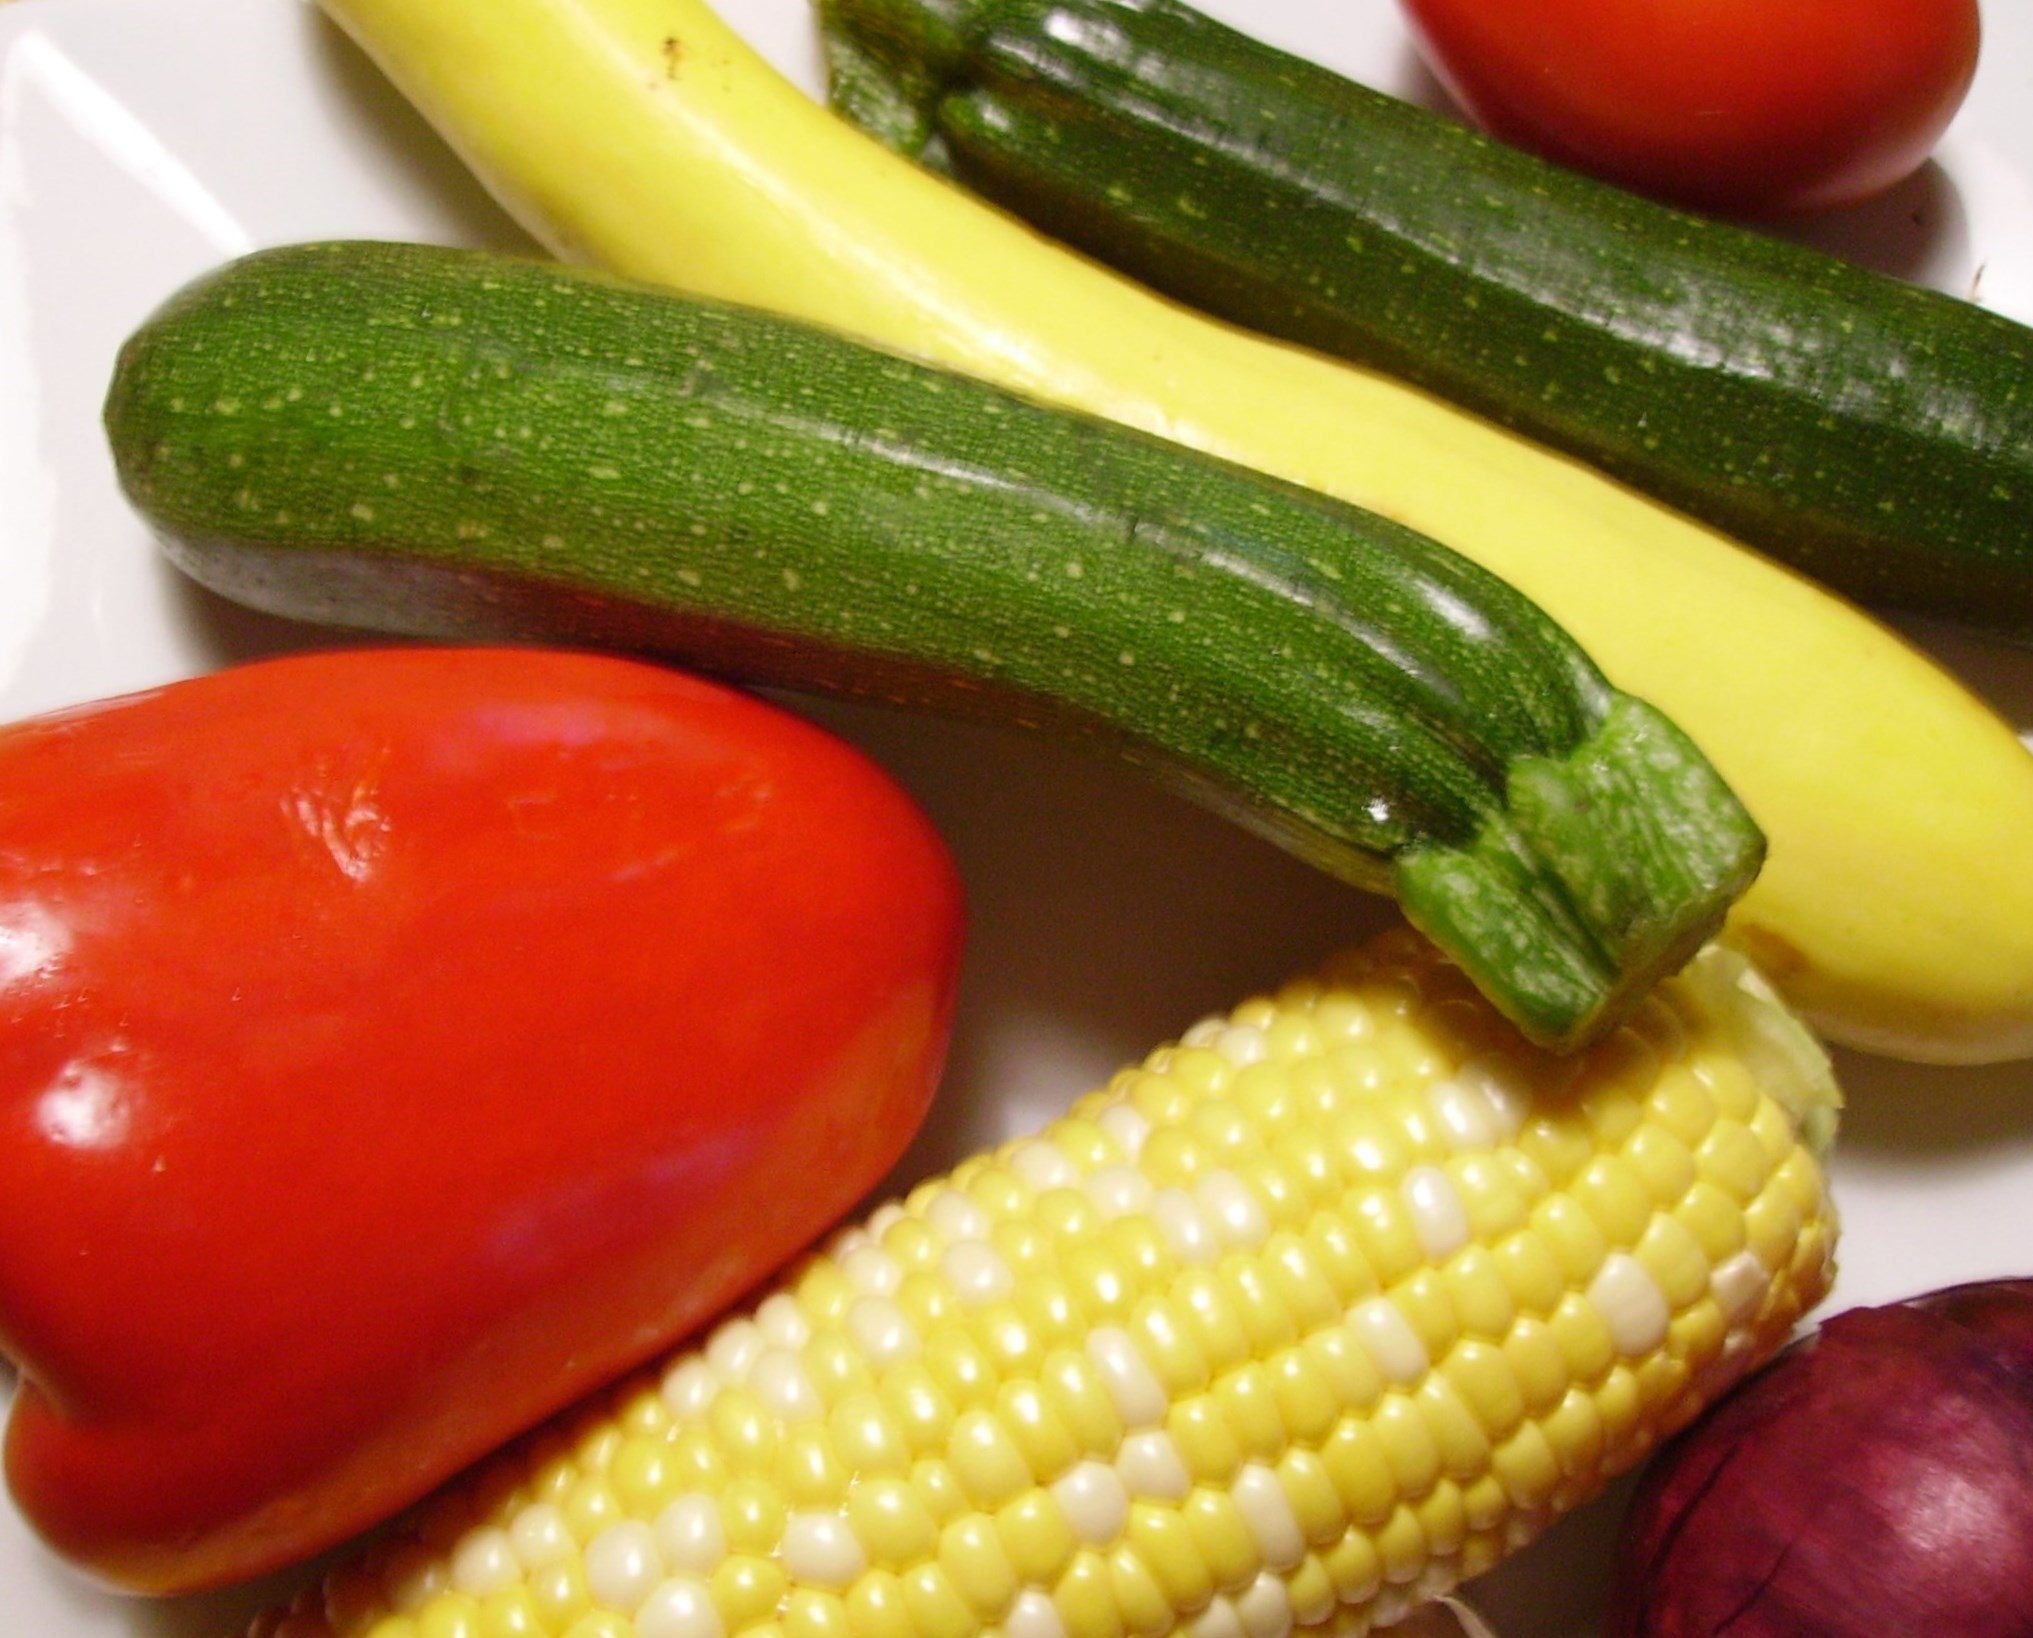
There wasn’t enough meatloaf (this made of ground turkey and turkey Italian sausage) to star in a meal, but it could become an integral part of an ensemble cast. This was my protein of choice/necessity. Any other protein you have on hand would be equally wonderful.DIGITAL CAMERA
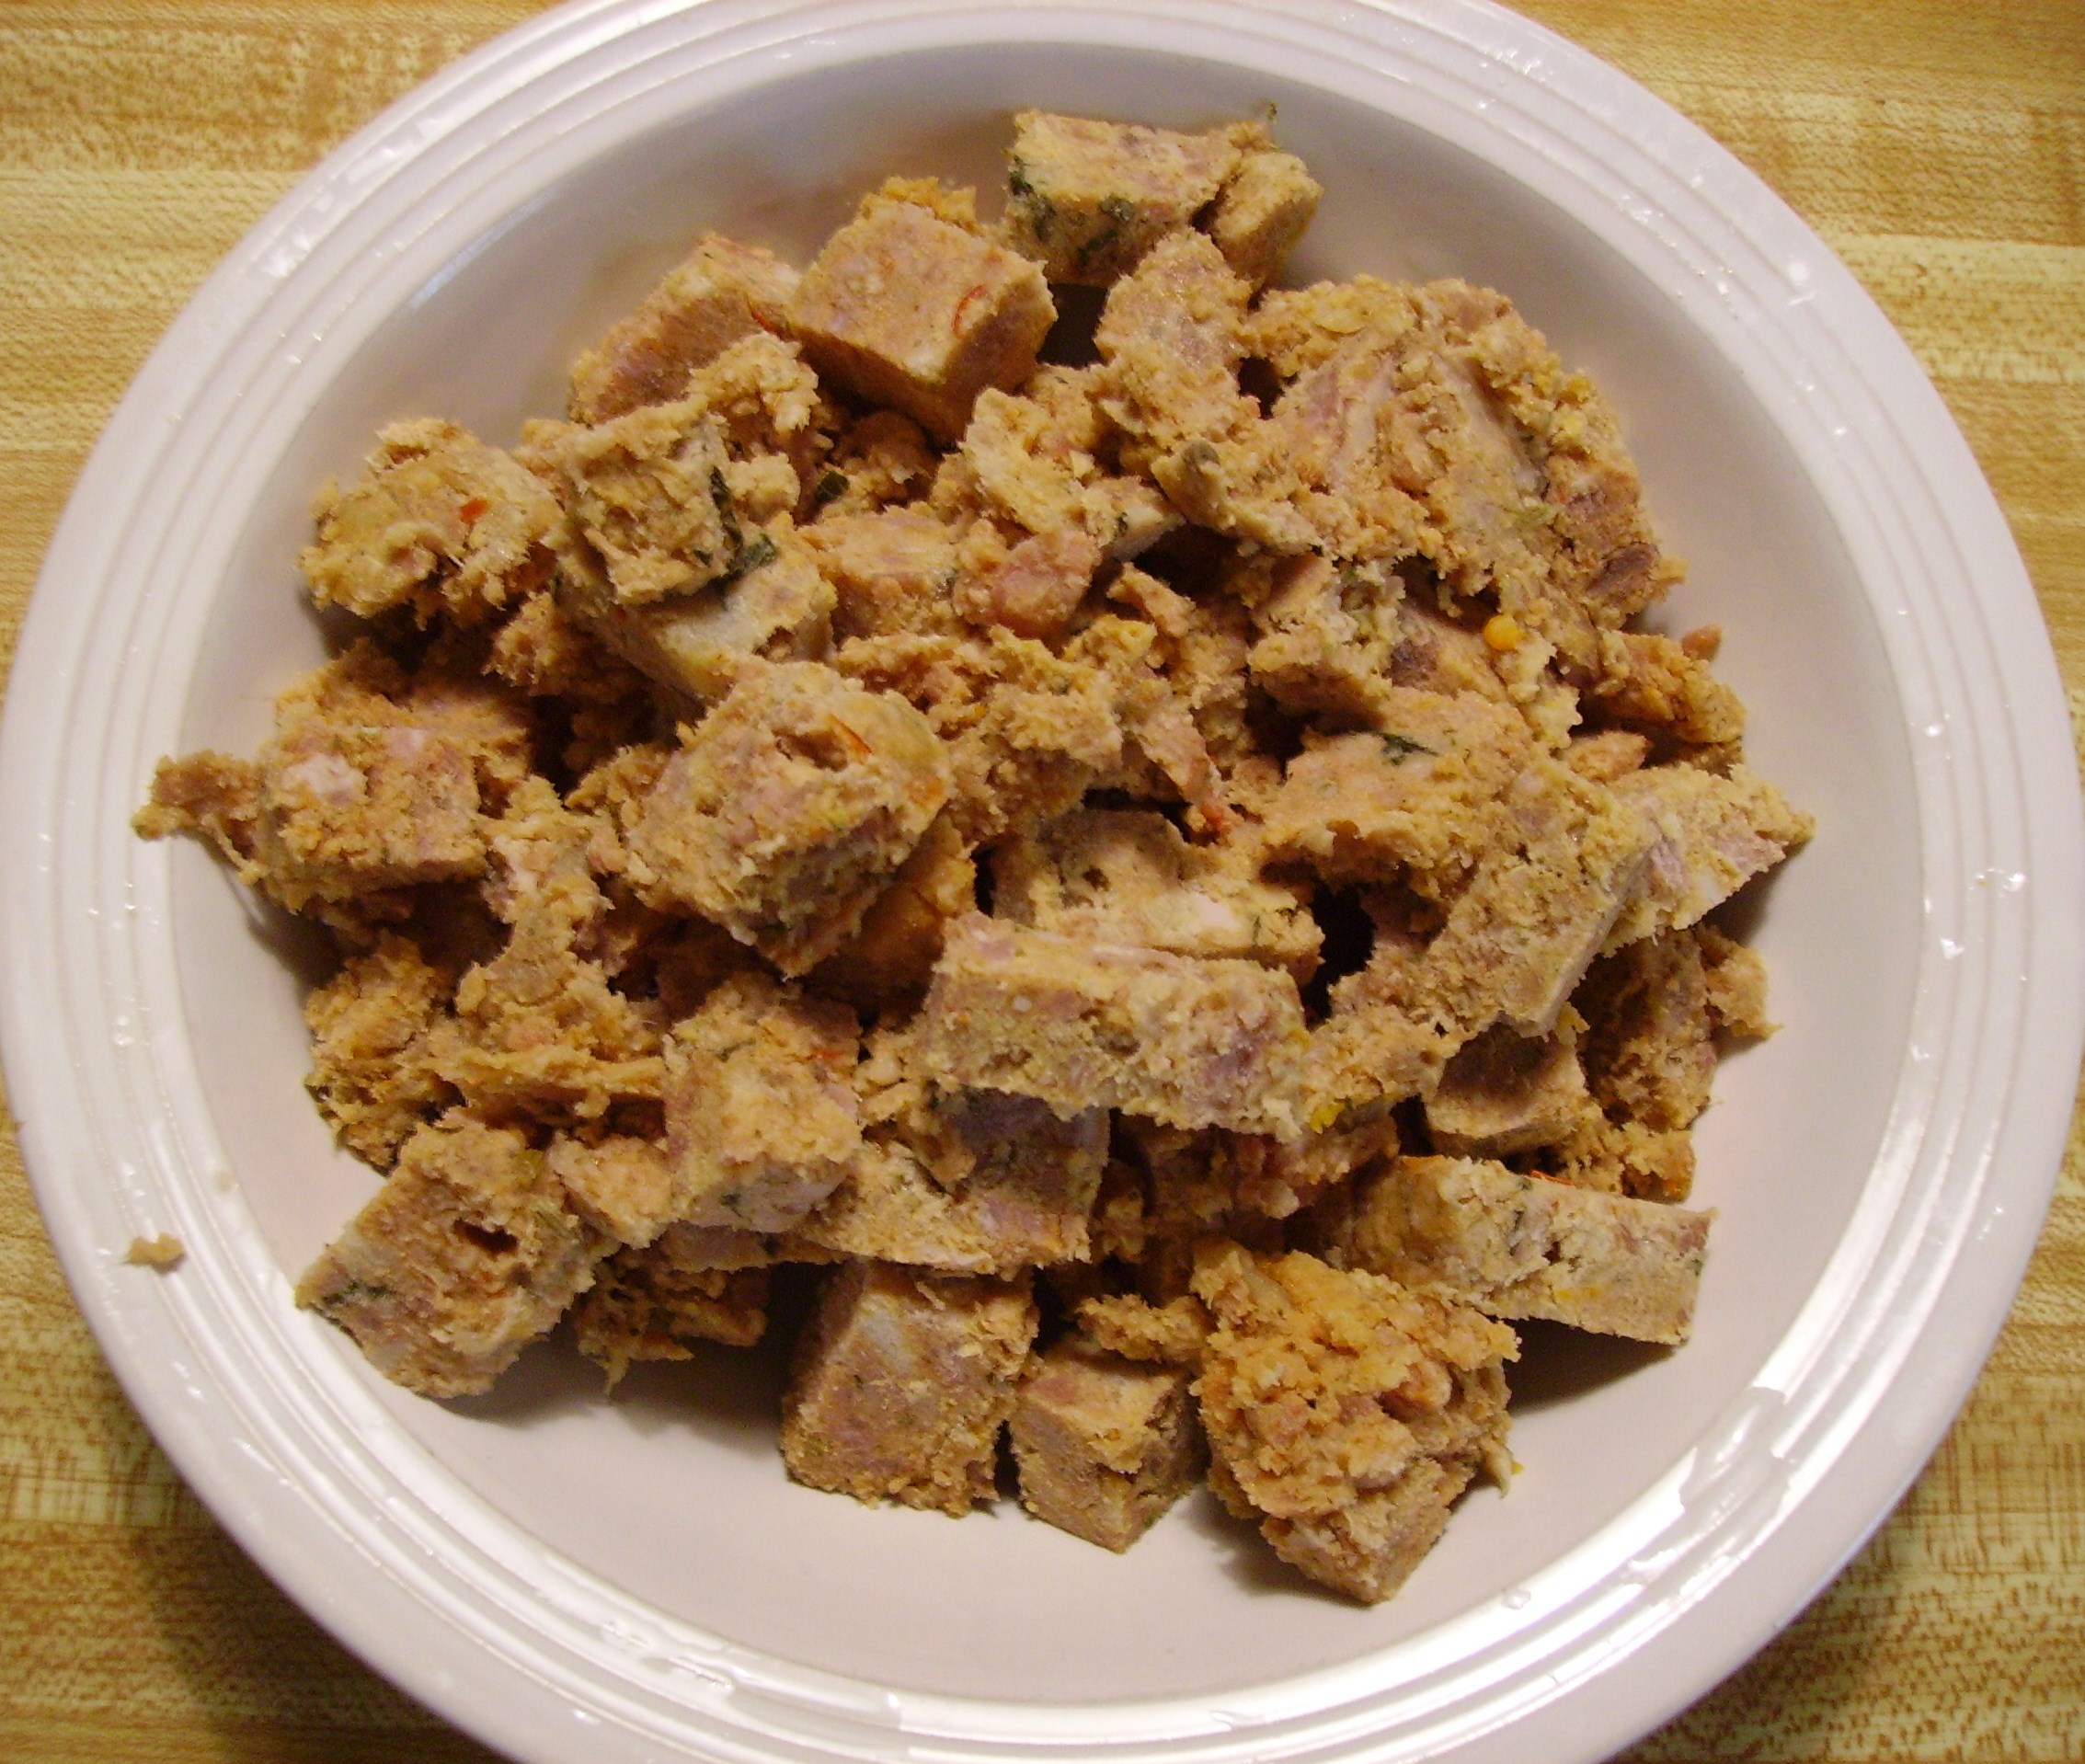
As I pondered the contents of my vegetable bins, I found 2 lovely colored bell peppers and the inspiration to stuff them came to me. But to stuff them with, what? I had a few mushrooms that were a bit past their prime and a zucchini with more than a little life left in it.  In the back corner of the butter keeper I found a package of Sun-Dried Tomatoes. It is Mama D’s Kitchen, so of course there were onions and garlic on the counter. The cast, or most of it, was in place…DIGITAL CAMERA
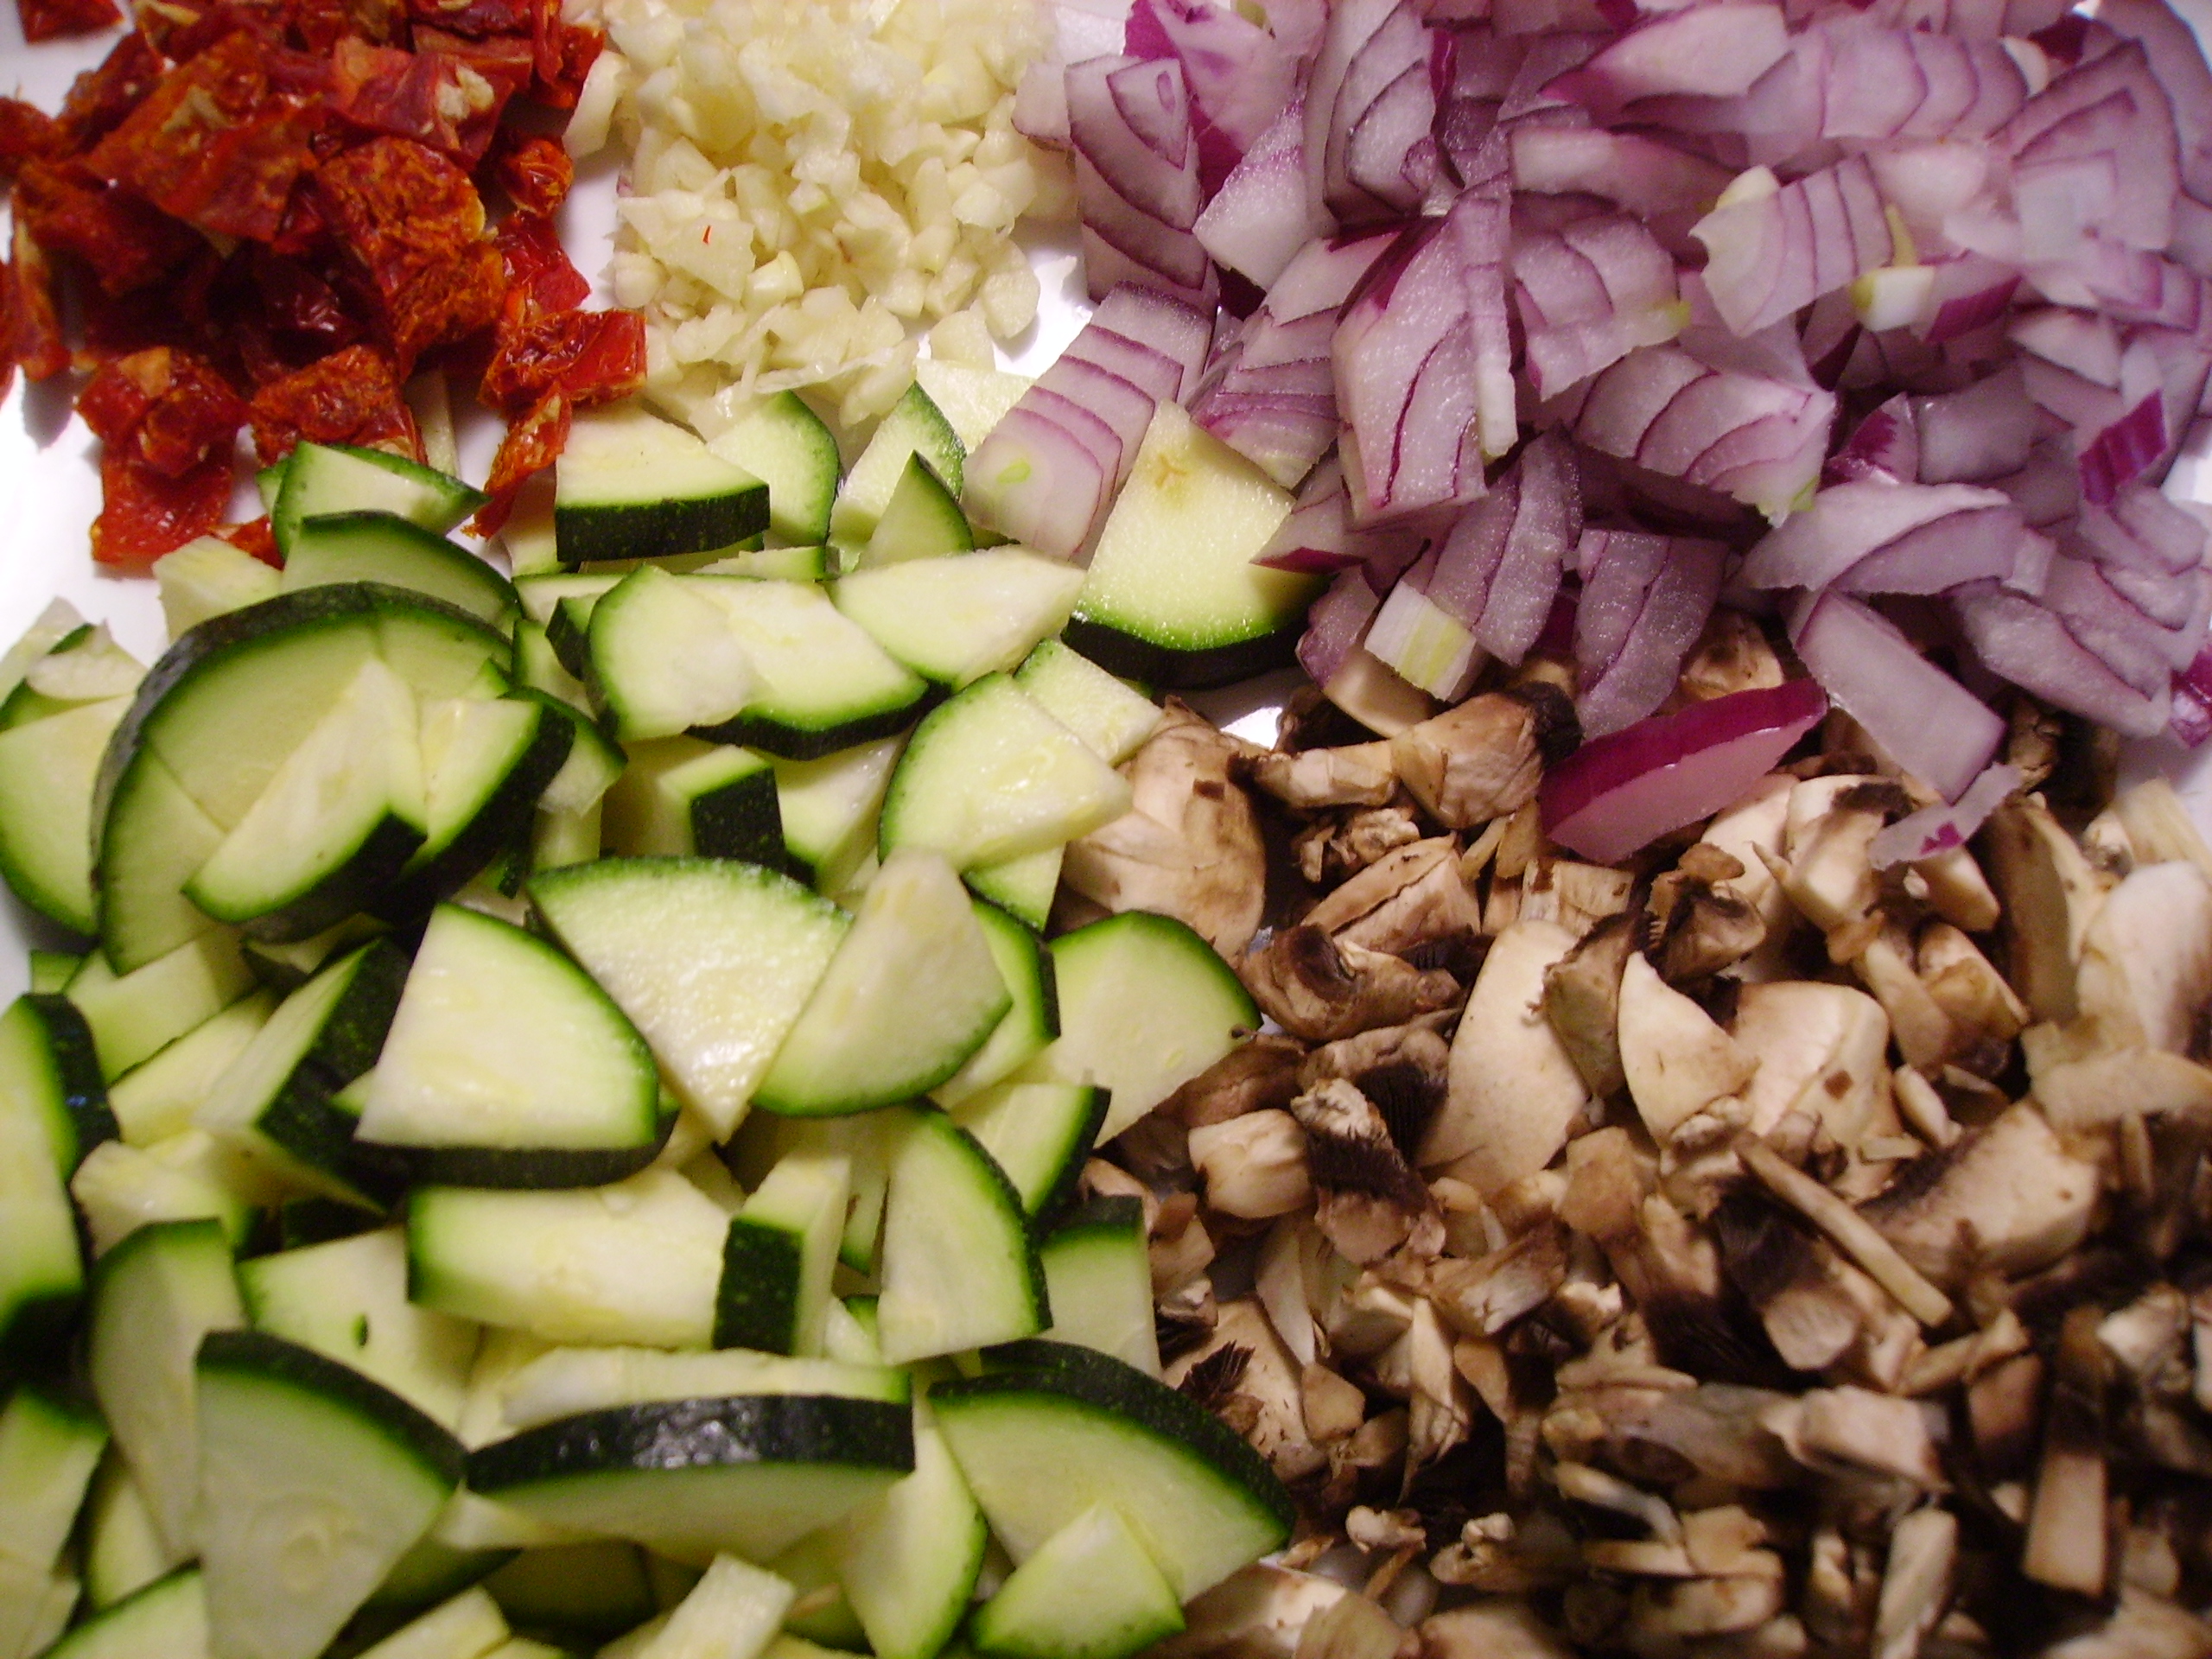
Rice is the traditional ingredient in stuffed peppers and I decided it was  a tradition that I liked, so Brown Rice cooked in some of my Vegetable Stock and was ready to join the players.DIGITAL CAMERAThe gathering was almost complete. There is usually a tomato sauce component to most stuffed peppers and a further search of the freezer turned up a small container of Marinara Sauce. Again, too little for a major role, but just enough to top the peppers once they were stuffed.

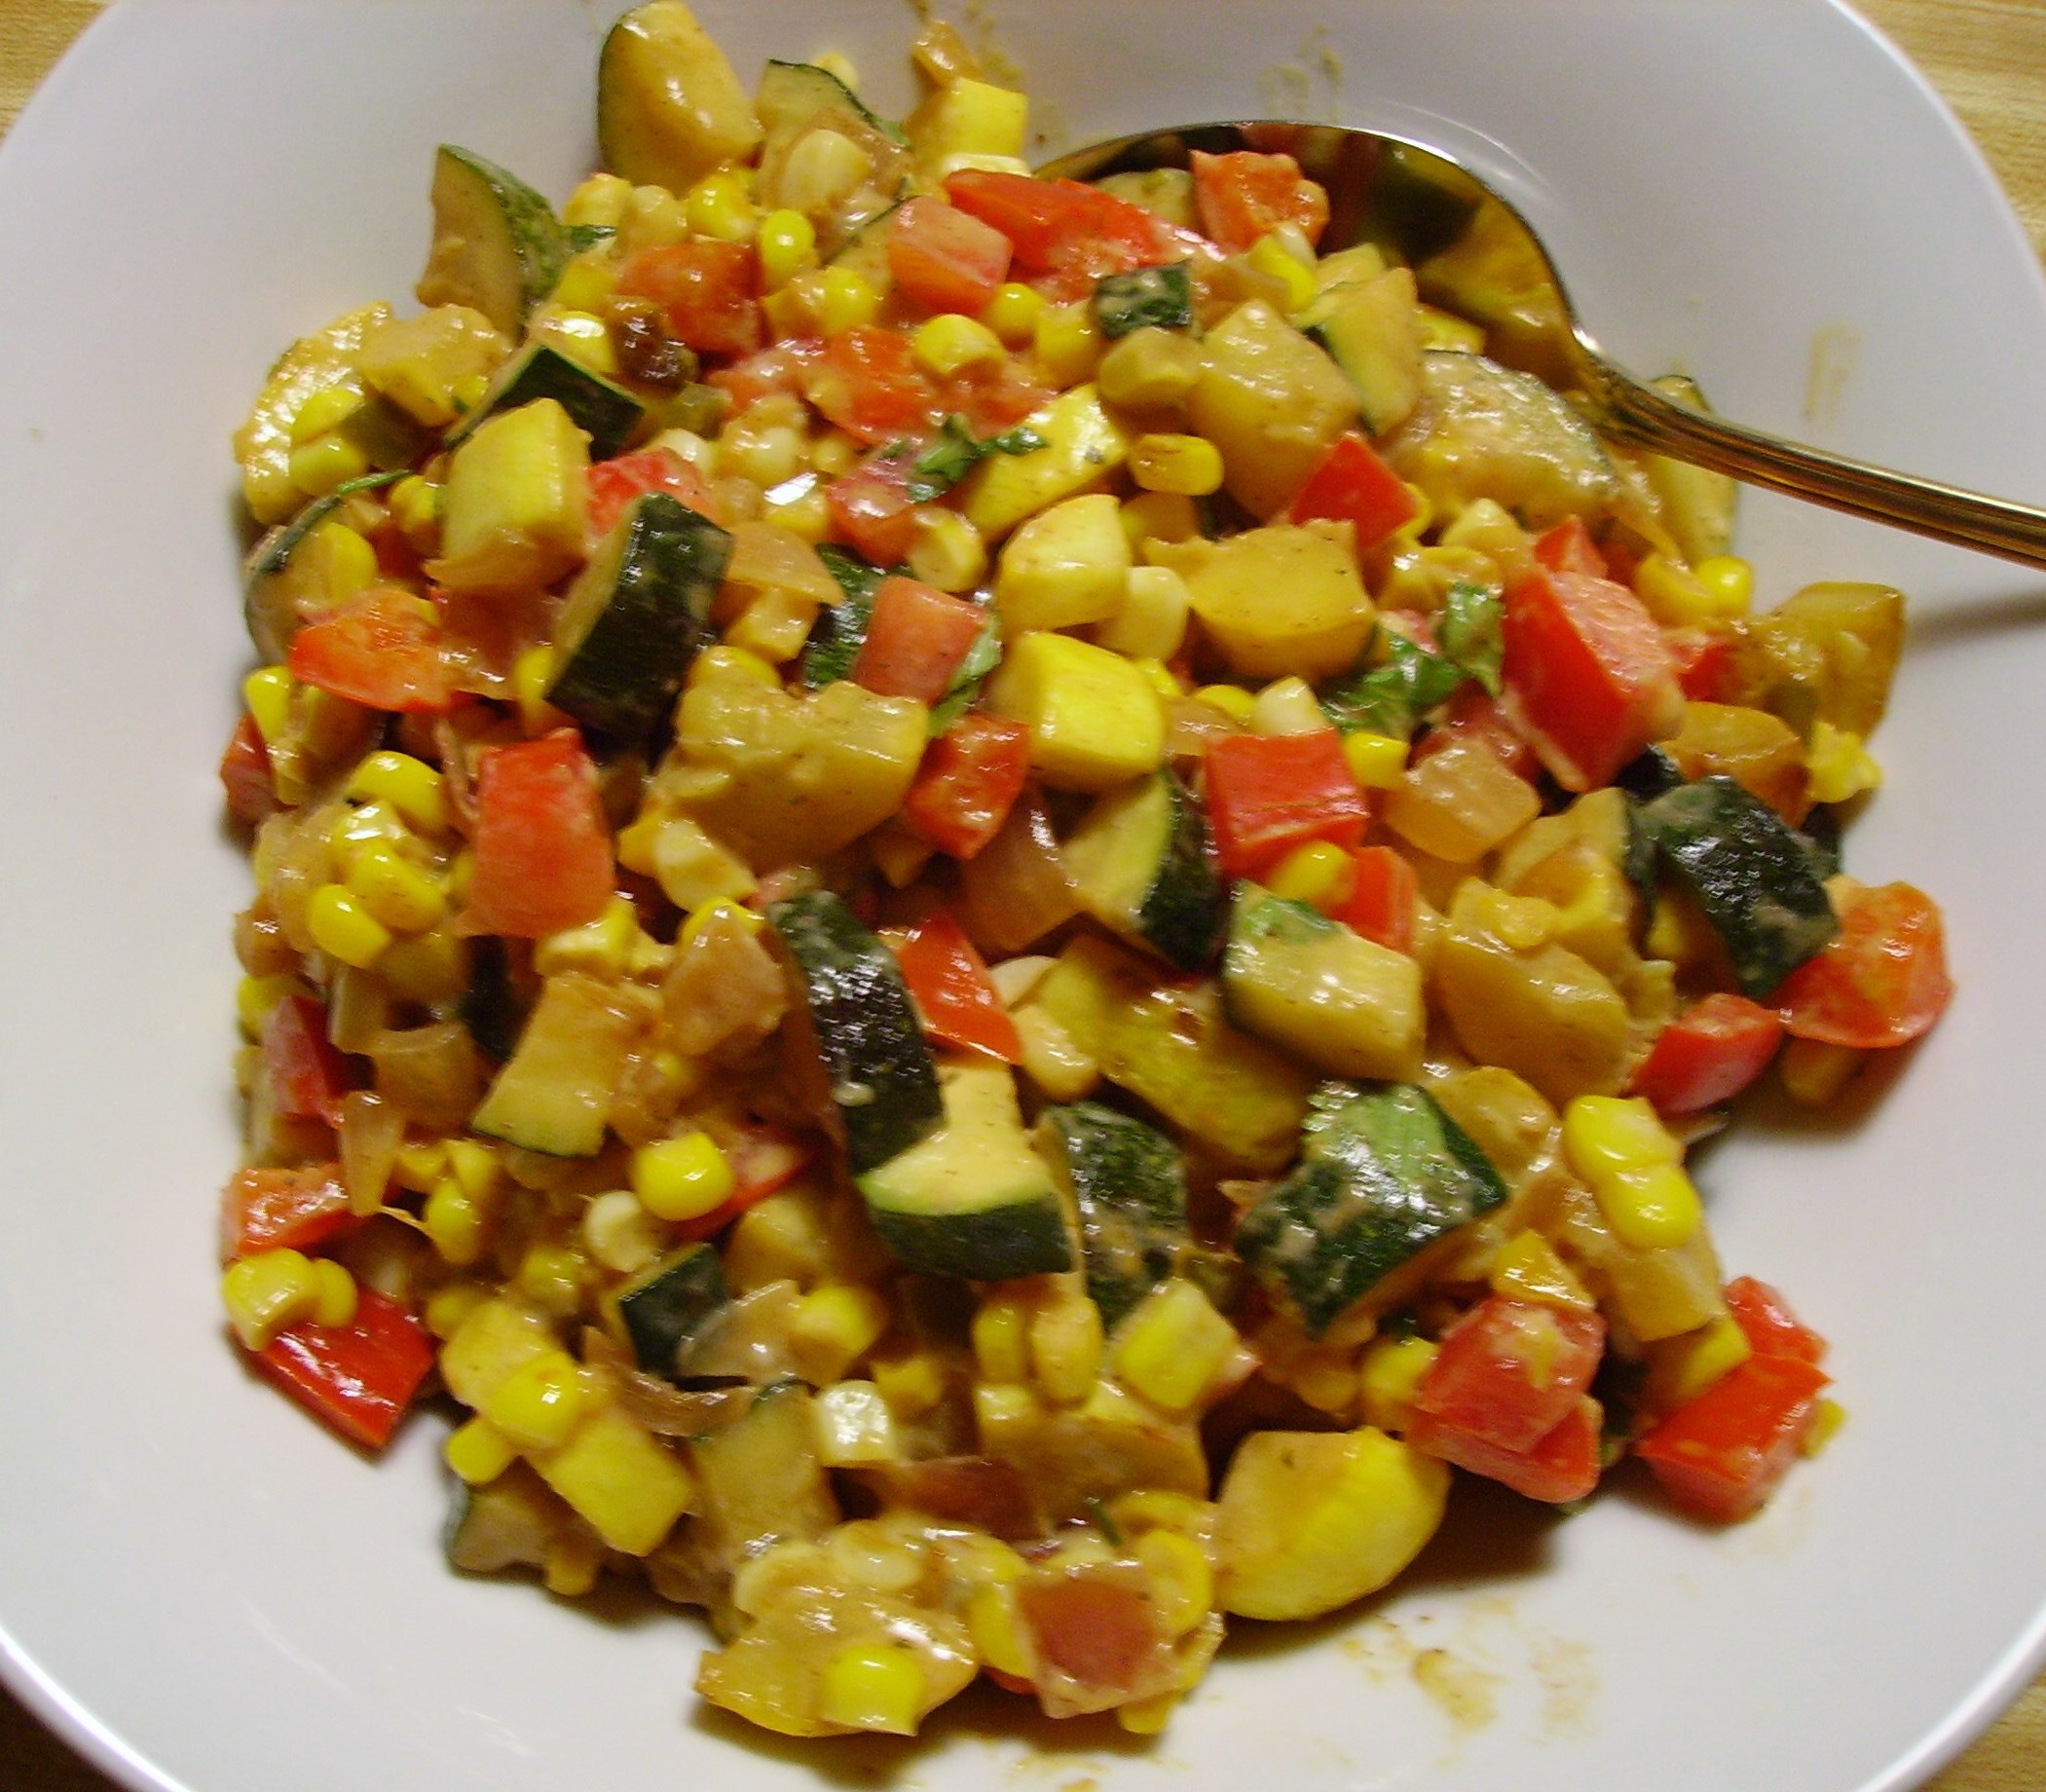
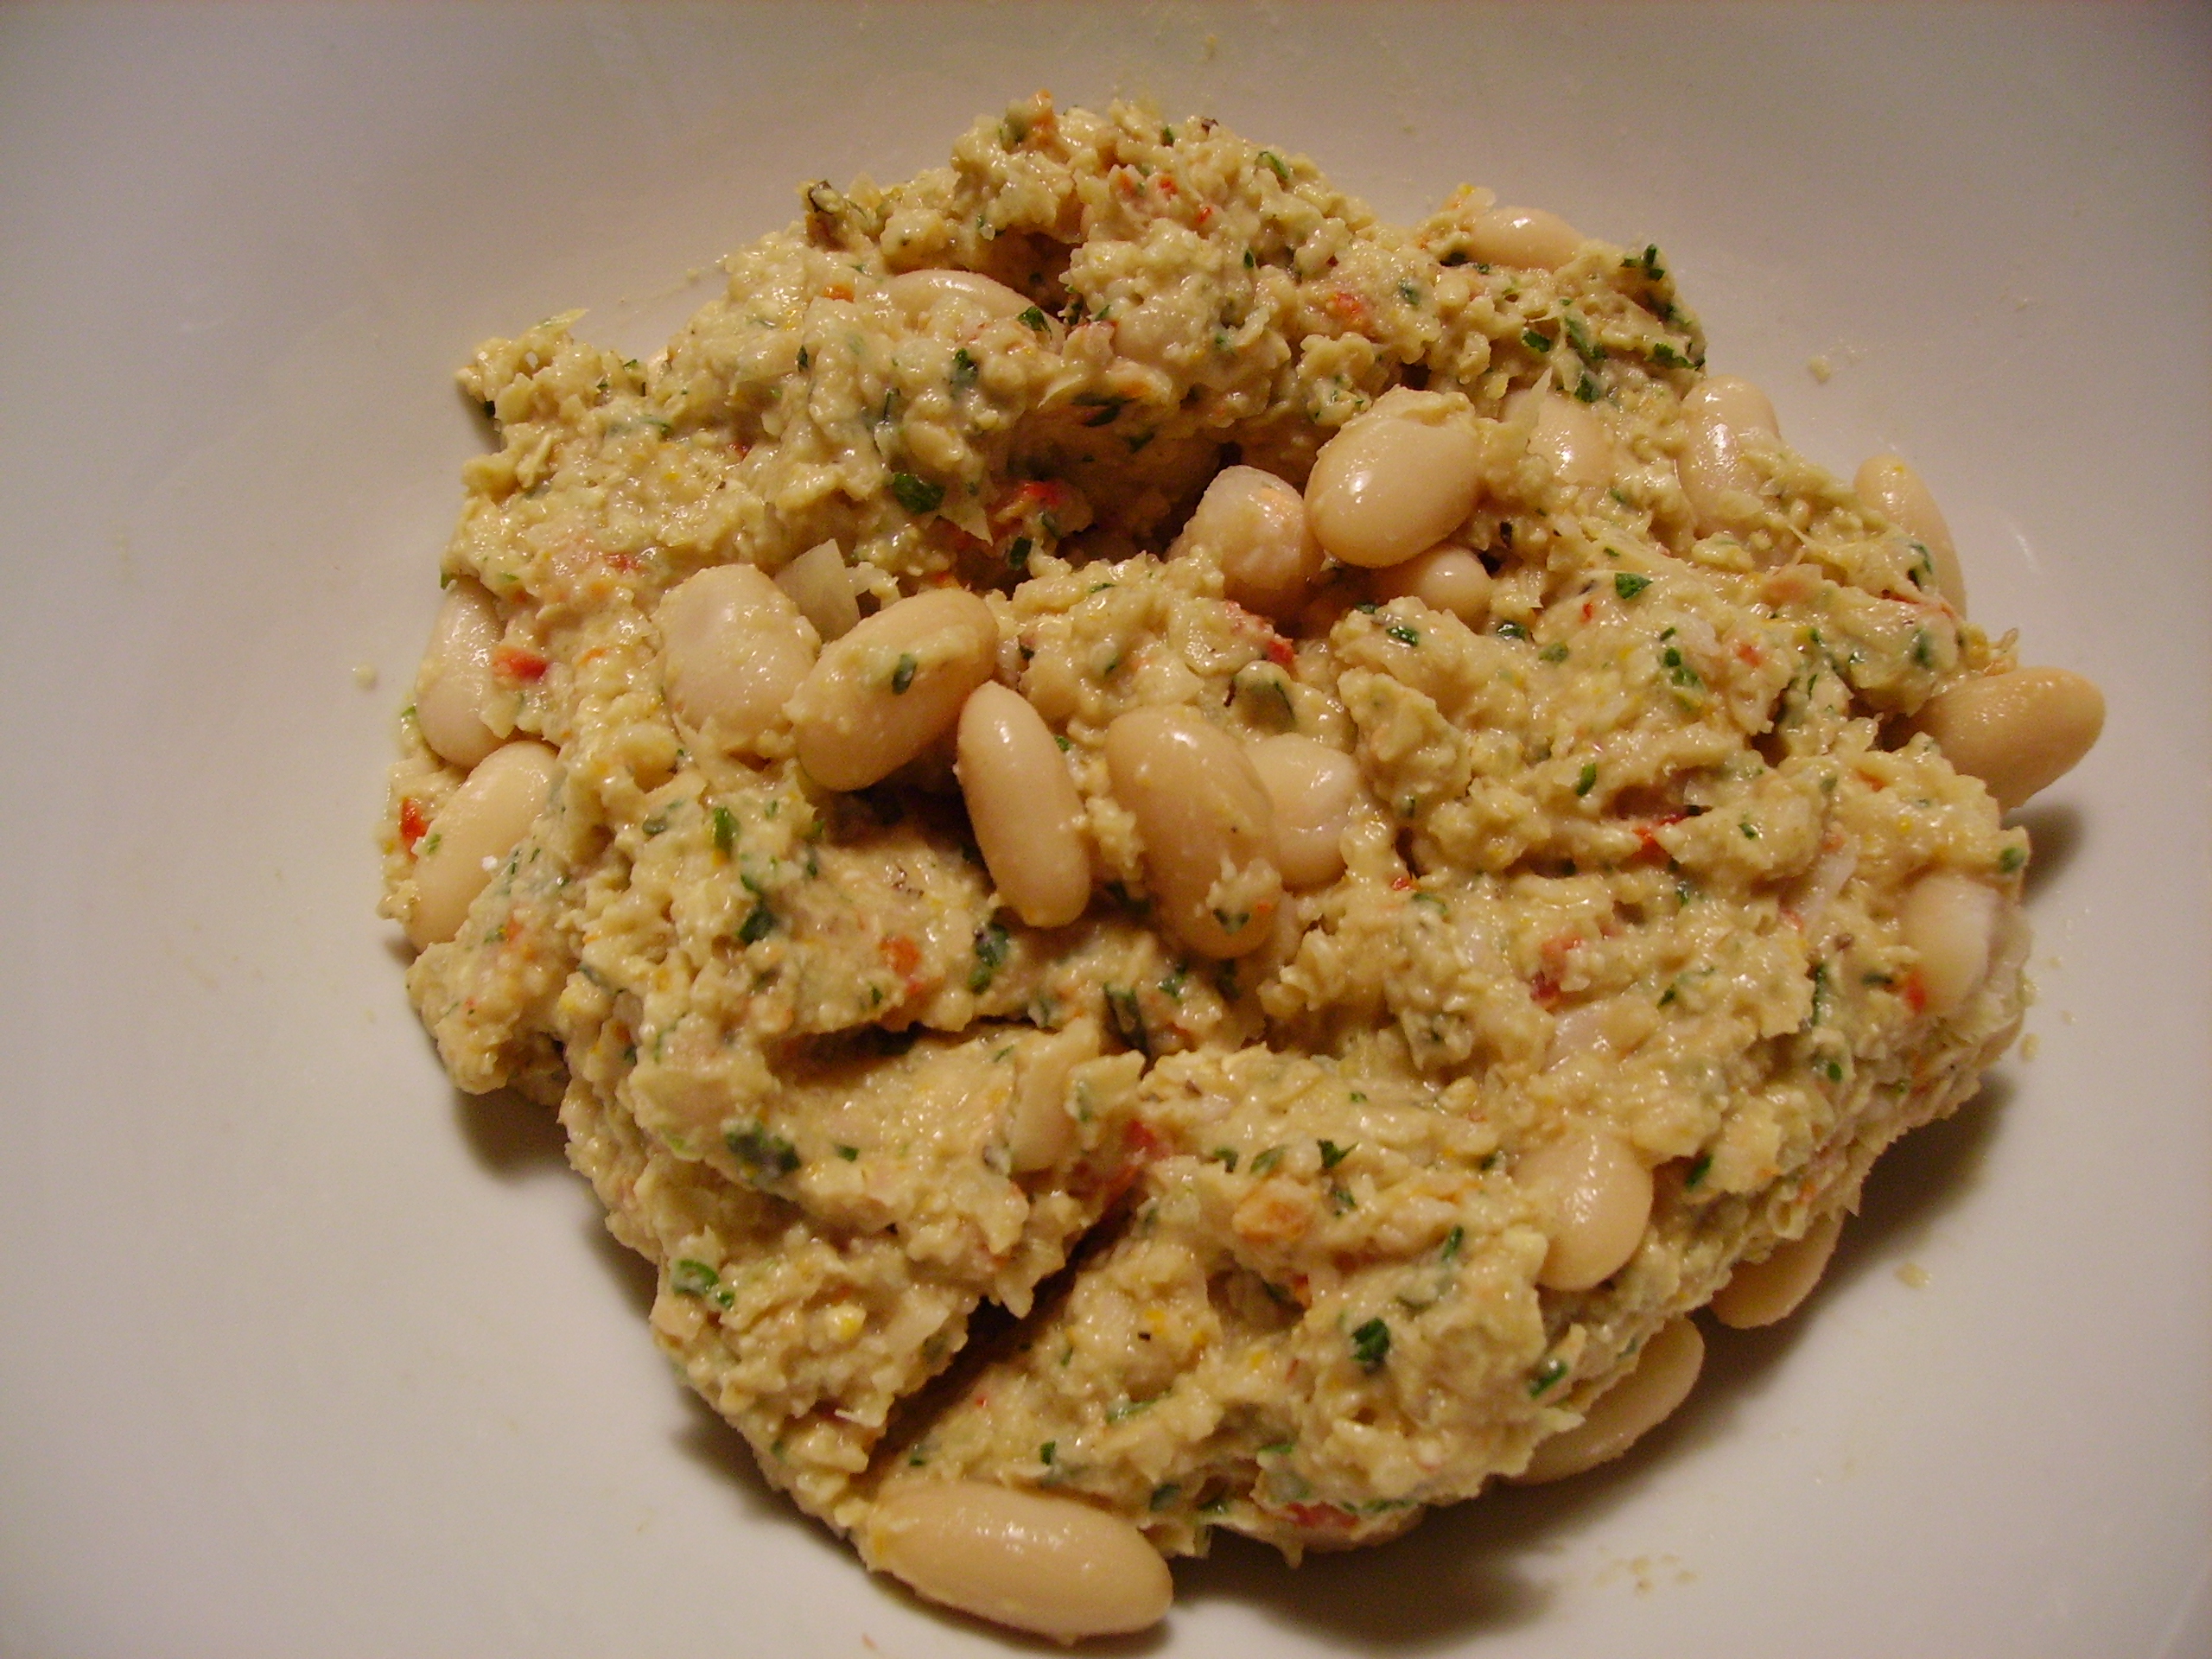
I sautéed the onions, mushrooms, zucchini, and garlic in a little olive oil before I added them to the rice and meatloaf. I raided my garden herbs and added a generous handful to the bowl.DIGITAL CAMERA
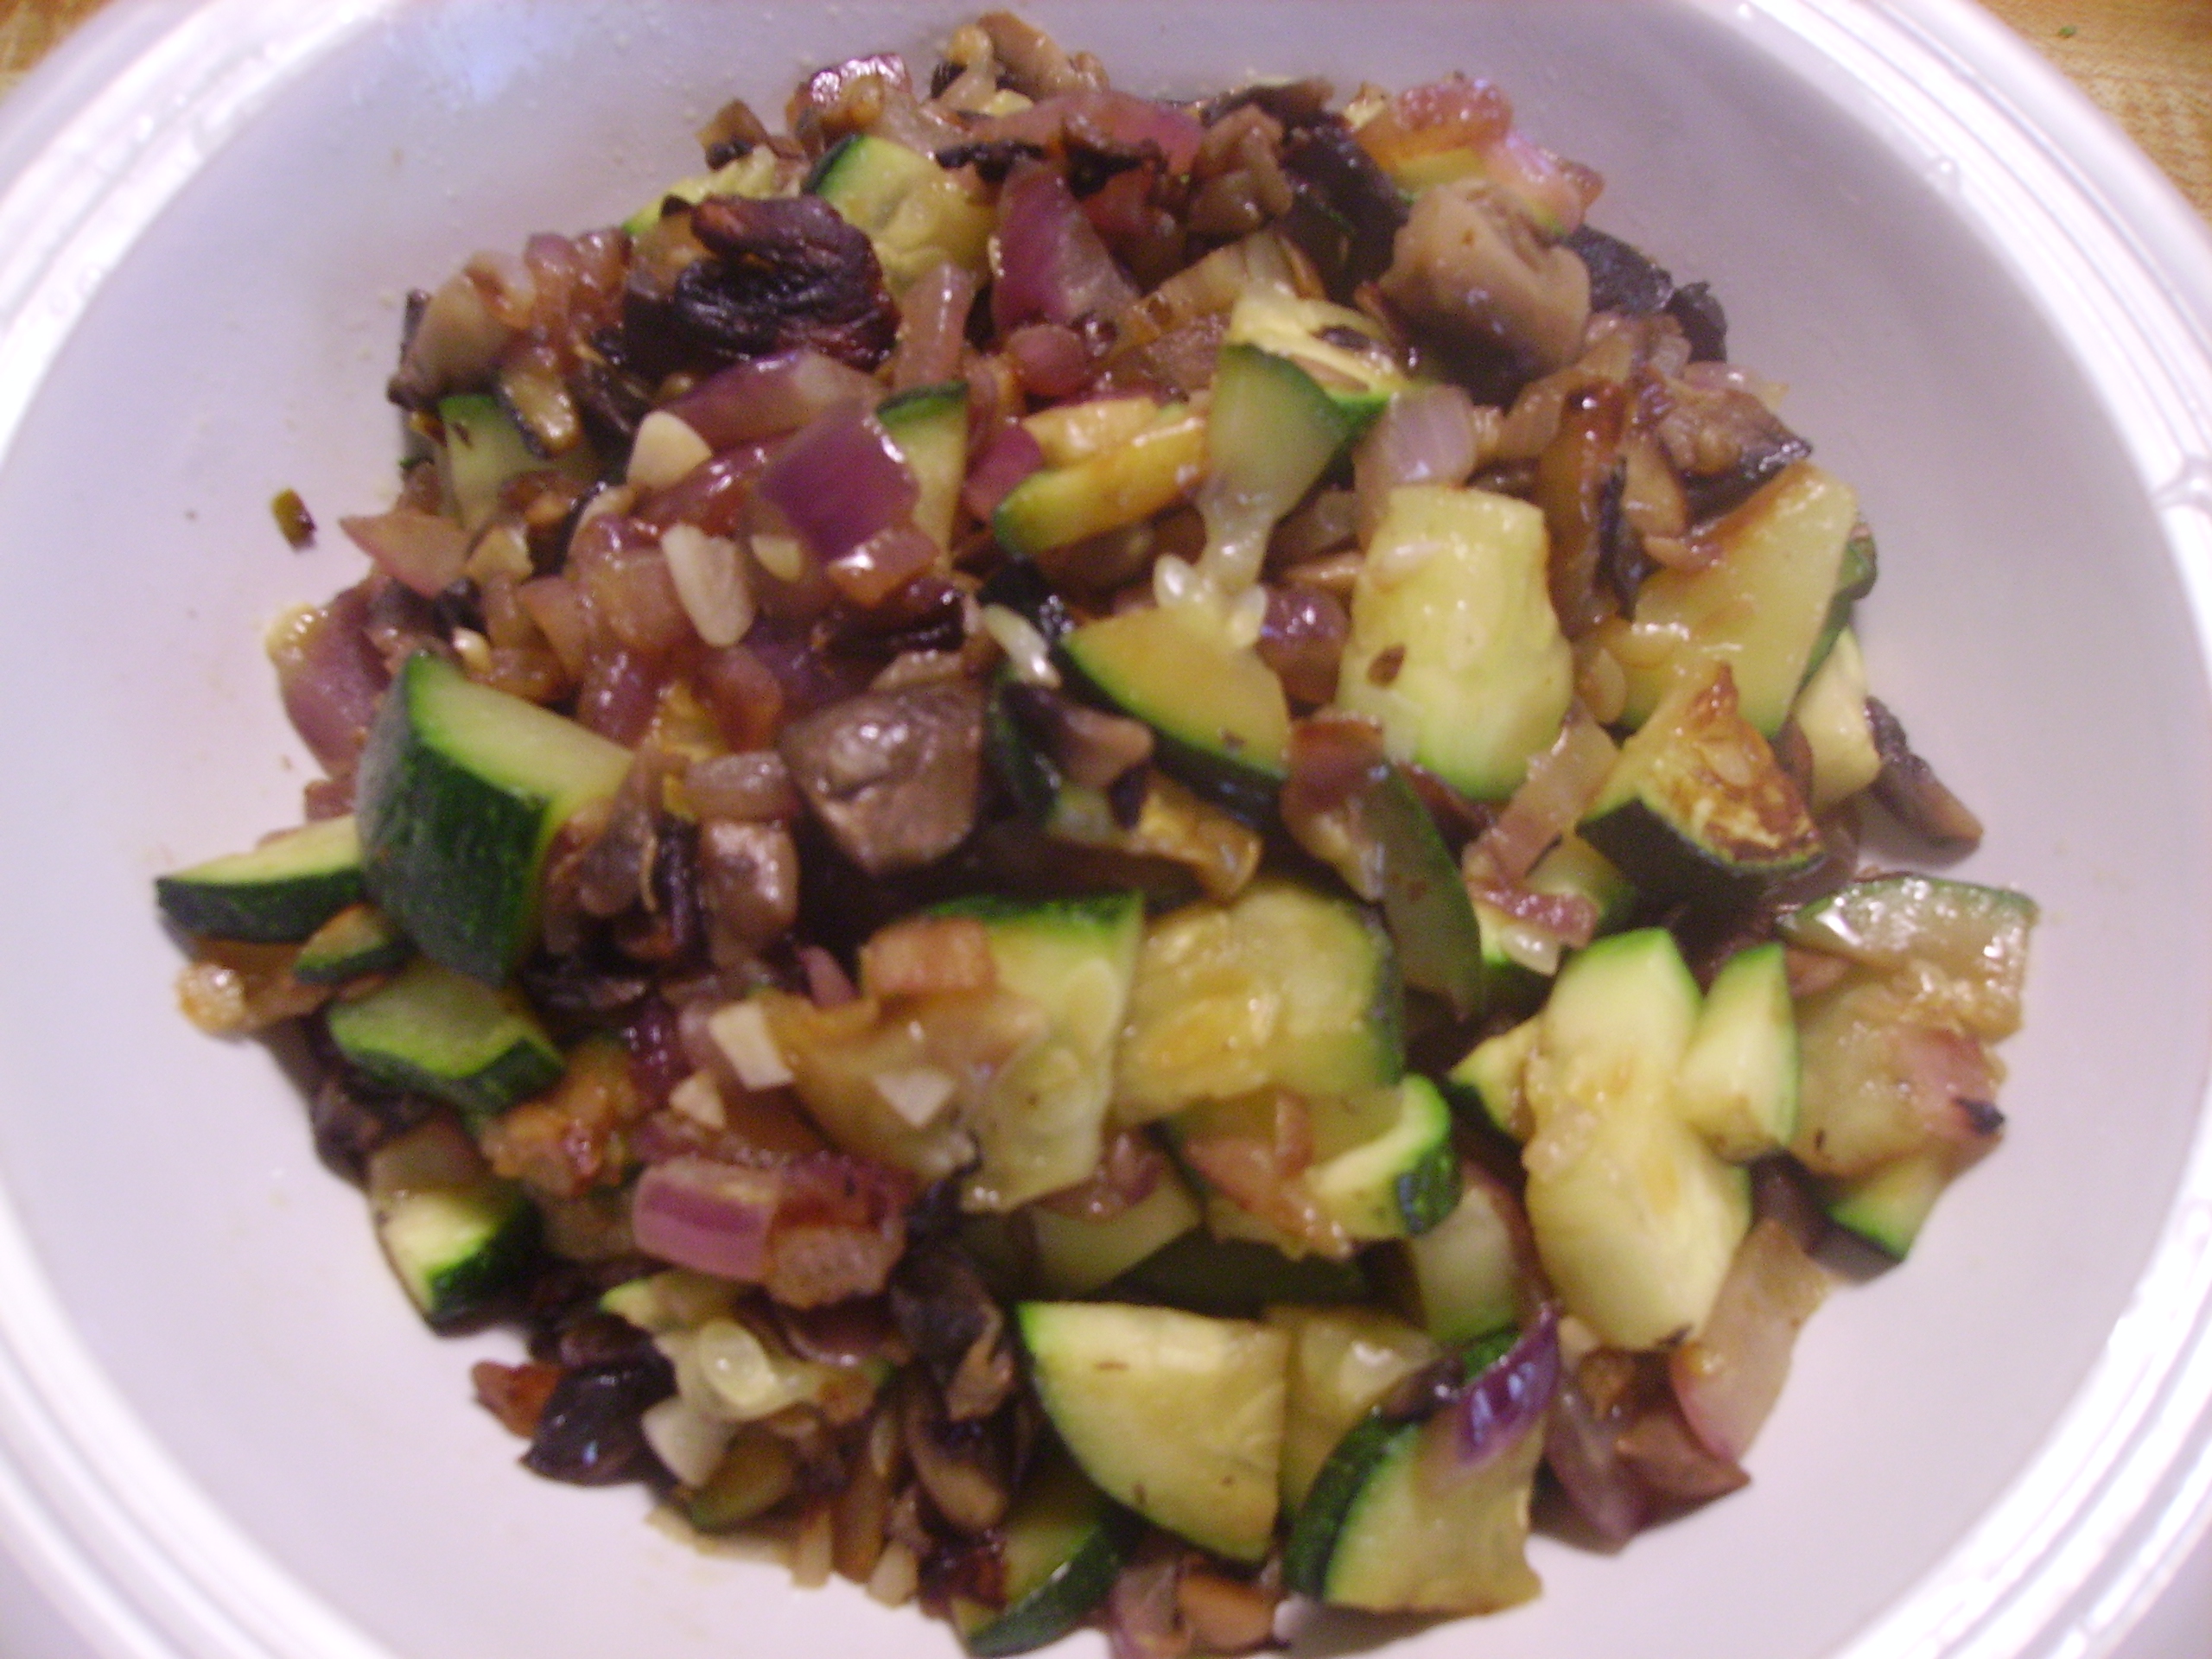
The sun-dried tomatoes were the dry kind so they were just snipped and added to the mixture. I moistened everything with more Vegetable Stock and let it sit in the refrigerator for several hours. An added bonus as the mixture got happy in the frig, the tomatoes plumped up and became tender and juicy.DIGITAL CAMERA
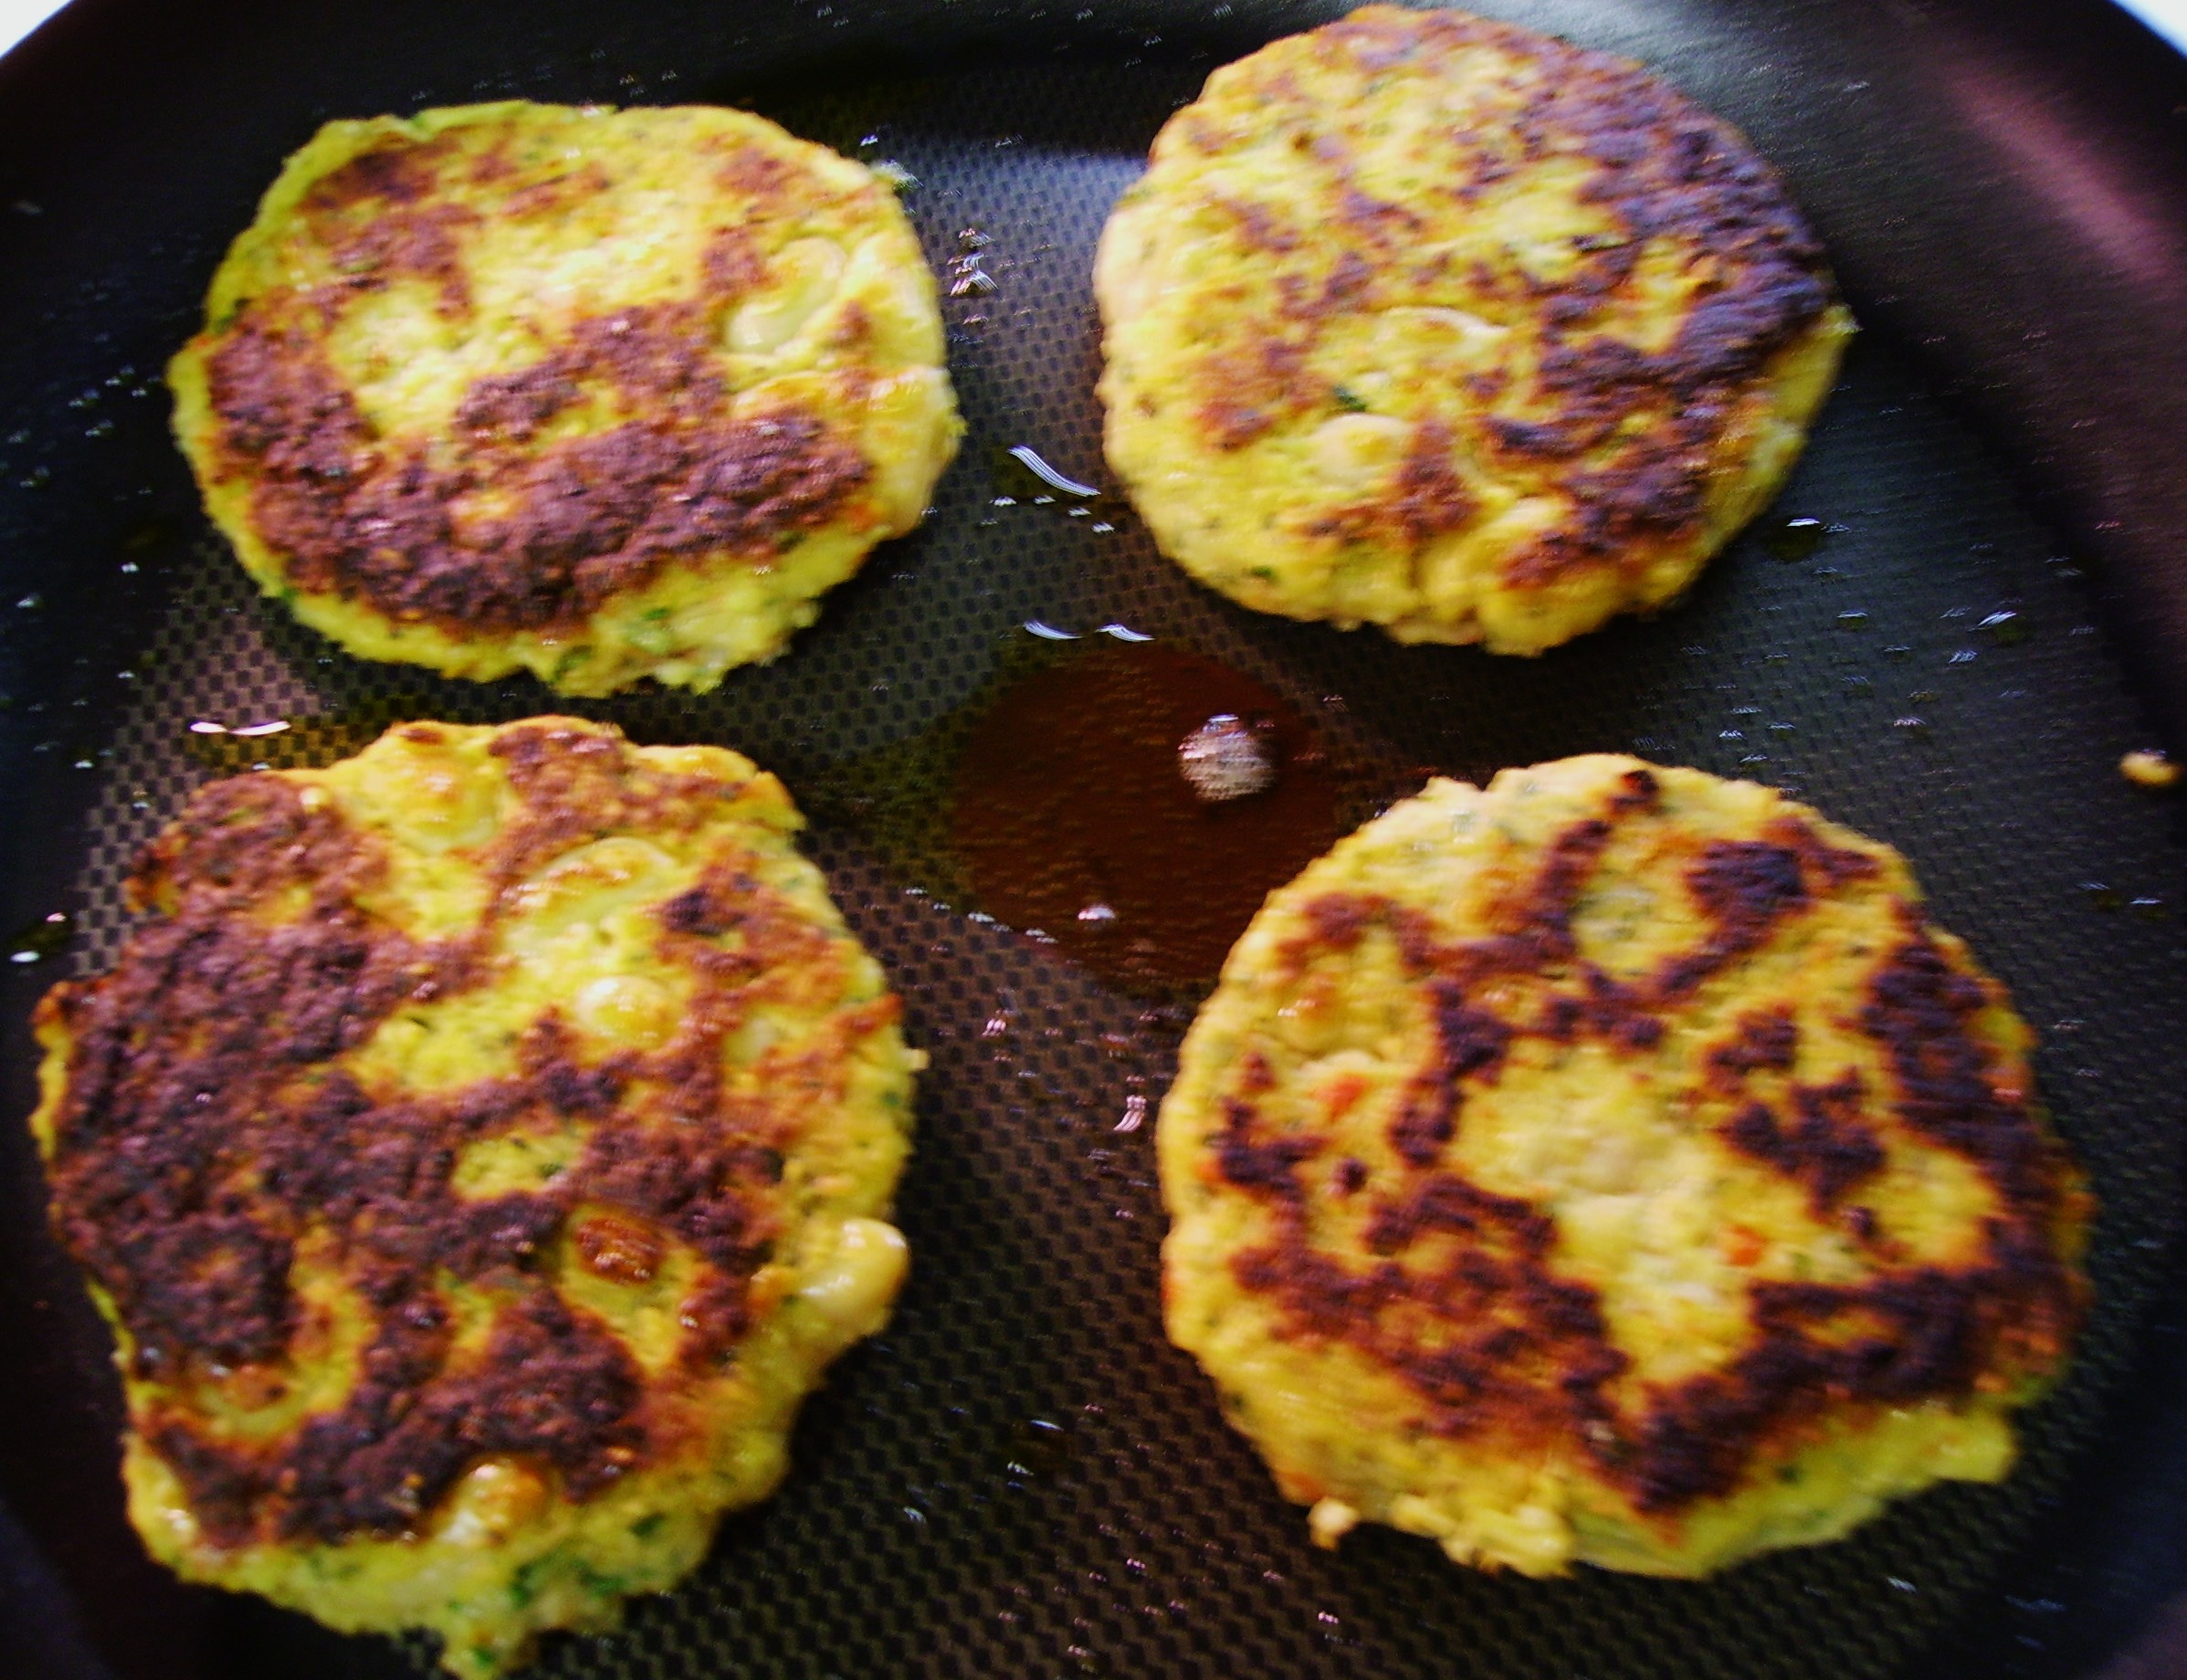
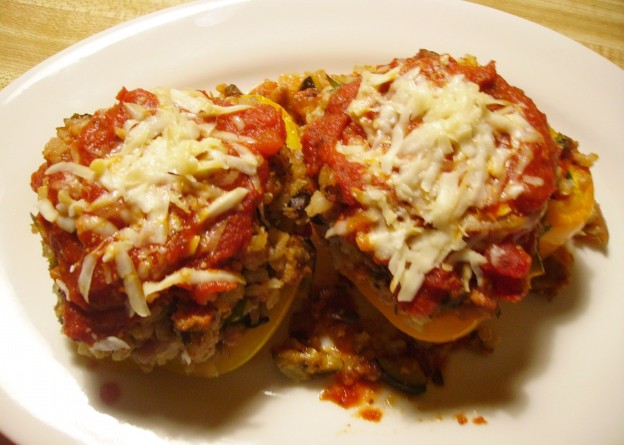
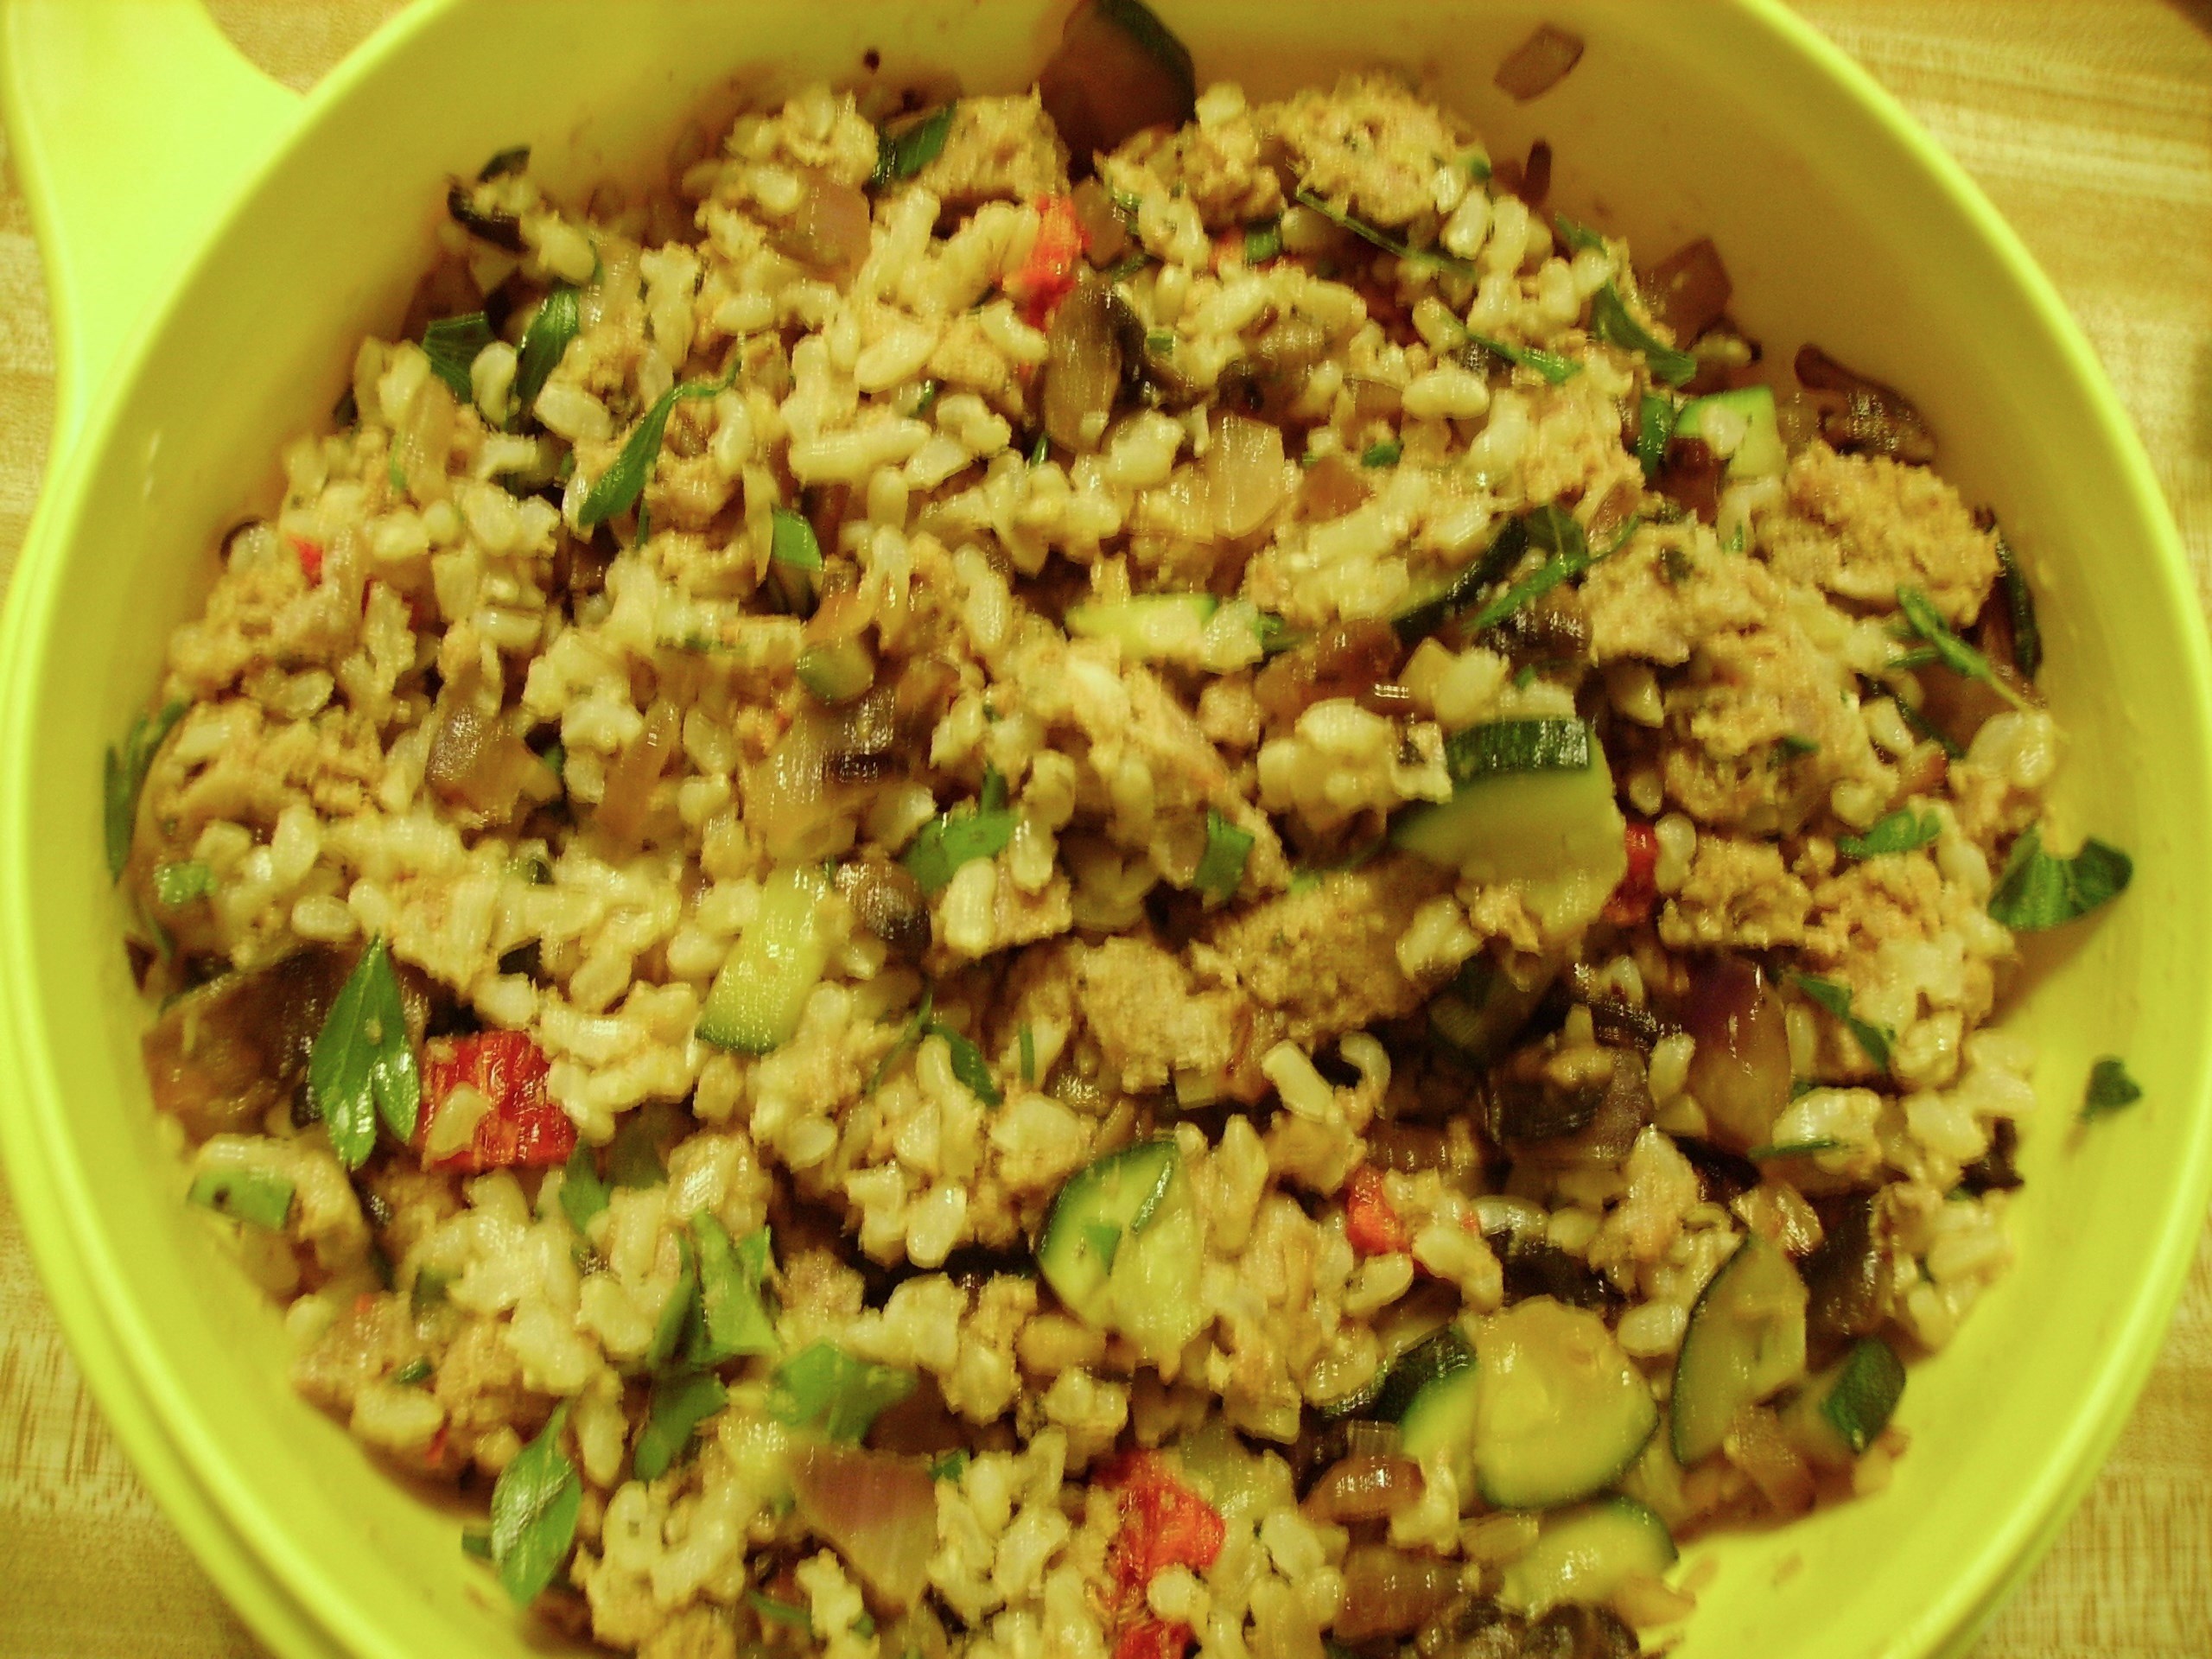
Finally, it was time to stuff the peppers. I opted to cut them in half lengthwise to make four pepper boats. I filled them liberally since I had a lot of filling and liberally is how I roll. I topped them with some of the tomato sauce, covered them with foil and baked them for about 35 minutes.DIGITAL CAMERA
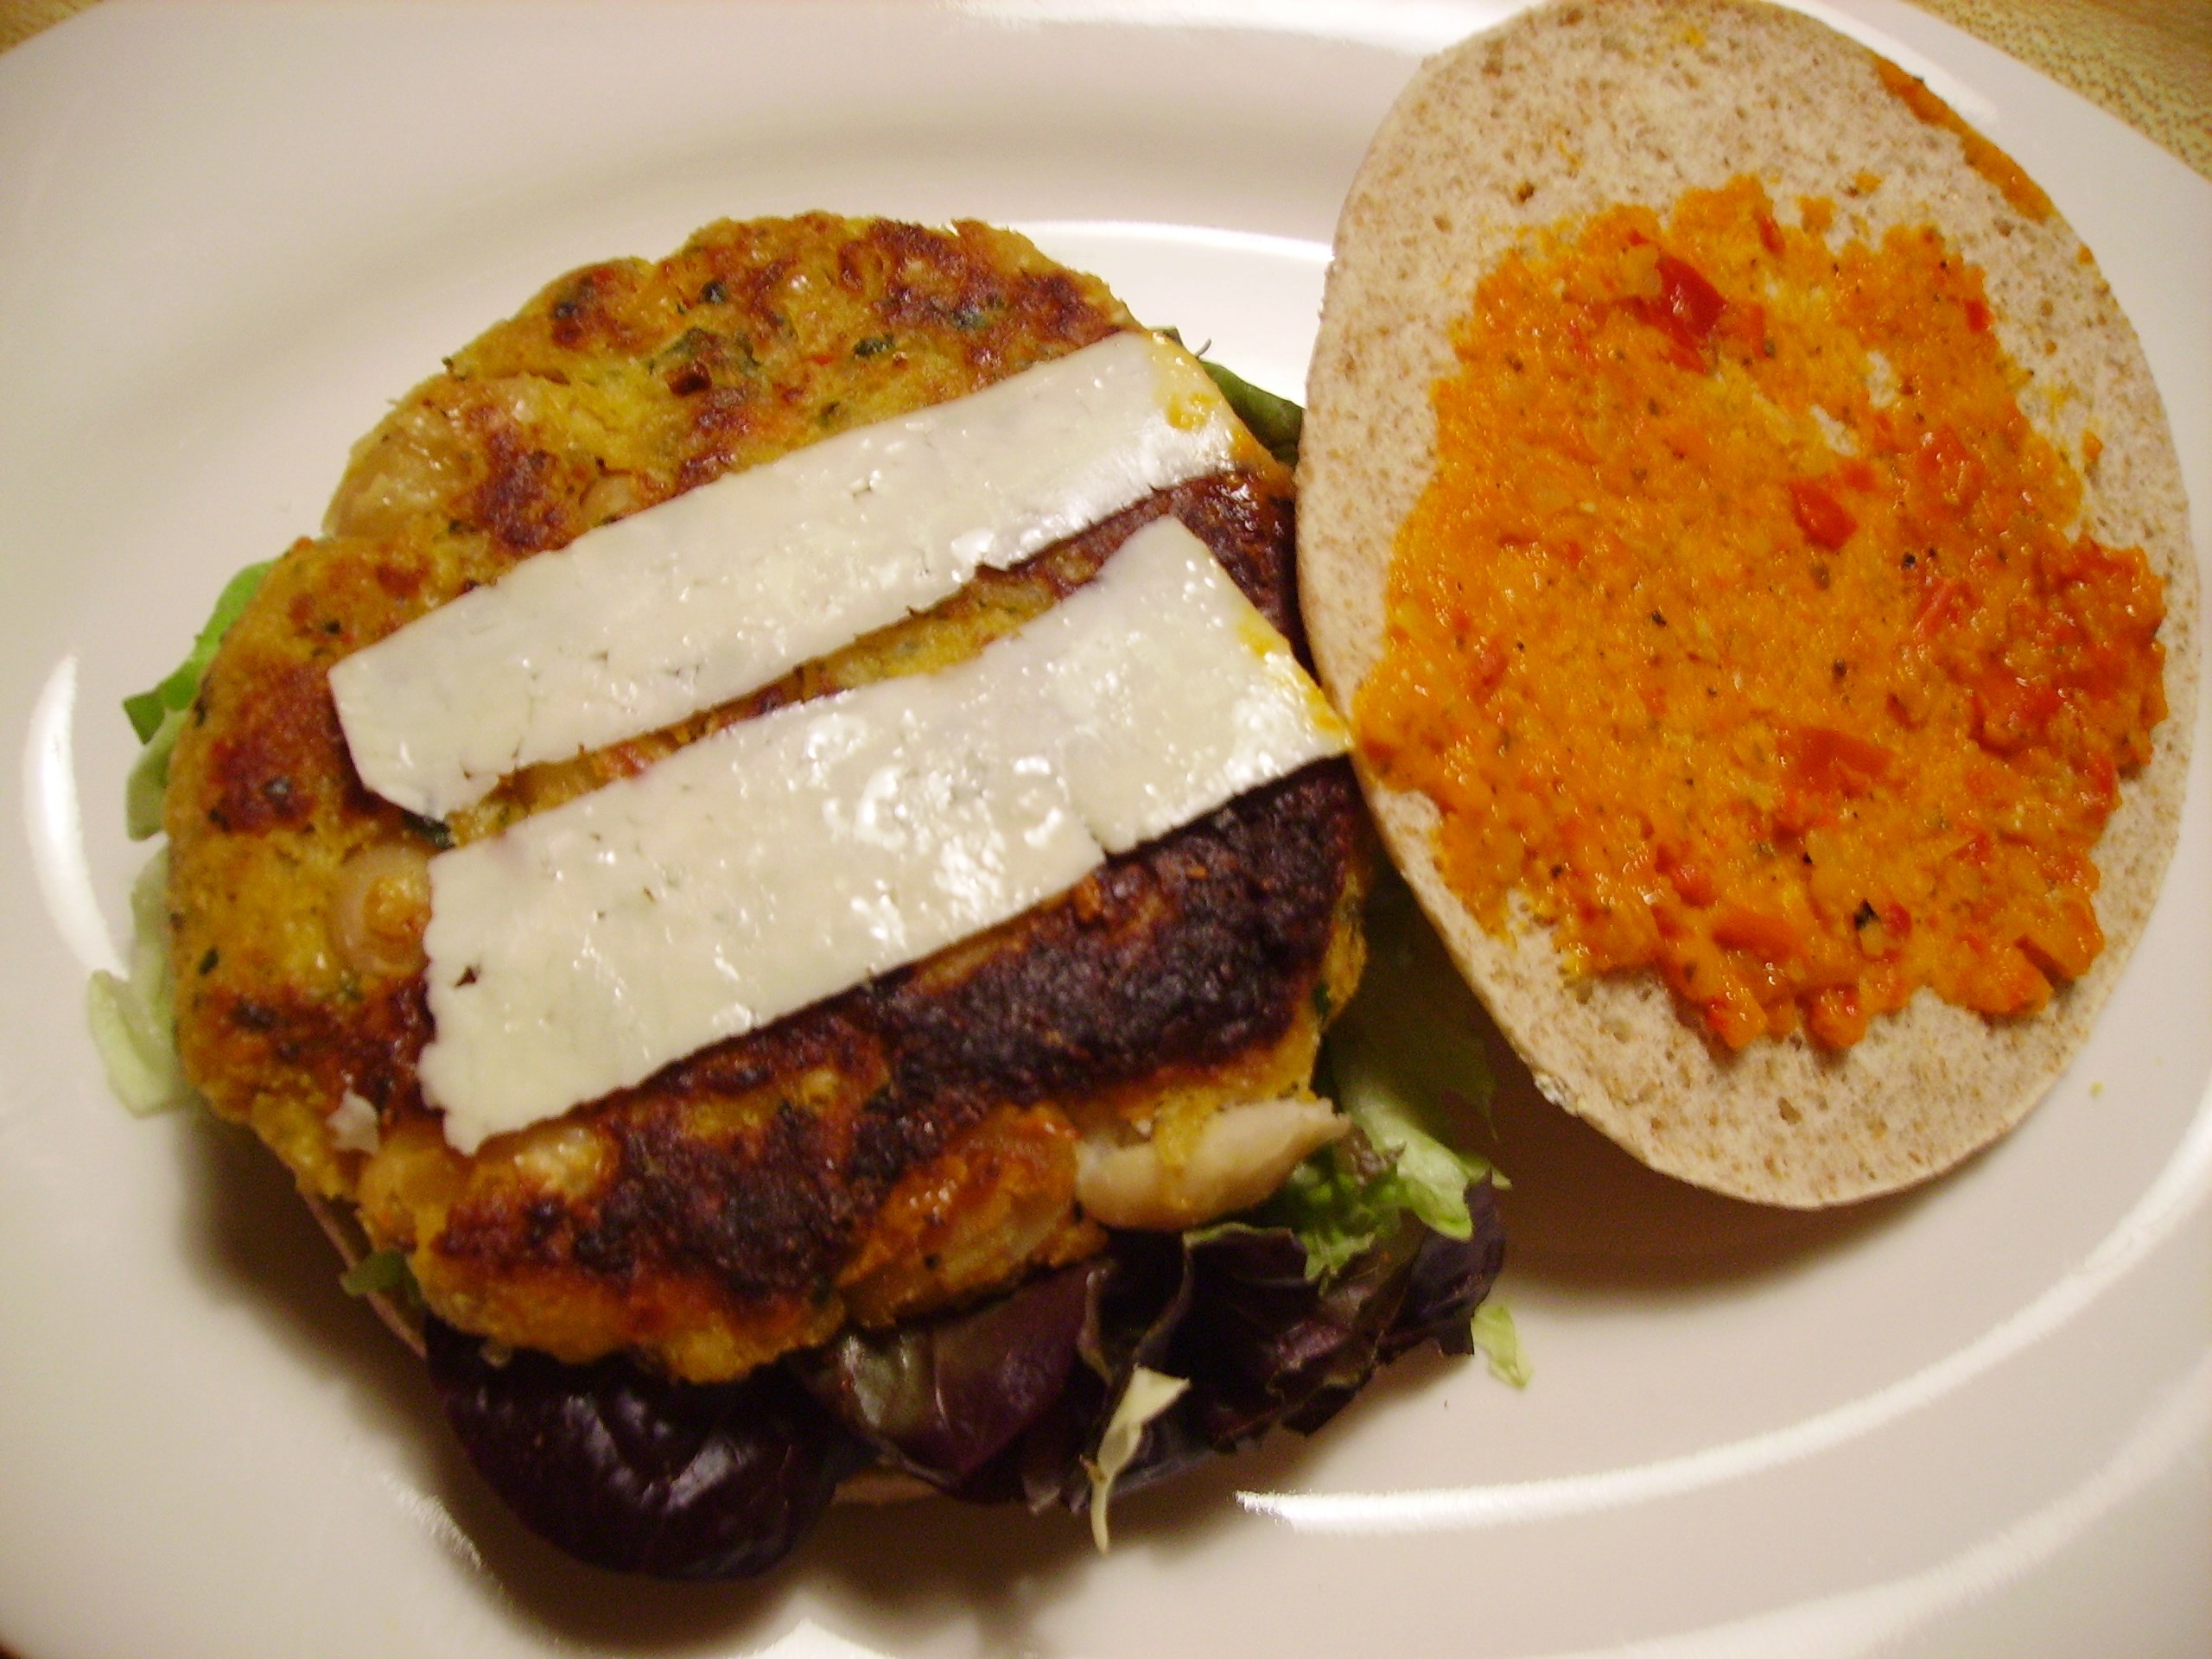
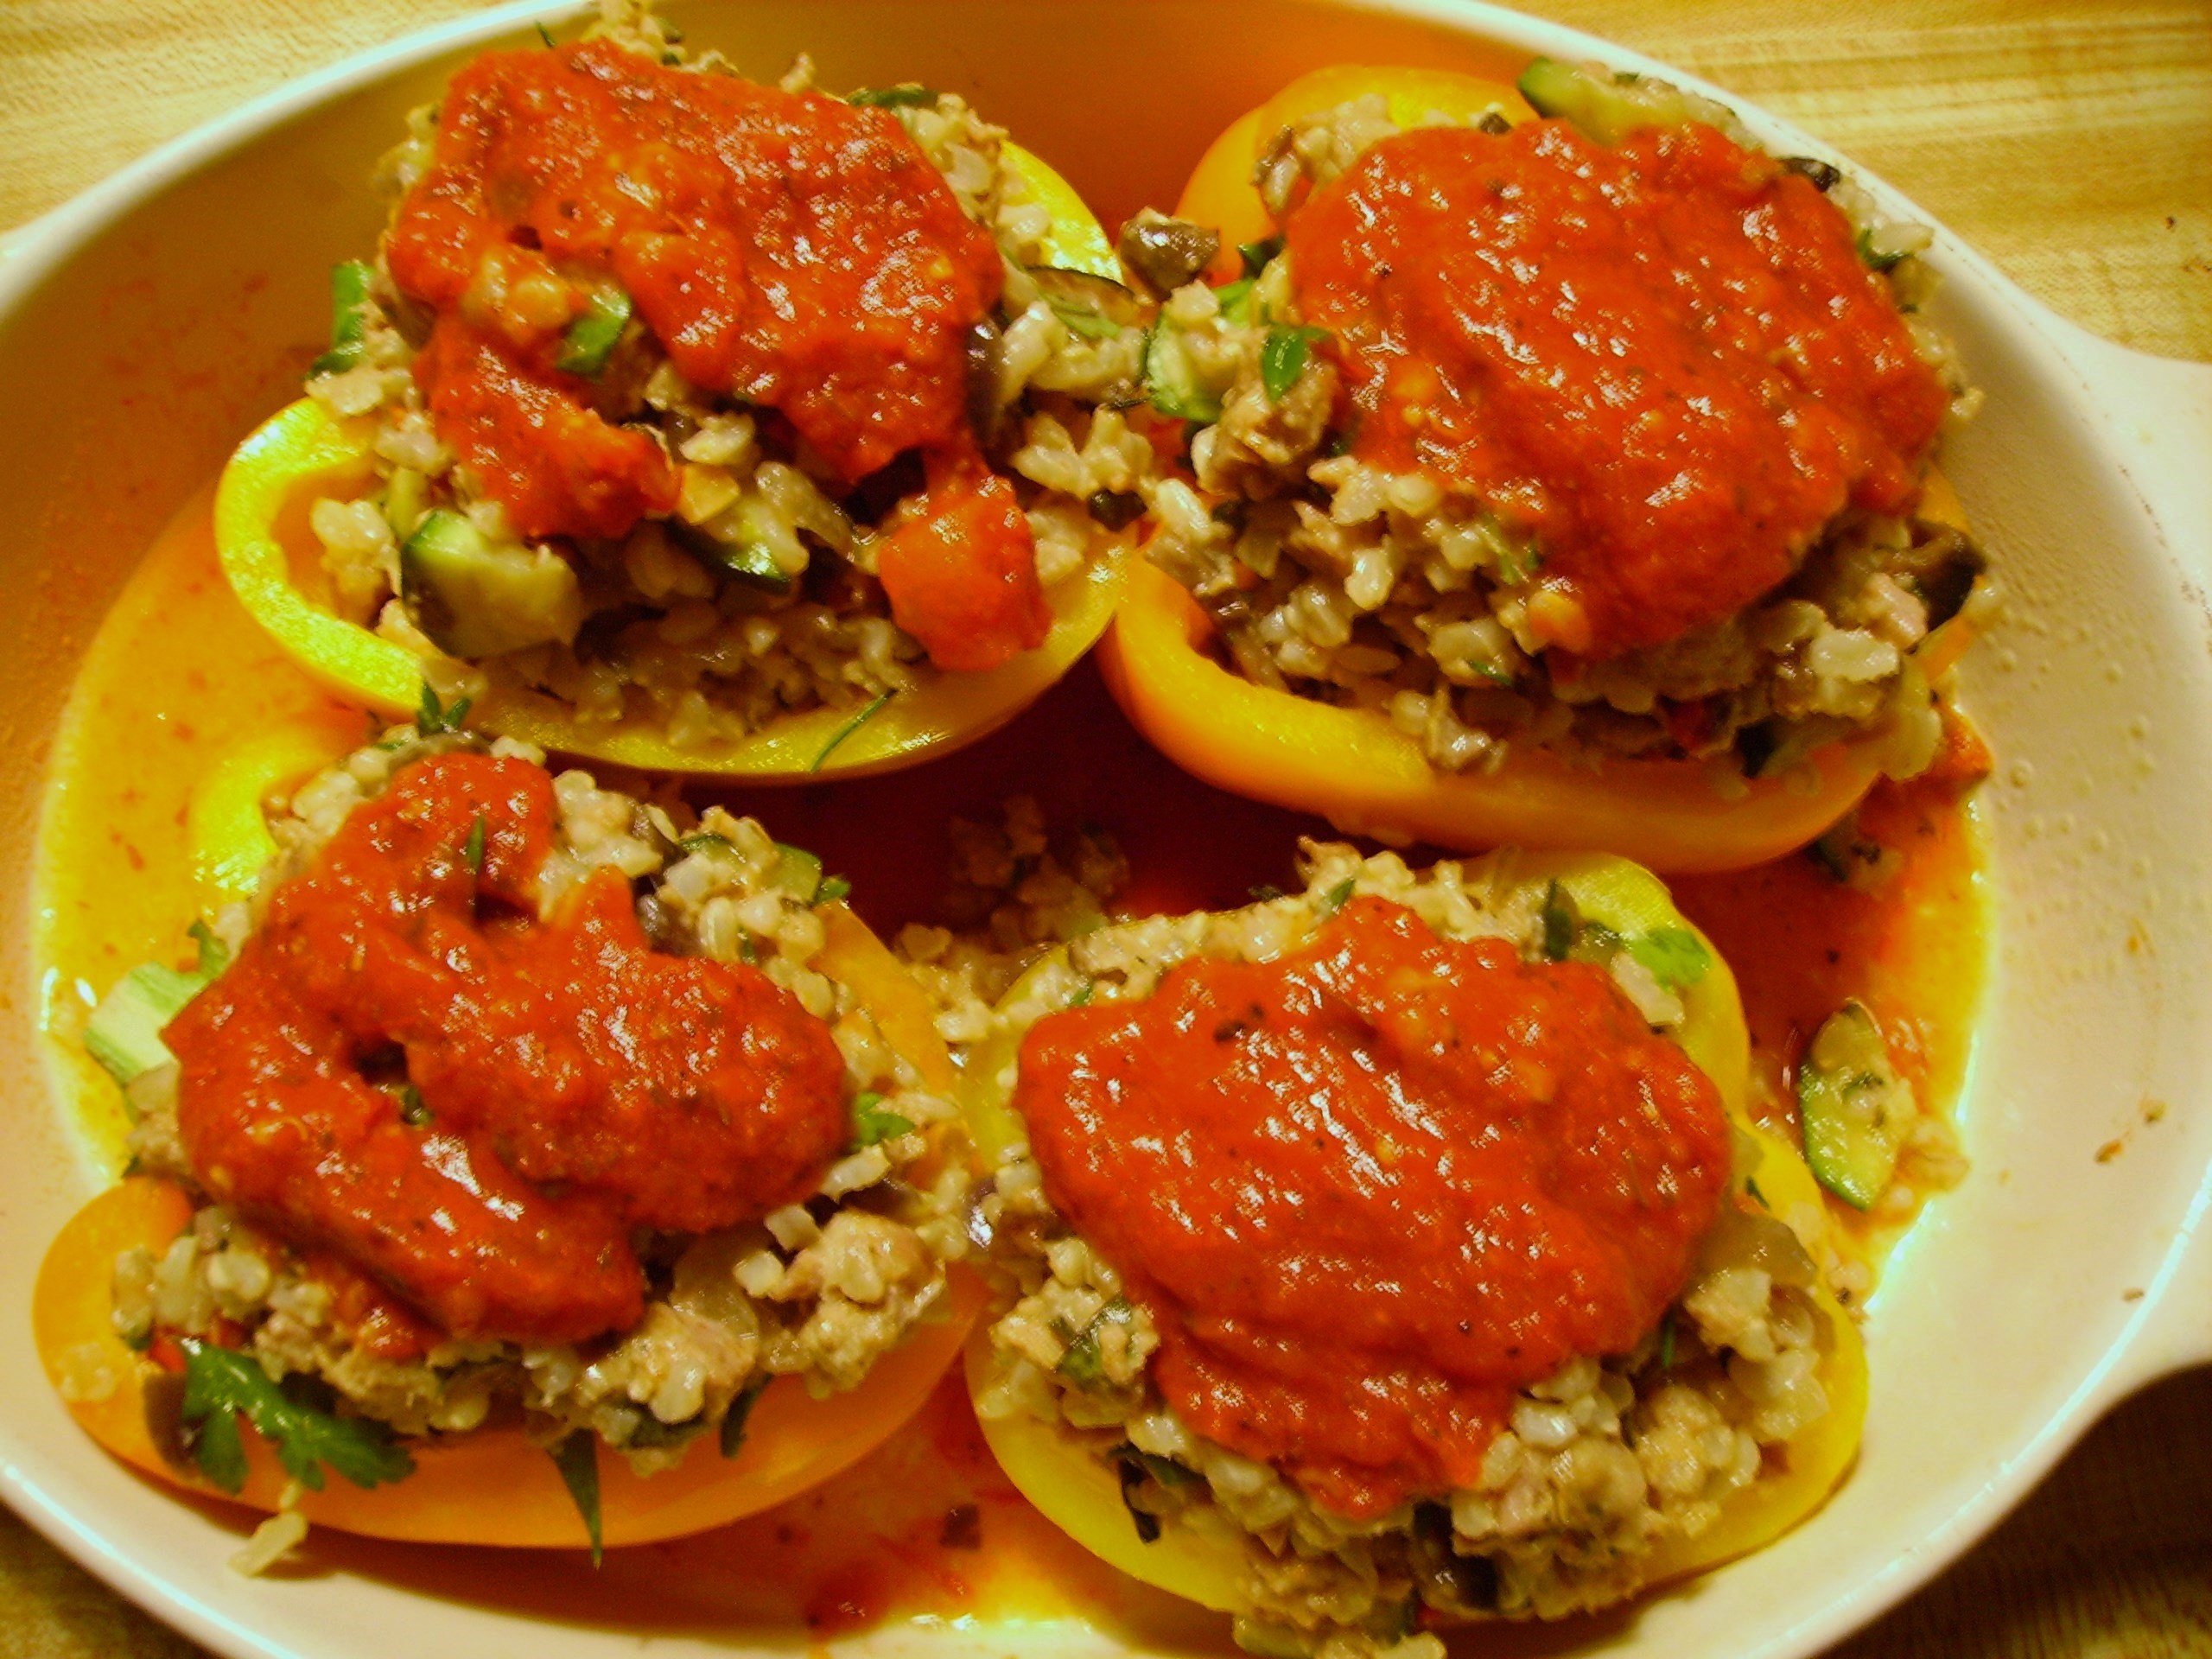
I removed the foil and added some Romano Cheese. A few more minutes in the oven and they were ready to enjoy.DIGITAL CAMERA
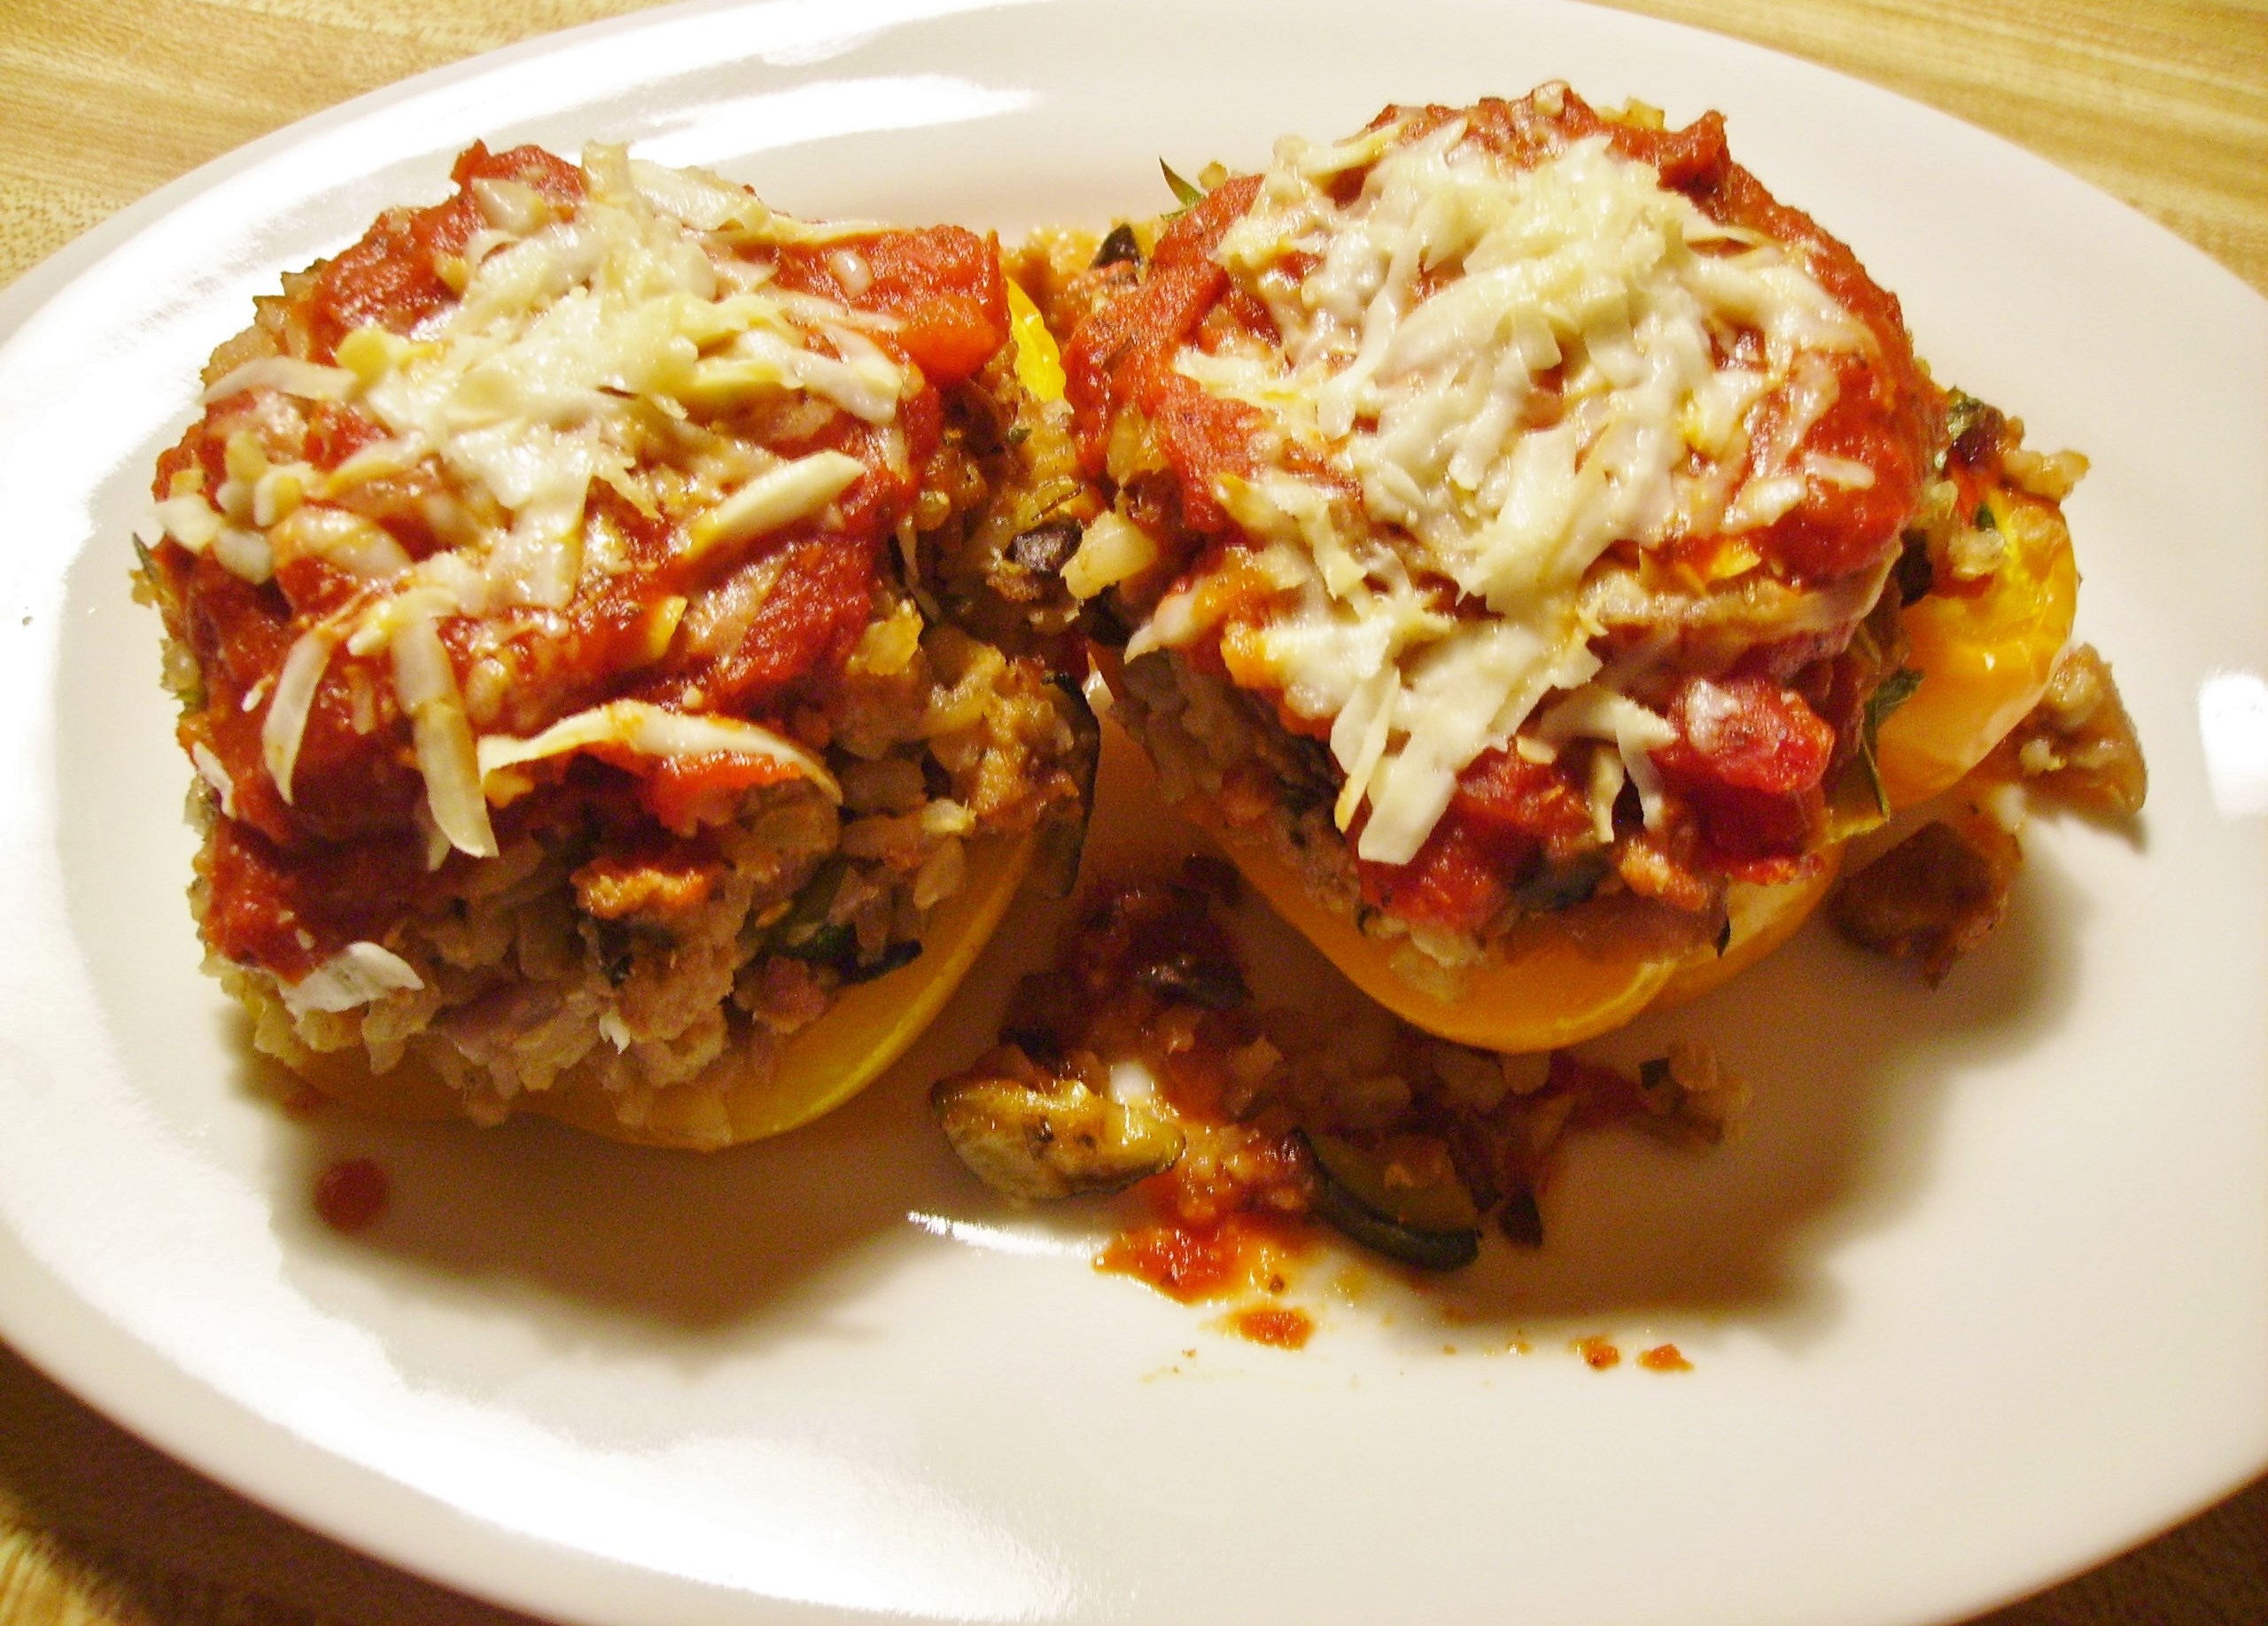
They were delicious and a perfect meal for an evening that strongly hinted of Fall. They were a far cry from the 50’s stuffed peppers my mother made and a welcome addition to Mama D’s recipe collection.

Stuffed Peppers
Print Recipe
Servings
4
Servings
4
Stuffed Peppers
Print Recipe
Servings
4
Servings
4
Ingredients
Servings:
Instructions
  1. Heat the 1-3/4 cups of vegetable stock to boiling in a small sauce pan. Add the rice and stir. Return to boil and cover. Reduce heat and simmer for 35 - 45 minutes. Stock should be absorbed and rice should be fairly tender. Cool slightly and place in a large bowl.
  2. Quarter the zucchini lengthwise and slice thinly. Coarsely chop onion and mushrooms. Set aside with the minced garlic.
  3. Heat a medium fry pan and add the olive oil. Swirl to cover the bottom of the pan. Add the onion and cook and stir for about 3 minutes. Add the mushrooms and cook and stir for 2 minutes more.
  4. Add the zucchini and garlic to the pan and cook for 4 minutes or so. The vegetables should be slightly soft and just beginning to brown. Remove from the heat and add to the rice in the bowl.
  5. Slice the tomatoes into small pieces and add to the bowl.
  6. Roughly chop or crumble the meatloaf and add to the bowl. If you are using another protein, chop it into small bite-sized pieces. Add to the bowl. Stir the ingredients to mix. Add the 1/2 cup of stock and stir once more. Cover and refrigerate for at least 1 hour.
  7. Slice the peppers in half lengthwise. Remove the seeds and white membranes. Spray a medium casserole with non-stick spray. Place the pepper halves in the pan cut side up. Preheat the oven to 375 degrees.
  8. Divide the mixture between the 4 pepper halves, packing lightly. Spoon approximately 1 tablespoon of the marinara on top of each filled pepper. Cover tightly with foil and place in the oven. Bake for 35 minutes.
  9. Remove the pan from the oven and remove the foil. Add another tablespoon or so of the marinara to each pepper and sprinkle with the cheese. Spoon any remaining marinara into the pan to coat the bottom,
  10. Return the pan to the oven uncovered and bake for 10 - 15 minutes until the cheese is melted and the peppers are a little brown. Serve.
Share this Recipe
Powered byWP Ultimate Recipe

We continue to sort through an astounding quantity of things that we have collected over the years. Closets and cabinets hold as much extra stuff as the freezer. At times the process is painful…we’ve become attached to many things. They are, as we are beginning to realize, just things. They represent memories that we can hold onto without a tangible souvenir. Our next chapter has plenty of room for those memories and newly found space for the memories and souvenirs to come.    Love, Mama D

Another Chapter Begins and We Enjoy Steak Tacos

It’s been a little over a year, and I’m beginning to feel comfortable in the life chapter that I am writing for myself. I’ve cooked and created recipes that are uniquely me, and shared them with a slowly expanding “public.” This has been one of the most satisfying times in my life…doing something that I’m passionate about and sharing it with the world (lol).

Life has a funny way of keeping us from becoming complacent and resting too comfortably on our laurels. As many of you know, I am only half of a team that has been together for almost 35 years. While our team membership has expanded, the core has never changed. It’s my husband Jeff and I that have sailed forward through life. That life has taken a new and very unexpected turn, but in typical J & J fashion we are leaping into it with excitement and faith.

Jeff recently retired from the school district where he worked for 13 years. Retirement, for some, is the final chapter. We however are taking the view that we are only somewhere slightly past the middle of our story. There are many new adventures awaiting. Those adventures will still include food, cooking and writing, as we well as “team adventures” many of which will be shared here.

As we begin to create our new life, we are making many changes. Can you say downsize? It has been a challenge to sit down in front of the computer and share what I’m cooking. Trust me, Mama D is in the kitchen every day and some really wonderful things are being created. I will be sharing some of my favorites here, even if it may be a little less often.

That brings me to a recent dinner that we found both tasty and satisfying. Steak Tacos with Roasted Pepper Salsa and Skillet Squash and Corn.DIGITAL CAMERAThe tacos started with skirt steak that was marinated in lime juice, onion, garlic and cilantro. Olive oil and Mexican oregano added some depth of flavor.DIGITAL CAMERA

The result was tender, juicy strips of beefy goodnessDIGITAL CAMERAthat nestled into a whole grain tortilla.DIGITAL CAMERAGarnished with Roasted Red Pepper Salsa and sliced avocado and tomato,DIGITAL CAMERAit was a marriage made in heaven.

My side dish of choice was a skillet vegetable medley. Local corn, zucchini and yellow squash were the backbone of this dish. Onions, red pepper and tomato joined in on the fun.

DIGITAL CAMERAIt was enhanced with light sour cream and pepper jack cheese that were the perfect counterpoint to the tender crisp vegetables.

Fresh Corn and Squash Skillet
Print Recipe
This is a wonderful Summer side dish. Adding the vegetables to the pan gradually insures that everything will turn our tender yet crisp.
Fresh Corn and Squash Skillet
Print Recipe
This is a wonderful Summer side dish. Adding the vegetables to the pan gradually insures that everything will turn our tender yet crisp.
Ingredients
Servings:
Instructions
  1. Heat a large fry pan over medium high heat. Add the olive oil and swirl to coat the bottom of the pan.
  2. Add the chopped red onion and cook for 2 or 3 minutes until the onions begin to soften.
  3. Add the corn kernels and cook for several minutes more. Add the peppers and garlic and cook for 2 minutes or so.
  4. Add the zucchini and squash and cook another few minutes. Everything should be tender yet have a little crunch.
  5. Add the chopped tomatoes and stir to combine,
  6. Reduce the heat to low and add the sour cream. Stir to blend and cook for several minutes until the everything is heated.
  7. Add the shredded cheese and stir and continue to cook until the cheese is melted.
  8. Taste and add salt and pepper as needed. Sprinkle the cilantro on the vegetables and toss lightly. Serve.
Share this Recipe
Powered byWP Ultimate Recipe

I decided to try a “mildly” unusual salsa. I started with a jar of roasted red peppers. Fresh roasted would be outstanding, but I had a few other things going on. A bit of onion, garlic and jalapeno gave it a little bite and ripe olives and a parsley/cilantro combo made it interesting. Lime juice brought it all together.

Roasted Red Pepper Salsa
Print Recipe
Salsa re-imagined. Sweet and mild, but if you like it with more heat, use a whole jalapeno and leave in a few seeds.
Roasted Red Pepper Salsa
Print Recipe
Salsa re-imagined. Sweet and mild, but if you like it with more heat, use a whole jalapeno and leave in a few seeds.
Ingredients
Servings:
Instructions
  1. Put the peppers in a medium bowl. Add the onions, garlic, cilantro, and parsley. Stir to combine.
  2. Add the jalapeno and lime zest and toss to combine.
  3. Stir in the lime juice and olive oil and stir again to combine.
  4. Taste and add salt and pepper to taste. Cover and chill for several hours.
  5. Serve as a garnish for tacos or with chips.
Share this Recipe
Powered byWP Ultimate Recipe

As the days to the “big move” fly by, life seems a little like a whirlwind, but in a very good way. Love is the stabilizing force that keeps it all together and food, especially when it is cooked with love, gives us the energy to handle it all. Mama D


The Further Adventures of Mama D and the Bean

“Beans, beans, the musical fruit…” I remember that little ditty from my youth. Beans have gotten a bad rap due to their intestinal music properties. (By the way, that can be partially remedied by draining and rinsing the canned ones and soaking the dry ones over night.) Beans are a magical vegetable.  Not in the Jack and the Giant manner but as a nutrition source. They pack a lot of nutritional value at a very small price, two qualities that Mama D holds very near and dear to her heart.

Today the spotlight is on Cannellini beans. These large white beans are the toast of Tuscany. So much so, that Tuscans are sometimes called “Mangiafagioli” or Bean Eaters. The versatile Cannnellini can be featured in soups,DIGITAL CAMERA and pasta dishes.DIGITAL CAMERA

They make wonderful guilt-free dips as well. (Check these out on my RECIPES page)DIGITAL CAMERAI like the nutty flavor and smooth, almost creamy texture in all kinds of dishes. Occasionally I cook them from dry but most of the time I just open a can. These white kidney beans, as they are sometimes called, are available everywhere. Most large grocery stores have a house brand and even Aldi has started carrying them. They give you a generous nutrition payout without a lot of financial investment. A half cup serving has around 100 calories and very little fat. The fiber and protein numbers are impressive as well (over 6 grams of each). Each can has up to four servings and rings up at well under a dollar. That’s a bargain any way you look at it.

Cannellini go well with the flavors of Tuscany. Lemon and garlic, olive oil and fresh herbs are the perfect  companions.DIGITAL CAMERAThis post however is about my latest Cannillini adventure, and here these lovely beans are taking center stage. Presenting the Cannellini Burger!DIGITAL CAMERA

This is a riff on the ever popular Veggie burger, this time starring the great white kidney, of course. Joined by onions, garlic and sun-dried tomatoes and enhanced with parsley, rosemary, and fennel seeds these were tasty and healthy.DIGITAL CAMERA

The ingredients were combined in the processor to  create a chunky paste. A few beans were left whole for added texture and interesting appearance.

DIGITAL CAMERAOnce formed into patties, they spent several hours in the refrigerator to set up prior to cooking.DIGITAL CAMERAOnce they were settled in the fry pan lightly coated with olive oil, they cooked to golden perfection in a matter of minutes.DIGITAL CAMERAI garnished them with shaved Romano Cheese, giving them a pleasant  jolt of sharp cheese flavor. I used my beloved Sandwich Thins as the base and mixed baby greens as the cushion. Red Pepper and Artichoke Tapenade garnished one version.DIGITAL CAMERAWhile sliced tomato and sweet onion graced another.DIGITAL CAMERAThese tasty burgers will be making return appearances on Meatless Mondays and beyond. Give this recipe a try. Once you’ve gone bean, you’ll be coming up with your own variations and reaping good taste and a healthy alternative to meat. Mama D

Cannellini Burgers
Print Recipe
Cannellini Burgers
Print Recipe
Ingredients
Servings:
Instructions
  1. Put the oats, fennel seed, onion and garlic in a food processor. Pulse until coarsely chopped.
  2. Add a little more than half of the beans, the parsley, rosemary, and tomatoes and pulse until almost smooth. Add the egg and process until everything is blended.
  3. Spoon the mixture into a bowl. Add the remaining beans and salt and pepper to taste. Stir to combine.
  4. Form the mixture into four patties. Spray a plate with cooking spray and place the patties on the plate. Cover with plastic wrap and chill for at least 2 hours.
  5. Heat a large skillet and add the olive oil. Put the patties into the pan and cook over medium high heat for 4 minutes or so. You want a nice golden brown.
  6. Flip the patties over and continue to cook another 4 minute or so until the second side is equally as golden as the first.
  7. Serve on buns or sandwich thins with the garnishes of your choice.
Share this Recipe
Powered byWP Ultimate Recipe

To My Subscribers

I have a confession to make.  I have been leading a double life. I don’t just share my recipes here on my website, I also use social media to get my recipes out. Did you know that I have Face Book Page, cleverly named Mama D’s Kitchen?  While all of my posts that appear here, go to Face Book, there are times when I publish a recipe directly to Face Book. The F.B. posts tend to be shorter, thus you can read them in less than a minute, check out the recipe, and get on with your life.DIGITAL CAMERAVegetable Hash with Toads in the Hole

These lots of other recipes are here at Mama D’s Kitchen of Love on the Recipe page. Just click on the word RECIPES in the upper left hand corner of the post page. If you haven’t taken a minute to check out this page, please give it a look.  You’ll find things like:

Grilled Portobello with Quinoa DIGITAL CAMERAZucchini Bread,DIGITAL CAMERAAnd Spaghetti SquashDIGITAL CAMERAIf  you aren’t visiting the RECIPE page when you are reading a new post, why not take a minute and give it a look-see. If you are already checking out the recipe page, thank you for your interest and support.DIGITAL CAMERAMango Peach Crisp

I also have a Pinterest Page Mama D’s Kitchen that has all of my recipes. If you are into that, check it out and re-pin any recipes that tickle your fancy. You can also follow my Pinterest page.

As I head into my second year of Mama D’s Kitchen of Love, I am trying to build a broader reader/viewer/subscriber base. You are my inaugural subscribers and hold a special place in my heart. If you enjoy these musings and meals of mine, please consider sharing the site with your friends.  I know that this sounds a little like a paid political announcement and maybe it is, but one of my goals is to grow this “hobby” into a career and this is one way I’m trying to accomplish that.

So check out the RECIPE page, Face Book, and Pinterest, and stay tuned for the next Mama D post coming soon.

Holding On To Summer

The calendar says August. The thermometer is registering 80 degrees. The humidity outside can be cut with a knife. That sure sounds like Summer to me.  Yet most schools are back in session, or will be soon. The stores are filled with “Back To School” clothes and if you look beyond the Halloween displays there is the faintest hint of Christmas creeping onto the shelves. I was in retail long enough to know that is all part of the corporate marketing plan, but wait a minute (or at least a few weeks). It’s still SUMMER!!!

The air conditioning is on more than it is off in my house. There are still tomatoes on the vine, but last week I opened my mailbox and found a Fall food magazine…I’m not ready for this. I’m still enjoying the fruits of summer, and the vegetables, too. I grill out almost every night (okay, I do that a lot at other times of the year, but still…). Living in the Midwest, Fall means Winter, and that means cold and snow and ice. There will be plenty of time for hearty soups and squash gratins, so let’s put all of that aside and focus on the here and now of Summer.DIGITAL CAMERA

Vegetables are still at their peak. We are blessed with fresh local sweet corn. Local meaning the ears were in the fields this morning less than five miles from home. DIGITAL CAMERAI admit that I am a Midwestern corn snob. I love it on the cob, brushed with butter, sprinkled with a little salt and pepper. DIGITAL CAMERAI adore it grilled as is or off the cob used in recipes. Corn is having its heyday and that’s just fine with me.

Grilled corn is a wonderful addition to many dishes. I recently used it in a Gazpacho that featured cucumbers, peppers, and of course tomatoes. DIGITAL CAMERACall it a soup, call it a liquid salad, it’s a wonderful way to use summer’s vegetable bonanza. Use what you have or what calls to you at the market. This gazpacho recipe will give you a jumping off place like the diving board at the deep end of the pool.

Gazpacho
Print Recipe
Servings
4
Servings
4
Gazpacho
Print Recipe
Servings
4
Servings
4
Ingredients
Servings:
Instructions
  1. Peel the cucumber and chop into pieces about 1 inch. Quarter the tomatoes. Core and seed them and chop into pieces about the same size as the cucumber. Put both in a large bowl.
  2. Chop the onion into one inch chunks. Do the same with the bell pepper. Add them to the bowl.
  3. Roughly chop the garlic, parsley, and cilantro and toss them in with the other vegetables. Mix everything together.
  4. Cut the corn kernels off the cobs and set aside
  5. Place a manageable amount of the vegetable mixture into the processor bowl. Add some of the vegetable juice and process until the mixture is slightly chunky. ( make this as smooth or chunky as you like) Put the processed vegetables back in the bowl.
  6. Continue to process the vegetables with the vegetable juice until they are all the consistency you want. Add the corn to the bowl of vegetables and stir to mix everything well.
  7. Add the juice of the lemon half, the vinegar, paprika, and cumin. Stir well and taste for seasoning. Add a little salt and any more of the flavorings that you want.
  8. Cover and chill for several hours. Serve in soup bowls or goblets and garnish with cilantro or whatever you would like.
Share this Recipe
Powered byWP Ultimate Recipe

Summer is salad time. I’ve shared lots of different kinds this season. There is a salad that provides the healthy veggies that you need and has the crunchy chew of crusty bread. I’m talking about Panzanella. Any vegetable can join the merriment and any rustic or crusty bread will provide the perfect counterpoint. Again, this recipe is a basic guideline to be played with like croquet mallets on a summer lawn.

Panzanella Salad
Print Recipe
Servings
4
Servings
4
Panzanella Salad
Print Recipe
Servings
4
Servings
4
Ingredients
Dressing
Servings:
Instructions
  1. Heat the oven to 325 degrees. Spread the bread cubes on a baking sheet that has been lightly sprayed with olive oil cooking spray. Spray the bread cubes lightly with the olive oil spray. Bake 15 minutes until the cubes are lightly browned. Set aside to cool.
  2. Quarter the tomatoes lengthwise. Remove the seeds and cut crosswise into 1/2 slices. Cut the onion in half crosswise. Cut each half in thin vertical strips.
  3. Put the onions and tomatoes in a large bowl. Add the chopped pepper, cucumbers, and the bread cubes. Tear the basil leaves into bite size pieces and add to the bowl.
  4. Dressing: Mash the garlic, anchovy paste and a pinch of salt in a mortar. It should be a fairly smooth paste. Combine the oil, vinegar, herbs, and the garlic anchovy paste in a jar with a tight fitting lid. Shake until the dressing is completely blended.
  5. Pour the dressing over the ingredients in the bowl and toss to coat. Cover and chill for several hours. Serve.
Share this Recipe
Powered byWP Ultimate Recipe

These are two of many recipes that shout summer to me. From early June to the last harvest, the bounty of summer vegetables can bring health and tasty variety to your table. Summertime seems to fly by more than any other season. The long days and warm nights are gone far too quickly. So, I’ll ignore the sweaters and boots in the stores and turn a blind eye to the Halloween costumes…there’s plenty of time to go there when it really is Fall. I’m holding on to Summer a little longer. Love, Mama D