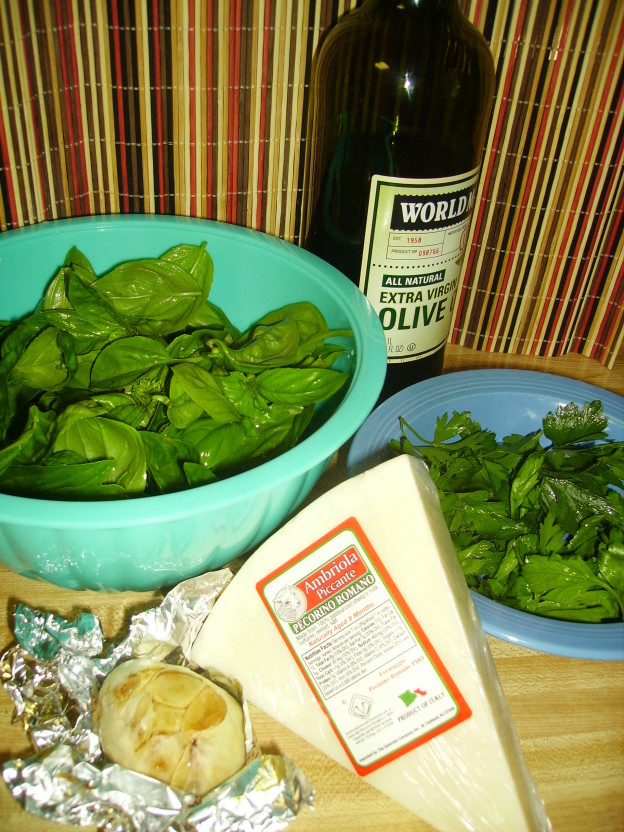
Roasted Garlic Pesto

Roasted Garlic Pesto
Print Recipe
Servings
1-1/2 Cups
Servings
1-1/2 Cups
Roasted Garlic Pesto
Print Recipe
Servings
1-1/2 Cups
Servings
1-1/2 Cups
Ingredients
Servings: Cups
Instructions
  1. Cut the top off the head of garlic (just enough to expose the cloves a bit). Place in the center of a square of heavy duty foil. Drizzle with a little olive oil and wrap sealing completely but leaving a little breathing room. Place in a 350 degree oven and bake for 40 minutes or until the kitchen smells wonderful and the garlic feels soft. Unwrap and allow to cool.
  2. Toast the pine nuts on top of the stove. Place them in a dry non-stick pan and toast over low heat shaking frequently to prevent burning. This should take 6 or 7 minutes.
  3. Place the basil and parsley leaves in the bowl of a processor. Squeeze the cooled garlic into the bowl. Add the pine nuts. Pulse to coarsely chop the ingredients.
  4. Add the grated cheese and pulse to combine.
  5. With the motor of the processor running, stream the olive oil into the feed tube. Stop as soon as the mixture is the texture that you like. (Do not process until smooth).
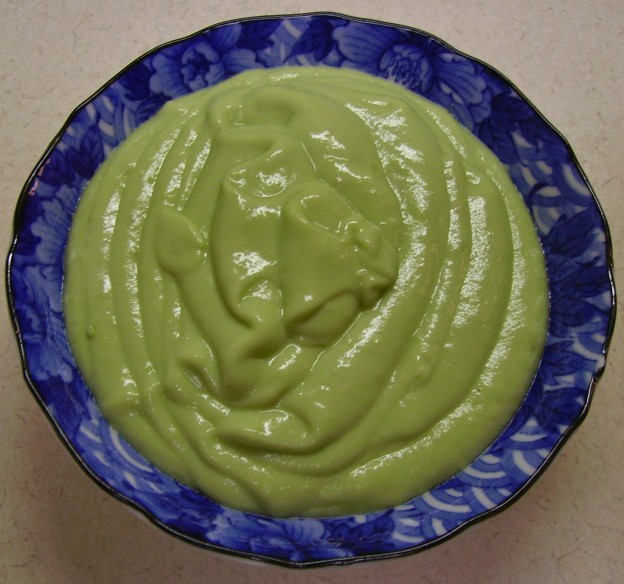
  6. Scrape the pesto into a bowl. Check for seasoning Add some ground pepper and a pinch of salt if you want.
  7. It is now ready to use. It can be frozen in 1/4 cup (or whatever amount you like) packages. It will keep in the refrigerator for a week. Pour a thin layer of olive oil on the pesto before you put it in the refrigerator to help preserve color and flavor.
Share this Recipe
Powered byWP Ultimate Recipe

Artichoke and Tomato Salad

Artichoke and Tomato Salad
Print Recipe
Servings
3
Servings
3
Artichoke and Tomato Salad
Print Recipe
Servings
3
Servings
3
Ingredients
Servings:
Instructions
  1. Combine the artichokes, tomatoes, and onion in a bowl. Toss gently to mix.
  2. Combine the remaining ingredients in a jar with a tight fitting lid. Close tightly and shake until all of the ingredients are thoroughly blended.
  3. Pour the dressing over the vegetable and toss to coat. Cover and refrigerate for at least 2 hours (more is better).
  4. Serve with your favorite grilled meat, fish, or poultry.
Share this Recipe
Powered byWP Ultimate Recipe

Buttermilk Avocado Dressing

Buttermilk Avocado Dressing
Print Recipe
Servings
1 Cup
Servings
1 Cup
Buttermilk Avocado Dressing
Print Recipe
Servings
1 Cup
Servings
1 Cup
Ingredients
Servings: Cup
Instructions
  1. Heat a small fry pan and add the olive oil, swirling to coat the bottom of the pan.
  2. Add the garlic and saute for 2 minutes or so. The garlic should be fragrant but not brown. Remove from heat and allow to cool for a few minutes.
  3. Scoop the avocado flesh into a deep bowl or the pitcher of a blender. Add the buttermilk and cooled garlic and olive oil mixture.
  4. If using the bowl, blend with an immersion blender until smooth. If using a blender, whirl until smooth.
  5. Add the herbs and spices, if you choose, along with a pinch of salt. Whirl/blend one more time and give it a taste.
  6. Adjust the seasonings to your liking and transfer to a bowl or jar with a tight fitting lid. Refrigerate for an hour or so to let the flavors get better acquainted.
  7. Serve as a dressing on salad, a sandwich spread, a dip for veggies or chips, a topping for chicken, or just lick it off of a spoon.
Share this Recipe
Powered byWP Ultimate Recipe

Orange Honey Mustard Slaw

Orange Honey Mustard Slaw
Print Recipe
Servings
4
Servings
4
Orange Honey Mustard Slaw
Print Recipe
Servings
4
Servings
4
Ingredients
Servings:
Instructions
  1. Place the broccoli slaw in a large bowl. Add the onions and peppers.
  2. Combine the mayonnaise, orange juice, honey, and mustard in a jar with a tight fitting lid. Shake until the ingredients are completely blended.
  3. Pour the dressing over the vegetables. Toss to coat well. cover and refrigerate for at least 2 hours or as long as 24 hours.
  4. Serve with your favorite sandwich or grilled meat.
Share this Recipe
Powered byWP Ultimate Recipe

Grilled Chicken Sausage Kabobs with Farro Risotto

Grilled Chicken Sausage Kabobs with Farro Risotto
Print Recipe
Servings
4
Servings
4
Grilled Chicken Sausage Kabobs with Farro Risotto
Print Recipe
Servings
4
Servings
4
Ingredients
Sausage Kabobs
Farro Risotto
Servings:
Instructions
Chicken Kabobs
  1. Combine the zucchini, whole tomatoes, onions, and whole mushrooms in a large container. You can use a skewer to create a "pilot hole" in the vegetables. This may help the marinade to penetrate more as well as make skewering easier later.
  2. In a jar with a tight fitting lid, combine the oil, vinegar, garlic, chili flakes, herbs, and salt. Cover tightly and shake to completely blend.
  3. Pour the dressing over the vegetables. Toss to coat and store covered in the refrigerator for at least 4 hours and as long as overnight.
  4. When you are ready to assemble the kabobs, slice the sausage into 1 inch chunks. Remove the vegetables from the marinade with a slotted spoon. Save the dressing to baste with later.
  5. Skewer the sausage and vegetables in random order. (Don't worry about a pattern unless that's your thing).
  6. Heat the grill to high ( or as high as it will go) and lightly coat with grill spray. Place the skewers on the grill and brush with the reserved dressing.
  7. Continue to grill, turn, and baste until everything is beginning to brown. This will take 15 - 20 minutes depending on the heat of your grill.
  8. Remove the kabobs from the grill and carefully slide the meat and veggies off the skewer.
Farro Risotto
  1. Heat the olive oil in a large fry pan, swirling to coat the bottom. Add the farro and cook for 5 minutes or so until it begins to brown. Add the garlic and cook another minute or so.
  2. Add the vermouth (or dry white wine) and cook for 2 - 3 minutes. Most of the wine should evaporate.
  3. Add the spinach and about 1 cup of the stock. Allow to simmer, stirring frequently until most of the stock has been absorbed.
  4. Add the red pepper and another cup of stock. Continue the simmering process allowing the stock to be absorbed.
  5. Give the farro a taste at this point. If you like the texture, it's done. If you like it softer, add a little more stock and continue to cook until the texture makes you happy.
  6. Season with salt and pepper to your taste and serve it with the kabobs.
Share this Recipe
Powered byWP Ultimate Recipe