Memories of Christmas Baking and Chex & Chocolate

One of the best parts of the holiday season for me is baking. When I was young, I remember baking with my mother. It was my favorite thing to do with her and while she baked throughout the year, she pulled out all the stops at Christmas. She would bake dozens of cookies that would be stored in colorful tins until it was their turn to grace our holiday table.

My mother would put all three leaves in the table, cover it with a damask Christmas tablecloth that she covered with a thin plastic sheet. This was deemed necessary as the table would remain open and set for at least two weeks. It was always ready when friends and family dropped in, which seemed to be almost daily. They would graze the table as they chatted and shared the spirit of the season. One of the jobs I loved was covering the remaining treats on the table with paper napkins. This was the standard way of preserving “leftovers.” Truthfully, by the end of the day there weren’t that many “leftovers” to cover and I was always assured of a bedtime snack.

Times have changed. My baked treasures stay secure in tins and sealed bags until the time they make their appearance on a cookie tray to share with friends and family. No matter how they are stored, they are a symbol of the love and spirit of giving that the Christmas season is all about.

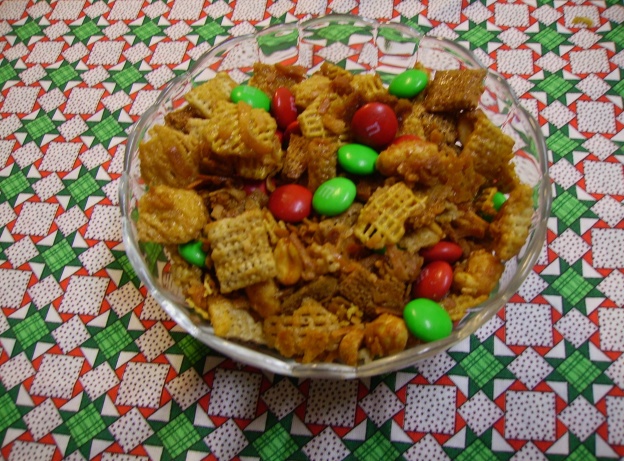
I’ve begun my holiday baking in my new small kitchen. I’m getting very comfortable in it and I have embraced the notion that recipes can be made one at a time and that it is very efficient to clean up from one adventure before starting another. My most recent adventure was a sweet and subtly salty snack mix that has been a staple for 25 years. It’s called Chex & Chocolate and it is addictivley tasty and worth the prep time.

DIGITAL CAMERA
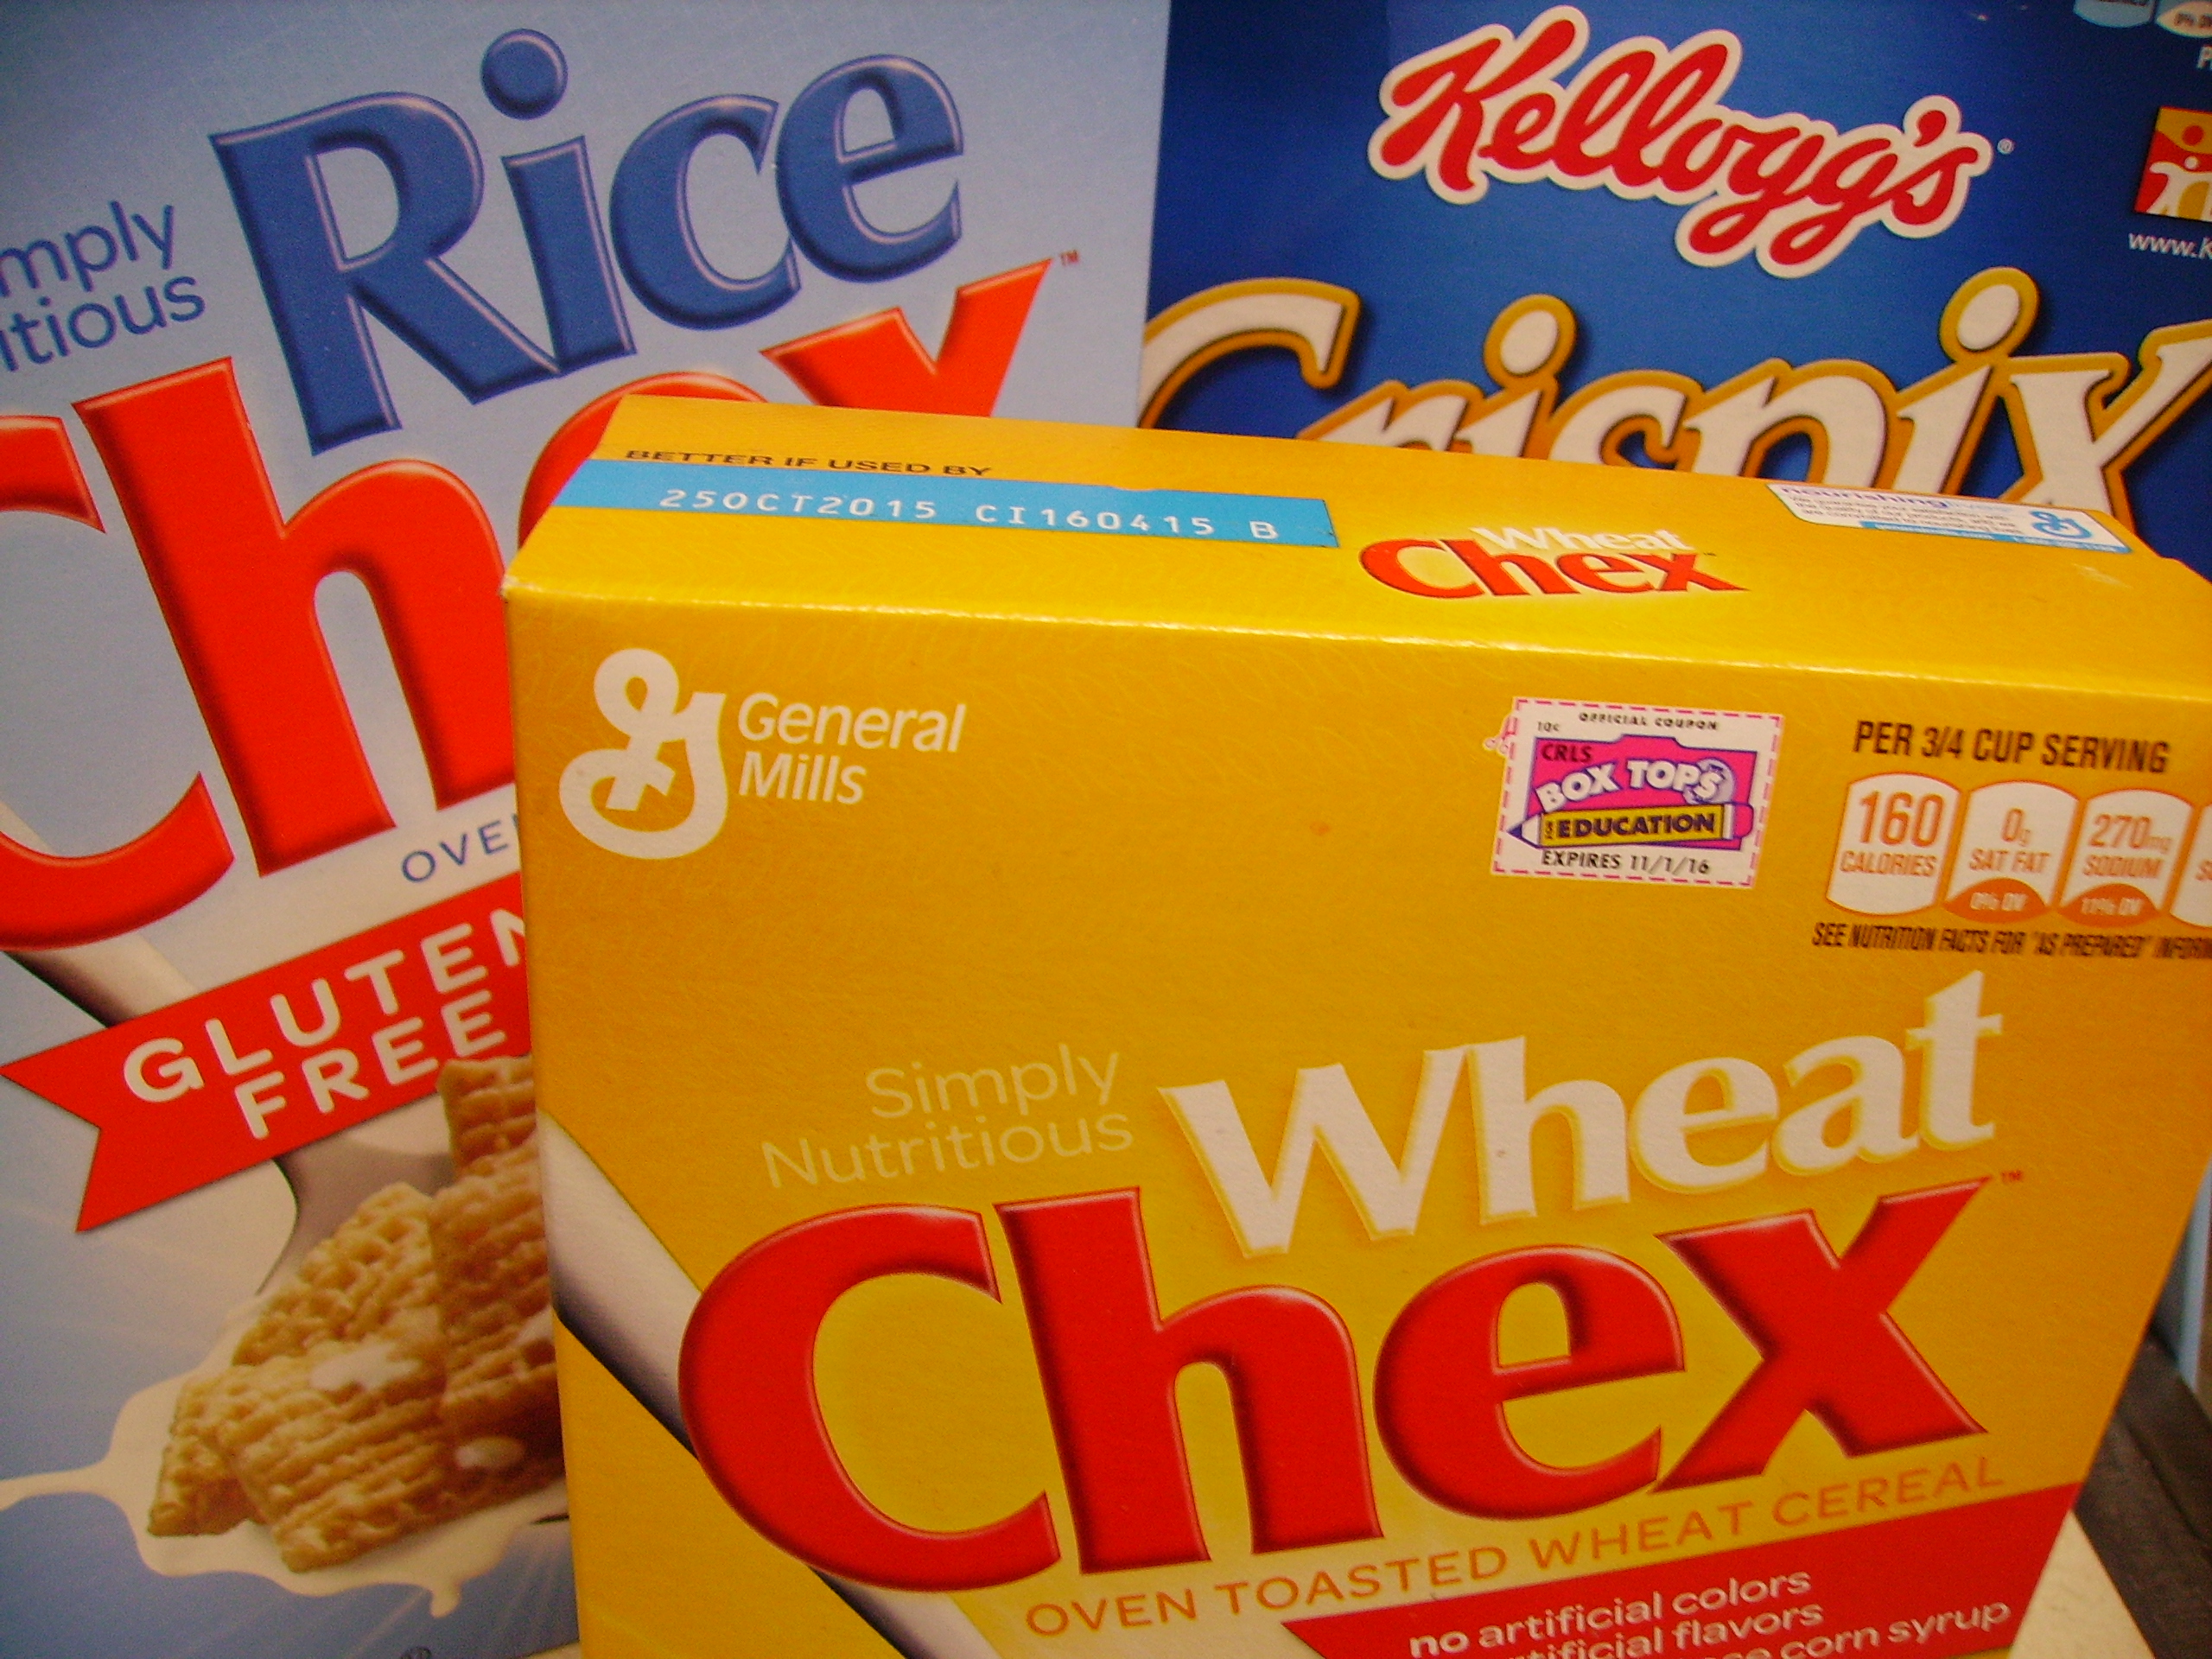
I like to use a combination of cereals that always includes Crispix. Until its demise, I used Multi- Bran Chex which gave a small whisper of healthy. I now use Wheat Chex and if  I’m feeling particularly randy another unsweetened Chex cereal. This year Rice Chex joined in the celebration.

DIGITAL CAMERA
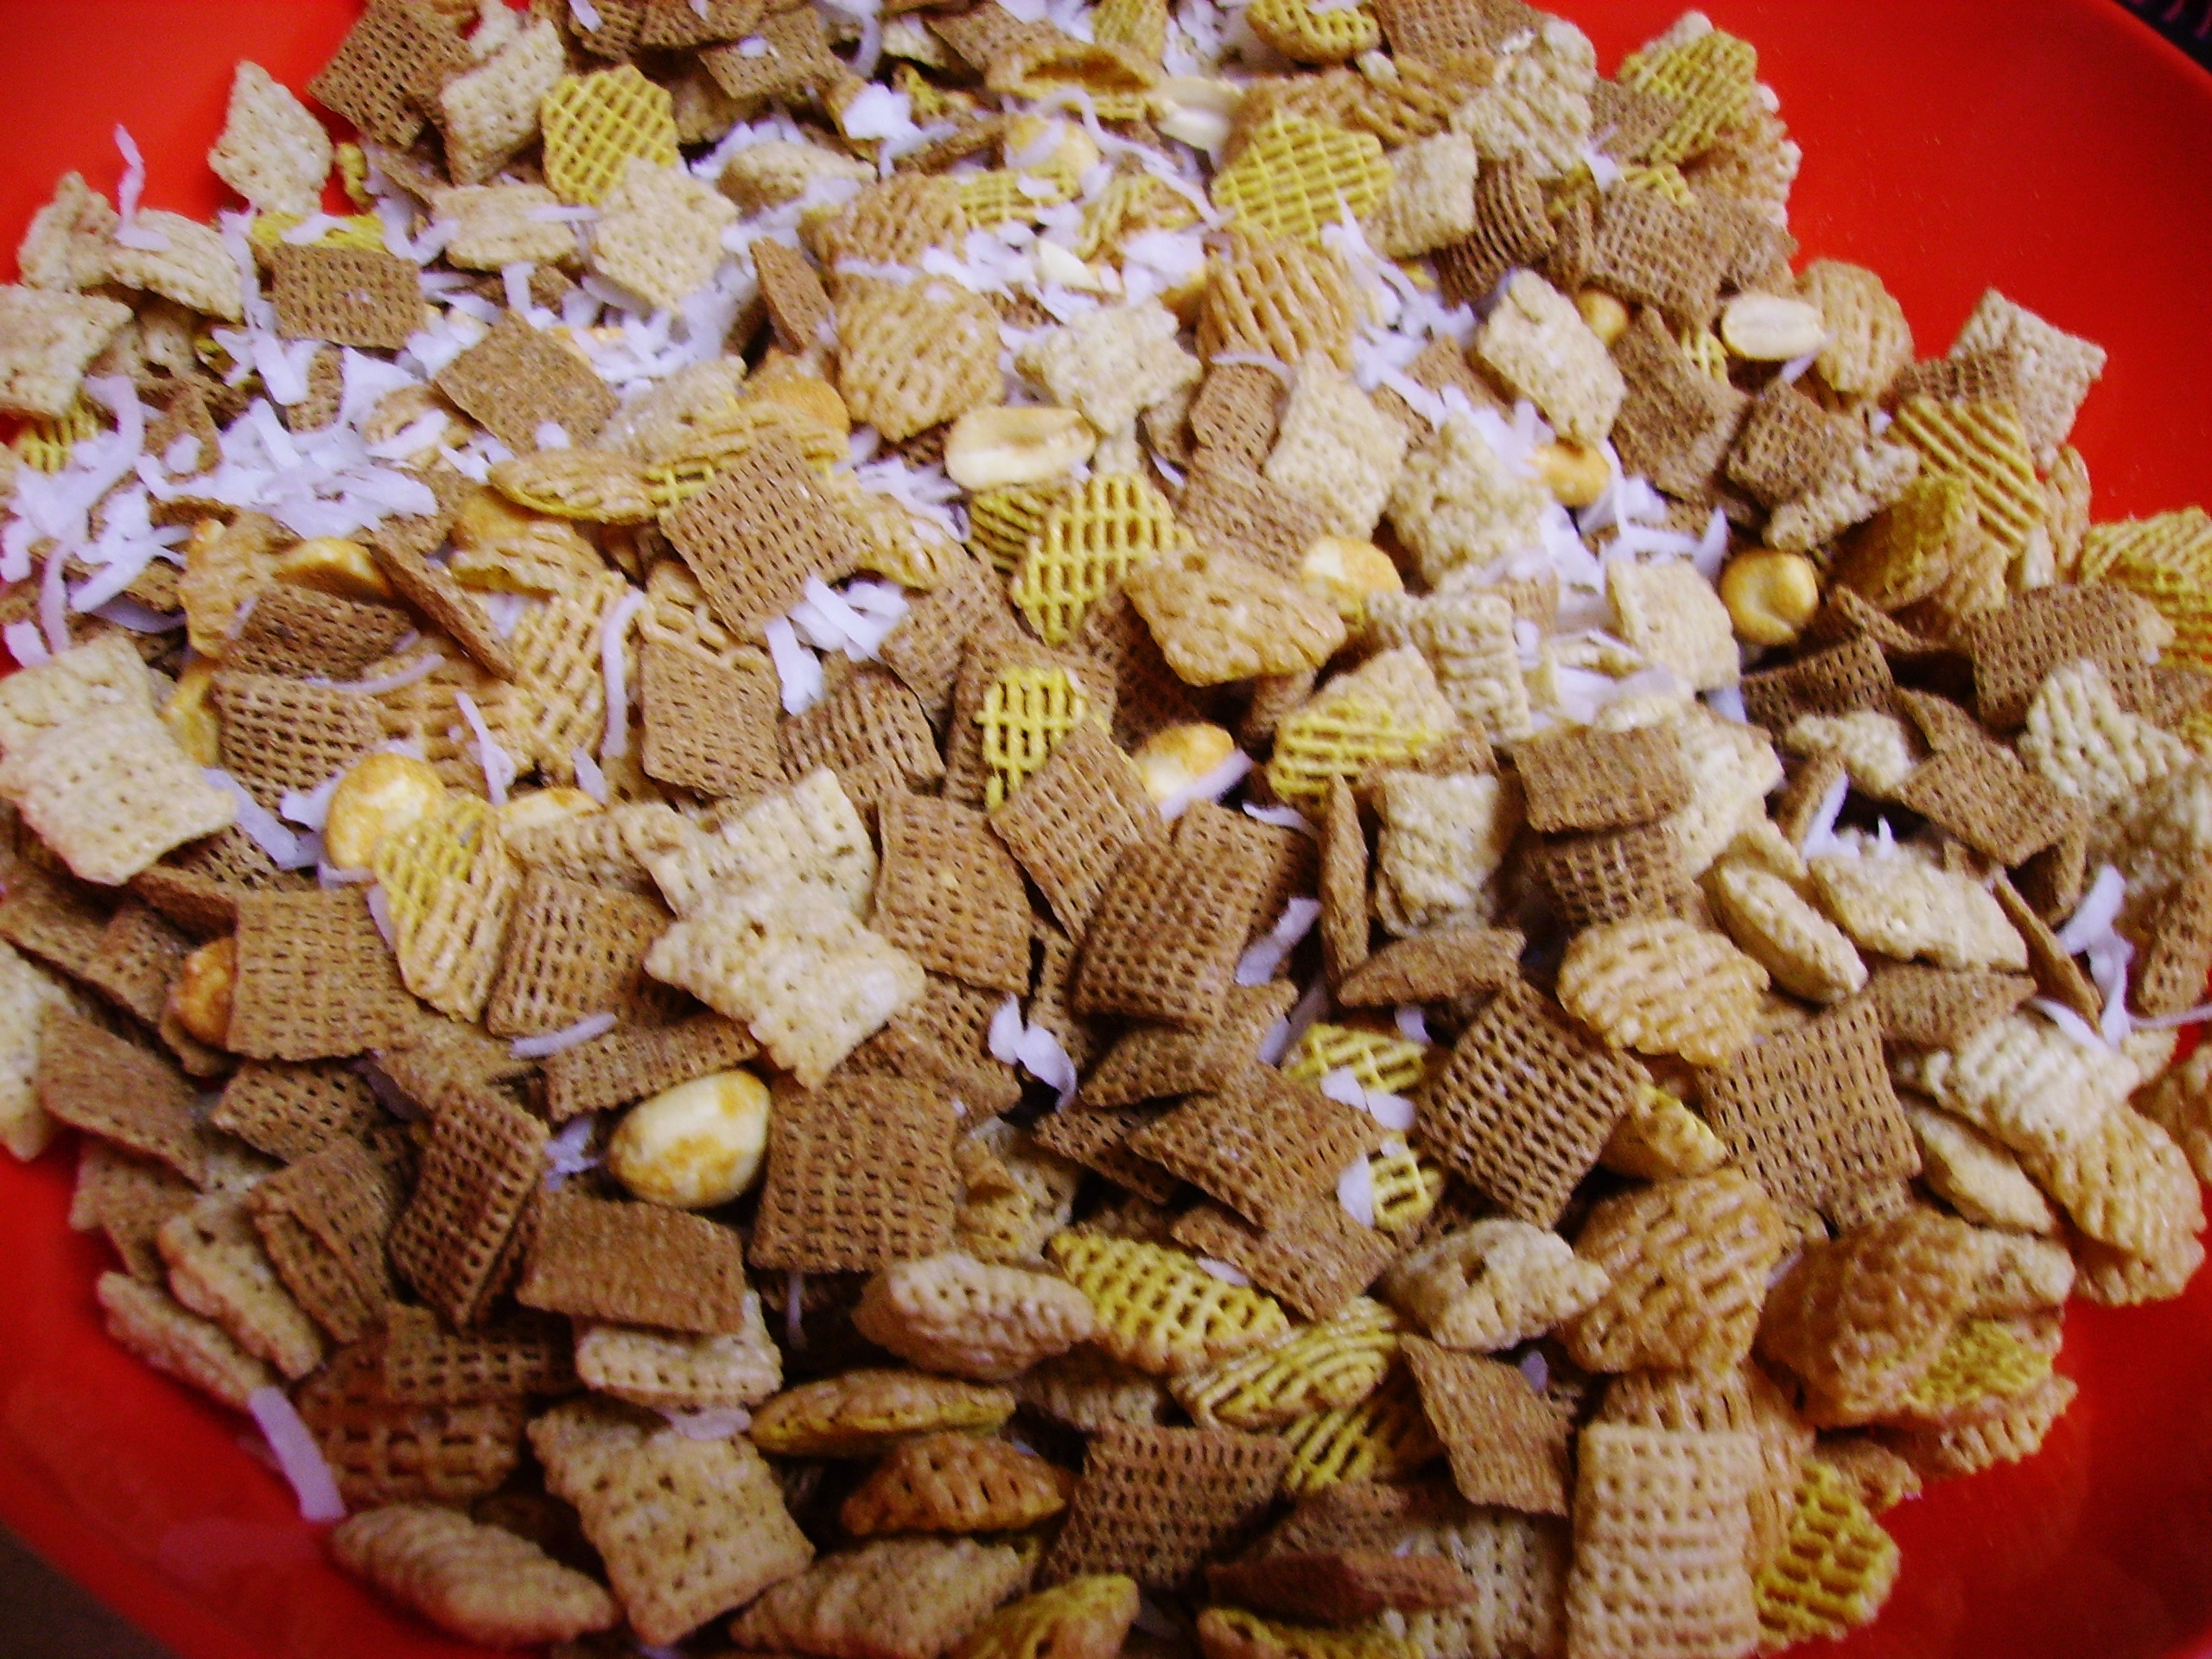
Coconut and peanuts combine with the cereal in a very large bowl. No matter the size of the bowl, there are always a few morsels that try to escape.DIGITAL CAMERA 
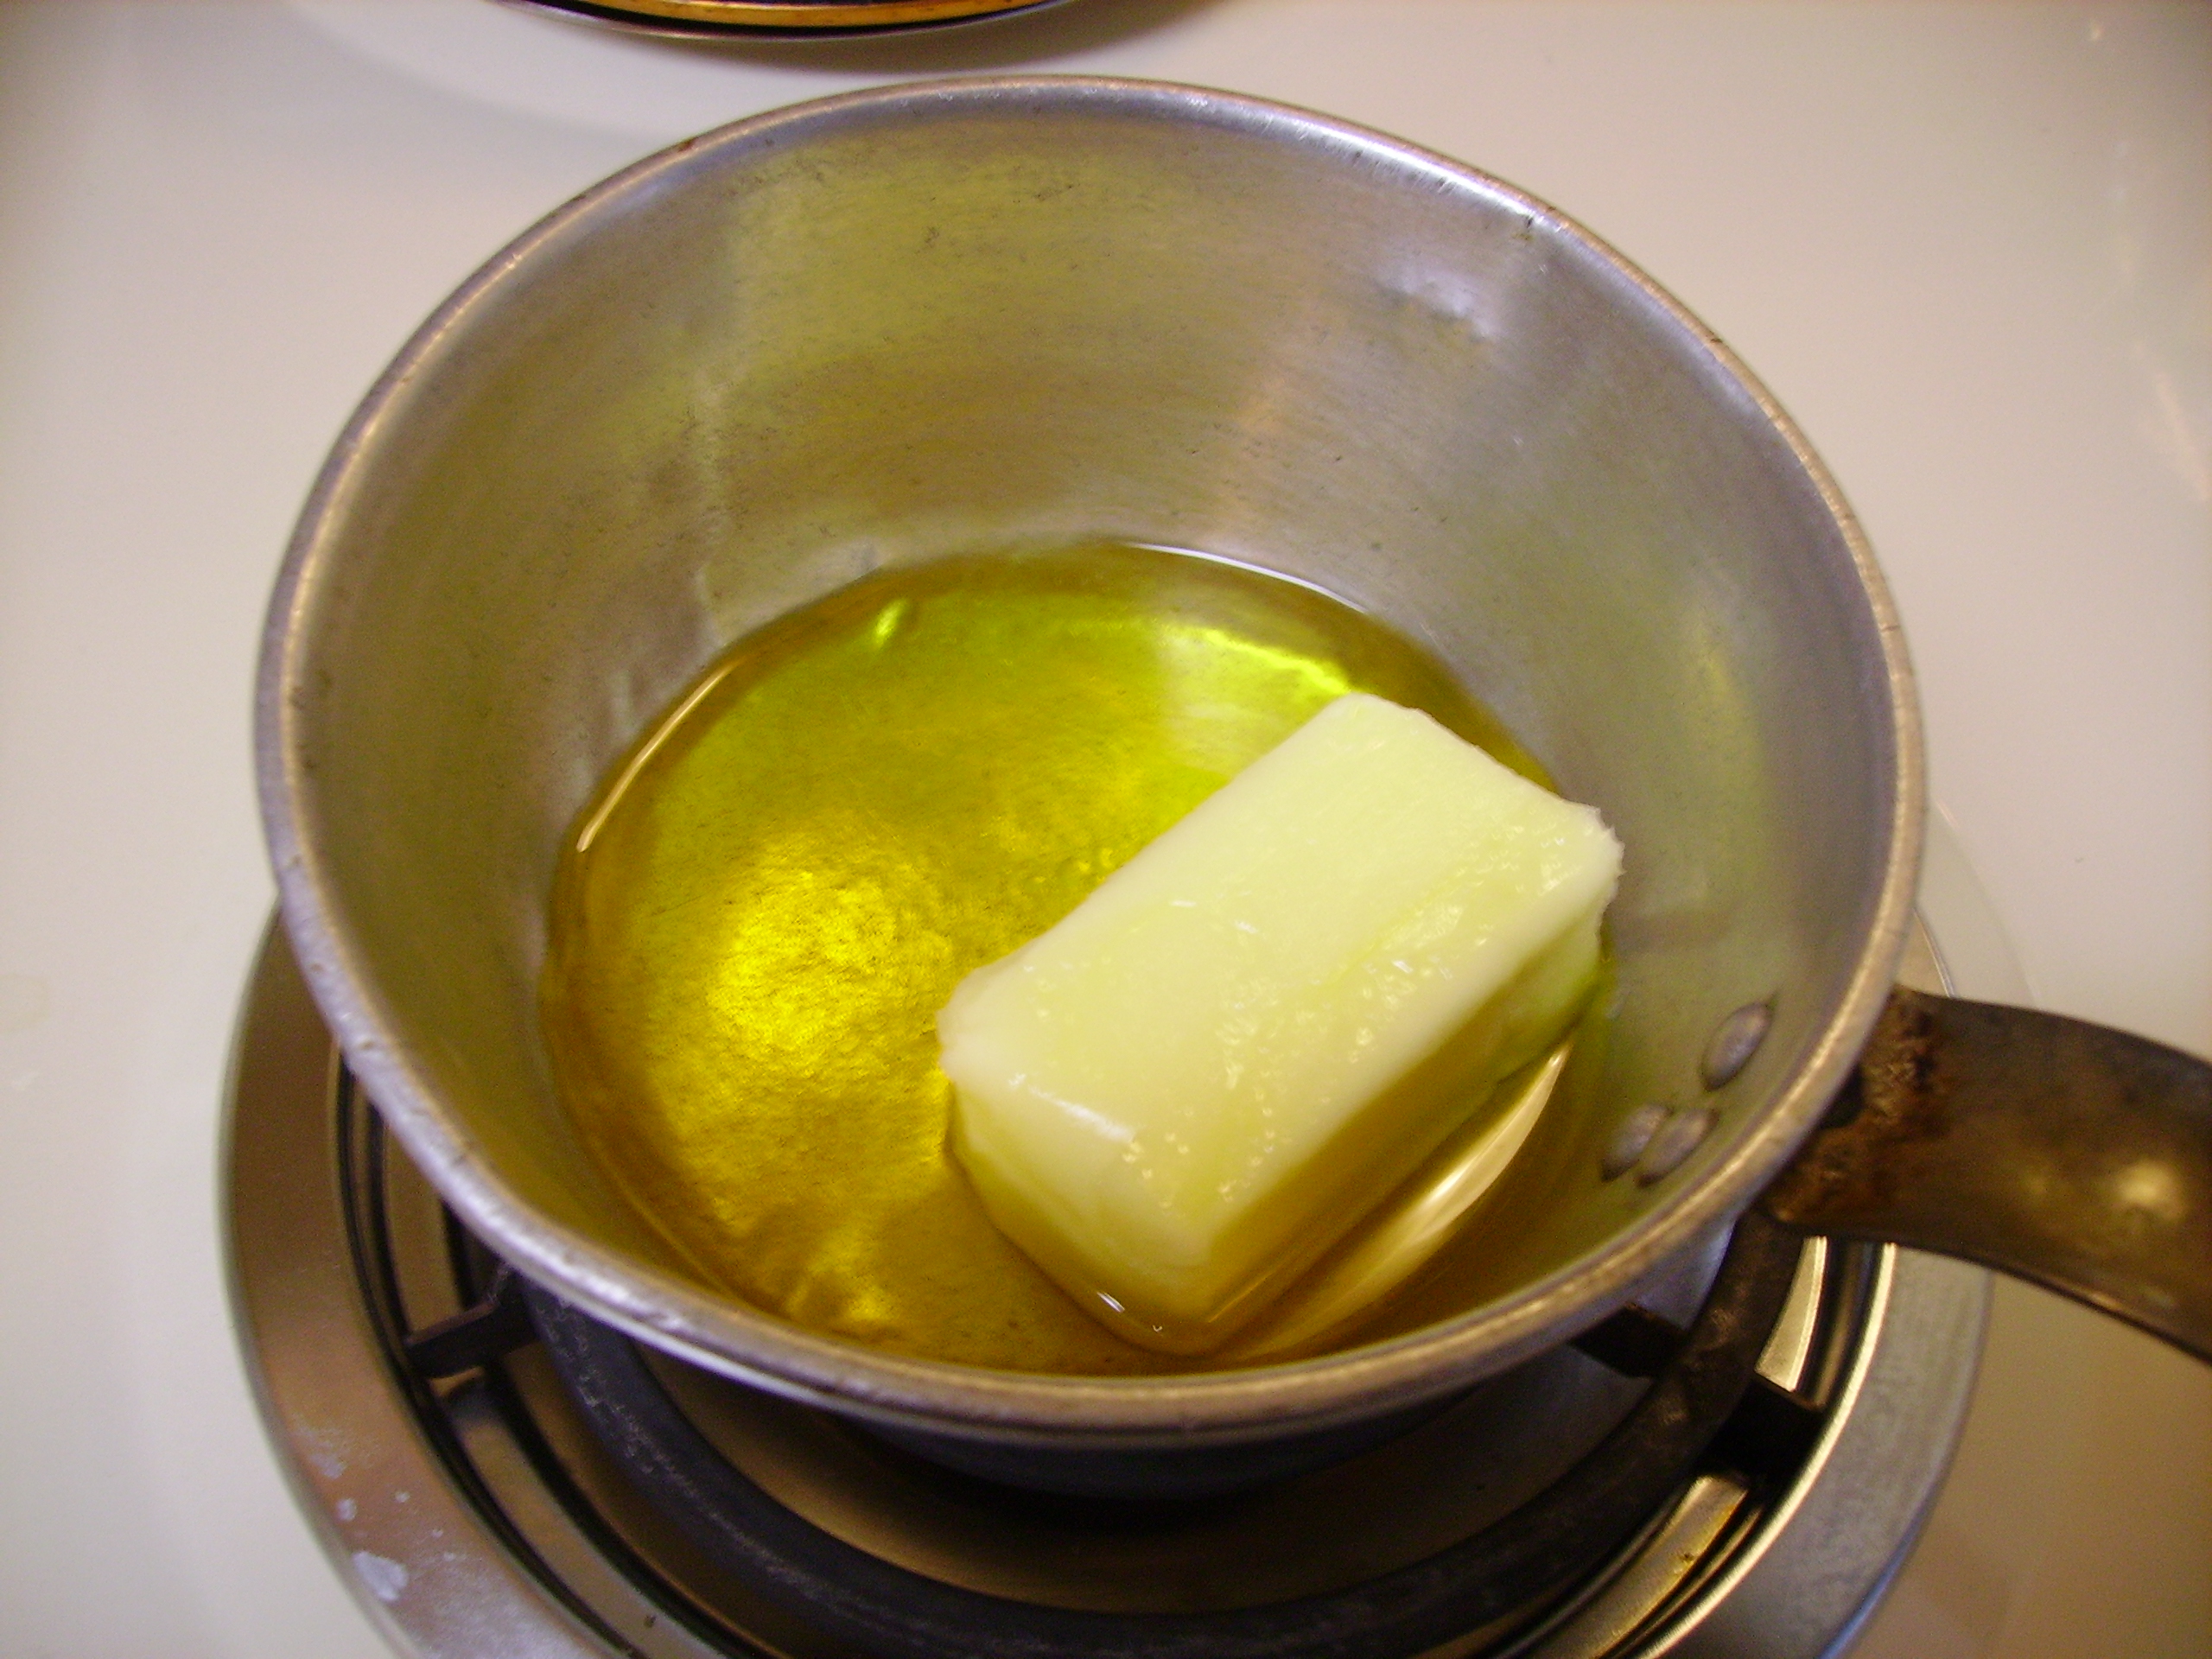
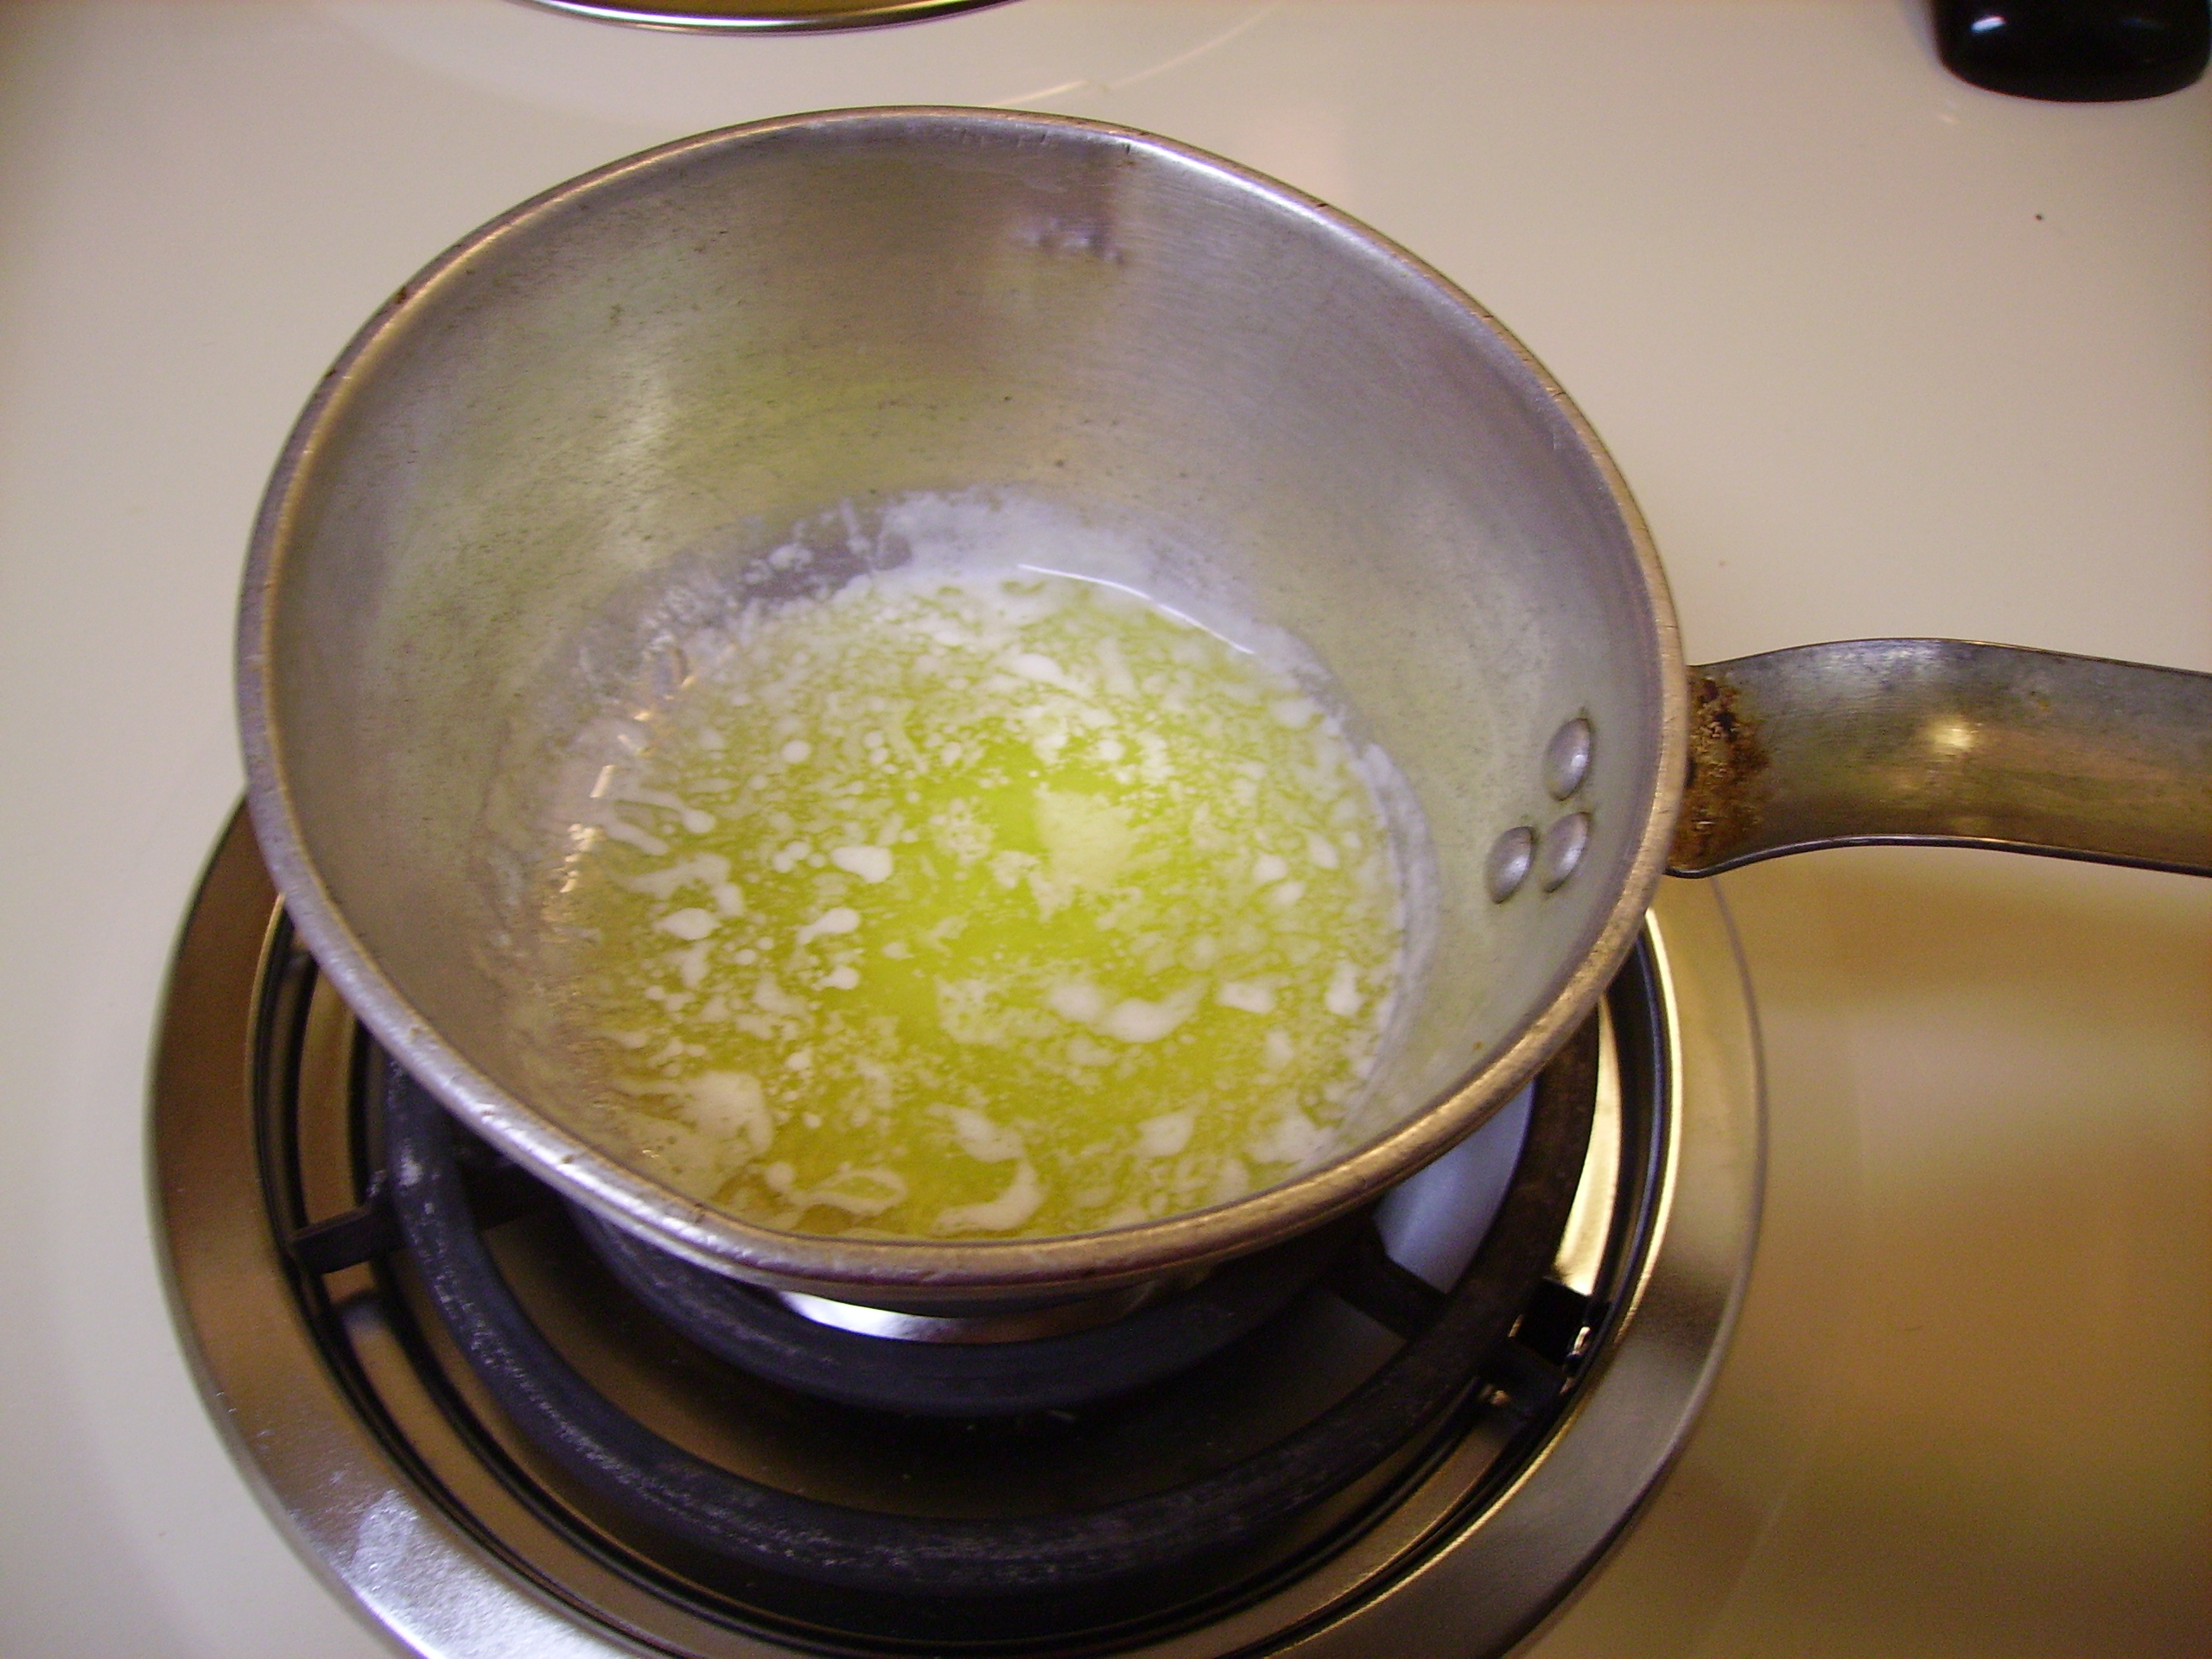
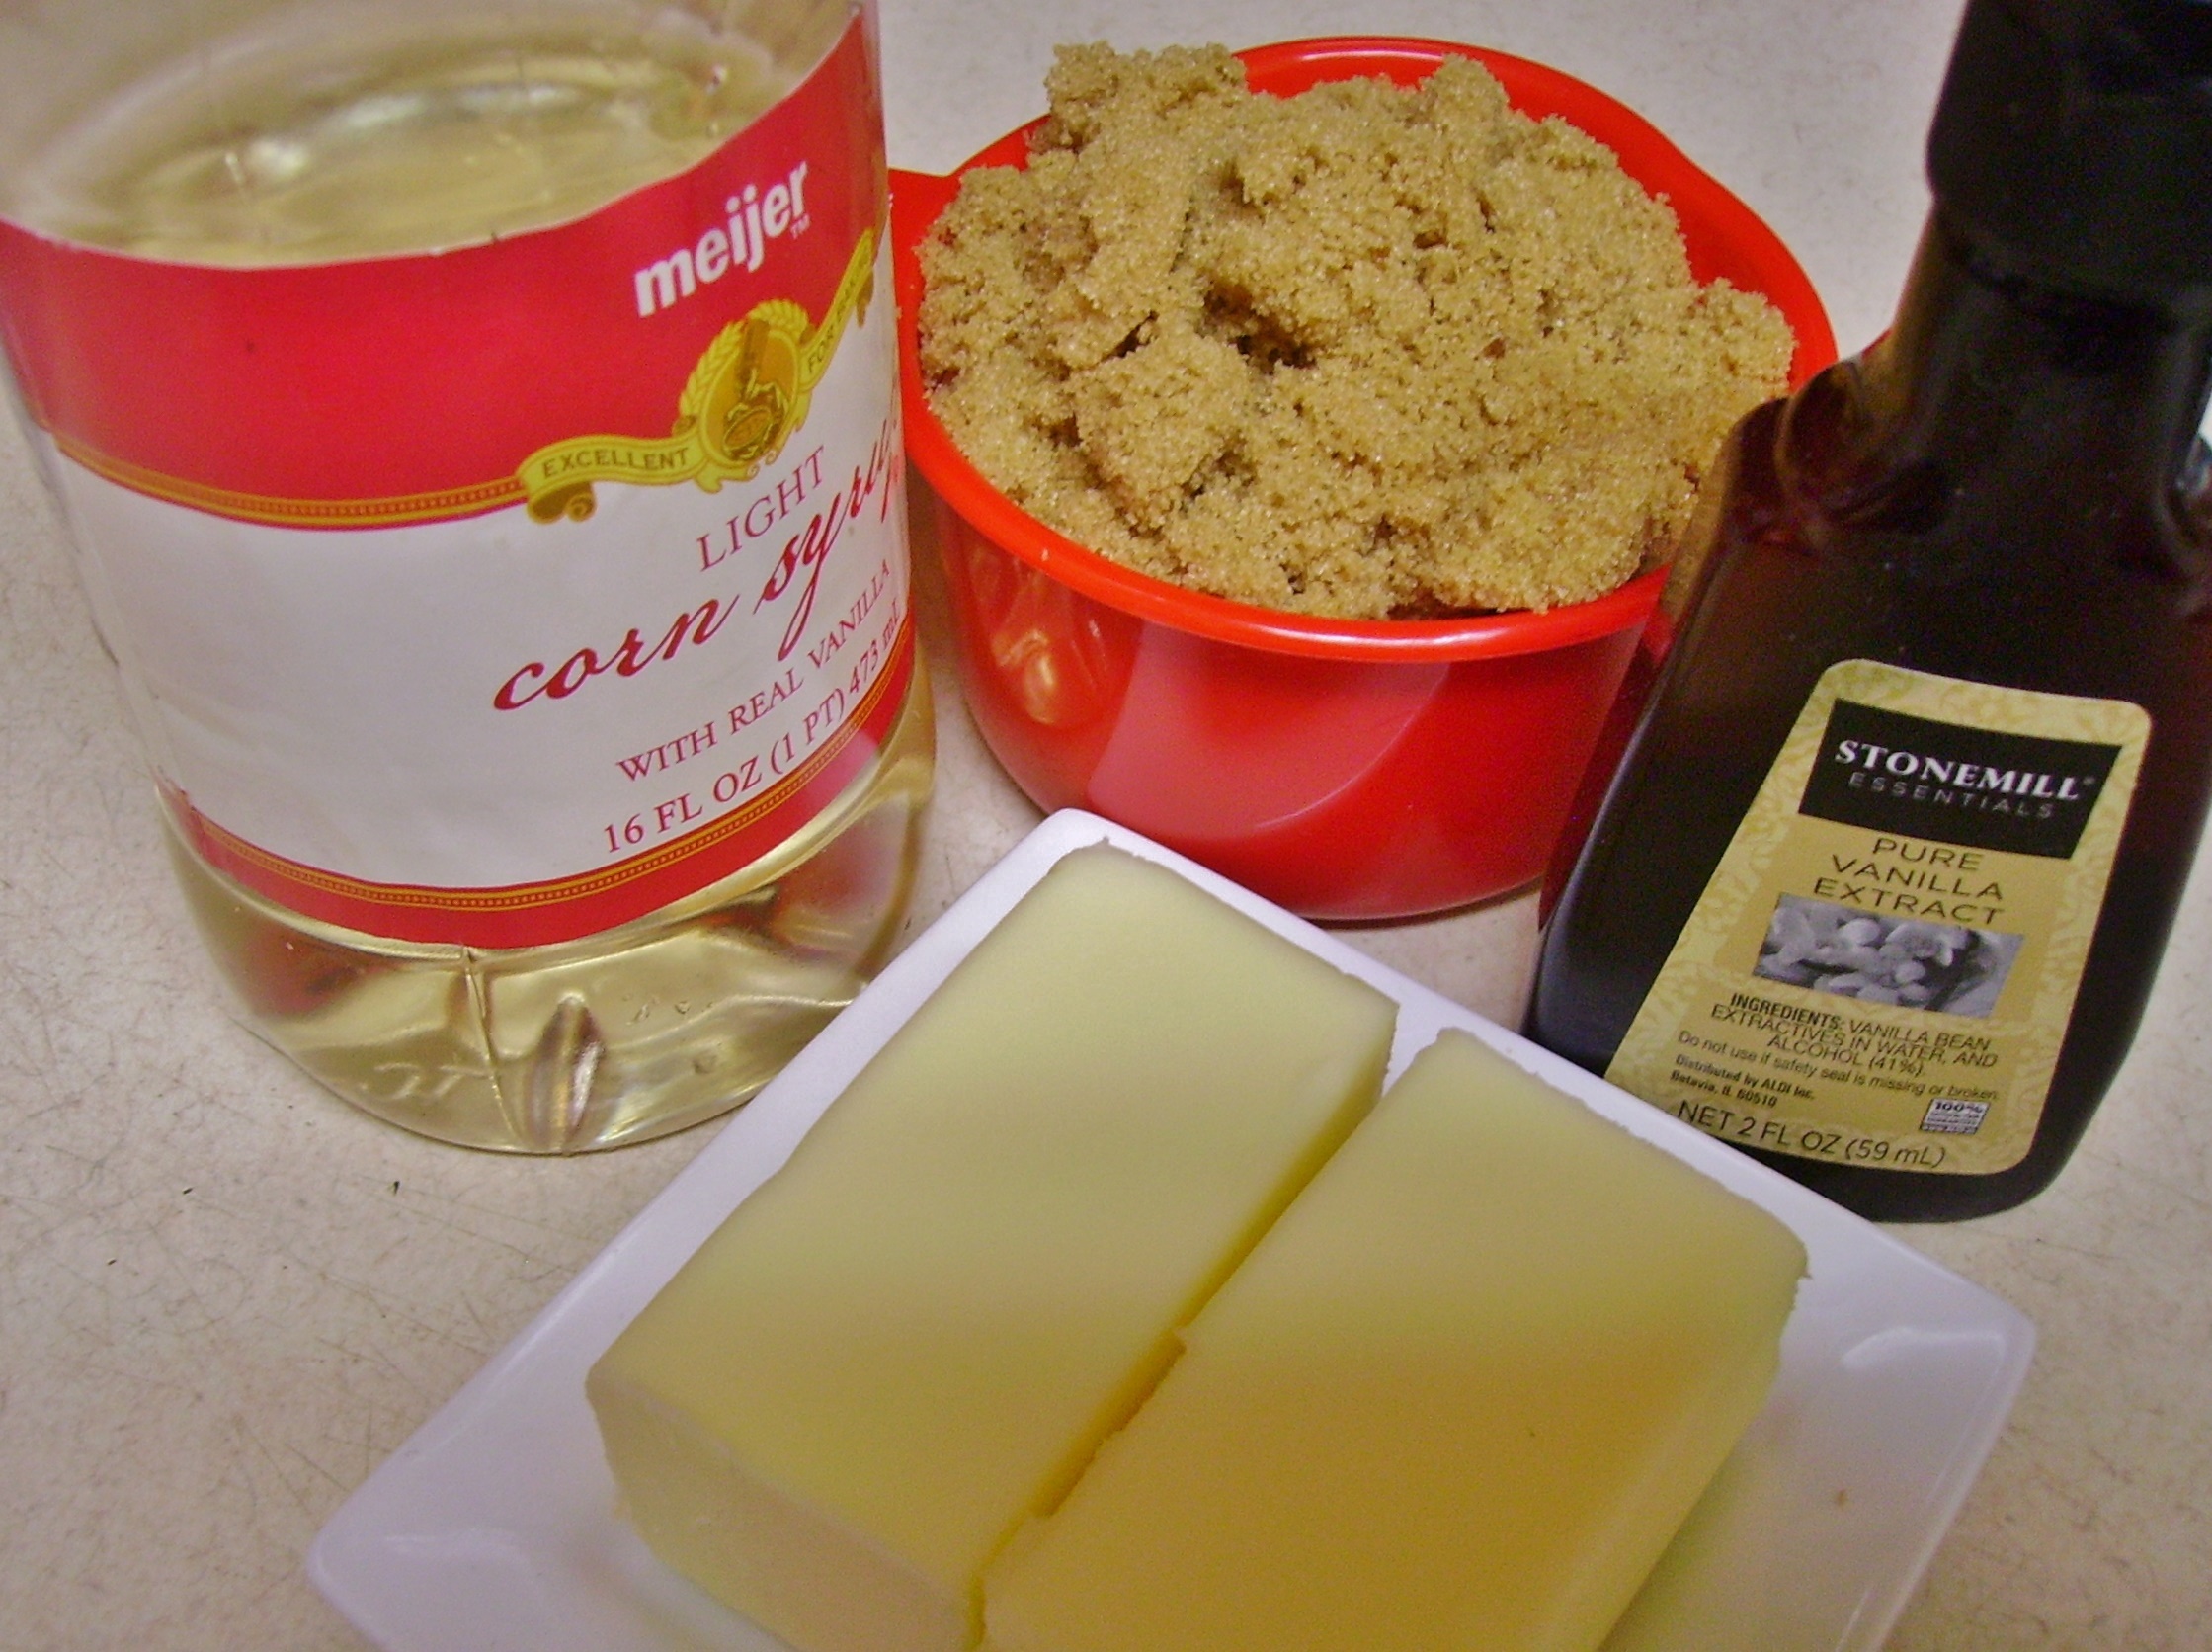
Butter, brown sugar, and corn syrup cook into a beautiful toffee that is poured over the cereal and nuts. DIGITAL CAMERA
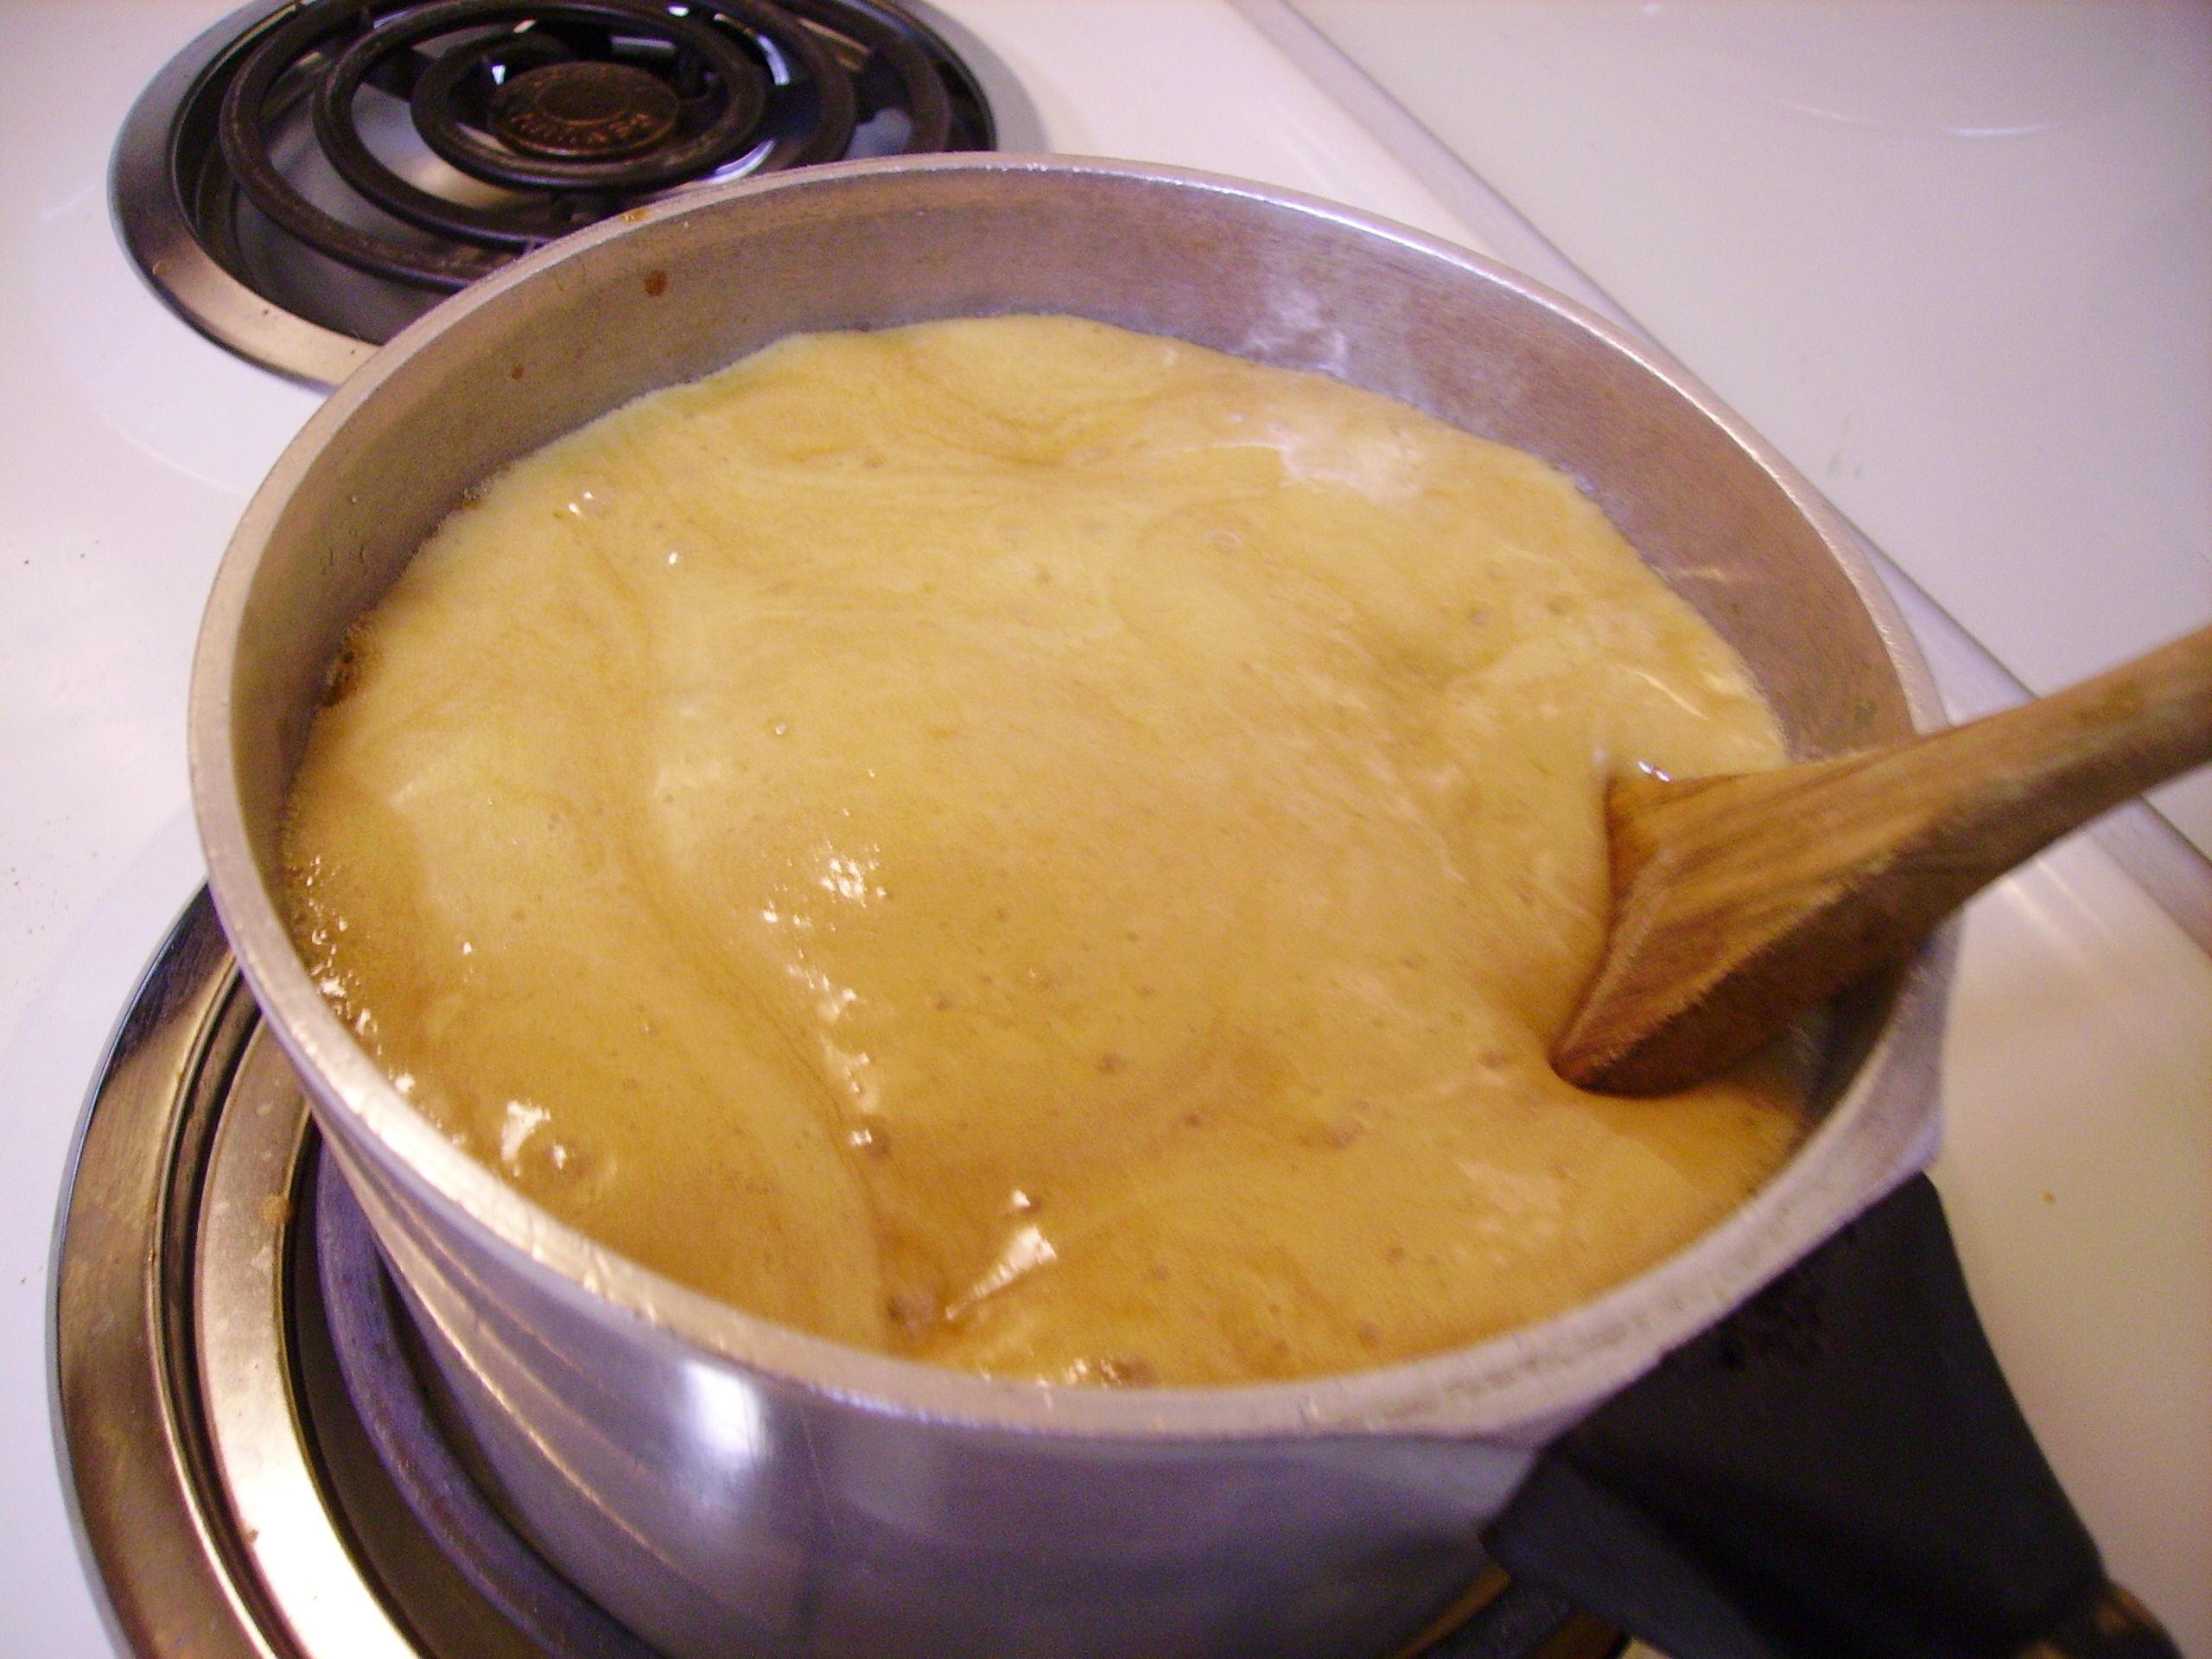
The trays of yumminess are popped in a slow oven where over the course of the next hour they will magically bond and blend into a golden crunchy delight.DIGITAL CAMERA 
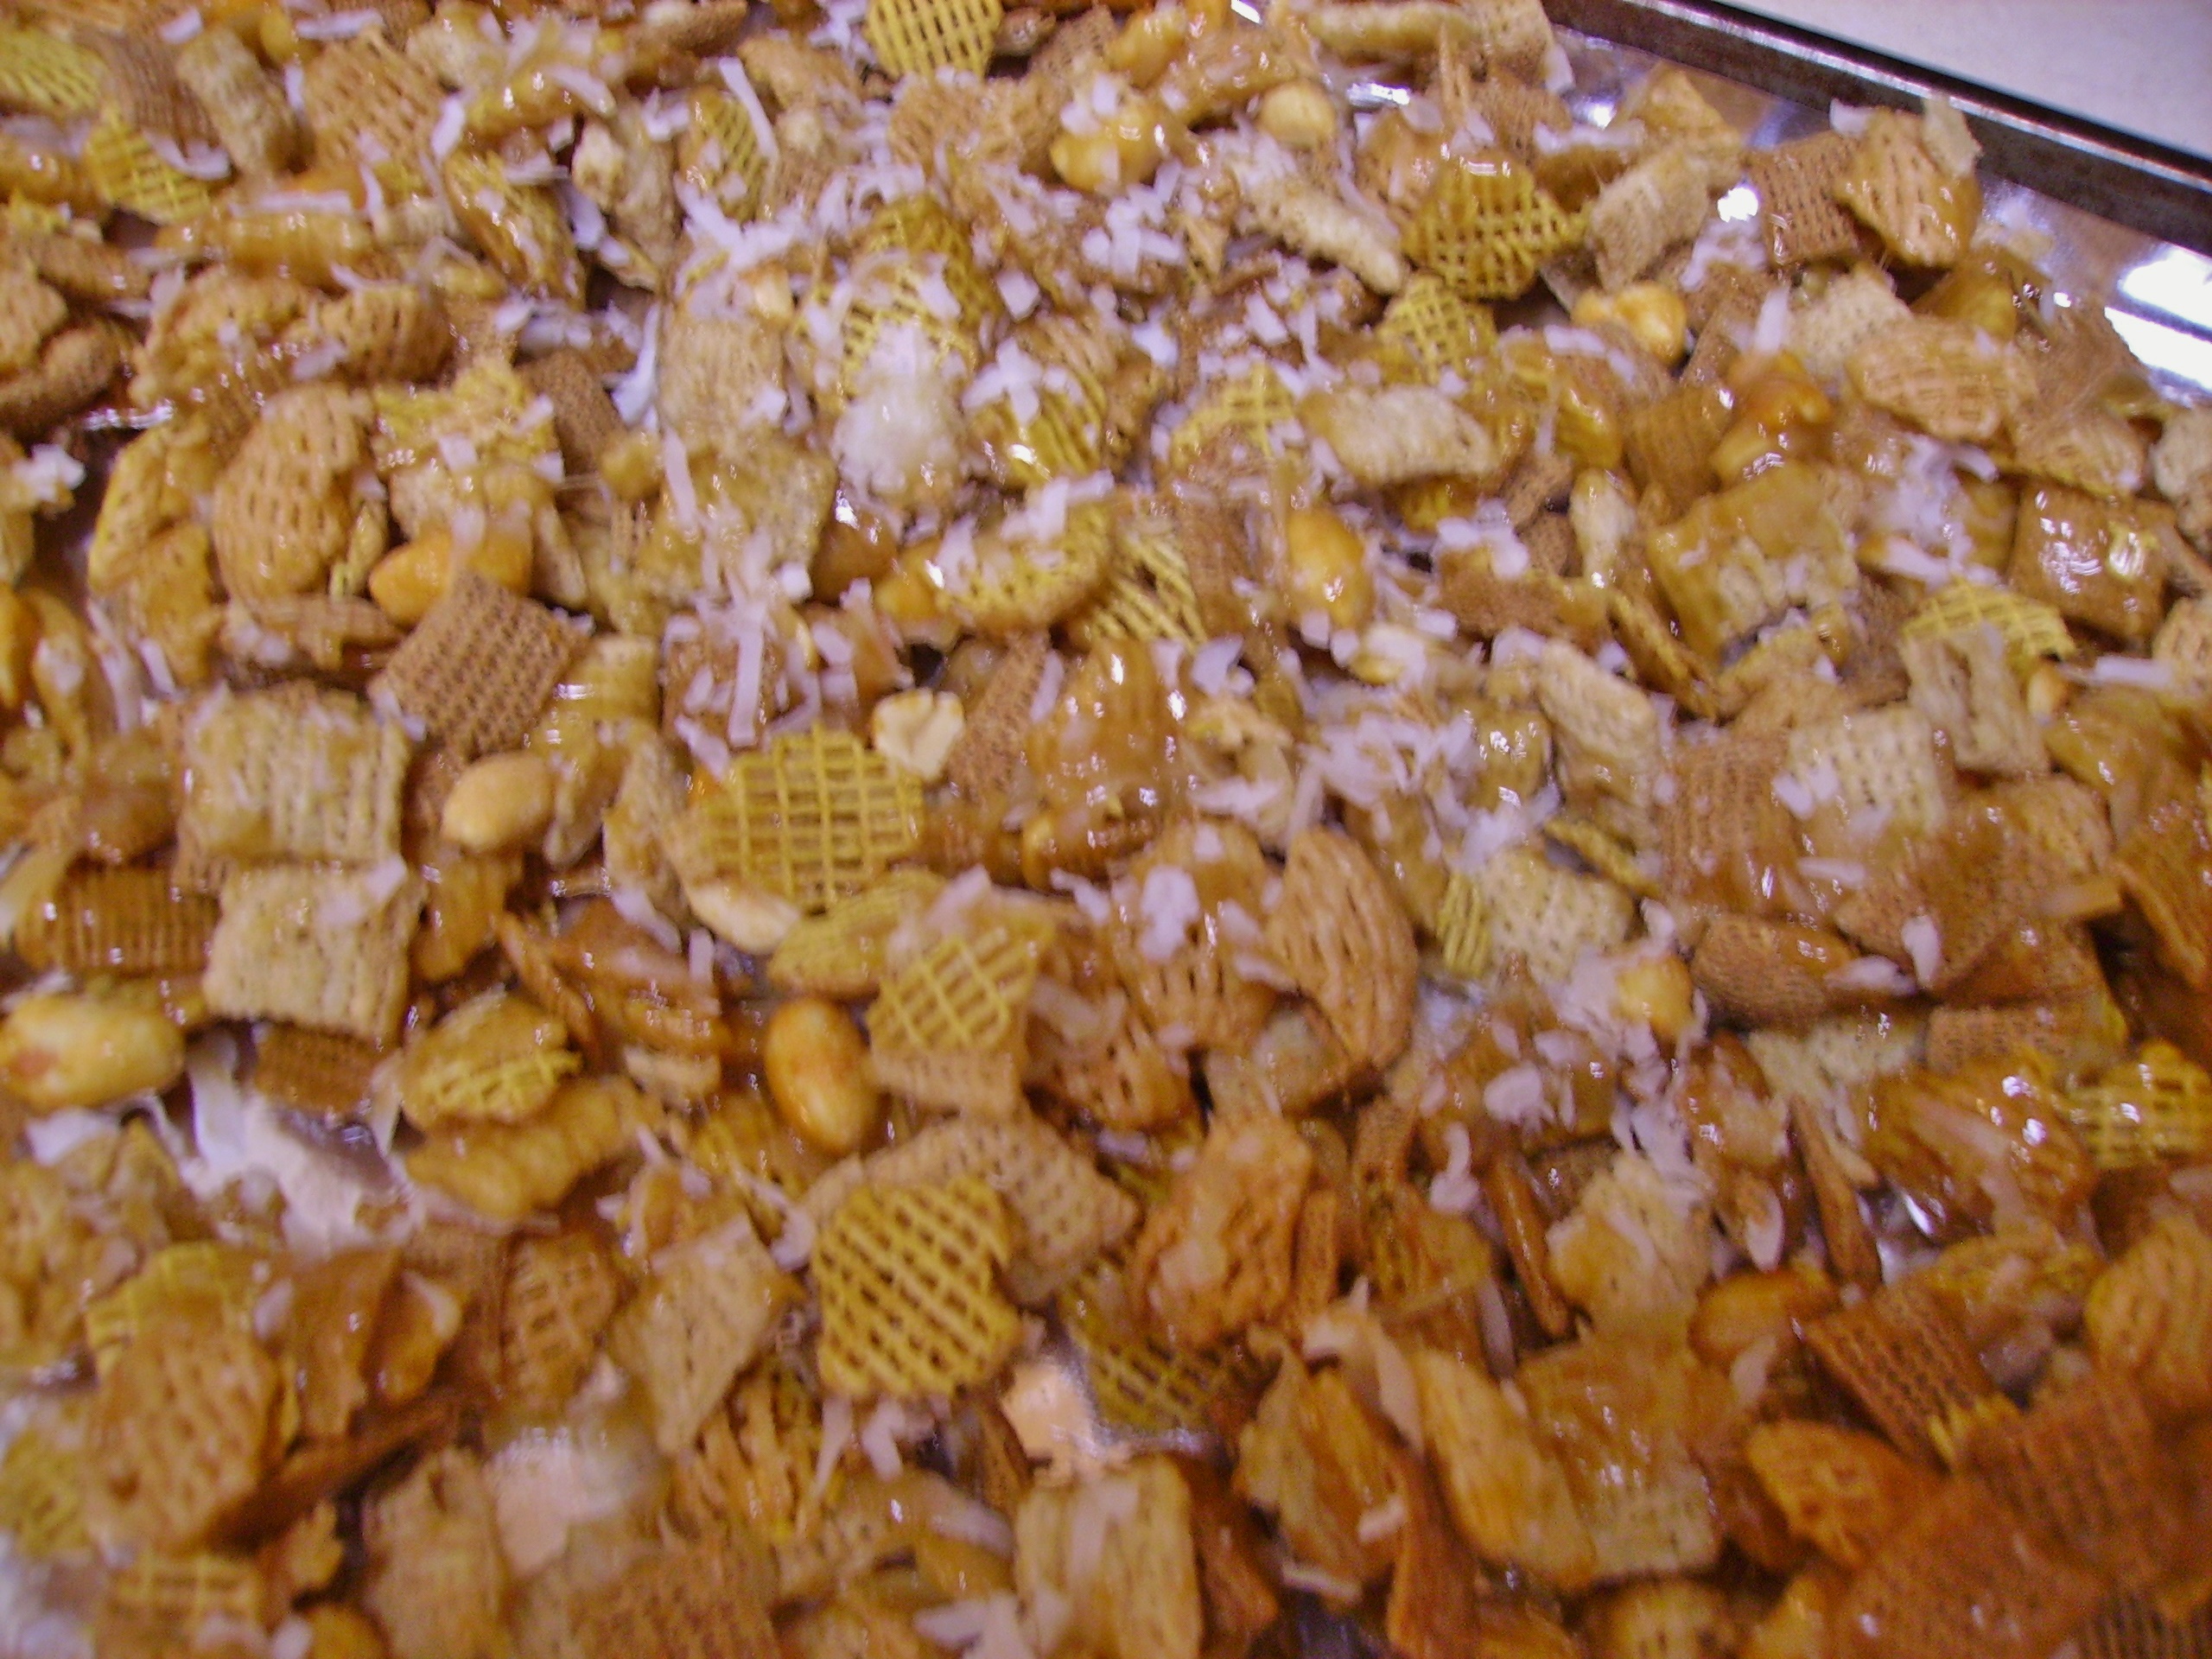
Once cooled and gently separated, they are embellished with red and green M & M’s. The result is now somewhere in the neighborhood of 14 cups of delicious. More than enough to share, it makes a wonderful gift.DIGITAL CAMERA

Chex and Chocolate
Print Recipe
Servings
14 Cups
Servings
14 Cups
Chex and Chocolate
Print Recipe
Servings
14 Cups
Servings
14 Cups
Ingredients
Servings: Cups
Instructions
  1. Preheat the oven to 250 degrees. Combine the cereals, coconut and peanuts in a large bowl.
  2. Line 2 large rimmed baking sheets with foil. Lightly coat the foil with cooking spray. Set aside.
  3. In a medium saucepan over medium heat combine the butter, brown sugar, and corn syrup. Heat to boiling stirring constantly.Without stirring, boil for 5 minutes.
  4. Remove from the heat. Stir in baking soda and vanilla. Continue to stir until the mixture becomes fluffy and light. Pour the mixture over the cereal and stir gently to coat evenly.
  5. Divide the mixture between the 2 prepared baking sheets, spreading out evenly.
  6. Place in oven and bake for 1 hour. Stir and switch the baking sheet positions every 15 minutes.
  7. Remove from the oven and allow to cool. Stir every 10 minutes and gently break apart any large clumps.
  8. When mixture is completely cool, stir in the M & M's. Store in airtight containers.
Share this Recipe
Powered byWP Ultimate Recipe

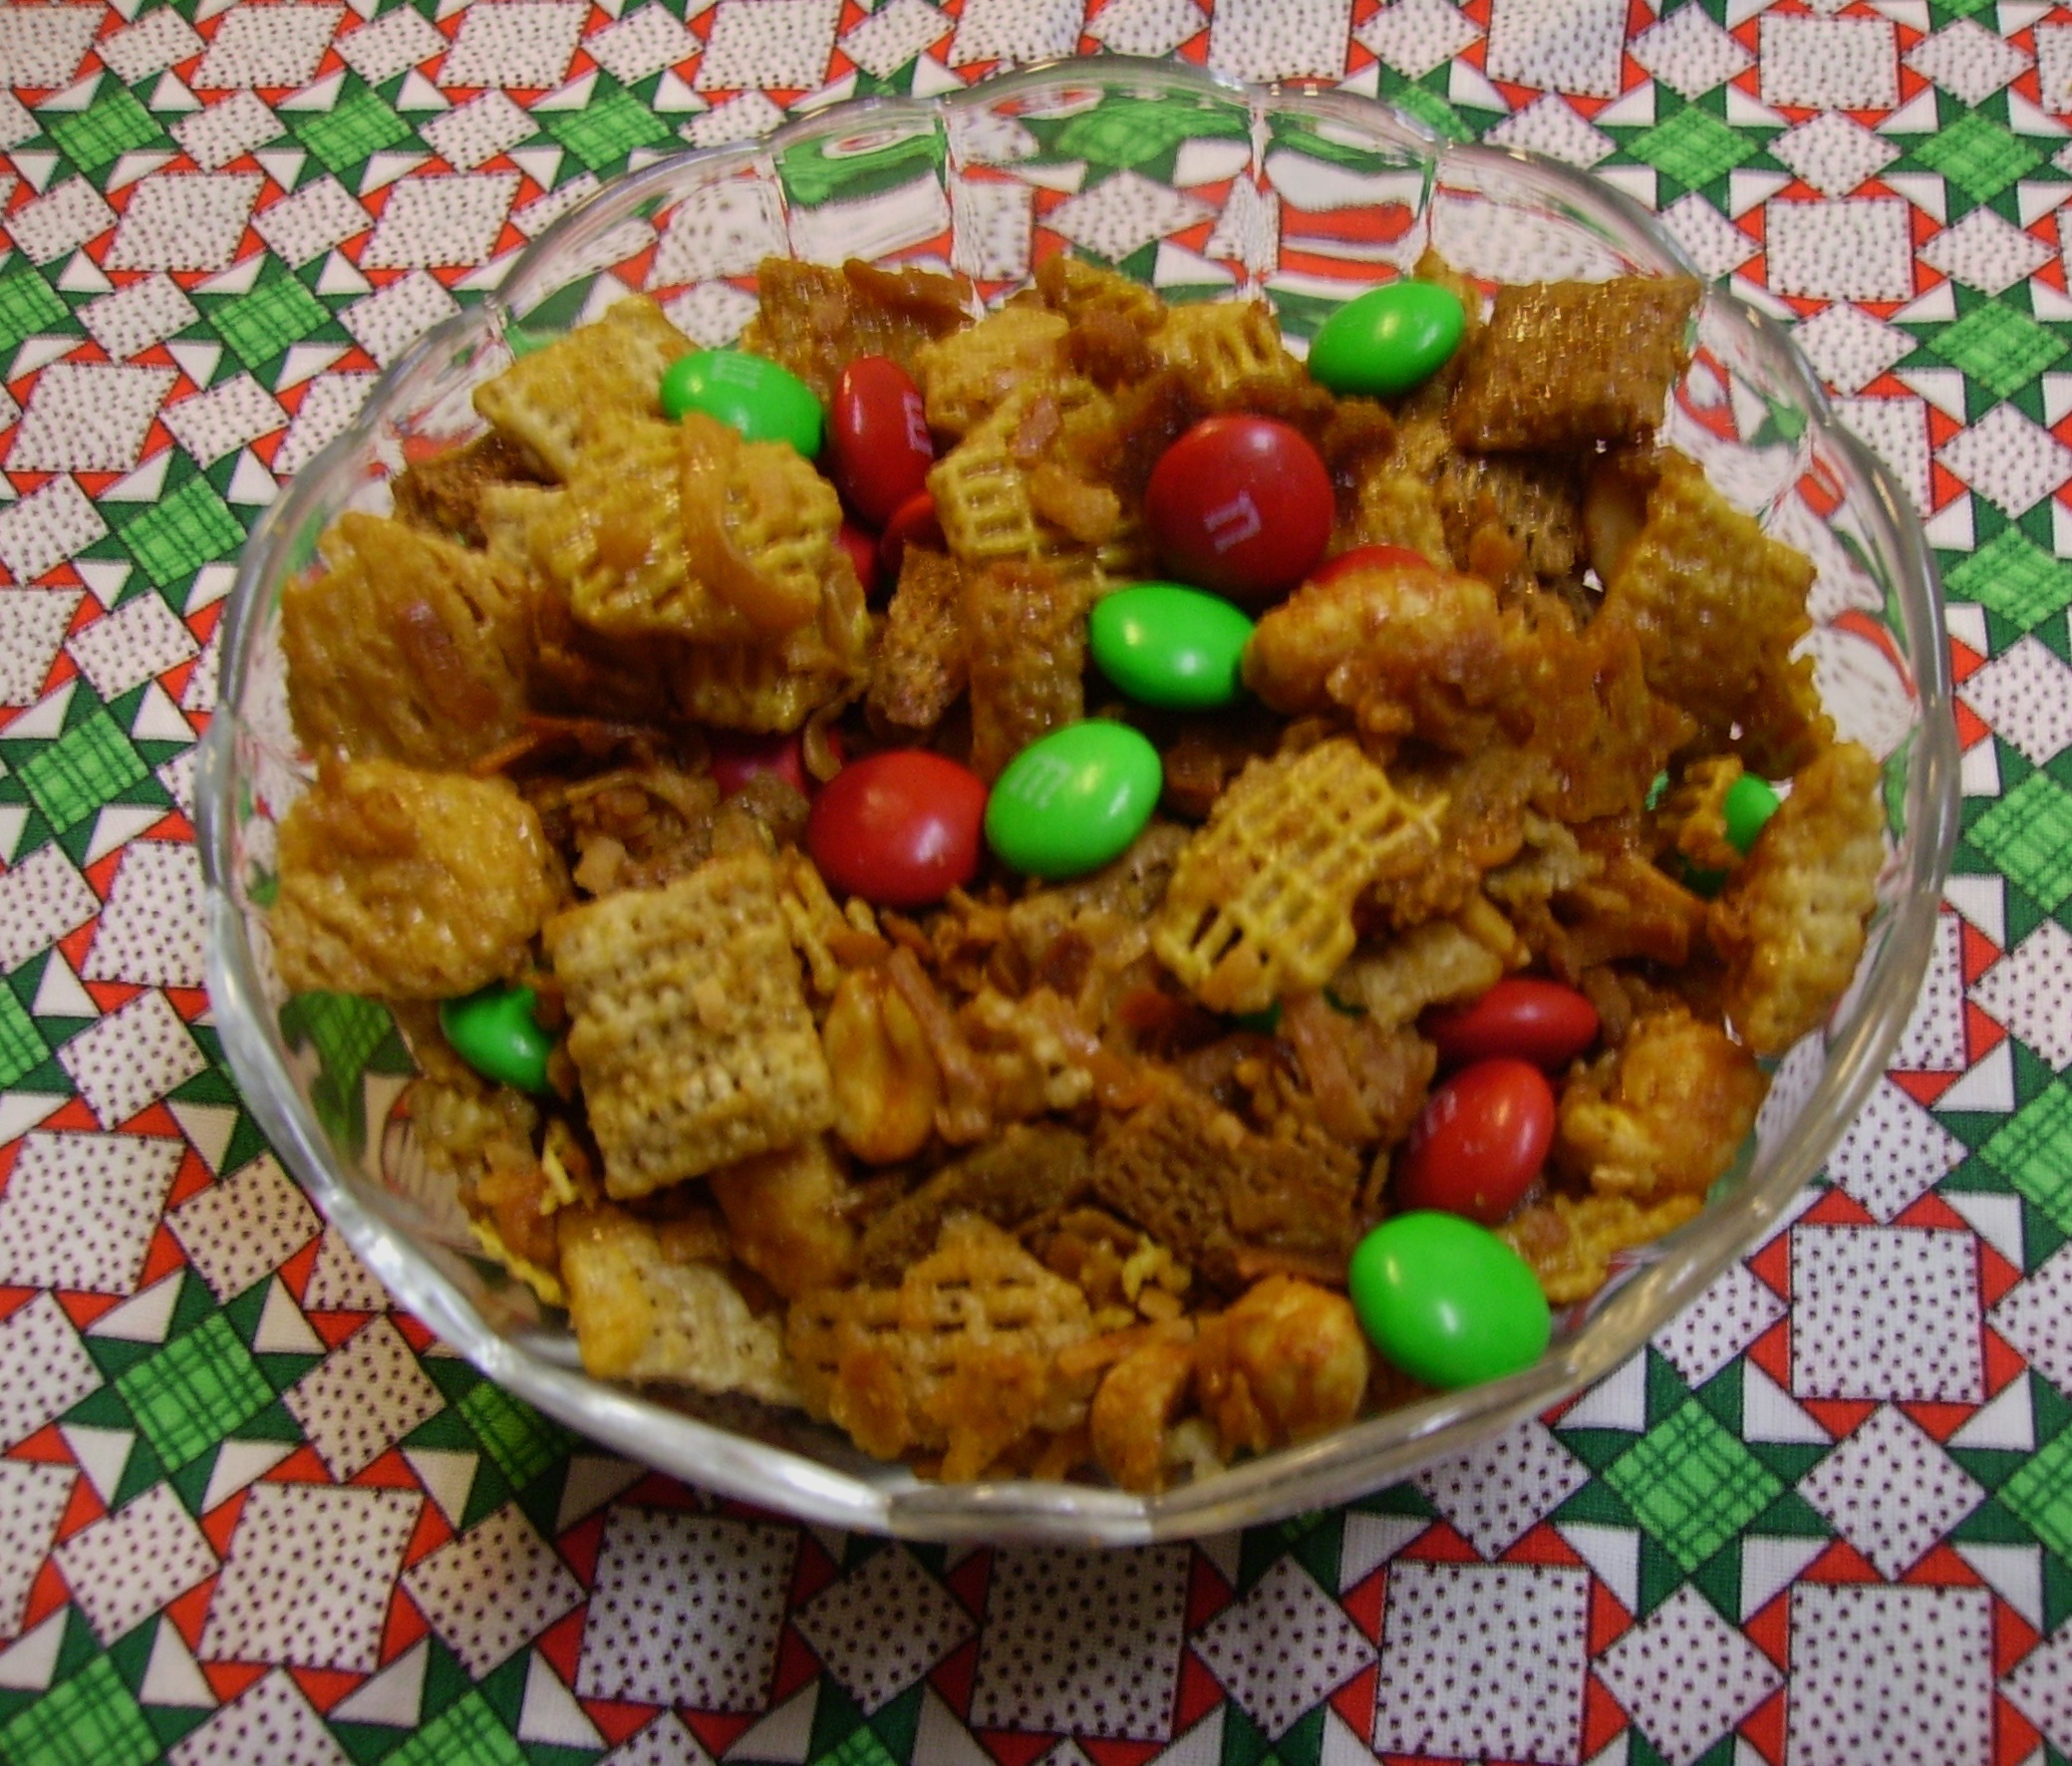
It keeps well in sealed containers ( do not leave this out on the table covered with a napkin). Be careful of the container you choose. When my sons were young, I used plastic cereal containers  that at any other time of the year would actually hold breakfast cereal. I stopped doing that after I came down to the dining room one morning to find that the boys and their sleep-over friends had poured milk over large bowls of the mix and were eating it with spoons. I made “Cool Mom” points for having M & M’s in the cereal, but lost some “Street Cred” with moms who had to deal with bouncing boys on a sugar high. It would, however make an awesome breakfast cereal…just saying.

Christmas is about love and sharing. This recipe is made for that. More than enough to share with those you hold dear at Christmas and all year-long.


Reflections on Thanksgiving

The Thanksgiving weekend has come to a close. Looking back on it, I have to say that it has been one of the happiest I can remember. The days were filled with family, food, shopping, and most of all love. Love, you know, makes everything better. You can see it and you can definitely feel it. The holidays are resplendent in love. I’ve had five days to bask in the sunshine of love and I must say that glow does wonders for me inside and out.

Family was at the center of the weekend. Thanksgiving dinner was a delightfully blended affair that was centered on the newest addition. We all gathered at Jakob’s house to share a dinner that everyone contributed to. Turkey and Ham were the stars each prepared by a grandma. The sides were everything that tradition demands and then some. Mashed Potatoes and Green Bean Casserole shared the table with Italian Green Bean Salad and Sour Dough and Artichoke Stuffing.

Yes, Mama D (aka Nonna) brought the California inspired stuffing that had more than a little Italian influence. The recipe actually was born during our time in California. Loosely based on recipes from Sunset Magazine and Weight Watchers it has developed over the years to become the family stuffing of choice.

Starting with toasted sour dough bread cubes,DIGITAL CAMERA it became  a Cali-Itali creation with the addition of Italian sausage, artichokes, spinach and more than a little onion and garlic.DIGITAL CAMERA

Everything came together in a health conscious manner (turkey sausage, low sodium chicken, etc). until it donned its gay holiday apparel of some grated Asiago Cheese

DIGITAL CAMERA before being bathed in olive oil and butter.DIGITAL CAMERAThe stuffing (I should call it dressing as it never saw the inside of the bird) was a huge success; gone before a photo of the finished dish could be taken. Trust me, it looked beautiful and tasted amazing.

Mama D's Cali-Itali Stuffing
Print Recipe
Use this for your holiday dinner. Make it your own by adjusting the flavors to your family's taste.
Servings
12
Servings
12
Mama D's Cali-Itali Stuffing
Print Recipe
Use this for your holiday dinner. Make it your own by adjusting the flavors to your family's taste.
Servings
12
Servings
12
Ingredients
Servings:
Instructions
  1. Heat a large skillet over medium high heat. Crumble the sausage into the pan and cook until it is well browned. Turn and break apart as needed.
  2. Remove the sausage from the pan and drain on a paper towel. Pour off most of the drippings. Add 3 tablespoons of olive oil to the pan and add the onions and garlic. Saute stirring frequently until the onion is golden and the garlic is fragrant, 5-7 minutes.
  3. Add the artichokes and spinach to the pan and continue to cook for another 3 - 5 minutes. The artichokes should have a little color and the spinach should be wilted.
  4. In a large bowl, combine the toasted bread cubes, sausage, and the vegetables from the pan (include all the drippings, too). Toss to combine.
  5. Add the seasonings that you are using along with the cheese and toss again to combine.
  6. Pour in the eggs and blend well. Add the chicken stock. Use enough so that the stuffing is very moist, but not mushy. Taste and make any necessary adjustments to the seasonings. Add a little salt if you think it needs it.
  7. Grease a large rectangular baking dish. Add the stuffing and smooth out evenly. Do not pack it down. Cover with foil and bake in a pre-heated 350 degree oven for 35 - 40 minutes.
  8. Combine the remaining olive oil and the melted butter. Remove the stuffing from the oven. Take off the foil and drizzle the butter/olive oil mixture over the top. Return to the oven for another 15 - 20 minutes until the top of the stuffing is golden brown.
  9. Remove from the oven and allow to rest for 10 minutes before serving.
Share this Recipe
Powered byWP Ultimate Recipe

For the first time I was in a position to begin Christmas shopping early (this IS very early for me). I was also in the pleasant position of being on the paying side of the cash register and that did change my perspective. Visits to the nearby mini mall and lovely downtown Geneva gave me what feels like an early jump on the whole shopping experience. Not a single long line at the mall, and the knowledge that I was supporting small businesses in Geneva while finding some unique little gifts began to fill me with Holiday spirit.

That holiday spirit reached its peak when I got to spend some quality time with my grandsons.We just bought a futon for the second bedroom and I invited Dylan over to take it for its maiden voyage. All that was just an excuse to have lots of time with him. We ( I should say Dylan), baked Peanut Butter Blossoms with a little good- natured hassling from Grampa. In spite of it all, they were perfect.DIGITAL CAMERAA walk around the grounds of our apartment complex became an adventure of sorts. I got us on the wrong path in the woods, but thanks to Dylan’s kindness and keen eye we made it out in one piece and eventually got back home. He’s become such a fine young man and I’m so proud of him.

Jakob brought his parents over for dinner on Saturday. Again, this was just my way of getting more time with my new Grand Boy. While the Lychee Bellini and Three Treasure Fried Rice were delicious, they couldn’t hold a candle to the delicious sweetness of holding Jakob and marveling at his wide-eyed wonder at our new home. I know the lights and the glow of the flickering candles had something to do with that wonderment, but it didn’t diminish the joy I felt.

December is here and the path to Christmas is always shorter than I imagine. Thanksgiving has given me a glimpse into the real gifts to come. The decorations will start appearing today and the baking will start soon. All of that is just the trappings of a time filled with love. I plan to relish the journey to Christmas and treasure the time spent with my family. I hope your holiday journey is filled with the same kind of joy.


Stock in a Box on Steroids

Let me start by saying that homemade stock is the best. It is easy to make and freezes beautifully. I will also say that nothing compares with the flavor of homemade stock. You are in complete control of salt and all the other flavors that you choose to add.

That being said, I admit that I use “Stock in a Box” from time to time. It is convenient and once you find a brand that you like and that doesn’t offend your healthy sensibilities too much, it is great for quick soups and sauces. I’ve even been known to saute in it.

I was getting ready to make some soup the other day and was out of my homemade stock. The soup, which was going to be dinner couldn’t wait for me to make scratch stock, so I went to the pantry and found a box of chicken stock. Feeling somewhat adventurous, I decided to play with it a bit.

I decided it needed to be bulked up some so I added a leek, some garlic, and fresh herbs.DIGITAL CAMERAI used my fool-proof method for cleaning leeks. Leeks are notoriously sandy and the sand loves to settle in the layers of the leek where it can create an unpleasant taste and texture experience.

DIGITAL CAMERA You can diligently rinse them under running water while prying the layers apart, but it’s been my experience that a few errant grains will remain.

This technique eliminates that. Once you have cut off the root end and the tougher dark green ends you can slice the leeks to suit the recipe you are creating.DIGITAL CAMERADrop the slices into a bowl of cold water and let them float there for 5 minutes or so.DIGITAL CAMERACarefully scoop out the leeks with a slotted spoon and drain them on paper towels. Dump out the water and marvel at the grit and sand in the bottom of the bowl that now will not ruin your creation.

Once the leeks were clean, I added them to a soup pot along with some garlic and herb sprigs. I let them all “sweat it out” for a bit in some olive oil before I added the stock.DIGITAL CAMERAI let everything simmer for 45 minutes or so until the stock smelled incredible. The sprigs of rosemary and thyme that I used came out clean as the proverbial whistle. I diligently fished them out until I had the same number of stems that I started out with.DIGITAL CAMERA This isn’t me being anal, it is saving my immersion blender from “choking” on the woody stems. Experience is a wonderful teacher…DIGITAL CAMERAThe stock that resulted was a bulked up and richer version of what came out of the box. It was a perfect addition to my soup. In fact, this may become a new Mama D standard when using stock in a box. I used chicken stock, but it would work equally as well with vegetable stock. You could even use this technique with homemade stock to give it a little more muscle. With Thanksgiving only days away, this could be a wonderful base for your gravy.

Stock in a Box on Steroids
Print Recipe
Stock in a Box on Steroids
Print Recipe
Ingredients
Servings:
Instructions
  1. Chop off the root and and the dark green top of the leek. Cut it in half lengthwise then slice thinly into half moons. Place the pieces in a bowl of cold water and let them sit for 5 - 10 minutes without disturbing them. Carefully scoop the pieces out with a slotted spoon and drain on paper towels.
  2. Heat the olive oil in a large soup pot over medium low heat. Add the leeks, garlic and herb sprigs (count them). Sweat until the leeks are very soft and the garlic is fragrant.
  3. Pour in the box of stock and stir to combine everything. Bring to a boil. reduce the heat to low, cover and simmer for 45 minutes or so. The stock should smell wonderful and the herb stems should be bare of their leaves.
  4. Remove the pot from the heat and fish out the herb stems. Make sure you have the same number of stems you put in (your immersion blender will thank you).
  5. Using an immersion blender process the stock until it is smooth (how smooth is up to you and there will be some herb flecks)
  6. Your "bulked up" stock is ready to use in your recipe.
Share this Recipe
Powered byWP Ultimate Recipe

DIGITAL CAMERA

Whatever techniques and ingredients you use in your cooking, the most important thing to add is love. There’s a place for short cuts and convenience, even in Mama D’s Kitchen. 


A Glimpse of Winter and the Love of Soup

Last night we watched the first real snowfall from our balcony. The flakes were big and fluffy falling on the courtyard below us. This morning we woke to an early Winter Wonderland.DIGITAL CAMERAit was barely enough to dust the ground and give the walks a powdered sugar-coating, but it was a start. I’m not in any kind of hurry to experience Winter in all its Midwestern glory, but there is something about the first snowfall that is magical. Stepping back inside I felt a warm feeling come over me. Our apartment is becoming a cozy haven filled with our slimmed down cache of treasures. Along with slippers and cozy throws my mind wanders to thoughts of soup.

Soup is the cornerstone of Mama D’s Kitchen. I make a pot of something wonderful at least once a week. Sometimes the recipes come from a raid on the pantry coupled with a good dose of inspiration. Other times I like to re-invent a dish into a soup. This recipe is a wonderful case that speaks to both points. Chicken Enchiladas are something I love to make and eat. From simple shredded chicken and mushrooms blanketed in a spicy chili sauce to a layered casserole combining creamy, spicy, and cheesy, I’ve done them all. While these don’t quite fit into Mama D’s en”light”ened kitchen they are a source of inspiration. That’s how Chicken Enchilada Soup came to be. DIGITAL CAMERAWhile not the “lightest” of soups, it is a bit more diet friendly than it’s richer casserole cousins.

This soup started with boneless skinless chicken thighs. When well-trimmed and cut into bite size pieces they are a rich yet somewhat healthy protein source.DIGITAL CAMERA

My last bag of homemade chicken stock went into this recipe along with onions, garlic, and a variety of peppers.DIGITAL CAMERAThe stock was given a bit of Latin flair with mild enchilada sauce and RoTel tomatoes and green chilies. Some pinto beans and a bit of roasted corn joined in the merriment.DIGITAL CAMERAThese were what was in the pantry, but you can use any type of sauce you’d like…you could even make it all from scratch on a cold wintry day.

It came together in the usual way. The chicken was browned in a bit of olive oil. The onions, peppers, and garlic were cooked briefly in the tasty remains before the main liquids were added. Some simmering gave everything a chance to get comfortable together.

I love a creamy sauced enchilada redolent with shredded cheeses. I know that takes a relatively healthy recipe and drives it down the avenue of fat laden decadence. I think I found a compromise that paid tribute to the essence yet fit into a lower fat food plan. I used a can of fat-free evaporated milk. It has some of the body of cream or half and half, but at a significant fat savings. A like amount of fat-free half and half would also work. Cheese still made an appearance, but in more modest proportions. Normally, up to a pound would have melted into this pot of deliciousness, but I opted for about six ounces of pepper jack and extra sharp cheddar creating about 2 cups of splendor.DIGITAL CAMERAUsing cheeses with big flavor like these allows a little less to go a longer way. Reduced fat cheese could also be used here, but I personally find it a little flat tasting and rubbery. Remember that everything in moderation addage…even moderation must be moderated.

So, the soup looked wonderful; it tasted good, too. Sitting in the bowl, it looked a little naked. so I brought on the embellishments. I toasted up some corn tortilla strips in the oven. A spritz of cooking spray and a sprinkling of sea salt gave them true chip stature.DIGITAL CAMERAI made an avocado cream that gave a hint of richness and a bit of healthy fat. DIGITAL CAMERA

Topping the soup with a little Queso Fresco was the perfect final touch. Heaven in a bowl, again.DIGITAL CAMERA

Ingredients
Servings:
Instructions
  1. Heat the olive oil in a large soup pot. Season the chicken with the herb seasoning and add to the pot. Cook and stir 5 -7 minutes until the chicken is lightly browned. Remove the chicken to a plate and set aside. Leave the drippings in the pot.
  2. Add the onions to the pot and stir to coat with the drippings. Cook for 3 minutes and add the garlic. Cook for 3 minutes more.
  3. Add the colored and poblano peppers to the pot and cook stirring frequently for five minutes or so.
  4. Return the chicken to the pan and add the corn, enchilada sauce, RoTel, and the chicken stock. Bring everything just to a boil. Reduce the heat and simmer for 20 -30 minutes.
  5. Add the drained beans and heat for a few minutes longer.
  6. Mix the masa harina with 1/2 cup of the evaporated milk until a smooth paste forms. Set aside. Pour the rest of the milk into the soup and stir to blend.
  7. Mix a little more of the soup liquid into the masa harina paste and add it to the soup pot stirring well. Continue to cook for 5 minutes or so until the soup thickens. Adjust the amount of masa to achieve the thickness that you want.
  8. Gradually add the shredded cheeses to the pot stirring until the cheese melts.
  9. Ladle into soup bowls and top with tortilla chips, a little crumbled queso fresco and avocado cream. Serve.
  10. Avocado Cream: Mash 1/2 of an avocado with a couple of spoons of light sour cream. Add enough fat free half & half to make it a cream consistency. Add a little chili powder and ground cumin and drizzle a bit on each bowl of soup
Share this Recipe
Powered byWP Ultimate Recipe

Our early shades of Winter aren’t going anywhere soon. This is just the beginning. Soup will be filling the kitchen with warmth, flavor, and love for months to come.

Life After a Microwave and a Skillet Pork Dish

I have never considered myself microwave dependent. In fact I only used it (or so I thought) to reheat leftovers and melt butter. So, as I left my old kitchen behind, I hardly gave the microwave a second glance. Cooking with love does not require energy waves. The stove top can do anything the microwave can and is so much more organic…or so I thought. One week in the new kitchen and I’ve reached for the microwave almost daily only to have to rethink  how to do some small cooking task. I guess I took the microwave for granted. Does it amount to enough need to take up precious counter space? Time will tell. but at this point, I think not.

The microwave was convenient and it was a time saver in the fact that I could set it and go on to other things. Not having a microwave has made me turn back to the way things were done in the “old days.”

We wanted pop corn for an alternative dinner the other night (don’t judge me, sometimes it’s the perfect end to a day). I always make my popcorn in a pan on the stove. I even have a designated popcorn pan that creates fluffy and tender kernels of goodness with hardly an “old maid” in the batch. While the magic is happening in the pan, I would melt a cube of butter in the microwave timing it so that the butter and the pop corn would be ready together. What to do without a microwave? I have a small sauce pan that was my mother’s that easily accommodated the butter and resulted in melted perfection.

DIGITAL CAMERA

As the week went on I reached for the microwave to reheat some leftovers which turned out better reheated on the stove where they could gain a little color and crust. I had to plan ahead more to thaw out things from the freezer, but they turned out better thawing naturally, as well. My new mantra became, no microwave, no problem…after all I was really only using it for shortcuts.

As I’ve shared before, I take inspiration for my recipes from many sources. Tonight’s dinner was no exception. I found a wonderful recipe for pork with a sauce made of squash, dried cranberries, and apples in the latest Cooking Light Magazine.DIGITAL CAMERA

I had a reasonable equivalent of the ingredients on hand so I set out to put Mama D’s spin on it.

Step 1 brought me to a screeching halt.  It called for microwaving the squash and cranberries to prep them for the sauce. Hm? Now what?  Out came my trusty steamer pan and in went the berries and squash.

DIGITAL CAMERA10 minutes later (only 3 minutes more than the microwave would have cooked them) they were ready to become part of the dish.DIGITAL CAMERAPork tenderloin, my new favorite pork product, was sliced into medallions that were lightly seasoned with a salt free onion and herb mixture.DIGITAL CAMERAOnce they were lightly browned, they waited patiently in a warm oven while the rest of the dish came together. Apples and onions were joined by a sprinkling of red pepper flakes and a pinch of sugar.DIGITAL CAMERASautéed in butter (just a little) they were joined by the squash and cranberries to create a lovely fruit and vegetable medley. DIGITAL CAMERAI chose to add the pork to the pan at this point. I had reduced some chicken broth in the pan I cooked the pork in and so I added that to the pan as well.DIGITAL CAMERAThe dish was wonderful. It took less than a half hour to prepare, even without the microwave. It tasted like Fall and was healthy, too. The leftovers, by the way, were great reheated in a small fry pan on the stove.DIGITAL CAMERA

Pork with Squash, Apples and Cranberries
Print Recipe
This is a skillet dinner that is all about Fall. Inspired by and adapted from Cooking Light Magazine.
Servings
4
Servings
4
Pork with Squash, Apples and Cranberries
Print Recipe
This is a skillet dinner that is all about Fall. Inspired by and adapted from Cooking Light Magazine.
Servings
4
Servings
4
Ingredients
Servings:
Instructions
  1. Place the squash and cranberries in the basket of a steamer pan. Add water to the pan, cover and steam for 7 - 10 minutes. The squash should be tender and the cranberries slightly plumped. Set aside.
  2. In a large skillet, heat the olive oil. Season the pork slices with onion herb mixture and dredge lightly in the flour. Add the slices to the skillet and cook, turning once until browned on both sides. This should take about 5 minutes. Place pork in a low oven to stay warm.
  3. Add the broth to the pan. Scrape up any brown bits and cook over medium heat until reduced by half. Set aside.
  4. In a medium fry pan, melt the butter. Add the apple and onion pieces, pepper flakes, and sugar. Toss to coat everything and let it cook for 4-5 minutes. The apples and onions should begin to soften.
  5. Add the squash and cranberries to the pan. Toss to coat and cook for a minute or two. Add the reduced chicken broth and any yummy bits stirring to combine. Let this cook for another minute.
  6. Add the pork slices and any accumulated juices and let everything get happy together for several more minutes.
  7. Divide among four plates and serve.
Share this Recipe
Powered byWP Ultimate Recipe

So, as I start the new version of Mama D’s Kitchen, I’m getting used to my new surroundings. While the kitchen is small, I’ve created two good-sized work spaces. I like the fact that everything is close at hand. It feels cozy and friendly. The electric stove is feeling less foreign. It will take a bit of time to get really comfortable with each other, but we’re going to make it.

Mama D’s smaller kitchen and the rest of her downsized apartment are starting to feel like home.