Stock in a Box on Steroids

Let me start by saying that homemade stock is the best. It is easy to make and freezes beautifully. I will also say that nothing compares with the flavor of homemade stock. You are in complete control of salt and all the other flavors that you choose to add.

That being said, I admit that I use “Stock in a Box” from time to time. It is convenient and once you find a brand that you like and that doesn’t offend your healthy sensibilities too much, it is great for quick soups and sauces. I’ve even been known to saute in it.

I was getting ready to make some soup the other day and was out of my homemade stock. The soup, which was going to be dinner couldn’t wait for me to make scratch stock, so I went to the pantry and found a box of chicken stock. Feeling somewhat adventurous, I decided to play with it a bit.

I decided it needed to be bulked up some so I added a leek, some garlic, and fresh herbs.DIGITAL CAMERA
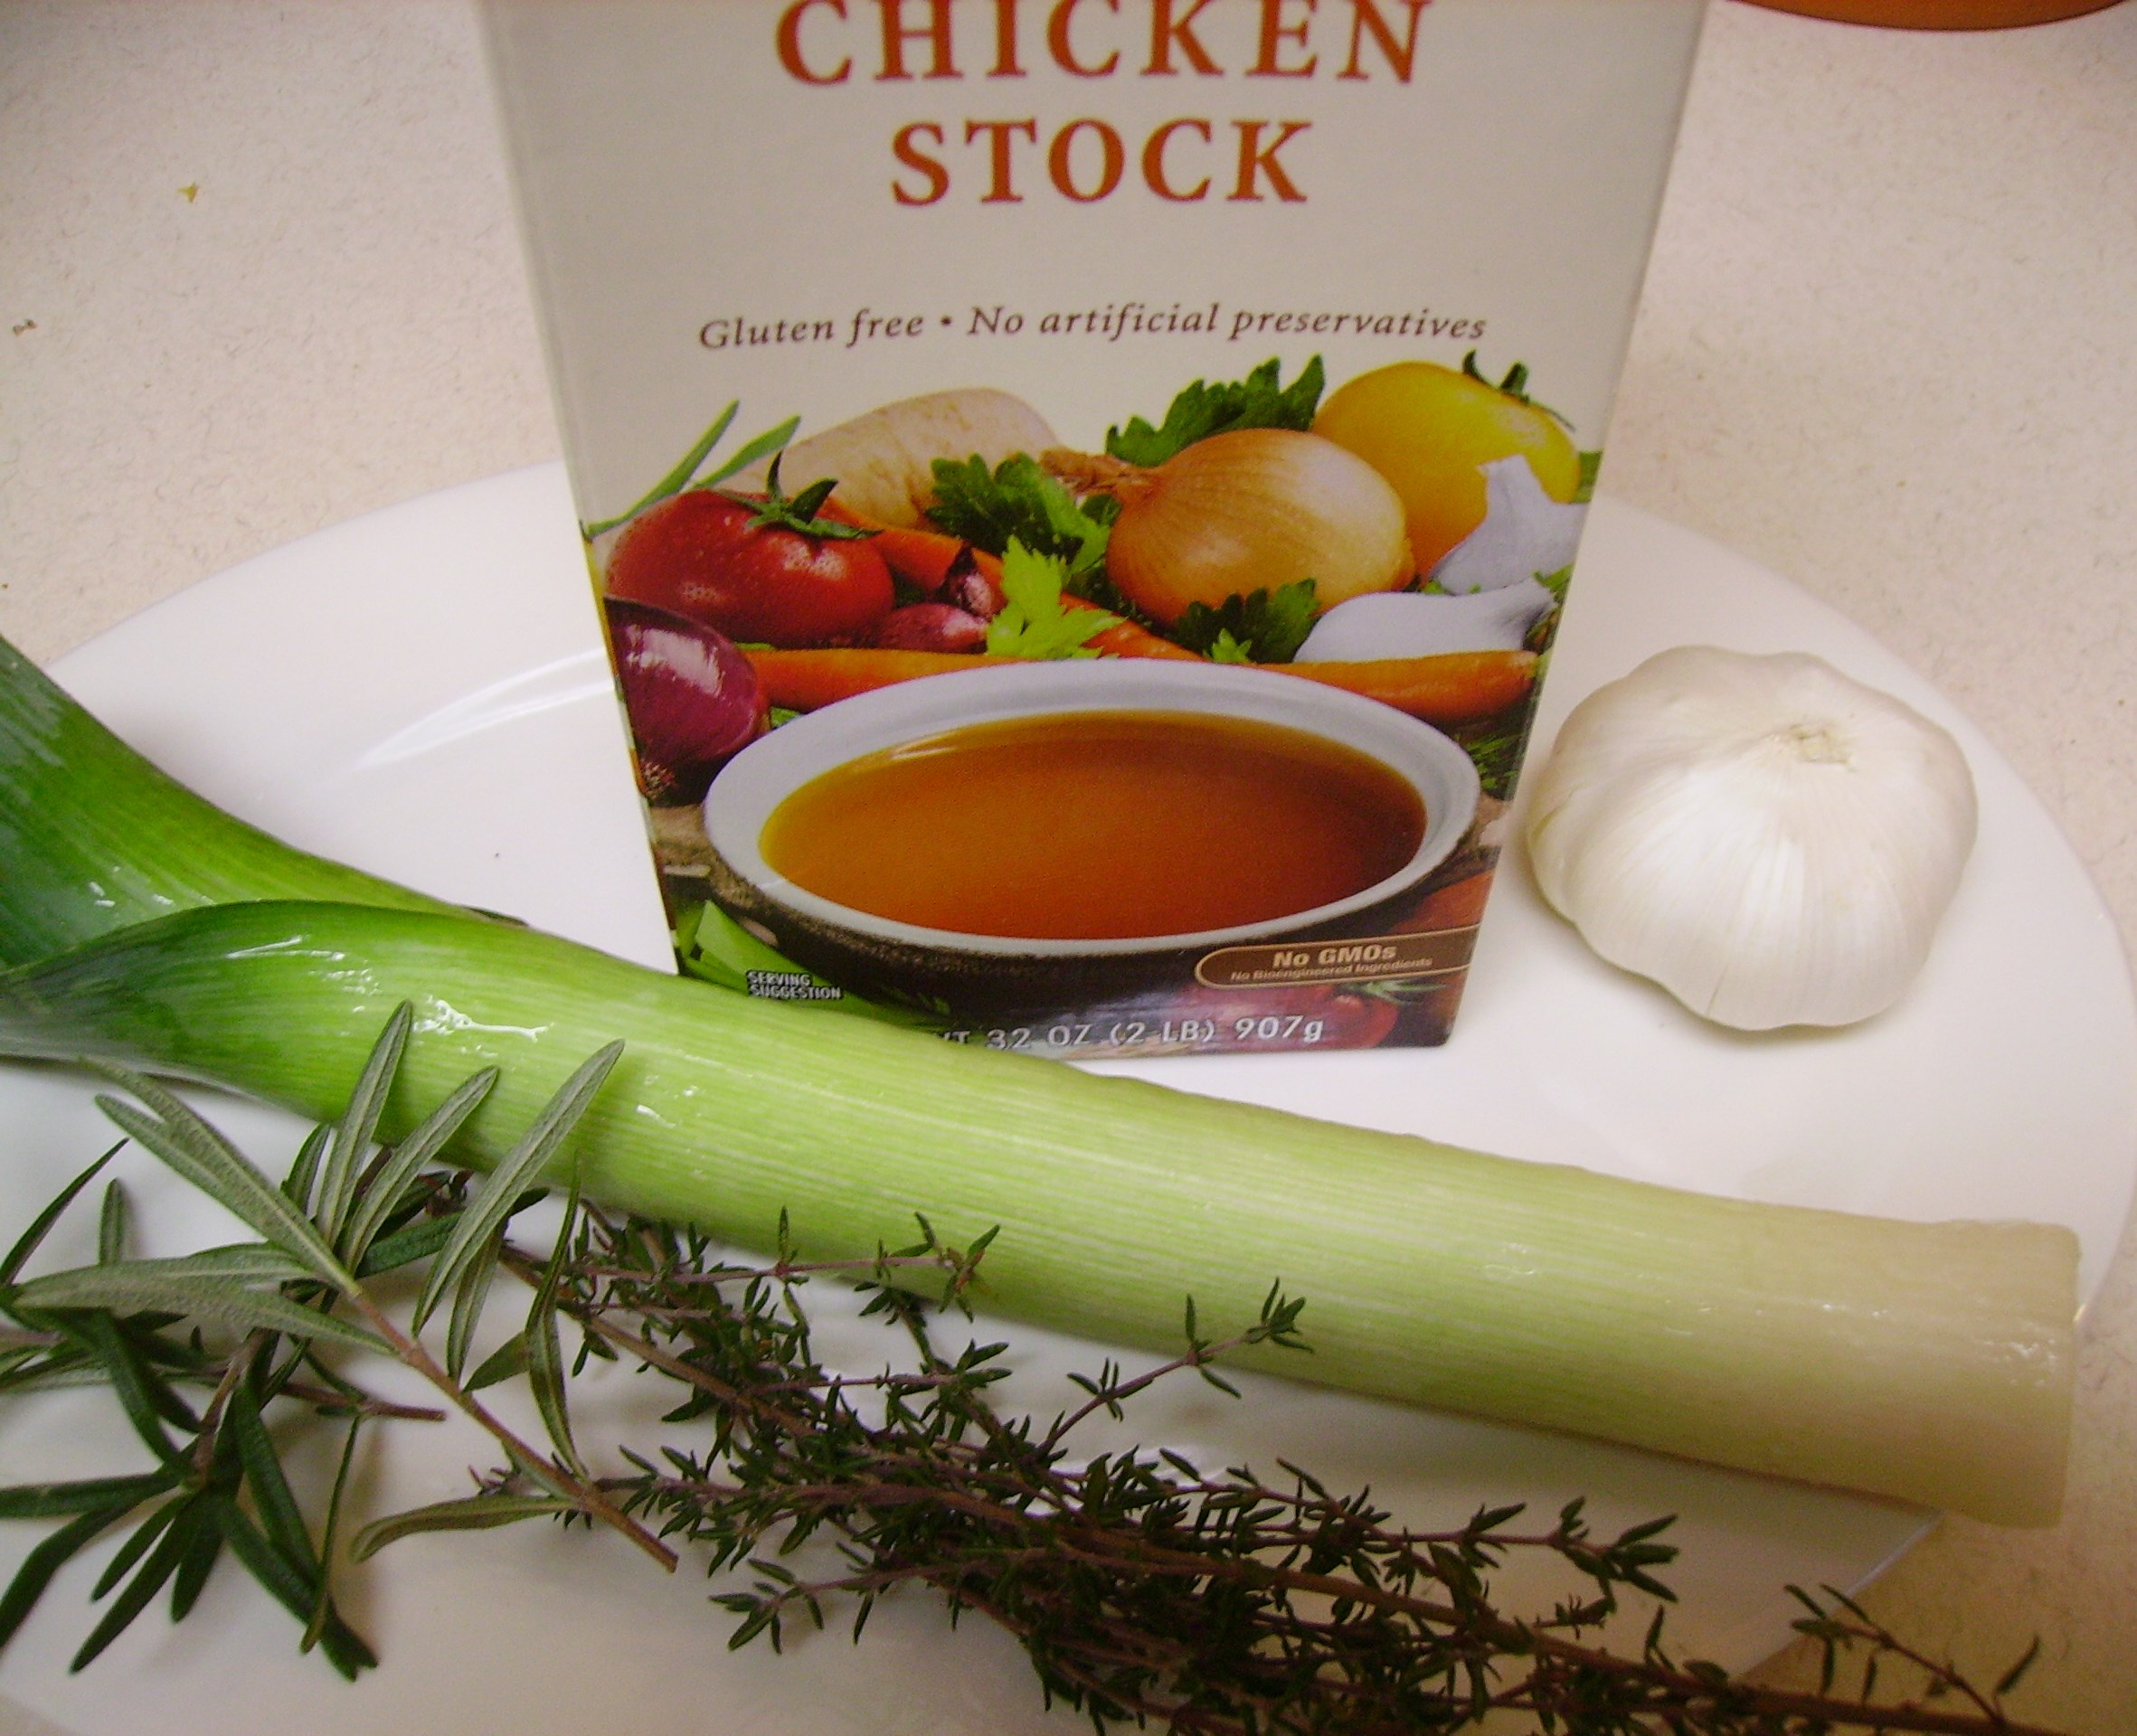
I used my fool-proof method for cleaning leeks. Leeks are notoriously sandy and the sand loves to settle in the layers of the leek where it can create an unpleasant taste and texture experience.

DIGITAL CAMERA You can diligently rinse them under running water while prying the layers apart, but it’s been my experience that a few errant grains will remain.

This technique eliminates that. Once you have cut off the root end and the tougher dark green ends you can slice the leeks to suit the recipe you are creating.DIGITAL CAMERA
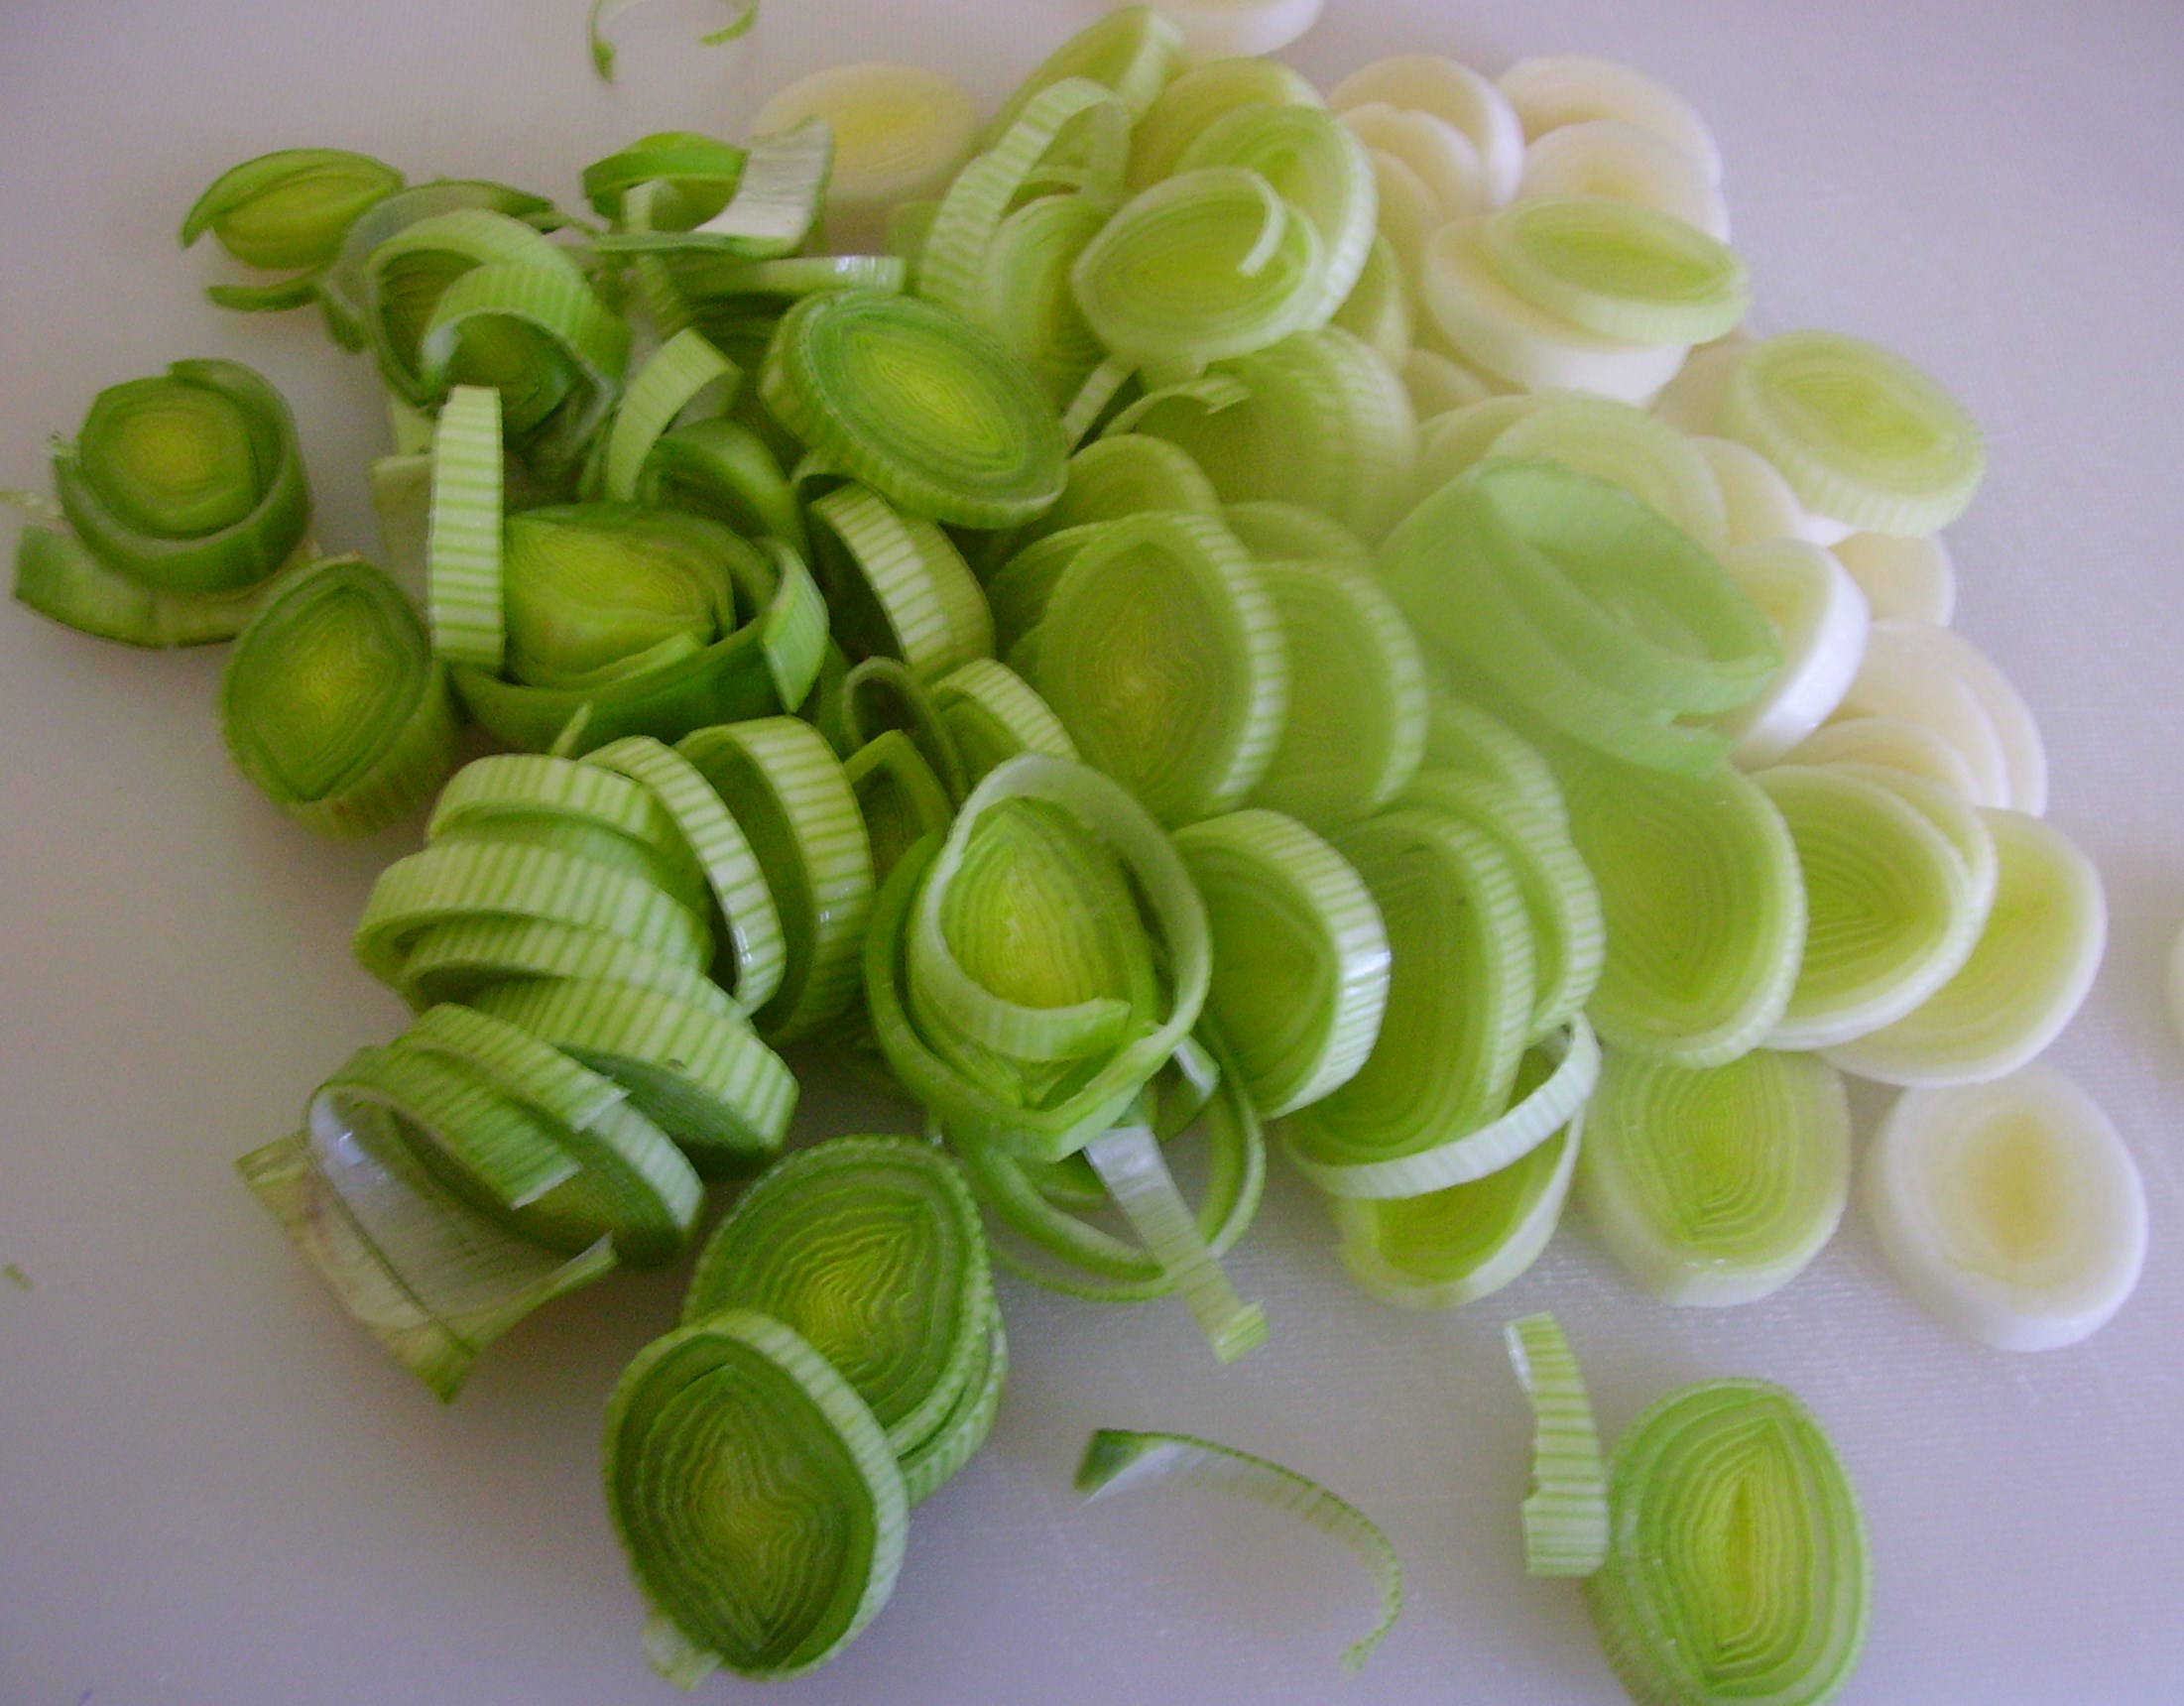
Drop the slices into a bowl of cold water and let them float there for 5 minutes or so.DIGITAL CAMERA
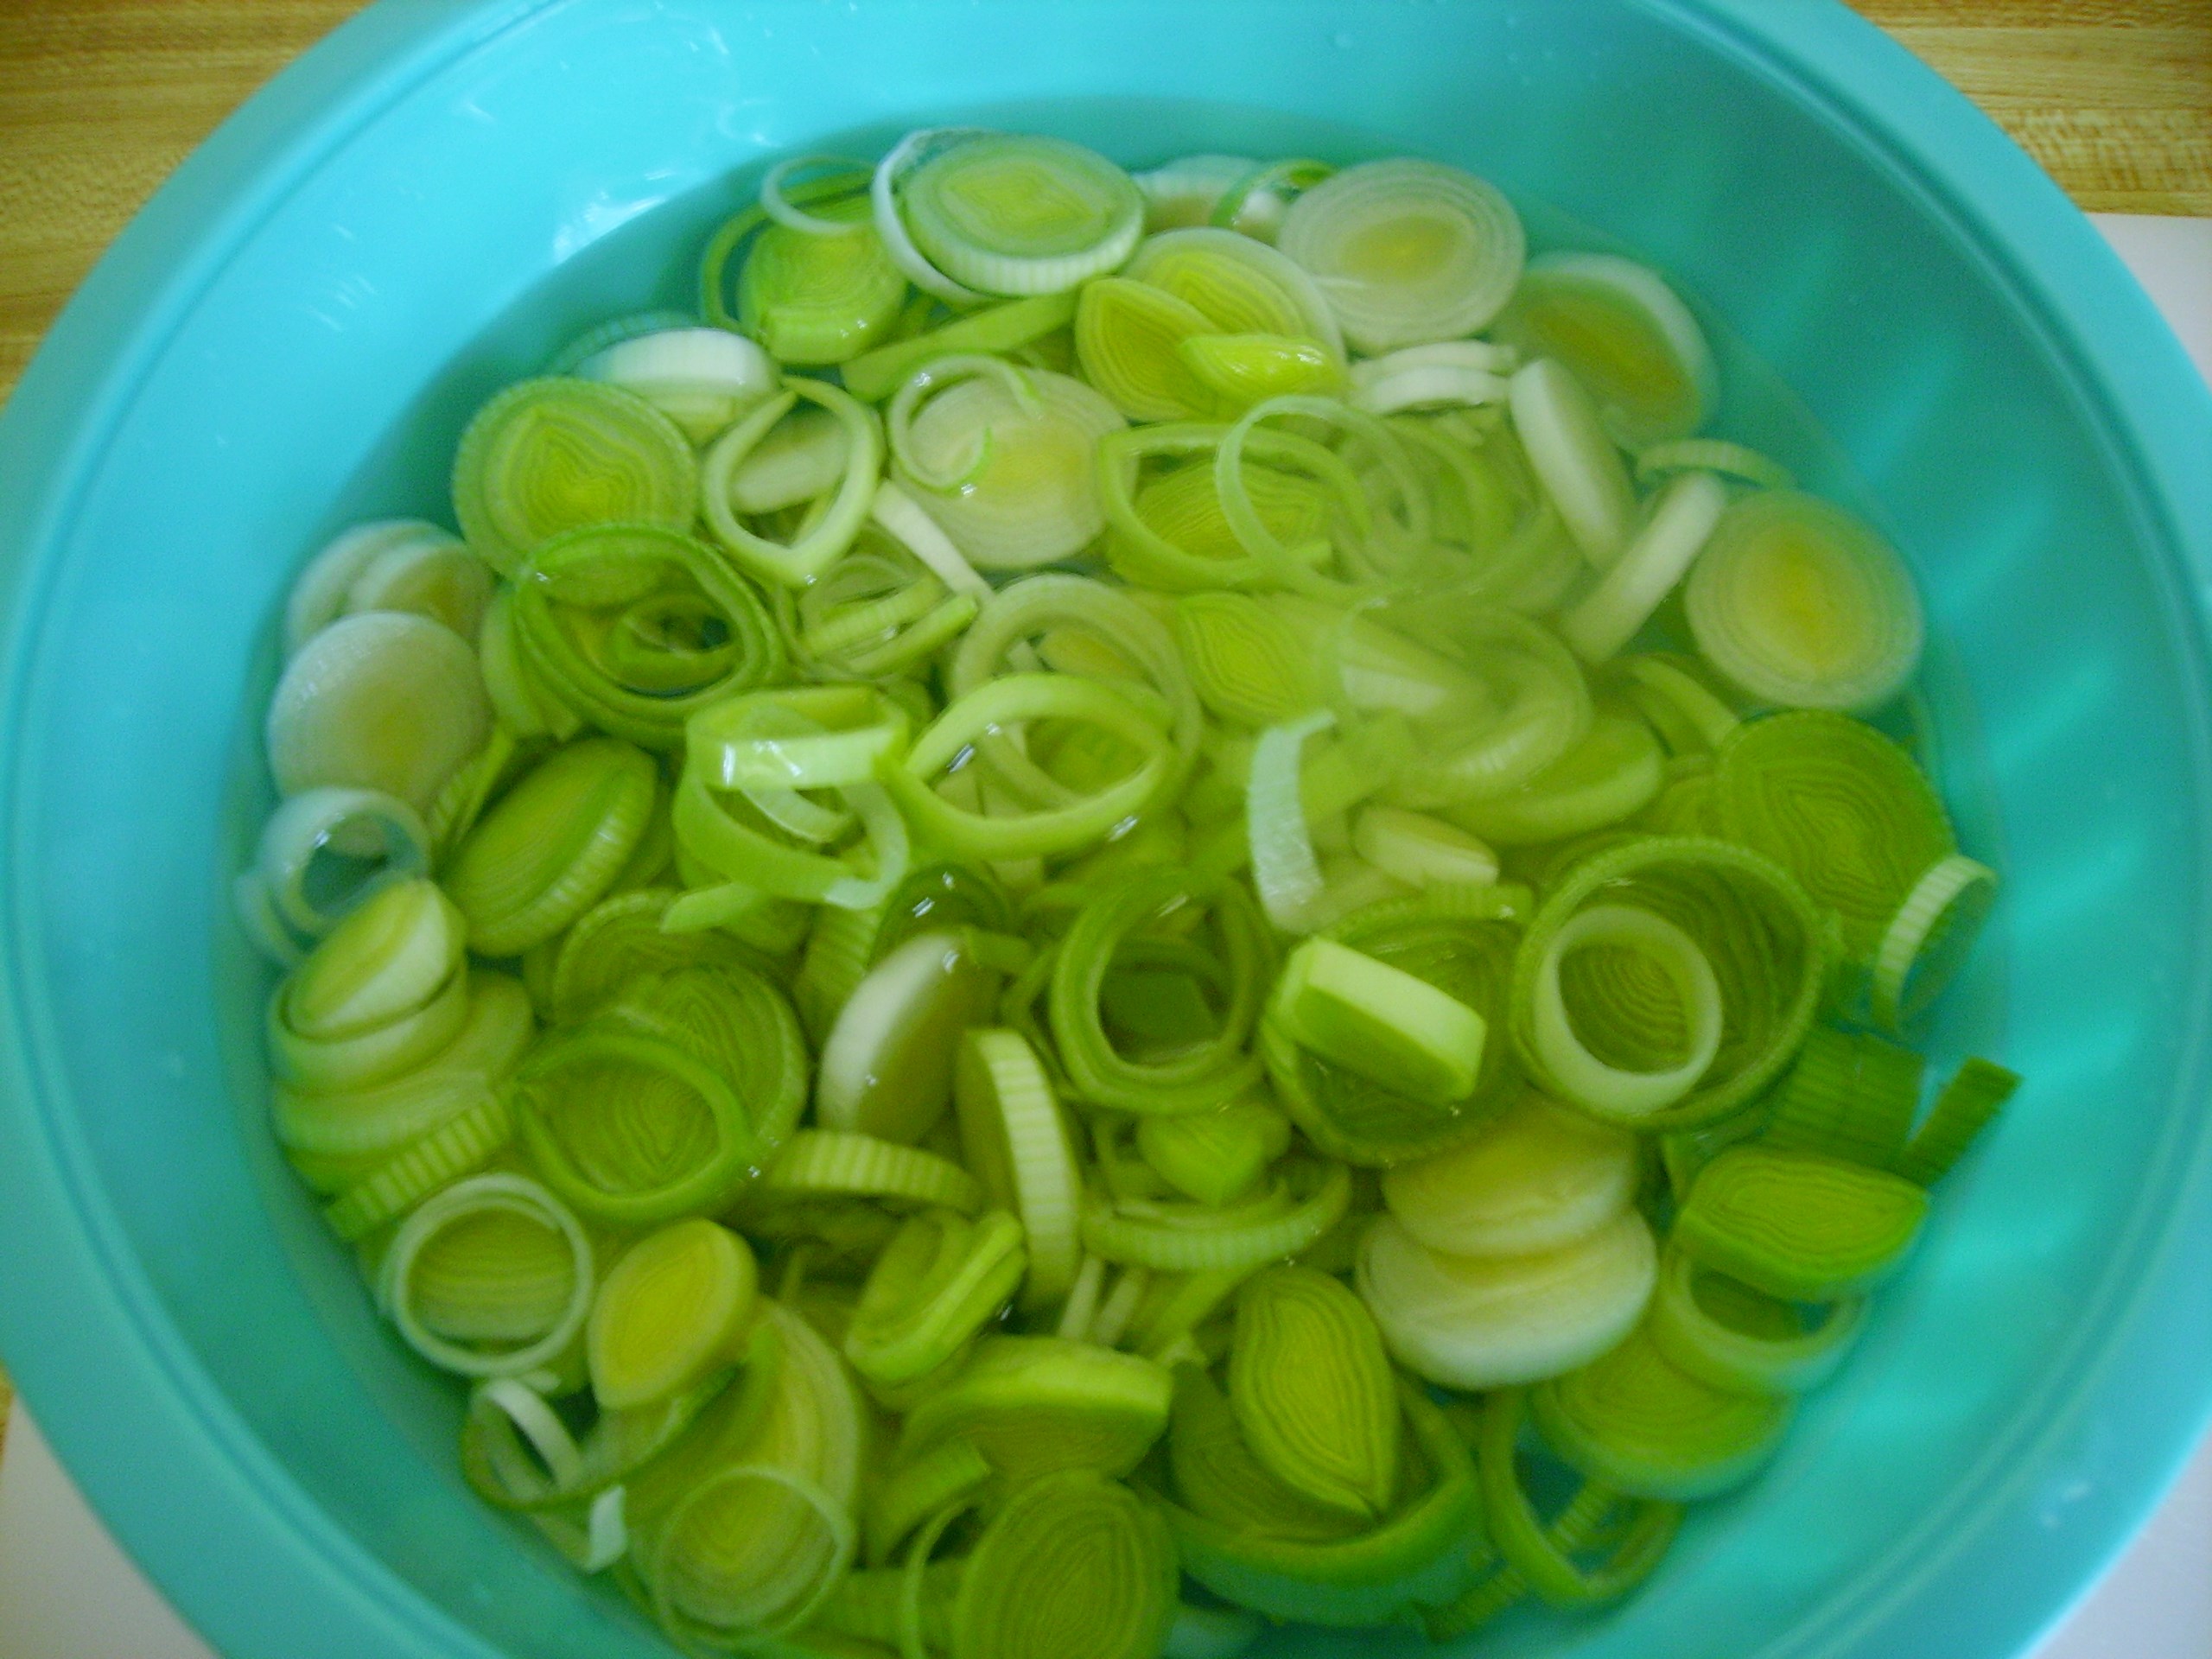
Carefully scoop out the leeks with a slotted spoon and drain them on paper towels. Dump out the water and marvel at the grit and sand in the bottom of the bowl that now will not ruin your creation.

Once the leeks were clean, I added them to a soup pot along with some garlic and herb sprigs. I let them all “sweat it out” for a bit in some olive oil before I added the stock.DIGITAL CAMERA
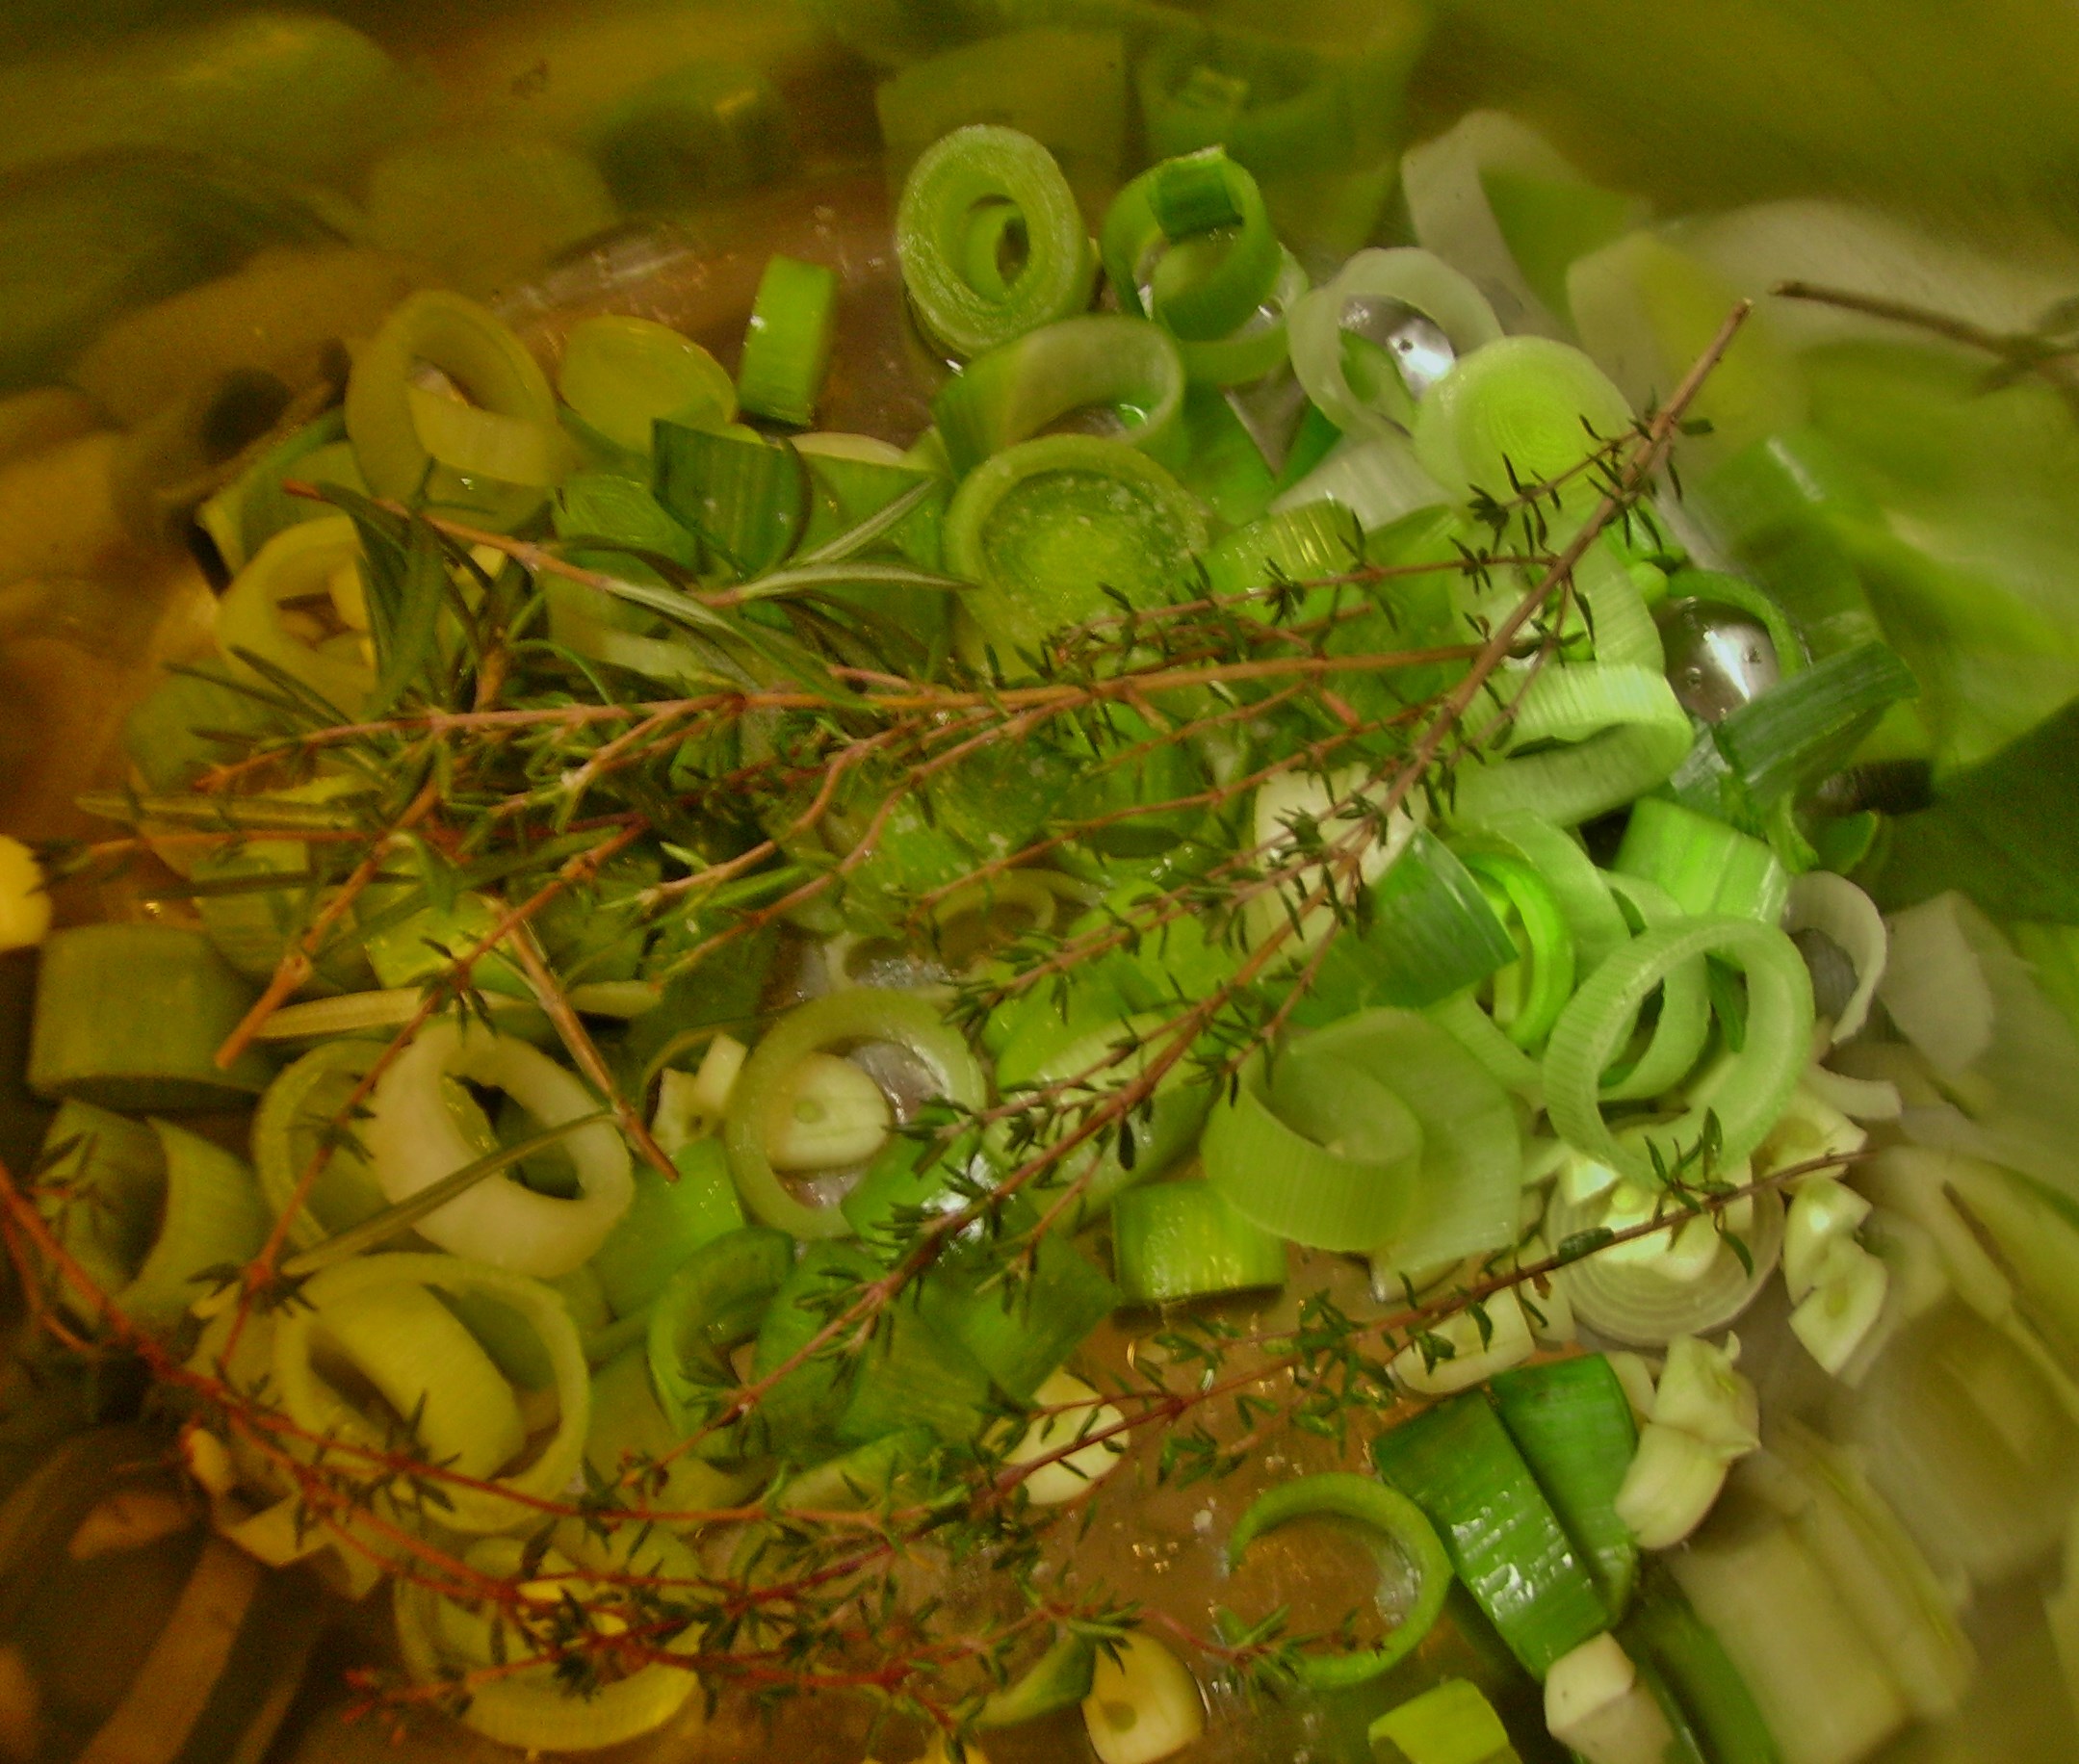
I let everything simmer for 45 minutes or so until the stock smelled incredible. The sprigs of rosemary and thyme that I used came out clean as the proverbial whistle. I diligently fished them out until I had the same number of stems that I started out with.DIGITAL CAMERA 
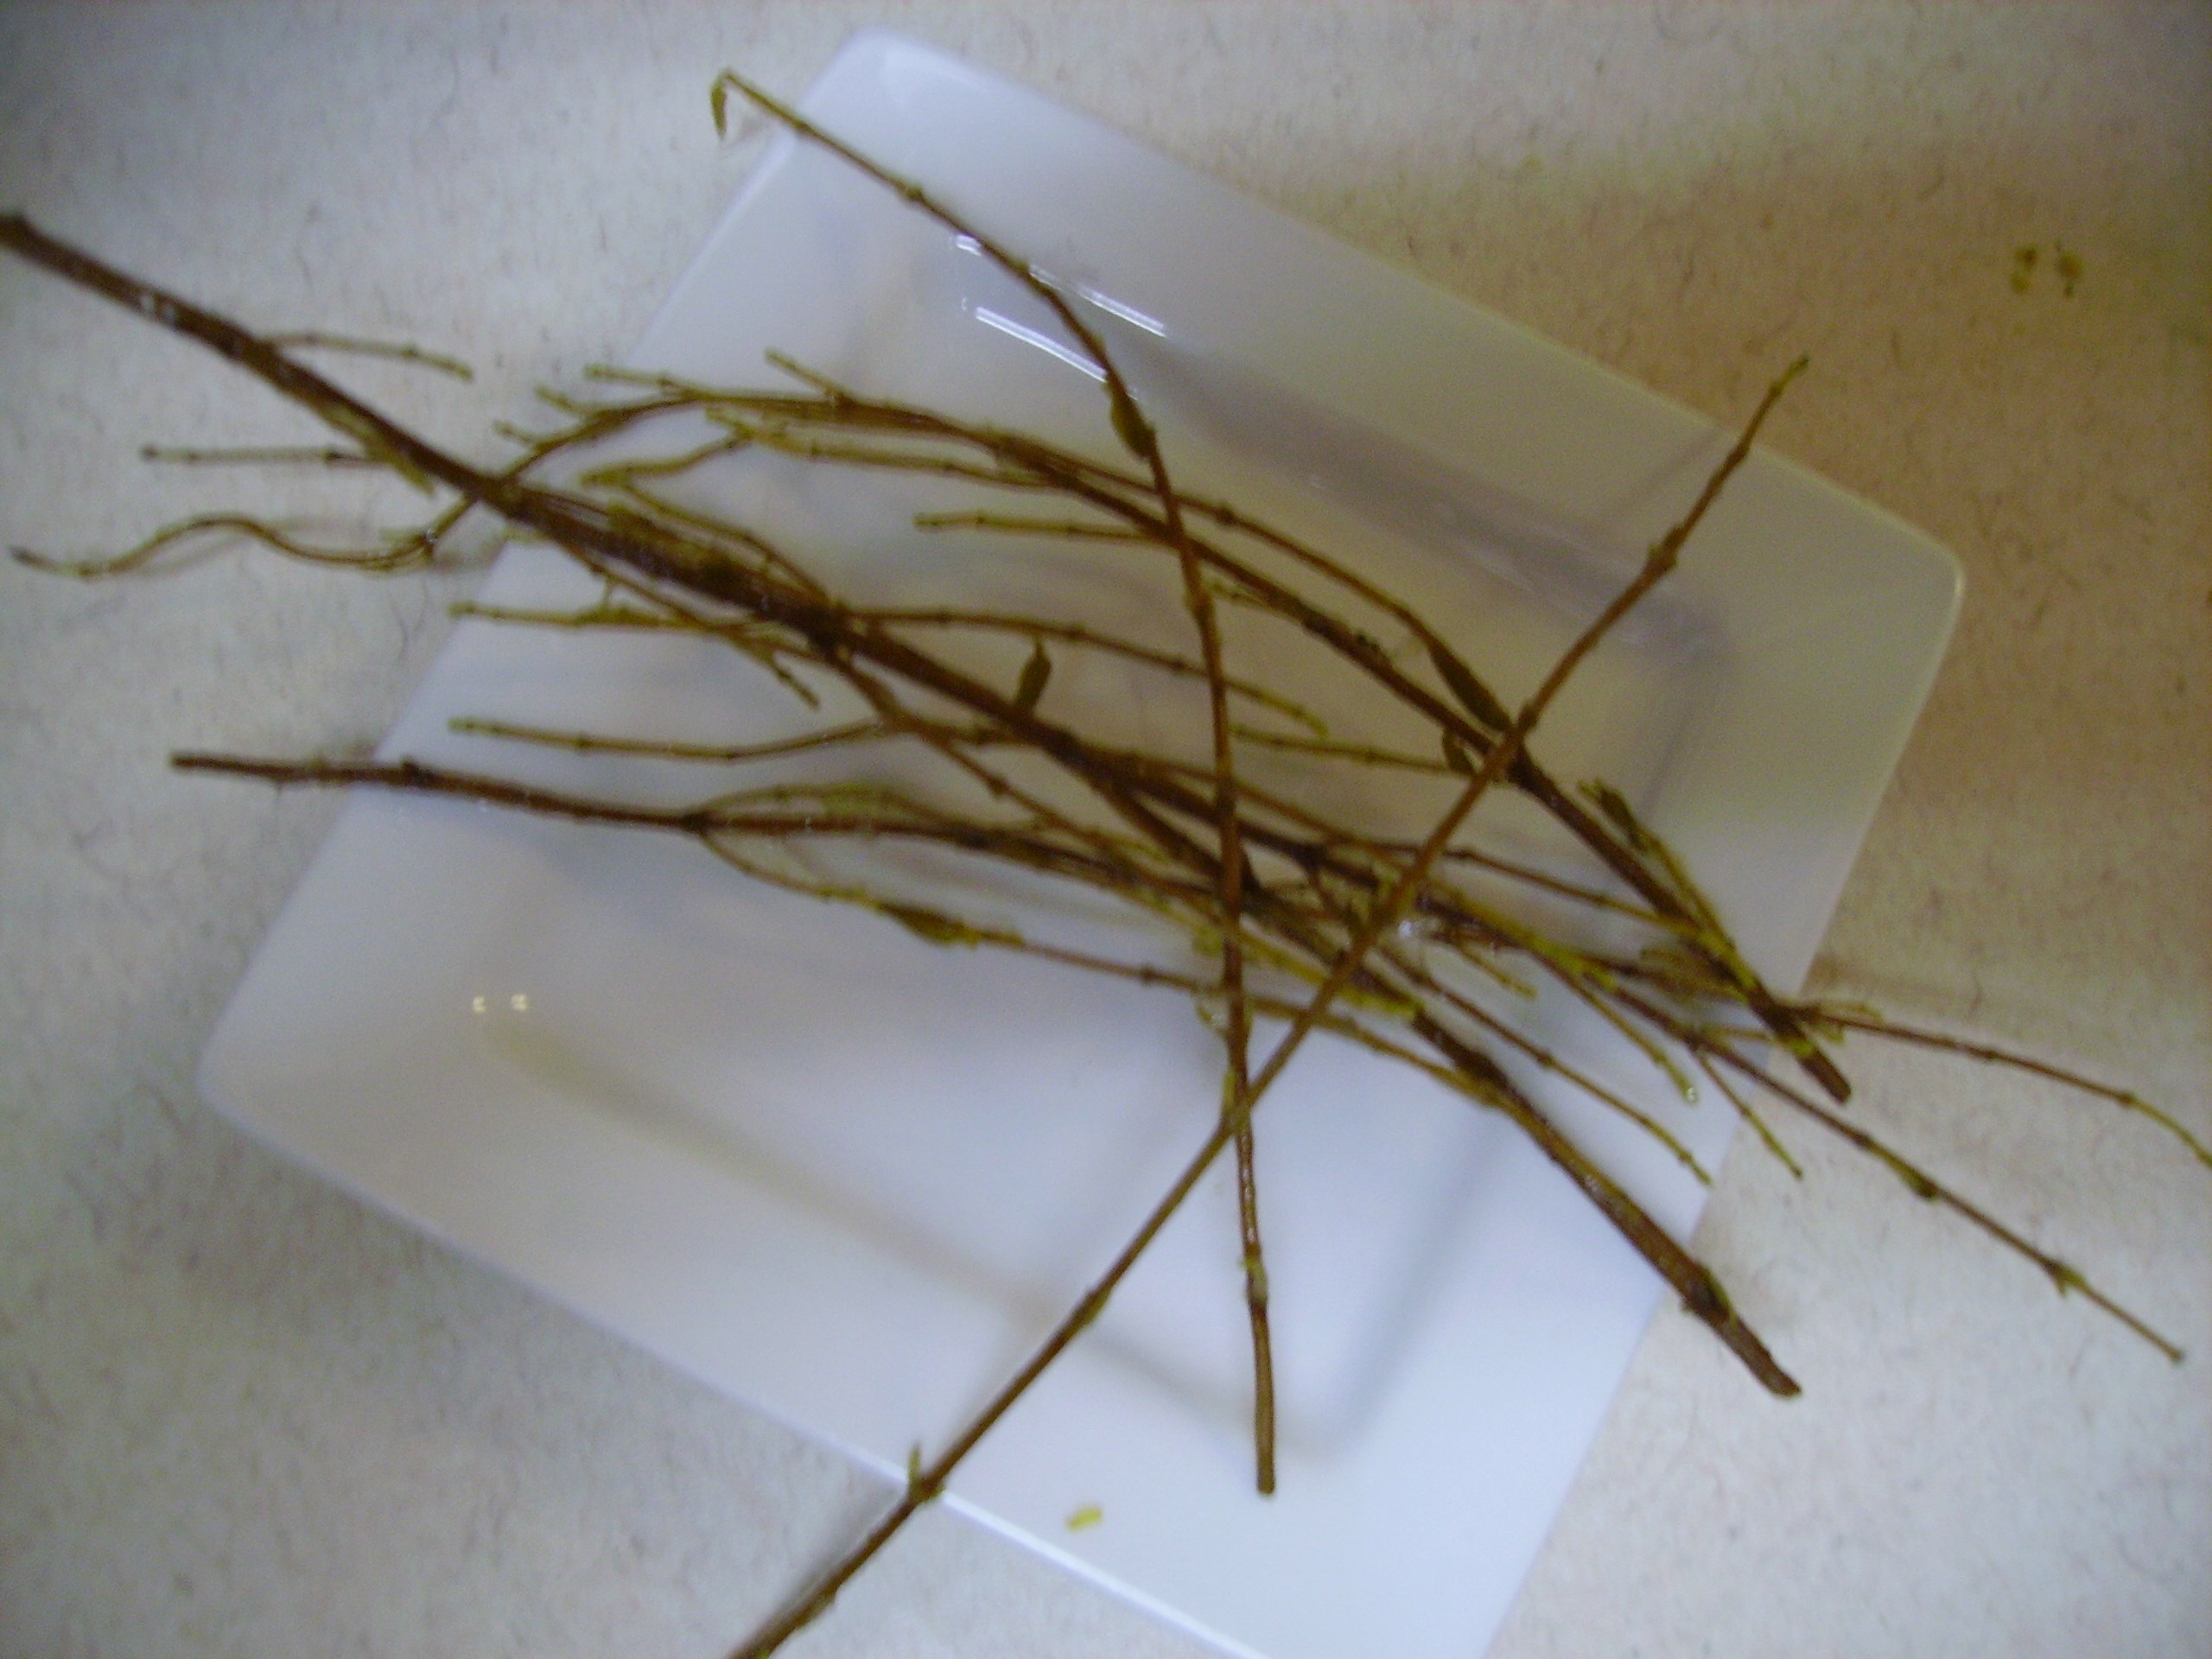
This isn’t me being anal, it is saving my immersion blender from “choking” on the woody stems. Experience is a wonderful teacher…DIGITAL CAMERA
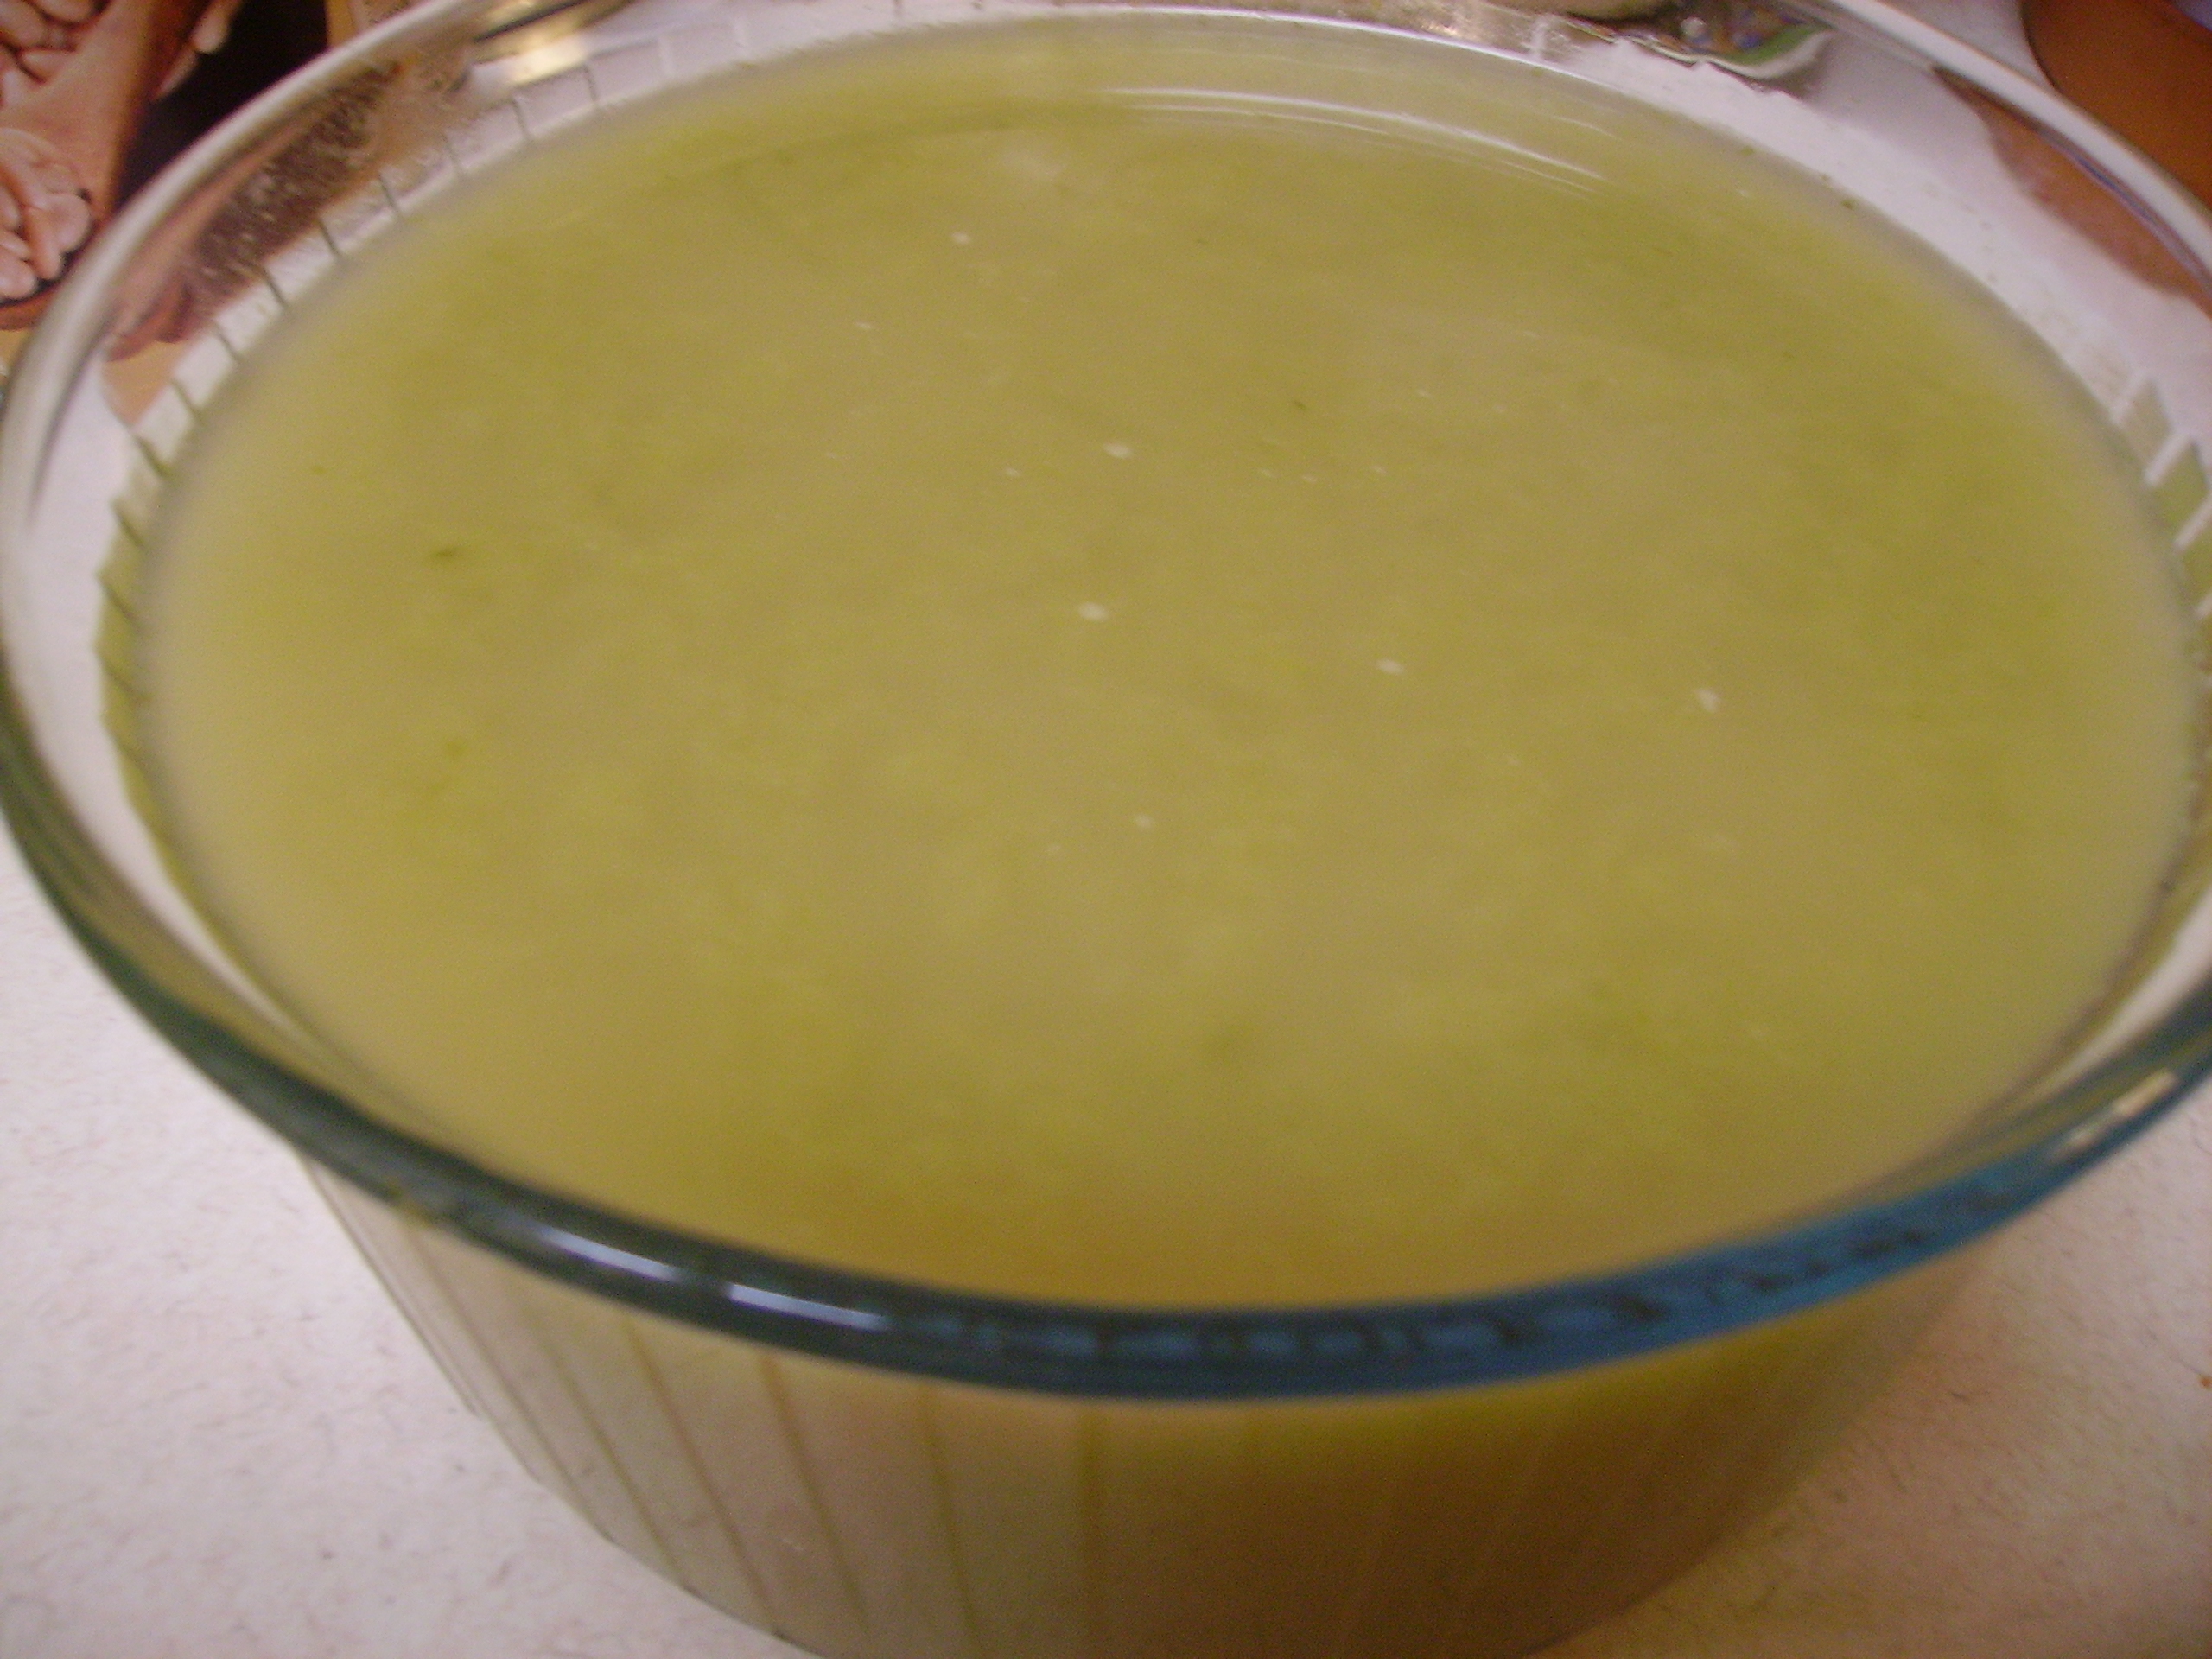
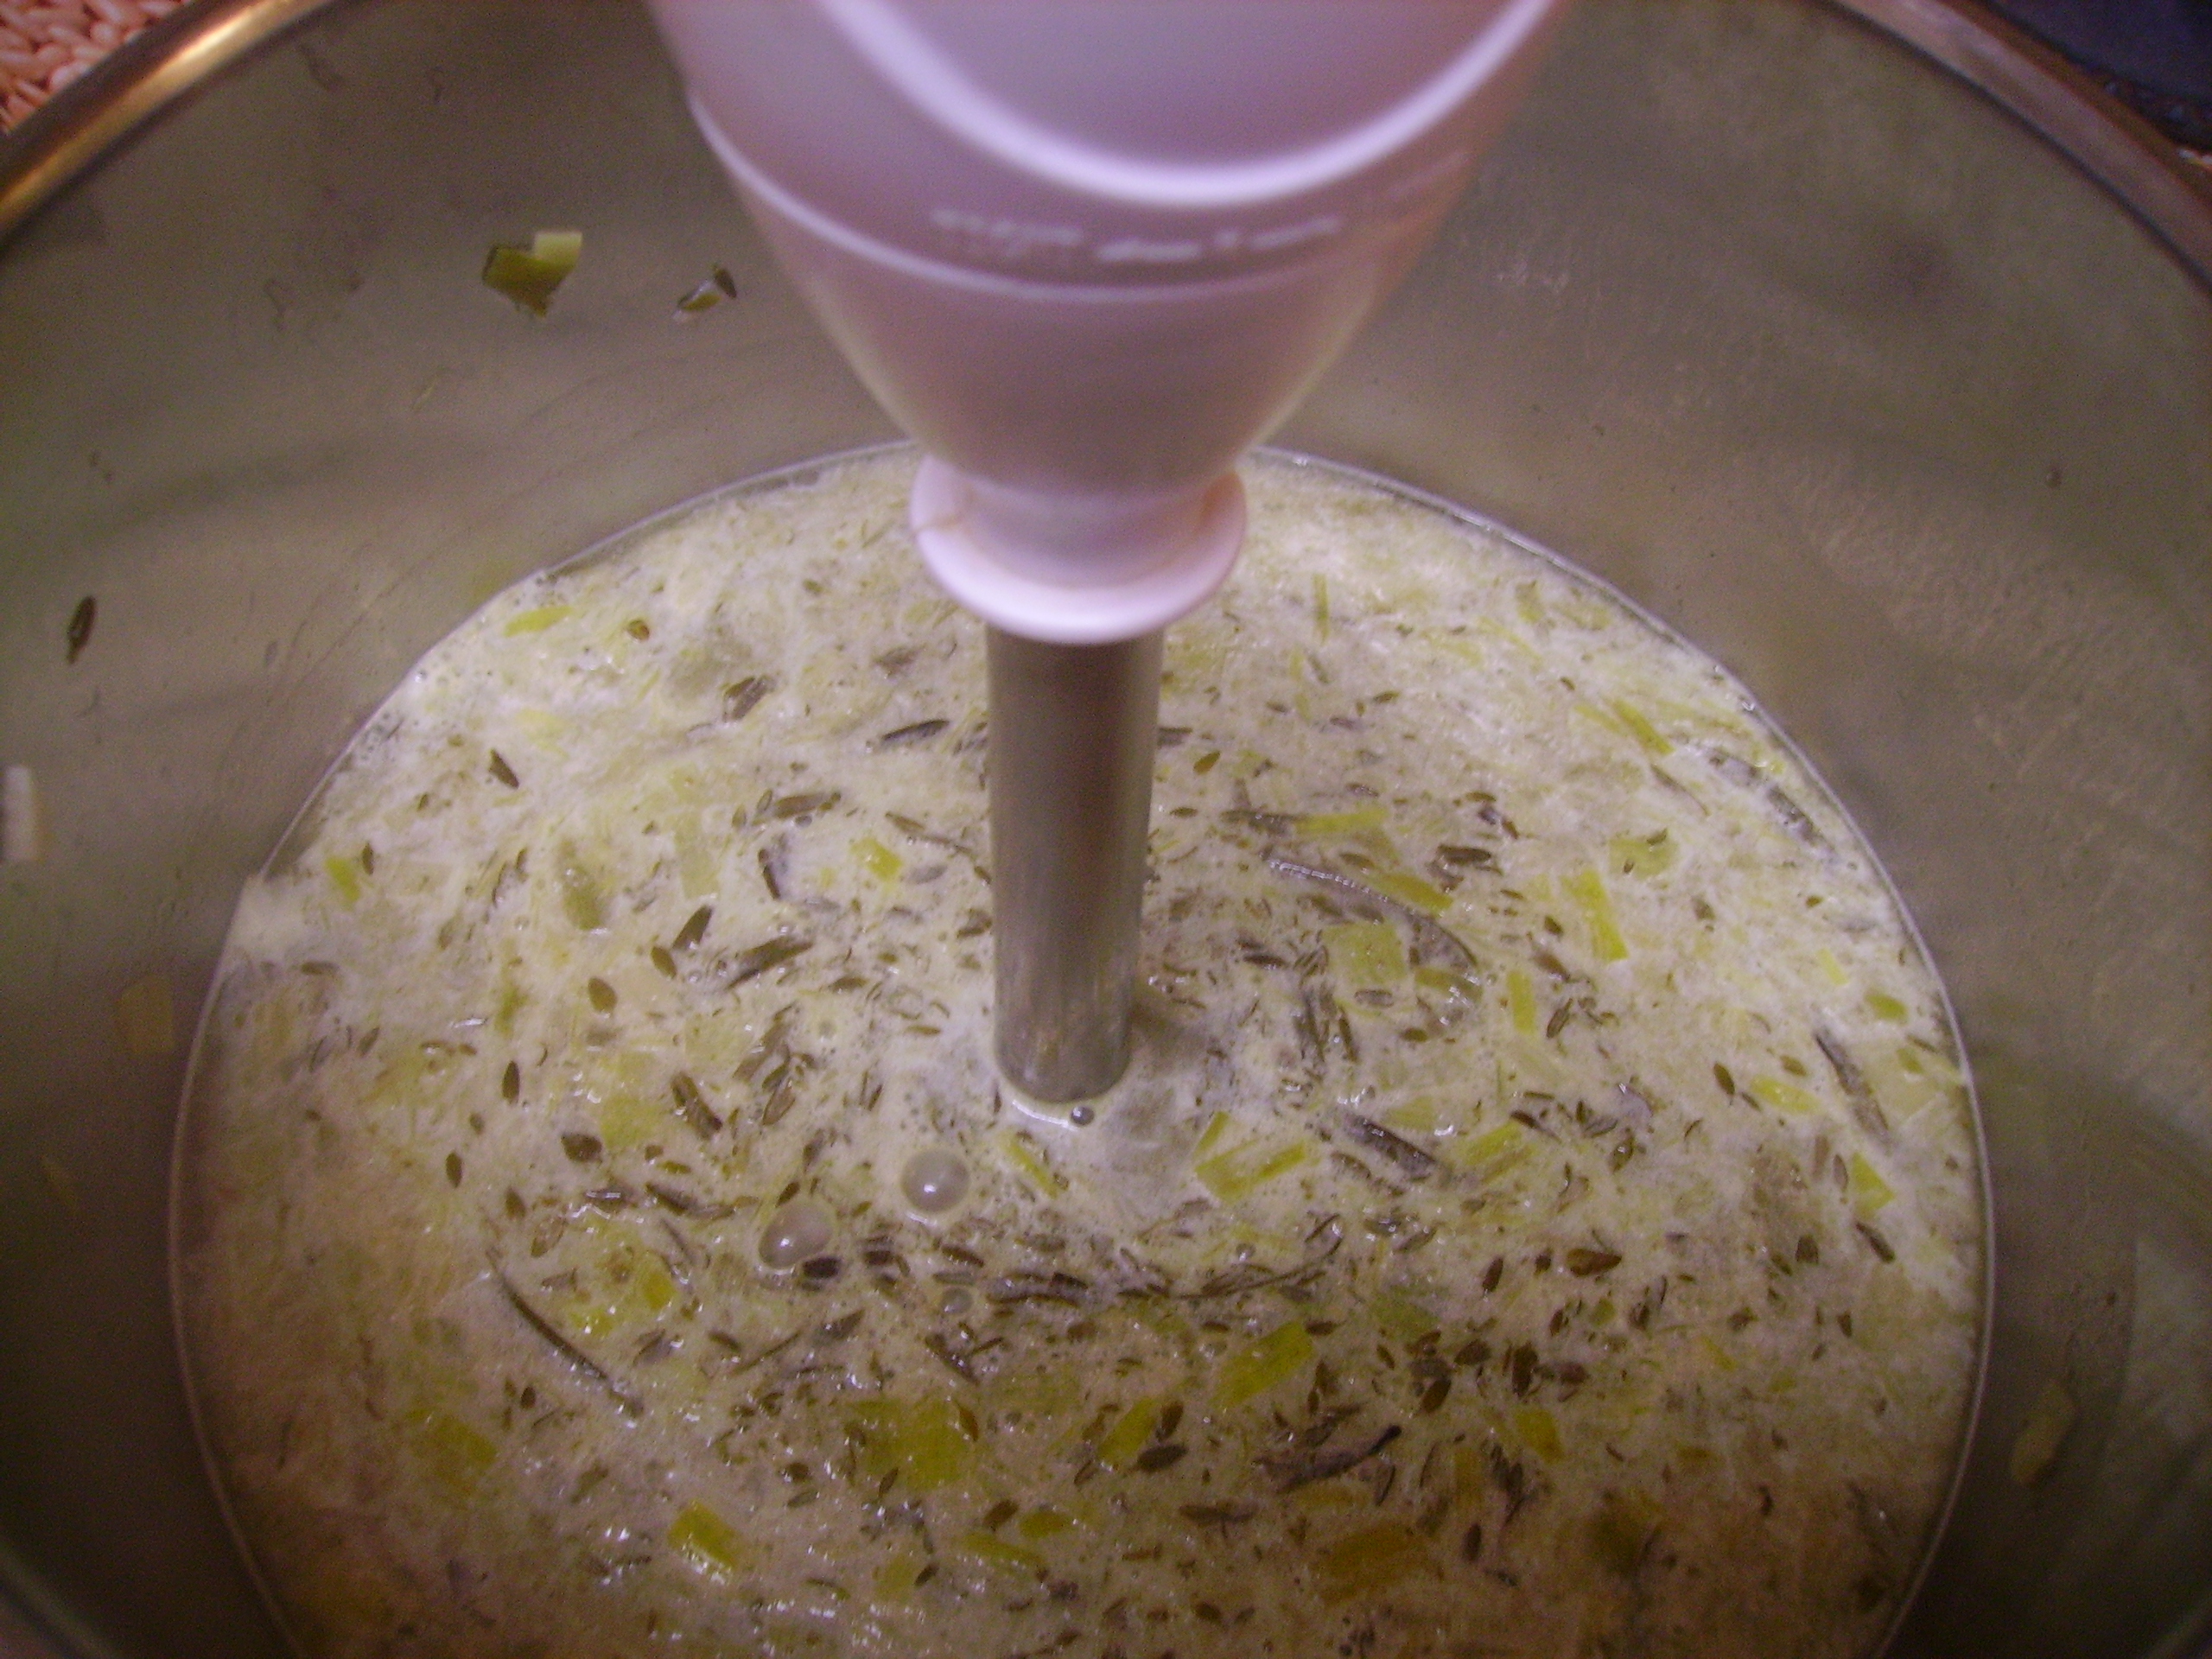
The stock that resulted was a bulked up and richer version of what came out of the box. It was a perfect addition to my soup. In fact, this may become a new Mama D standard when using stock in a box. I used chicken stock, but it would work equally as well with vegetable stock. You could even use this technique with homemade stock to give it a little more muscle. With Thanksgiving only days away, this could be a wonderful base for your gravy.

Stock in a Box on Steroids
Print Recipe
Stock in a Box on Steroids
Print Recipe
Ingredients
Servings:
Instructions
  1. Chop off the root and and the dark green top of the leek. Cut it in half lengthwise then slice thinly into half moons. Place the pieces in a bowl of cold water and let them sit for 5 - 10 minutes without disturbing them. Carefully scoop the pieces out with a slotted spoon and drain on paper towels.
  2. Heat the olive oil in a large soup pot over medium low heat. Add the leeks, garlic and herb sprigs (count them). Sweat until the leeks are very soft and the garlic is fragrant.
  3. Pour in the box of stock and stir to combine everything. Bring to a boil. reduce the heat to low, cover and simmer for 45 minutes or so. The stock should smell wonderful and the herb stems should be bare of their leaves.
  4. Remove the pot from the heat and fish out the herb stems. Make sure you have the same number of stems you put in (your immersion blender will thank you).
  5. Using an immersion blender process the stock until it is smooth (how smooth is up to you and there will be some herb flecks)
  6. Your "bulked up" stock is ready to use in your recipe.
Share this Recipe
Powered byWP Ultimate Recipe

DIGITAL CAMERA

Whatever techniques and ingredients you use in your cooking, the most important thing to add is love. There’s a place for short cuts and convenience, even in Mama D’s Kitchen. 


A Glimpse of Winter and the Love of Soup

Last night we watched the first real snowfall from our balcony. The flakes were big and fluffy falling on the courtyard below us. This morning we woke to an early Winter Wonderland.DIGITAL CAMERAit was barely enough to dust the ground and give the walks a powdered sugar-coating, but it was a start. I’m not in any kind of hurry to experience Winter in all its Midwestern glory, but there is something about the first snowfall that is magical. Stepping back inside I felt a warm feeling come over me. Our apartment is becoming a cozy haven filled with our slimmed down cache of treasures. Along with slippers and cozy throws my mind wanders to thoughts of soup.

Soup is the cornerstone of Mama D’s Kitchen. I make a pot of something wonderful at least once a week. Sometimes the recipes come from a raid on the pantry coupled with a good dose of inspiration. Other times I like to re-invent a dish into a soup. This recipe is a wonderful case that speaks to both points. Chicken Enchiladas are something I love to make and eat. From simple shredded chicken and mushrooms blanketed in a spicy chili sauce to a layered casserole combining creamy, spicy, and cheesy, I’ve done them all. While these don’t quite fit into Mama D’s en”light”ened kitchen they are a source of inspiration. That’s how Chicken Enchilada Soup came to be. DIGITAL CAMERAWhile not the “lightest” of soups, it is a bit more diet friendly than it’s richer casserole cousins.

This soup started with boneless skinless chicken thighs. When well-trimmed and cut into bite size pieces they are a rich yet somewhat healthy protein source.DIGITAL CAMERA

My last bag of homemade chicken stock went into this recipe along with onions, garlic, and a variety of peppers.DIGITAL CAMERAThe stock was given a bit of Latin flair with mild enchilada sauce and RoTel tomatoes and green chilies. Some pinto beans and a bit of roasted corn joined in the merriment.DIGITAL CAMERAThese were what was in the pantry, but you can use any type of sauce you’d like…you could even make it all from scratch on a cold wintry day.

It came together in the usual way. The chicken was browned in a bit of olive oil. The onions, peppers, and garlic were cooked briefly in the tasty remains before the main liquids were added. Some simmering gave everything a chance to get comfortable together.

I love a creamy sauced enchilada redolent with shredded cheeses. I know that takes a relatively healthy recipe and drives it down the avenue of fat laden decadence. I think I found a compromise that paid tribute to the essence yet fit into a lower fat food plan. I used a can of fat-free evaporated milk. It has some of the body of cream or half and half, but at a significant fat savings. A like amount of fat-free half and half would also work. Cheese still made an appearance, but in more modest proportions. Normally, up to a pound would have melted into this pot of deliciousness, but I opted for about six ounces of pepper jack and extra sharp cheddar creating about 2 cups of splendor.DIGITAL CAMERAUsing cheeses with big flavor like these allows a little less to go a longer way. Reduced fat cheese could also be used here, but I personally find it a little flat tasting and rubbery. Remember that everything in moderation addage…even moderation must be moderated.

So, the soup looked wonderful; it tasted good, too. Sitting in the bowl, it looked a little naked. so I brought on the embellishments. I toasted up some corn tortilla strips in the oven. A spritz of cooking spray and a sprinkling of sea salt gave them true chip stature.DIGITAL CAMERAI made an avocado cream that gave a hint of richness and a bit of healthy fat. DIGITAL CAMERA

Topping the soup with a little Queso Fresco was the perfect final touch. Heaven in a bowl, again.DIGITAL CAMERA

Ingredients
Servings:
Instructions
  1. Heat the olive oil in a large soup pot. Season the chicken with the herb seasoning and add to the pot. Cook and stir 5 -7 minutes until the chicken is lightly browned. Remove the chicken to a plate and set aside. Leave the drippings in the pot.
  2. Add the onions to the pot and stir to coat with the drippings. Cook for 3 minutes and add the garlic. Cook for 3 minutes more.
  3. Add the colored and poblano peppers to the pot and cook stirring frequently for five minutes or so.
  4. Return the chicken to the pan and add the corn, enchilada sauce, RoTel, and the chicken stock. Bring everything just to a boil. Reduce the heat and simmer for 20 -30 minutes.
  5. Add the drained beans and heat for a few minutes longer.
  6. Mix the masa harina with 1/2 cup of the evaporated milk until a smooth paste forms. Set aside. Pour the rest of the milk into the soup and stir to blend.
  7. Mix a little more of the soup liquid into the masa harina paste and add it to the soup pot stirring well. Continue to cook for 5 minutes or so until the soup thickens. Adjust the amount of masa to achieve the thickness that you want.
  8. Gradually add the shredded cheeses to the pot stirring until the cheese melts.
  9. Ladle into soup bowls and top with tortilla chips, a little crumbled queso fresco and avocado cream. Serve.
  10. Avocado Cream: Mash 1/2 of an avocado with a couple of spoons of light sour cream. Add enough fat free half & half to make it a cream consistency. Add a little chili powder and ground cumin and drizzle a bit on each bowl of soup
Share this Recipe
Powered byWP Ultimate Recipe

Our early shades of Winter aren’t going anywhere soon. This is just the beginning. Soup will be filling the kitchen with warmth, flavor, and love for months to come.

Life After a Microwave and a Skillet Pork Dish

I have never considered myself microwave dependent. In fact I only used it (or so I thought) to reheat leftovers and melt butter. So, as I left my old kitchen behind, I hardly gave the microwave a second glance. Cooking with love does not require energy waves. The stove top can do anything the microwave can and is so much more organic…or so I thought. One week in the new kitchen and I’ve reached for the microwave almost daily only to have to rethink  how to do some small cooking task. I guess I took the microwave for granted. Does it amount to enough need to take up precious counter space? Time will tell. but at this point, I think not.

The microwave was convenient and it was a time saver in the fact that I could set it and go on to other things. Not having a microwave has made me turn back to the way things were done in the “old days.”

We wanted pop corn for an alternative dinner the other night (don’t judge me, sometimes it’s the perfect end to a day). I always make my popcorn in a pan on the stove. I even have a designated popcorn pan that creates fluffy and tender kernels of goodness with hardly an “old maid” in the batch. While the magic is happening in the pan, I would melt a cube of butter in the microwave timing it so that the butter and the pop corn would be ready together. What to do without a microwave? I have a small sauce pan that was my mother’s that easily accommodated the butter and resulted in melted perfection.

DIGITAL CAMERA

As the week went on I reached for the microwave to reheat some leftovers which turned out better reheated on the stove where they could gain a little color and crust. I had to plan ahead more to thaw out things from the freezer, but they turned out better thawing naturally, as well. My new mantra became, no microwave, no problem…after all I was really only using it for shortcuts.

As I’ve shared before, I take inspiration for my recipes from many sources. Tonight’s dinner was no exception. I found a wonderful recipe for pork with a sauce made of squash, dried cranberries, and apples in the latest Cooking Light Magazine.DIGITAL CAMERA

I had a reasonable equivalent of the ingredients on hand so I set out to put Mama D’s spin on it.

Step 1 brought me to a screeching halt.  It called for microwaving the squash and cranberries to prep them for the sauce. Hm? Now what?  Out came my trusty steamer pan and in went the berries and squash.

DIGITAL CAMERA10 minutes later (only 3 minutes more than the microwave would have cooked them) they were ready to become part of the dish.DIGITAL CAMERAPork tenderloin, my new favorite pork product, was sliced into medallions that were lightly seasoned with a salt free onion and herb mixture.DIGITAL CAMERAOnce they were lightly browned, they waited patiently in a warm oven while the rest of the dish came together. Apples and onions were joined by a sprinkling of red pepper flakes and a pinch of sugar.DIGITAL CAMERASautéed in butter (just a little) they were joined by the squash and cranberries to create a lovely fruit and vegetable medley. DIGITAL CAMERAI chose to add the pork to the pan at this point. I had reduced some chicken broth in the pan I cooked the pork in and so I added that to the pan as well.DIGITAL CAMERAThe dish was wonderful. It took less than a half hour to prepare, even without the microwave. It tasted like Fall and was healthy, too. The leftovers, by the way, were great reheated in a small fry pan on the stove.DIGITAL CAMERA

Pork with Squash, Apples and Cranberries
Print Recipe
This is a skillet dinner that is all about Fall. Inspired by and adapted from Cooking Light Magazine.
Servings
4
Servings
4
Pork with Squash, Apples and Cranberries
Print Recipe
This is a skillet dinner that is all about Fall. Inspired by and adapted from Cooking Light Magazine.
Servings
4
Servings
4
Ingredients
Servings:
Instructions
  1. Place the squash and cranberries in the basket of a steamer pan. Add water to the pan, cover and steam for 7 - 10 minutes. The squash should be tender and the cranberries slightly plumped. Set aside.
  2. In a large skillet, heat the olive oil. Season the pork slices with onion herb mixture and dredge lightly in the flour. Add the slices to the skillet and cook, turning once until browned on both sides. This should take about 5 minutes. Place pork in a low oven to stay warm.
  3. Add the broth to the pan. Scrape up any brown bits and cook over medium heat until reduced by half. Set aside.
  4. In a medium fry pan, melt the butter. Add the apple and onion pieces, pepper flakes, and sugar. Toss to coat everything and let it cook for 4-5 minutes. The apples and onions should begin to soften.
  5. Add the squash and cranberries to the pan. Toss to coat and cook for a minute or two. Add the reduced chicken broth and any yummy bits stirring to combine. Let this cook for another minute.
  6. Add the pork slices and any accumulated juices and let everything get happy together for several more minutes.
  7. Divide among four plates and serve.
Share this Recipe
Powered byWP Ultimate Recipe

So, as I start the new version of Mama D’s Kitchen, I’m getting used to my new surroundings. While the kitchen is small, I’ve created two good-sized work spaces. I like the fact that everything is close at hand. It feels cozy and friendly. The electric stove is feeling less foreign. It will take a bit of time to get really comfortable with each other, but we’re going to make it.

Mama D’s smaller kitchen and the rest of her downsized apartment are starting to feel like home.

Memories of Parties and Orzo Spinach Salad

We’ve had lots of parties at our house over the years. We’ve celebrated birthdays, holidays and for no reason other than the act of having  a party. We’ve had big parties and little parties; inside and outside. This was/is an excellent party house, but I’m looking forward to the parties we will have at our new home. I’m up for the challenge of creating a festive environment in a small space, and have sophisticated visions for intimate gatherings to come in our new “pad.”

I love getting people together to share good food and good company. There are many “go to” recipes that have graced my table over the years. Some have been shared here like the UnPotato Potato Salad and Tomato Bruschetta. If you missed them the first time check them out on my RECIPES page.

The recipe that I’m sharing today was born out of necessity. I needed a starchy side for an impromptu  party and didn’t have time to run to the store. I spent a bit of time staring into my pantry and came out with a box of orzo, a jar of roasted red peppers and some dry soup mix. The refrigerator yielded a jar of kalamata olives and the freezer revealed a box of chopped spinach. There were lemons and red onions on the counter and lemon infused olive oil and white balsamic vinegar in the cabinet. Inspiration dawned and the Orzo and Spinach Salad was born. This dish has attended many parties here and has traveled far and wide to guest at many others.DIGITAL CAMERAThis recipe makes a ton! It could literally feed a small army which makes it perfect party fare. It is stupid simple to make and while it is better the next day, it is quite tasty with as little as four or five hours in the frig.

It could also be Pasta Salad 101. The technique can be applied to any set if ingredients you’d like to turn into pasta salad. Boil the pasta according to the package directions. Prep any vegetables that you’d like to cook lightly and drop them in the bottom of the colander. When you drain the pasta in that same colander the hot water will blanch the vegetables as it passes through. A good rinse under cold water and you’re good to go.DIGITAL CAMERA

Dry soup mix was the darling of the 50’s & 60’s. From dips to seasoning it hardly ever made it into actual soup. I really like Lipton Savory Herb with garlic soup mix. I have to say I’ve never made it into soup, but I’ve used it in crock pot Italian beef, as a breading ingredient for chicken, and of course in this recipe. In this particular use, I just sprinkled it dry on the pasta and spinach and stirred it in.DIGITAL CAMERARed onions, roasted red peppers and kalamata olives joined the bowl along with the grated zest of a lemon. DIGITAL CAMERAThe dressing was fresh lemon juice and white balsamic vinegar shaken with lemon infused olive oil. I tossed about half of the dressing with the salad and let it get happy overnight in the refrigerator. I drizzled the remaining dressing over the salad and gave it one more good toss before transferring it to a serving bowl.DIGITAL CAMERAThis made a recent appearance at a party for a former co-worker who is also in the process of moving. It was welcomed with open mouths and made several new friends. I thought it was time to share this Mama D classic with the world; so here it is.

Spinach Orzo Salad
Print Recipe
This lemon forward pasta salad is great for parties. Make it a main dish by adding Feta Cheese and maybe some cooked chicken or garbanzo beans.
Servings
12
Servings
12
Spinach Orzo Salad
Print Recipe
This lemon forward pasta salad is great for parties. Make it a main dish by adding Feta Cheese and maybe some cooked chicken or garbanzo beans.
Servings
12
Servings
12
Ingredients
Servings:
Instructions
  1. Boil the orzo in salted water according to package directions. While the orzo is cooking, squeeze out the thawed spinach and crumble it into the bottom of a colander.
  2. When the pasta is cooked drain it into the colander with the spinach. Drain well, rinse under cold water, and drain again. Pour it all into a large bowl.
  3. In the meantime, chop the red peppers and onions and slice the olives. Remove all of the zest from the lemon with a grater and squeeze all of the juice into a small bowl. Set all of these wonderful things aside.
  4. Pour about 2 tablespoons of the olive oil over the orzo spinach mixture and toss to coat evenly.Open both packages of the dry soup mix and sprinkle them onto the mixture. Stir to combine everything very well. Add the lemon zest and stir well again.
  5. Add the reserved vegetables and toss to combine things.
  6. In a jar with a tight fitting lid combine the remaining olive oil, the lemon juice and the white balsamic vinegar. Cover and shake well to blend. Pour about 1/2 to 2/3 of the dressing on the salad and toss to incorporate.
  7. Cover the salad and refrigerate for at least 4 hours, but better yet, overnight. Store the rest of the dressing in the refrigerator as well.
  8. Just before serving, remove the salad from the frig and toss it well. Add the remaining dressing and toss again. Transfer to a serving bowl and feed the masses.
Share this Recipe
Powered byWP Ultimate Recipe

This dish can easily become a one dish meal (you know how much Mama D loves those) simply by adding some feta cheese (or any other hard salty cheese) along with some cooked chicken, garbanzo beans, or even salami. However you choose to serve it, this salad will become a favorite for parties large and small, and it is fantastic left over!

There’s going to be one more party in this house, my grandson Dylan’s birthday. After that, Mama D’s kitchen will be packed up and readied for the trip to its new home. I can now say that I’m really looking forward to it.

Musings on a Small Kitchen and Dinner in Seven Layers

In less than four weeks we will be moving to our new home. It is a beautiful two bedroom apartment with many amenities. I know that it will be perfect in many ways; location, fitness center, and beautiful grounds. Still, at the back of my mind I keep coming back to that tiny kitchen. I also keep scolding myself for dwelling on it. I spent most of my adult life using a tiny kitchen, and I can say from experience that they are efficient and convenient, even if the last 12 years has altered my perspective.

There is however, a movement afoot, a covert plan of sorts that wants to convince me that small kitchens are a blessing in disguise.  I recently opened a magazine to find a four page spread on the wonders of a kitchen that is no bigger than my future home’s. I’ve also seen respected celebrity chefs extol the virtues of their New York City mini kitchens. It’s enough to make me reevaluate my new Kitchen of Love’s assumed short comings. This may be a case of less is more…

The philosophical debate will be raging in my head for some time, but in the meantime, I’m practicing working in a smaller space. Short of taping off parameters, I’m working on keeping things close at hand and being conscious of using space efficiently, and it’s not so bad…

Fortunately, all of this isn’t interfering with the creative cooking that is happening. There are so many things that are whetting my culinary creative juices. Lightening the pantry (and the freezers), coming up with healthy and tasty dishes for two, and having something interesting to write about, are all contributing to positive production (and thoughts) in Mama D’s Kitchen.

A recent dinner featured a Seven Layer Salad. These have been around in one form or another for years. From the earliest incarnation featuring iceberg lettuce and peas, to recent versions that feature every kind of vegetable imaginable, they have earned a permanent place in many cooks’ arsenals.

I spun this concept ever so slightly by using Farro. I’ve shared the virtues of this grain before, so I’ll spare you the details and get on to the dish. Garbanzo beans, red bell and cubanelle peppers, grape tomatoes, olives and red onion joined in the fun.DIGITAL CAMERATraditionally there are seven distinct layers including the dressing. I wound up with slightly more, but I repeated some ingredients to create an even serving of all the flavors. DIGITAL CAMERAFarro went in first to act as a sponge for the veggies and dressing to come. This was left over from my last farro foray. It emerged unscathed from the freezer and proudly took it’s place in the bowl.DIGITAL CAMERARed bell peppers and garbanzos piled on (in an orderly manner, of course).DIGITAL CAMERARed onions contributed their mild flavor and a welcome pop of color.DIGITAL CAMERAThe cubanelle peppers topped more farro.

DIGITAL CAMERATomatoes and ripe olives were the final ingredients, that is before the balsamic vinaigrette Everything spent a lovely afternoon in the refrigerator before a sprinkle of Italian Cheese Blend added a lacy finishing touch.DIGITAL CAMERAAs always, choose the vegetables that appeal to you. Use rice, pasta or quinoa as your grain or leave the grain out. Whatever you choose you have my blessing. This was a Meatless Monday dinner, but ham, bacon, or cooked chicken could easily provide the protein. I added some grilled sourdough bread mainly because there was some in the refrigerator. I must say it added a nice crunchy accent.

DIGITAL CAMERAThis is almost a unrecipe, but if you like written guidelines, here they are.      

Seven +/- Layer Salad
Print Recipe
Servings
4
Servings
4
Seven +/- Layer Salad
Print Recipe
Servings
4
Servings
4
Ingredients
Light Balsamic Dressing
Servings:
Instructions
  1. In a deep glass bowl layer the ingredients beginning with the farro. Layer them at your whim, but aim for appealing color combinations. The only sort of rule is to end with the olives and tomatoes, but again that's up to you.
  2. Combine the dressing ingredients in a small jar with a tight fitting lid. Shake well until everything has blended together.
  3. Pour the dressing over the layered salad. Cover with plastic wrap and chill for at least 4 hours or as long as overnight.
  4. When ready to serve, top with the shredded cheese. Sprinkle with a few fresh herbs if that tickles your fancy, and serve.
Share this Recipe
Powered byWP Ultimate Recipe
                                                                         

One of my favorite sayings these days is: “Embrace the Change.” It’s time to take my own words to heart and embrace my new small kitchen.                                                                                                                                                                Mama D