Here Comes Christmas…But First: Ham and Turkey Au Gratin

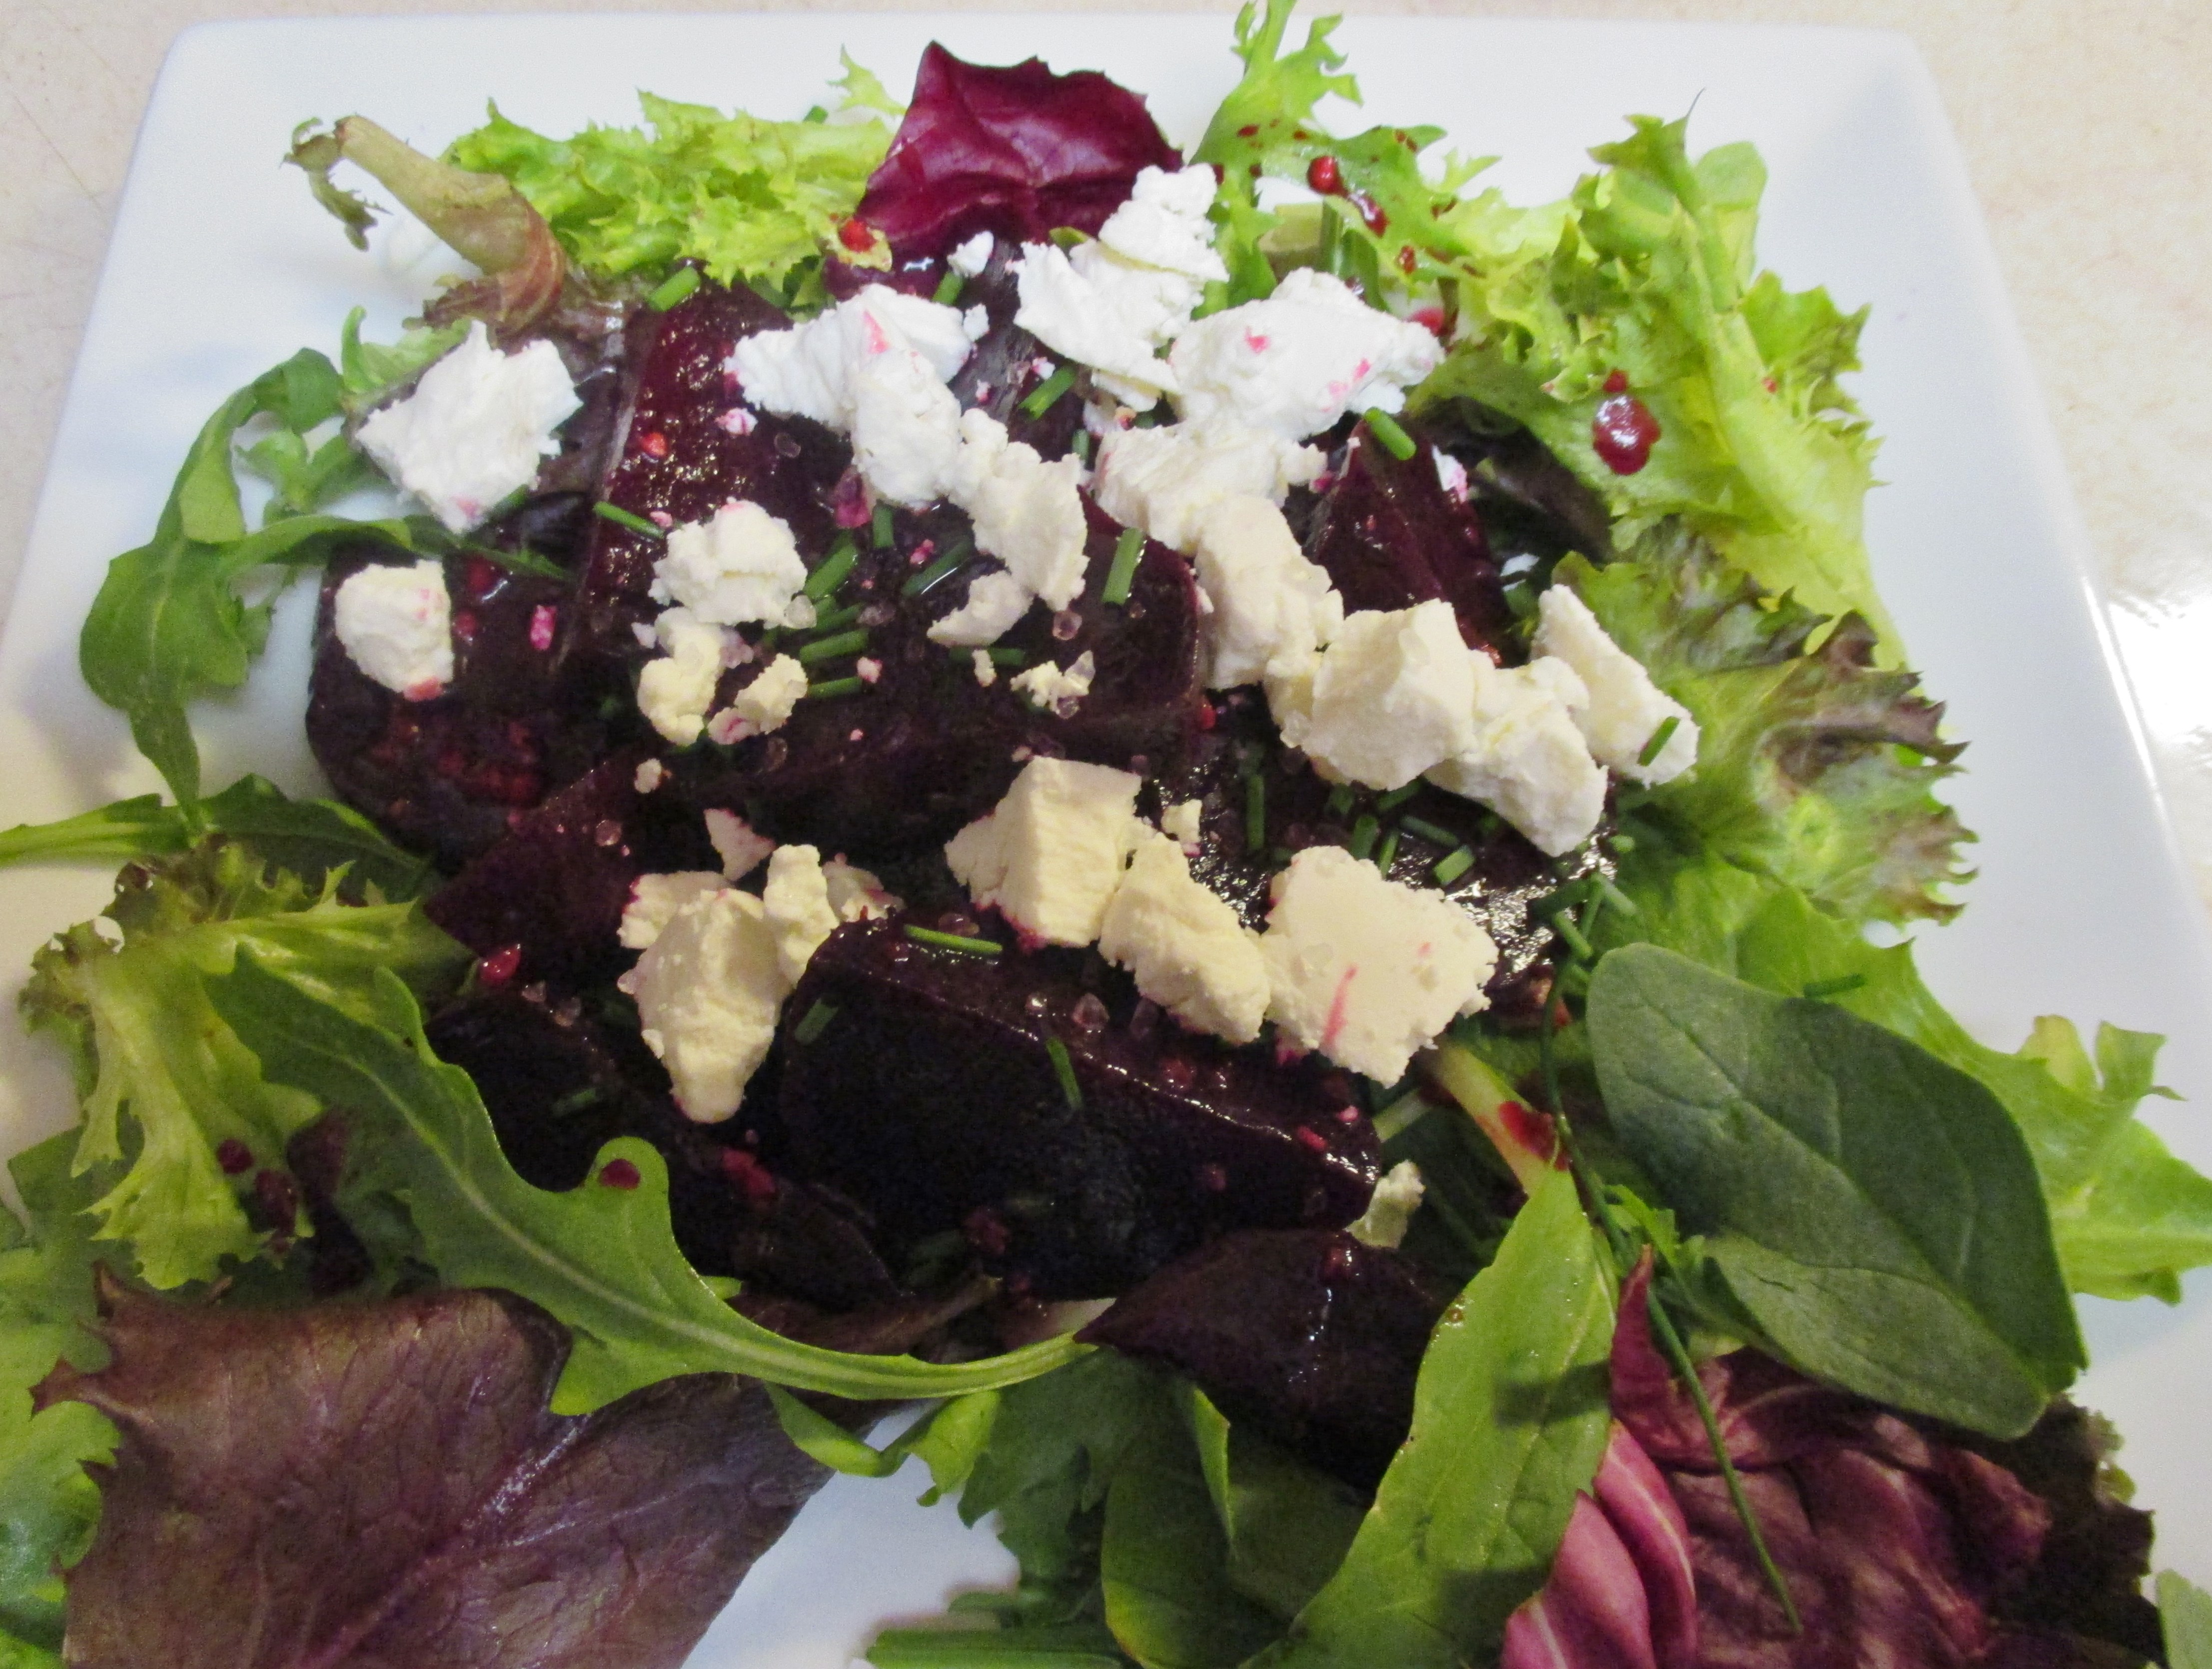
The halls have been decked and the shopping is more than half done ( a new record for me). Mama D’s Kitchen will soon be alive with holiday goodies both sweet and savory. Before I get started on all the wonders that will find their way onto trays and into baskets and jars, I thought I’d share one more recipe with you.

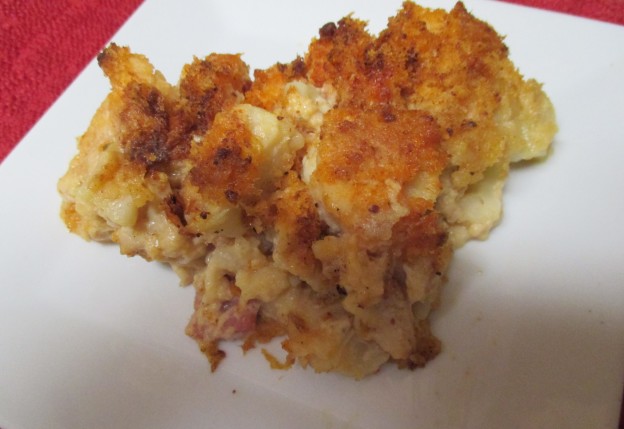
I’m sure your Thanksgiving leftovers are long gone (if not it’s probably time to clean out the fridge)  but, another army of holiday meals lies ahead and this recipe would transform some of the leftovers into a delicious and slightly healthy supper. I give you Ham, Turkey, and Cauliflower Au Gratin.

The inspiration for this came from my teen years. My mother and I lived within walking distance of the Oak Park shopping area on Lake Street. We loved to browse in the shops and occasionally buy something from the sale racks. We would stop for dinner at a restaurant on Lake Street. Sadly, I don’t remember the name of it. All I remember was that they served a Ham and Turkey Au Gratin that was to die for.

I felt so sophisticated when it arrived at the table, bubbling and golden brown in an individual gratin dish. The cheese sauce was thick and rich and the slices of ham and turkey were juicy. I always burned my tongue because I couldn’t wait to taste it.

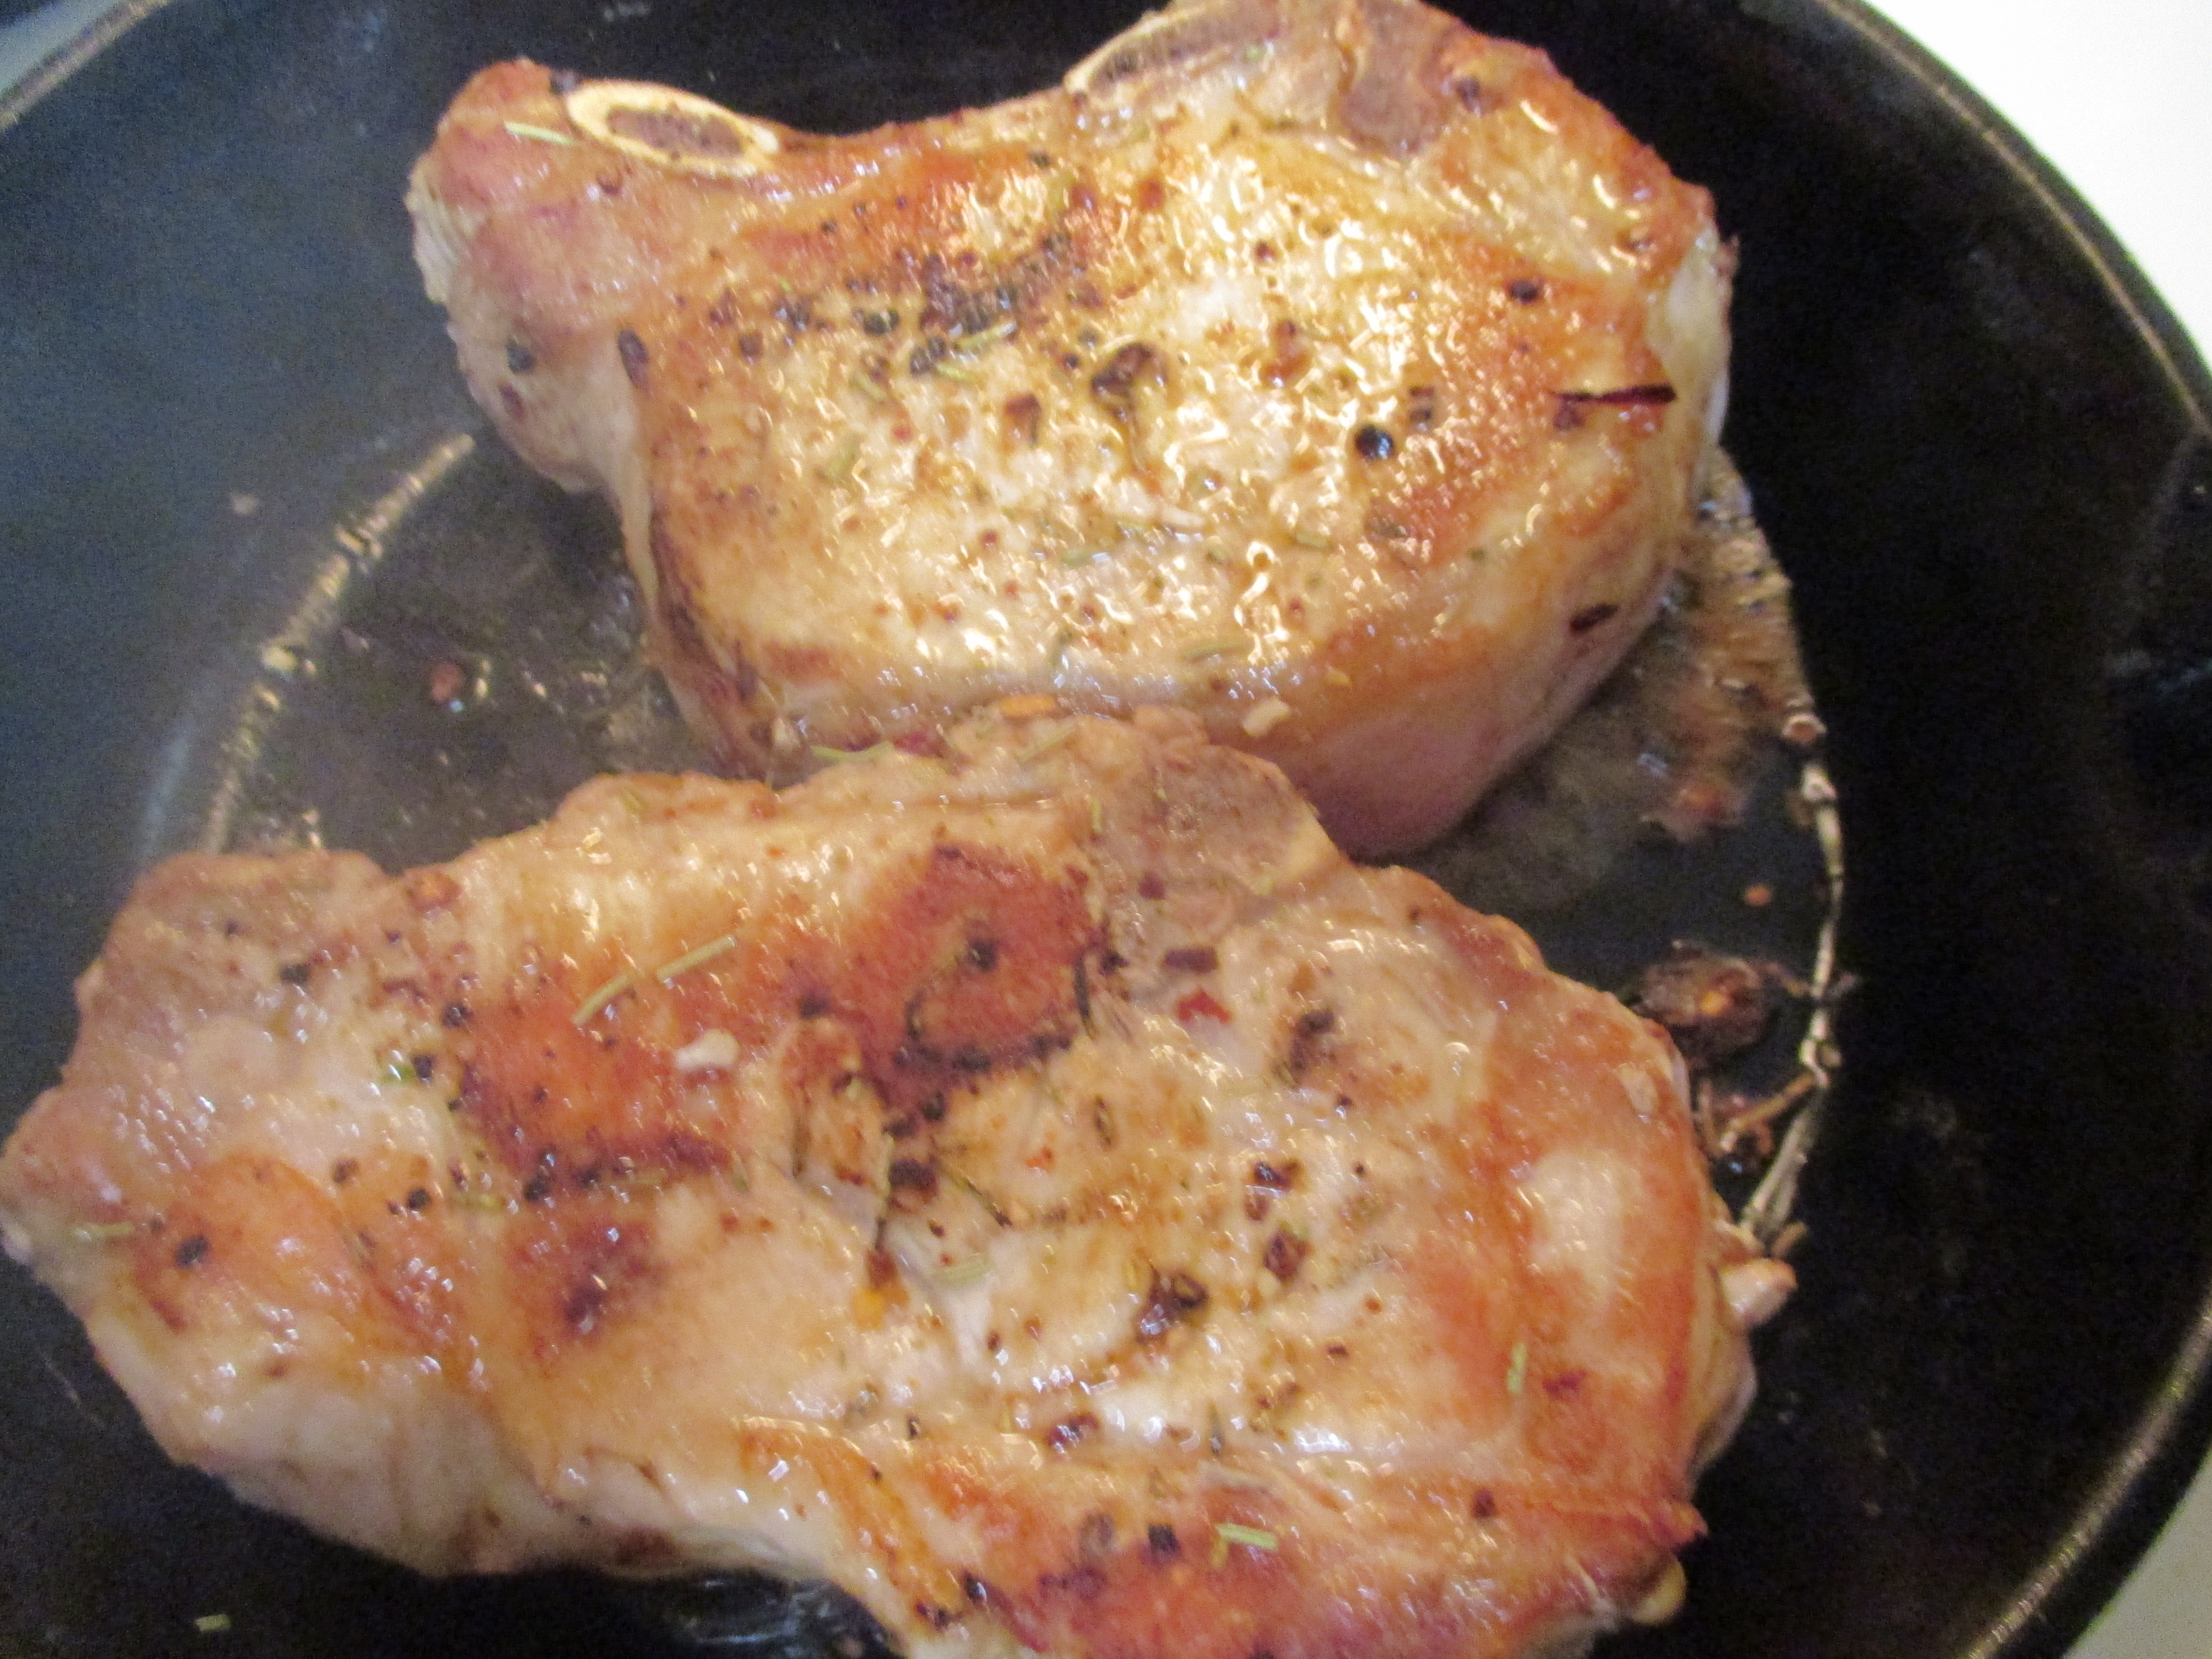
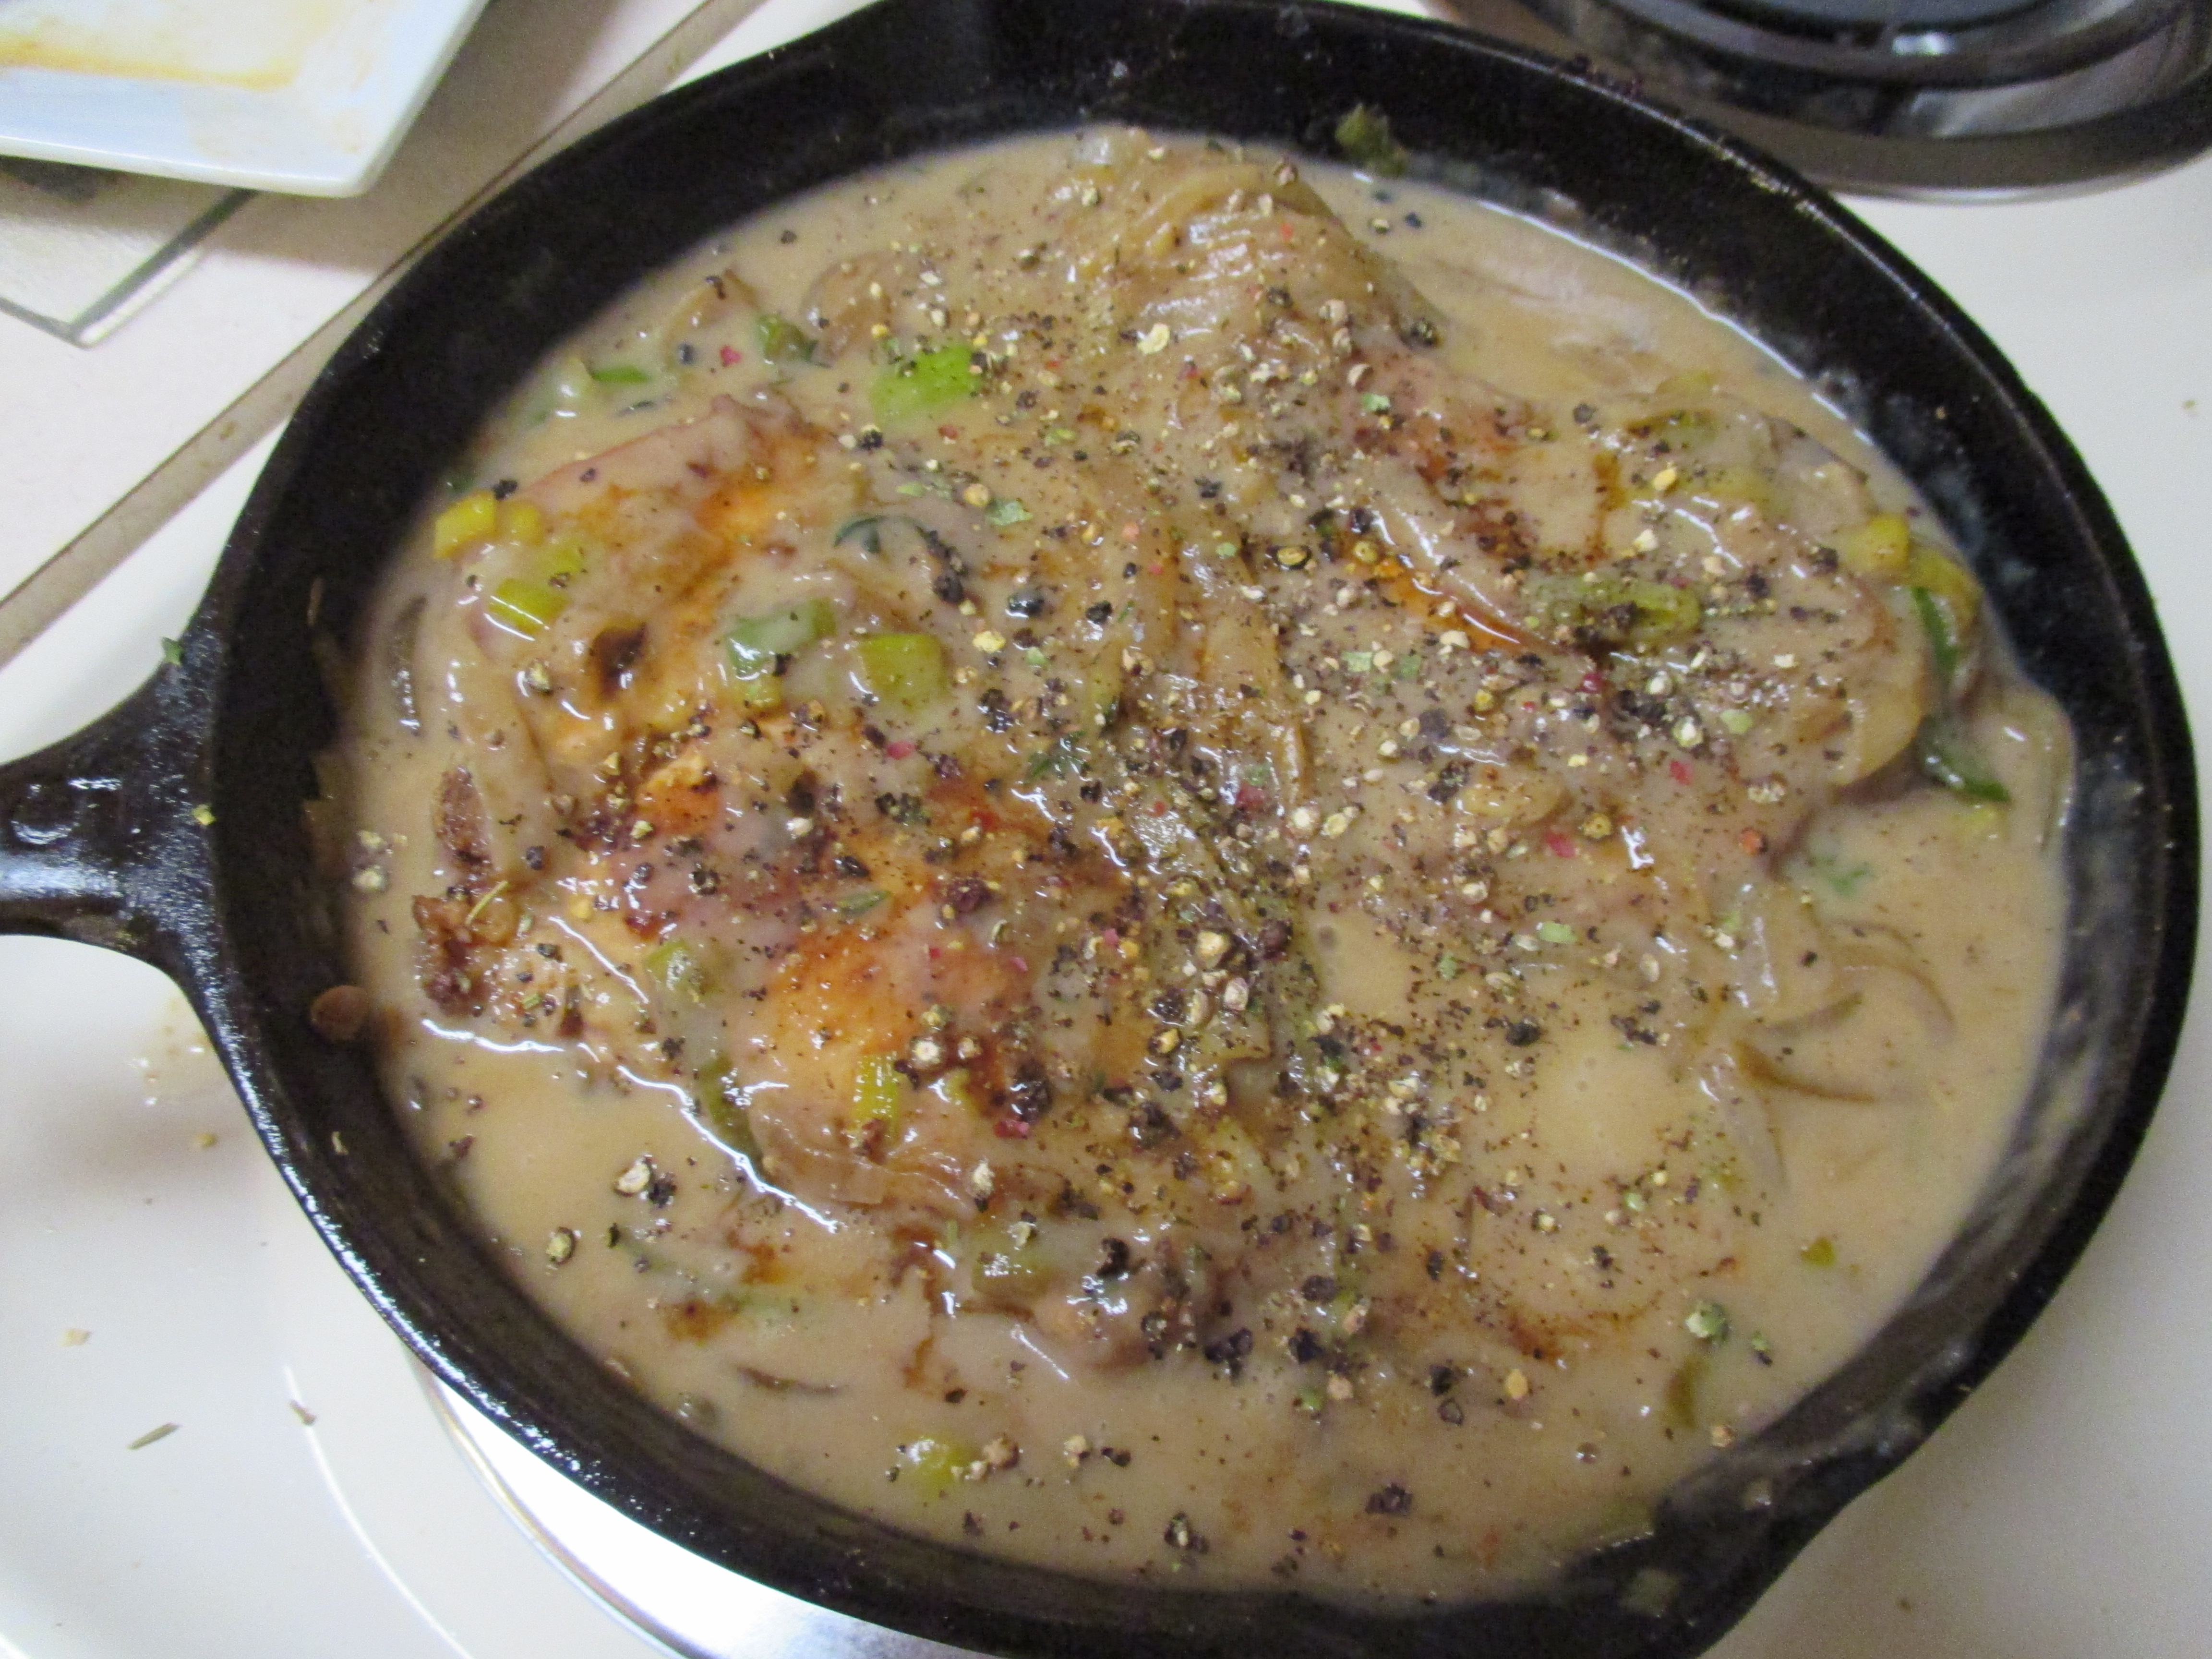
I’ve made versions of this through the years, but this time, I think I came up with a true winner. The ham and turkey actually came from the deli, but this would be a fitting finale for your holiday meats. I added cauliflower because I was also going for a “not macaroni” and cheese dish. IMG_0689
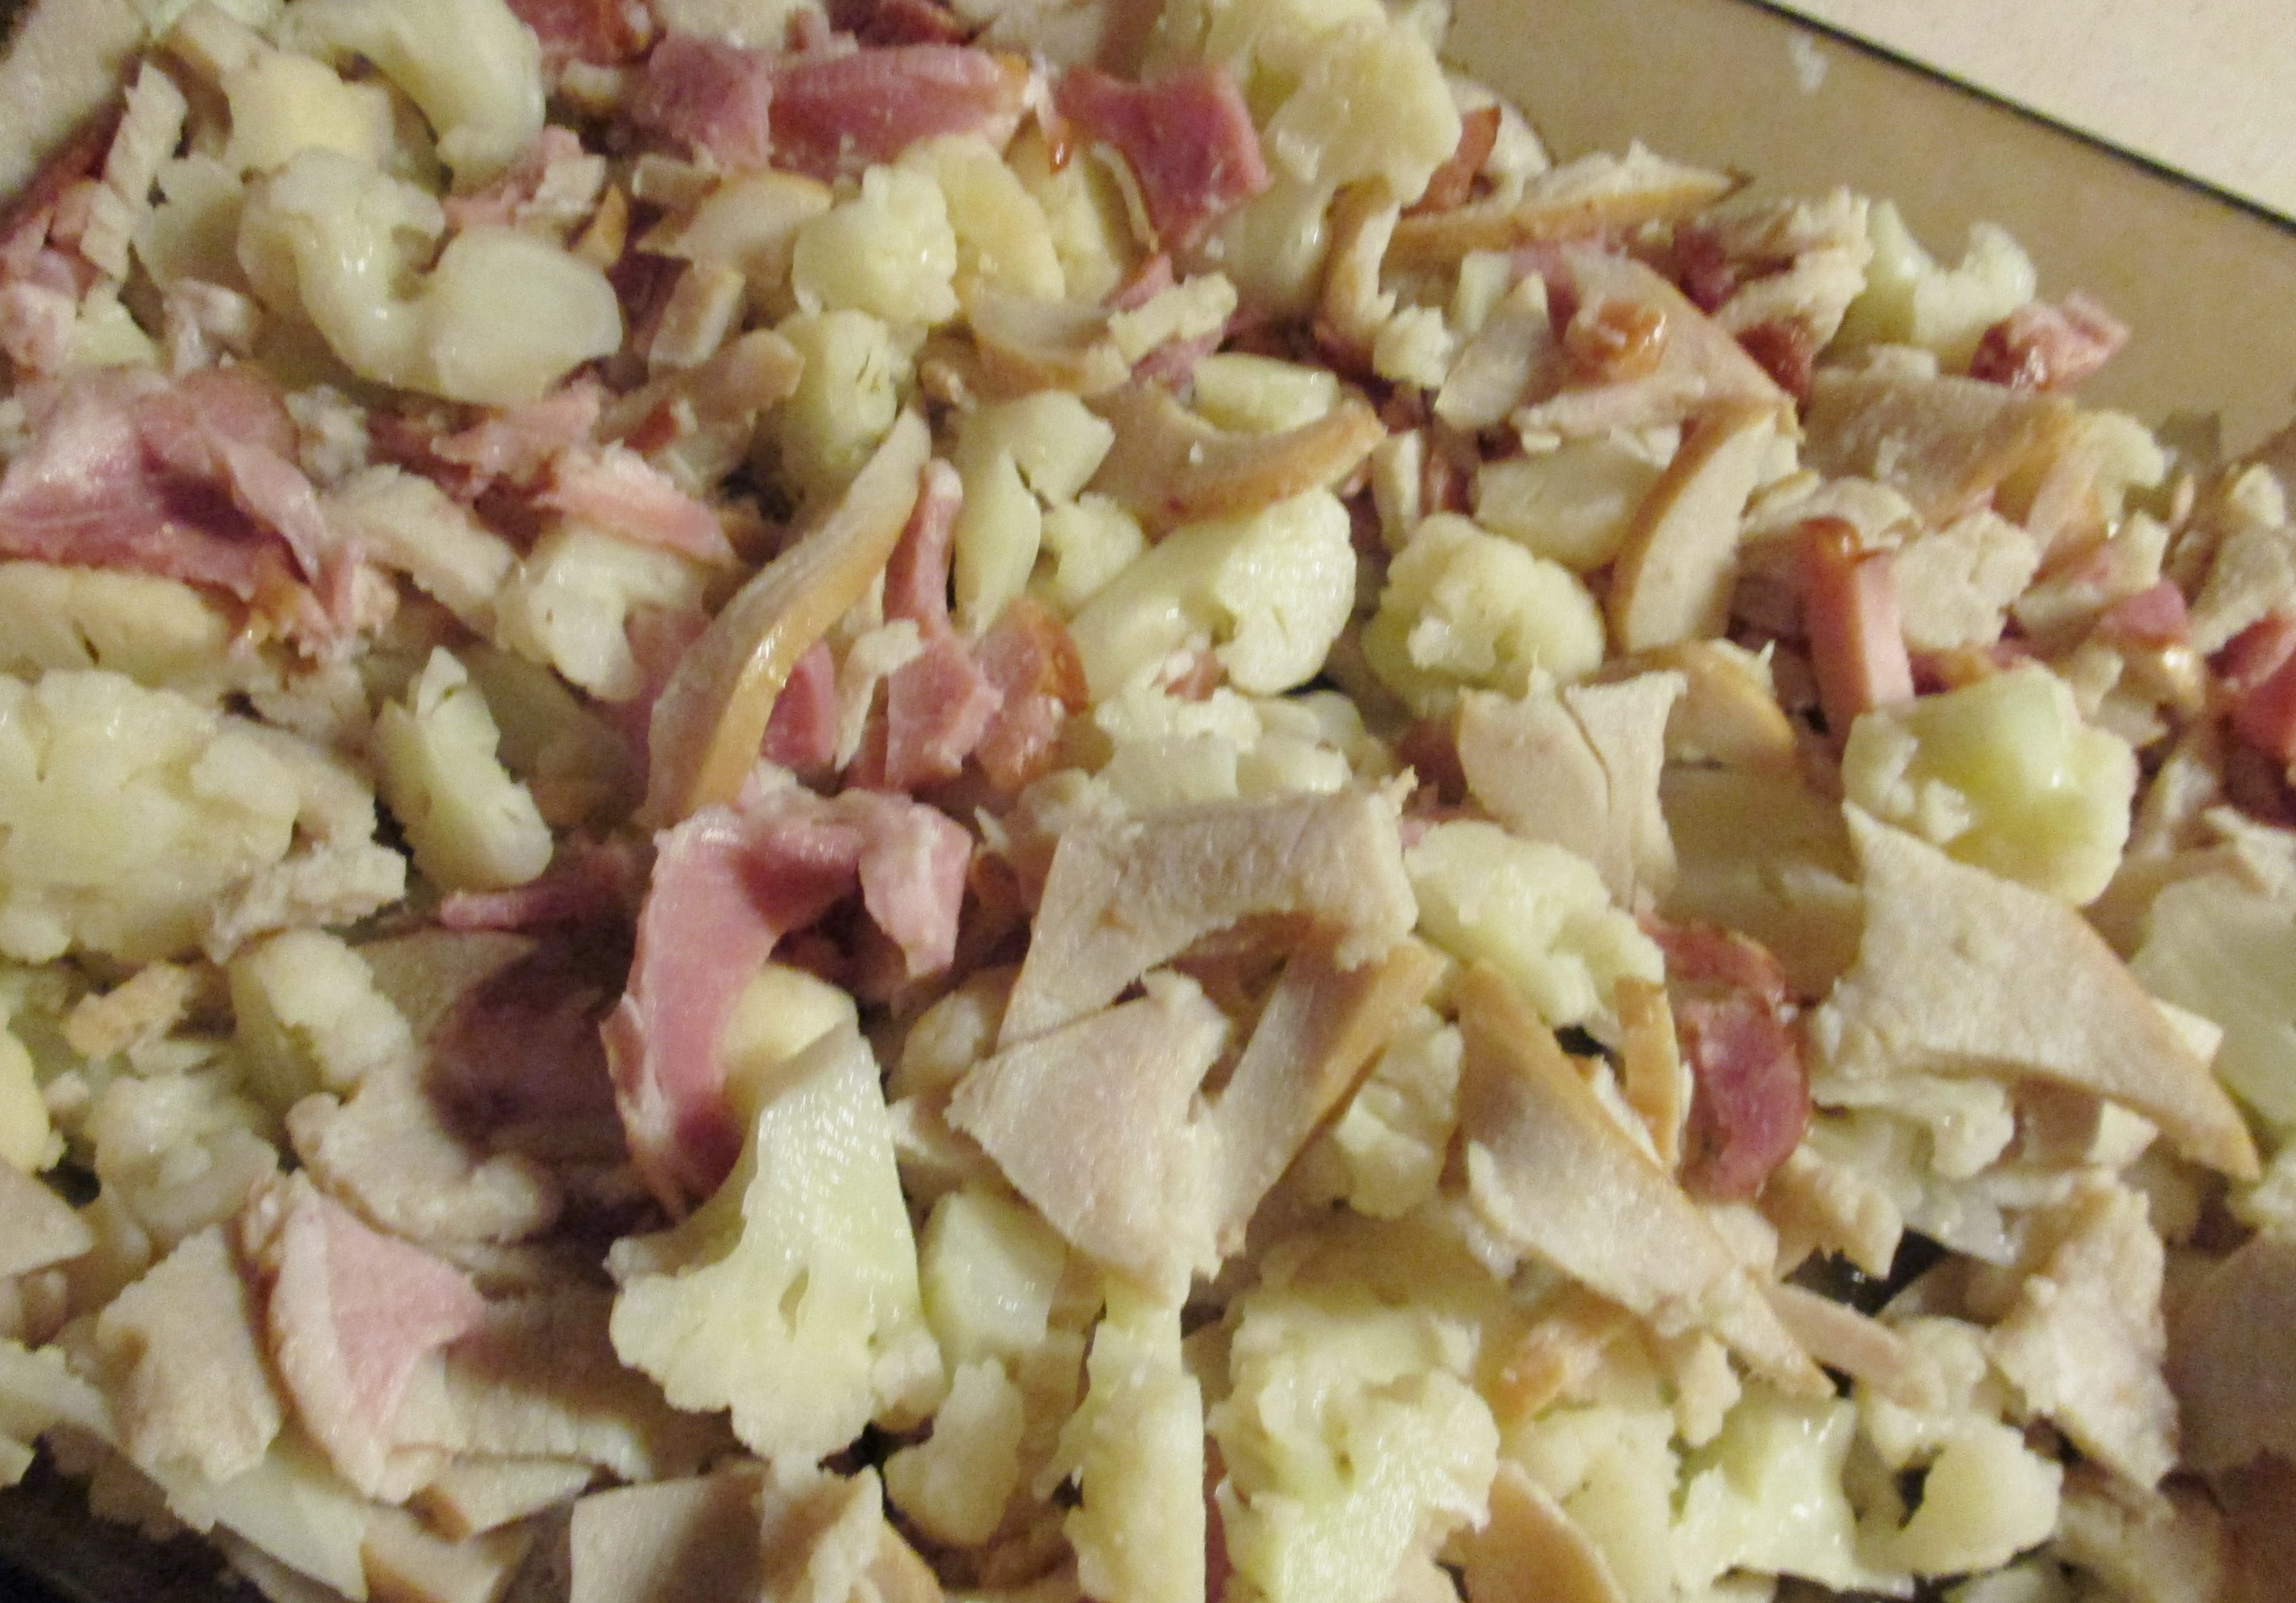
An inspired rummage through the refrigerator resulted in the addition of beer to the cheese sauce. I actually made the cheese sauce with 1% milk. It cut back on the fat and thanks to the aforementioned beer, no flavor was sacrificed. I used Extra Sharp Cheddar because it packs a lot of punch in a modest amount ( about 2 cups for at least 6 generous servings). Every cheese sauce needs a little mustard, a dash of Worcestershire, and a splash of hot sauce, so I added all of the above.

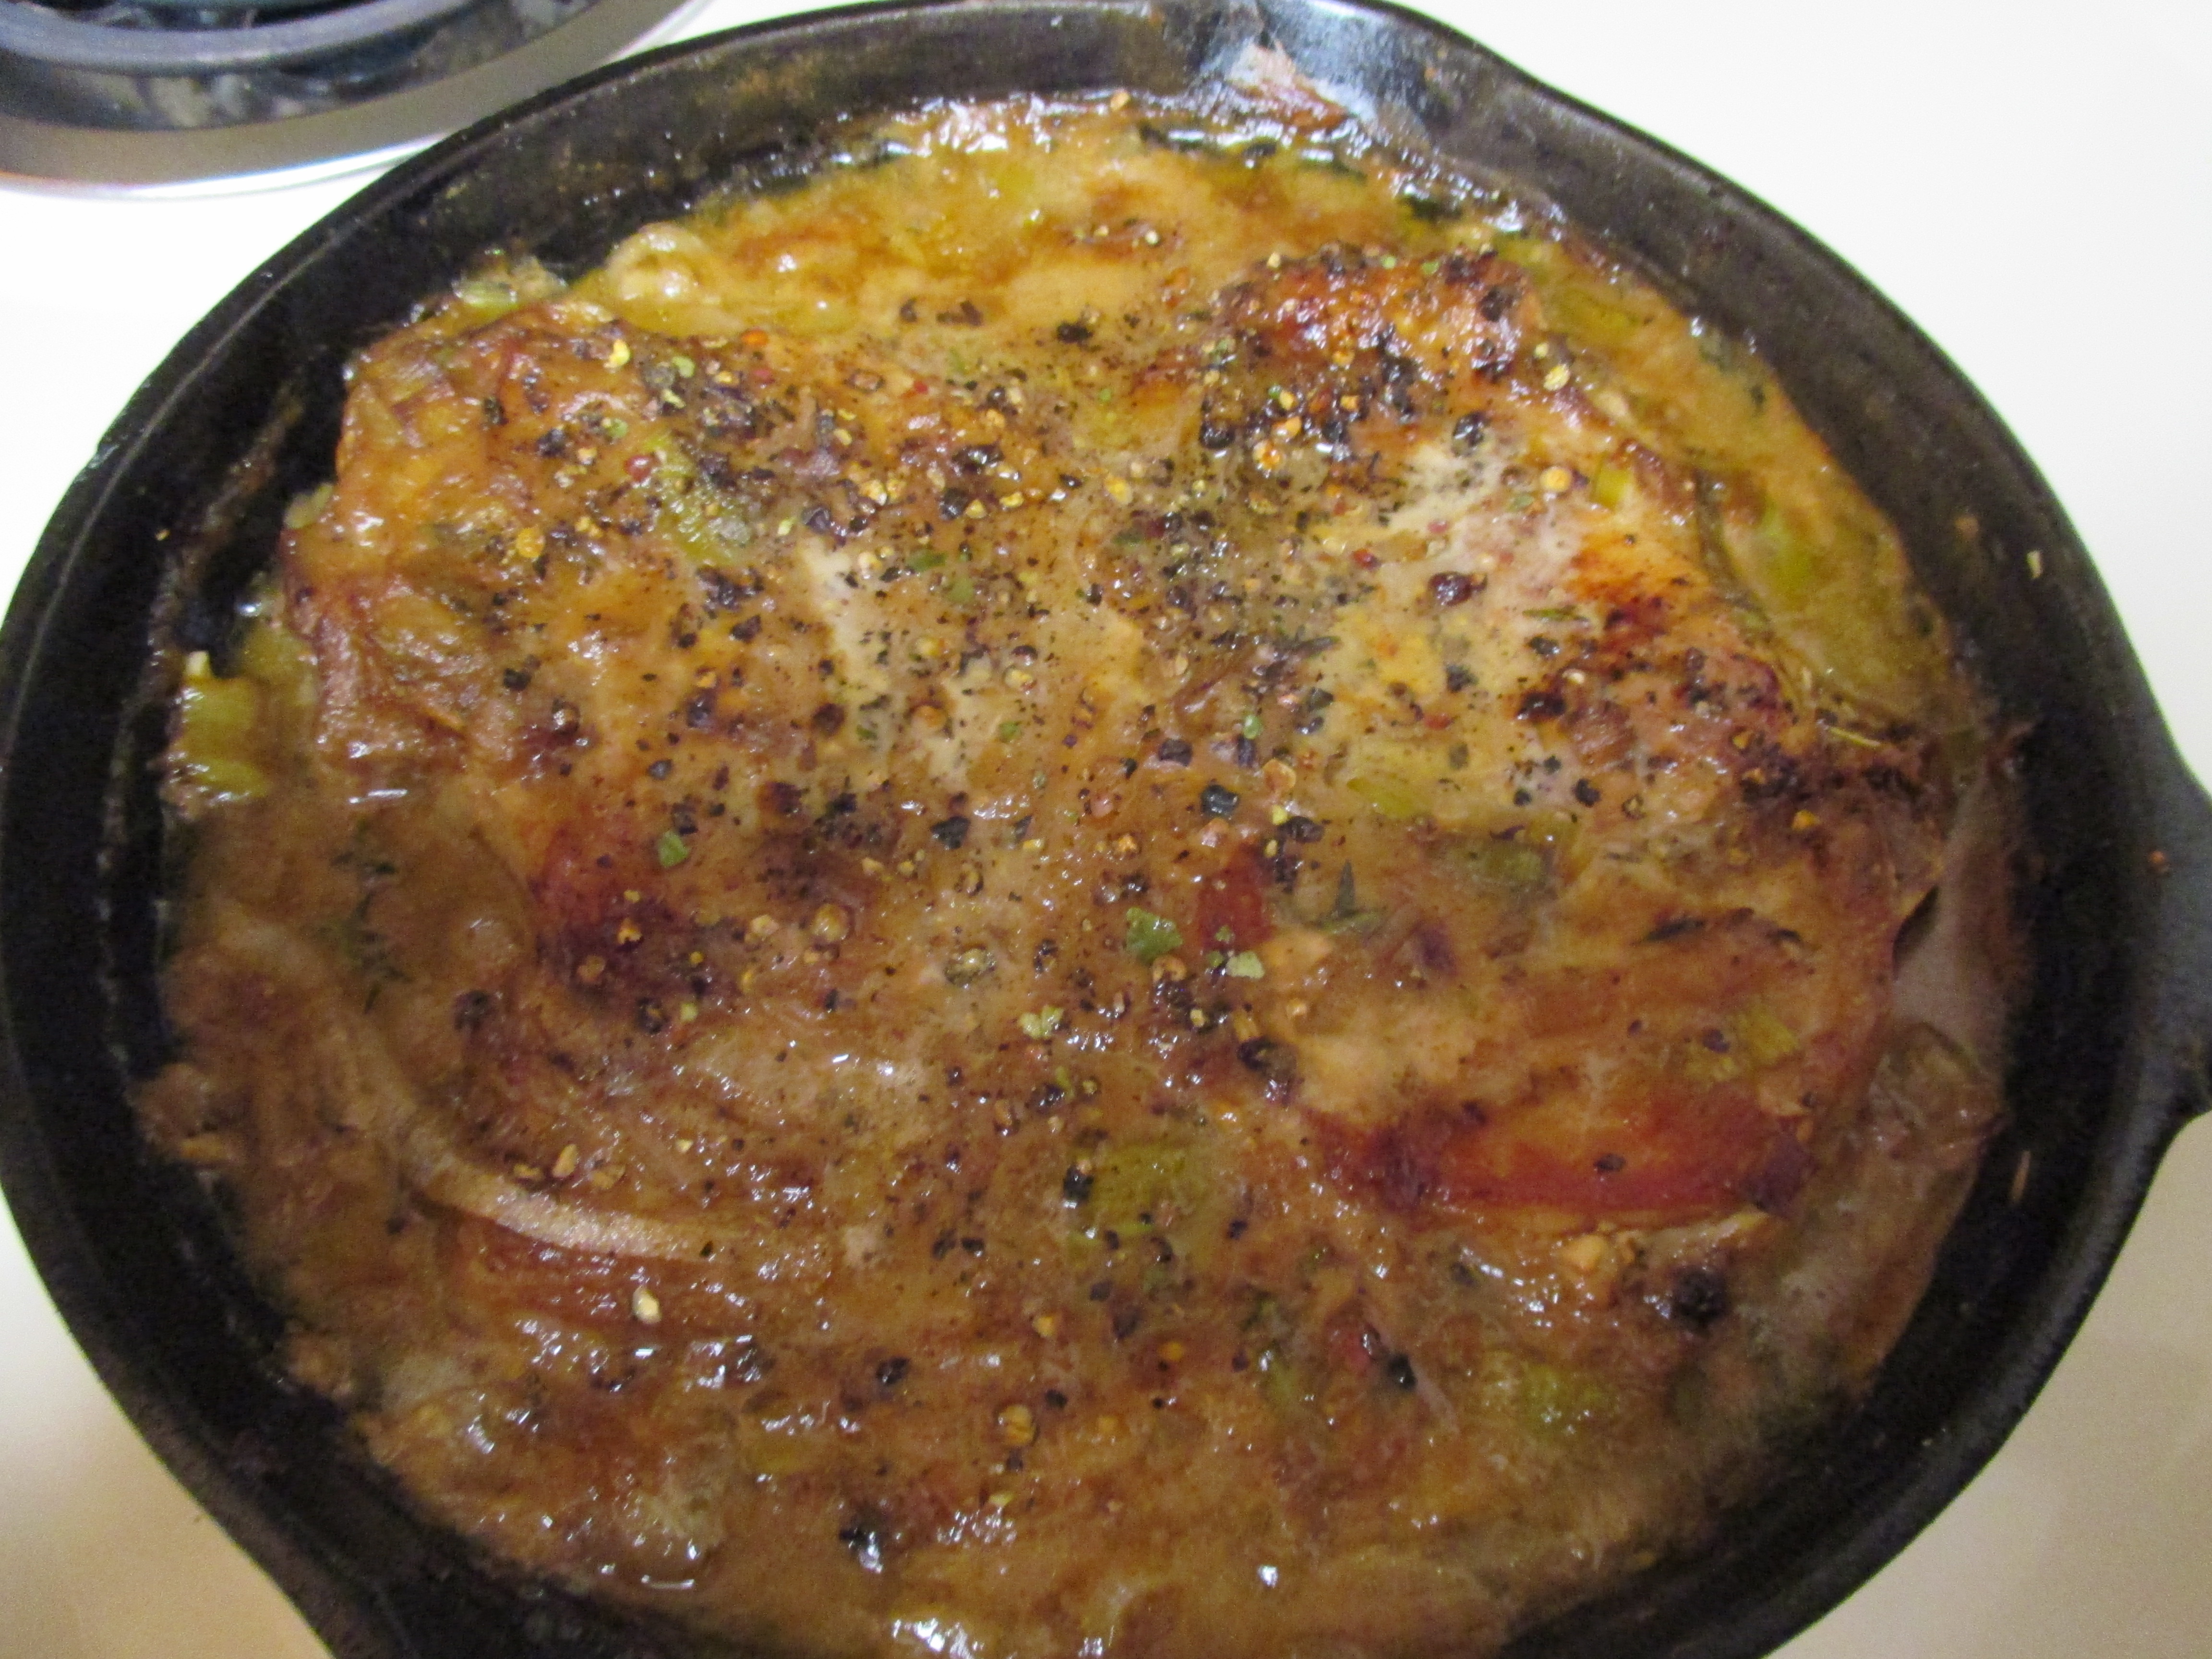
While the dish from years ago didn’t have one, I wanted the extra crunch of a Panko crumb topping. A bit of grated Parmesan added to the wonderfulness of that crust.IMG_0697
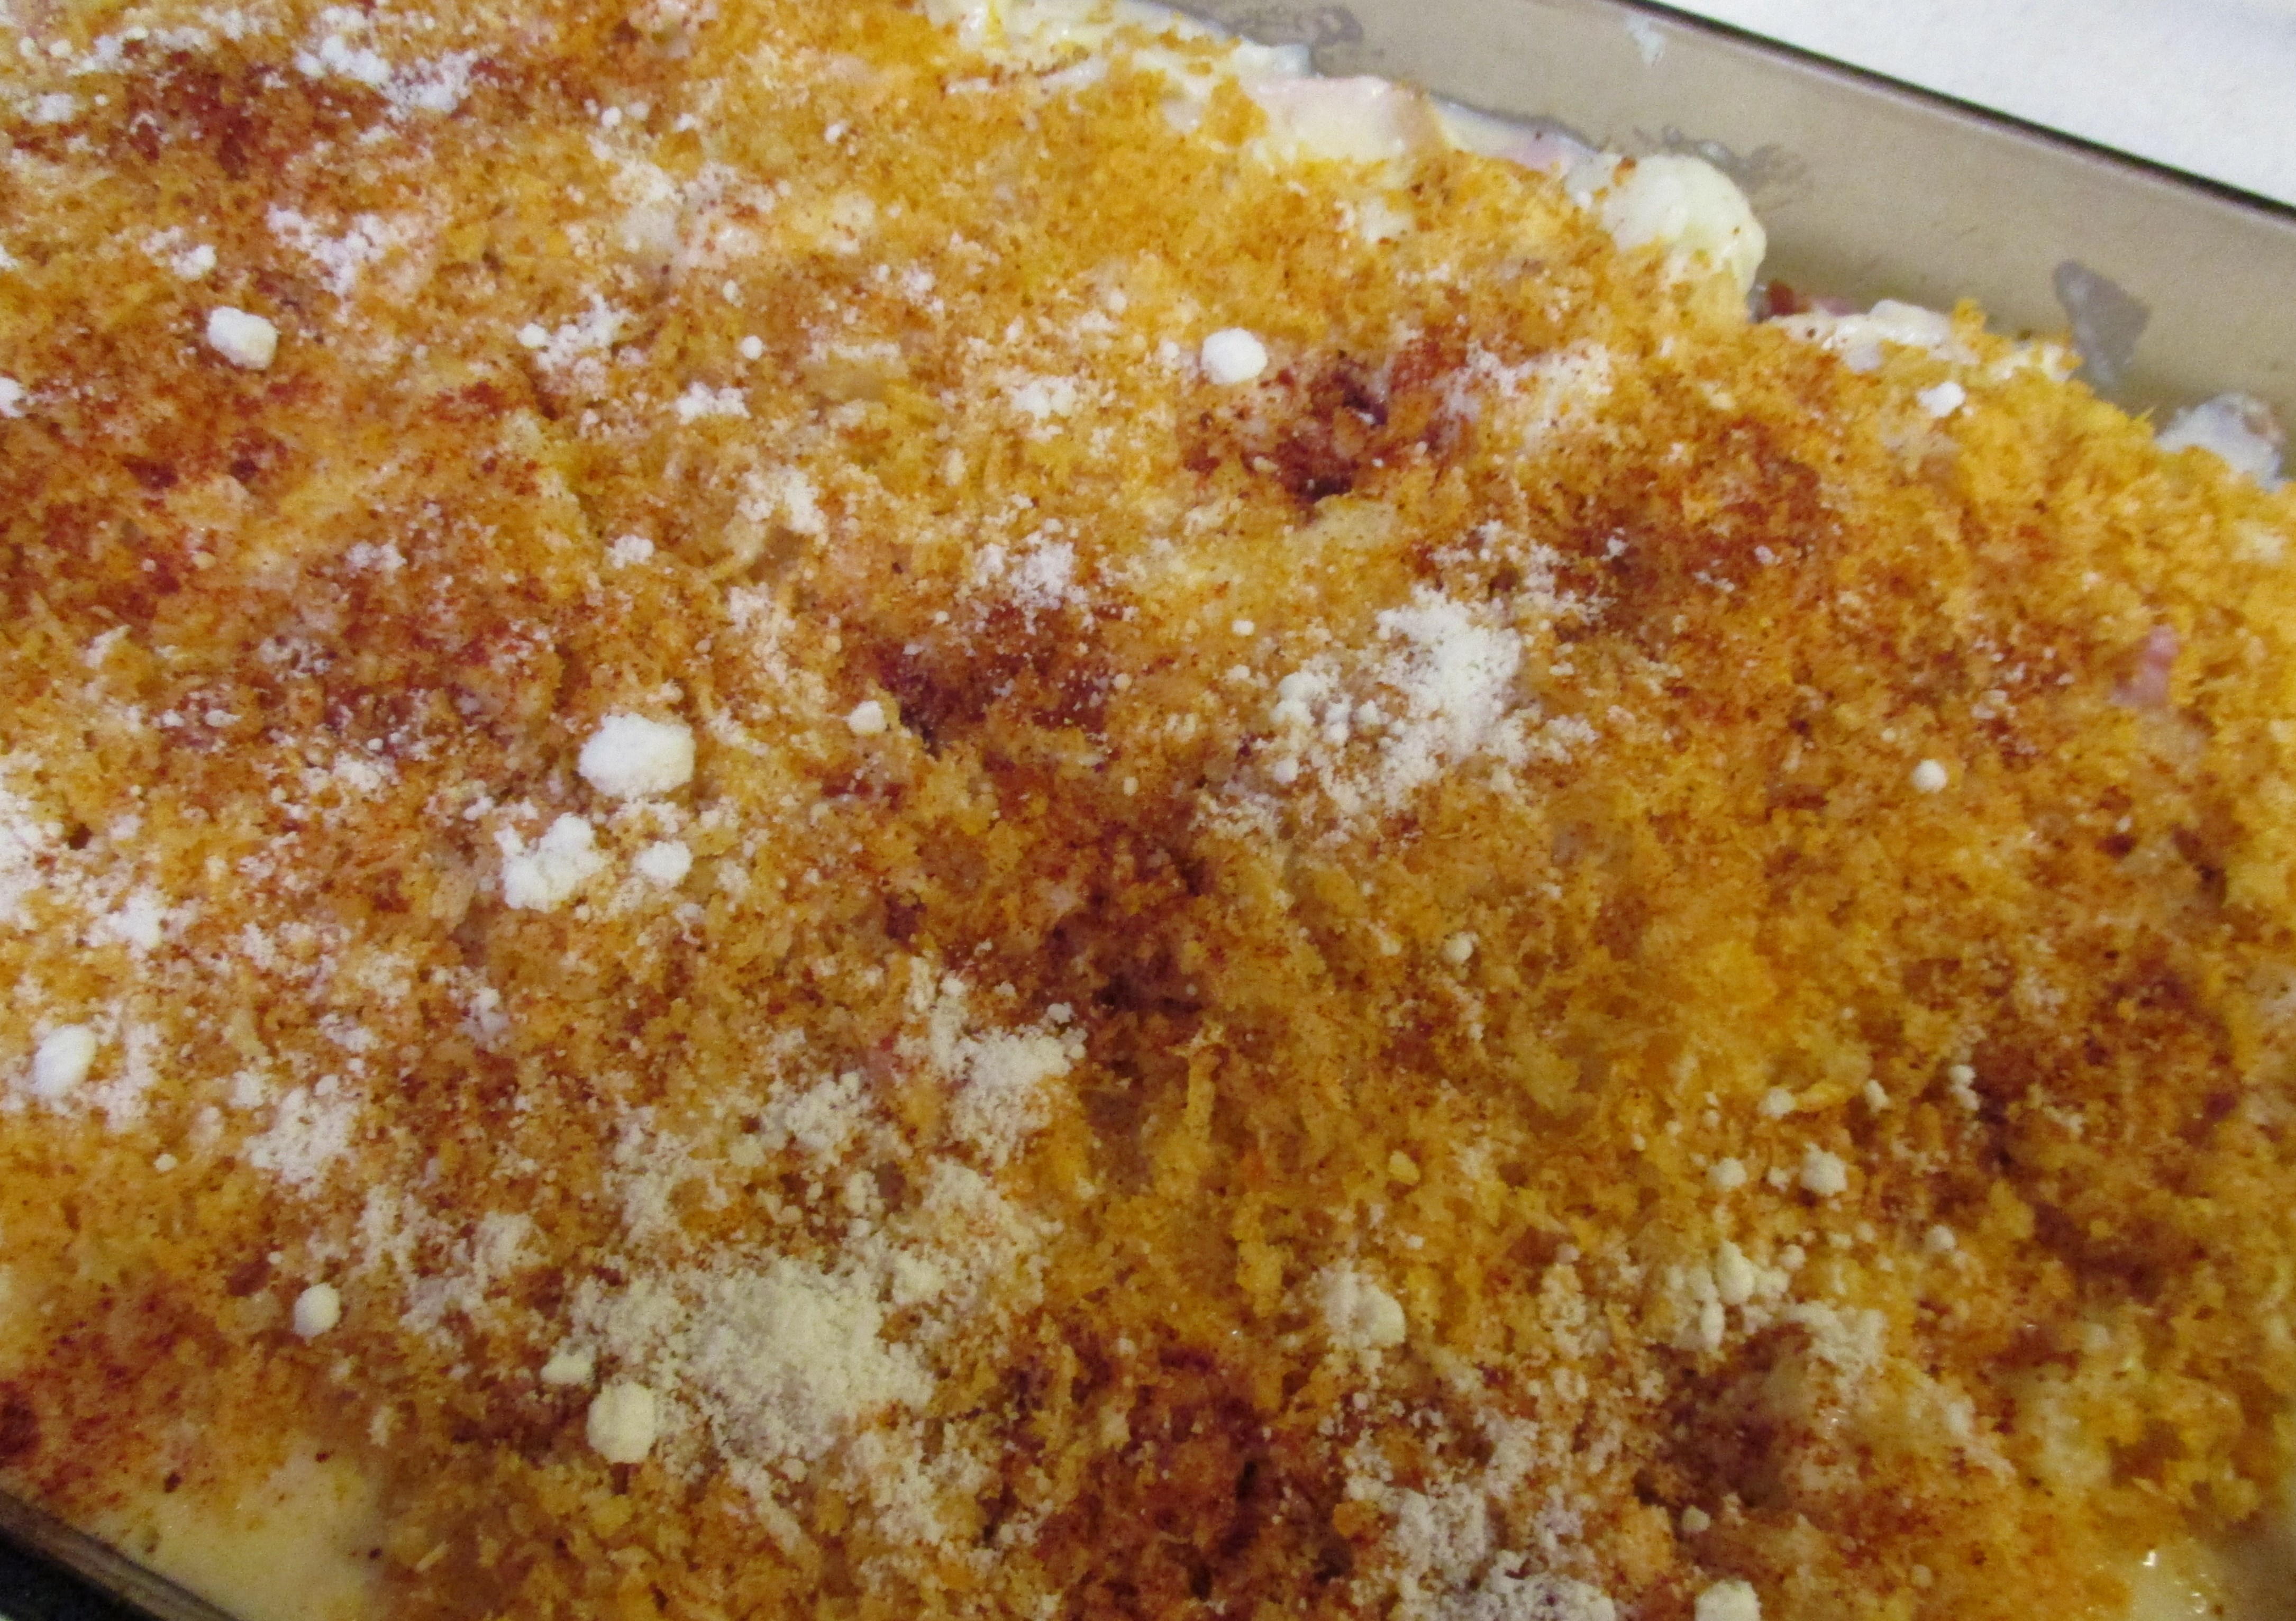
A bake in the oven resulted in a golden crust, bubbly sauce, and the perfect marriage of ham, turkey, and cauliflower. IMG_0700

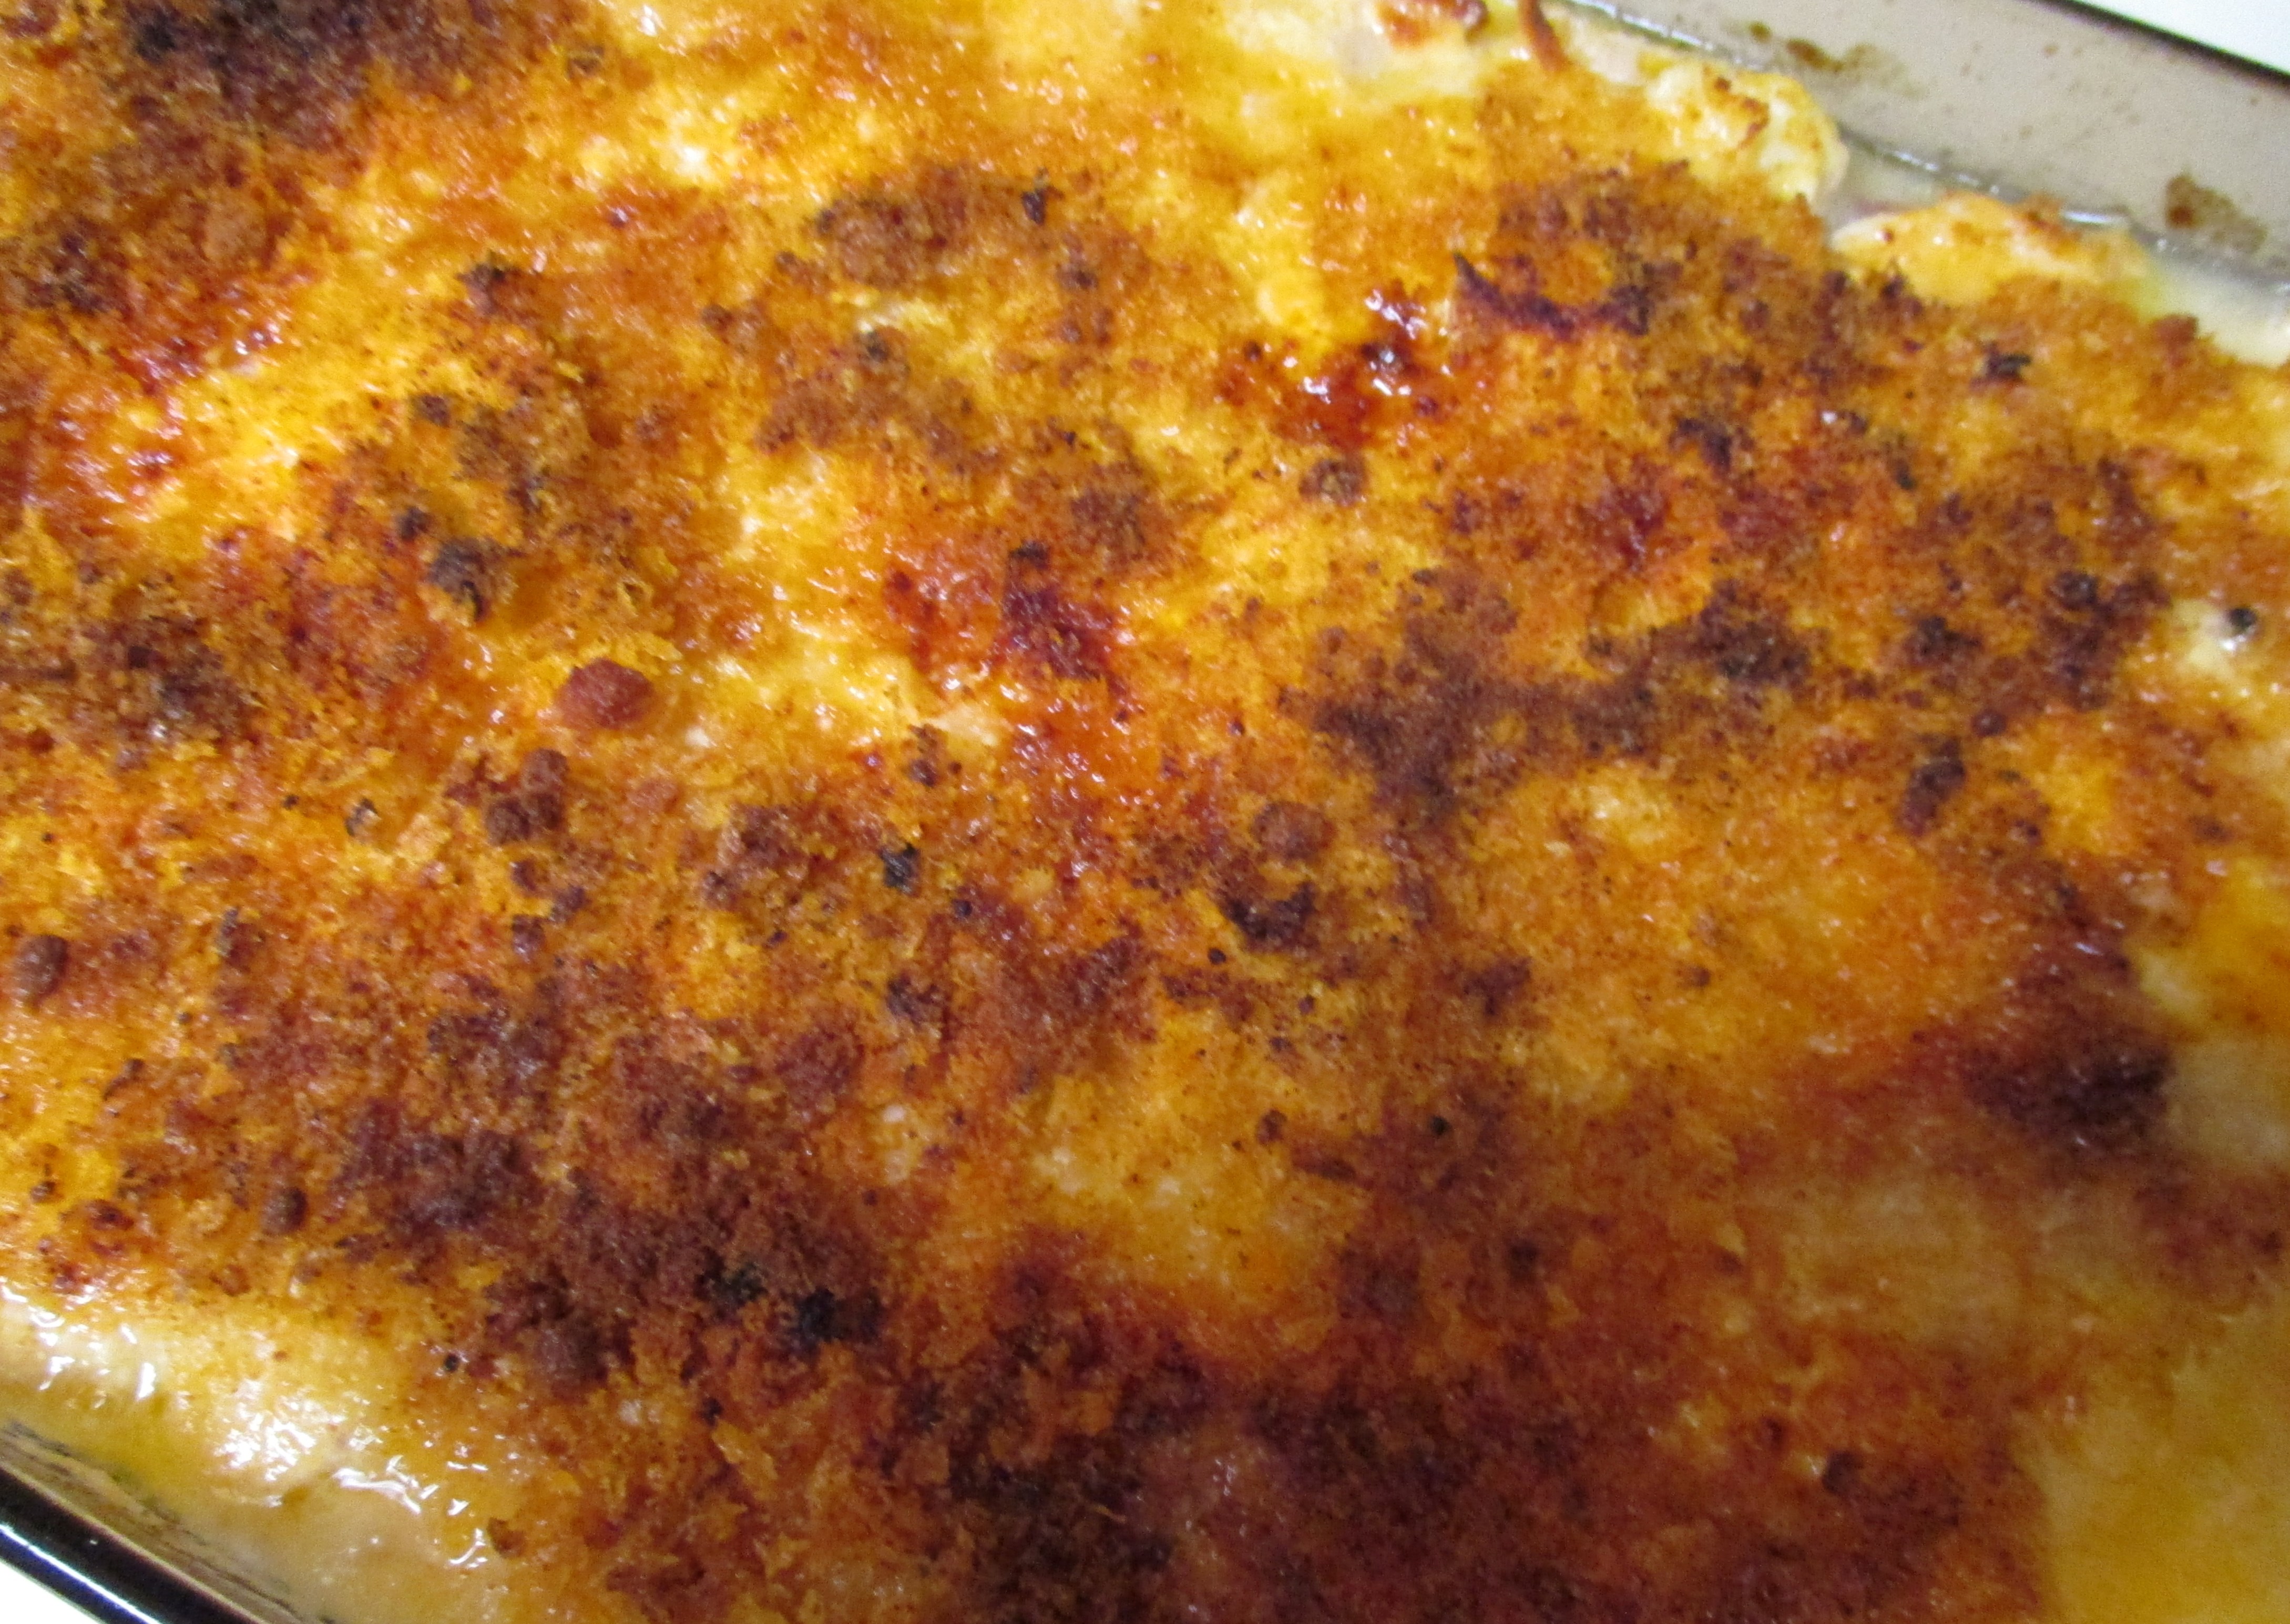
This dish took me back to a simpler time, yet paid a bit of respect to my healthier habits of the present.

Ham and Turkey Au Gratin
Print Recipe
Servings
6
Servings
6
Ham and Turkey Au Gratin
Print Recipe
Servings
6
Servings
6
Ingredients
Servings:
Instructions
  1. Spray a rectangular baking dish with cooking spray. Combine the ham, turkey and cauliflower in the baking dish and set aside.
  2. Melt 2 tablespoons of the butter in a medium saucepan. Add the shallots and cook for several minutes until the shallots begin to soften.
  3. Whisk in the flour and cook for 2 minutes stirring frequently. Add the beer to the pan and continue to whisk until a smooth paste forms. Allow to cook for another 2 minutes.
  4. Slowly whisk in the milk. Continue to cook, stirring constantly until the mixture comes to a boil. Reduce the heat to low.
  5. Add the mustard, Worcestershire sauce, and hot sauce to the pan. Cook until the sauce thickens which should take several minutes.
  6. Remove the pan from the heat and gradually stir in the cheddar cheese. Once everything is melted, pour the sauce over the meat and cauliflower mixture. Stir to combine.
  7. Melt the remaining butter and toss with the bread crumbs. Sprinkle the crumbs evenly over the top of the casserole. Top with the Parmesan cheese and give the top a light blast of cooking spray.
  8. Bake at 375 degrees for 25 minutes until everything is bubbly. Turn the oven to broil and let it go for 2 - 3 minutes until the top is golden brown.
  9. Remove from the oven and allow to rest for 10 minutes before serving.
Share this Recipe
Powered byWP Ultimate Recipe

A note here on using cauliflower as a starch alternative: This vegetable is a veritable blank canvas and because of its color and texture can make a credible stand in for potatoes or pasta… it’s all in how you cut and cook it. It is considered a super food by many and as the Recipe Archive will show has been a guest in the Kitchen on several occasions.

Let the holidays begin (or should I say continue) and don’t forget to take some time to reflect and be thankful for all the year has given you, and if it wasn’t all that you dreamed, remember, you get to start over very soon.


Let’s Talk Turkey… All Week Long

As I write this, we are barely a day away from the ultimate turkey feast. Birds are waiting patiently for their close up. Some are thawing, some may have been strutting around only a few days ago, and some are soaking in one savory salt bath or another. Mama D’s kitchen doesn’t have a turkey in waiting this year, but that doesn’t mean that her week hasn’t had a more than a few turkey adventures… Obviously that intro was written prior to Turkey Day, here’s how it went down. By the way, you can click on those little red links for more recipes.

My son and his girlfriend  hosted Thanksgiving this year and I once again brought the stuffing (to be correct it was dressing as it never saw the inside of a bird). Thanks to Pinterest, this year  Mama D’s Cali-Itali Stuffing  arrived in a bundt pan. Who doesn’t love stuffing enough to eat it like cake? Instead of frosting, I opted to create a gravy. How does one do this without actually having a turkey? Why by using turkey wings, of course. This idea came from Cooking Light Magazine  and it resulted in a wonderful stock that is the base for a  gravy that is low in fat yet delicious. I used their method for making the stock, but took some liberties when it came to the gravy itself (see the recipe below).IMG_0817 I ended up with a lot of stock; four quarts to be exact. One of those quarts became the Garlic and Wine Gravy….that left 3 quarts of this flavorful stock to play with, and play I did.

First up was a simple soup that I made the day I cooked the stock. I browned some Turkey Italian Sausage along with Mama D’s Trinity (olive oil, onions and garlic). I added some spinach and a modest amount of the Turkey stock and let everything simmer for 45 minutes. I topped it with a Ciabatta roll covered with melted Asiago Cheese and a satisfying Sunday Supper was the result. This is truly an non-recipe recipe, but, if you want the measurements for two hearty bowls, it was 2 sausage links, a 6 ounce bag of spinach, 4 cups of stock and a respectable amount of onion and garlic.IMG_0825The day before Thanksgiving was set to be a busy one, so I opted to use yet another quart IMG_0831of my turkey stock and create some Turkey Mole Chili . I had planned on making it for dinner the night before, but I got lazy and we went out instead. (Yes, I do choose not to cook every so often.) Much of the prep had been done earlier and I added the turkey wing meat to the mix since it was sitting in the fridge doing nothing. It was a nice combination with the ground turkey and added a bit more texture. I combined all the ingredients then put it in the crock pot. The all day simmer gave the chili time to really come together. It worked as well as making it a day ahead. (Note to self: you’ve got a crock pot, use it!) It was a warm tasty supper that required nothing more than a touch of cheese and some corn bread croutons. A bed of brown rice was a comforting addition.IMG_0864

The stuffing cake was a huge success. My only adjustment to the original recipe was to add an extra egg and a little more of the turkey stock. I packed the bundt pan pretty tightly. I covered it tightly with foil for its initial baking which lasted about 30 minutes.IMG_0835Once we arrived at the gathering, I uncovered it and let it continue to bake for another 20 minutes. (Note: It was sharing the oven with a green bean casserole that was being reheated so the time was longer than if it was in the oven on its own.)

It un-molded without a hitch, always a good thing. and made quite the attractive presentation.IMG_0840We sliced it as you would any bundt cake and gave it a little drizzle of gravy. The gravy stayed nice and hot for everyone’s seconds and thirds because of an electric gravy boat. This is one gadget that I’m glad I impulsively bought.IMG_0841

Here’s the recipe for that gravy.

Garlic and Wine Turkey Gravy
Print Recipe
Servings
12
Servings
12
Garlic and Wine Turkey Gravy
Print Recipe
Servings
12
Servings
12
Ingredients
Servings:
Instructions
  1. Heat the olive oil in a small fry pan. Add the garlic and shallots and cook until golden brown. Be careful not to burn them.
  2. Add the wine to the pan and bring to a boil. Reduce the heat to medium and simmer until the wine is reduced by half, 5 - 7 minutes. Set aside.
  3. In a medium saucepan, melt the butter over medium heat. Whisk in the flour and cook stirring often for 2 minutes.
  4. Add about 1 cup of the stock and continue to whisk until it is smooth. Gradually stir in the rest of the stock. Bring the mixture to a boil, reduce the heat and add the reserved garlic and wine mixture and the Italian Herb Blend.
  5. Continue to simmer for 5 - 10 minutes until the gravy thickens. Give it a taste and add salt and pepper as needed.
  6. Serve with turkey, dressing, or anything else you want to put it on.
Share this Recipe
Powered byWP Ultimate Recipe

So, my Turkey Week is coming to an end.The food that was created was wonderful but, it couldn’t come close to how wonderful it was to be with my family. I hope that your Thanksgiving was filled with just as much love and deliciousness.


Italian Tomato Soup, Literally

I used to come home for lunch when I was in grade school. I couldn’t wait to get in the door and discover what my mom had made for lunch. Sometimes it was a sandwich, but most of the time it was something hot and that hot item was often soup. Tomato was one of my favorites. My mother always used Campbell’s, but made it her own by adding milk instead of water. It changed the color from rose to salmon and it tasted wonderful. Every once in a while she’d stir in some leftover rice and the bowl of goodness became even more comforting. Back then the Grilled Cheese Sandwich of choice was made with Velveeta. Steaming hot tomato soup and a gooey grilled “cheese” sandwich made coming home for lunch extra special. (Disclaimer: Remember, this was the 1950’s. The world of convenience food was in its prime and my mother being a modern, forward thinking woman, embraced it.)

That was then and this is now, as the saying goes. I now know that making  homemade tomato soup is super easy. It just takes tomatoes. either fresh or canned and whatever ingredients you happen to have on hand to sweeten the deal. The time for fresh tomatoes has passed, so this soup started with a large can of tomatoes. These weren’t your basic tomatoes, no sir. These were the veritable Cadillac of tomatoes. These were San Marzano.

2015-08-16-1439737857-6365608-sanmarzano1These heirloom tomatoes originated in a town near Naples were they grew in the rich volcanic soil  surrounding Mount Vesuvius. To be authentic they have to grow in that area. This easily makes a can of them twice the price of the domestic variety, but it is so worth it. The San Marzano is sweet and rich and has low acidity. All of these factors make it a perfect choice for soup.

IMG_0665Mama D’s Trinity (onions, garlic, and olive oil) was the foundation. The trio became a quartet when I added a good dose of Red Pepper Flakes.IMG_0668 Besides the tomatoes I decided to continue the Italian theme by adding some Toasted Farro and Cannellini Beans. Both of these have made appearances here before. Farro actually comes from Italy and the beans’ ancestors came over on the boat, too.

IMG_0779The Trinity sweat with the pepper flakes before the tomatoes went into the pot along with some Chicken Broth. I would have used Vegetable stock, but I didn’t have it on hand. Either one will do the trick. I decided to keep the Italian vibe going and added a bit of Marsala Wine, I let this all simmer together for twenty minutes or so before I took a potato masher to it. This gave it a rustic chunky texture that I found quite enjoyable, but you could use an immersion blender if you want your soup base to be silky smooth.

The cooked farro and the drained beans went in next along with some generous grinds of my McCormick Italian Herb Blend. I let things bubble away a bit more before, in a nod to my Mom, I added some half and half.  The soup was delightful. Just rich enough to be satisfying, but light enough to be guilt free.IMG_0676What’s tomato Soup without Grilled Cheese? Incomplete. My version was more cheese toast than sandwich and featured shredded Asiago.IMG_0673 If I’d had a baguette on hand, I would have definitely used it, but I didn’t so some Italian Bread stepped in. Use whatever cheese you love or have on hand. Just goes to show that anything that works for you, works.IMG_0686

Italian Tomato Soup with Farro and Cannellini Beans
Print Recipe
Servings
4
Servings
4
Italian Tomato Soup with Farro and Cannellini Beans
Print Recipe
Servings
4
Servings
4
Ingredients
Servings:
Instructions
Farro
  1. Toast the farro: Rinse 1/2 cup farro and allow to dry. Place the farro in a dry fry pan. Turn heat on stove to medium and toast the farro, stirring frequently until it is golden and fragrantly nutty, 10 -15 minutes
  2. Bring 2 cups of water (or broth) to a boil. Stir in the toasted farro and return to a boil. Reduce heat and simmer until most of the liquid is absorbed, 30 minutes or so. The farro should be chewy but tender. Drain any remaining liquid and set aside.
Soup
  1. Heat a soup pot over medium high heat. Add the olive oil. Once the oil is hot, add the onion, garlic and red pepper flakes. Stir to coat with the oil and cook for 5 minutes or so until the onion begins to soften.
  2. Stir in the stock, tomatoes, Italian Seasoning, and Marsala. Bring up to a boil and reduce the heat to simmer. Simmer for 20 - 30 minutes. Use a potato masher to create a chunky soup. Hit it with the immersion blender if you want it smooth.
  3. Stir in the farro and beans. Simmer for a little longer; 15 minutes is about right.
  4. Ladle into soup bowls and garnish with the pesto and croutons if desired.
Share this Recipe
Powered byWP Ultimate Recipe

Soup season is upon us and there will be more soup adventures as Fall settles into Winter. There is nothing quite like a bowl of warm comforting soup in the Kitchen of Love.

Lovin’ From the Oven – Smothered Pork Chops

As you probably know, Mama D runs a pretty healthy kitchen. Fresh and light are terms often used in the posts that appear here. Every once in a while though, especially when the weather is getting chilly, she loosens her apron strings and goes for a little more gusto. Smothered Pork Chops from the oven is one such dish. It is a little richer than what I usually prepare, but it is lightened up in a few places as well. It’s the perfect weekend splurge that won’t break the calorie bank.

Pork is probably my favorite meat and pork chops are high on my list of favorite cuts. I wanted to see if I could come up with a different spin on this Southern favorite. I poked around the internet to get some background on this dish. Some called it Creole, some called it Soul Food, but everyone called it a comfort food staple. I kept some of the ingredients and a few of the techniques, but in the end it was a Mama D original.

It starts with thick center cut pork chops. Keep the bone in, the flavor it imparts is amazing. I skipped the dredge and seasoned the chops with Italian Herb Seasoning. I got a small cast iron skillet screaming hot and sprayed it lightly with Olive Oil Cooking Spray.IMG_0647 The chops got a quick sear before they took a seat on a nearby plate. I left all the wonderful bits and drippings in the pan and turned the heat to low before I added a bit of olive oil.IMG_0648 I added onions, leeks, and garlic and let them cook undisturbed for 5 minutes. I added a small pinch of salt and let them cook slowly for another 20 minutes giving them a stir every now and then.

Smothered Pork Chop Gravy can be anything from decadent and creamy to rich and savory. I opted to create a lighter sauce  without short-changing the flavor. The carmelized onion and garlic mixture was the perfect flavor base. A little Wondra Flour went in and cooked for a couple of minutes. Then I gradually added chicken broth and 1% milk and let it bubble into a beautiful thick sauce. I added some thyme sprigs while it was bubbling to give a delightful woodsy scent. Rosemary would also be wonderful as would any combination of woody herbs.IMG_0655

I added the chops back to the pan. The sauce almost covered the chops but I gave them a few turns to make sure every nook and cranny was coated. Some cracked black pepper went on the top before it headed into the oven to become a skillet full of golden love.IMG_0658The gravy was beyond fabulous. I even caught myself eating the leftover golden goodness out of the pan as I cleaned up. Gravy is meant to top something and the pork chops were delighted I chose them.

I rounded out the plate with some Polenta. I happened to have instant in the pantry so that;s what I used. I have to say I prefer the longer cooking variety as it has more texture, but this did fill in nicely. I added some sautéed spinach and garlic to the polenta as it was cooking. It made a wonderful side dish that also enjoyed a bit of gravy love.

IMG_0660

Smothered Pork Chops
Print Recipe
Servings
2
Servings
2
Smothered Pork Chops
Print Recipe
Servings
2
Servings
2
Ingredients
Servings:
Instructions
  1. Heat a small cast iron skillet over high heat. Sprinkle the Italian seasoning on both sides of the pork chops. Spray the skillet with the cooking spray. Add the pork chops and sear 3 minutes on each side. Remove the chops from the pan and set aside.
  2. Reduce the heat to medium and add the olive oil to the skillet. Add the onions, leeks, and garlic to the skillet and cook undisturbed for 5 minutes. Add a pinch of salt and continue to cook slowly for 20 minutes, stirring occasionally until they are golden brown.
  3. Add the flour to the skillet. Cook and stir for 2 minutes. Slowly add the broth and milk stirring to keep everything smooth. Add the thyme sprigs and continue to cook until the gravy begins to thicken, 5 minutes or so.
  4. Return the chops to the pan and turn several times to coat them with the gravy. Top with a generous dose of cracked black pepper. Place the skillet in a preheated 350 degree oven. Bake 20 - 30 minutes until the are cooked. Remove the thyme stems. Allow to cool slightly before plating.
Spinach Polenta
  1. Saute 2 cups of chopped spinach in a little olive oil with a clove or two of minced garlic. Set Aside
  2. Cook 1/2 cup polenta according to the package directions using equal parts of milk and chicken broth. When the polenta is the consistency you like, add the spinach mixture, 1 small pat of butter, and a small handful of Romano cheese. Serve.
Share this Recipe
Powered byWP Ultimate Recipe

Mama D’s Fall Kitchen Adventures

There  is more than just a hint of fall in the air. Cool days and cooler breezes make it abundantly clear that the season has changed here. Not that there’s anything wrong with that. I’m ready for Fall, at least I think I am. I enjoy the cooler days and the leaves changing colors. No longer having to rake them makes the whole process even more enjoyable. While I’m not anxious for Winter, I am ready for this change and the change in my cooking focus that it brings.

I want to share a few quick picks of what’s been happening in Mama D’s Kitchen. Many of these are Non-Recipe Recipes; that is they really are just musings on what’s in season and more importantly what’s in the house. So come join me as we a take a culinary walk back over the last couple of weeks.

I bought some Nan bread (the garlic variety) to go with a curry dish. The curry wound up being paired with some Brown Basmati Rice and the Nan was left to fend for itself. In case you’ve never thought of it, Nan makes a great quick pizza crust. It’s the perfect shape and size for personal pizza and works in the oven or on the grill.

I opted for a version of White Pizza using some of my Homemade Ricotta (thanks, Ina Garten) and Pesto. I mixed the two together to create the “sauce” I drizzled the Nan with some olive oil and toasted it in the oven briefly before adding said sauce. The toppings were Italian Sausage and Mini Heirloom Tomatoes both of which were on hand and waiting for their moment to shine. The cheese was a marinated mozzarella that was purchased on speculation, but perfectly suited to the pizza.2015-09-29 19.07.46 Once baked it was topped with some basil, olive oil, and served with baby greens dressed lightly with lemon juice and olive oil. Now, that was a delightful and very easy supper.2015-09-29 19.17.31

I found some lovely beets at the store and since they are one of Papa D’s favorites I had to bring some home. My preferred method of cooking is to roast them. This also is the most stain proof way, in my opinion. Wash them off and remove the greens leaving a little of the stem. Lay them on a couple of sheets of heavy foil, drizzle with a little olive oil and wrap them up tightly. Let them roast at 375 – 400 degrees until they are easily pierced with a knife and the kitchen has the earthy aroma of beets. This can take anywhere from 30 to 60 minutes depending on the beets.2015-09-27 19.45.11 Let them cool long enough to make them handle-able. I love beets, but beet red is not my color, so I opt to wear gloves to rub the skins off. If you enjoy red fingers go ahead and use bare hands and paper towels. Once peeled, I cut them into chunky chunks and dressed them lightly with a Balsamic Vinaigrette that was laced with some orange peel. Any dressing that you love would work here. I set them on top of some baby greens (left from guess what?) and garnished them with some goat cheese. Wonderful!2015-09-28 19.34.01

Finally I have to share another “Pork Love” dish, Stuffed Pork Chops. I have recently re-fallen in love with pork chops, particularly the thick cut, bone in, center variety. They are eating perfection. The thin ribbon of fat on the edge and the succulent bone along the side create a depth of flavor that is divine. They are wonderful simply prepared on the grill or in the oven, but I knew they were just begging to be stuffed.

This stuffing was inspired by what I had on hand and included some frozen chopped spinach, red bell peppers, and whole grain bread. Honestly anything could go into the stuffing. Leave out the bread and go all veggie, or use rice, quinoa or any other grain you have within easy reach. I started my stuffing with onion and garlic that I sautéed in a little olive oil (Is there any other way to begin?). The spinach and bell pepper jumped in and got very friendly with them. I put the bread in the toaster and then crumbled it into the veggies. I added a little chicken stock to moisten everything and packed it generously, albeit lightly, into the pockets that I had cut. I added a little wine to the pan and salt and pepper to the chops. For a crowning flavor boost I topped them with some sliced onions.2015-09-28 18.42.53

I let them bake covered for 20 minutes or so then I lifted their foil blanket and let them roast another few minutes to get lightly golden. I opted for 350 degrees because that seemed right. Baking time depends on the thickness of the chops and what’s inside…use your best guess, but do not overcook them.2015-09-28 19.38.31

The chops were scrumptious; moist and tender and positively dripping with flavor. I’ve started a mental list of what to add the next time; herbs, sausage, cheese, the ideas are endless.

So there you have it, three quick and easy kitchen adventures. Now it’s your turn to take my ideas and run with them.