Life After a Microwave and a Skillet Pork Dish

I have never considered myself microwave dependent. In fact I only used it (or so I thought) to reheat leftovers and melt butter. So, as I left my old kitchen behind, I hardly gave the microwave a second glance. Cooking with love does not require energy waves. The stove top can do anything the microwave can and is so much more organic…or so I thought. One week in the new kitchen and I’ve reached for the microwave almost daily only to have to rethink  how to do some small cooking task. I guess I took the microwave for granted. Does it amount to enough need to take up precious counter space? Time will tell. but at this point, I think not.

The microwave was convenient and it was a time saver in the fact that I could set it and go on to other things. Not having a microwave has made me turn back to the way things were done in the “old days.”

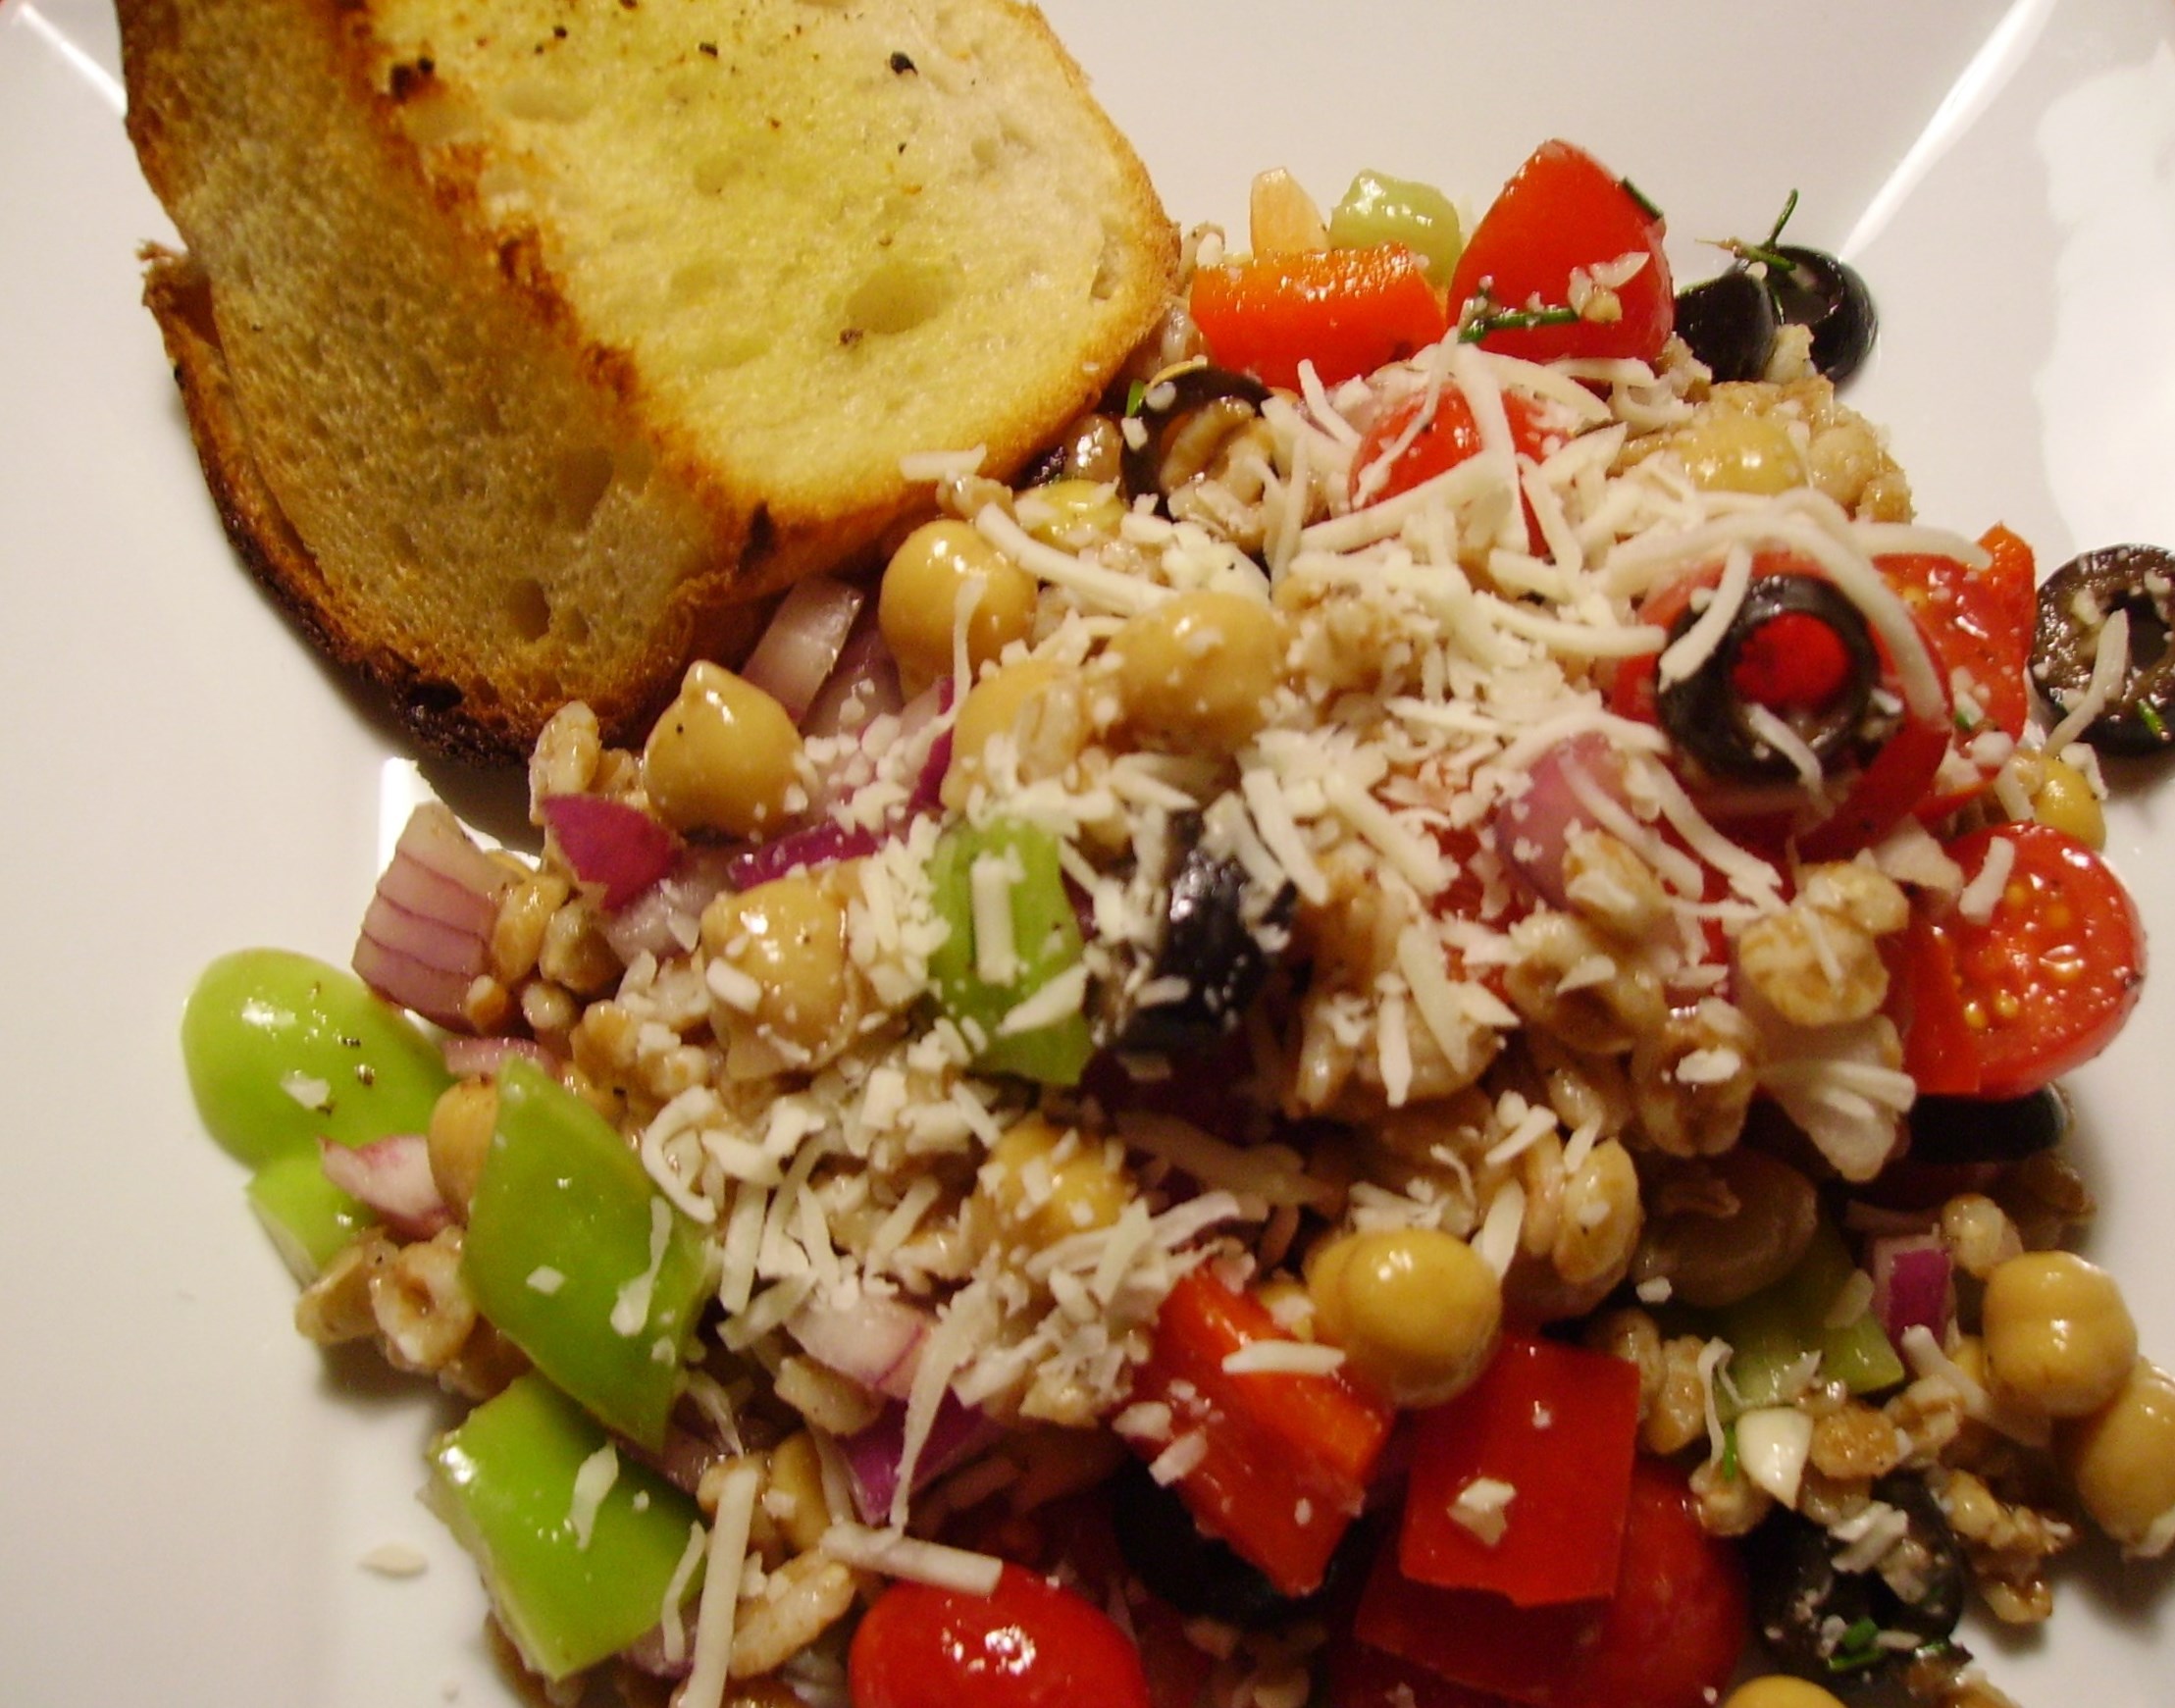
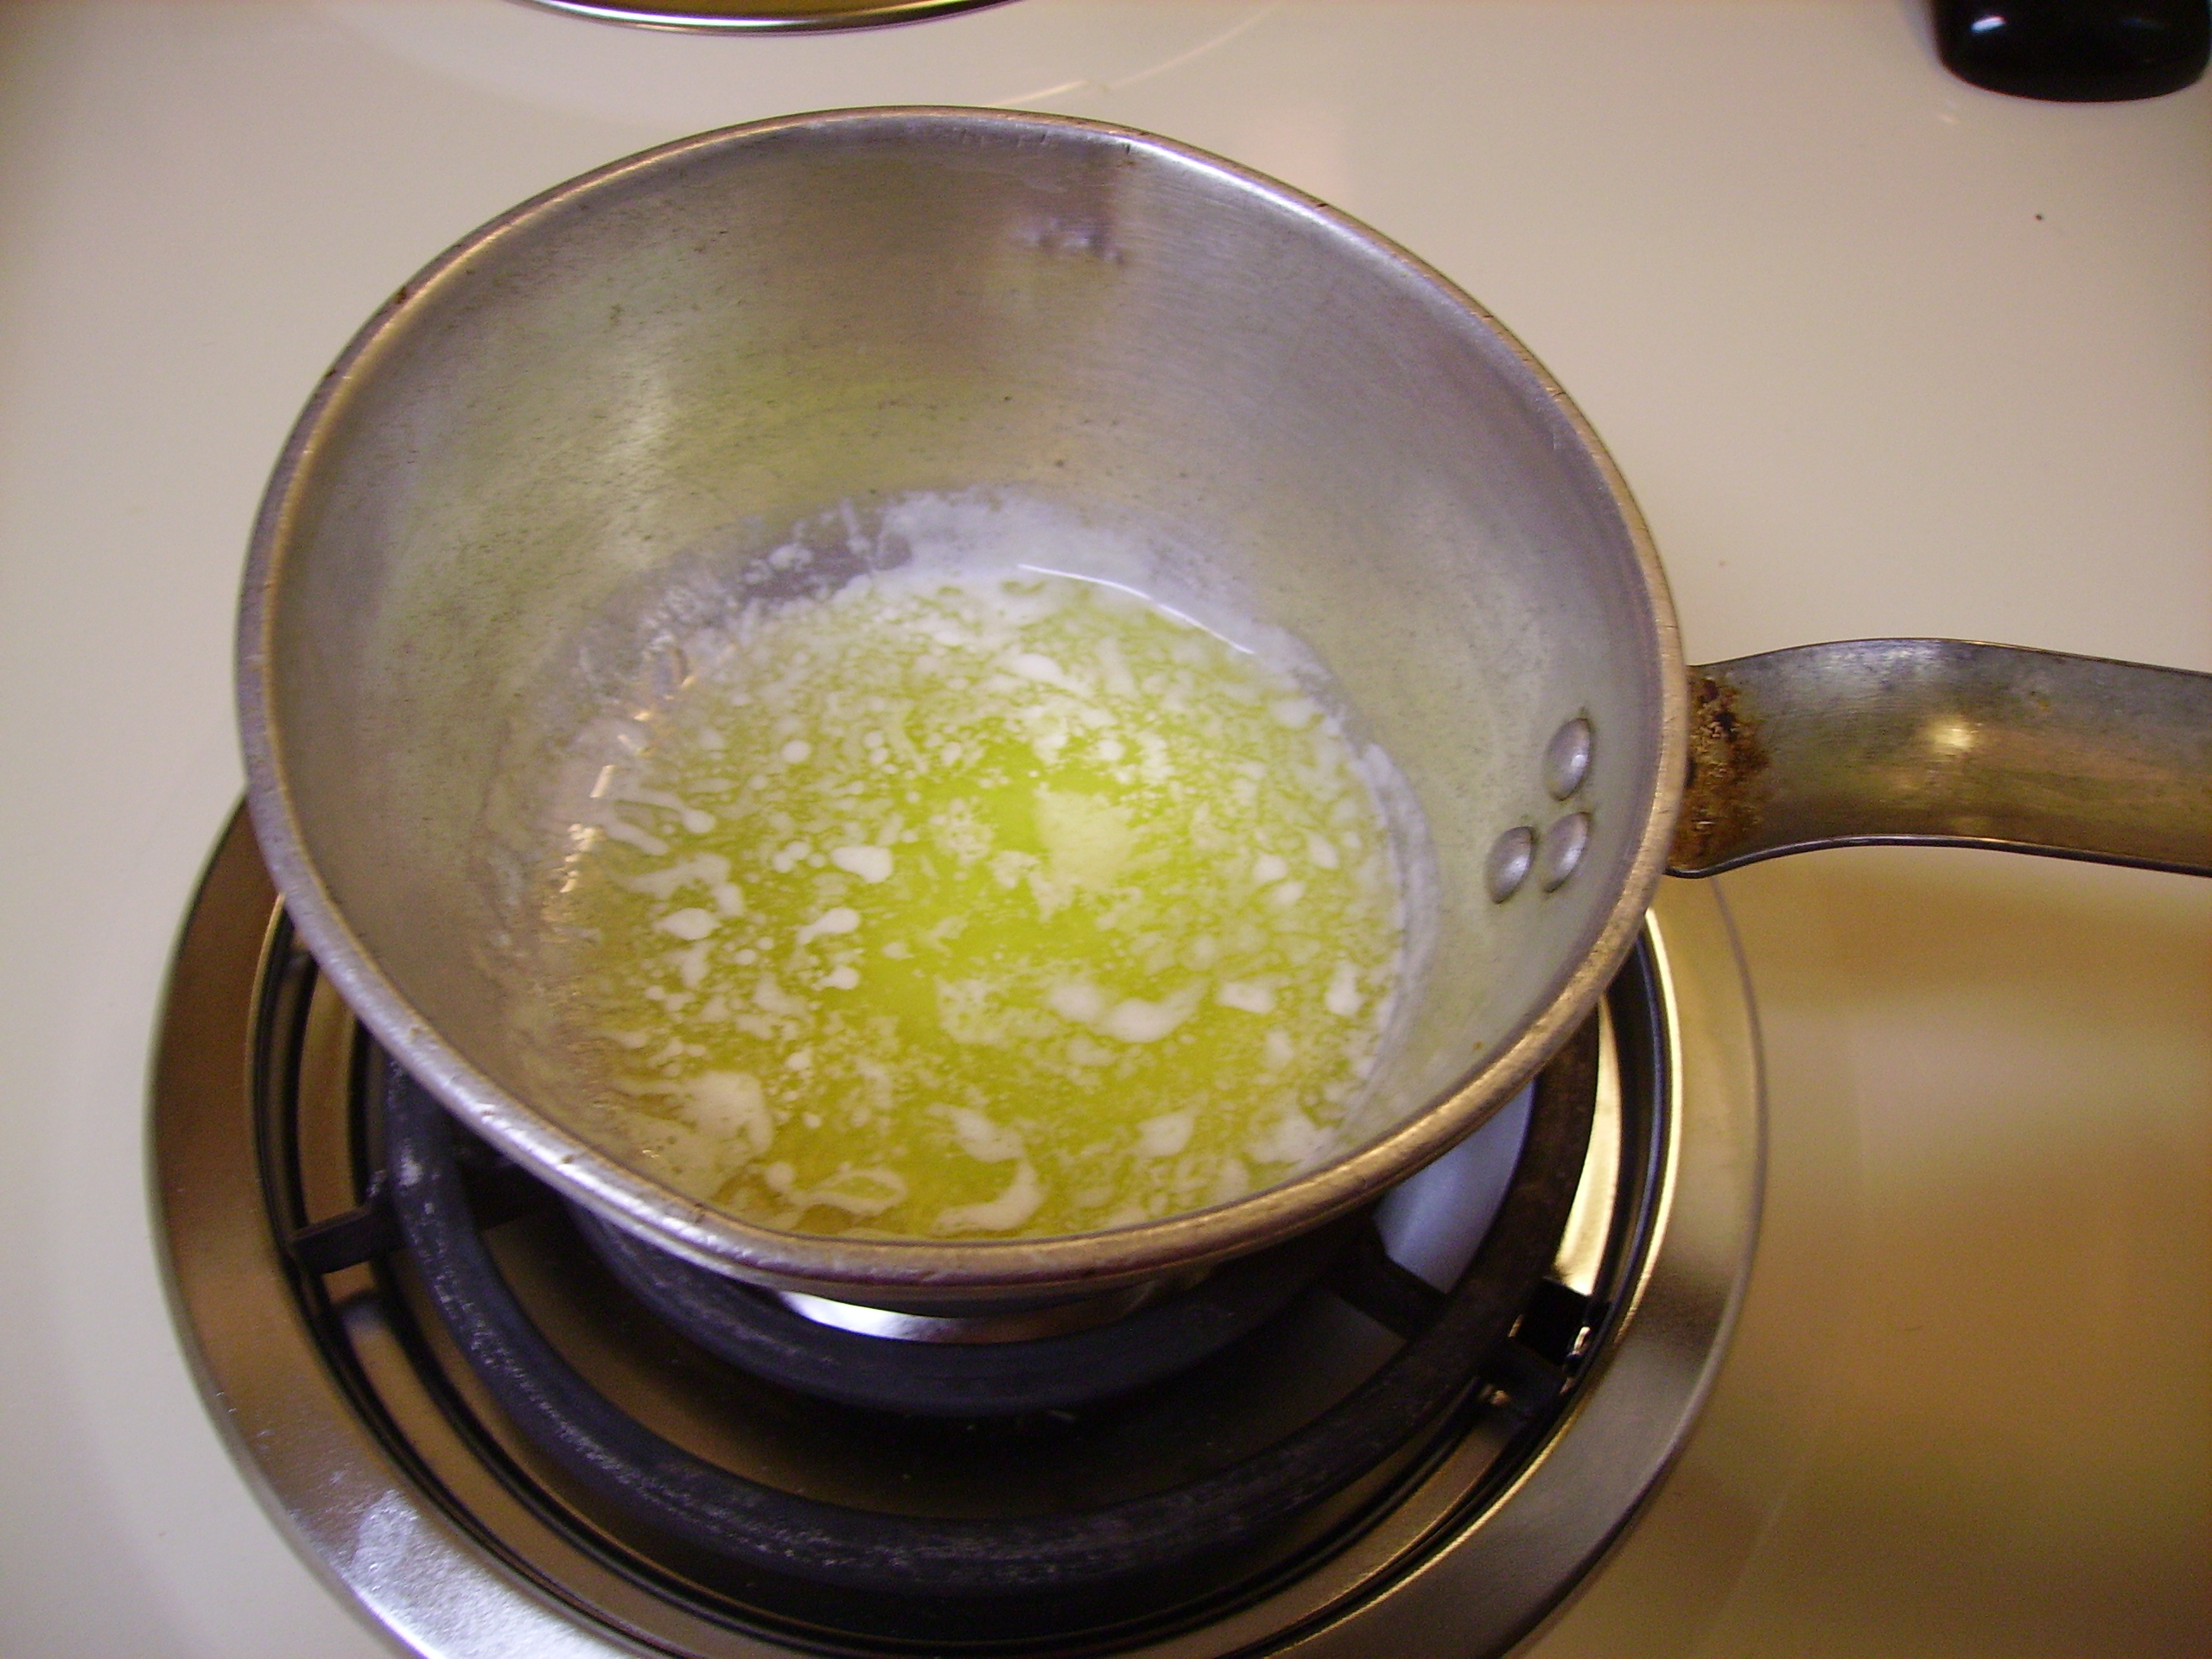
We wanted pop corn for an alternative dinner the other night (don’t judge me, sometimes it’s the perfect end to a day). I always make my popcorn in a pan on the stove. I even have a designated popcorn pan that creates fluffy and tender kernels of goodness with hardly an “old maid” in the batch. While the magic is happening in the pan, I would melt a cube of butter in the microwave timing it so that the butter and the pop corn would be ready together. What to do without a microwave? I have a small sauce pan that was my mother’s that easily accommodated the butter and resulted in melted perfection.

DIGITAL CAMERA

As the week went on I reached for the microwave to reheat some leftovers which turned out better reheated on the stove where they could gain a little color and crust. I had to plan ahead more to thaw out things from the freezer, but they turned out better thawing naturally, as well. My new mantra became, no microwave, no problem…after all I was really only using it for shortcuts.

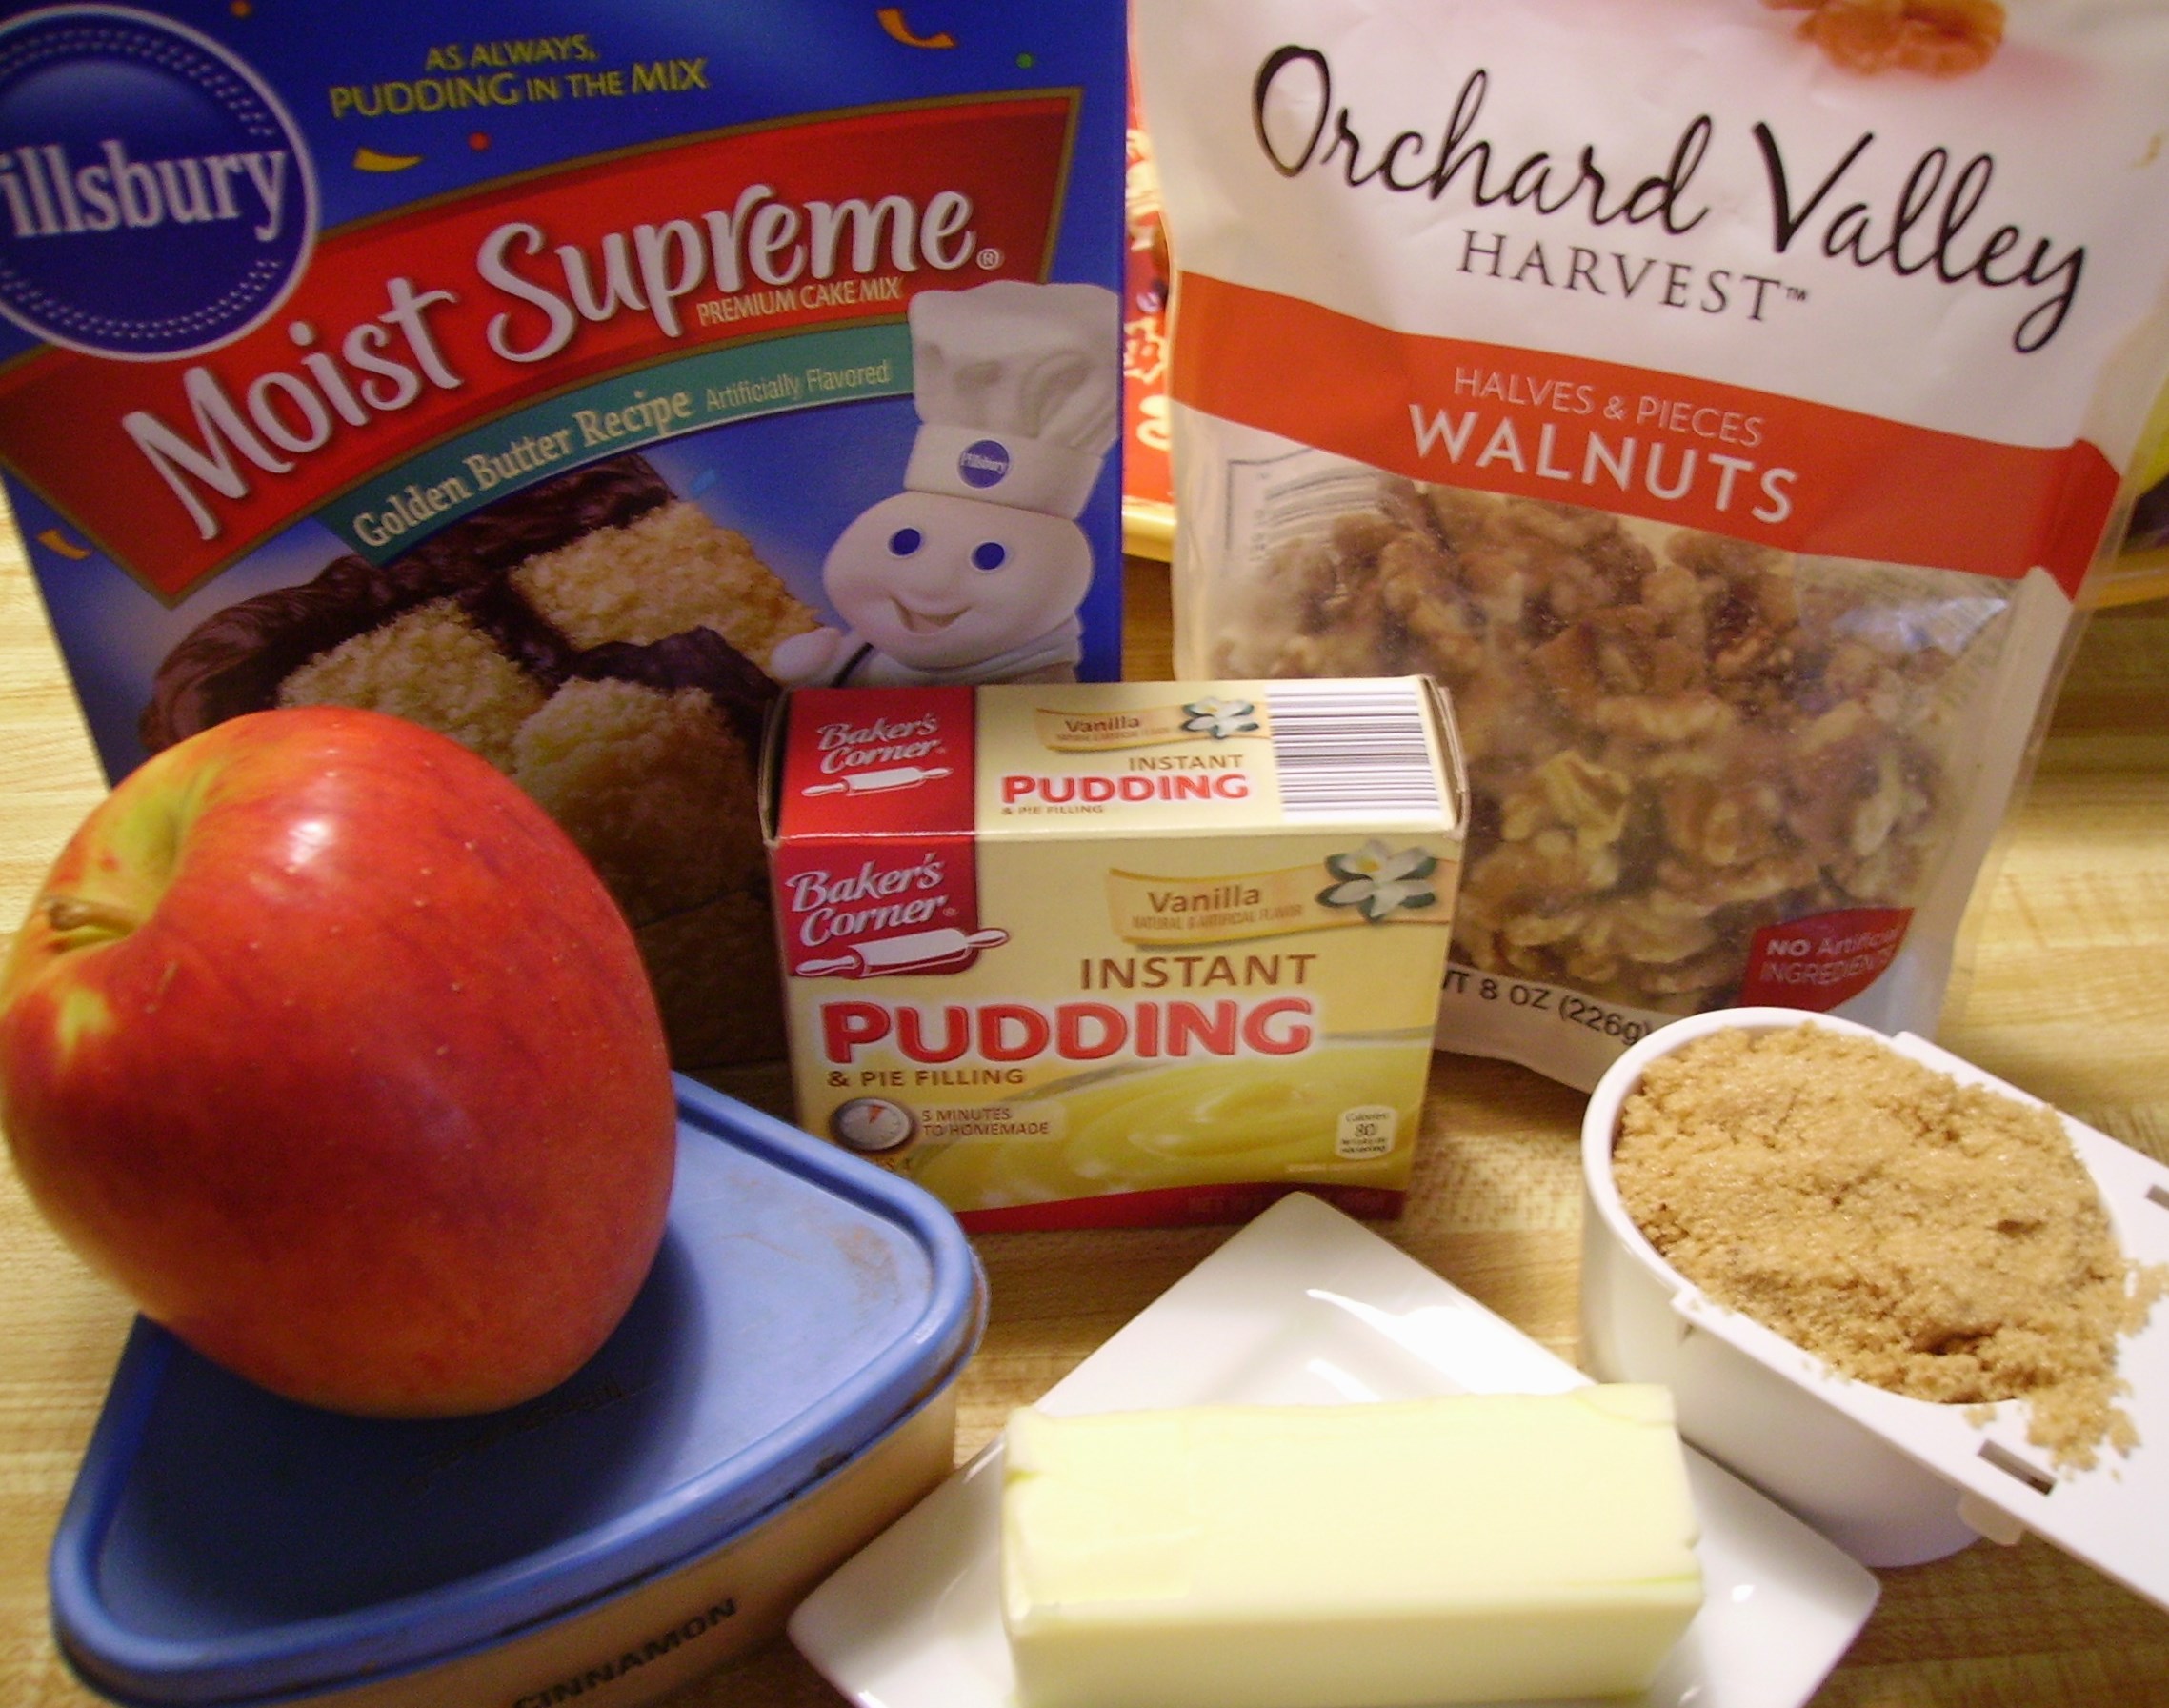
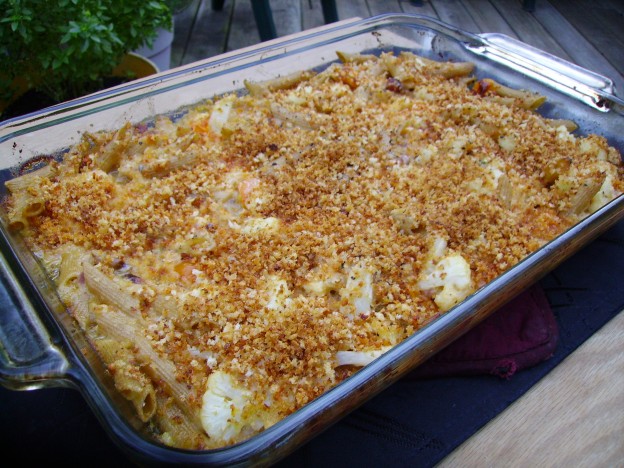
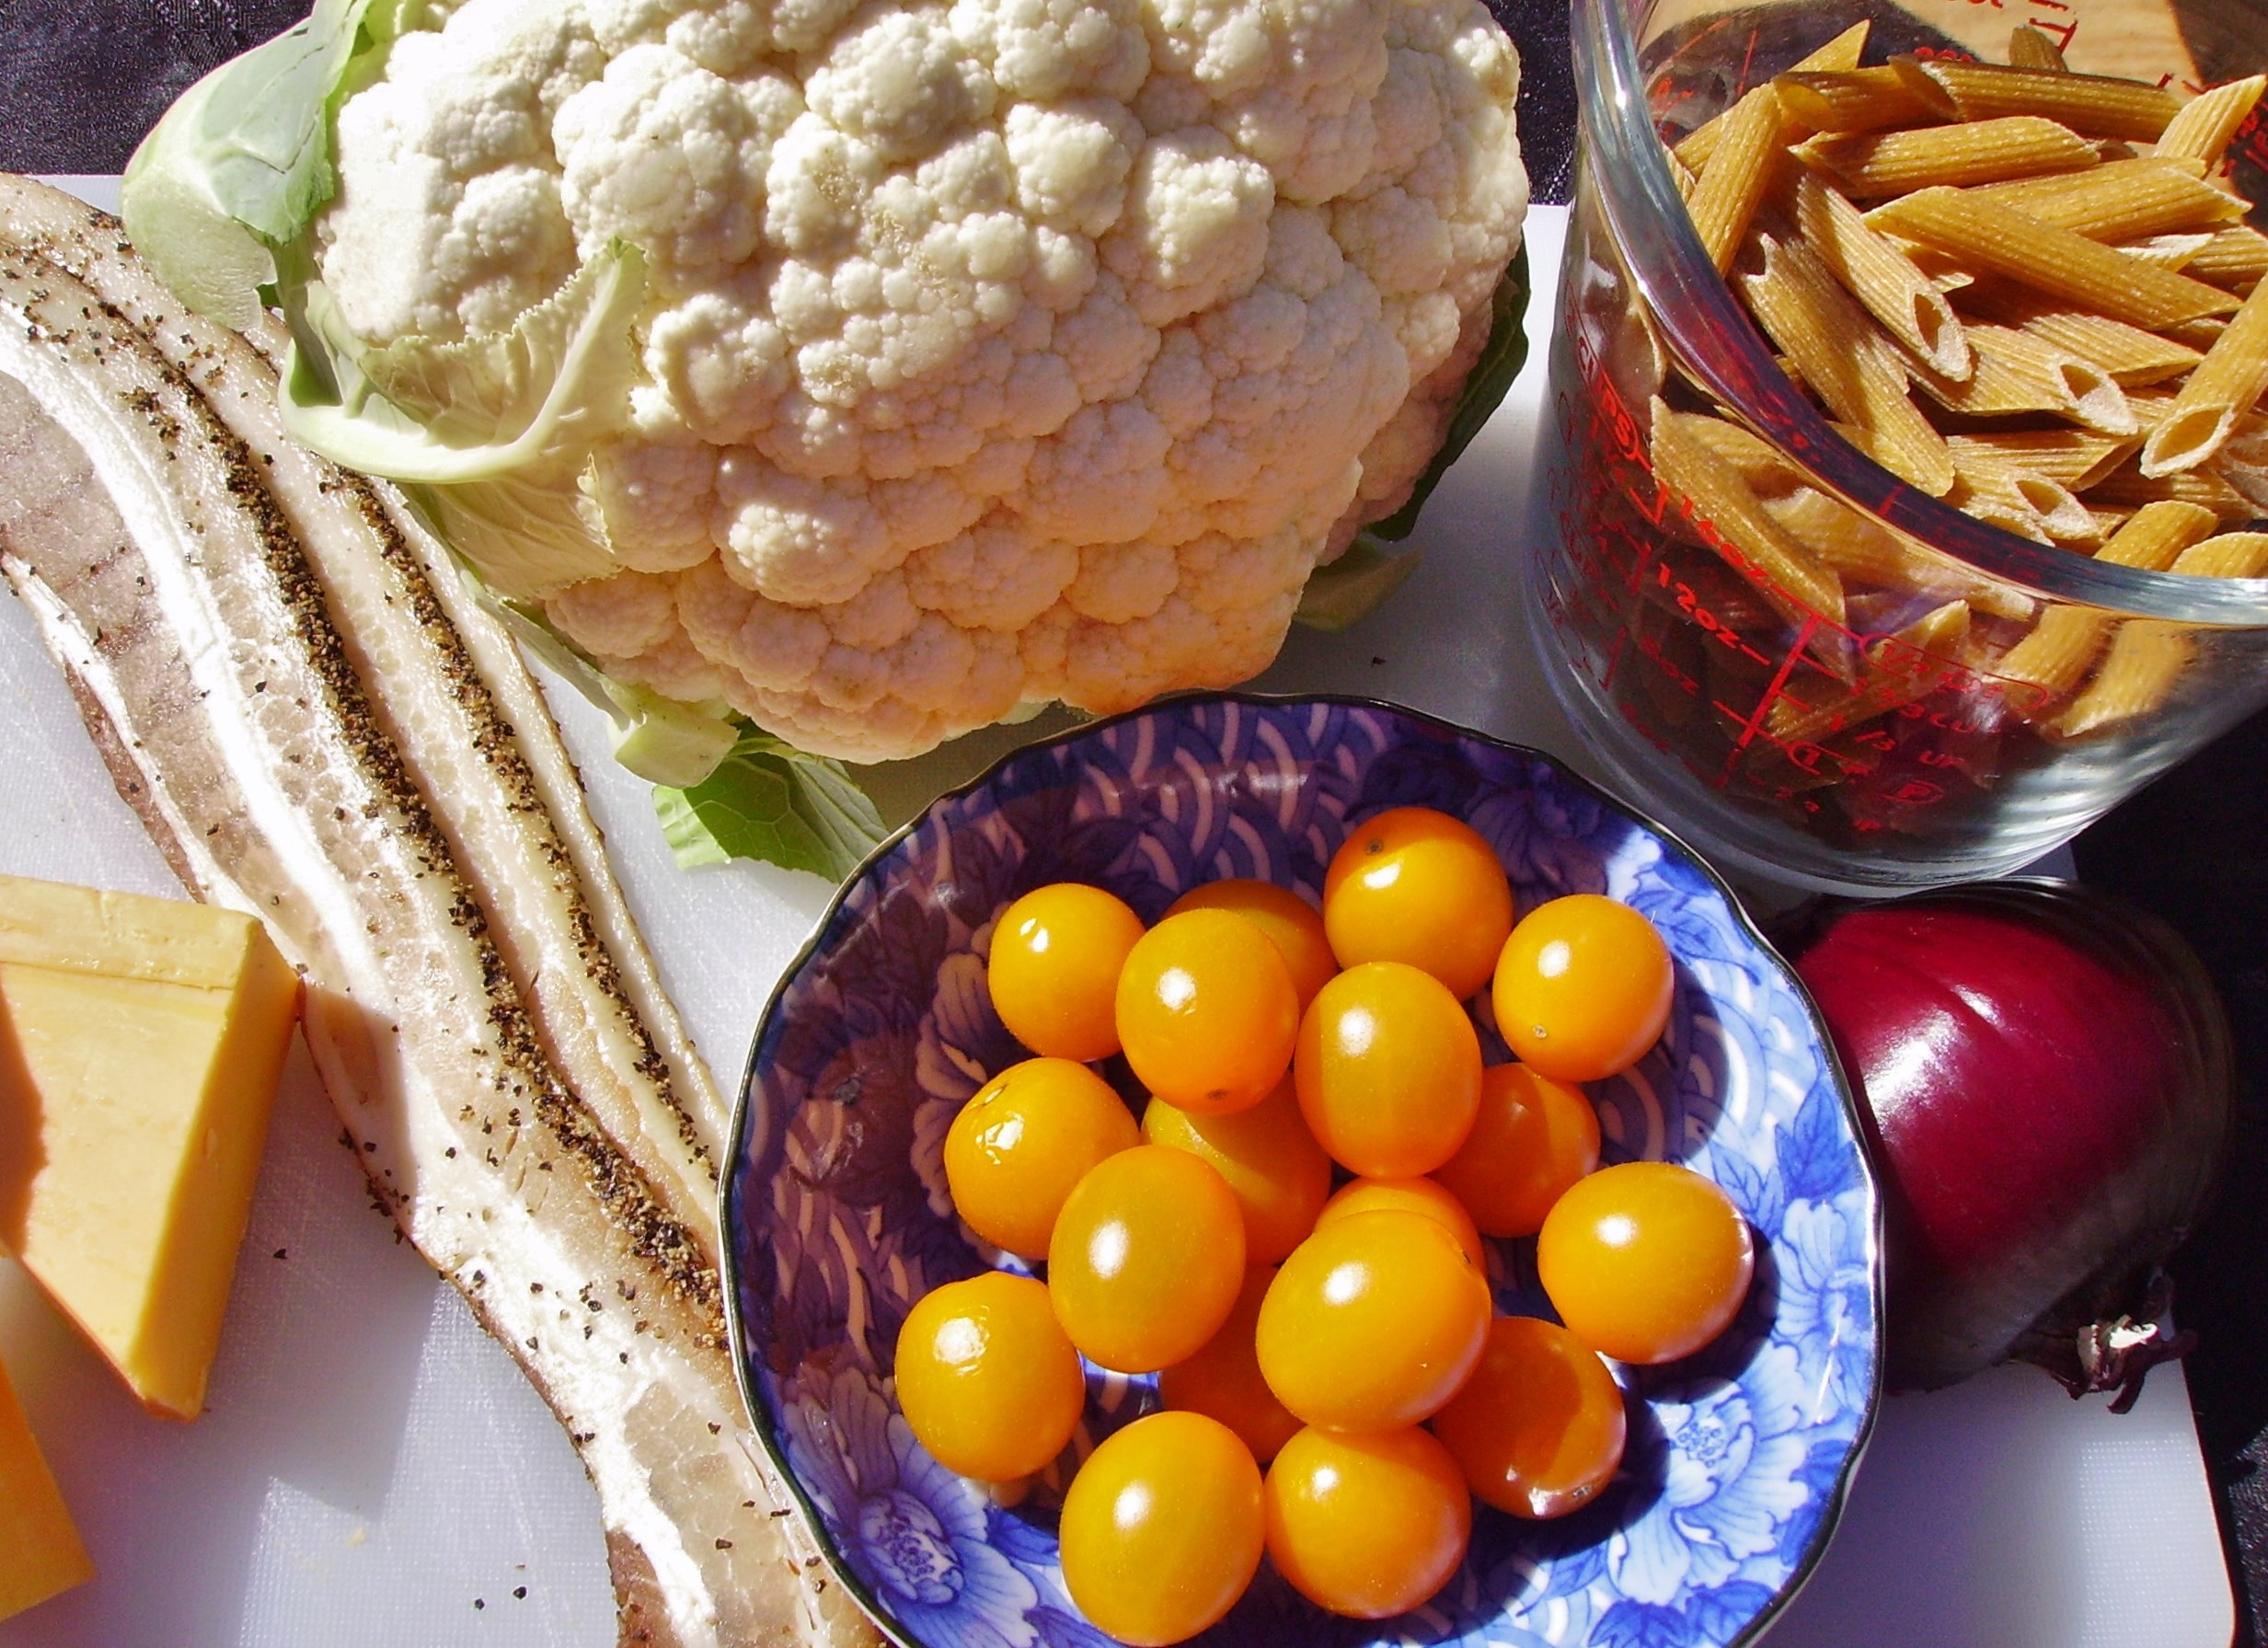
As I’ve shared before, I take inspiration for my recipes from many sources. Tonight’s dinner was no exception. I found a wonderful recipe for pork with a sauce made of squash, dried cranberries, and apples in the latest Cooking Light Magazine.DIGITAL CAMERA

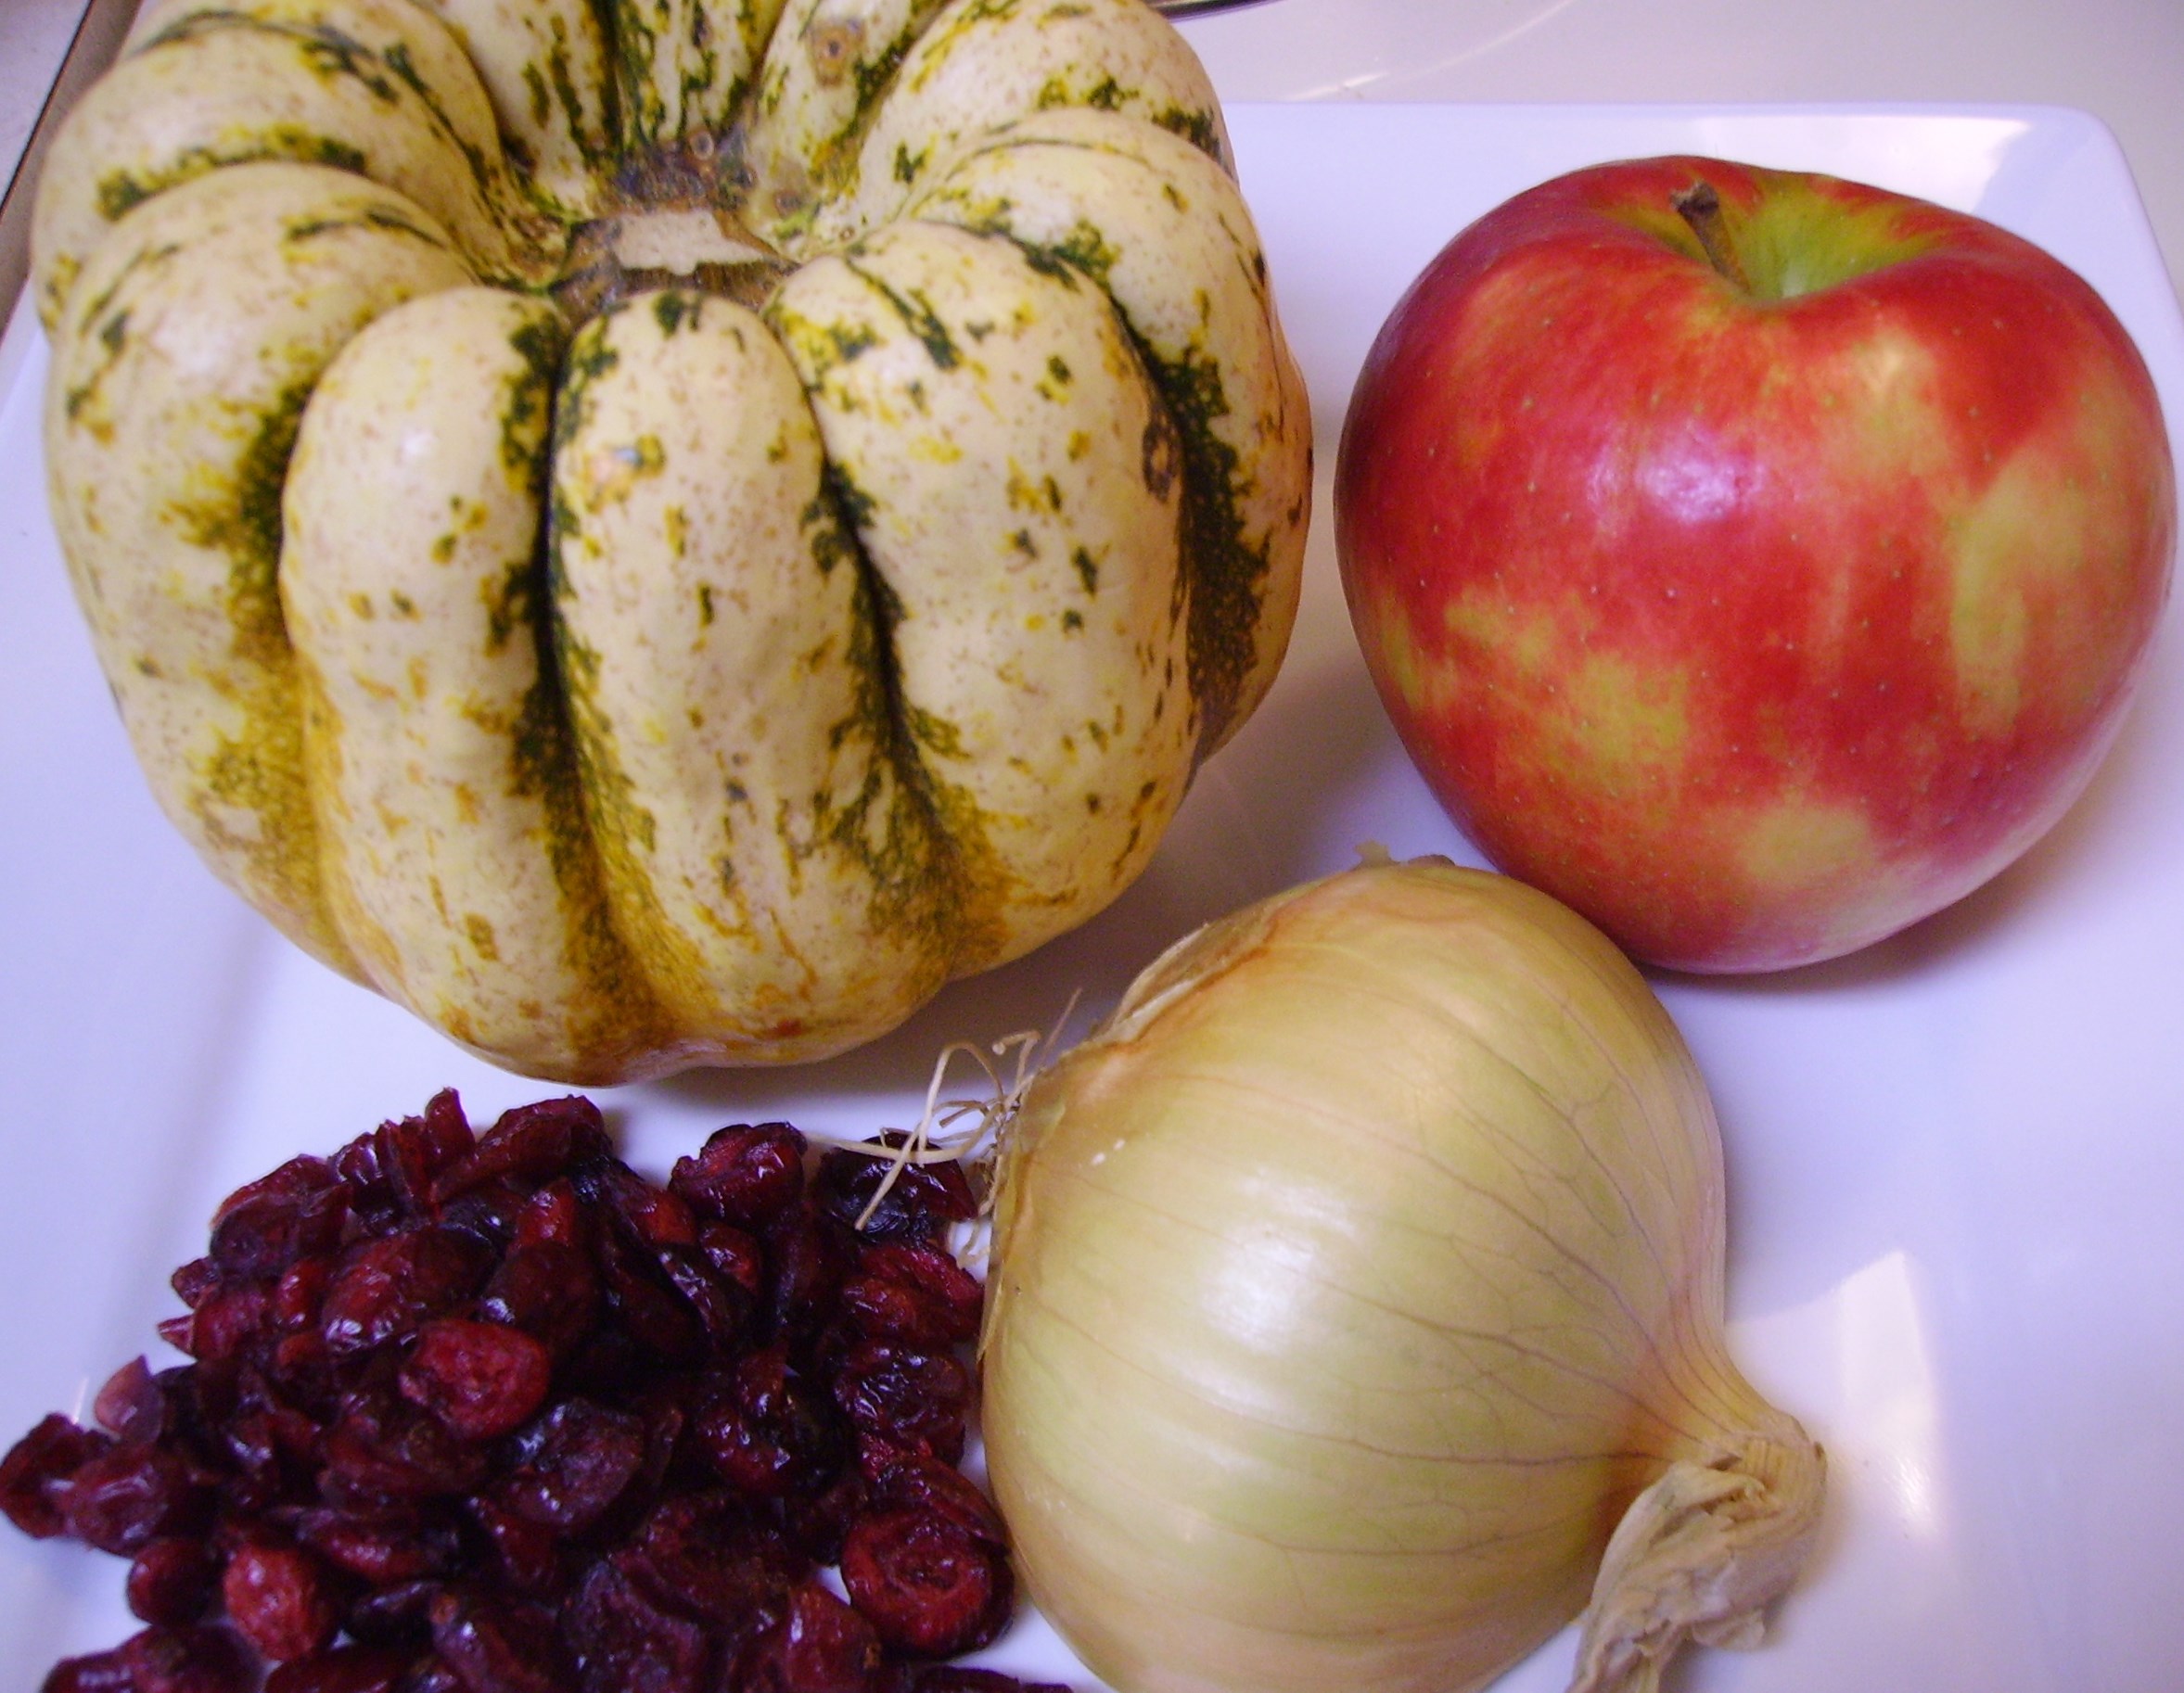
I had a reasonable equivalent of the ingredients on hand so I set out to put Mama D’s spin on it.

Step 1 brought me to a screeching halt.  It called for microwaving the squash and cranberries to prep them for the sauce. Hm? Now what?  Out came my trusty steamer pan and in went the berries and squash.

DIGITAL CAMERA
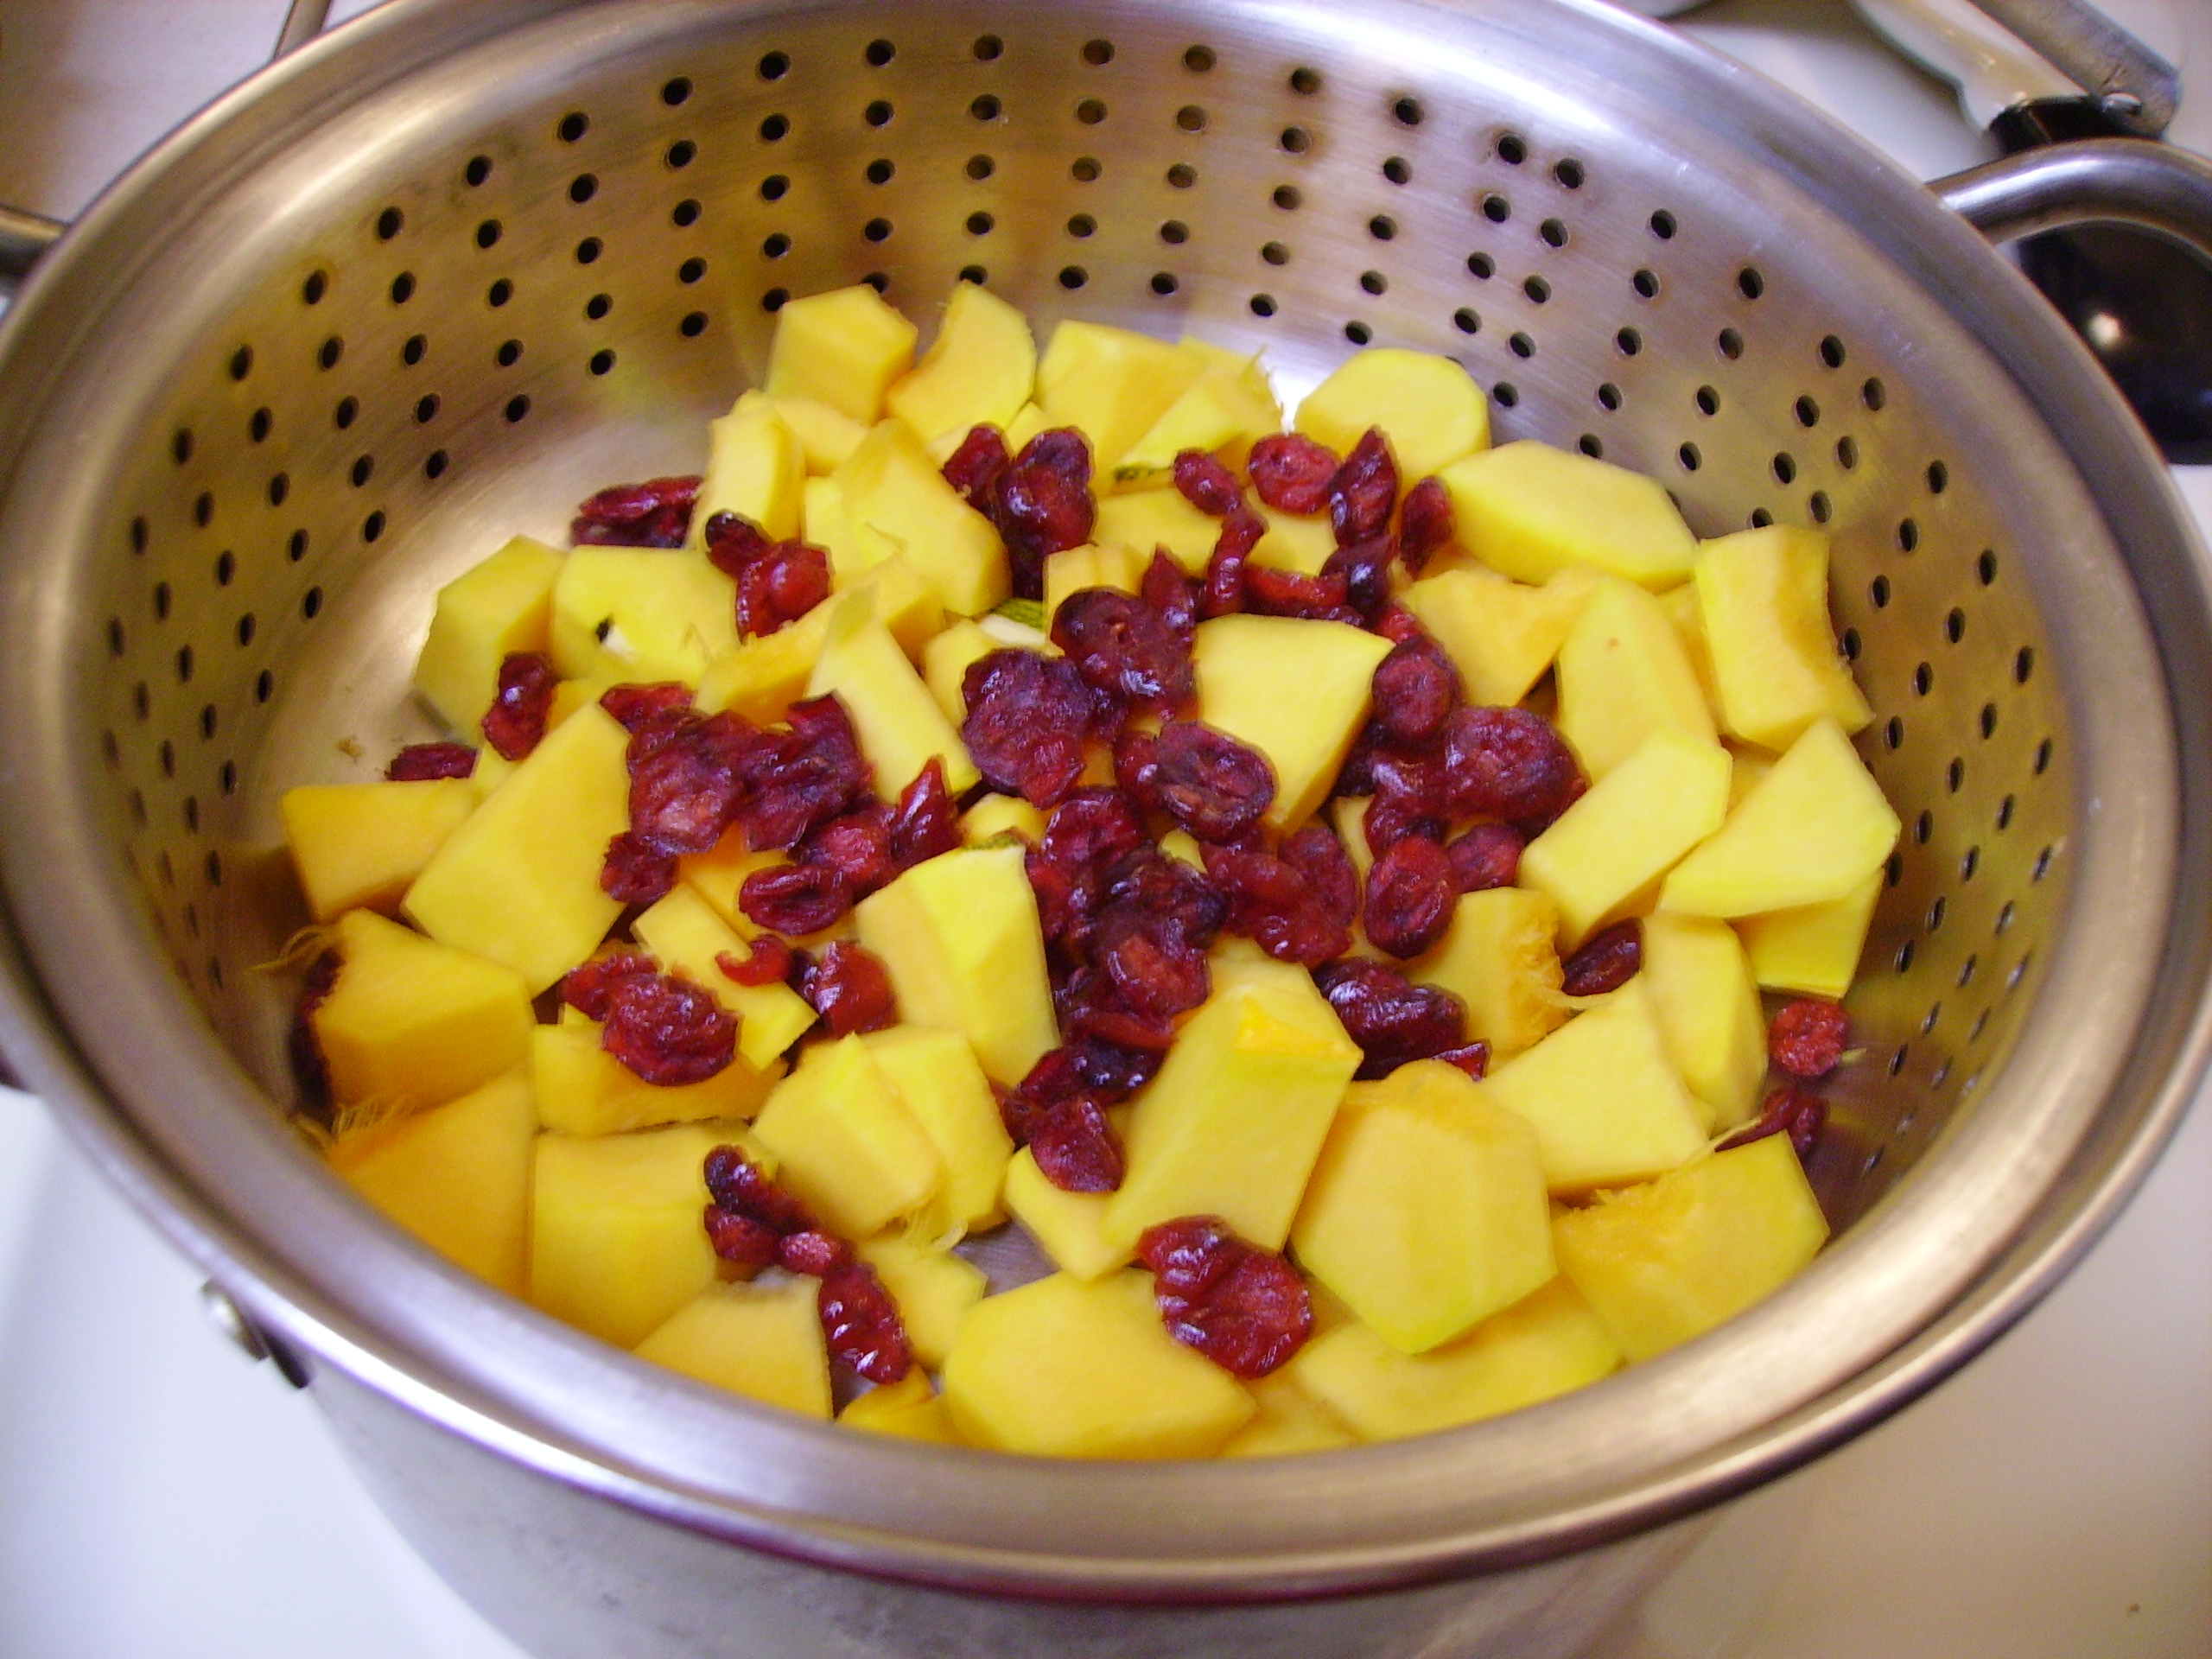
10 minutes later (only 3 minutes more than the microwave would have cooked them) they were ready to become part of the dish.DIGITAL CAMERA
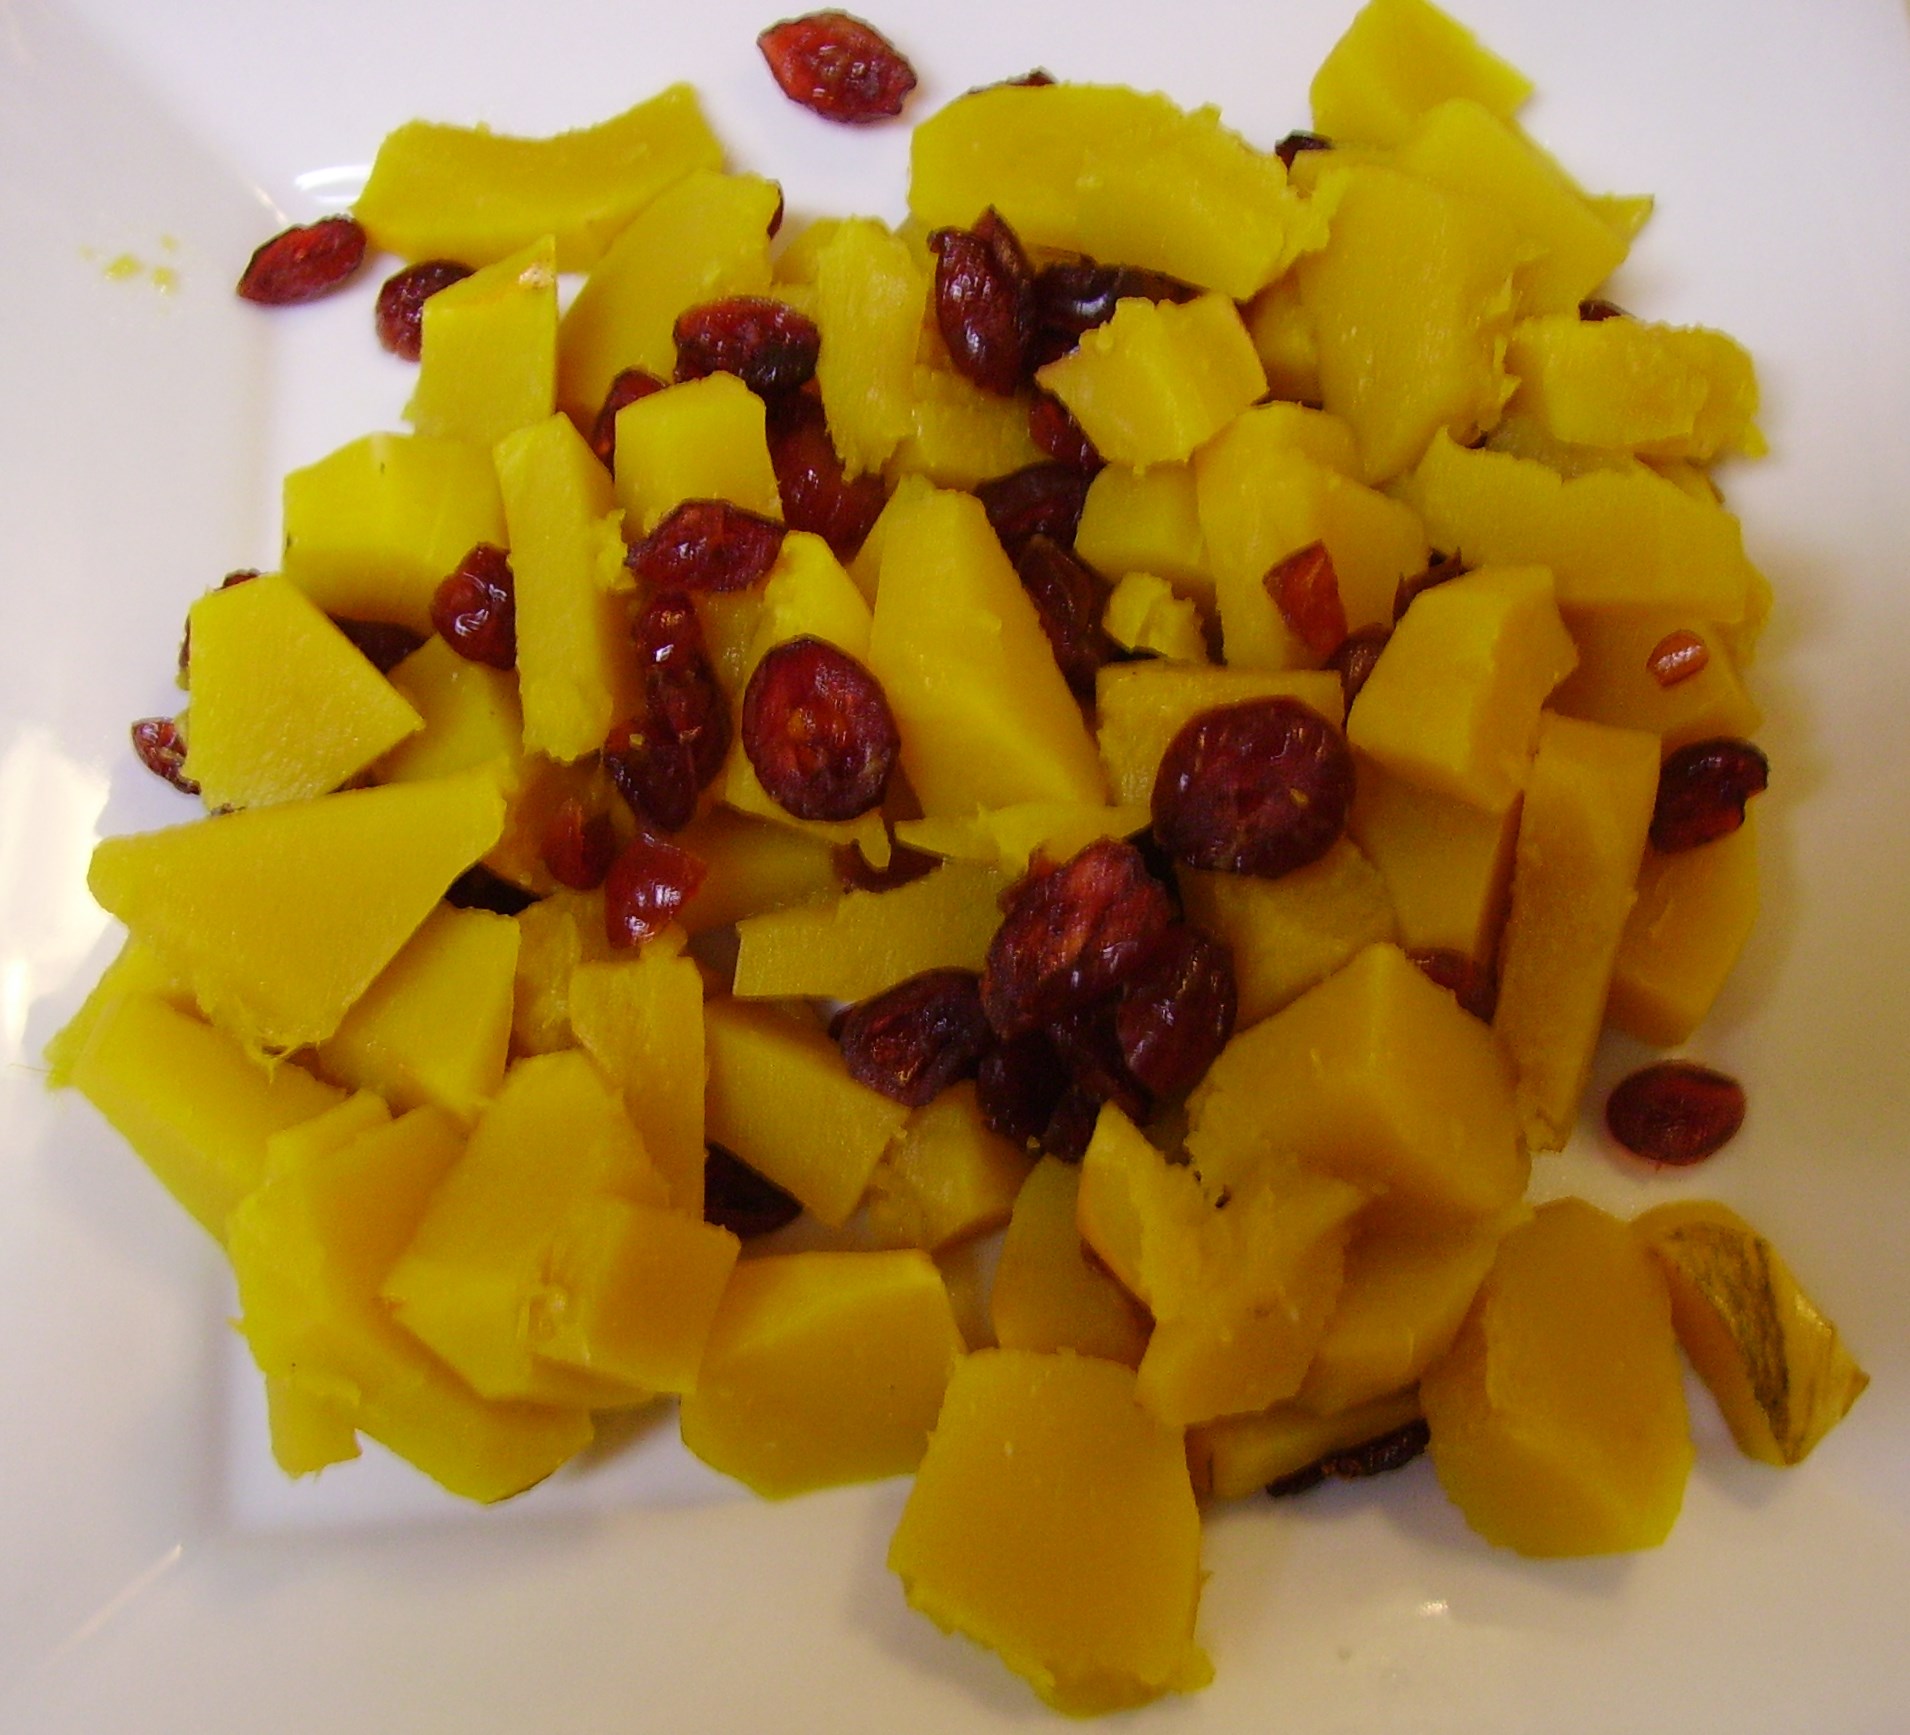
Pork tenderloin, my new favorite pork product, was sliced into medallions that were lightly seasoned with a salt free onion and herb mixture.DIGITAL CAMERA
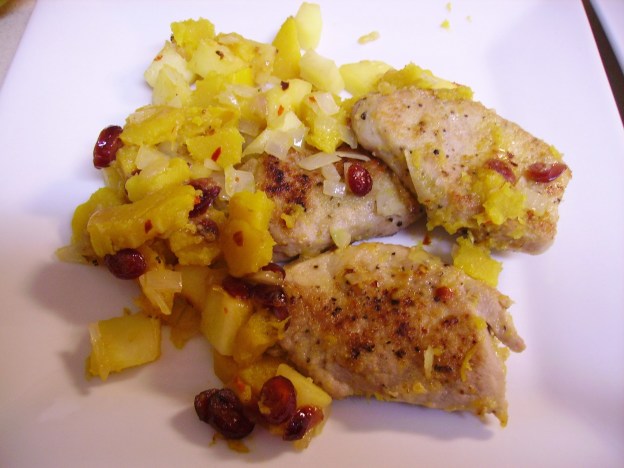
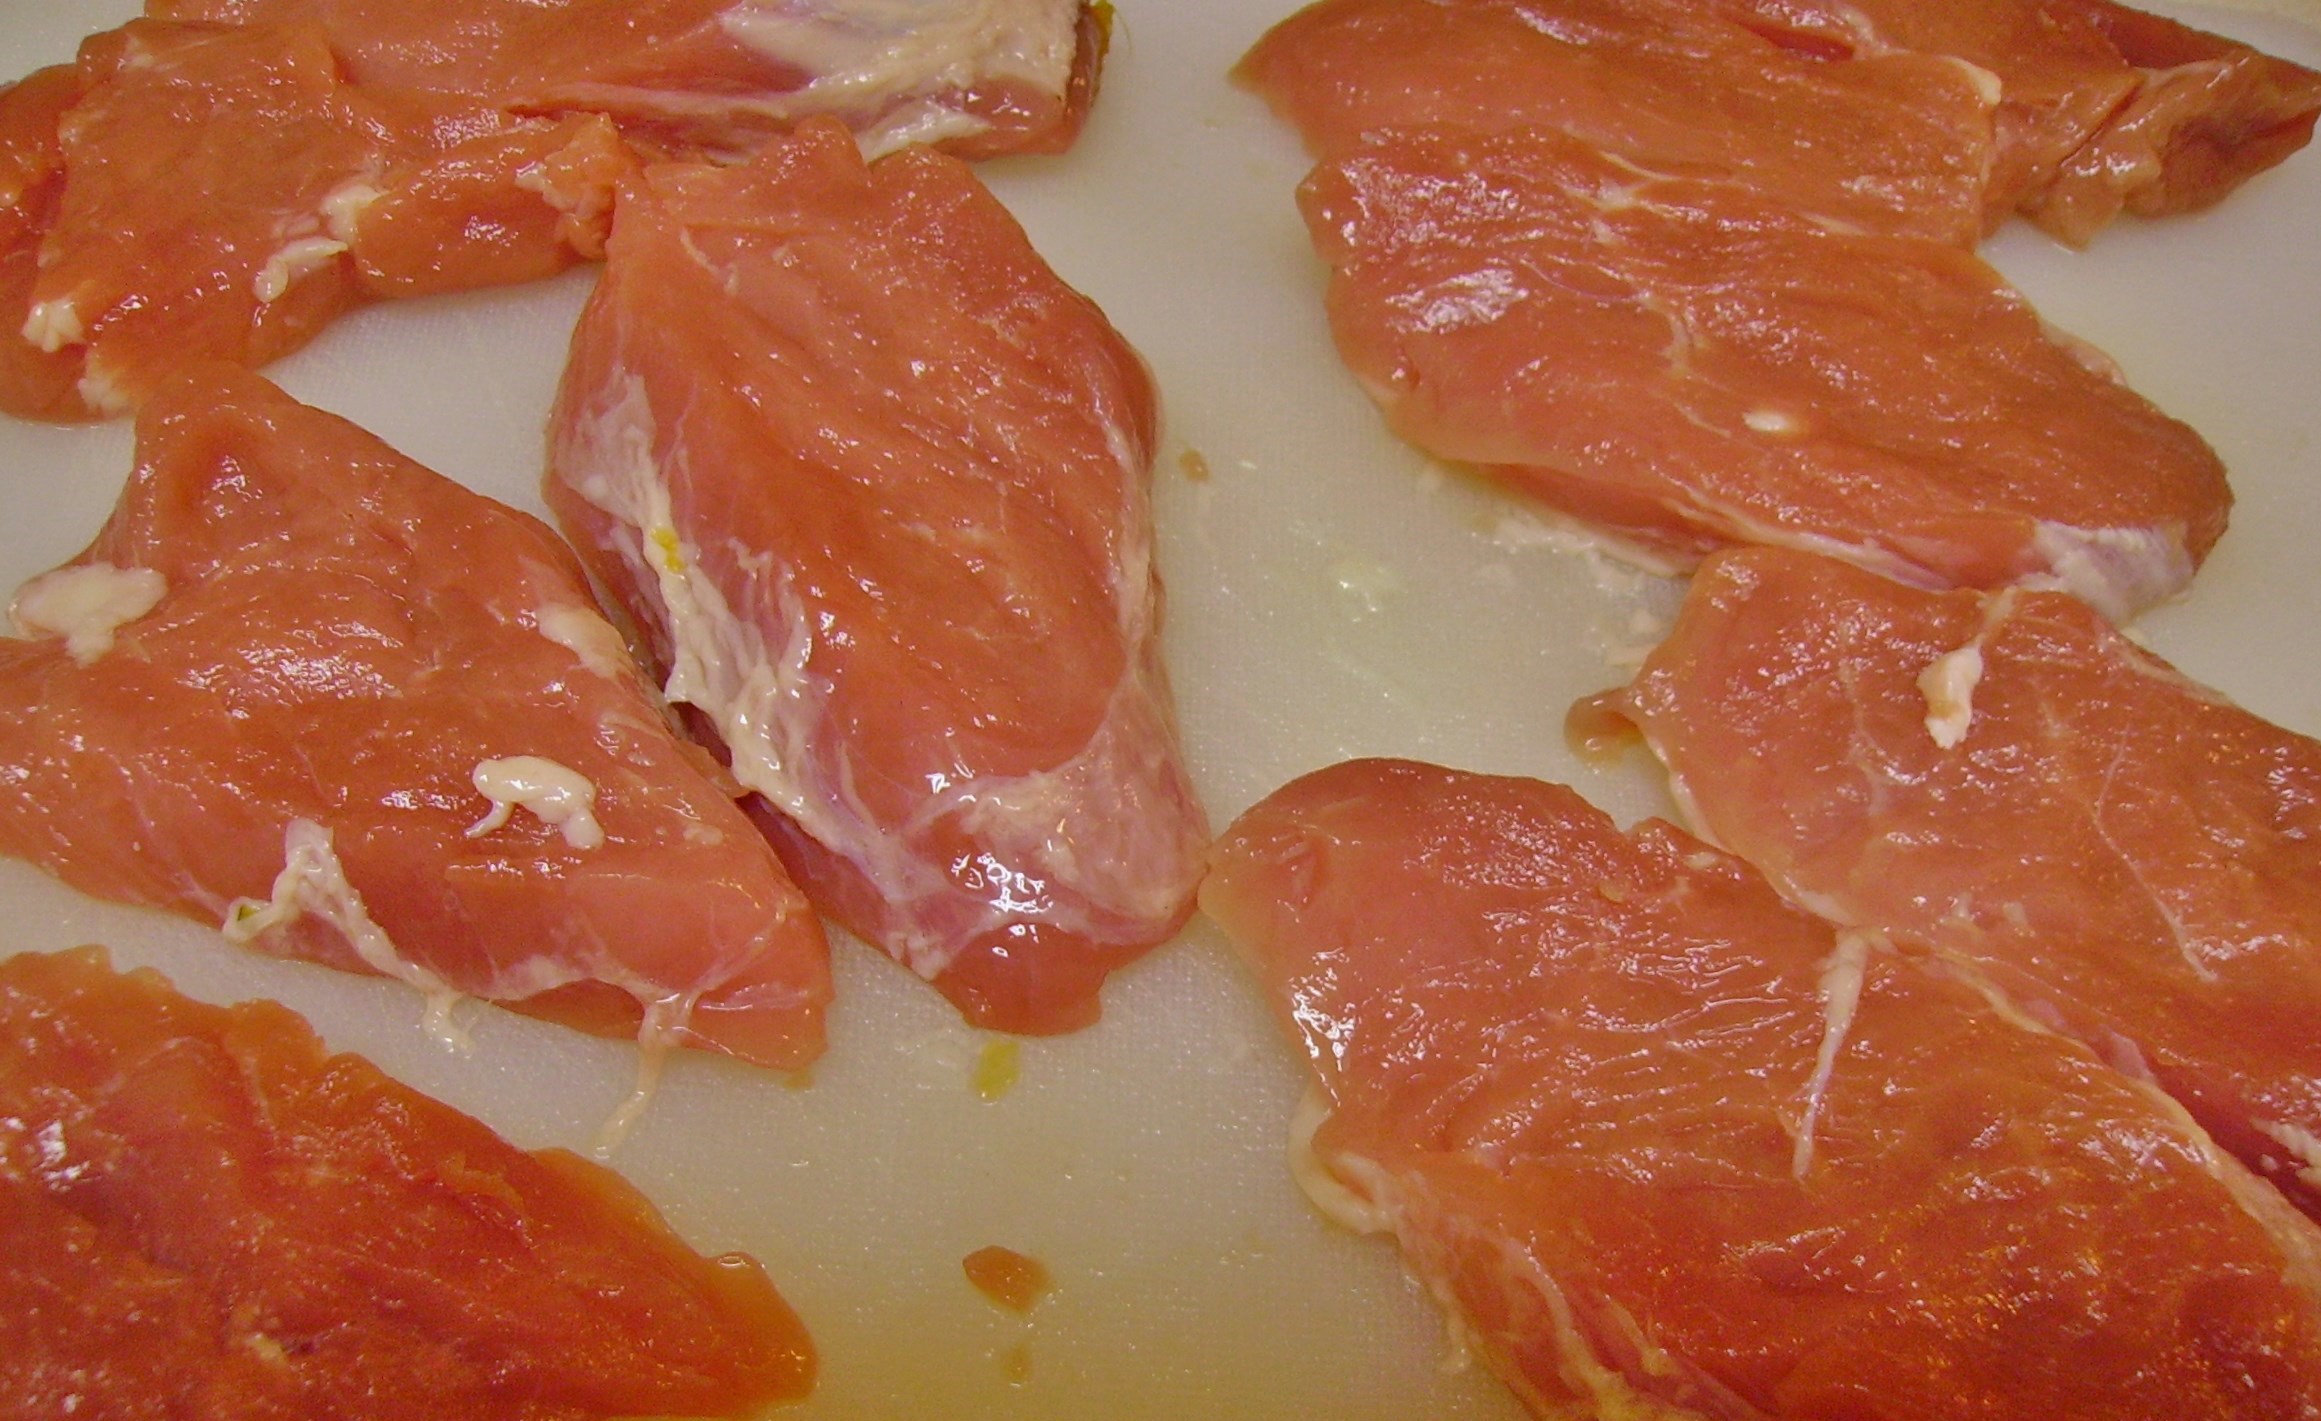
Once they were lightly browned, they waited patiently in a warm oven while the rest of the dish came together. Apples and onions were joined by a sprinkling of red pepper flakes and a pinch of sugar.DIGITAL CAMERA
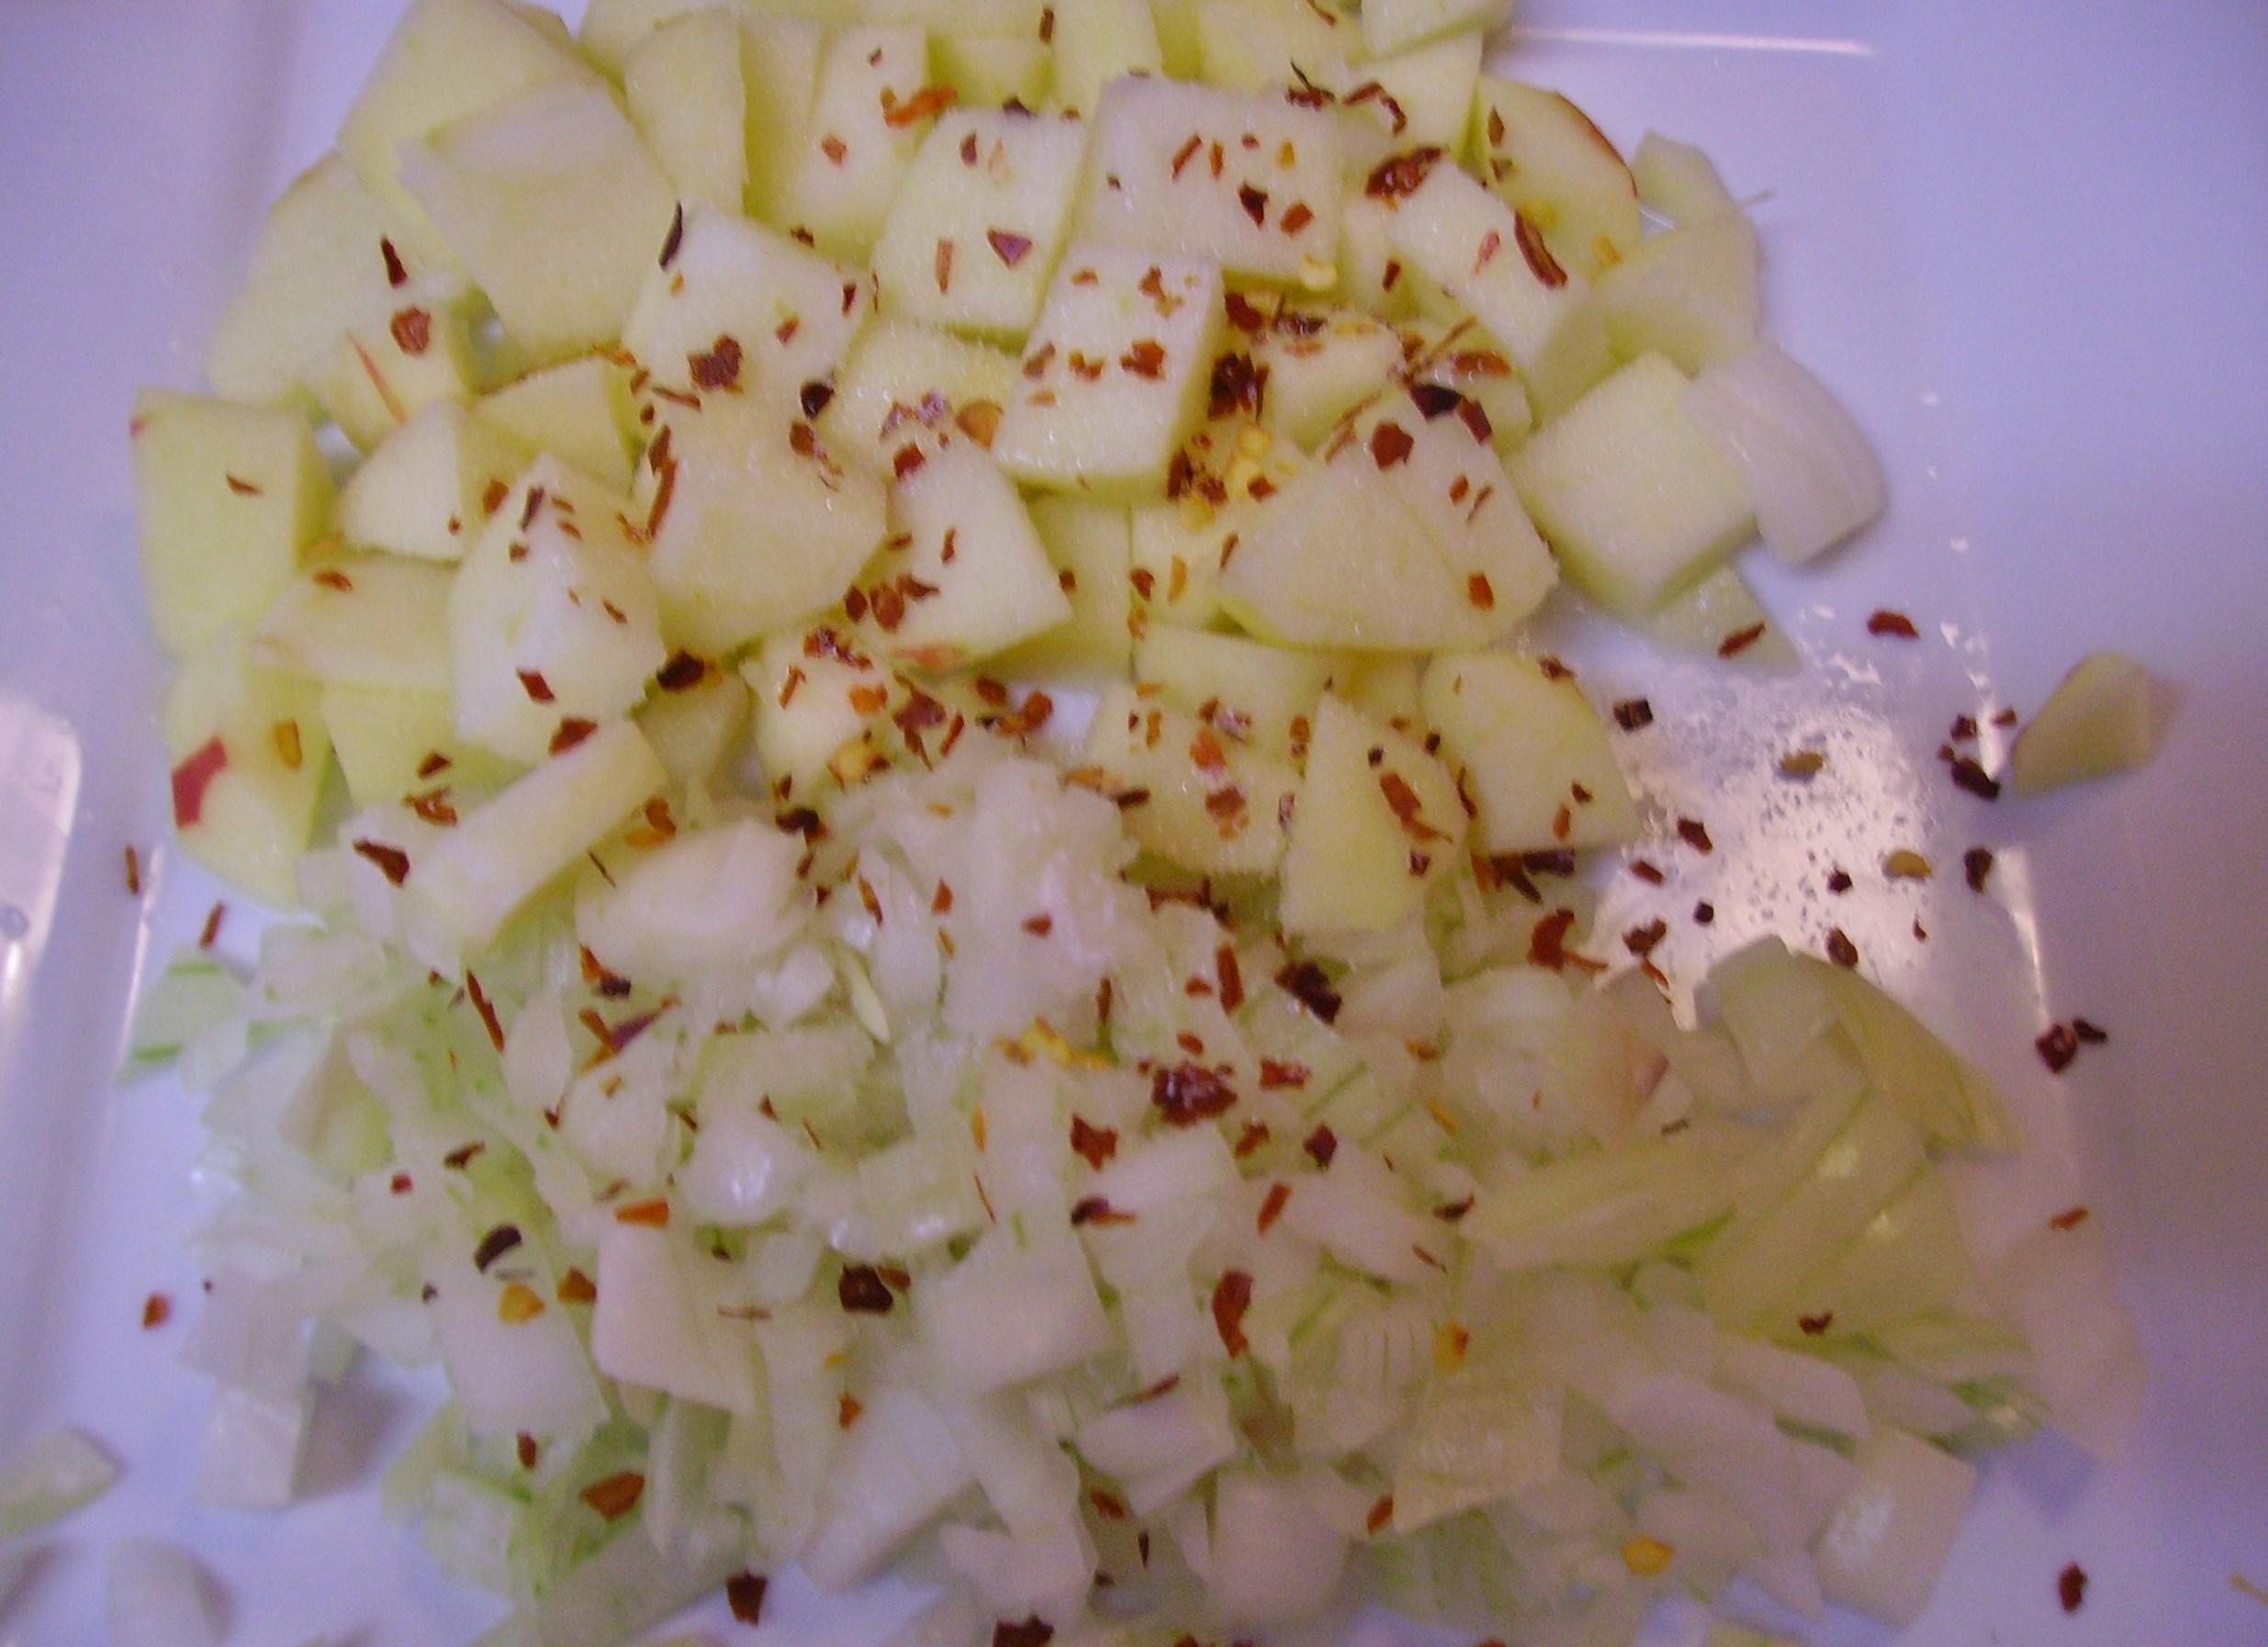
Sautéed in butter (just a little) they were joined by the squash and cranberries to create a lovely fruit and vegetable medley. DIGITAL CAMERA
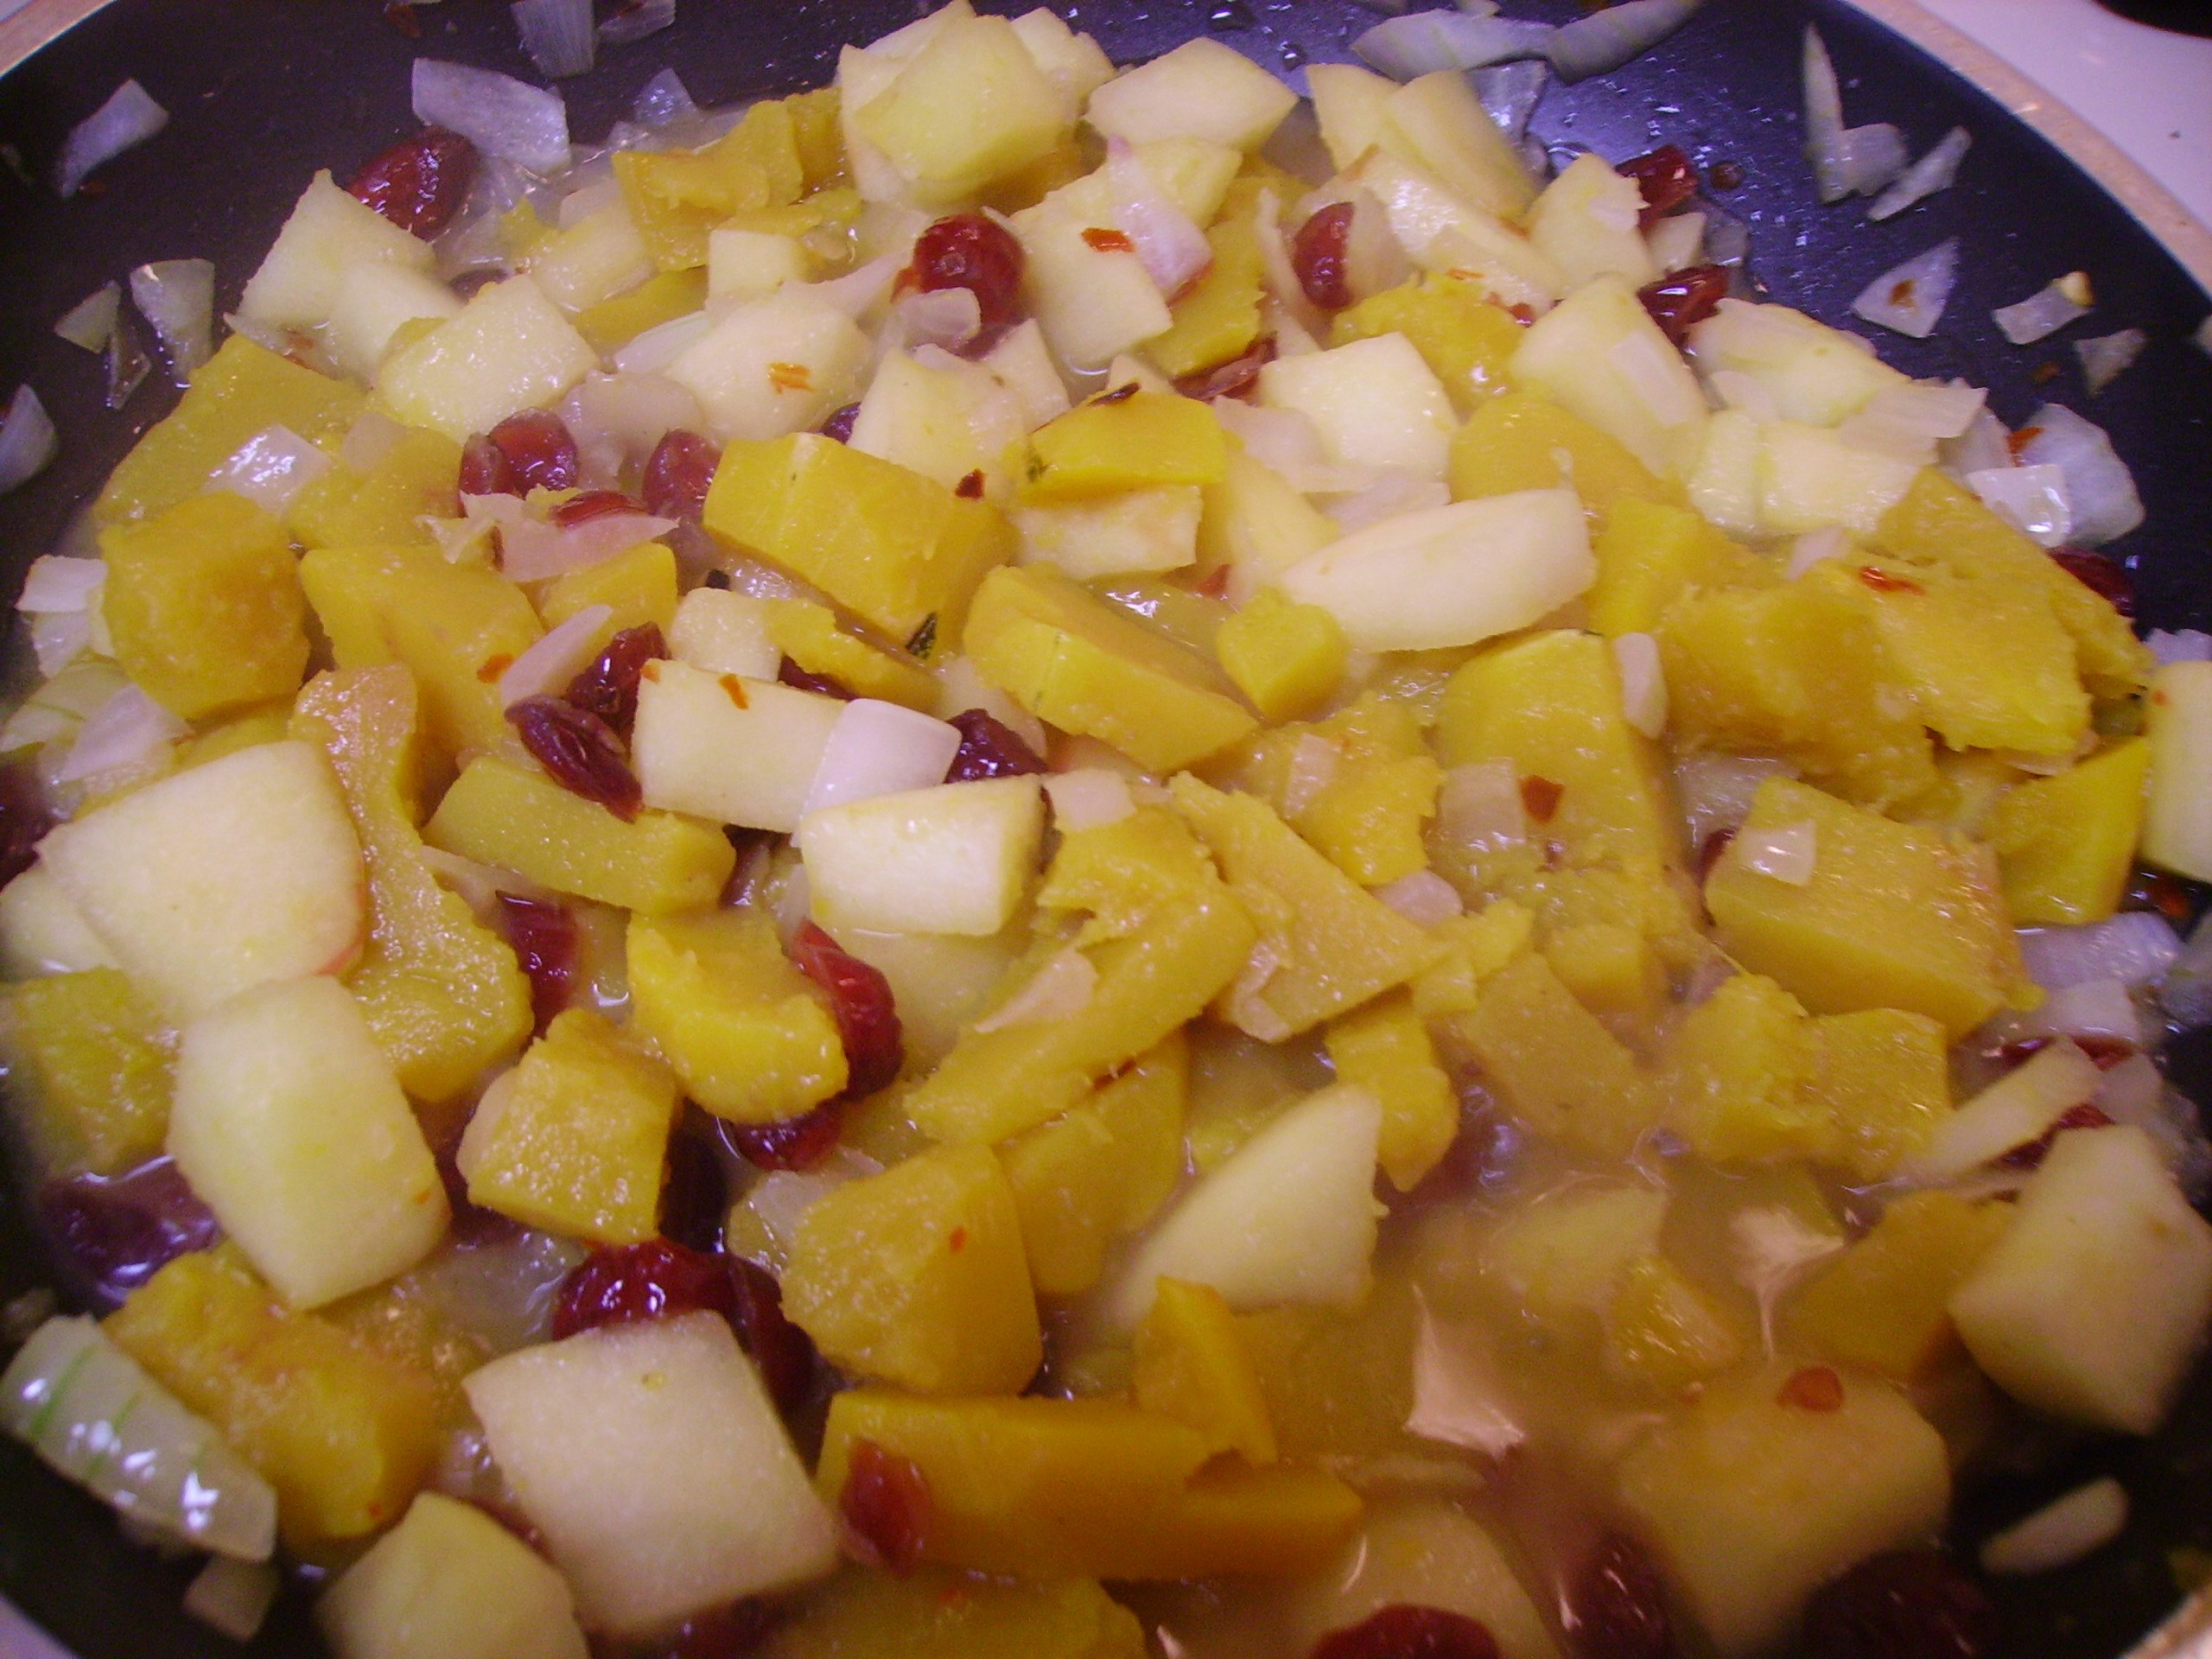
I chose to add the pork to the pan at this point. I had reduced some chicken broth in the pan I cooked the pork in and so I added that to the pan as well.DIGITAL CAMERA
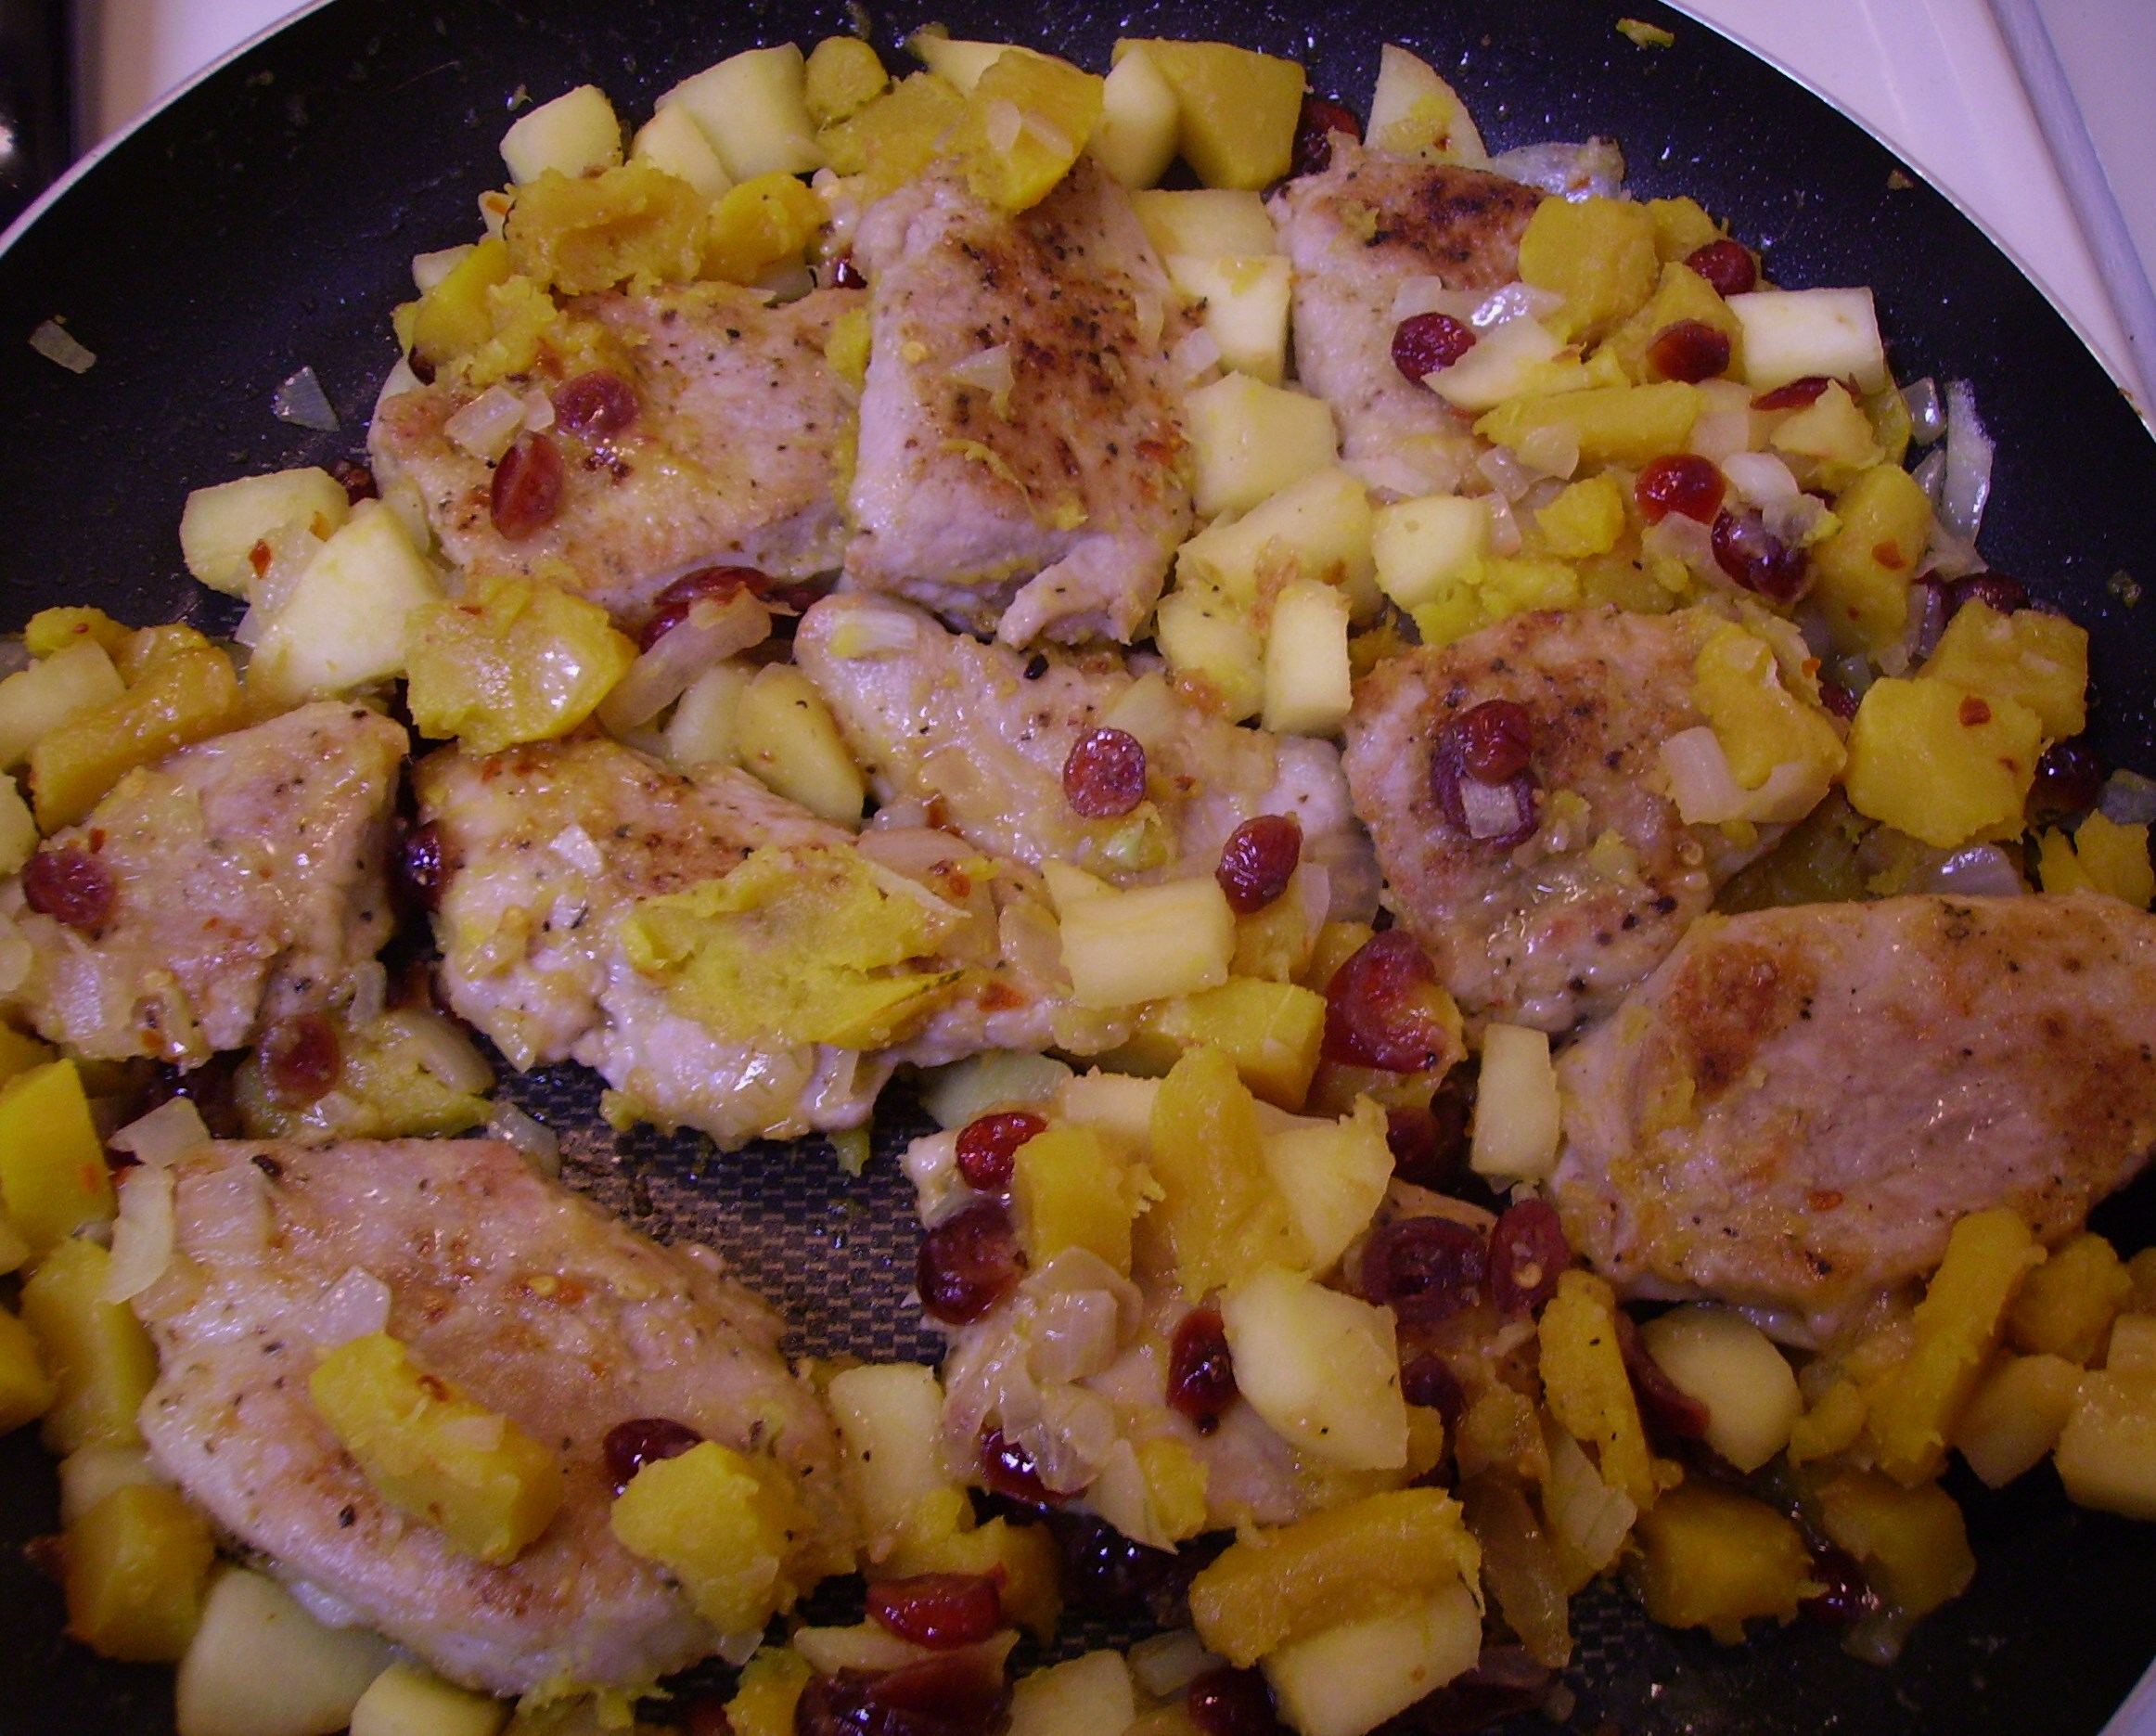
The dish was wonderful. It took less than a half hour to prepare, even without the microwave. It tasted like Fall and was healthy, too. The leftovers, by the way, were great reheated in a small fry pan on the stove.DIGITAL CAMERA

Pork with Squash, Apples and Cranberries
Print Recipe
This is a skillet dinner that is all about Fall. Inspired by and adapted from Cooking Light Magazine.
Servings
4
Servings
4
Pork with Squash, Apples and Cranberries
Print Recipe
This is a skillet dinner that is all about Fall. Inspired by and adapted from Cooking Light Magazine.
Servings
4
Servings
4
Ingredients
Servings:
Instructions
  1. Place the squash and cranberries in the basket of a steamer pan. Add water to the pan, cover and steam for 7 - 10 minutes. The squash should be tender and the cranberries slightly plumped. Set aside.
  2. In a large skillet, heat the olive oil. Season the pork slices with onion herb mixture and dredge lightly in the flour. Add the slices to the skillet and cook, turning once until browned on both sides. This should take about 5 minutes. Place pork in a low oven to stay warm.
  3. Add the broth to the pan. Scrape up any brown bits and cook over medium heat until reduced by half. Set aside.
  4. In a medium fry pan, melt the butter. Add the apple and onion pieces, pepper flakes, and sugar. Toss to coat everything and let it cook for 4-5 minutes. The apples and onions should begin to soften.
  5. Add the squash and cranberries to the pan. Toss to coat and cook for a minute or two. Add the reduced chicken broth and any yummy bits stirring to combine. Let this cook for another minute.
  6. Add the pork slices and any accumulated juices and let everything get happy together for several more minutes.
  7. Divide among four plates and serve.
Share this Recipe
Powered byWP Ultimate Recipe

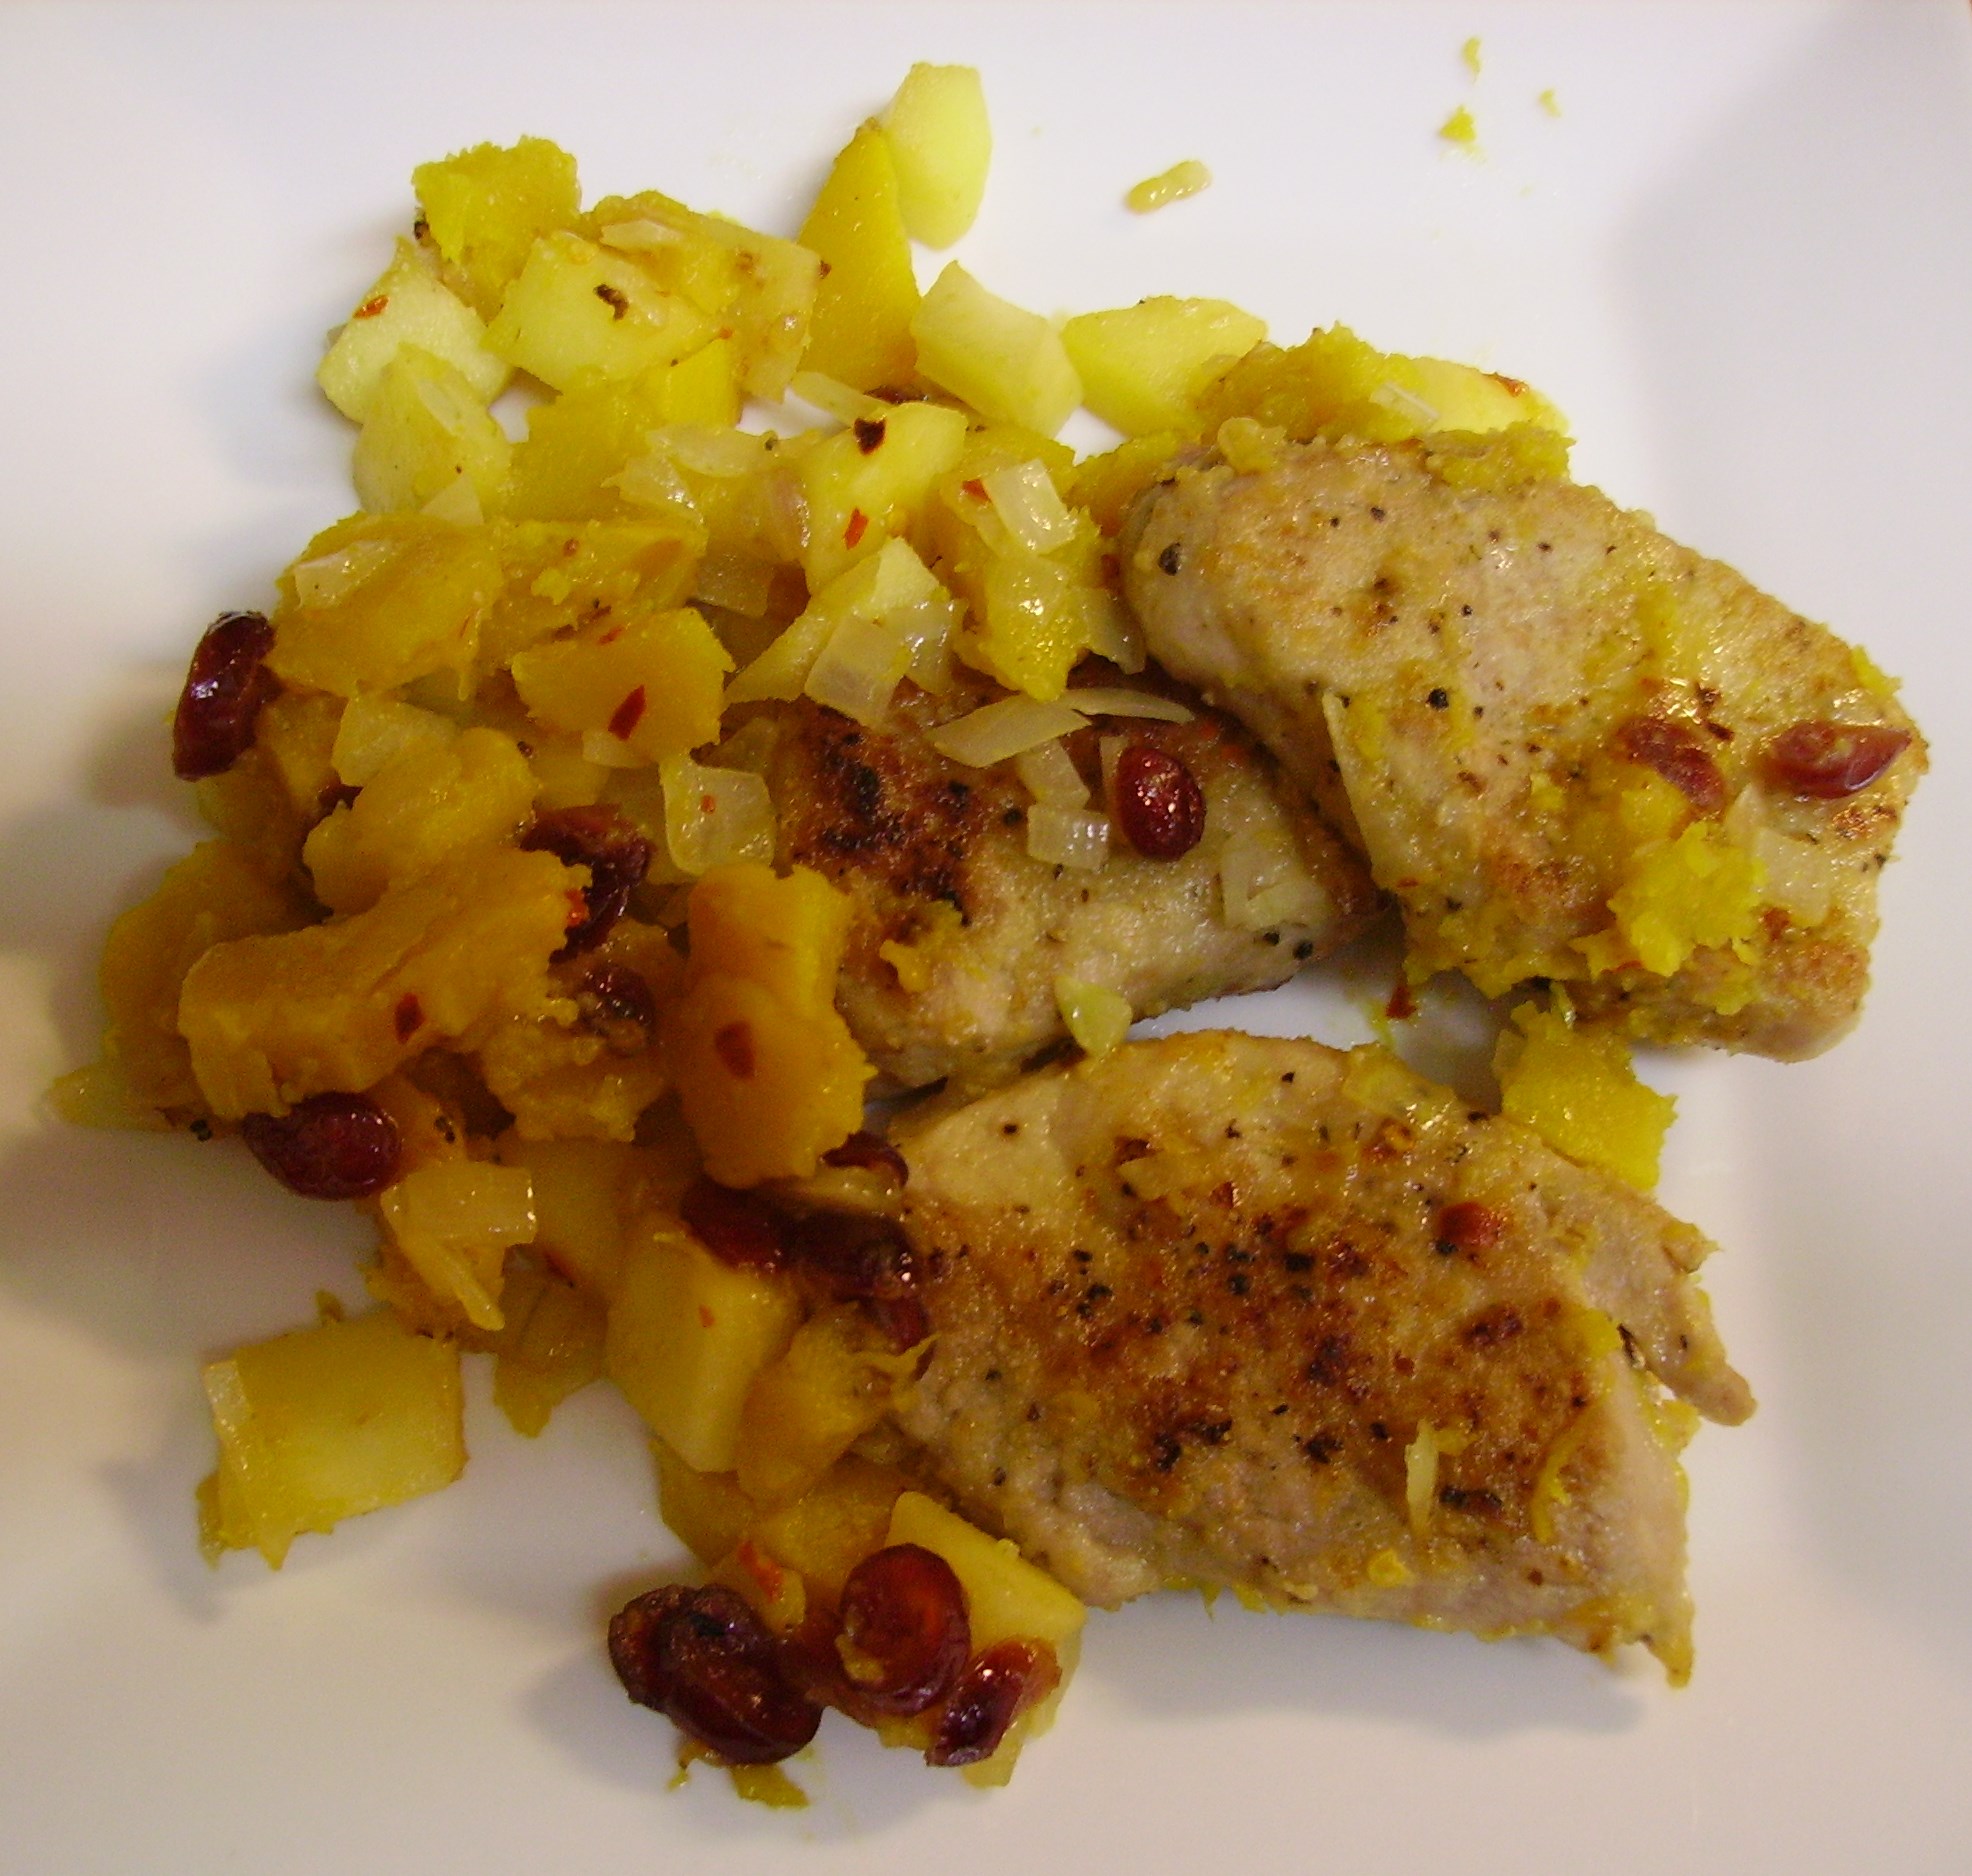
So, as I start the new version of Mama D’s Kitchen, I’m getting used to my new surroundings. While the kitchen is small, I’ve created two good-sized work spaces. I like the fact that everything is close at hand. It feels cozy and friendly. The electric stove is feeling less foreign. It will take a bit of time to get really comfortable with each other, but we’re going to make it.

Mama D’s smaller kitchen and the rest of her downsized apartment are starting to feel like home.

Memories of Parties and Orzo Spinach Salad

We’ve had lots of parties at our house over the years. We’ve celebrated birthdays, holidays and for no reason other than the act of having  a party. We’ve had big parties and little parties; inside and outside. This was/is an excellent party house, but I’m looking forward to the parties we will have at our new home. I’m up for the challenge of creating a festive environment in a small space, and have sophisticated visions for intimate gatherings to come in our new “pad.”

I love getting people together to share good food and good company. There are many “go to” recipes that have graced my table over the years. Some have been shared here like the UnPotato Potato Salad and Tomato Bruschetta. If you missed them the first time check them out on my RECIPES page.

The recipe that I’m sharing today was born out of necessity. I needed a starchy side for an impromptu  party and didn’t have time to run to the store. I spent a bit of time staring into my pantry and came out with a box of orzo, a jar of roasted red peppers and some dry soup mix. The refrigerator yielded a jar of kalamata olives and the freezer revealed a box of chopped spinach. There were lemons and red onions on the counter and lemon infused olive oil and white balsamic vinegar in the cabinet. Inspiration dawned and the Orzo and Spinach Salad was born. This dish has attended many parties here and has traveled far and wide to guest at many others.DIGITAL CAMERAThis recipe makes a ton! It could literally feed a small army which makes it perfect party fare. It is stupid simple to make and while it is better the next day, it is quite tasty with as little as four or five hours in the frig.

It could also be Pasta Salad 101. The technique can be applied to any set if ingredients you’d like to turn into pasta salad. Boil the pasta according to the package directions. Prep any vegetables that you’d like to cook lightly and drop them in the bottom of the colander. When you drain the pasta in that same colander the hot water will blanch the vegetables as it passes through. A good rinse under cold water and you’re good to go.DIGITAL CAMERA

Dry soup mix was the darling of the 50’s & 60’s. From dips to seasoning it hardly ever made it into actual soup. I really like Lipton Savory Herb with garlic soup mix. I have to say I’ve never made it into soup, but I’ve used it in crock pot Italian beef, as a breading ingredient for chicken, and of course in this recipe. In this particular use, I just sprinkled it dry on the pasta and spinach and stirred it in.DIGITAL CAMERARed onions, roasted red peppers and kalamata olives joined the bowl along with the grated zest of a lemon. DIGITAL CAMERAThe dressing was fresh lemon juice and white balsamic vinegar shaken with lemon infused olive oil. I tossed about half of the dressing with the salad and let it get happy overnight in the refrigerator. I drizzled the remaining dressing over the salad and gave it one more good toss before transferring it to a serving bowl.DIGITAL CAMERAThis made a recent appearance at a party for a former co-worker who is also in the process of moving. It was welcomed with open mouths and made several new friends. I thought it was time to share this Mama D classic with the world; so here it is.

Spinach Orzo Salad
Print Recipe
This lemon forward pasta salad is great for parties. Make it a main dish by adding Feta Cheese and maybe some cooked chicken or garbanzo beans.
Servings
12
Servings
12
Spinach Orzo Salad
Print Recipe
This lemon forward pasta salad is great for parties. Make it a main dish by adding Feta Cheese and maybe some cooked chicken or garbanzo beans.
Servings
12
Servings
12
Ingredients
Servings:
Instructions
  1. Boil the orzo in salted water according to package directions. While the orzo is cooking, squeeze out the thawed spinach and crumble it into the bottom of a colander.
  2. When the pasta is cooked drain it into the colander with the spinach. Drain well, rinse under cold water, and drain again. Pour it all into a large bowl.
  3. In the meantime, chop the red peppers and onions and slice the olives. Remove all of the zest from the lemon with a grater and squeeze all of the juice into a small bowl. Set all of these wonderful things aside.
  4. Pour about 2 tablespoons of the olive oil over the orzo spinach mixture and toss to coat evenly.Open both packages of the dry soup mix and sprinkle them onto the mixture. Stir to combine everything very well. Add the lemon zest and stir well again.
  5. Add the reserved vegetables and toss to combine things.
  6. In a jar with a tight fitting lid combine the remaining olive oil, the lemon juice and the white balsamic vinegar. Cover and shake well to blend. Pour about 1/2 to 2/3 of the dressing on the salad and toss to incorporate.
  7. Cover the salad and refrigerate for at least 4 hours, but better yet, overnight. Store the rest of the dressing in the refrigerator as well.
  8. Just before serving, remove the salad from the frig and toss it well. Add the remaining dressing and toss again. Transfer to a serving bowl and feed the masses.
Share this Recipe
Powered byWP Ultimate Recipe

This dish can easily become a one dish meal (you know how much Mama D loves those) simply by adding some feta cheese (or any other hard salty cheese) along with some cooked chicken, garbanzo beans, or even salami. However you choose to serve it, this salad will become a favorite for parties large and small, and it is fantastic left over!

There’s going to be one more party in this house, my grandson Dylan’s birthday. After that, Mama D’s kitchen will be packed up and readied for the trip to its new home. I can now say that I’m really looking forward to it.

Musings on a Small Kitchen and Dinner in Seven Layers

In less than four weeks we will be moving to our new home. It is a beautiful two bedroom apartment with many amenities. I know that it will be perfect in many ways; location, fitness center, and beautiful grounds. Still, at the back of my mind I keep coming back to that tiny kitchen. I also keep scolding myself for dwelling on it. I spent most of my adult life using a tiny kitchen, and I can say from experience that they are efficient and convenient, even if the last 12 years has altered my perspective.

There is however, a movement afoot, a covert plan of sorts that wants to convince me that small kitchens are a blessing in disguise.  I recently opened a magazine to find a four page spread on the wonders of a kitchen that is no bigger than my future home’s. I’ve also seen respected celebrity chefs extol the virtues of their New York City mini kitchens. It’s enough to make me reevaluate my new Kitchen of Love’s assumed short comings. This may be a case of less is more…

The philosophical debate will be raging in my head for some time, but in the meantime, I’m practicing working in a smaller space. Short of taping off parameters, I’m working on keeping things close at hand and being conscious of using space efficiently, and it’s not so bad…

Fortunately, all of this isn’t interfering with the creative cooking that is happening. There are so many things that are whetting my culinary creative juices. Lightening the pantry (and the freezers), coming up with healthy and tasty dishes for two, and having something interesting to write about, are all contributing to positive production (and thoughts) in Mama D’s Kitchen.

A recent dinner featured a Seven Layer Salad. These have been around in one form or another for years. From the earliest incarnation featuring iceberg lettuce and peas, to recent versions that feature every kind of vegetable imaginable, they have earned a permanent place in many cooks’ arsenals.

I spun this concept ever so slightly by using Farro. I’ve shared the virtues of this grain before, so I’ll spare you the details and get on to the dish. Garbanzo beans, red bell and cubanelle peppers, grape tomatoes, olives and red onion joined in the fun.DIGITAL CAMERATraditionally there are seven distinct layers including the dressing. I wound up with slightly more, but I repeated some ingredients to create an even serving of all the flavors. DIGITAL CAMERAFarro went in first to act as a sponge for the veggies and dressing to come. This was left over from my last farro foray. It emerged unscathed from the freezer and proudly took it’s place in the bowl.DIGITAL CAMERARed bell peppers and garbanzos piled on (in an orderly manner, of course).DIGITAL CAMERARed onions contributed their mild flavor and a welcome pop of color.DIGITAL CAMERAThe cubanelle peppers topped more farro.

DIGITAL CAMERATomatoes and ripe olives were the final ingredients, that is before the balsamic vinaigrette Everything spent a lovely afternoon in the refrigerator before a sprinkle of Italian Cheese Blend added a lacy finishing touch.DIGITAL CAMERAAs always, choose the vegetables that appeal to you. Use rice, pasta or quinoa as your grain or leave the grain out. Whatever you choose you have my blessing. This was a Meatless Monday dinner, but ham, bacon, or cooked chicken could easily provide the protein. I added some grilled sourdough bread mainly because there was some in the refrigerator. I must say it added a nice crunchy accent.

DIGITAL CAMERAThis is almost a unrecipe, but if you like written guidelines, here they are.      

Seven +/- Layer Salad
Print Recipe
Servings
4
Servings
4
Seven +/- Layer Salad
Print Recipe
Servings
4
Servings
4
Ingredients
Light Balsamic Dressing
Servings:
Instructions
  1. In a deep glass bowl layer the ingredients beginning with the farro. Layer them at your whim, but aim for appealing color combinations. The only sort of rule is to end with the olives and tomatoes, but again that's up to you.
  2. Combine the dressing ingredients in a small jar with a tight fitting lid. Shake well until everything has blended together.
  3. Pour the dressing over the layered salad. Cover with plastic wrap and chill for at least 4 hours or as long as overnight.
  4. When ready to serve, top with the shredded cheese. Sprinkle with a few fresh herbs if that tickles your fancy, and serve.
Share this Recipe
Powered byWP Ultimate Recipe
                                                                         

One of my favorite sayings these days is: “Embrace the Change.” It’s time to take my own words to heart and embrace my new small kitchen.                                                                                                                                                                Mama D


Downsizing the Kitchen and Apple Cinnamon Bundt Cake

Downsizing is an exciting adventure, discovering things that had been forgotten. Looking through boxes and boxes of everything and feeling a little like Solomon making decisions on what to keep and what to part with. There are parts of the house that are virtually empty save packed boxes, empty boxes, and things to be packed in boxes.

I’ve been putting off downsizing the kitchen. Mama D has to cook/blog and Papa D has to eat, so it’s justifiable. Truth be told, the kitchen is my deepest connection to the house. When we moved in over 12 years ago, I was thrilled to have what felt like the biggest kitchen in the world. While missing a dishwasher and high-end appliances, lots of cabinets, an enormous peninsula for prep and serving, and even a space to claim as a pantry made it feel like cooking heaven.

The kitchen has been the place for celebrations big and small. In hard times it’s been a place of comfort. It gave birth to Mama D’s Kitchen of Love and that love has been shared with all who have entered. Kitchen, I think I’m going to miss you most of all…

Today I began the actual process of downsizing the kitchen starting with the pantry. Like many other places in the house, I found things I didn’t know I had. Some were treasures, but many were trash. What’s left now is usable, organized and catalogued (Yup, I’m that anal). DIGITAL CAMERAThe list  I created is the springboard to what I like to call “guided inspiration.” That inspiration is going to find its way into the kitchen. The best of these inspired adventures will show up here. Besides inspired recipes the goal here is to use up as many of the items as I can. It’s less to move of course, but it is also economical.

I found lots of baking ingredients including several cake mixes. These are the quintessential inspiration ingredients, ready to be adorned and enriched in so many ways. There are literally hundreds of recipes that begin with a cake mix…like this one.DIGITAL CAMERAThese are the raw materials for an Apple Cinnamon Bundt Cake.  Yellow cake flavored with cinnamon, crowned with a caramel glaze that was loaded with apple and walnuts. 

Butter, cinnamon and brown sugar melted together to make a caramel that coated the bottom of a bundt pan.DIGITAL CAMERA

Chopped apples and walnuts nestled on top of the caramel.DIGITAL CAMERAThe cake came together in the usual way with pudding mix, eggs, oil, and water. The extra touch of love was a generous dose of cinnamon. Once beautifully blended it went into the pan.

DIGITAL CAMERABaking for about 45 minutes, it filled the kitchen with the scent of sweet cinnamon that interlaced with the vanilla in the cake mix. It was divine. It emerged from the oven beautifully puffed and golden brown. It spent a little more time in the pan cooling and allowing everything to come together before it was freed to take its place in the cake hall of fame.DIGITAL CAMERAThis cake is delicious! It is moist and flavorful. The caramel, apple, walnut layer creates a delicious topping that seeps into the cake just enough to elevate the overall flavor to another level. A little whipped cream or rich vanilla ice cream wouldn’t be too much, so go ahead and indulge. According to Papa D this actually makes a great breakfast. Give it a try.

Apple Cinnamon Bundt Cake
Print Recipe
A moist and delicious cake. Use your favorite kind of apple.
Servings
16
Servings
16
Apple Cinnamon Bundt Cake
Print Recipe
A moist and delicious cake. Use your favorite kind of apple.
Servings
16
Servings
16
Ingredients
Servings:
Instructions
  1. Preheat the oven to 350 degrees. Coat a bundt pan with non-stick cooking spray.
  2. Combine the butter, sugar, and 1 teaspoon cinnamon in a microwave safe bowl. Microwave on high heat for 2 minutes, stirring every 30 seconds. Pour into the bundt pan.
  3. Layer the apples and walnuts evenly over the caramel. Set aside.
  4. In a large bowl, combine the cake mix, pudding mix, eggs, oil, water, and the remaining 2 teaspoons of cinnamon. Beat for 2 minutes. Pour over the apple caramel mixture.
  5. Bake for approximately 45 minutes. Begin checking for "doneness" after 30 minutes. A toothpick poked in the center of the cake should come out clean. When cake is done, remove from the oven and cool in pan for 10 minutes.
  6. Carefully invert the cake onto the cooling rack. Allow to cool completely before transferring to a serving plate.
Share this Recipe
Powered byWP Ultimate Recipe

So, the pantry is a few more items lighter and a new cake has been created in Mama D’s kitchen. In a few weeks the Kitchen of Love will have a new location. It will be smaller and differently equipped, but it will still be the Kitchen of Love… that will never change.    Mama D

Signs of Fall and Cauliflower Mac and Cheese

As I take my daily ride into the country, the signs of Fall are everywhere. The corn stalks stand drying in the fields their single ears of seed corn still attached. they’ll stay there for a few more weeks until the process is complete.DIGITAL CAMERAOther stalks face another fate. Gathered and bound to adorn farm stands in every incarnation imaginable, decking their yards for Fall. DIGITAL CAMERAHay bales not being used for feed find their way into the autumn landscape. They can become a climbing structure waiting for children to cast allergies to the wind and scale them with reckless abandon.DIGITAL CAMERA Others are transformed with a few props into (slightly tacky) symbols of the season.DIGITAL CAMERA

DIGITAL CAMERAThe air has that Fall scent. It’s an almost imperceptible hint ofDIGITAL CAMERA dried leaves and crisp air that has just a touch of chill to it. There are a those rogue overachiever trees that are displaying their autumn glory more than a few weeks early, The touches of red and orange a gift of their perfect proximity to the sun.

DIGITAL CAMERA

This is casserole weather. The temperature is cool enough to turn off the air conditioning and open the windows and using the oven is once again a pleasant proposition. Mama D, always a fan of the one dish meal, has popped more than a few things in the oven of late. Pork loins and chicken breasts have roasted to perfection within the oven walls, but the real treat is when an eclectic group of ingredients come together in one pan of love.

The most recent creation was a healthier twist on Macaroni and Cheese. Pasta was there in the form of Multi-Grain Penne. Extra sharp Cheddar Cheese created a creamy sauce. There was even a little bacon goodness going on. This casserole also featured a healthy dose of cauliflower, red onion, and a handful of golden grape tomatoes.

DIGITAL CAMERACombining these ingredients was easy, if a little time consuming, but completely worth it. I chopped up 3 cups worth of cauliflower (a little more than 1/2 a large head). I cooked the pasta in the usual manner and added the cauliflower to the pot a couple of minutes before the pasta was cooked. They resided together in a rectangular casserole dish. I broiled the tomatoes and cooked the bacon and added them to the dish. DIGITAL CAMERAWhile I drained most of the bacon drippings from the pan, I kept just a little to saute the onions which became the base for my cheese sauce. Cheese sauce needs cheese and I chose an extra sharp cheddar. The grab your taste buds kick allowed me to use less saving some fat and calories.DIGITAL CAMERAI upped the flavor of the sauce with Worcestershire sauce, Tabasco, and mustard. Some garden thyme added a little sumpin’ as well.

Every good casserole needs a crunchy crumb topping and so did mine. Panko crumbs with a little garlic powder and paprika was the crowning touch.DIGITAL CAMERAIt baked in the oven mostly covered with foil, but (foil) topless for a bit to create a crunchy golden crust. The result was a tasty yet somewhat healthy dish. DIGITAL CAMERAThe bacon could be eliminated to make it a Meatless Monday delight. Any cut pasta would work from elbows to shells to rotini. Just cut the cauliflower to a size that is similar to the pasta. This will generously serve four and the leftovers are pretty tasty as well.

Cauliflower Mac and Cheese
Print Recipe
Cauliflower Mac and Cheese
Print Recipe
Ingredients
Servings:
Instructions
  1. Cook pasta "al dente" in a large pot of lightly salted boiling water. When the pasta is almost done, add the cauliflower and cook for 2 minutes or so. Drain and place in a rectangular baking dish that has been lightly coated with non-stick spray.
  2. Slice the tomatoes in half and place on a broiler pan that is lightly coated with cooking spray. Spray the tomatoes lightly with more cooking spray. Broil until the tomatoes begin to break down and are lightly browned. Add to the pasta and cauliflower.
  3. Heat a large saucepan over medium heat. Add the bacon and cook stirring occasionally until the bacon is browned. Remove the bacon from the pan and drain on paper towels before adding to the casserole dish.
  4. Remove all but a scant tablespoon of the bacon drippings from the pan. Add the first tablespoon of butter. When it melts, add the red onion. Cook for several minutes until the onion begins to soften.
  5. Add the flour and stir to coat the onions. Continue to cook and stir for 2-3 minutes. Do not let the mixture brown.
  6. Add 1/2 cup of the milk and stir to create a smooth paste. Slowly add the rest of the milk, stirring constantly to keep things smooth. Conttinue to cook and stir until the mixture is thickened, 5 minutes or so.
  7. Add the mustard, pepper sauce and Worcestershire sauce to the pan and stir to mix. Remove from heat and add the cheese. Stir until the cheese is melted. Pour over the mixture in the baking dish.
  8. Melt the second tablespoon of butter in a small pan. Add the Panko, garlic powder, and paprika to the pan and toss until the crumbs are evenly coated. Sprinkle on top of the casserole.
  9. Cover with foil and bake in a pre-heated 375 degree oven for 25 minutes or so (it should be bubbly around the edges). Remove the foil and return to the oven for 10 minutes more. The crumbs should be golden brown.
  10. Remove from the oven and allow to rest for 5 minutes or so before serving.
Share this Recipe
Powered byWP Ultimate Recipe

Autumn brings changes in the weather and often the foods we eat. This year fall also holds many personal changes for us. Like a change of season…a change of lifestyle can be a welcome challenge.  Embrace it.  Love, Mama D