Cauliflower Mac & Cheese, Again.

Disclaimer: I confess that I have shared various recipes for Cauliflower Mac & Cheese over the years. That is because I really, really like it. This, as with the other versions, takes a slightly different path. You can check these and lots of other recipes out on my website: mamadskitchen.net.

Even though spring is here, a casserole of comfort food love is a welcome weeknight supper once in a while.  Nothing says comfort food love like homemade Macaroni and Cheese, full of comfort and unfortunately, fat and calories. This is my attempt to take away some of the bad and keep most of the good intact.

Enter everyone’s (well, most everyone’s) favorite chameleon vegetable, cauliflower. Cauliflower is everywhere these days, often under the radar, in pizza crust, mashed potatoes, and of course as the low carb rice substitute.

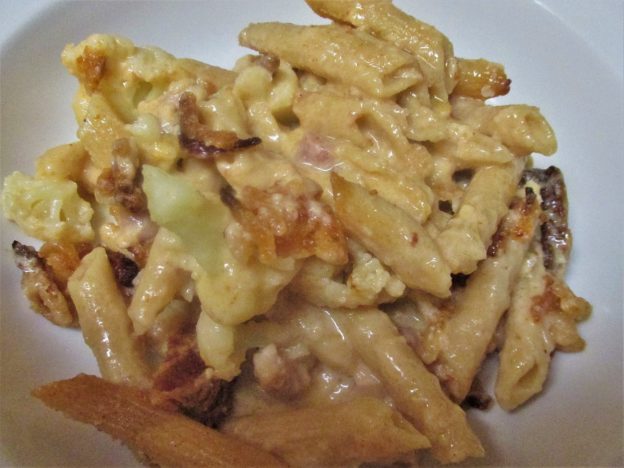
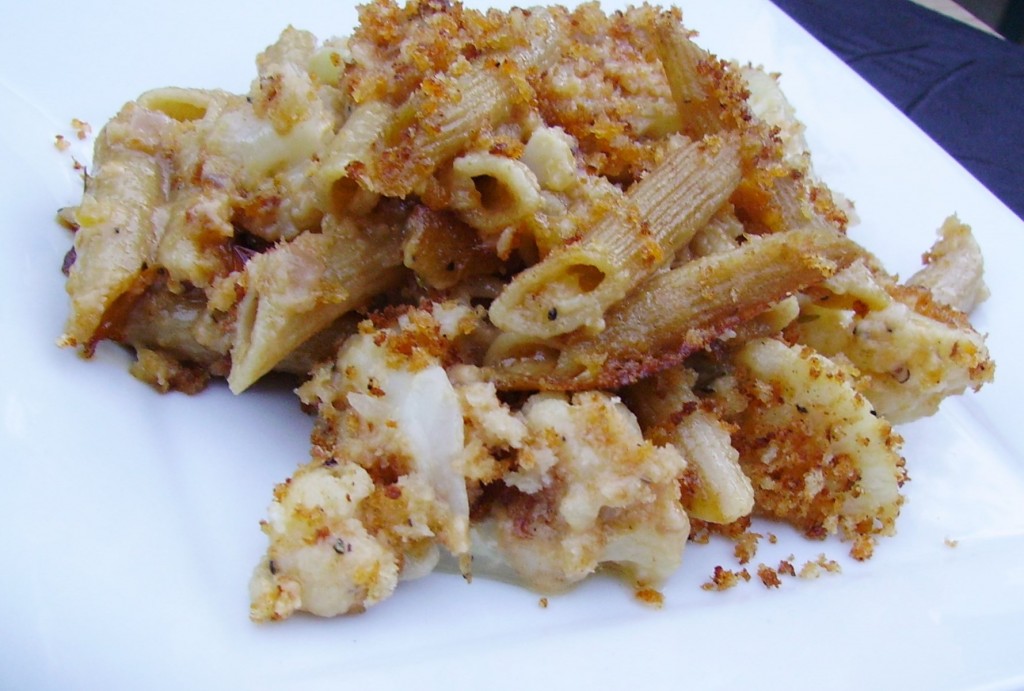
One of the best things about cauliflower is how well it plays with others. That’s how it came to have a starring role in this dish. Cut into florets and cooked to al dente, it blends with cut pasta seamlessly. This dish is equal parts of cauliflower and pasta. Since cauliflower shrinks and pasta grows when cooked, I measured accordingly.

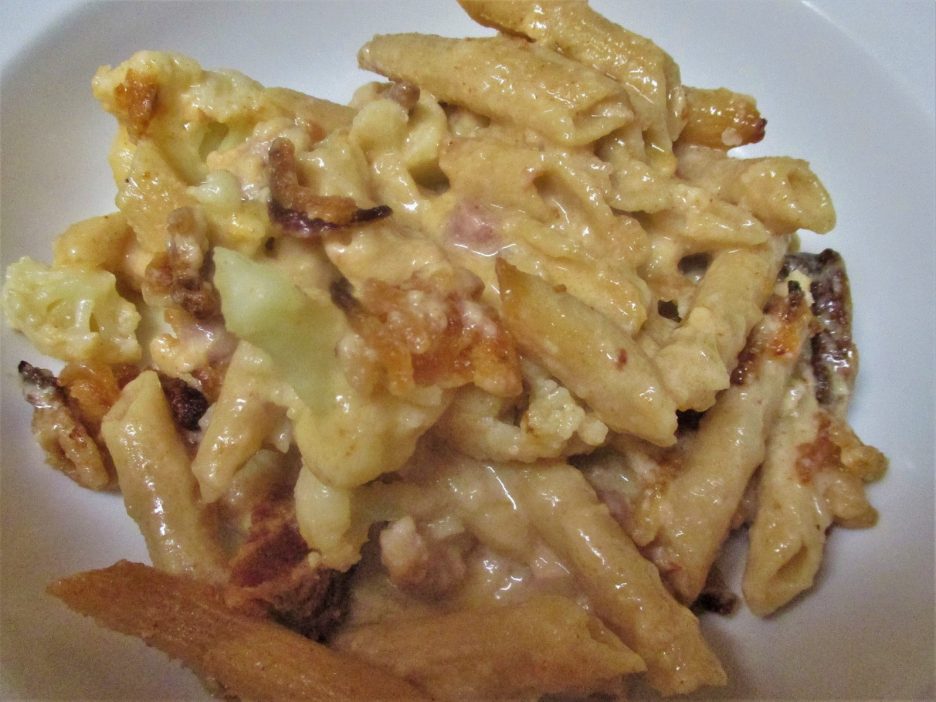
We all know that a delicious Mac & Cheese is only as good as the cheese used, so I chose a combination of Aged Cheddar and Smoked Gouda. They both provide big flavor, and that means that you need less to get that big cheese bang for the buck. Any cheese(s) that you love will work, however.

I used 2% milk because I think it gives enough creaminess without as much fat as cream, half & half, or whole milk would.  Smoked paprika and cayenne add a bit of heat and color, but you could add whatever flavors you would like.

Now, about the prosciutto. It added a saltiness and texture the dish. You could substitute ham or bacon or leave the pork products out completely. Remember this is going to be your recipe.

Finally, a word about the topping. French Fried Onions out of the can are one of my guilty pleasures. They are delicious on a green bean casserole, as a crunchy salad topping, or all by themselves as a crunchy salty snack.

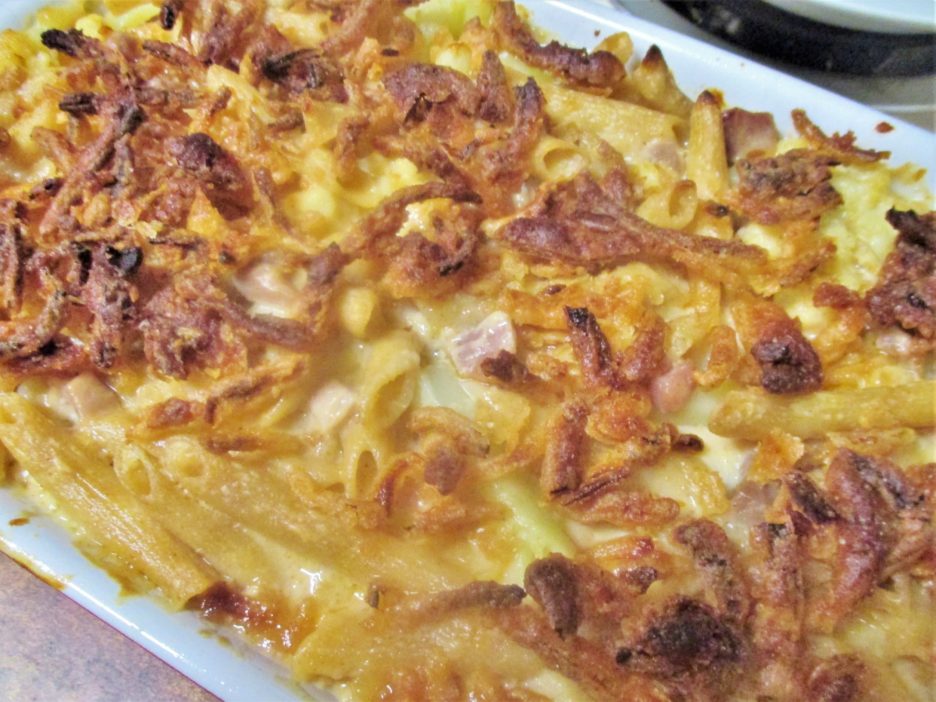
So here is your Cauliflower Mac & Cheese springboard waiting for you to take the plunge.

Cauliflower Mac & Cheese
Print Recipe
Servings
4
Servings
4
Cauliflower Mac & Cheese
Print Recipe
Servings
4
Servings
4
Ingredients
Servings:
Instructions
  1. Cook the pasta in salted boiling water until just al dente. Add the cauliflower and cook 2 minutes more. Drain and set aside.
  2. Melt the butter in a medium saucepan. Add the shallots and cook until they begin to soften. Add the flour and stir to form a roux. Cook for 2 minutes.
  3. Gradually add the milk, stirring constantly. continue to cook stirring constantly until the sauce comes to a gentle bubble and thickens.
  4. Remove from the heat and add in the cheese, stirring until it is melted. Add the paprika and cayenne and taste for seasoning. Add what it needs.
  5. Combine the cheese sauce with the pasta, cauliflower, and prosciutto (if using). Pour into a 2 quart casserole that has been lightly coated with cooking spray.
  6. Cover with foil and bake at 350 degrees for 25 minutes, until the sauce is bubbling.
  7. Sprinkle with the fried onions and bake uncovered another 5 - 7 minutes until the onions are golden brown. Allow to rest 10 minutes before serving.
Share this Recipe
Powered byWP Ultimate Recipe

All Over the Map Asian Noodle Soup


This easy soup uses Asian ingredients from several different countries. Soba Noodles from Japan, Fish Sauce from Vietnam, Soy Sauce from China and broth in a box that is Thai inspired. It’s rounded out with American Pork, and vegetables that are available in most any grocery store.

Since this soup is literally all over the map it is fair game to any kind of modification you would like. Change the meat, change the noodles (rice or ramen noodles would be good) to whatever you have or like. The same goes for the vegetables.

I found this broth at Aldi. It is not one of their regular items so it may not be there when you go. Take a hint from the label and you can probably add ginger, lime juice, fish sauce, and chili to chicken broth and get a similar result. (Yes, I did taste all of those flavors in the broth.)

The cooking times in the recipe will result in tender crisp vegetables. Adjust the time to your preference.

All Over the Map Asian Noodle Soup
Print Recipe
Servings
4
Servings
4
All Over the Map Asian Noodle Soup
Print Recipe
Servings
4
Servings
4
Ingredients
Servings:
Instructions
  1. Heat 1/2 tablespoon oil in a soup pot. Add the ground pork and cook until it is no longer pink. Remove with a slotted spoon and set aside.
  2. Add the remaining oil to the pan and add the onions and carrots to the pan and cook for a few minutes until they are fragrant. Add the garlic and ginger and cook 2 minutes longer.
  3. Return the pork to the pan and add the broth, fish & soy sauce and lime juice. simmer for 15 minutes to allow the flavors to blend.
  4. Give the soup a taste and add whatever you think it needs. Add the cabbage, red pepper, chilis and green onions. s\Simmer for 5 minutes or so.
  5. While the soup is cooking, prepare the noodles per the package directions. Add the cooked noodles to the soup and let everything get acquainted for another 5 minutes.
  6. Serve with a sprinkle of chopped cilantro and a squeeze of lime. You could also add a splash of Sriracha if you like.
Share this Recipe
Powered byWP Ultimate Recipe


One Way to Stuff a Chicken Thigh

I’m always ready for a new cooking adventure, so the idea of stuffing a chicken thigh entered my mind. I love using boneless, skinless, chicken thighs because they are always tender, juicy, and flavorful. I love them grilled and they respond well to oven roasting too. In fact I have prepared them in many ways, but I’ve never tried to stuff them.

Tasty they may be, but they are not what one would call uniform in size and thickness. There are several muscles at play here  that create a flattening challenge. Patience and the tried and true meat mallet and plastic wrap finally resulted in a pretty even playing field.

A note here about fat. Thighs do have a certain amount of surface fat…juiciness does not occur in a vacuum after all. In a nod to health and fat intake I do remove most of that surface fat, but in another nod to tasting yummy, I leave a little on.

I decided that my filling would be a combination of good and evil. I started with crimini mushrooms and shallots. I sautéed them in a little olive oil until they were reduced to flavorful bits and spread them on the flattened thighs.
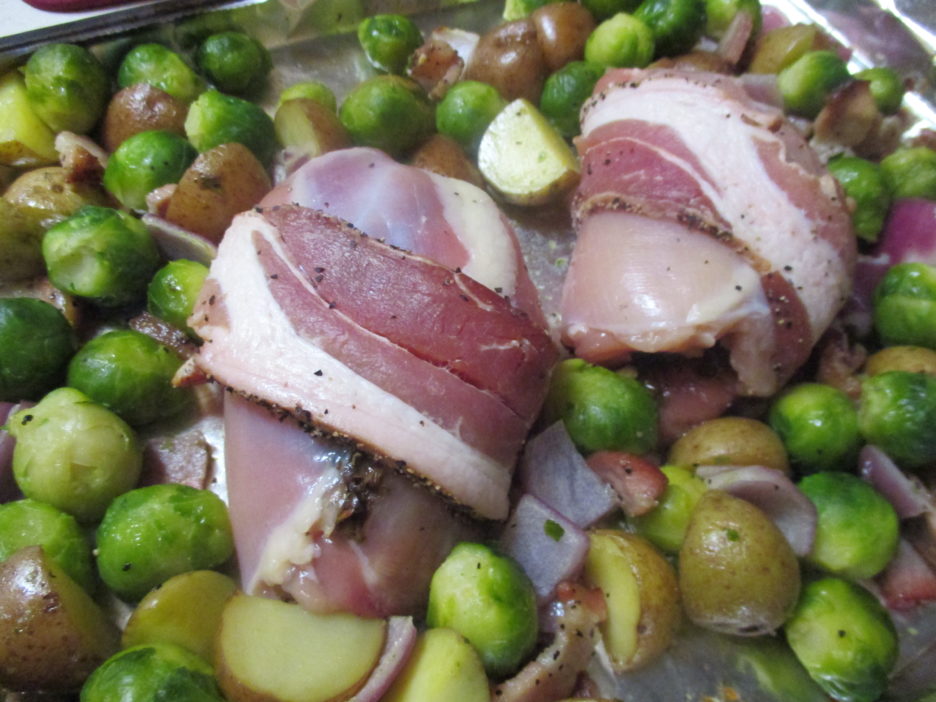
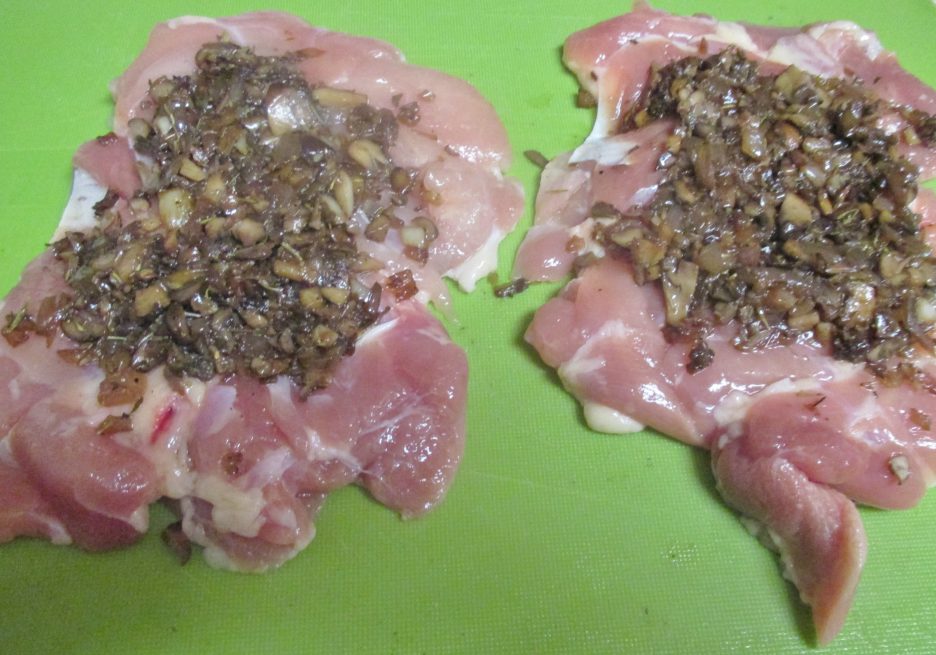
Here is where the healthy train derailed a bit. I added a modest pat of Garlic Herb Cheese before rolling the thighs into plump torpedos. To help them stay rolled, I wrapped them in a strip of bacon.

I am having an ongoing love affair with sheet pan meals. I love the ease of having everything in one place even if they don’t always cook for the same amount of time. Once my little torpedoes were ready, I centered them on a foil-lined pan (another easy step; cleanup is throwing the foil away). They were surrounded by brussels sprouts, potatoes and onions, and maybe just a little more bacon which had gotten a bit of a head start. Everything was done in about 30 minutes.

The chicken was delicious even though a bit of the cheese oozed out (happily onto the vegetables). This was an elegant meal, suitable for company, but easy enough to be a welcome weeknight supper.

Stuffed Chicken Thighs
Servings: 2
Ingredients
  • 2 Large Boneless Skinless Chicken Thighs
  • 4 Ounces Crimini Mushrooms Finely chopped
  • 1 Large Shallot Finely chopped
  • 1 Clove Garlic Finely chopped
  • 1 Tbsp. Olive Oil
  • 2 Tbsp. Garlic Herb Cheese Like Alouette
  • 2 Strips Bacon
  • Salt & Pepper
Instructions
  1. Trim the excess fat off the chicken thighs. Using plastic wrap and  something flat and heavy, pound the thighs to as even a thickness as possible. Try to make them 1/2" thick or less.

  2. Heat the olive oil in a medium skillet. Add the mushrooms and shallots and cook until golden. About 5 minutes. Add the garlic and cook 2-3 minutes more until the garlic is soft and fragrant. Set aside.

  3. While the mushroom mixture is cooking, form the Garlic Herb Cheese into small logs. Wrap loosely and put in the freezer. Chilling the cheese will keep it from oozing out too much.

  4. Lay the thighs out smoother side down. Season with salt and pepper to your taste. Divide the mushroom mixture between the the thighs. Top each with a garlic cheese log. Roll up carefully and wrap a strip of bacon around each thigh bundle. Secure with a toothpick if necessary.

  5. Bake at 375 degrees for 25- 30 minutes. Serve with sides of your choice.

To Make this a Sheet Pan Dinner
Note: To create a sheet pan dinner, toss brussels sprouts, chopped potatoes, and onions (or vegetables of your choice) with a drizzle of olive oil, salt and pepper, and maybe a chopped strip of bacon. Roast at 375 degrees for 10-15 minutes before adding the chicken to the center of the pan. Continue roasting as noted above.

As the title suggests, this is just one way to stuff a chicken thigh. Grab your meat mallet, use your imagination and create your own tasty torpedos.

Visions of Meatloaf Dancing in My Head

The holidays are approaching at seemingly warp speed. With shopping and baking and decorating it’s hard to give much thought to dinner. Dinner is still very important. It gives you the strength to shop and bake and decorate. So, my proposal is to stock the freezer with hearty meals filled with comfort and joy and more than enough love. Soups, casseroles and of course some wonderful marinara or bolognese make for a happy freezer (and dinner table). This musing isn’t about any of those. It’s about Meatloaf.

I love meatloaf. It can take so many wonderful forms. It is easy to make. Just combine any ground meat or meats of you choice with some eggs, bread crumbs, and seasonings and there you have it. I have made many varieties over the years and have shared one or two right here. This go round I’m sharing my new favorite. I love this meatloaf!!! 
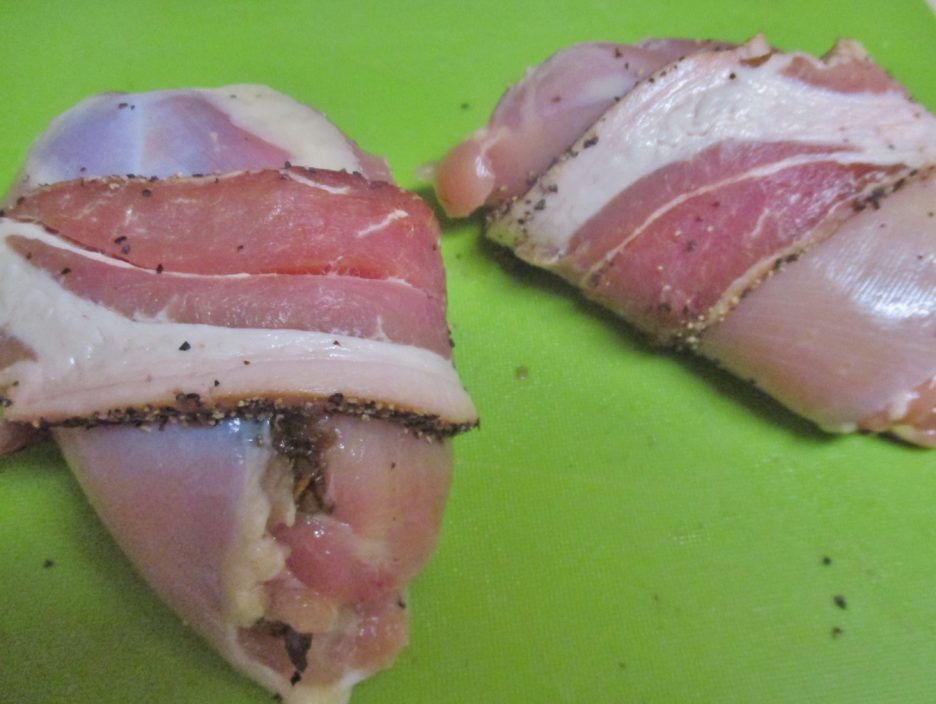
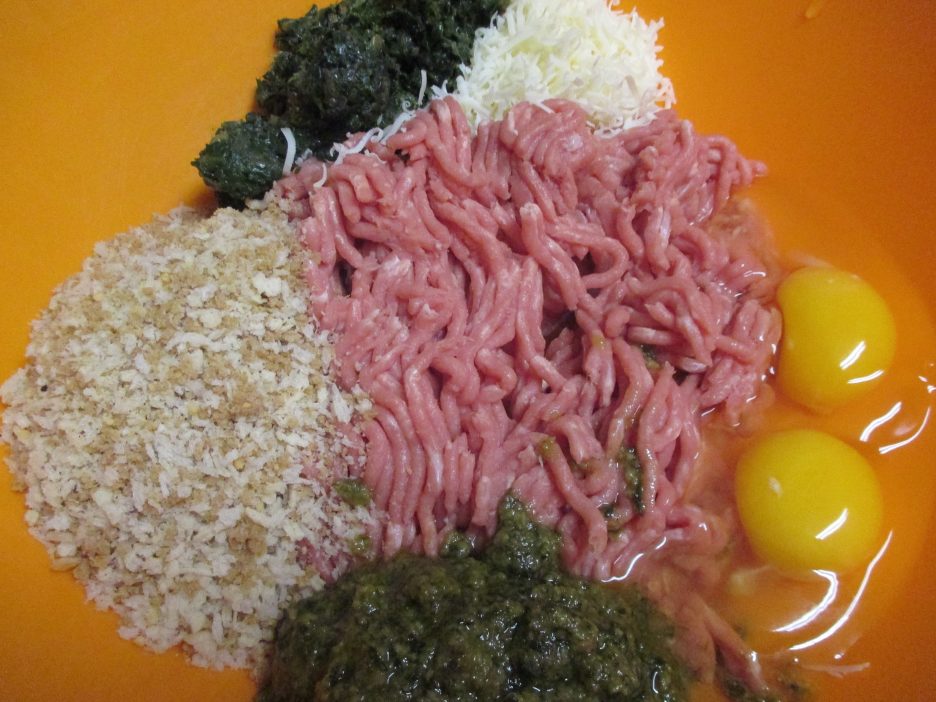
My ground meat of choice was turkey, but this would work with any ground meat that you desire. Eggs and bread crumbs were there of course because I wanted the  meatloaf to remain a loaf and these two ingredients make the perfect glue. Onions are an absolute necessity and for this rendition I added some fresh spinach. Before they went into the bowl, I cooked them in a little olive oil. I like my meatloaf to have a smooth consistency and this seemed to do the trick. The last ingredients were grated Pecorino Romano and some Pesto ( click here for the recipe). In an unusual move on my part, I didn’t use garlic. Hard as that is to believe, this didn’t need it. The healthy dose of pesto provided just the right amount of garlic zing along with all of the other wonderful notes this beautiful green paste provides.

When times are busy, it’s good to cut prep time whenever possible. so I made a large batch and froze it in individual meatloaves. This reduces the baking time and I think they look really cute on the plate.

I took two of my mini loaves out of the freezer and and when they had thawed (safely in the refrigerator), I centered them on a rimmed baking sheet. Why that much room, you may ask. Because they would go into the oven on their own, but they wouldn’t be lonely for long. After about 10 minutes (give or take) I added some olive oil tossed green beans. These were frozen Haircots Verts. It’s winter here so fresh green beans, if they can be found, are not always very tasty. The frozen ones are always tasty no matter the weather. 
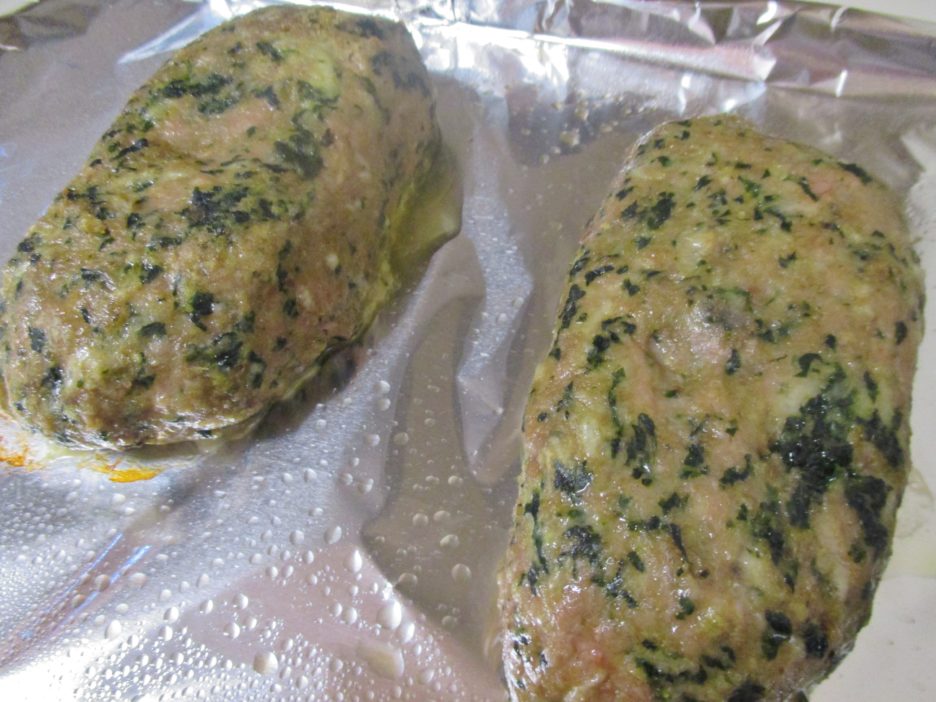
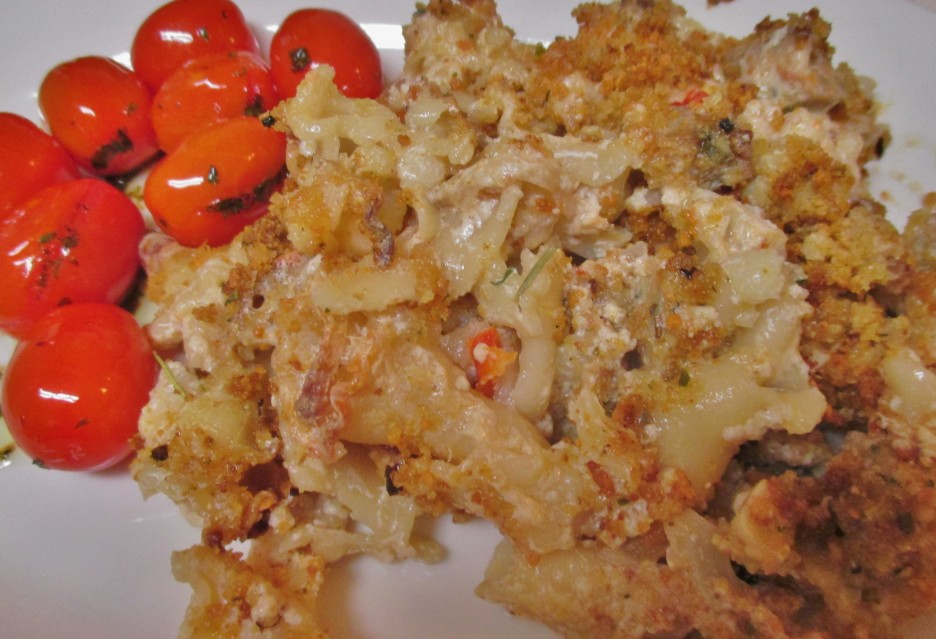
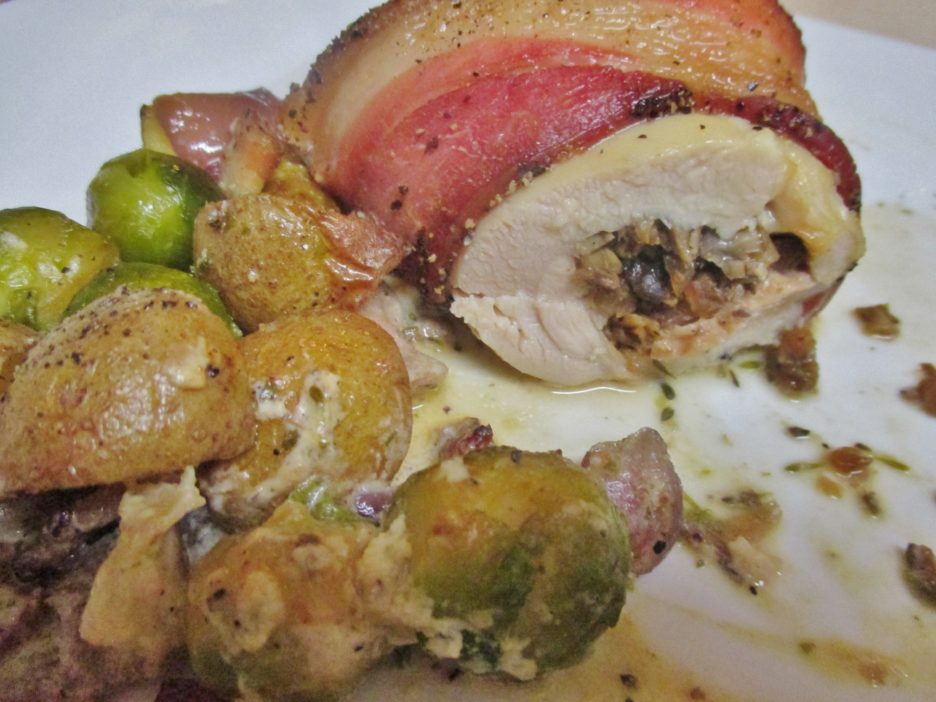
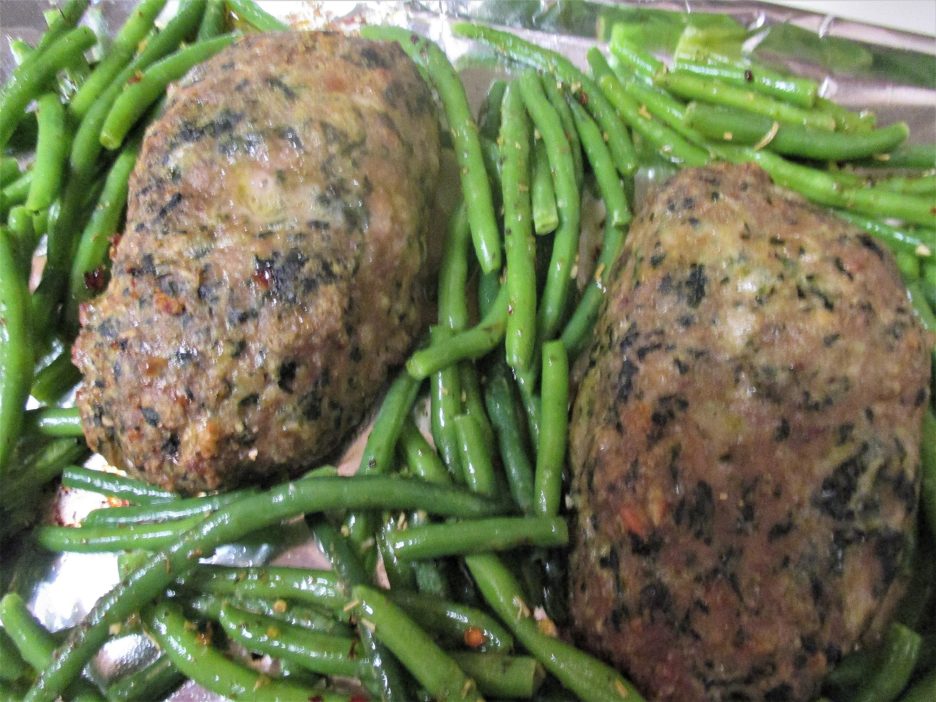
Another 15-20 minutes in the oven and my loaves and beans were ready for plating. Rounding out the dish and making this a comfort food classic was a scoop of creamy mashed potatoes.
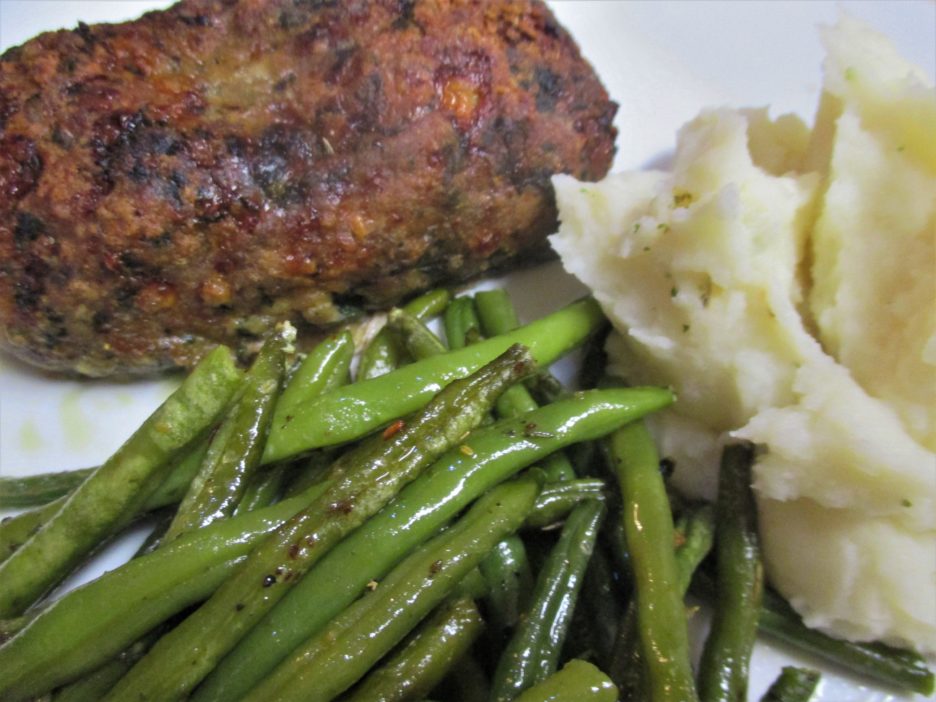
This was a plate of pure love and comfort and really took very little immediate effort on my part. Best of all, there are more little loaves in the freezer to bring tasty joy to the holidays.

Pesto and Spinach Meatloaf
Print Recipe
Servings
4
Servings
4
Pesto and Spinach Meatloaf
Print Recipe
Servings
4
Servings
4
Ingredients
Servings:
Instructions
  1. Heat the olive oil in a large skillet. Add the onions and cook until soft and just beginning to brown.
  2. Add the chopped spinach and continue to cook until the spinach is very wilted. Remove from heat and allow to cool.
  3. In a large bowl combine all of the ingredients, stirring until everything is blended together.
  4. Form into 4 small loaves. If you are not baking them immediately, freeze them in individual zip top bags.
  5. To bake immediately, preheat the oven to 350 degrees. Coat a rimmed baking sheet with cooking spray and place the loaves down the center.
  6. Bake for approximately 15 minutes. Add the green beans to the pan spreading them around the loaves.
  7. Bake another 15 minutes or until the loaves are cooked through and the beans are tender crisp. Serve
Share this Recipe
Powered byWP Ultimate Recipe

Panzanella-Palooza: The Summer Edition

Over the years I have sung the praises of the Panzanella Salad. Italian peasant fare, vegetables combined with dry bread cubes and a vinaigrette dressing. It is an established fact that if it is summer there will be panzanella salad in Mama D’s Kitchen of Love. This summer is no exception. In fact it has become the reigning go to supper here, appearing at least weekly in various shapes and forms.

Panzanella got its start in Tuscany long ago with onions being the star of the show. Later tomatoes took over that position and modern panzanella was born. Bread, usually stale has also been a principle player. Thrifty Tuscans didn’t want even the most stale bread to go to waste so they would soak it in water and add vegetables to make a meal. This is probably how it got its name. Pane means bread and zanella means deep bowl. If you have wet bread and vegetables you are going to need a deep bowl.

Making so many Panzanella salads this summer I have come to a few conclusions. I wanted to share some of those along with a recipe or two in case you want this to be your Panzanella-Palooza Summer, too.

  1. The bread you use is important, it is bread salad after all. The bread should be sturdy, crusty and maybe a little stale. Sourdough is my current bread of choice. I am always searching for a loaf that has the flavor and smell to take me back to San Francisco. La Brea Bread Company (available at Caputo’s) makes one and I just got another great loaf at Mariano’s bakery. Don’t worry if your bread isn’t stale. You backyard grill or even your oven can create the perfect croutons for your salad.
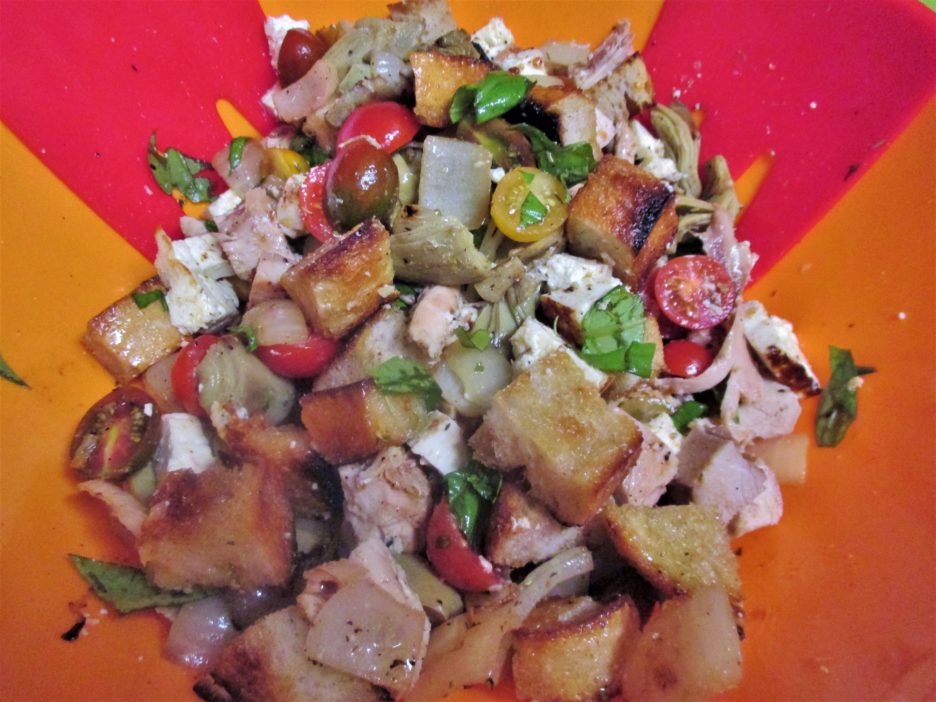
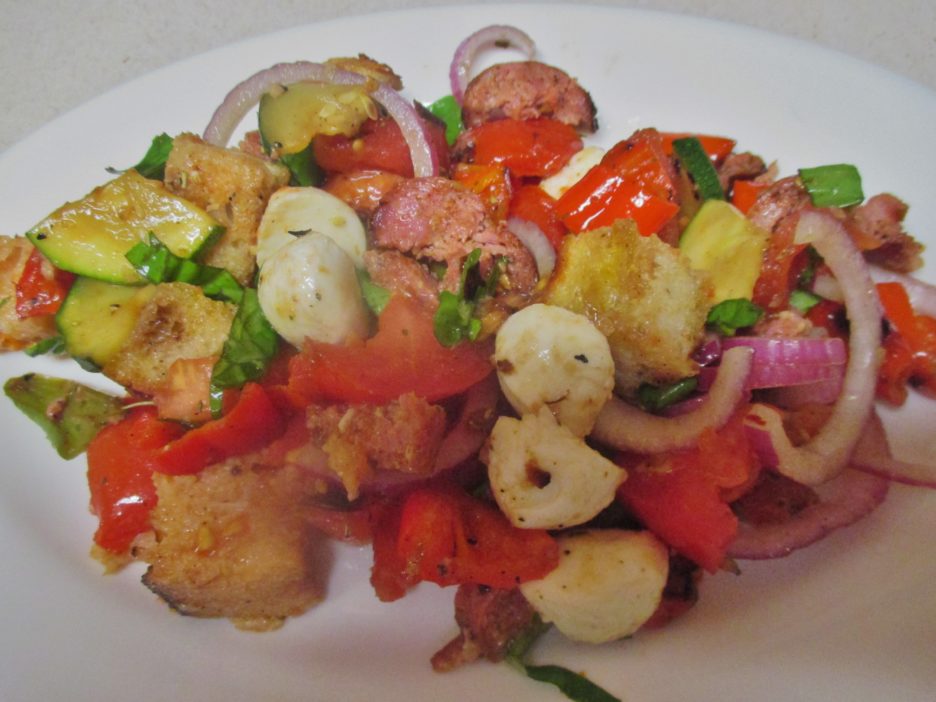
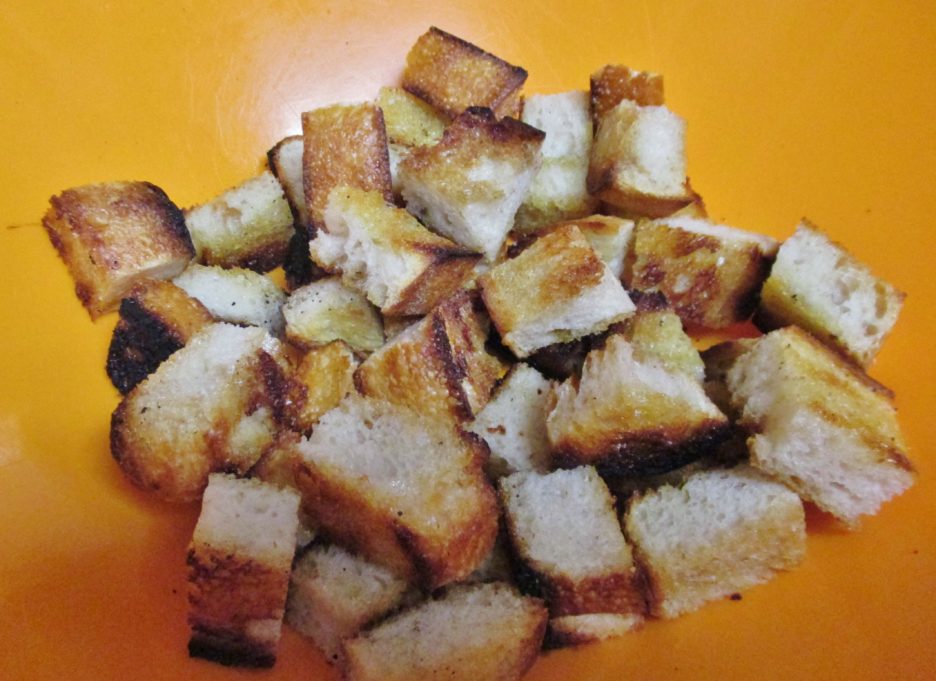
There are lots of other good choices including Ciabatta and French. I’ve made several wonderful salads with Multigrain Baguettes as well. Use what you love or have on hand.
  2. Tomatoes get lonely so give them some company. Summer vegetables are hitting their stride right now and most of them play well with tomatoes. Onions should always be invited to the party. Cucumbers, bell peppers, summer squash and zucchini are great bowl mates too. Artichoke hearts (I use frozen for convenience) are a welcome addition as well. If you love the vegetable it will love being in your salad.
  3. Having a variety of vegetables makes for great flavors. Having a variety of textures makes for a great salad. I like to mix raw and cooked vegetables to achieve that wonderfully interesting balance. This summer, I have been grilling many of the vegetables. Tomatoes, onions, and peppers have all had a turn on the grill before jumping into a salad. Tomatoes grilled just enough to release their juices combine beautifully with crunchy red onions….etc.
  4. When it comes to dressing, simple is probably better. The recipe below is not very complex, but if you are feeling a bit fancy it is a great match up to any salad.
    Mediterranean Vinaigrette

    A twist on the classic vinaigrette with plenty of lemon and more than a hint of garlic. Add any fresh herbs of your choice. This is wonderful on a Greek salad, but it would be equally delightful as a dressing for grilled vegetable or a pasta salad. It makes a great marinade as well.

    Ingredients
    • 1 Medium Lemon Juice and zest
    • 2 Cloves Garlic Grated
    • 1/4 Cup White Balsamic Vinegar
    • 1/2 Tsp. Red Pepper Flakes Optional, to taste
    • 3 Tbsp. Chopped Fresh Herbs Parsley, thyme, basil, or you choice
    • Kosher Salt and Pepper To taste
    • 1 Tsp. Dijon Mustard
    • 1/4 Cup Olive oil
    Instructions
    1. Combine all of the ingredients in a jar with a tight fitting lid. Shake until completely blended. Allow to rest in the refrigerator for at least one hour.

    As the summer has gone on, I have stripped it down. Some good olive oil warmed with a few smashed garlic cloves is a lovely base. Combined with a flavorful vinegar, salt and pepper it lets the beauty of the vegetables shine through.

  5. Add some protein and make your salad a meal. Use anything that sounds good to you. Leftover chicken, cured meats, beans, grilled sausage or steak all work well. Then there is cheese. Who doesn’t love cheese? Fresh mozzarella or cubed Asiago have found there way into my salads, but the best discovery has been Grilled Feta. 
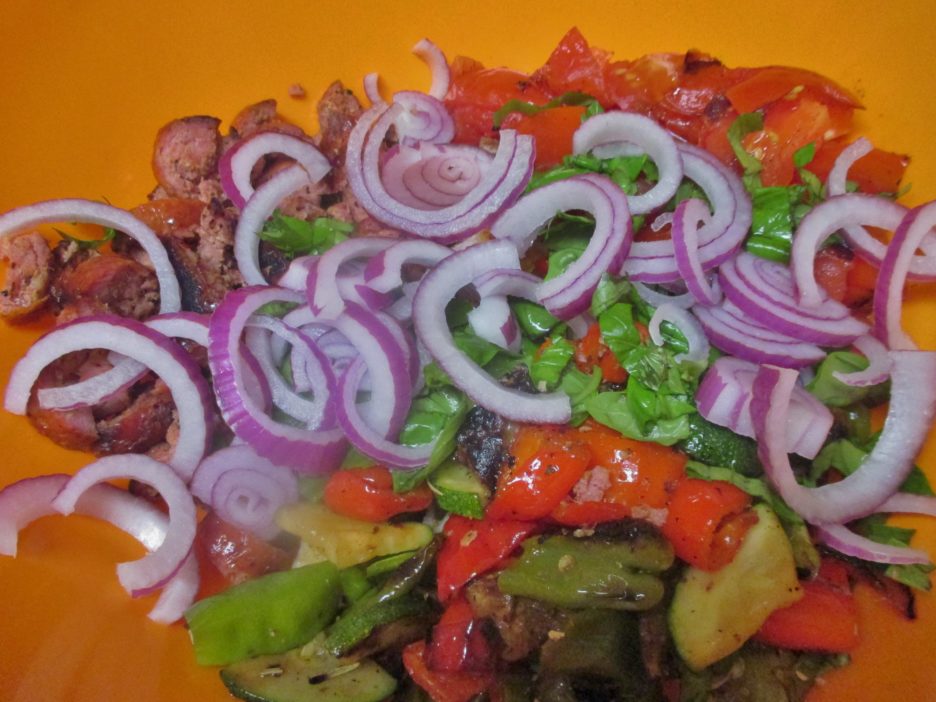
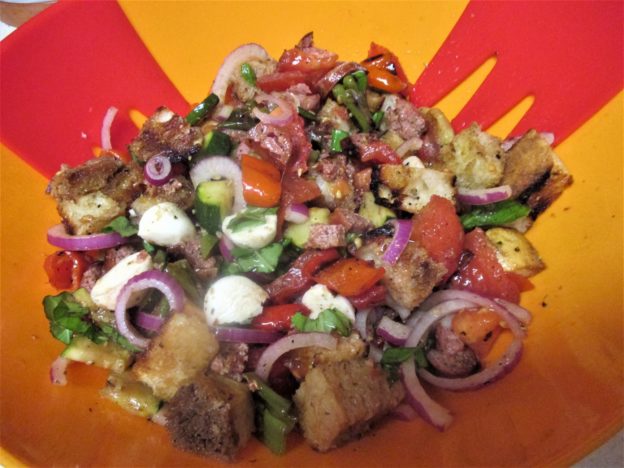
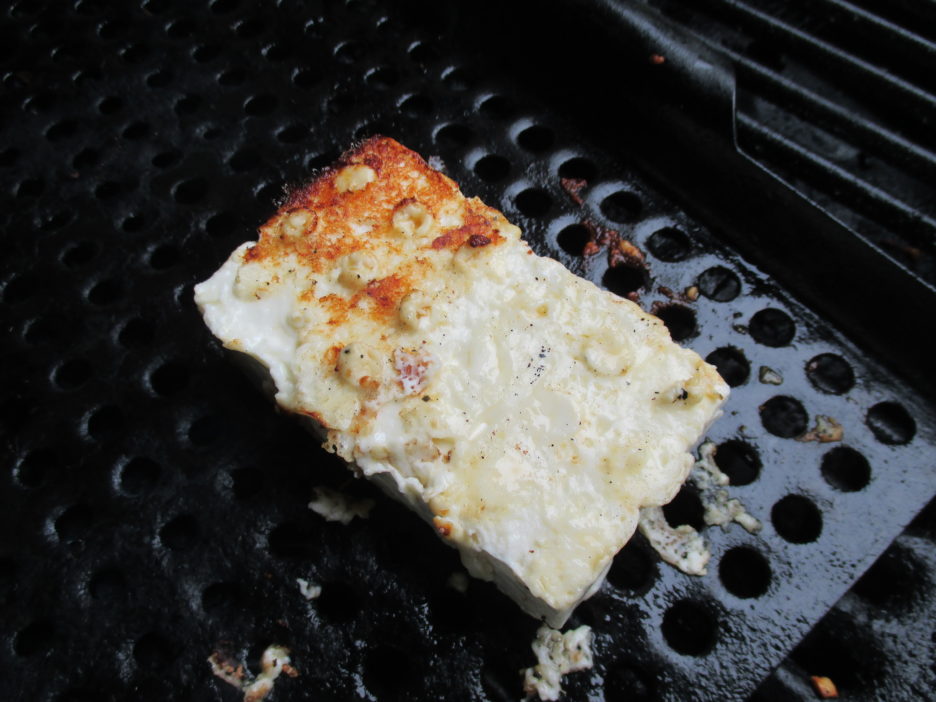
It is firm and dense enough to hold up to the grill’s heat though it does need to be watched carefully. The time and effort is worth it.
  6. Herbs make everything better. Chop up a handful of whatever you love and add them to the salad. Basil, parsley, and chives are my current go tos.
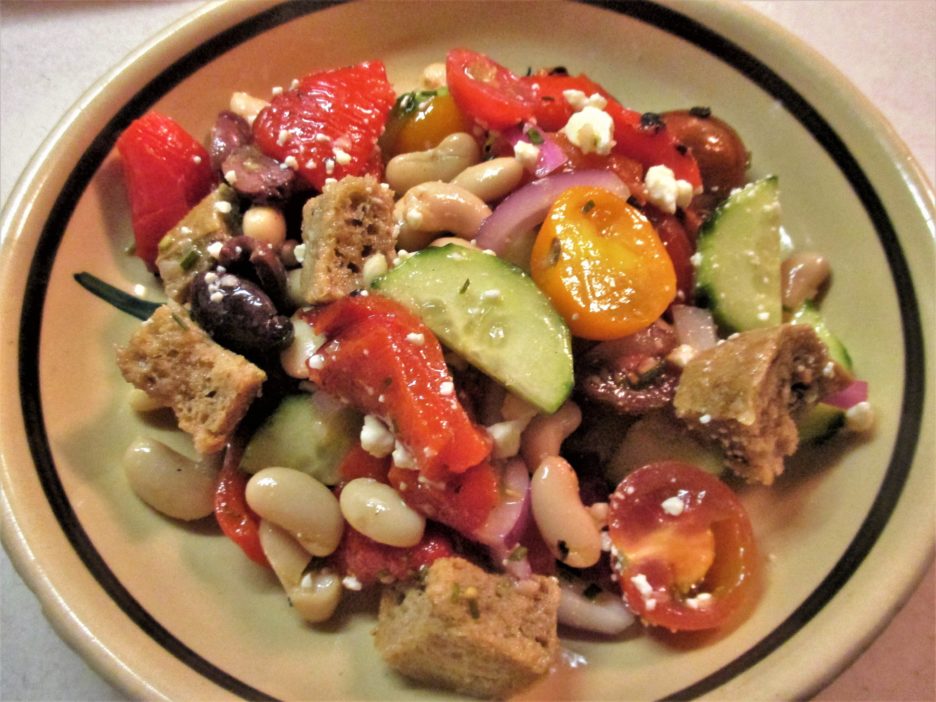
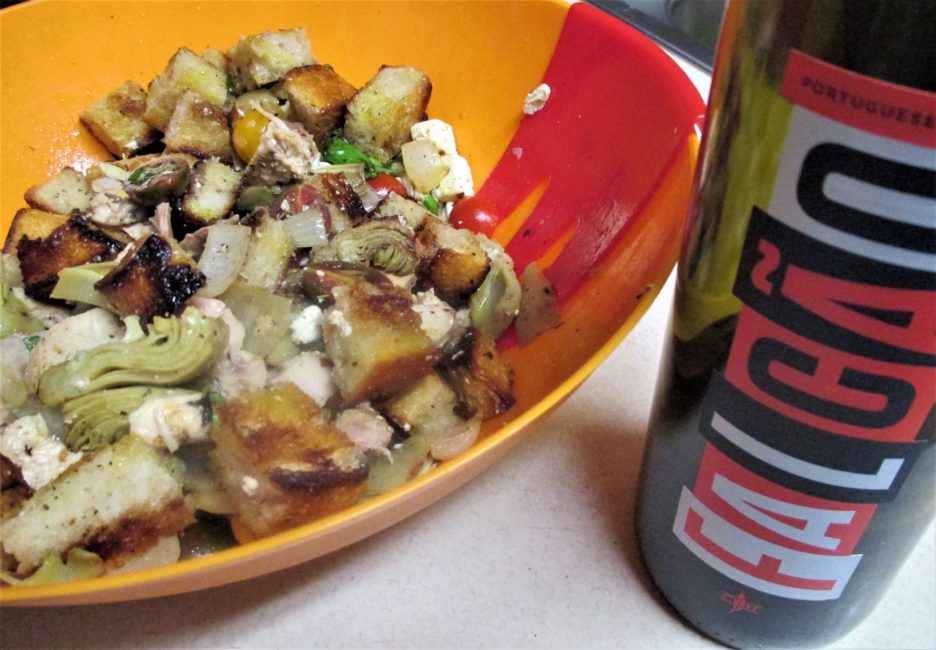
Here is a Basic Recipe for a Summer Panzanella Salad…it is very grill forward and leaves room for all kinds of interpretation.
    Summer Panzanella Salad

    A basic recipe for Panzanella salad that takes advantage of Summer's bounty.

    Servings: 2
    Ingredients
    • 3-4 Ounces Crusty Bread Stale is great!
    • 1/4 Cup Olive Oil
    • 2 Cloves Garlic Smashed
    • 1 Medium Onion Any variety
    • 2-3 Medium Tomatoes
    • 2 Cups Chopped Vegetables Whatever you love
    • 1/2 Cup Chopped Herbs Any variety to taste
    • 2 Tbsp. Vinegar Your choice
    • 1 Cup Chopped Protein Anything
    • 2 Ounces Cheese
    • Salt & Pepper To Taste
    Instructions
    1. In a small pan heat the oil and garlic gently . Once the garlic begins to sizzle take it off the heat and let it steep.

    2. Slice the bread about 1 inch thick. Brush both cut sides with a little of the olive oil and toast in the oven or on the grill. It should be dry and lightly browned. Let it cool then cut it into cubes. Place in the bottom of a deep bowl.

    3. If you are grilling vegetables, brush them lightly with some of the garlic olive oil and place on a medium grill. Tomatoes can be cut in half horizontally  and will only take a few minutes. Cherry tomatoes can be skewered. Other vegetables whether cooked whole or chopped should be tender and lightly charred. Cut any whole vegetables into bite size pieces. Put these on top of the bread cubes.

    4. Cut or chop raw vegetables into bite size pieces. Roughly chop the herbs. Cut your protein into bite size pieces as well. All of these can be put on top of the bread cubes. Toss everything together.

    5. Add the vinegar to the remaining garlic olive oil and season with salt and pepper. Mix well. Pour the dressing over the salad and toss to combine. If the salad seems a bit dry add a bit more olive oil. 

    6. Let the salad sit for 15-20 minutes to allow the flavors to blend.  Taste and adjust any seasonings. Divide between 2 plates and serve.

    As you can see, this is a very general and basic recipe that will lend itself to any direction you want to head in. There are so many vegetables that would enjoy winding up in this kind of salad. Play around..that’s part of what Summer is all about. Know too, that as Fall approaches and winter comes along, there will be lots more Panzanella Salads.