Let the Grilling (Season) Begin – Kale Stuffed Pork Tenderloin

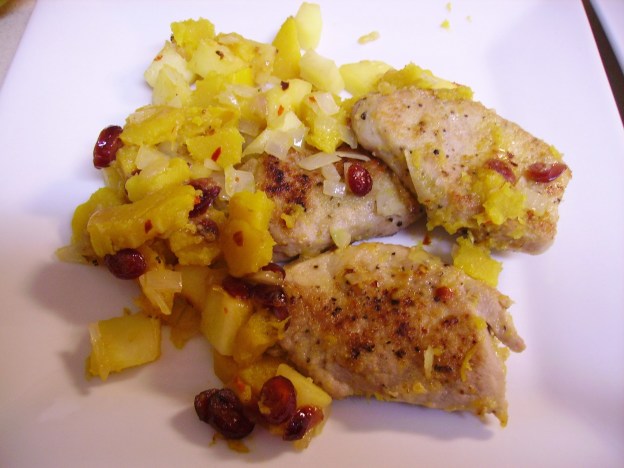
Here in the Midwest, we seem to finally be having Spring like weather, (with Memorial day just around the corner, it’s about time). Warmer weather lends itself to grilling. Lighter meals and less time spent in the kitchen are both good reasons to take the cooking outside. Even though we grill year round, there’s something special about cooking out in warmer weather. The fact that it is staying light longer makes lingering outdoors to enjoy the warmer temperatures a real pleasure. Plain and simple, grilling just seems like the right thing to do.

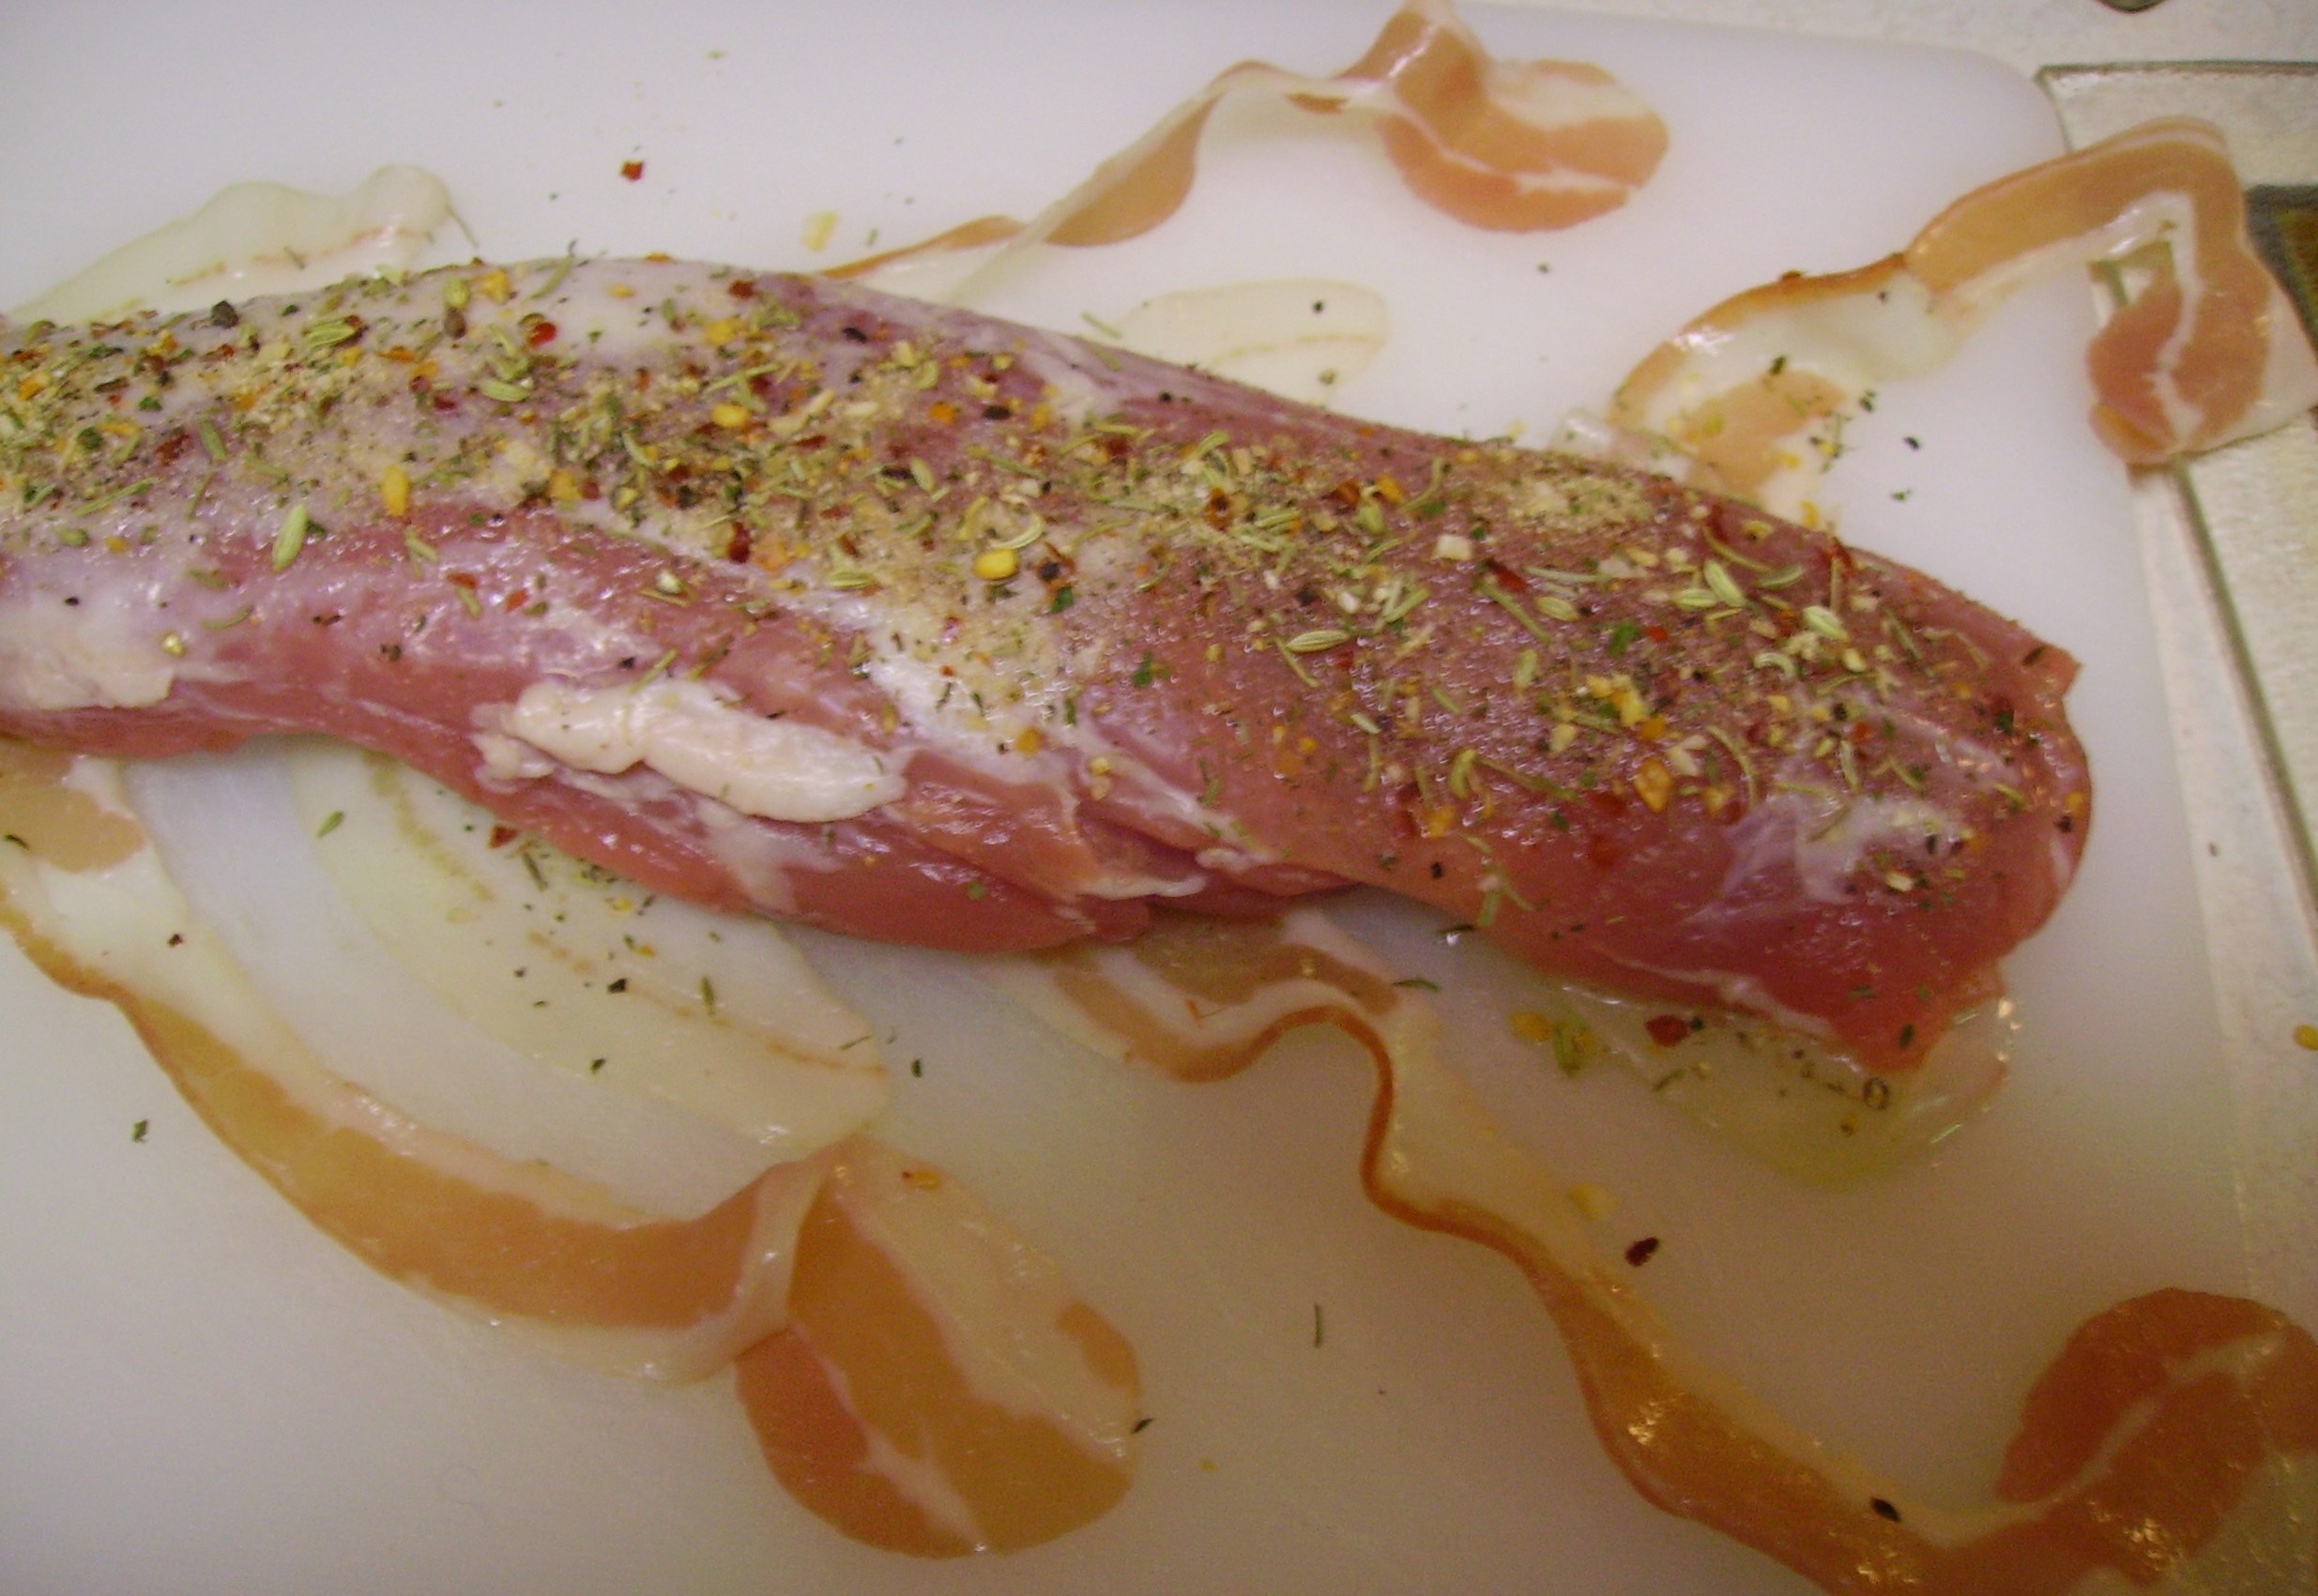
A recent outing featured the ever popular Pork Tenderloin. While this lean cut of meat can be easily decimated on the grill, a few carefully chosen steps can result in a juicy and tender piece of meat. I opted to use a stuffing to add moisture deep inside the pork. Then just to make sure that everything stayed juicy, I wrapped it in bacon. Yes folks, we had pork on pork goodness.

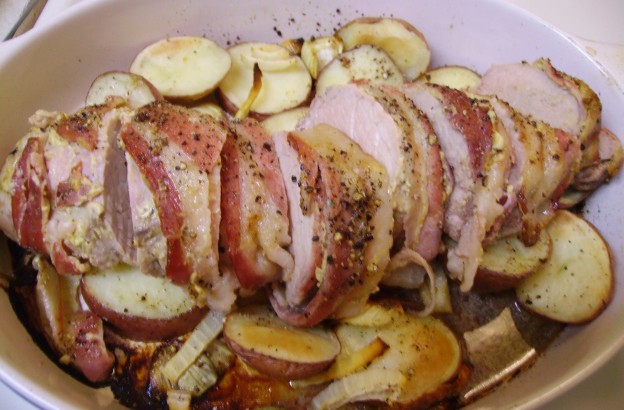
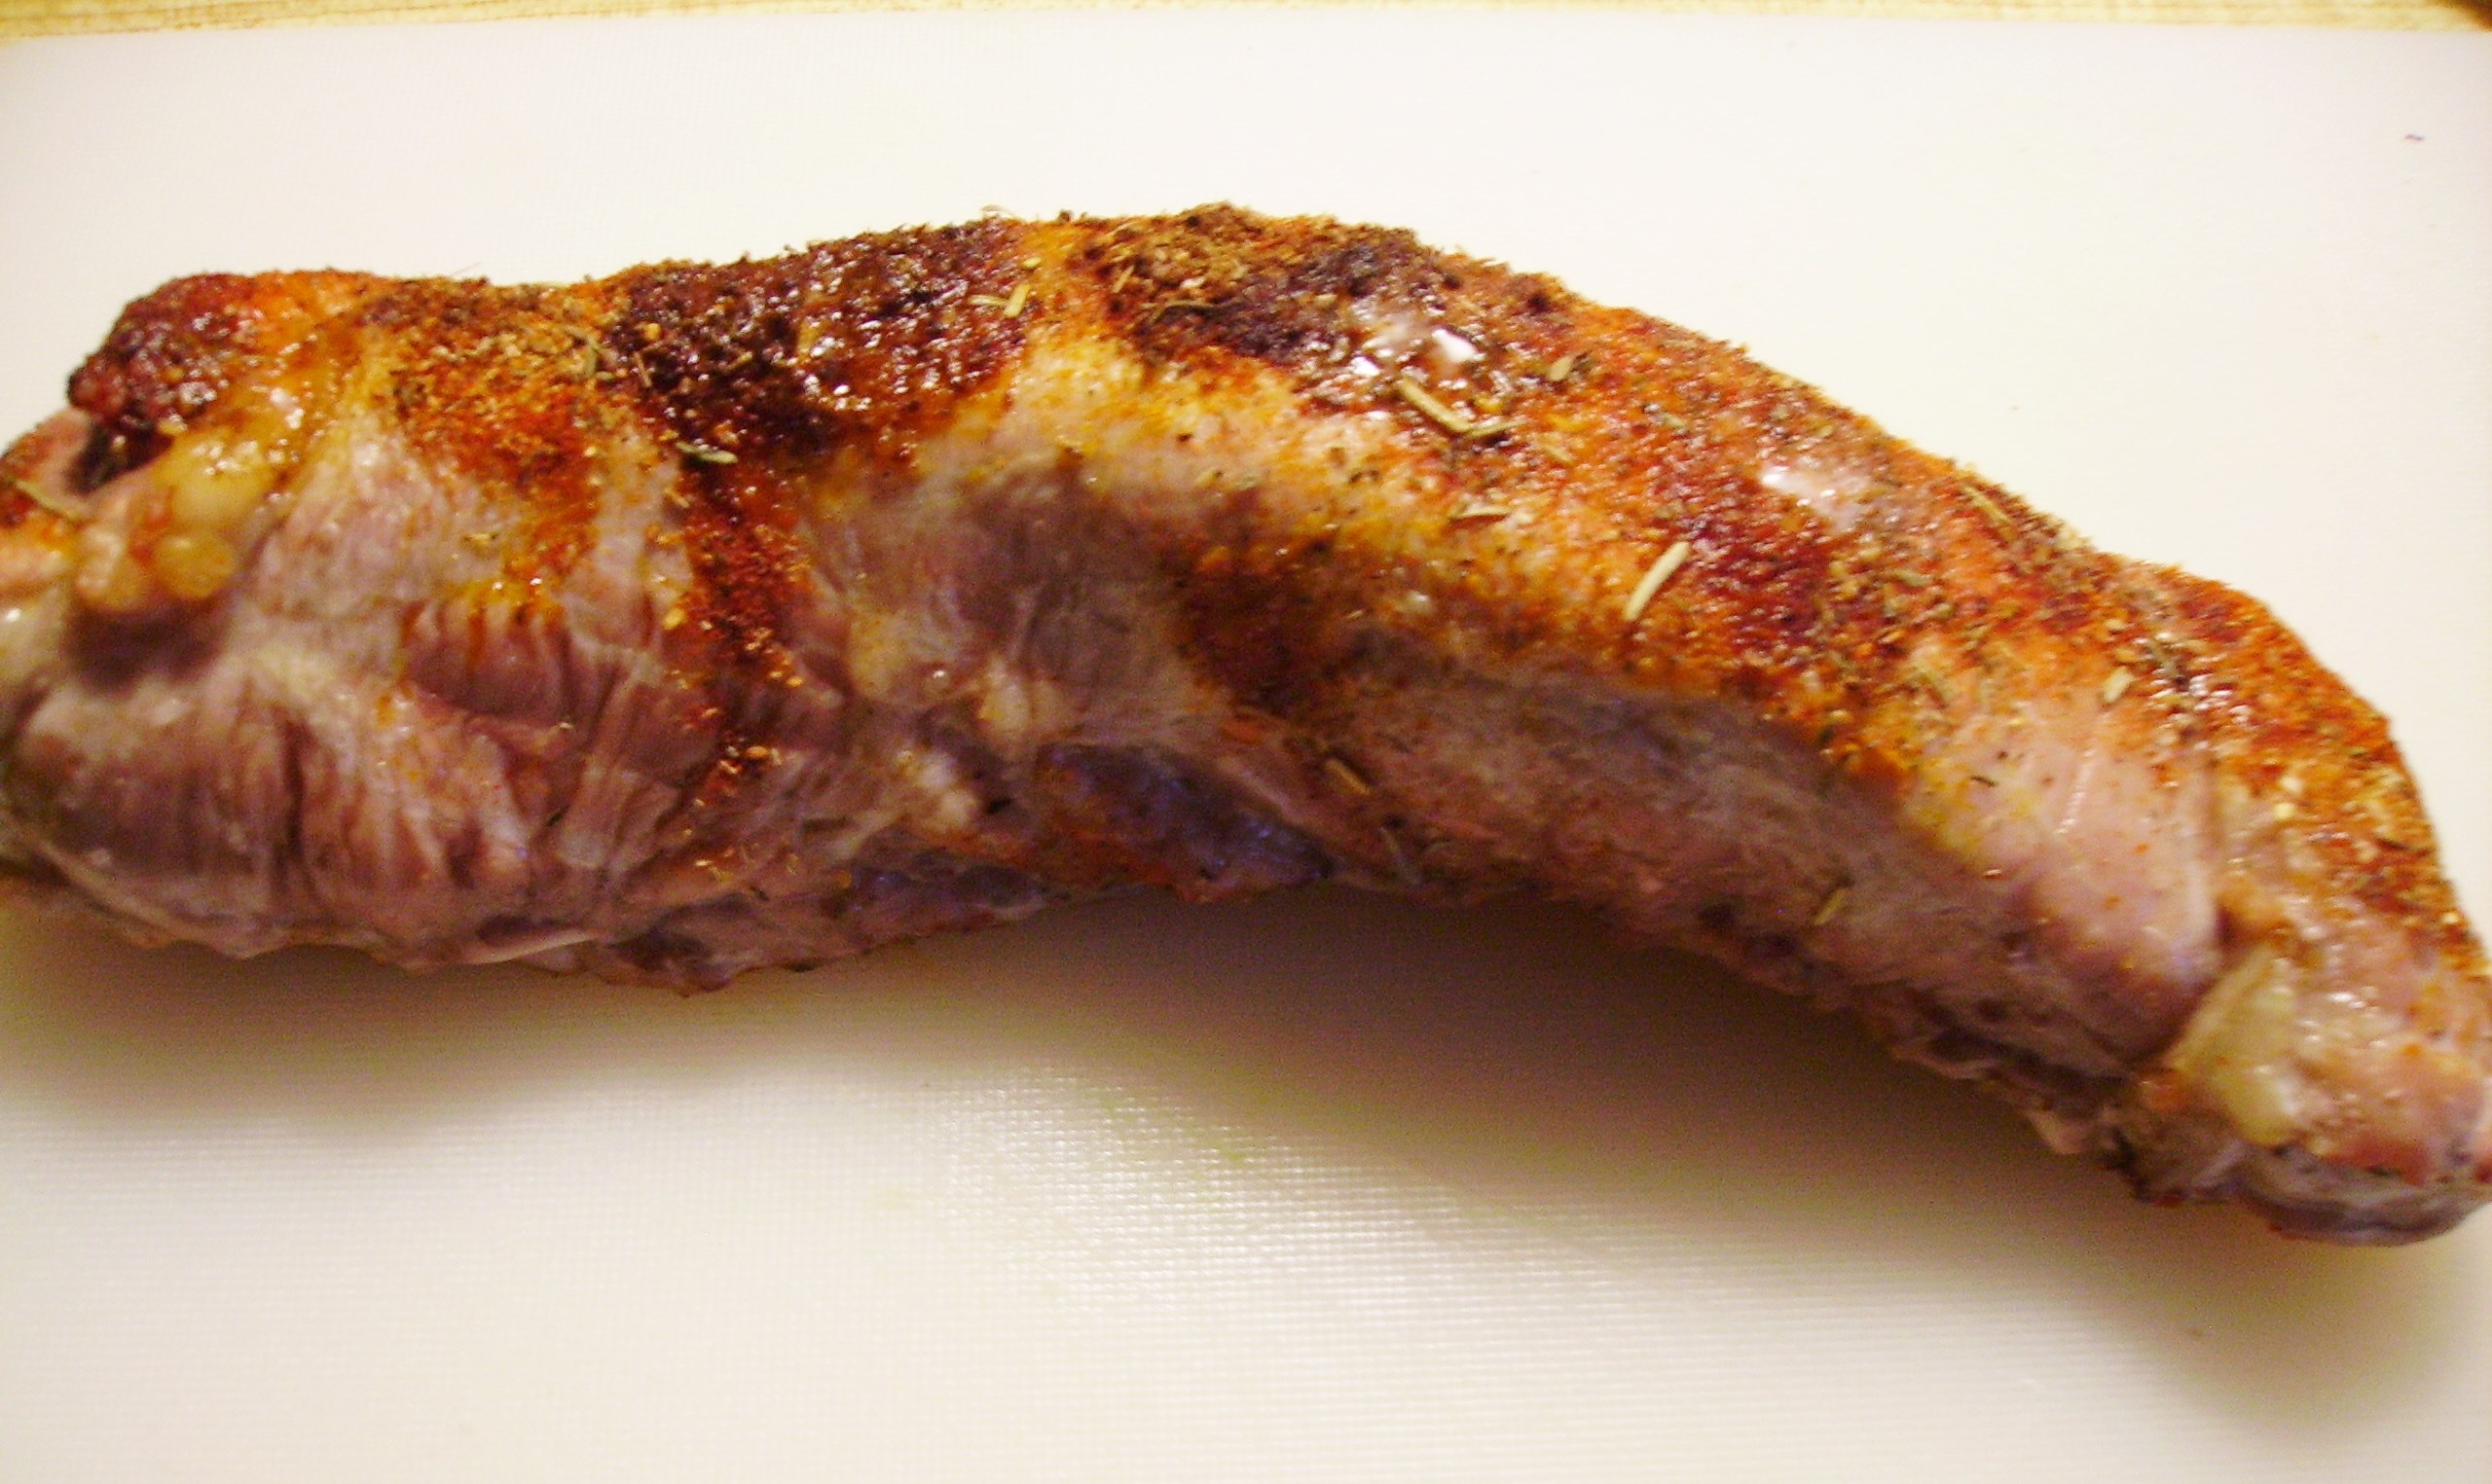
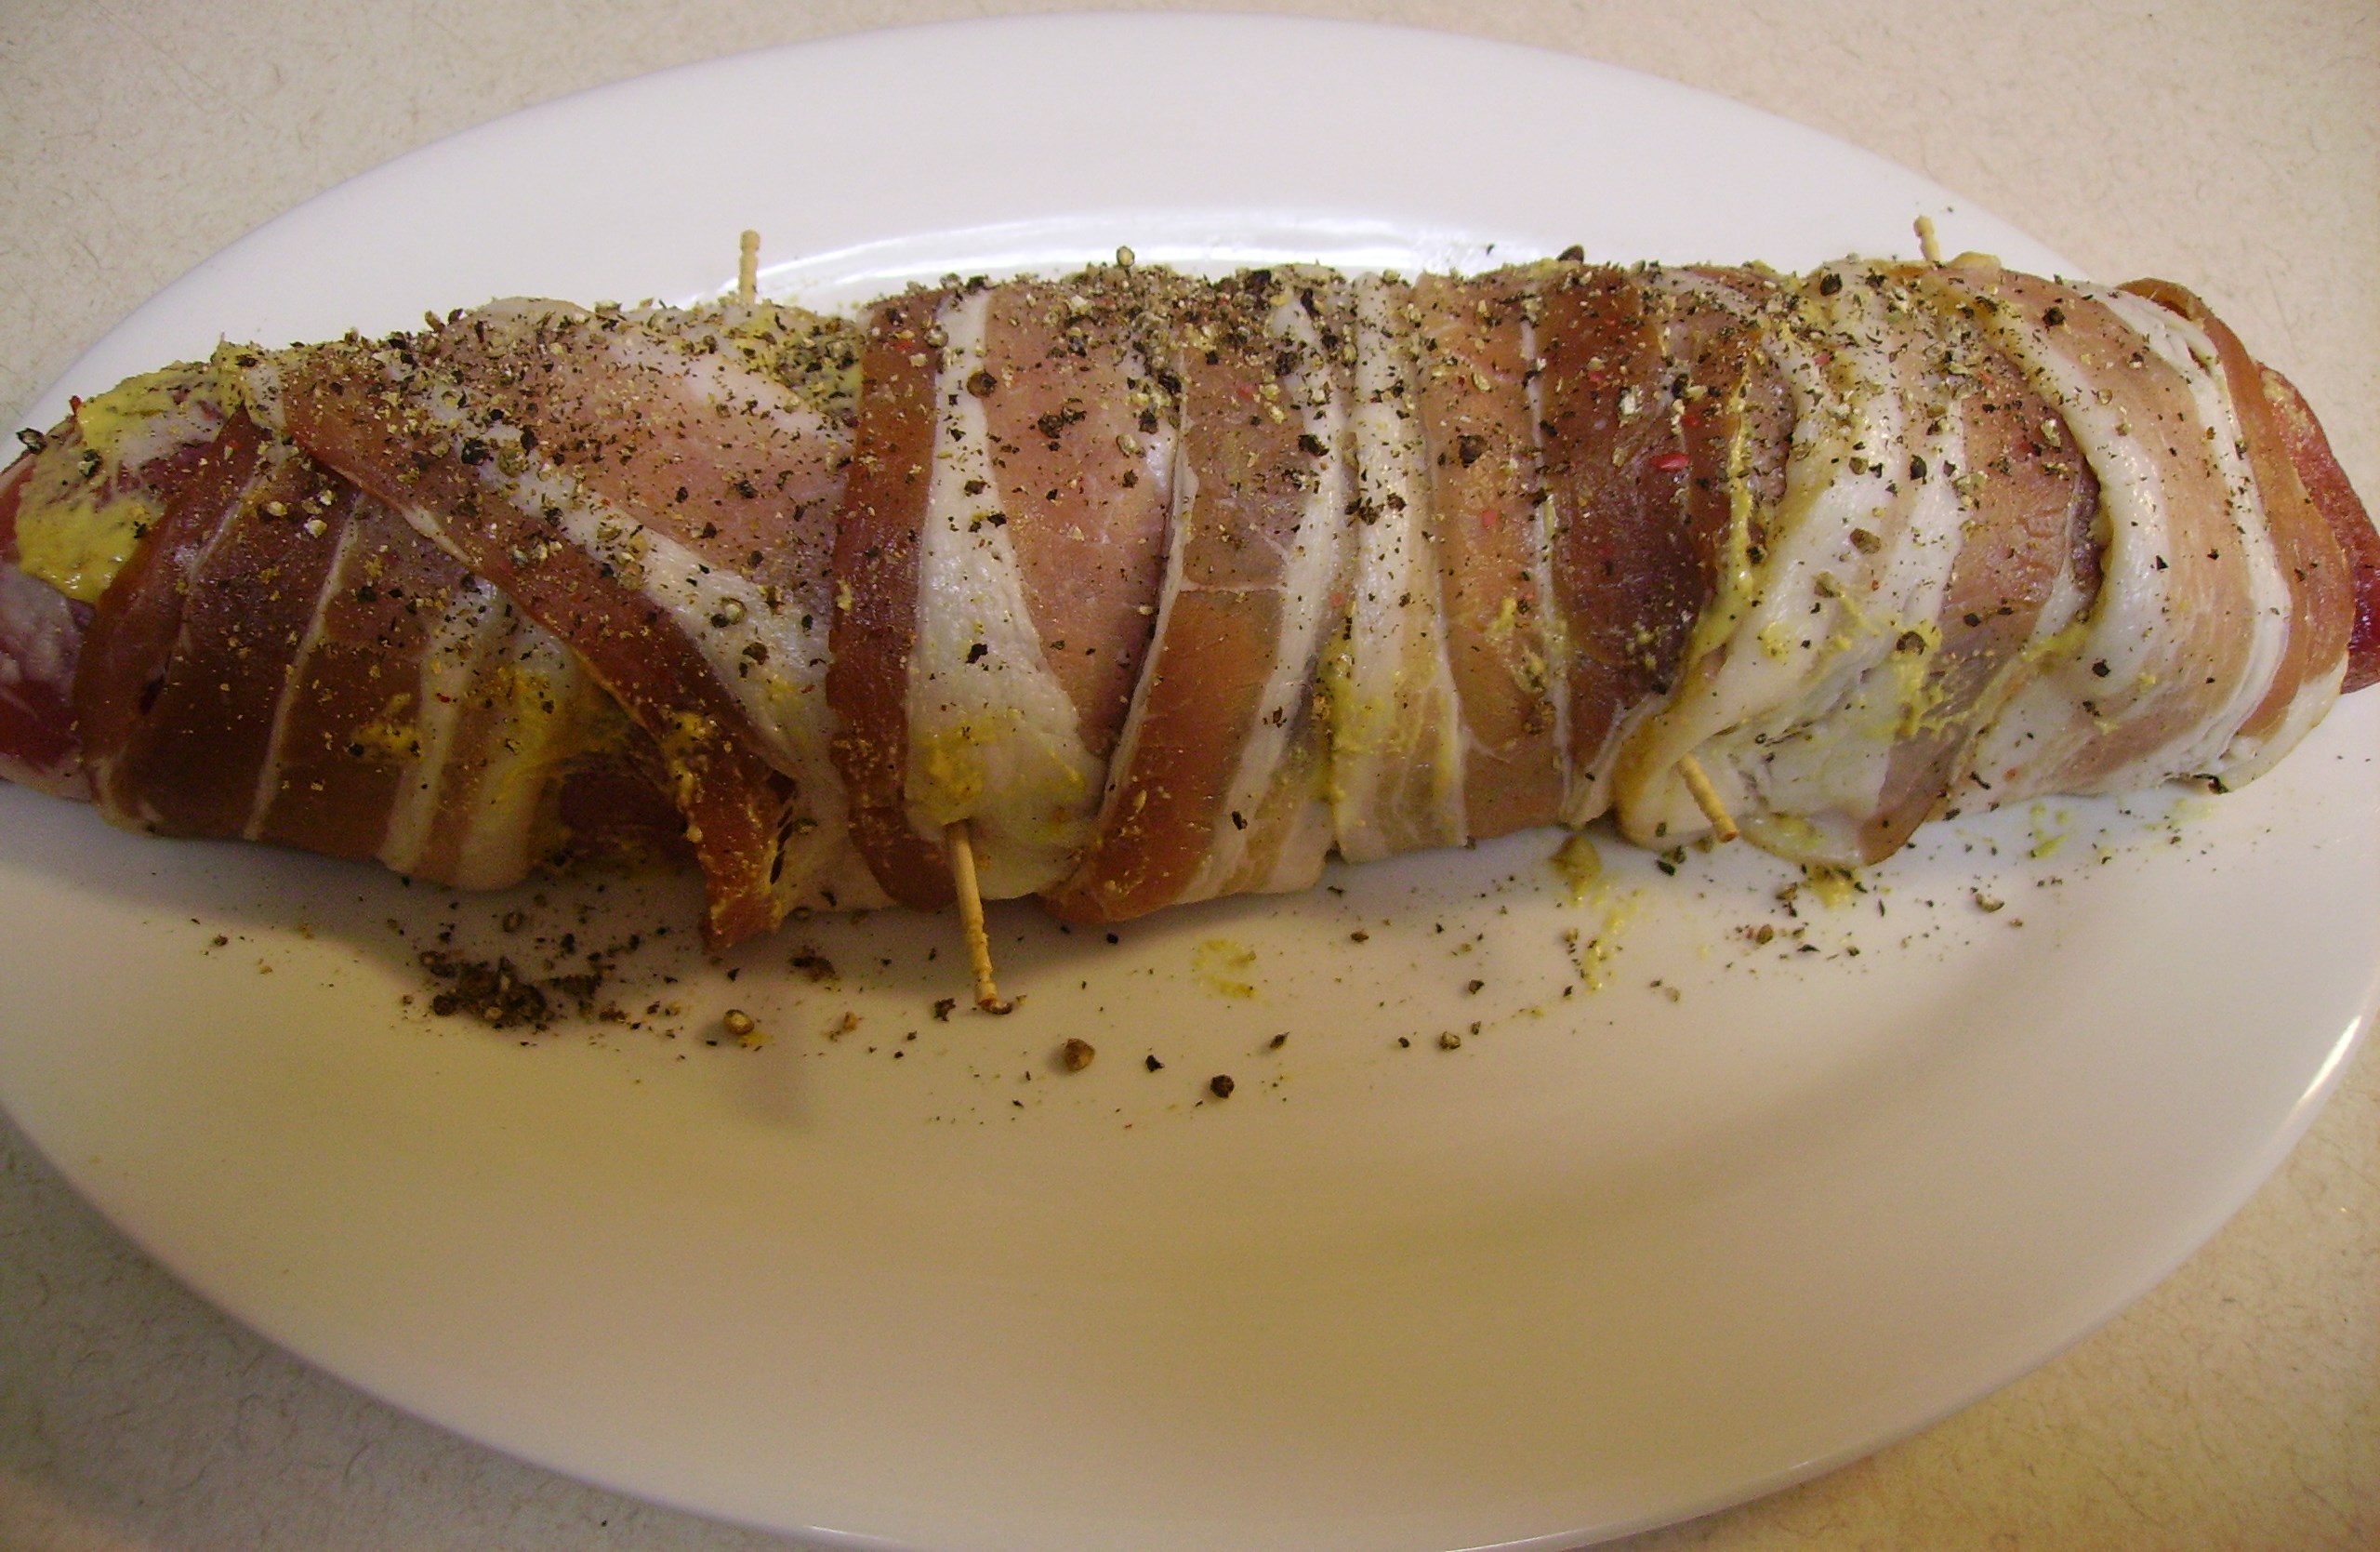
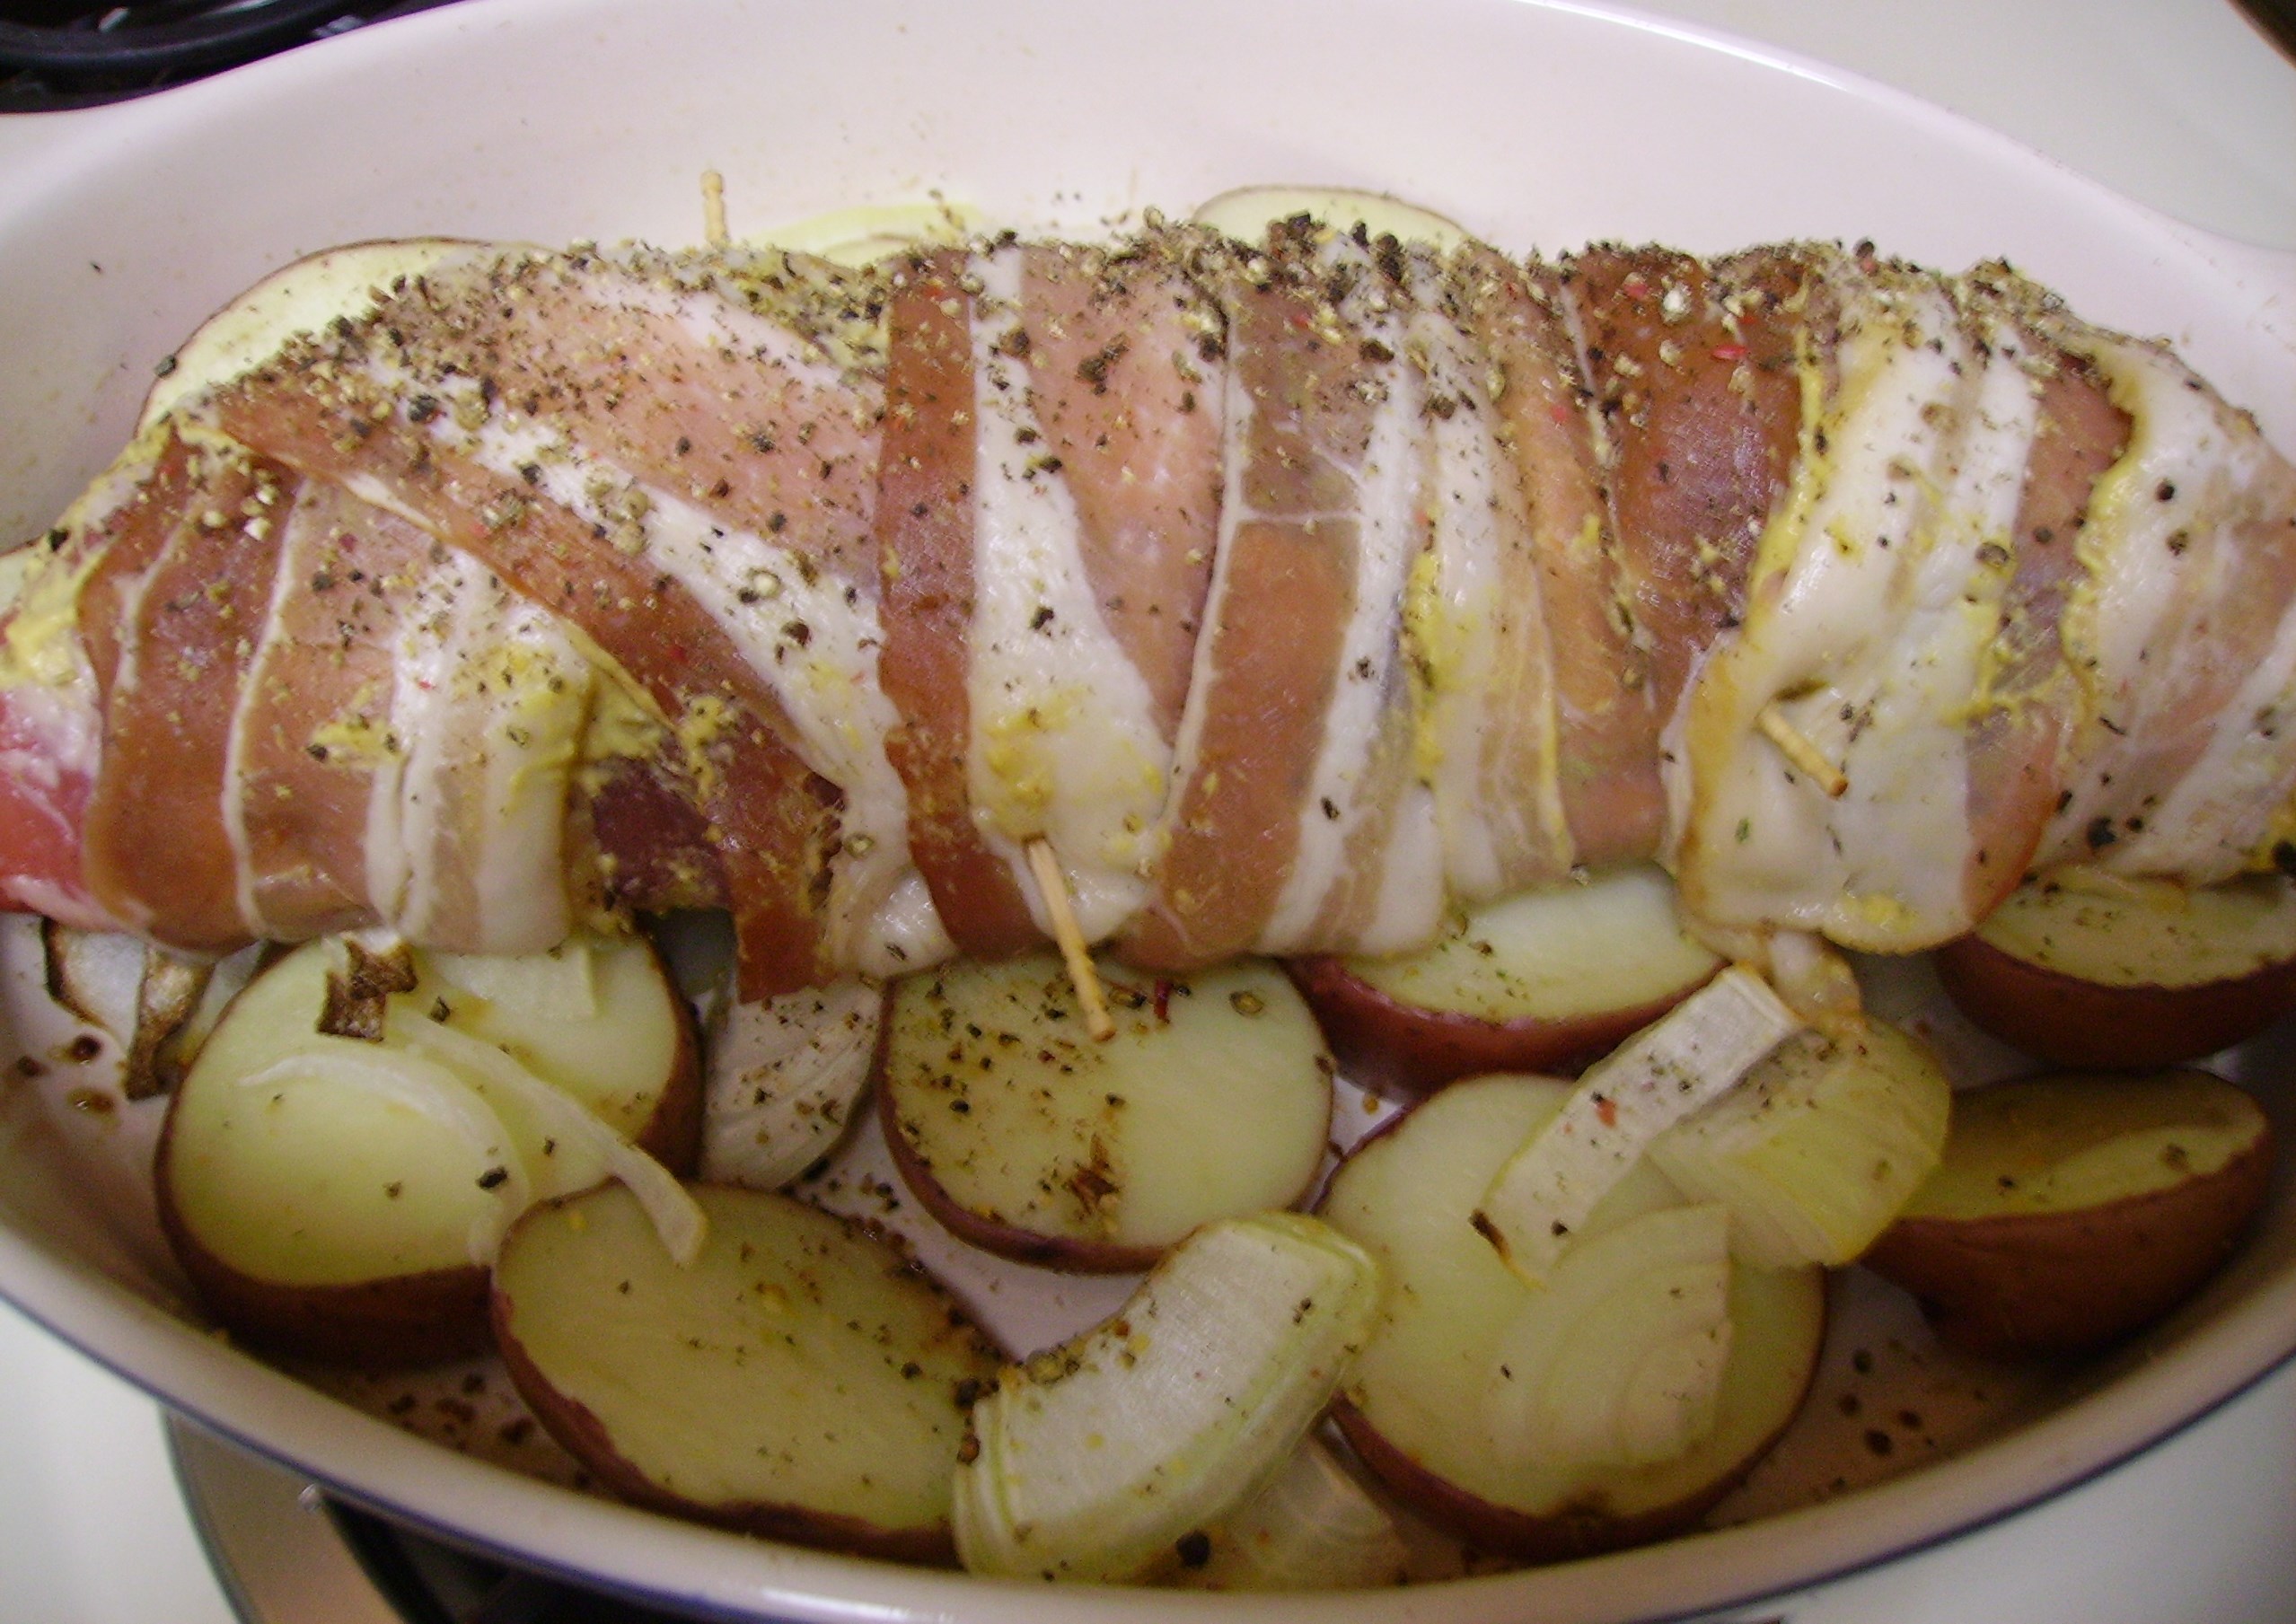
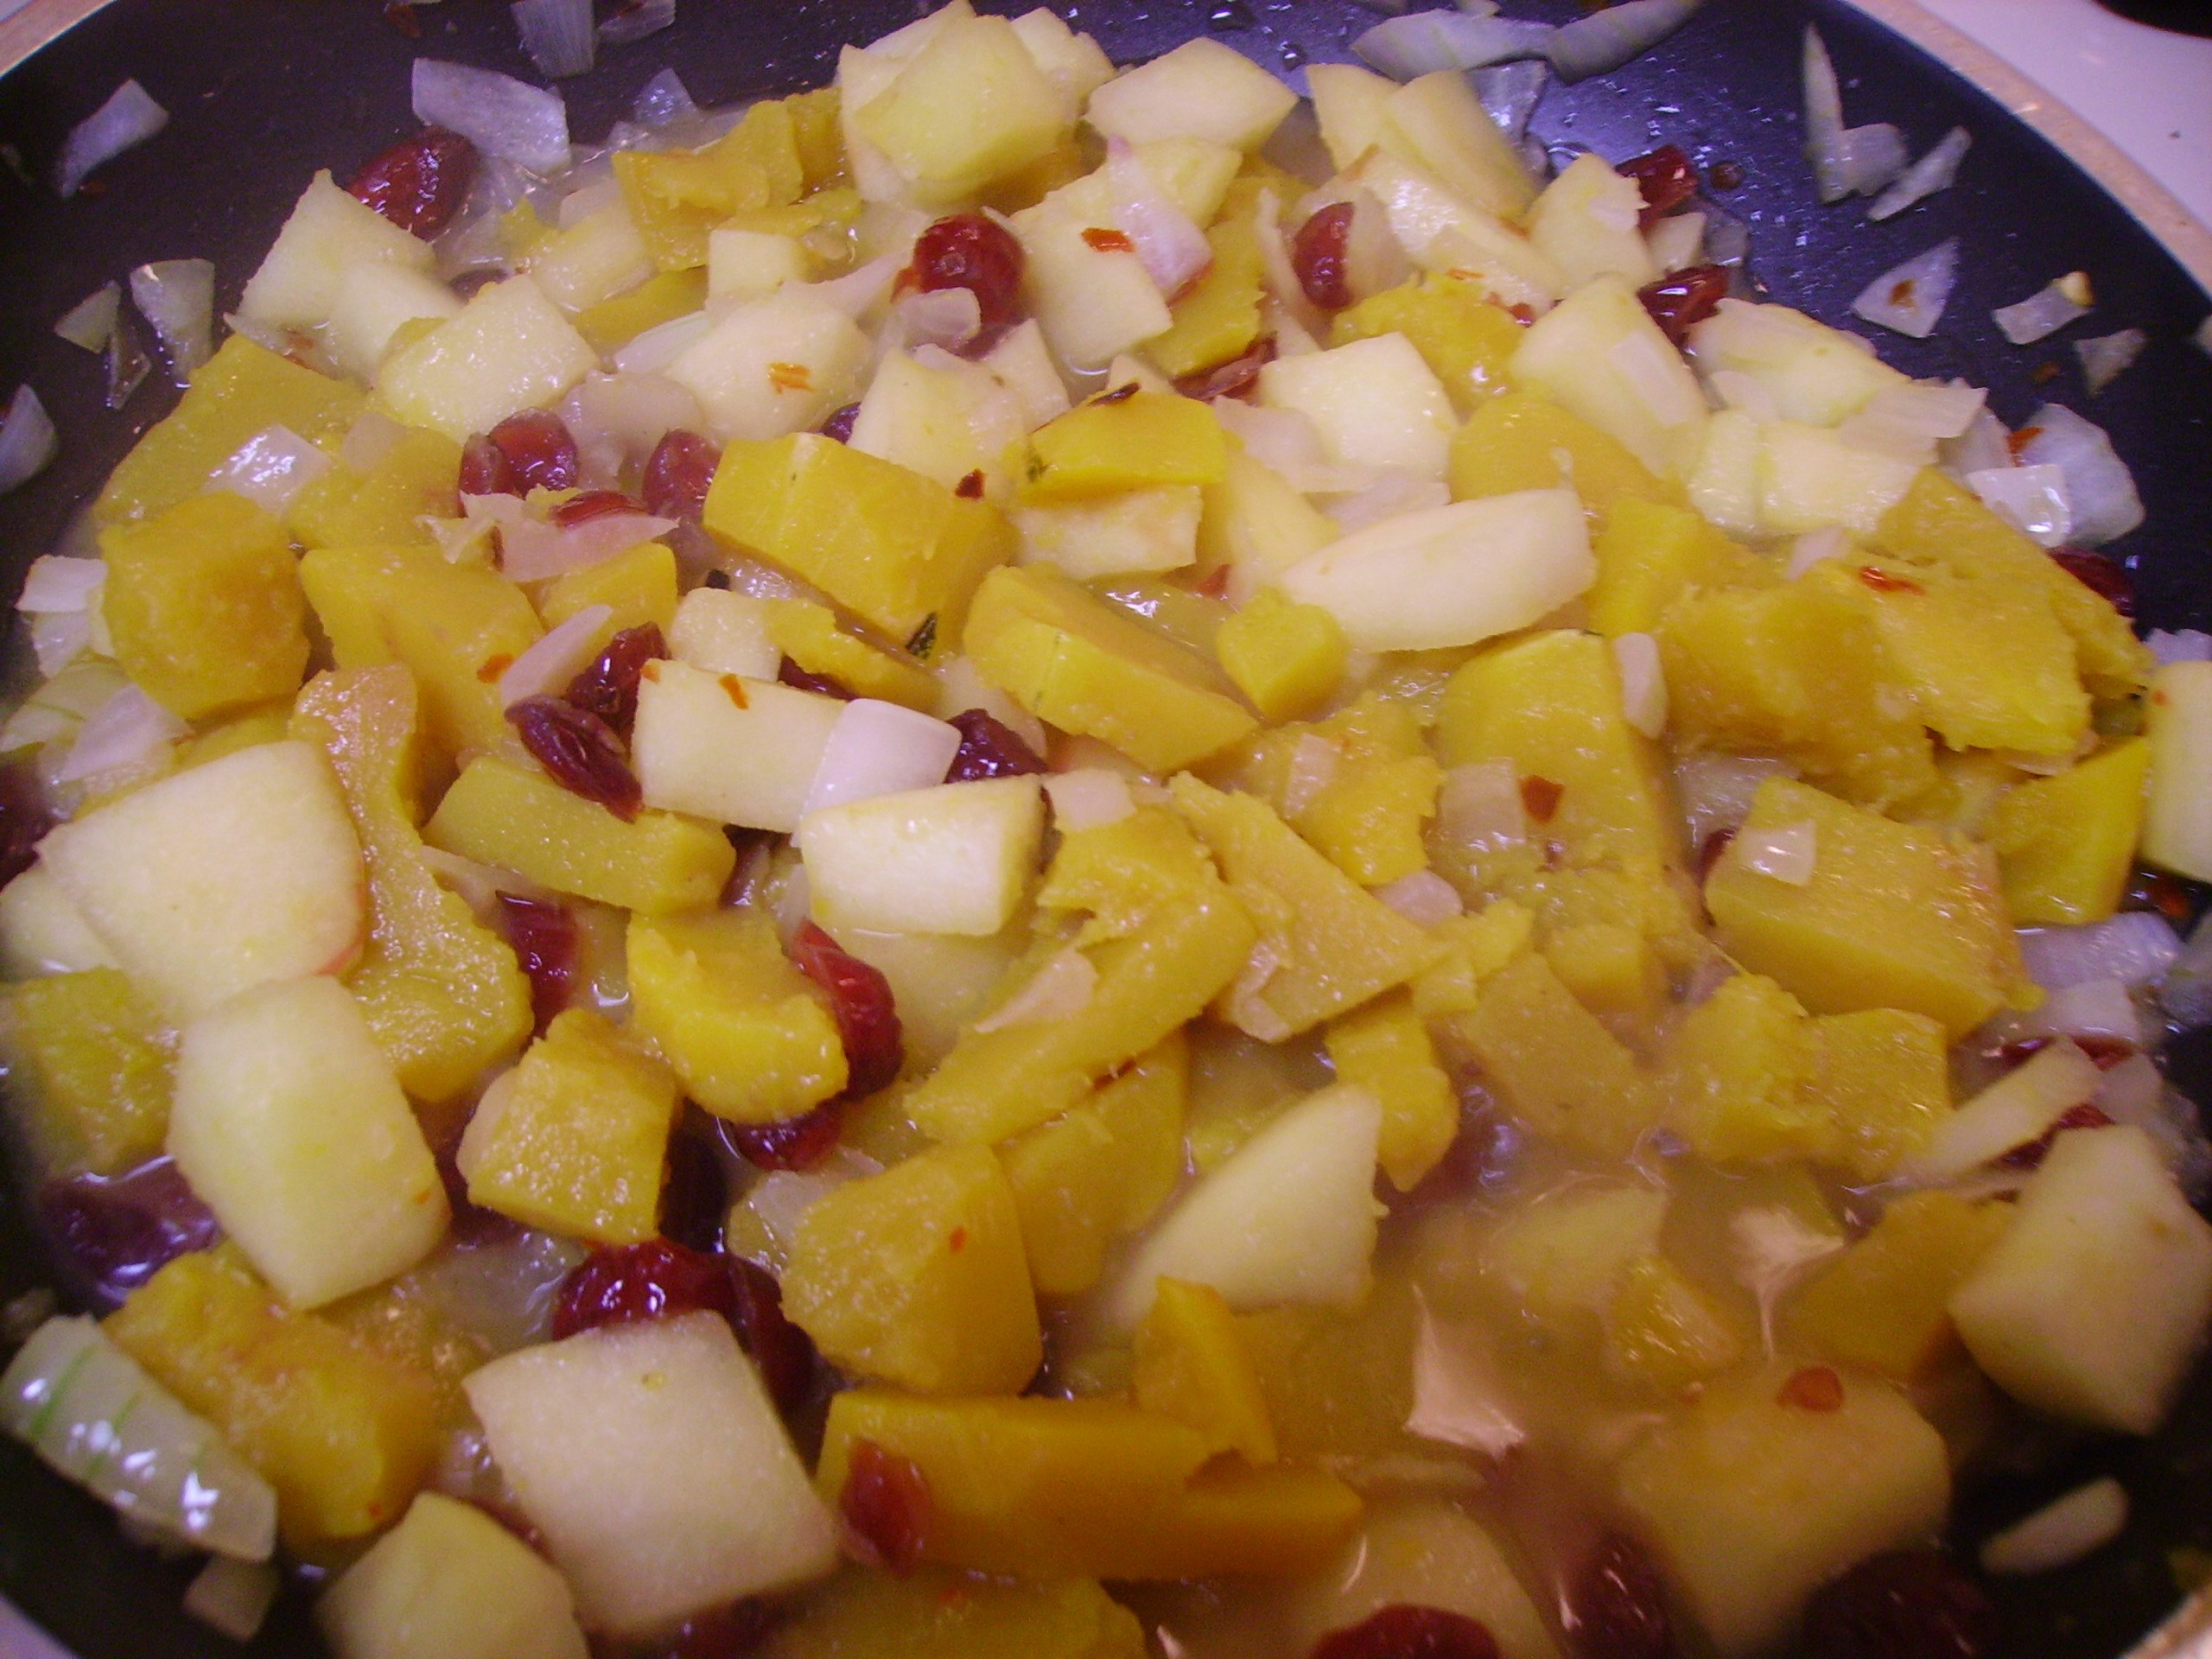
The stuffing was a simple blend of onions, garlic, and kale sautéed in olive oil that cooked down to caramelized deliciousness. A little salt and pepper was the only other addition. Once the tenderloin had been opened up, the filling went into every nook and cranny.IMG_1798
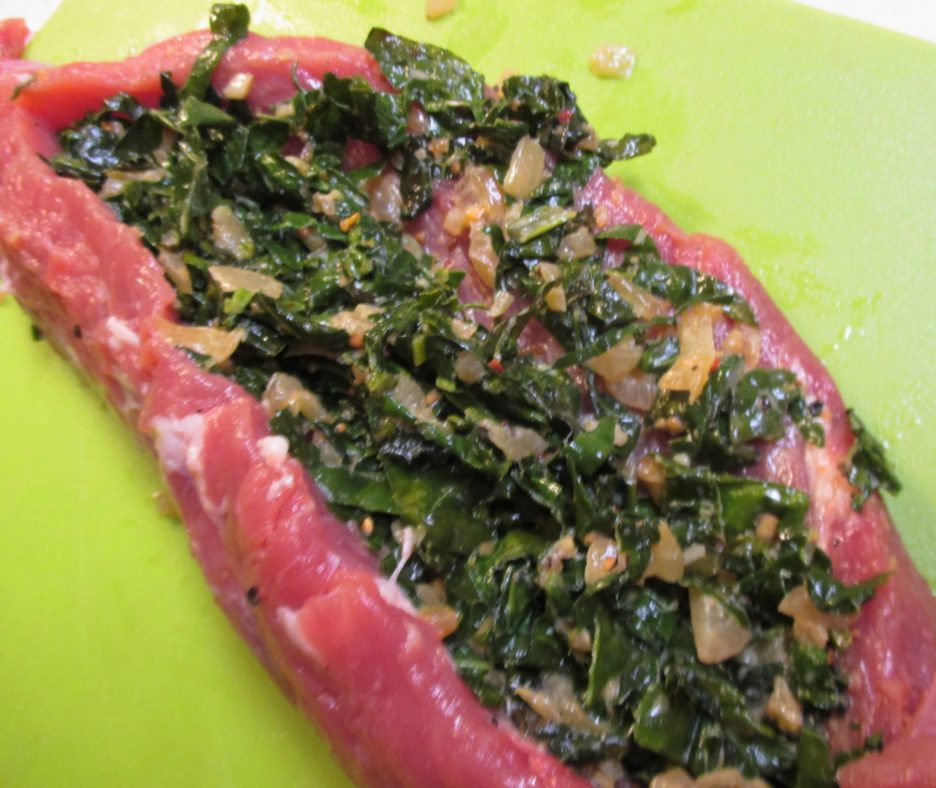
How to securely enclose this lovely filling? There is always butcher’s twine, but since the little torpedo was going on the grill, something that could provide a bit of protection seemed like a better choice. Enter Thick Cut Peppered Bacon. I precooked it a little before inrobing the tenderloin. It rendered a bit of the fat and ensured both of the porks would be ready at the same time. Again, butcher’s twine could have and probably should have come into service. Instead I used toothpicks, eight to be exact. Knowing the exact number is actually pretty important; it prevents someone getting an unexpected surprise.IMG_1800
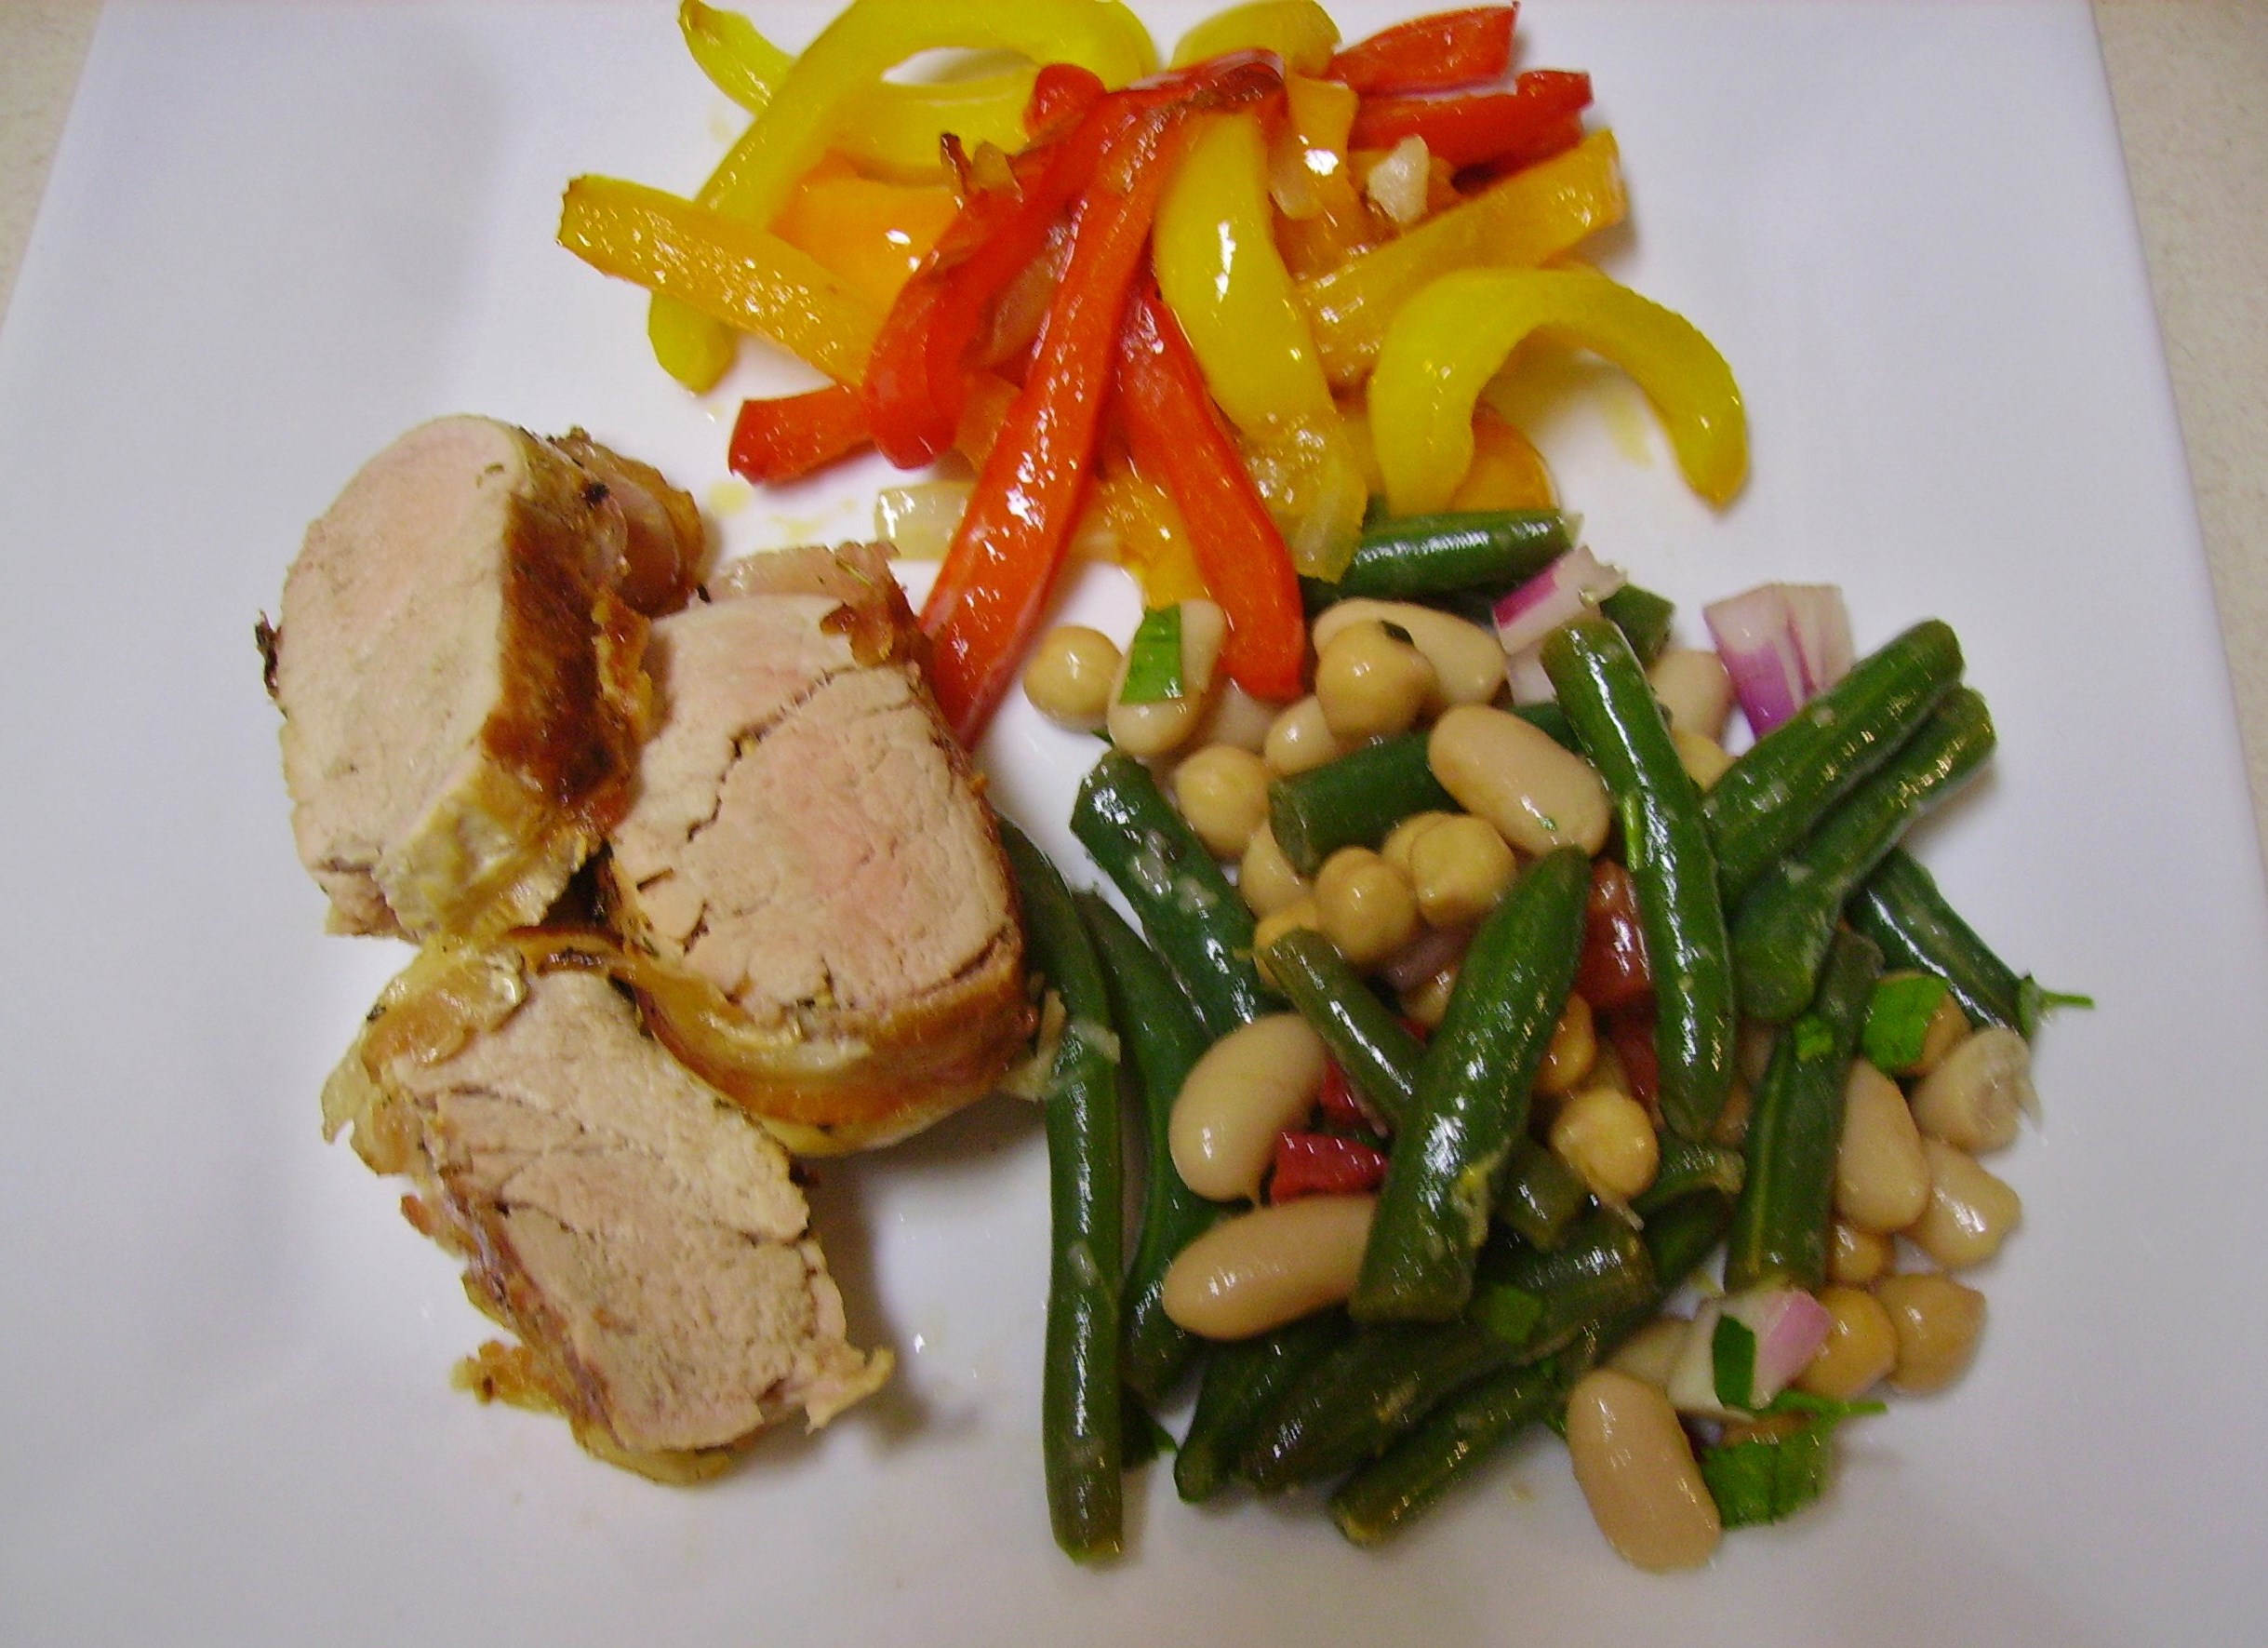
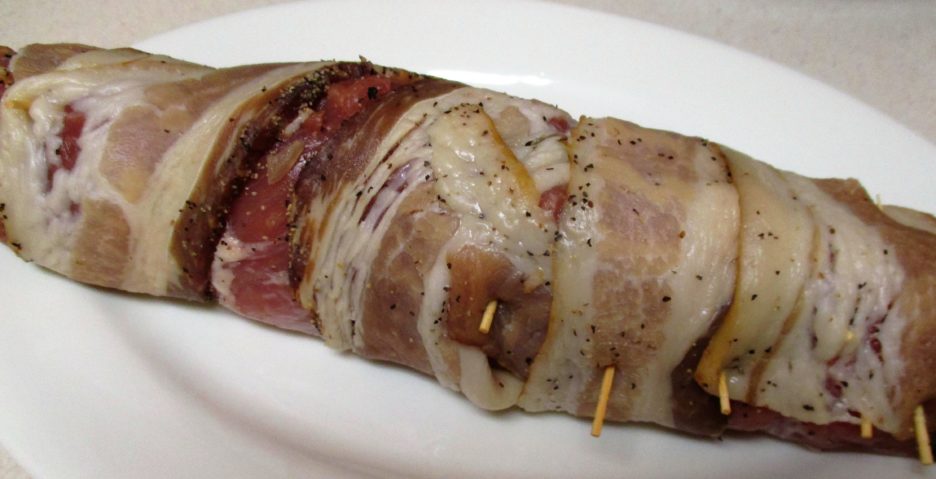
Off to the grill it went. The wonderful thing about Pork Tenderloin is that it cooks very quickly making it a perfect weeknight meal. This was average size, weighing in at around a pound and it was ready in about 25 minutes. It rested for a few minutes while the rest of the dinner came together (in this case, steamed broccoli). IMG_1804
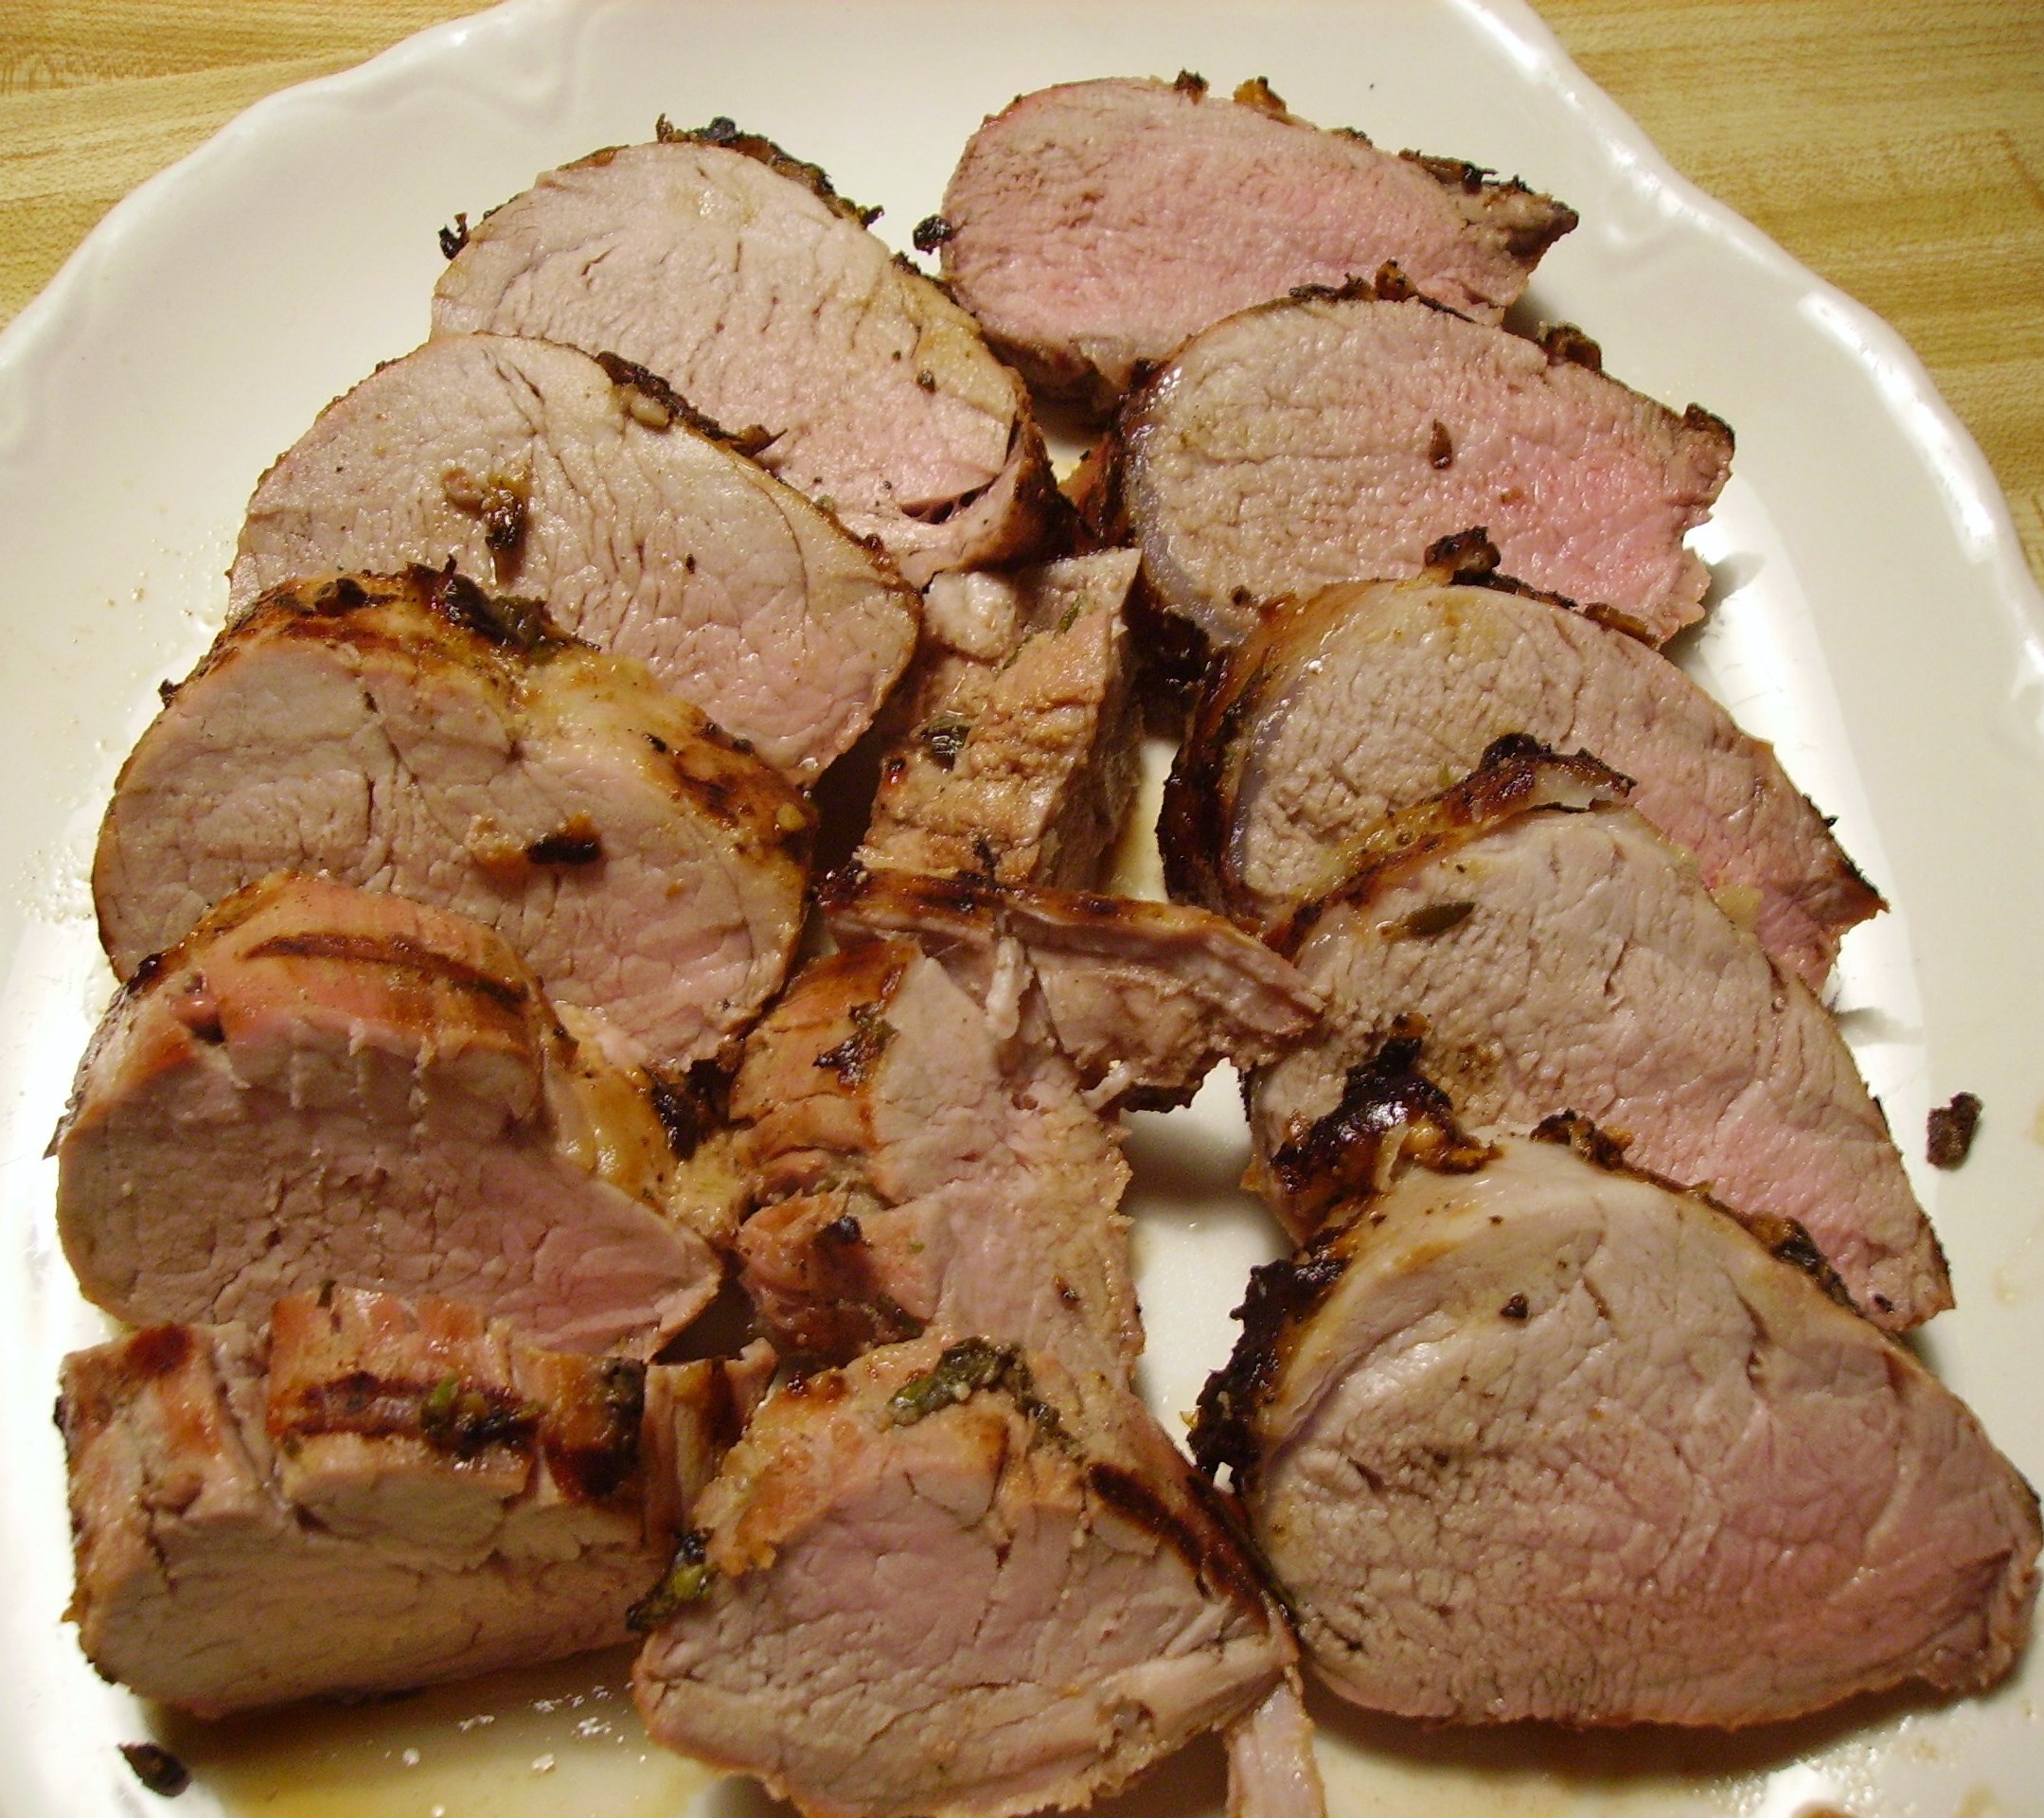
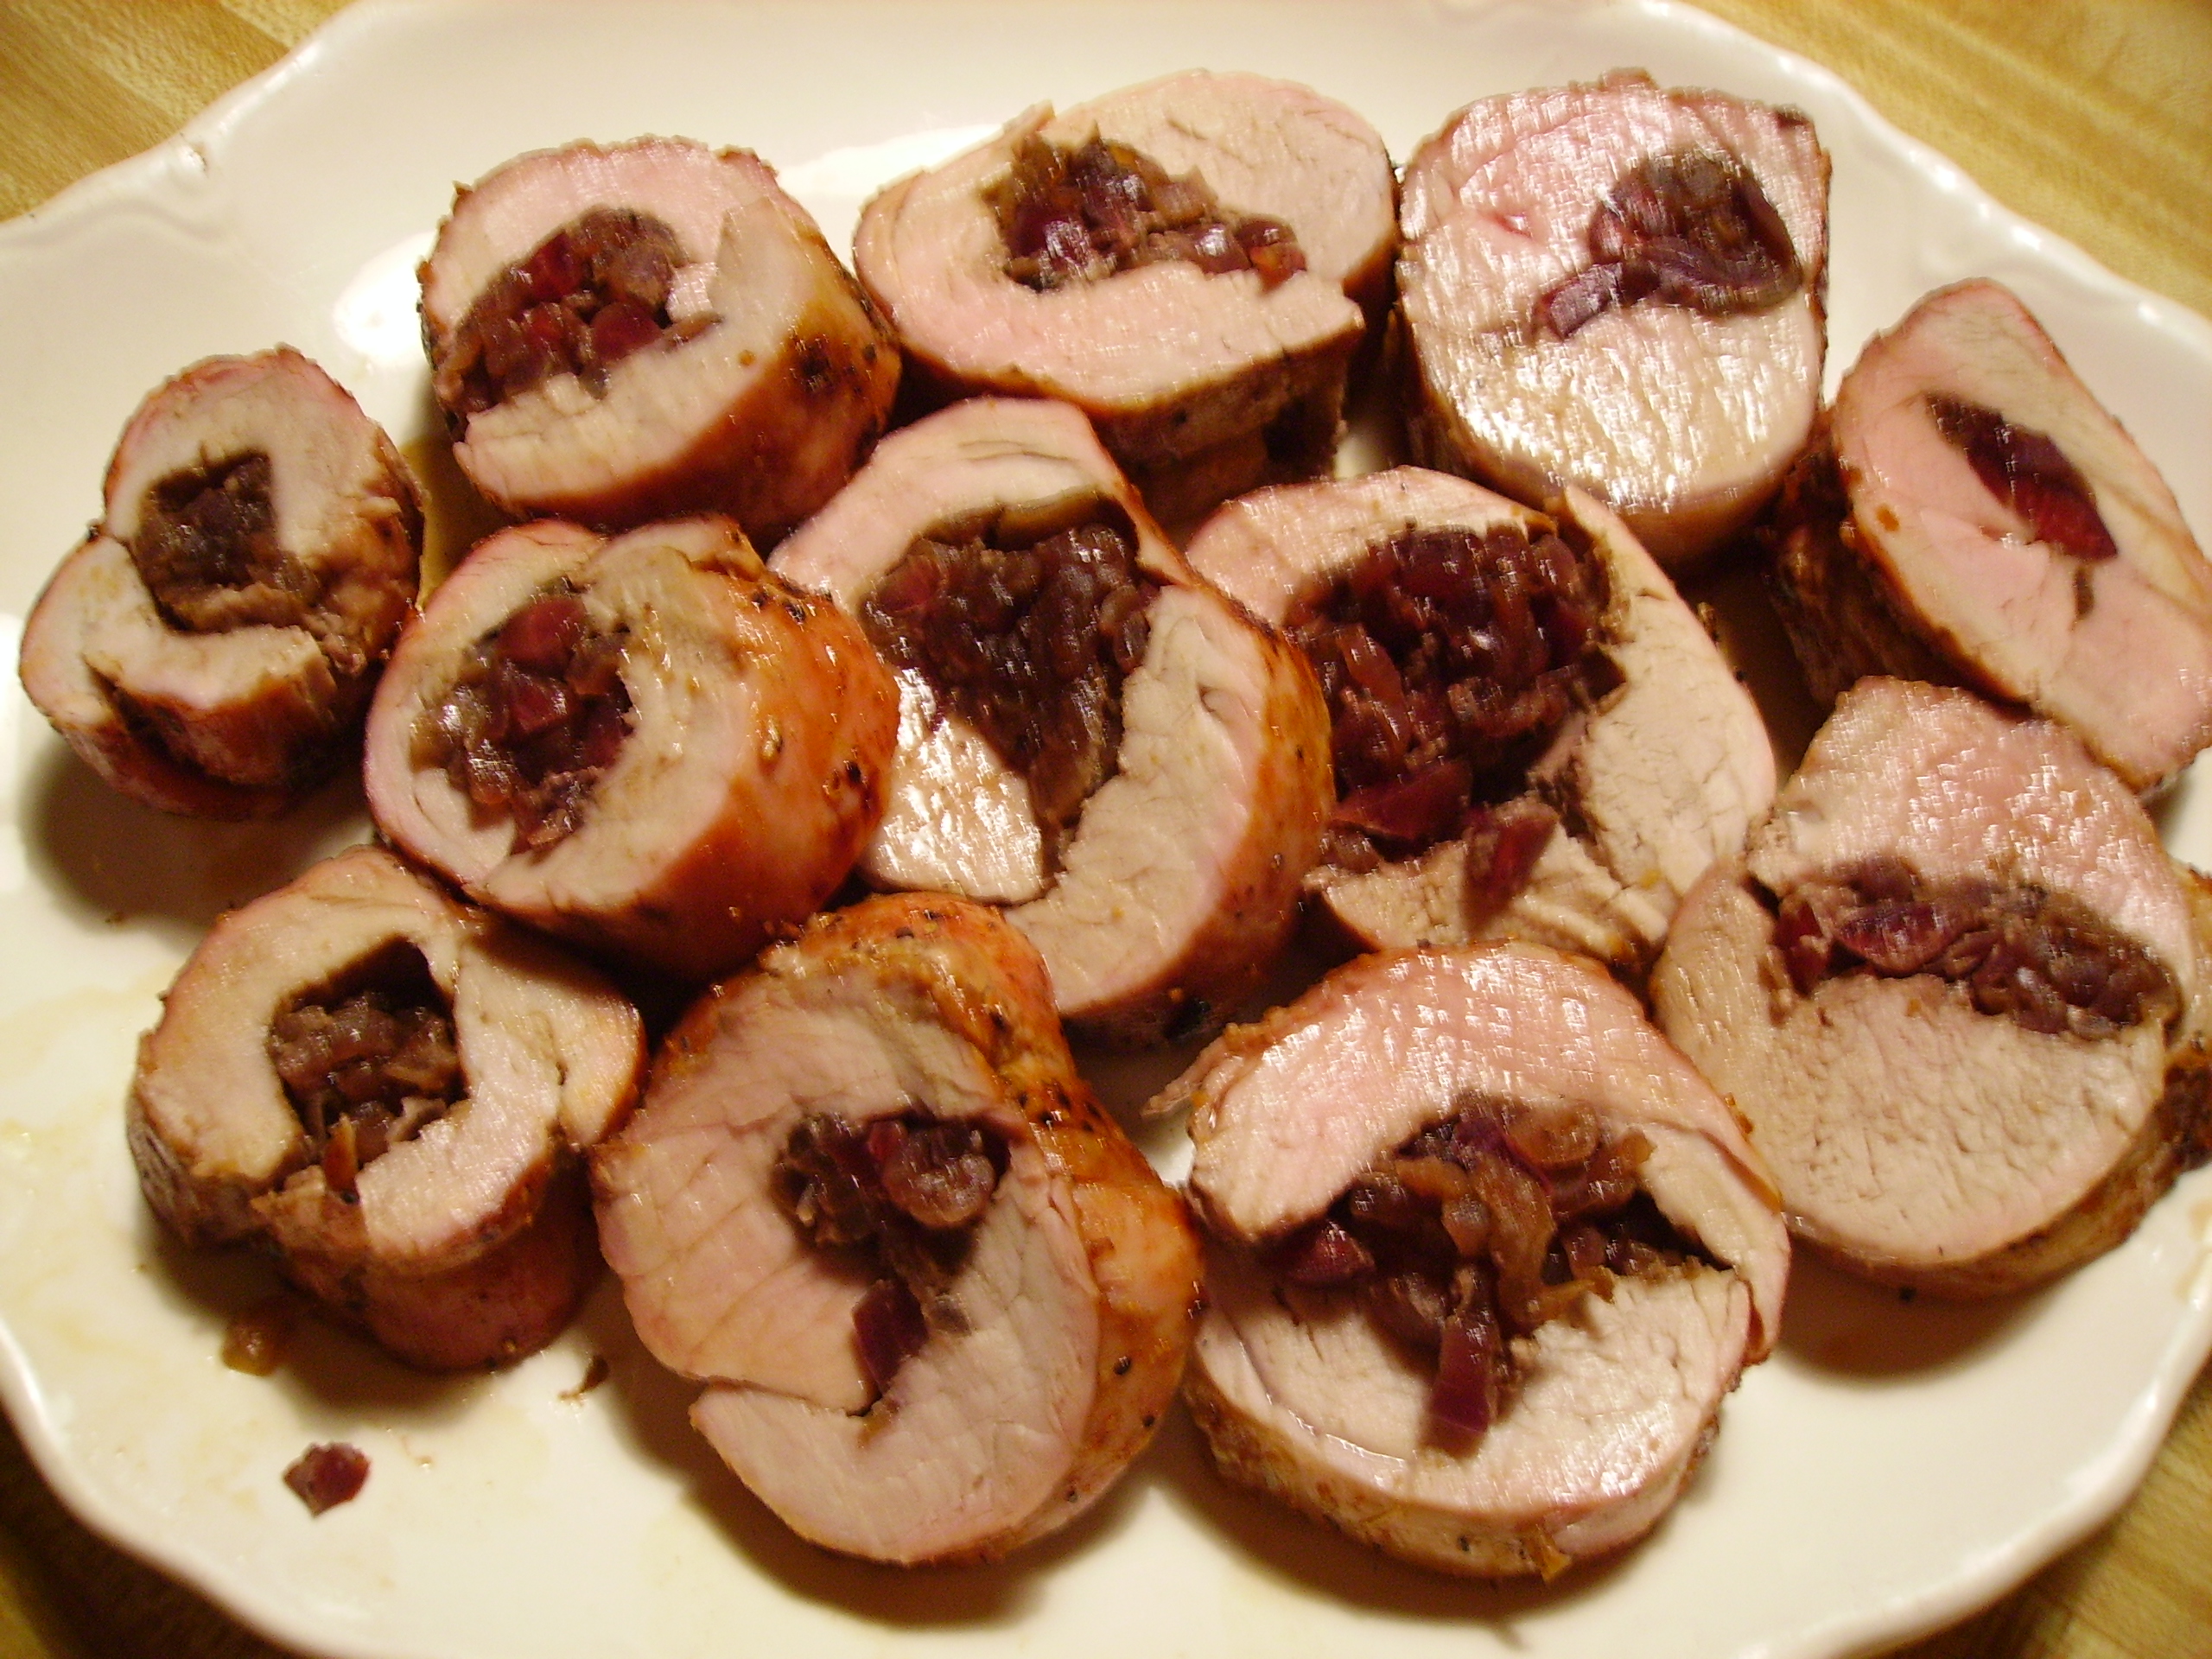
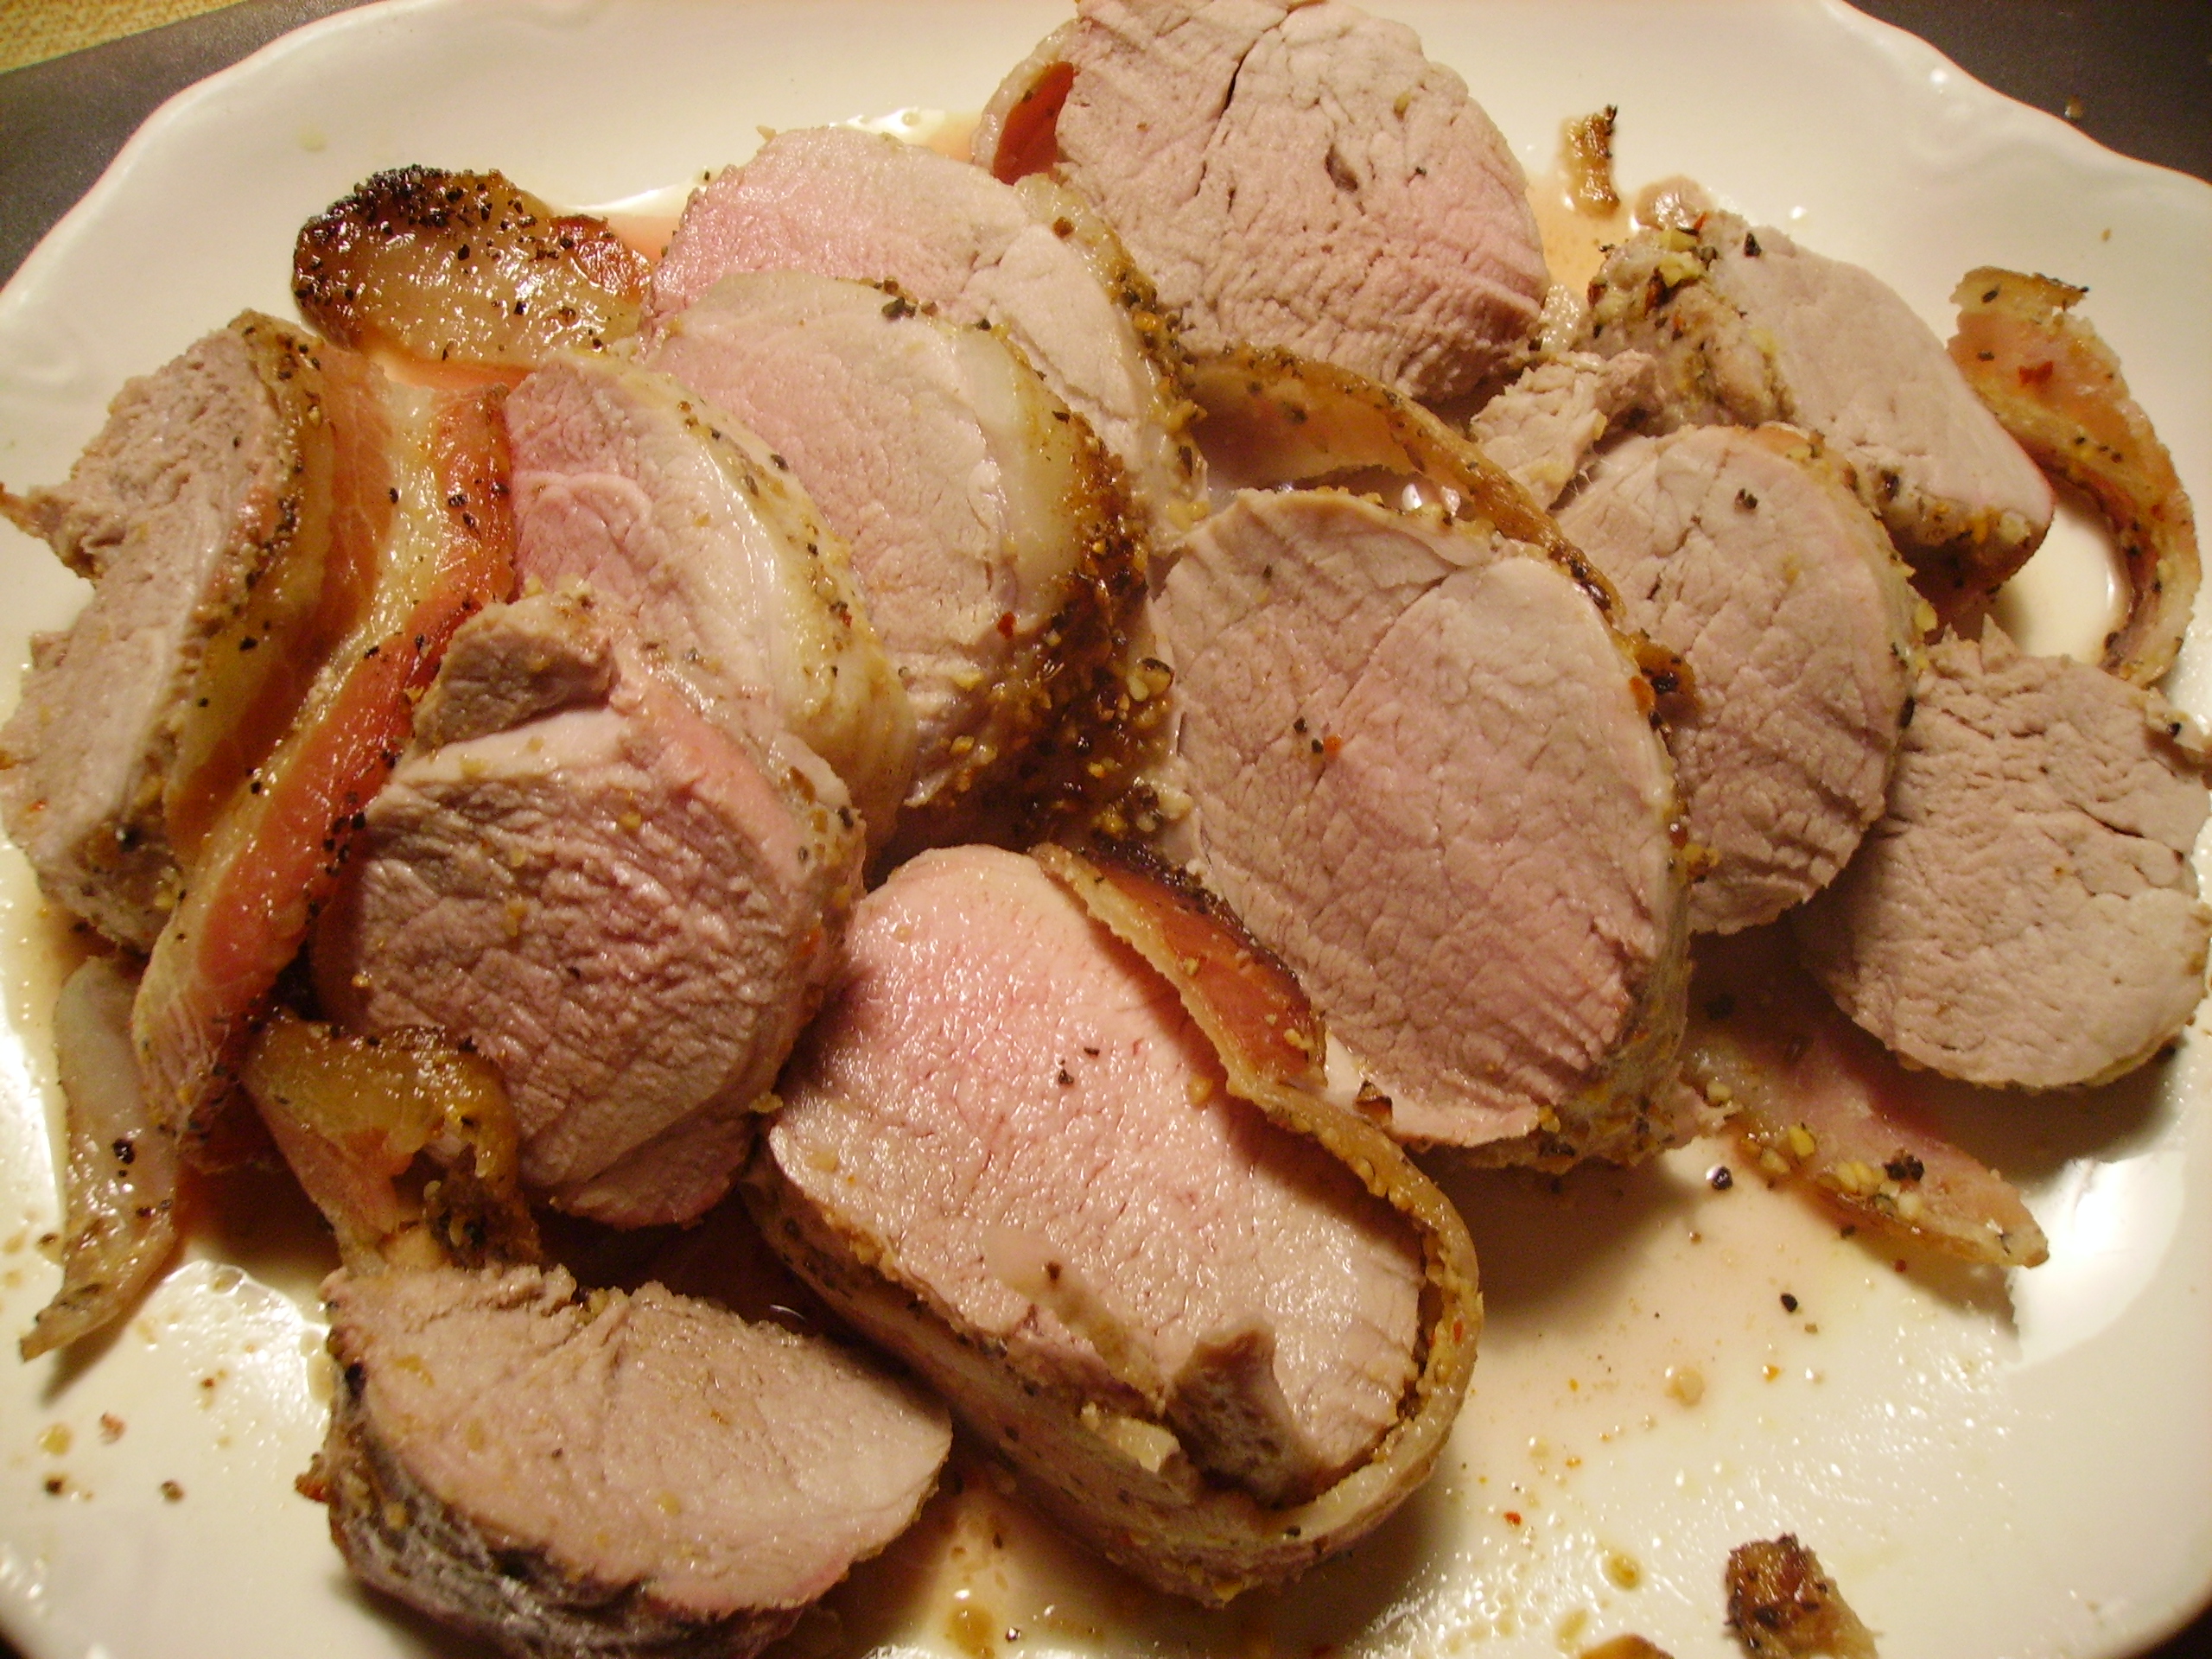
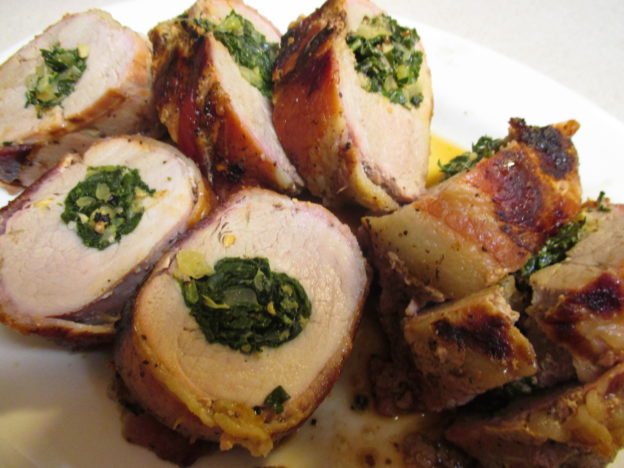
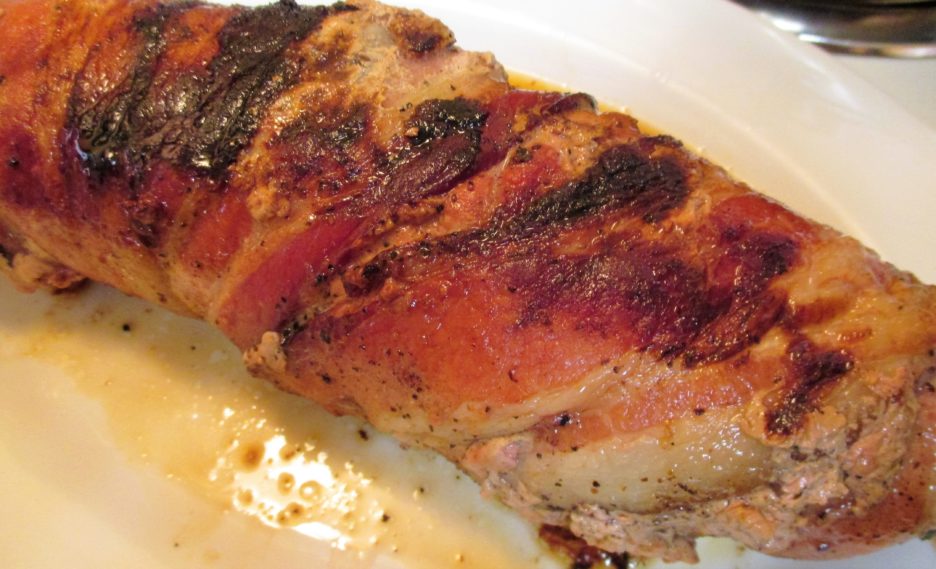
Not to brag, but the slices looked beautiful. The filling created a perfect green bullseye on each slice.IMG_1807

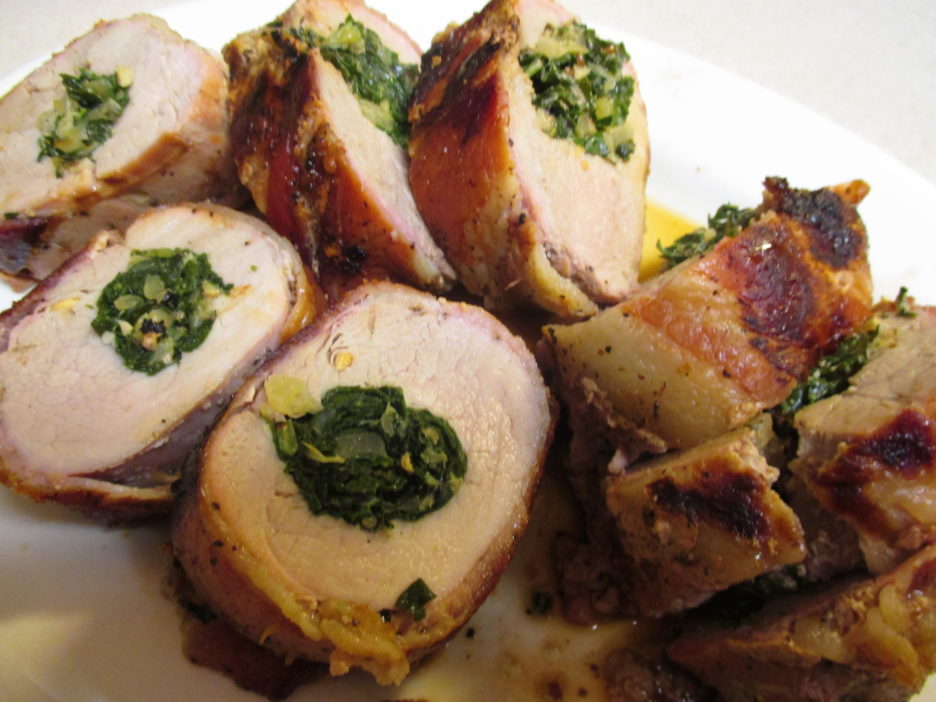
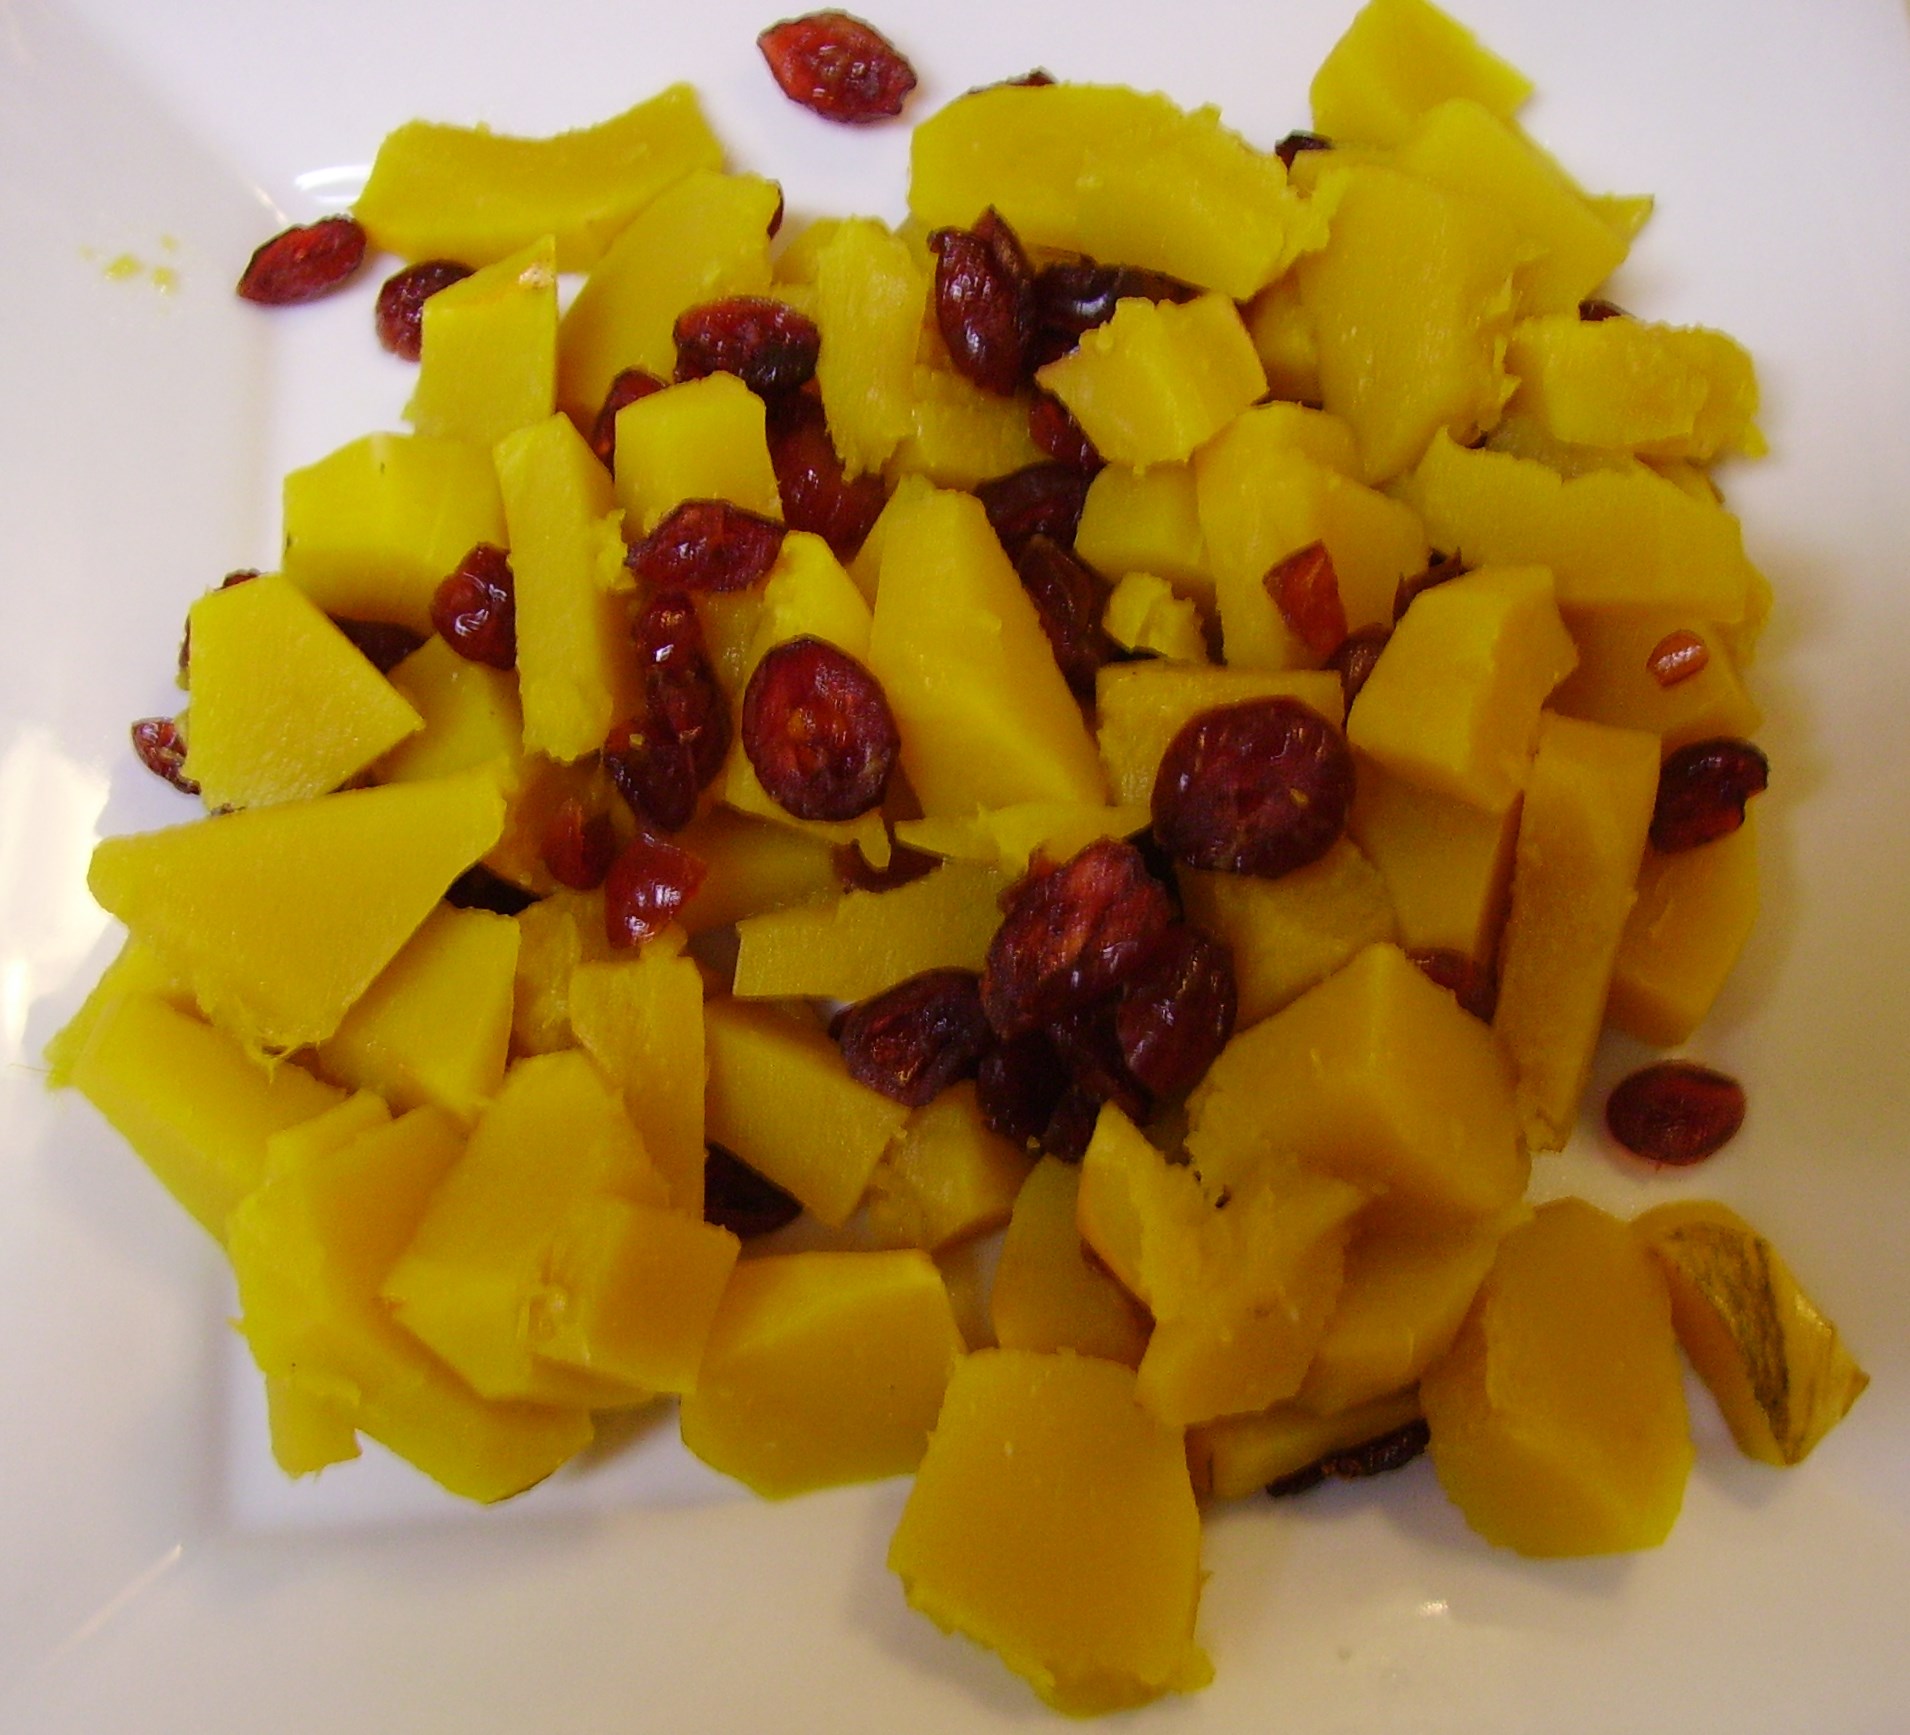
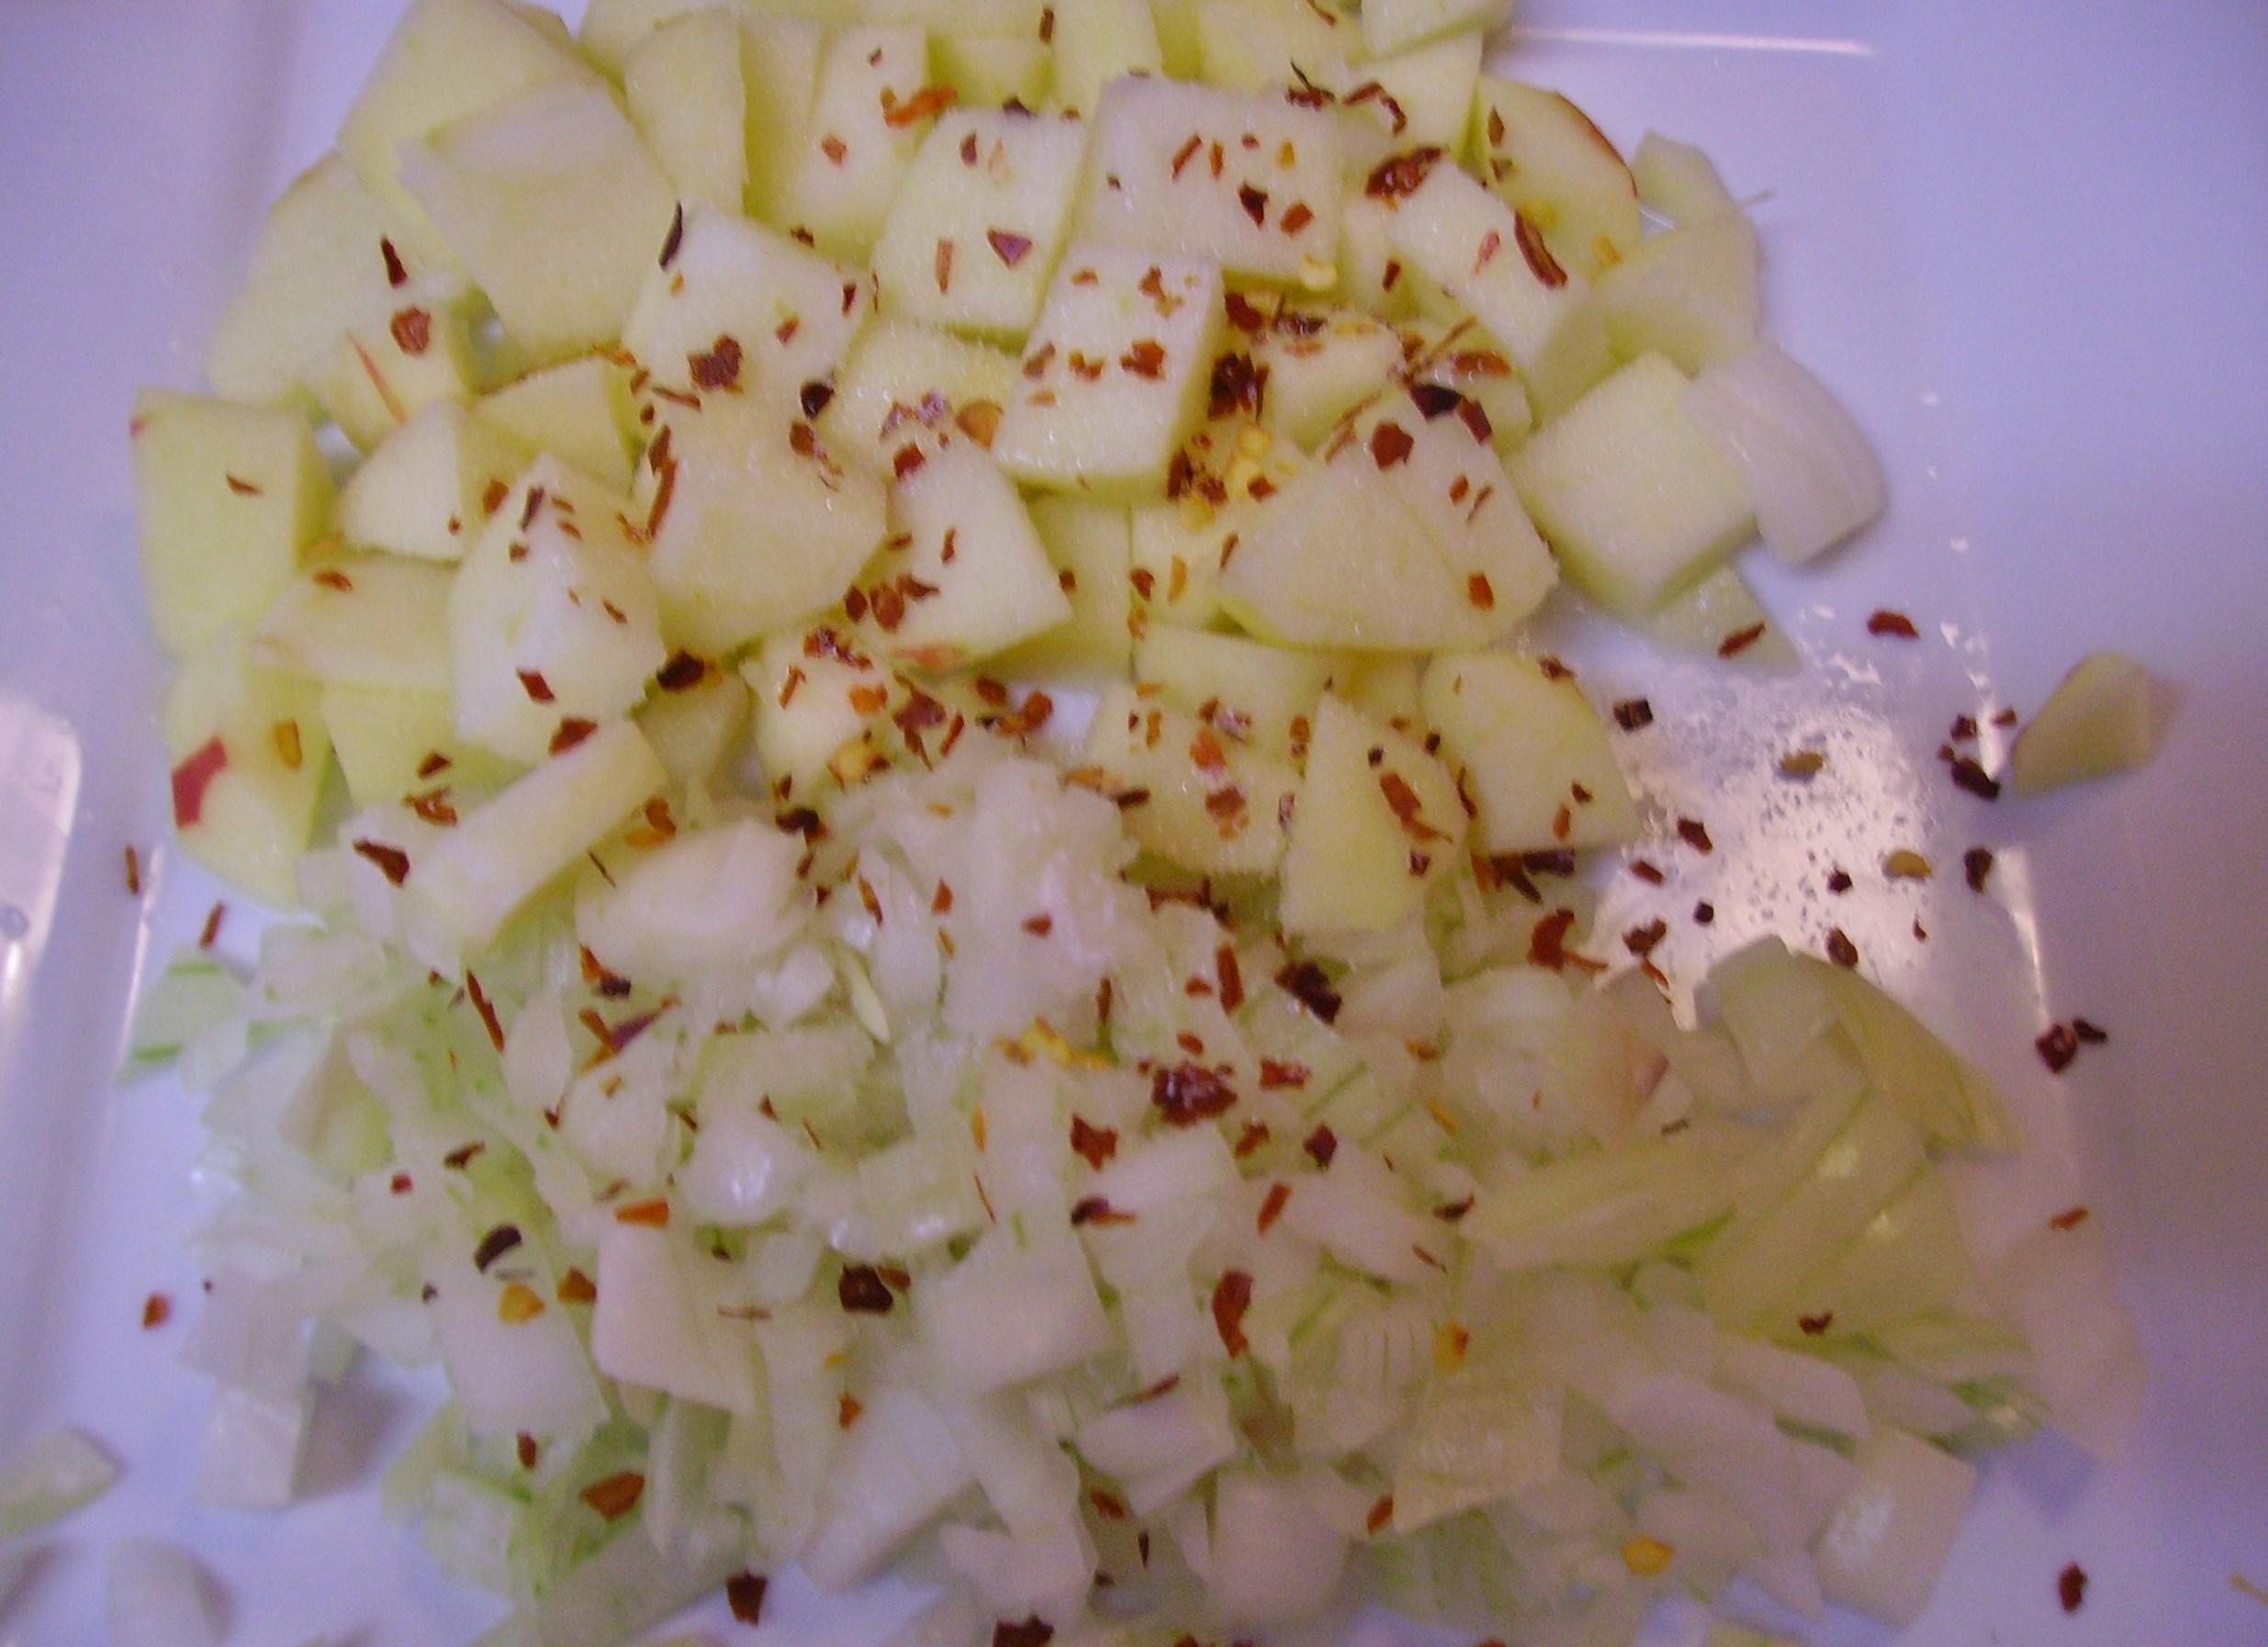
The taste matched the visual appeal. The rich, slightly bitter kale was a perfect counterpoint to the smokey flavor that the pork received from the bacon. All things considered, this was an excellent use for the last of the kale I had on hand. It had lost some of its luster and there wasn’t enough to create a true dish, but as the star of this filling, it stood proud and I felt noble having saved it from the compost bin. Any vegetables that you have on hand would work in this filling, so use what you have. As with the filling, the outer wrap is subject to what you have on hand. Prosciutto or pancetta would be wonderful. 

Grilled Pork Tenderloin Stuffed with Kale
Print Recipe
Servings
4
Servings
4
Grilled Pork Tenderloin Stuffed with Kale
Print Recipe
Servings
4
Servings
4
Ingredients
Servings:
Instructions
  1. Heat the olive oil in a medium size skillet. Add the onions and toss to coat. Cook for 2 - 3 minutes.
  2. Add the kale and the garlic and continue to cook for another 5 minutes or so. The kale should be wilted and somewhat tender and the onions and garlic should be golden.
  3. Add a little half and half to keep things moist and continue to cook until everything is very tender. Set aside
  4. If you choose to precook the bacon, lay the strips in a medium skillet and cook over low heat 5 -7 minutes until the bacon begins to render some fat. Remove from the pan and drain on paper towels while you prepare the tenderloin.
  5. Trim any fat from the tenderloin. Using a sharp knife, cut along the length of the tenderloin so that it lays flat. Be careful not to cut all the way through. Set aside.
  6. Spoon the filling into the pork tenderloin stopping a bit short of the ends. Smooth the filling out stopping about 1/2 inch from the edges.
  7. Pull the cut edges together so that the filling is completely enclosed and the tenderloin is more or less back to its original shape.
  8. Wrap the bacon strips around the tenderloin covering it completely. Overlap the strips as necessary to create the coverage. Secure with tooth picks. Know how many you are putting in and make sure to take the same number out prior to serving.
  9. Place the tenderloin on a preheated grill and cook over medium high heat, turning as needed to brown and cook evenly, 20 - 25 minutes. Tenderloin is done when it reaches an internal temperature of 145 degrees.
  10. Allow the tenderloin to rest at least 5 minutes before slicing.
Share this Recipe
Powered byWP Ultimate Recipe

As we head into the first “Official” weekend of the summer, fire up those grills (if you haven’t already) and let you imagination run free. There should always be an affirmative answer to the question, “Can you grill it?”

Summer Vacation and Italian Three Bean Salad in the Kitchen of Love

It’s hard to believe that my summer vacation will be over in a week. As the saying goes, time flies when you’re having fun. To be honest, I will still have a generous portion of each afternoon to do all the summer type things that I am remembering how much I enjoyed. While I’m not riding my bike or trying to go “over the bars” on a swing, I am taking time to enjoy the simpler things that made the Midwestern summers of my childhood so special, warm days, long evenings, and now, time in the kitchen.  I am loving the time that I can spend planning and preparing meals. Produce abounds from the garden, farm stands, and the grocery store. The colors and textures paint visions of meals that are vegetable driven, healthy and dare I say it, fabulously delicious.

I’ve gone back to dinners around a theme. Recently we had an Italian inspired dinner. Okay, lots of my dinners have an Italian vibe. What do you expect? I’m Italian and proud of it. “Italian-ness” aside, I do love pork. Tenderloins are my current favorite because they are versatile, quick cooking and the perfect size for two. I wanted to do another version of the pork wrapped in pork that is always so succulently yummy. I had a little thin sliced pancetta that I carefully uncoiled to create a delicate casing for the pork.

DIGITAL CAMERA

The seasoning for the meat had a very sausage like taste…red pepper flakes, fennel, and Italian herbs. In the summer, if you are Italian, and you think sausage, the next thing to pop into your head is peppers. Of course, peppers fried in olive oil with a bit of onion had to become the side.

DIGITAL CAMERA

Now what? In what I feel was a stroke of brilliance, a bean salad came to mind. Then the gears in my Italian brain meshed and I decided to make an Italian version of Three Bean Salad. We all remember the traditional Three Bean Salad that often appears at picnics and many salad bars. Varying combinations of green and kidney beans swim in a decidedly sweet vinegar dressing. Can this become a Paisan? I kept the green beans and added garbanzo and cannellini beans. The dressing went from sweet to tangy with the addition of lemon juice and white balsamic vinegar. Garlic and olive oil completed the transformation.DIGITAL CAMERA I opted to use rosemary and parsley as the herb component because I love how they taste with lemon. I chose red for the onion and pepper because they’re pretty and it gave a little nod to the Italian flag. As with any marinated salad, I made it early in the day so that everything had time to become as friendly as the goombahs from the old neighborhood.

Italian Three Bean Salad
Print Recipe
Servings
4
Servings
4
Italian Three Bean Salad
Print Recipe
Servings
4
Servings
4
Ingredients
Servings:
Instructions
  1. Cook the green beans in salted boiling water for about 2 minutes. You want them quite crisp, but with a tender heart.
  2. Drain the beans and cool quickly in a bowl of ice water. Drain well again and place in a large bowl.
  3. Add the cannellini and garbanzo beans to the bowl. Let the peppers and onions join in the fun, too. Toss everything together.
  4. Combine the olive oil, vinegar, lemon juice & zest, garlic, mustard, rosemary and parsley in a jar with a tight fitting lid. Shake vigorously until the dressing is completely blended.
  5. Pour the dressing over the salad ingredients and toss to coat everything. Taste and add salt and pepper if needed. Cover and refrigerate for at least 3 hours, overnight if you have the time.
  6. Give it one more good toss before you serve it and taste again, making any adjustments. It's ready.
Share this Recipe
Powered byWP Ultimate Recipe

This was a wonderful partner for the pork and peppers, but it would go well with any grilled meat and would be a hit at any party you brought it to. Another plus for this dish is that it can easily function as a one dish meal. The beans provide plenty of protein and fiber, but if you wanted to up the ante, add some cheese.

I did just that for lunch the next day. A little feta cheese, some tomatoes and a nice bed of baby greens from the garden made for a lunch that was as tasty as it was pretty.

DIGITAL CAMERA

Pork Tenderloin A La Boulangere…and Other Words of (Pork) Love

When I was growing up, my mother would cook Pork Tenderloin often. It was the 50’s and she would get it from the butcher at the Bonnie Bee. He did all the work of pounding it into thin cutlets. She took these lovely slices home and dredged them in flour seasoned with Lawry’s Salt. Fried in Crisco, in her electric fry pan, and usually served with mashed potatoes, it was heaven on a plate. That was then…this is now. My approach is lighter and healthier but, the result is still heaven on a plate.DIGITAL CAMERA

Why do I Love Pork Tenderloin?                                                                                                                     It is just the right size: Weighing in at right around one pound it is the perfect size for two people with enough leftover to make a fabulous lunch the next day.                                    It is relatively cheap: the going rate around here is somewhere around $3.00 to $4.00 per pound. That’s cheap for 2+ servings of deliciousness in my book.                                                     It is lean: cuddled deep inside the loin, it has little visible fat and is as tender as pork comes.

DIGITAL CAMERAIt is a perfect blank canvas: it loves rubs and marinades,DIGITAL CAMERAand it can be grilled, roasted or sautéed.DIGITAL CAMERAWith a little patience, you can even stuff it.DIGITAL CAMERA

I think my favorite preparation however, is cooking this lovely little morsel whole. And I’m torn as to whether I like it better roasted or grilled. So, I’m sharing recipes for pork tenderloin both ways. The grilled version is more of a guideline than a formal recipe. The oven recipe is more specific and features smokey bacon that adds tons of flavor as well as an insulating robe of moistness.DIGITAL CAMERA The grilled version gets flavor from, well, the grill, and retains its juciness with careful supervision ( a little olive oil helps, too).DIGITAL CAMERANow, back to the roasted tenderloin. The inspiration for this recipe came from my Doubleday Cookbook. I’ve shared my long-term love affair with this two-volume gem before. It is still one of the best cookbooks I’ve ever used. The recipe is Roast Pork A La Boulangere;  potatoes, onions and pork prepared as a French baker’s wife would do it. This is usually done with a bone-in pork loin roast that results in succulent meat served with potatoes and onions that have roasted in the pork fat and juices. It is comfort food on steroids and probably not the healthiest of meals, but it is wonderful.

Substituting the pork tenderloin reduces the fat and cooking time tremendously. Yes, there is bacon, but it’s only two slices and the flavor they give to everything is more than worth the indulgence. Pork tenderloin cooks very quickly, 20 to 30 minutes in a hot oven is all it takes. The potatoes and onions take longer than that, so I gave them a head start. Salt, pepper and a drizzle of olive oil was all that I added. DIGITAL CAMERAI let them roast for 30 minutes at 375 degrees. While that was happening, I spread some Dijon mustard on all the sides of the pork. I wrapped the bacon around the little torpedo, securing the strips with toothpicks. Some freshly ground pepper and it was ready to sit high atop the partially cooked potatoes.DIGITAL CAMERAIt only took 25 minutes for the pork to cook. I strongly recommend using a meat thermometer. Current guidelines recommend an internal temperature of 145 degrees. This results in juicy slices with just a hint of pink.DIGITAL CAMERA

Pork Tenderloin A La Boulangere
Print Recipe
Servings
2
Servings
2
Pork Tenderloin A La Boulangere
Print Recipe
Servings
2
Servings
2
Ingredients
Servings:
Instructions
  1. Heat oven to 375 degrees. Lightly coat a baking pan with cooking spray. Combine the sliced potatoes, onions, and garlic in the pan. Add the olive oil and toss to coat. Add 1 teaspoon of coarsely ground pepper and a pinch of salt. Roast for 30 minutes.
  2. While the potatoes roast, prepare the pork. Lay the bacon strips crosswise on a cutting board. Brush a little of the mustard down the center of the bacon. Brush mustard on one side of the pork. Lay the pork in the center of the bacon mustard side down.
  3. Brush the remaining mustard on all the other sides of the pork. Wrap the bacon around the pork at a slight diagonal. Fasten with toothpicks. Sprinkle the remaining pepper on all sides of the pork/bacon bundle.
  4. Remove the pan from the oven. Place the pork on top of the potatoes and return it to the oven and roast for about 20 -25 minutes.
  5. Check for doneness with a meat thermometer after 20 minutes. The internal temperature should be 145 degrees. Continue to roast, checking often for the correct internal temperature.
  6. When the meat is cooked, remove the pan from the oven. Transfer the pork to a warm platter, cover loosely with foil and allow to rest for 10 - 15 minutes.
  7. Remove the foil and cut into thick slices. Serve with the potatoes and onions.
Share this Recipe
Powered byWP Ultimate Recipe

While the roasted version is richly delicious,the grilled version has just as much to offer. As I’ve said, this blank canvas takes to anything you want to put it in or coat it with. This is a non-recipe, recipe. I’ve slathered it in mustard, soaked it in teriyaki, rubbed it with spices and tied it with herbs. These are suggestions that you can use to create your own pork love. Any marinade that strikes your fancy will work. The same goes for herbs, spices, and wet rubs, too.

A word of warning here: Pork tenderloin is very lean. Read that to mean it can go from wonderful to burnt and dry in a matter of minutes. Once the meat is on the grill, designate a responsible guardian. For even cooking and browning, turn every 4 or 5 minutes and move it around as needed. Keep that meat thermometer handy and check for the magic 145 degrees at the 20 minute mark. Continue to turn and check until that temperature is reached. Bring the pork in and allow it to rest before slicing. Partner it with any sides of your choice and enjoy the love.

DIGITAL CAMERAI keep a small stash of these little bundles of joy in my freezer. Every time I cook one it is a new adventure. There are so many directions to take this delight in that I know I’ll be sharing for a long time to come. I hope that you will, too.


Life After a Microwave and a Skillet Pork Dish

I have never considered myself microwave dependent. In fact I only used it (or so I thought) to reheat leftovers and melt butter. So, as I left my old kitchen behind, I hardly gave the microwave a second glance. Cooking with love does not require energy waves. The stove top can do anything the microwave can and is so much more organic…or so I thought. One week in the new kitchen and I’ve reached for the microwave almost daily only to have to rethink  how to do some small cooking task. I guess I took the microwave for granted. Does it amount to enough need to take up precious counter space? Time will tell. but at this point, I think not.

The microwave was convenient and it was a time saver in the fact that I could set it and go on to other things. Not having a microwave has made me turn back to the way things were done in the “old days.”

We wanted pop corn for an alternative dinner the other night (don’t judge me, sometimes it’s the perfect end to a day). I always make my popcorn in a pan on the stove. I even have a designated popcorn pan that creates fluffy and tender kernels of goodness with hardly an “old maid” in the batch. While the magic is happening in the pan, I would melt a cube of butter in the microwave timing it so that the butter and the pop corn would be ready together. What to do without a microwave? I have a small sauce pan that was my mother’s that easily accommodated the butter and resulted in melted perfection.

DIGITAL CAMERA

As the week went on I reached for the microwave to reheat some leftovers which turned out better reheated on the stove where they could gain a little color and crust. I had to plan ahead more to thaw out things from the freezer, but they turned out better thawing naturally, as well. My new mantra became, no microwave, no problem…after all I was really only using it for shortcuts.

As I’ve shared before, I take inspiration for my recipes from many sources. Tonight’s dinner was no exception. I found a wonderful recipe for pork with a sauce made of squash, dried cranberries, and apples in the latest Cooking Light Magazine.DIGITAL CAMERA

I had a reasonable equivalent of the ingredients on hand so I set out to put Mama D’s spin on it.

Step 1 brought me to a screeching halt.  It called for microwaving the squash and cranberries to prep them for the sauce. Hm? Now what?  Out came my trusty steamer pan and in went the berries and squash.

DIGITAL CAMERA10 minutes later (only 3 minutes more than the microwave would have cooked them) they were ready to become part of the dish.DIGITAL CAMERAPork tenderloin, my new favorite pork product, was sliced into medallions that were lightly seasoned with a salt free onion and herb mixture.DIGITAL CAMERAOnce they were lightly browned, they waited patiently in a warm oven while the rest of the dish came together. Apples and onions were joined by a sprinkling of red pepper flakes and a pinch of sugar.DIGITAL CAMERASautéed in butter (just a little) they were joined by the squash and cranberries to create a lovely fruit and vegetable medley. DIGITAL CAMERAI chose to add the pork to the pan at this point. I had reduced some chicken broth in the pan I cooked the pork in and so I added that to the pan as well.DIGITAL CAMERAThe dish was wonderful. It took less than a half hour to prepare, even without the microwave. It tasted like Fall and was healthy, too. The leftovers, by the way, were great reheated in a small fry pan on the stove.DIGITAL CAMERA

Pork with Squash, Apples and Cranberries
Print Recipe
This is a skillet dinner that is all about Fall. Inspired by and adapted from Cooking Light Magazine.
Servings
4
Servings
4
Pork with Squash, Apples and Cranberries
Print Recipe
This is a skillet dinner that is all about Fall. Inspired by and adapted from Cooking Light Magazine.
Servings
4
Servings
4
Ingredients
Servings:
Instructions
  1. Place the squash and cranberries in the basket of a steamer pan. Add water to the pan, cover and steam for 7 - 10 minutes. The squash should be tender and the cranberries slightly plumped. Set aside.
  2. In a large skillet, heat the olive oil. Season the pork slices with onion herb mixture and dredge lightly in the flour. Add the slices to the skillet and cook, turning once until browned on both sides. This should take about 5 minutes. Place pork in a low oven to stay warm.
  3. Add the broth to the pan. Scrape up any brown bits and cook over medium heat until reduced by half. Set aside.
  4. In a medium fry pan, melt the butter. Add the apple and onion pieces, pepper flakes, and sugar. Toss to coat everything and let it cook for 4-5 minutes. The apples and onions should begin to soften.
  5. Add the squash and cranberries to the pan. Toss to coat and cook for a minute or two. Add the reduced chicken broth and any yummy bits stirring to combine. Let this cook for another minute.
  6. Add the pork slices and any accumulated juices and let everything get happy together for several more minutes.
  7. Divide among four plates and serve.
Share this Recipe
Powered byWP Ultimate Recipe

So, as I start the new version of Mama D’s Kitchen, I’m getting used to my new surroundings. While the kitchen is small, I’ve created two good-sized work spaces. I like the fact that everything is close at hand. It feels cozy and friendly. The electric stove is feeling less foreign. It will take a bit of time to get really comfortable with each other, but we’re going to make it.

Mama D’s smaller kitchen and the rest of her downsized apartment are starting to feel like home.