Visions of Meatloaf Dancing in My Head

The holidays are approaching at seemingly warp speed. With shopping and baking and decorating it’s hard to give much thought to dinner. Dinner is still very important. It gives you the strength to shop and bake and decorate. So, my proposal is to stock the freezer with hearty meals filled with comfort and joy and more than enough love. Soups, casseroles and of course some wonderful marinara or bolognese make for a happy freezer (and dinner table). This musing isn’t about any of those. It’s about Meatloaf.

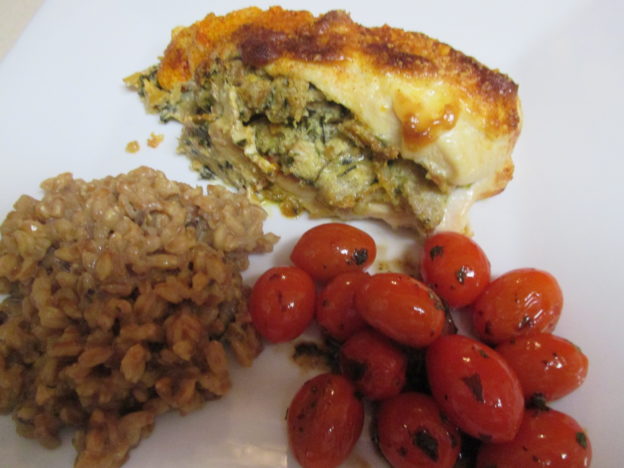
I love meatloaf. It can take so many wonderful forms. It is easy to make. Just combine any ground meat or meats of you choice with some eggs, bread crumbs, and seasonings and there you have it. I have made many varieties over the years and have shared one or two right here. This go round I’m sharing my new favorite. I love this meatloaf!!! 
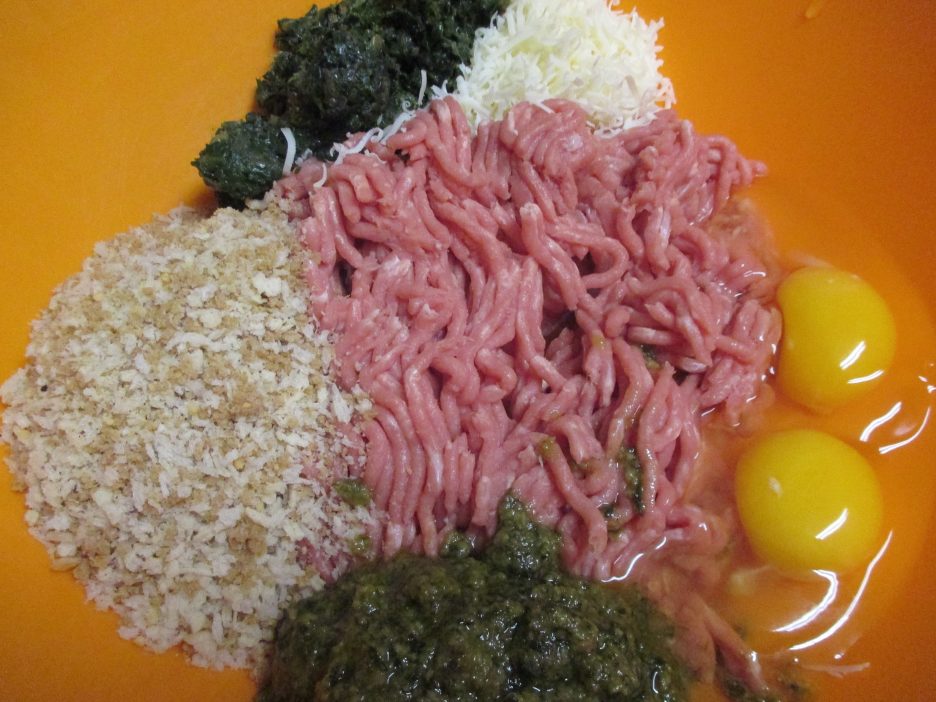
My ground meat of choice was turkey, but this would work with any ground meat that you desire. Eggs and bread crumbs were there of course because I wanted the  meatloaf to remain a loaf and these two ingredients make the perfect glue. Onions are an absolute necessity and for this rendition I added some fresh spinach. Before they went into the bowl, I cooked them in a little olive oil. I like my meatloaf to have a smooth consistency and this seemed to do the trick. The last ingredients were grated Pecorino Romano and some Pesto ( click here for the recipe). In an unusual move on my part, I didn’t use garlic. Hard as that is to believe, this didn’t need it. The healthy dose of pesto provided just the right amount of garlic zing along with all of the other wonderful notes this beautiful green paste provides.

When times are busy, it’s good to cut prep time whenever possible. so I made a large batch and froze it in individual meatloaves. This reduces the baking time and I think they look really cute on the plate.

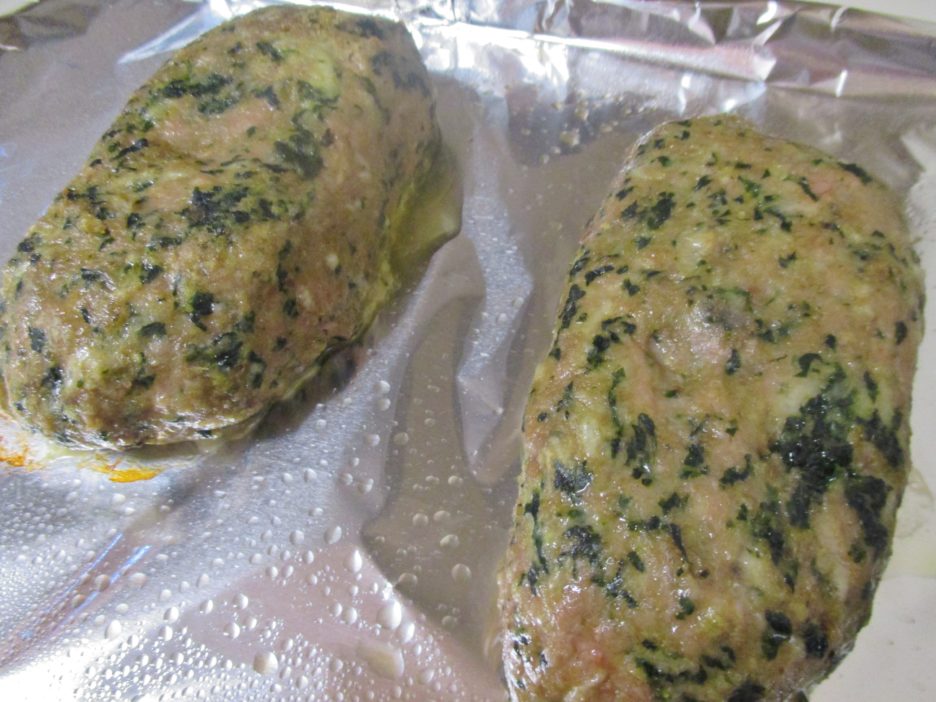
I took two of my mini loaves out of the freezer and and when they had thawed (safely in the refrigerator), I centered them on a rimmed baking sheet. Why that much room, you may ask. Because they would go into the oven on their own, but they wouldn’t be lonely for long. After about 10 minutes (give or take) I added some olive oil tossed green beans. These were frozen Haircots Verts. It’s winter here so fresh green beans, if they can be found, are not always very tasty. The frozen ones are always tasty no matter the weather. 
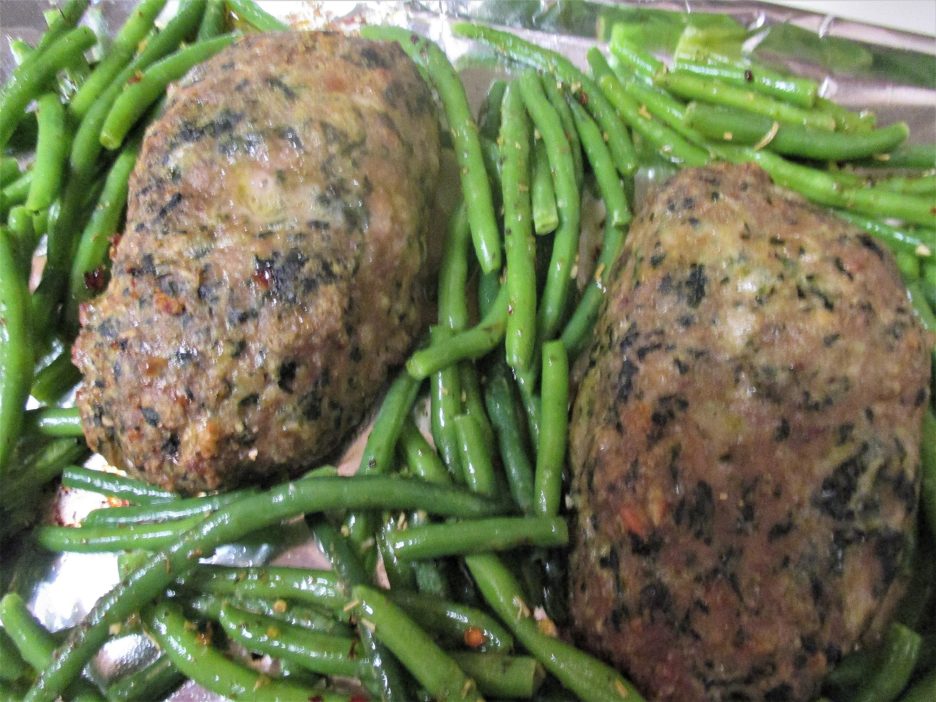
Another 15-20 minutes in the oven and my loaves and beans were ready for plating. Rounding out the dish and making this a comfort food classic was a scoop of creamy mashed potatoes.
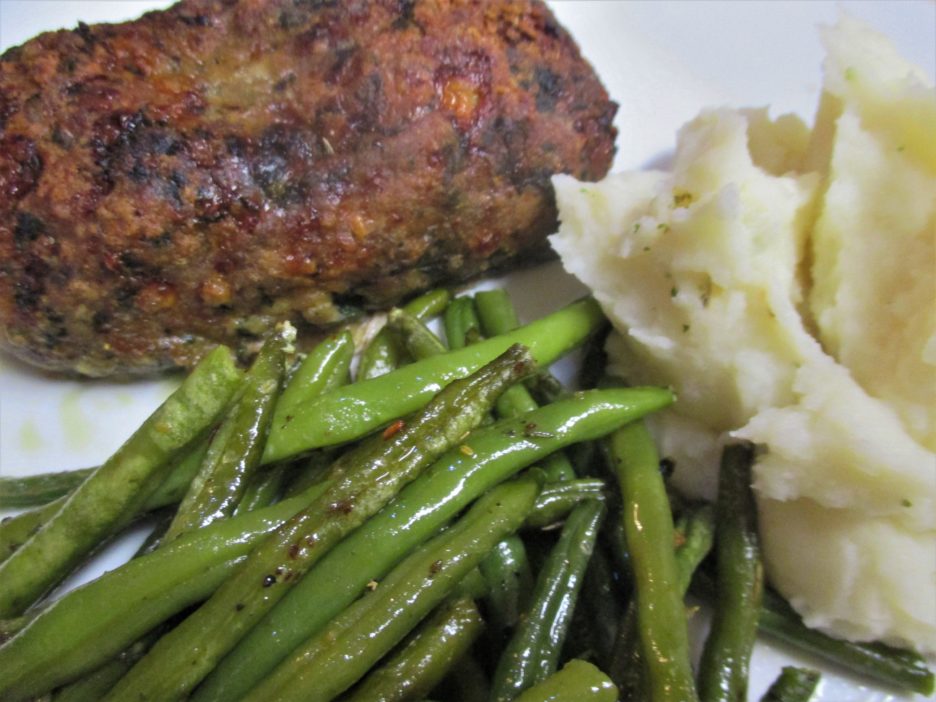
This was a plate of pure love and comfort and really took very little immediate effort on my part. Best of all, there are more little loaves in the freezer to bring tasty joy to the holidays.

Pesto and Spinach Meatloaf
Print Recipe
Servings
4
Servings
4
Pesto and Spinach Meatloaf
Print Recipe
Servings
4
Servings
4
Ingredients
Servings:
Instructions
  1. Heat the olive oil in a large skillet. Add the onions and cook until soft and just beginning to brown.
  2. Add the chopped spinach and continue to cook until the spinach is very wilted. Remove from heat and allow to cool.
  3. In a large bowl combine all of the ingredients, stirring until everything is blended together.
  4. Form into 4 small loaves. If you are not baking them immediately, freeze them in individual zip top bags.
  5. To bake immediately, preheat the oven to 350 degrees. Coat a rimmed baking sheet with cooking spray and place the loaves down the center.
  6. Bake for approximately 15 minutes. Add the green beans to the pan spreading them around the loaves.
  7. Bake another 15 minutes or until the loaves are cooked through and the beans are tender crisp. Serve
Share this Recipe
Powered byWP Ultimate Recipe

Mama D’s Best Pot Roast, Ever

We are definitely falling into winter. The days are shorter, the air is colder, and snow has dusted the ground more than once. Hearty comfort food seems like the thing to do. It was time to come to grips with my love/ hate relationship with Pot Roast. Perhaps hate is too strong a word. Maybe I just haven’t had the perfect pot roast. I am here in the winter laden Midwest for the long (cold) haul, so the time has come to find it.

What I’ve always loved about pot roast is how it makes the house smell. My challenge was developing a recipe that tasted as good to me as it smelled. I looked at lots of recipes from slow cooker style to Beef a la Mode and everything in between.

I decided that oven braising would give me the aroma that I loved and would make the apartment warm and toasty too. This also gave me a reason to use my large Dutch Oven. Porcelain clad cast iron, bright red, and weighing in at about 15 pounds, its ability to hold heat evenly would be just the vessel to house my roast. 
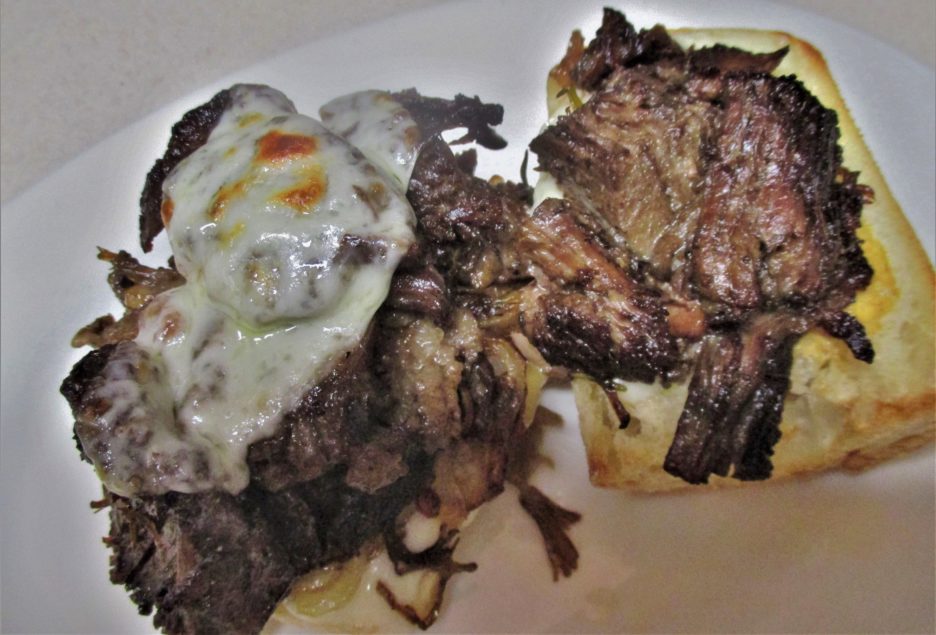
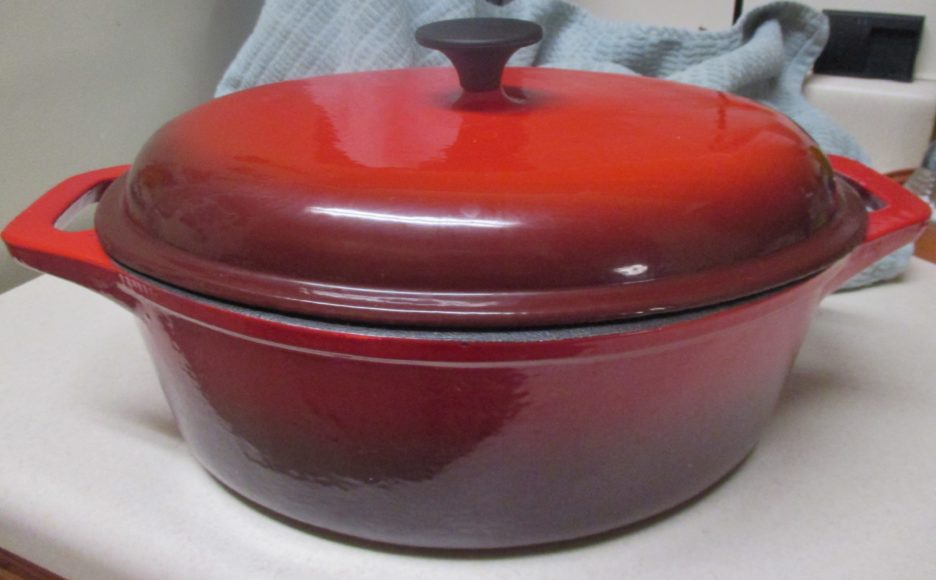
Granted moving it from place to place was an upper body workout in itself, but the effort would be worth it.

I like the traditional vegetable trio of onions, carrots, and potatoes so I knew they would be active participants. I can’t do anything without garlic, and bacon is my guilty pleasure so they had to be in the mix as well. My herb of choice is rosemary which was still growing on the balcony. So, now that I had my cast of characters in place it was time to get on with the show.

The perfect pot roast starts with the perfect chuck roast. Boneless, well marbled, and weighing in at around three pounds it was ready for its closeup. I heated my dutch oven to screaming hot on the stove, added some olive oil and plopped the roast in and covered it with a splatter screen. The browning had to be extreme and the screen kept the kitchen and Papa D from getting too upset. Once it was delightfully brown on all sides, I removed it from the pan and added some thick peppered bacon that I had chopped up. Then came onions. Lots and lots of onions. 
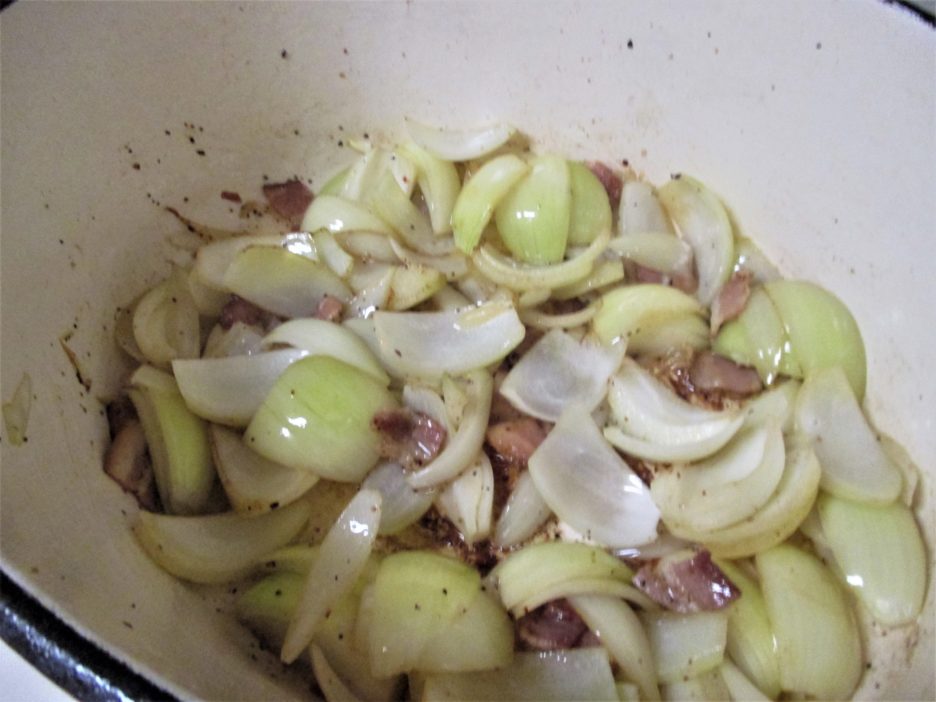
I let them soften and begin to brown before I added an almost obscene amount of garlic. Once everything looked perfect, I nestled the roast back in. Braising requires liquid to gently surround the roast so I used a combination of beef stock, red wine, and Worcestershire sauce. Simple and traditional, but that can be a very good thing.

All that was left to do was cover it and pop it into a low (300 degree) oven. The dutch oven now had to be weighing far more than 15 pounds so I didn’t pop it in as much as I grit my teeth, held my breath, and shoved it in. It spent the next hour and a half getting extremely happy and perfuming my home beautifully.

I pulled the pan out of the oven (the maneuver was a modified clean jerk) and added some gold creamer potatoes and baby carrots. The cover went on and the pan went back in the oven. While everything cooked for another hour, I iced my biceps and had a glass of wine.

Finally it was time to bring it all together. The roast was perfectly done. Tender and juicy, but holding itself together. I admired its beautiful brown crust as I moved it to the platter.  I lifted all the lovely vegetables out of the pan and heated the golden liquids on the stove adding a splash more of wine to help loosen all the yummy bits. I shook up a slurry of water and flour and whisked it into the gravy. I let it bubble for a few minutes while I cut the roast into respectable slices.

Mama D's Perfect Pot Roast
Print Recipe
Servings
6
Servings
6
Mama D's Perfect Pot Roast
Print Recipe
Servings
6
Servings
6
Ingredients
Servings:
Instructions
  1. Season the roast generously with salt and pepper. Heat a 6 Qt. Dutch Oven over high heat.
  2. Add the olive oil to the pan and let it get hot. Add the meat and sear until well browned on all sides. Remove the roast from the pan and set it aside.
  3. Reduce the heat to medium. Add the bacon and let it soften for a minute or two. Add the onions and toss to coat. Cook until the onions begin to soften. and brown.
  4. Add the garlic and cook a couple of minutes longer. Remove the pan from the heat and nestle the roast back in.
  5. Combine the stock, wine, and worcestershire sauce. Pour around the roast. The liquid should come about halfway up the roast.
  6. Tuck the rosemary sprigs around the meat. Cover the pan and place in a preheated 300 degree oven. Roast for 1-1/2 hours
  7. Add the potatoes and carrots to the pan, tucking them around the roast. Cover and continue to roast until the vegetables are tender, approximately 1 hour.
  8. Remove the roast from the pan and allow to rest for 10 minutes. Remove the vegetables with a slotted spoon and keep warm. Leave all the liquid in the pan.
  9. Place the pan on medium heat and add a splash of wine. Scrape up any brown bits. Shake together the flour and water and stir into the pan liquids.
  10. Simmer the gravy until it thickens. Slice the meat. Drizzle with a little of the gravy. Put the rest of the gravy in a bowl to pass at the table. Serve with the vegetables.
Share this Recipe
Powered byWP Ultimate Recipe

The result was a plate of goodness. The roast was oh so tender and still tasted like the wonderful beef that it was. The veggies were melt in your mouth delicious. We cleaned our plates and filled them again. We made ourselves stop so that we could enjoy Pot Roast sandwiches on another day.

Panzanella-Palooza: The Summer Edition

Over the years I have sung the praises of the Panzanella Salad. Italian peasant fare, vegetables combined with dry bread cubes and a vinaigrette dressing. It is an established fact that if it is summer there will be panzanella salad in Mama D’s Kitchen of Love. This summer is no exception. In fact it has become the reigning go to supper here, appearing at least weekly in various shapes and forms.

Panzanella got its start in Tuscany long ago with onions being the star of the show. Later tomatoes took over that position and modern panzanella was born. Bread, usually stale has also been a principle player. Thrifty Tuscans didn’t want even the most stale bread to go to waste so they would soak it in water and add vegetables to make a meal. This is probably how it got its name. Pane means bread and zanella means deep bowl. If you have wet bread and vegetables you are going to need a deep bowl.

Making so many Panzanella salads this summer I have come to a few conclusions. I wanted to share some of those along with a recipe or two in case you want this to be your Panzanella-Palooza Summer, too.

  1. The bread you use is important, it is bread salad after all. The bread should be sturdy, crusty and maybe a little stale. Sourdough is my current bread of choice. I am always searching for a loaf that has the flavor and smell to take me back to San Francisco. La Brea Bread Company (available at Caputo’s) makes one and I just got another great loaf at Mariano’s bakery. Don’t worry if your bread isn’t stale. You backyard grill or even your oven can create the perfect croutons for your salad.
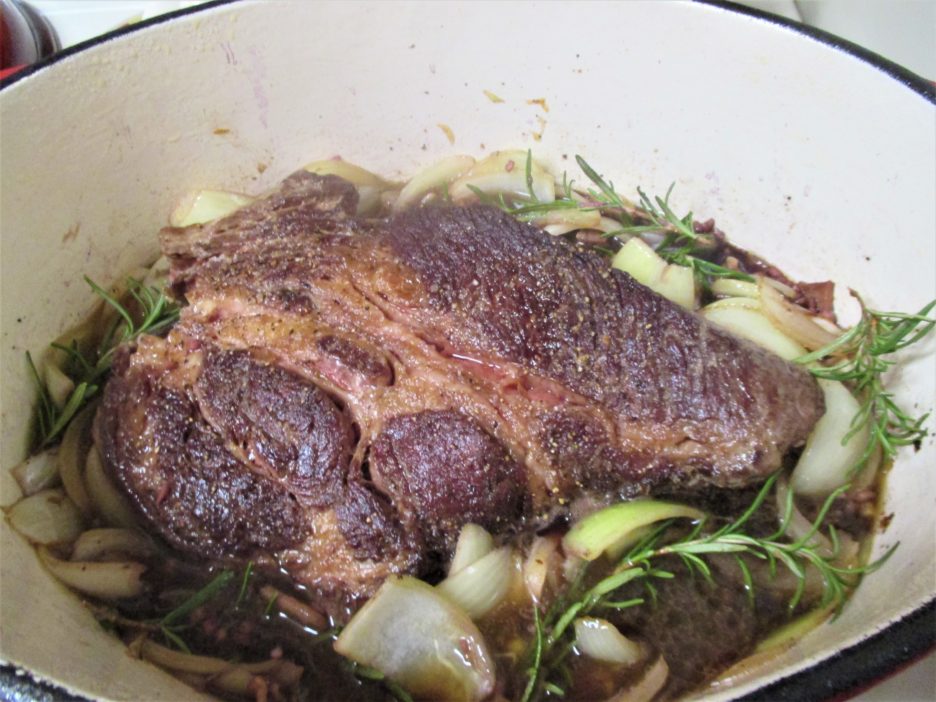
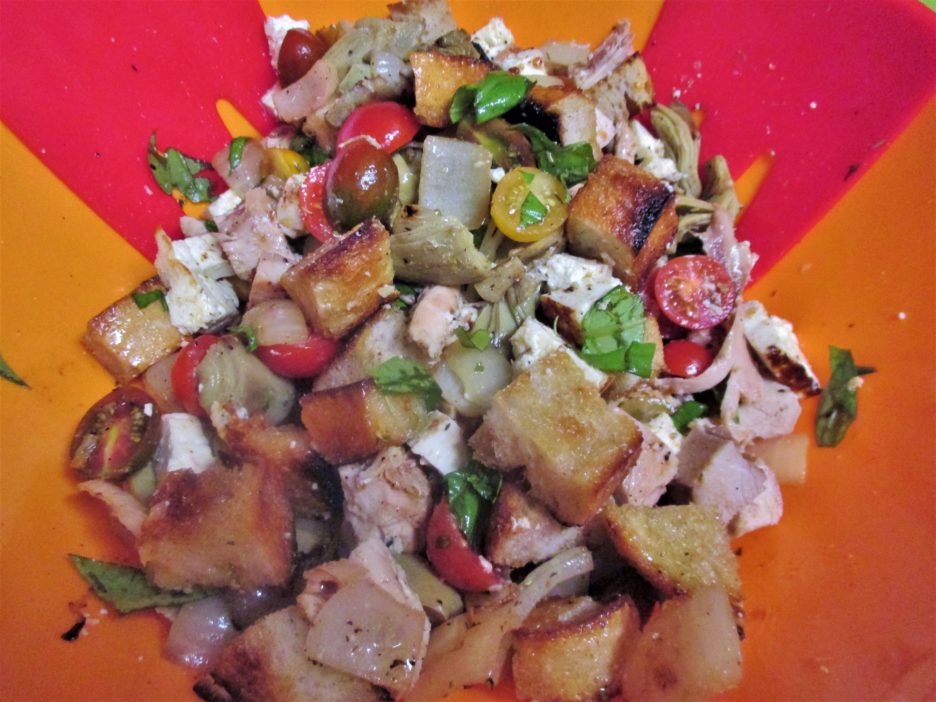
There are lots of other good choices including Ciabatta and French. I’ve made several wonderful salads with Multigrain Baguettes as well. Use what you love or have on hand.
  2. Tomatoes get lonely so give them some company. Summer vegetables are hitting their stride right now and most of them play well with tomatoes. Onions should always be invited to the party. Cucumbers, bell peppers, summer squash and zucchini are great bowl mates too. Artichoke hearts (I use frozen for convenience) are a welcome addition as well. If you love the vegetable it will love being in your salad.
  3. Having a variety of vegetables makes for great flavors. Having a variety of textures makes for a great salad. I like to mix raw and cooked vegetables to achieve that wonderfully interesting balance. This summer, I have been grilling many of the vegetables. Tomatoes, onions, and peppers have all had a turn on the grill before jumping into a salad. Tomatoes grilled just enough to release their juices combine beautifully with crunchy red onions….etc.
  4. When it comes to dressing, simple is probably better. The recipe below is not very complex, but if you are feeling a bit fancy it is a great match up to any salad.
    Mediterranean Vinaigrette

    A twist on the classic vinaigrette with plenty of lemon and more than a hint of garlic. Add any fresh herbs of your choice. This is wonderful on a Greek salad, but it would be equally delightful as a dressing for grilled vegetable or a pasta salad. It makes a great marinade as well.

    Ingredients
    • 1 Medium Lemon Juice and zest
    • 2 Cloves Garlic Grated
    • 1/4 Cup White Balsamic Vinegar
    • 1/2 Tsp. Red Pepper Flakes Optional, to taste
    • 3 Tbsp. Chopped Fresh Herbs Parsley, thyme, basil, or you choice
    • Kosher Salt and Pepper To taste
    • 1 Tsp. Dijon Mustard
    • 1/4 Cup Olive oil
    Instructions
    1. Combine all of the ingredients in a jar with a tight fitting lid. Shake until completely blended. Allow to rest in the refrigerator for at least one hour.

    As the summer has gone on, I have stripped it down. Some good olive oil warmed with a few smashed garlic cloves is a lovely base. Combined with a flavorful vinegar, salt and pepper it lets the beauty of the vegetables shine through.

  5. Add some protein and make your salad a meal. Use anything that sounds good to you. Leftover chicken, cured meats, beans, grilled sausage or steak all work well. Then there is cheese. Who doesn’t love cheese? Fresh mozzarella or cubed Asiago have found there way into my salads, but the best discovery has been Grilled Feta. 
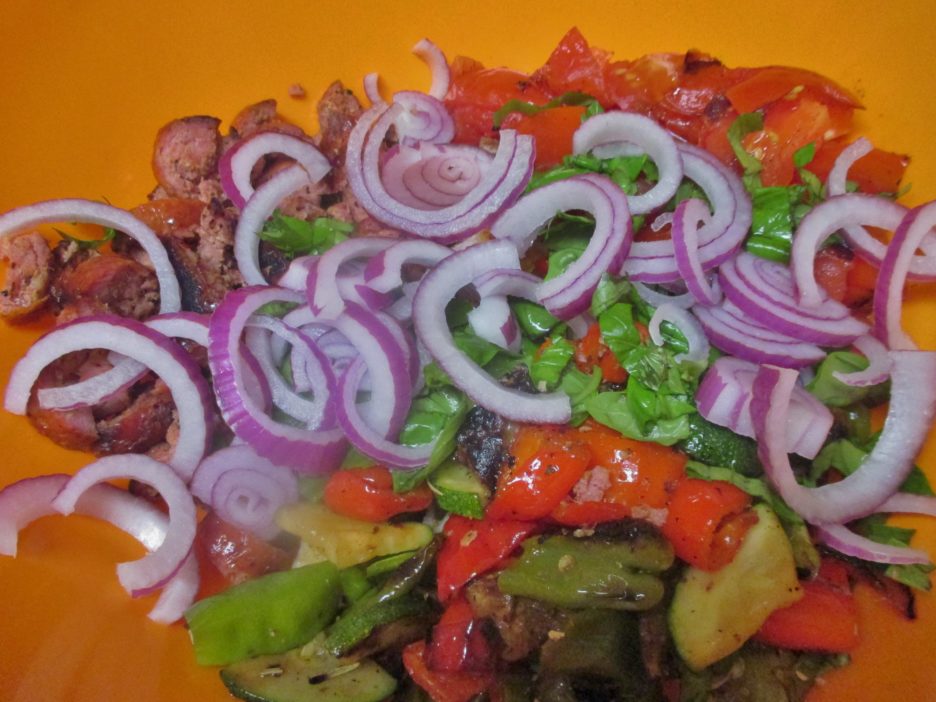
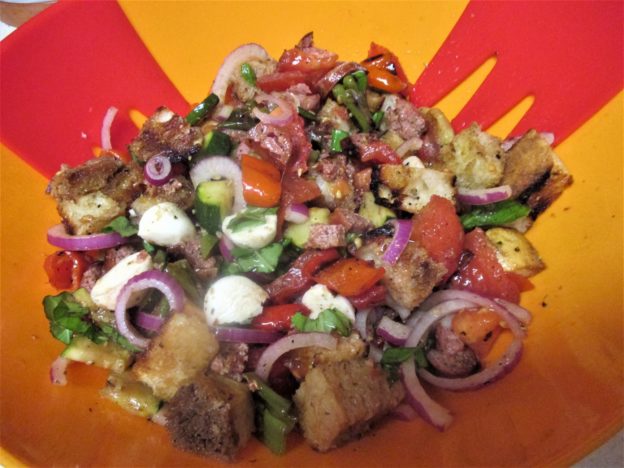
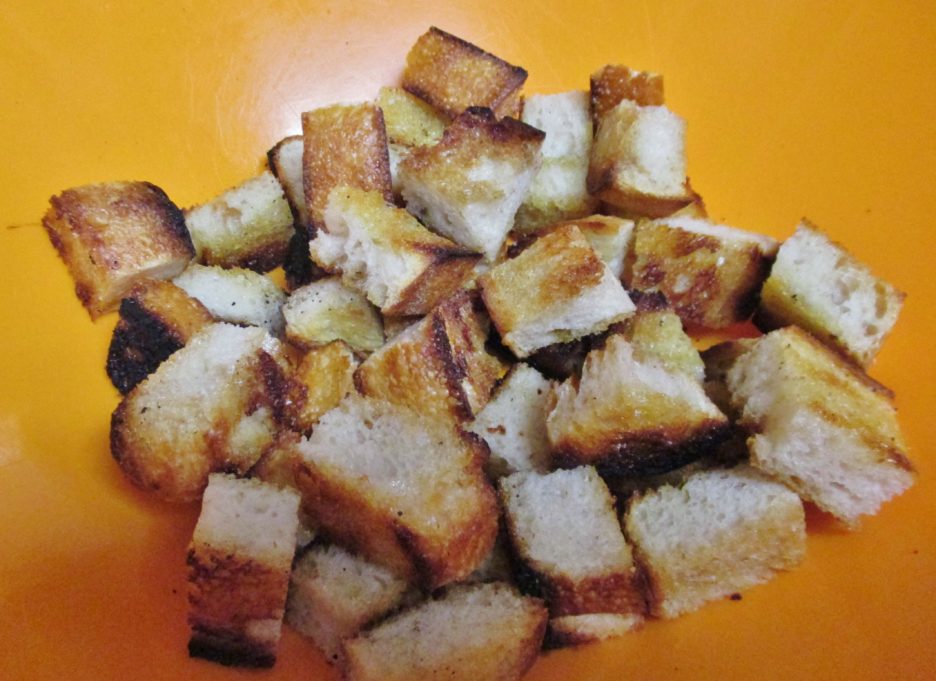
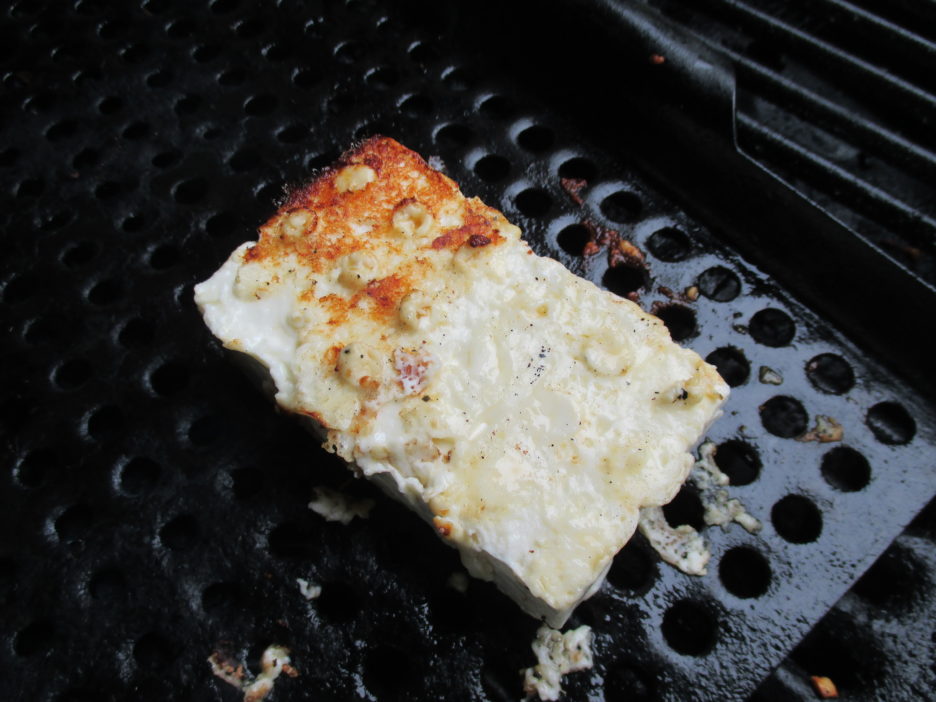
It is firm and dense enough to hold up to the grill’s heat though it does need to be watched carefully. The time and effort is worth it.
  6. Herbs make everything better. Chop up a handful of whatever you love and add them to the salad. Basil, parsley, and chives are my current go tos.
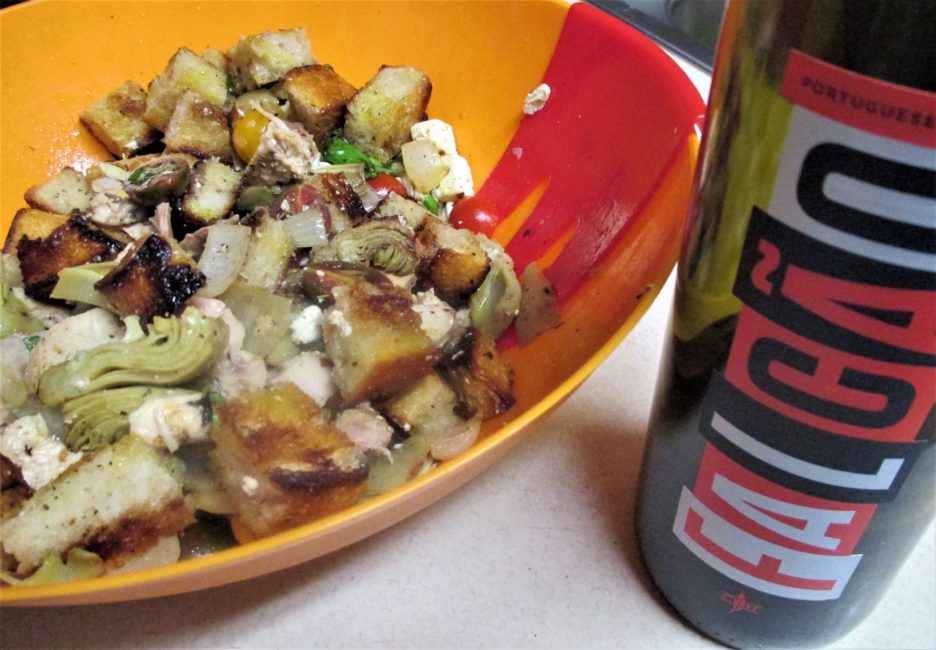
Here is a Basic Recipe for a Summer Panzanella Salad…it is very grill forward and leaves room for all kinds of interpretation.
    Summer Panzanella Salad

    A basic recipe for Panzanella salad that takes advantage of Summer's bounty.

    Servings: 2
    Ingredients
    • 3-4 Ounces Crusty Bread Stale is great!
    • 1/4 Cup Olive Oil
    • 2 Cloves Garlic Smashed
    • 1 Medium Onion Any variety
    • 2-3 Medium Tomatoes
    • 2 Cups Chopped Vegetables Whatever you love
    • 1/2 Cup Chopped Herbs Any variety to taste
    • 2 Tbsp. Vinegar Your choice
    • 1 Cup Chopped Protein Anything
    • 2 Ounces Cheese
    • Salt & Pepper To Taste
    Instructions
    1. In a small pan heat the oil and garlic gently . Once the garlic begins to sizzle take it off the heat and let it steep.

    2. Slice the bread about 1 inch thick. Brush both cut sides with a little of the olive oil and toast in the oven or on the grill. It should be dry and lightly browned. Let it cool then cut it into cubes. Place in the bottom of a deep bowl.

    3. If you are grilling vegetables, brush them lightly with some of the garlic olive oil and place on a medium grill. Tomatoes can be cut in half horizontally  and will only take a few minutes. Cherry tomatoes can be skewered. Other vegetables whether cooked whole or chopped should be tender and lightly charred. Cut any whole vegetables into bite size pieces. Put these on top of the bread cubes.

    4. Cut or chop raw vegetables into bite size pieces. Roughly chop the herbs. Cut your protein into bite size pieces as well. All of these can be put on top of the bread cubes. Toss everything together.

    5. Add the vinegar to the remaining garlic olive oil and season with salt and pepper. Mix well. Pour the dressing over the salad and toss to combine. If the salad seems a bit dry add a bit more olive oil. 

    6. Let the salad sit for 15-20 minutes to allow the flavors to blend.  Taste and adjust any seasonings. Divide between 2 plates and serve.

    As you can see, this is a very general and basic recipe that will lend itself to any direction you want to head in. There are so many vegetables that would enjoy winding up in this kind of salad. Play around..that’s part of what Summer is all about. Know too, that as Fall approaches and winter comes along, there will be lots more Panzanella Salads.

Porcini Pasta Revisited

When something is wonderfully delicious, it earns the right to be made again. It also earns the right to be tweaked a little to make it even more wonderfully delicious. Porcini Pasta is just that kind of recipe. I first made it as a side dish to enhance grilled steak. It stole the show so to speak. It was definitely tasty enough to move into the spotlight as a main dish. I dressed it up with a little cheese and served it to non-meat eating guests. Again it was a home run. Could the third time be even more of a charm? So here’s what I came up with.

It was one of those days that seemed busy from the minute my feet hit the floor. Errands, laundry, and a bit of grandboy sitting and before I knew it, dinner (or plans for it) was looming on the horizon. Time to take stock of what was interesting in the pantry. Porcini pasta was sitting in an unassuming corner and not too far away was a jar (yes, I do succumb sometimes) of Alfredo Sauce. A brief foray into the refrigerator yielded  crimini mushrooms and some prosciutto. I also found a chunk of Aged Asiago Cheese. I sensed that this could be the start of a wonderful friendship.

I gave some thought to how I was going to use the prosciutto. I decide to see if I could fry it to create crispy bits much like bacon. The thin slices frizzled up beautifully and crumbled into wonderful salty flakes that would serve as both a surprise crunch in the sauce and a garnish.

Using my original recipe as a guide, I sliced the mushrooms and chopped up shallots and garlic. These cooked in the drippings  from the prosciutto and some olive oil until they were lightly caramelized.

While the water for the pasta boiled, I thinned the Alfredo sauce with some chicken broth and let it simmer with the mushroom mixture. I added a good amount of the grated Asiago and a generous amount of freshly ground pepper. I cooked the pasta until it was barely al dente, drained it and added it to the sauce along with half of my prosciutto flakes. Things got happy for a few more minutes and dinner was ready to plate. All it needed was a sprinkling of a little more cheese and a flurry of prosciutto flakes.

Porcini Pasta Revisited

The original side dish recipe has graduated to an easy Weeknight Supper.

Servings: 3
Ingredients
  • 8 Ounces Porcini Pasta
  • 3 Ounces Prosciutto
  • 8 Ounces Crimini Mushrooms Sliced
  • 1/2 Cup Chopped Shallots
  • 3 Cloves Garlic Chopped
  • 1 Tbsp. Olive Oil
  • 1-1/3 Cups Alfredo Sauce
  • 1/2 Cup Chicken Broth More or less as needed
  • 1 Cup Grated Asiago Cheese Divided
  • 3/4 Tsp. Freshly Ground Pepper
Instructions
  1. Bring a large pot of pasta to a boil. While the water heats prepare the sauce.

  2. Heat a large skillet over medium heat. Add the olive oil and heat. Add the prosciutto and cook until it is crispy. remove from the pan and drain on a paper towel.

  3. Add the mushrooms, onions, and garlic to the drippings in the pan. Cook stirring occasionally until everything is lightly golden brown.

  4. Add the Alfredo sauce and the chicken broth and cook over low heat for 5 minutes or so.

  5. Cook the pasta until it is just barely "al dente."

  6. Add 3/4 of the cheese and half of the prosciutto to the sauce along with the pepper. Drain the pasta and add it to the sauce. toss to coat and allow to cook for a few minutes more.

  7. Pour into a serving bowl and top with the remaining cheese and prosciutto.     Serve

If my truth be told, I hardly ever make anything the same way twice, not that there’s anything wrong with that. I am always looking for ways to make things better or to incorporate ingredients that I have on hand. That’s how Mamam D’s Kitchen of Love rolls. 


Chicken Breasts…the Right Stuff(ed)

As we began the Holiday Season, I shared a post about stuffed chicken breasts. 
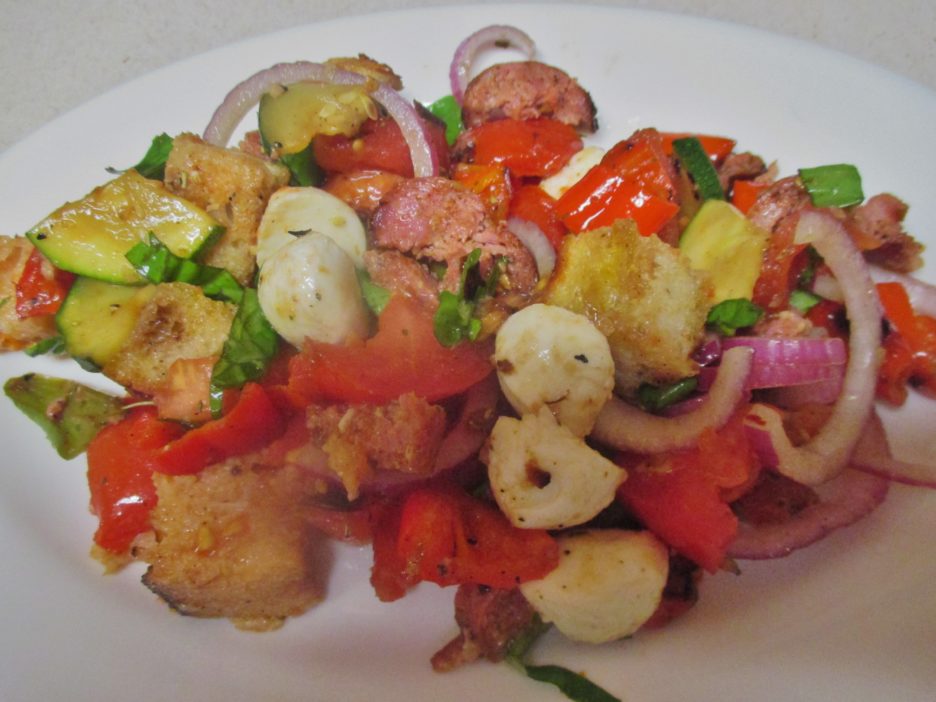
Little did I know that when the new year began, that I would still be singing their praises. Not to sound like I am repeating myself, but I have come up with yet two more ideas for filling a chicken breast and both of them are delicious and easy.

Why am I suddenly obsessed with stuffing chicken breasts? First off they are a lean and inexpensive protein. In and of themselves they are pretty bland and very boring, but that is what makes them so wonderfully versatile. They are quick cooking which is always a plus for weeknight suppers and can embrace any cuisine from comfort to gourmet.

Another reason to stuff a chicken breast is to keep it moist and tender, especially when it is heading into the oven. I’m sure that we have all choked our way through a dry and tough chicken breast at one event or another. Stuffing works from the inside to keep everything moist. To create a little extra moistness insurance, wrapping or coating it with something fat based helps as well.

There are two ways to stuff a chicken breast. The more gourmet method is to butterfly a good-sized breast and then pound it into a nice evenly flat canvas that can then be stuffed, rolled, and tied.

A simpler approach is to cut a deep pocket into the breast and fill it to the rim with something yummy. That is where we are heading today. The fillings of choice are more carb friendly for those that care about that sort of thing. They are vegetable forward with just the right amount of richness to create a palate pleasing sensation.

This can be considered a master recipe. I wrote it for two servings because that’s how many I cook for most of the time. It can easily be doubled, tripled or quadrupled if that’s what you need. A little simple math will give you the amount of ingredients you need. This stuffing will generously stuff the breasts with a little left over to create a comfy bed in the baking pan. Without further ado I give you Stuffed In the Side Pocket Chicken Breasts.

Stuffed In The Side Pocket Chicken Breasts

A master recipe for creating moist and delicious baked chicken breasts.

Servings: 2
Ingredients
  • 2 6-8 Ounce Boneless Skinless Chicken Breasts
  • 1/2 Tbsp. Olive Oil
  • 1 Clove Garlic Chopped
  • 1/3 Cup Chopped Onion Any type will work
  • 2 Cups Raw Vegetables, chopped Pick the ones you love.
  • 1 Ounce Cream Cheese Optional
  • 1 Tbsp. Bread Crumbs As needed, optional.
  • 4 Strips Bacon For wrapping the breast
  • 1 Tbsp. Mayonnaise To coat breast if not using bacon
  • Paprika
Instructions
  1. Using a sharp knife and going slowly, cut a pocket in the thickest side of the breast. Do not pass go or cut all the way through. Set Aside

  2. In a medium skillet, heat the olive oil over high heat. Reduce slightly and add the onions and garlic. Cook stirring occasionally until the mixture is soft and fragrant,

  3. Add the vegetables that you have chosen and continue to cook for 7-10 minutes stirring often. The vegetables need to be soft and slightly caramelized. At this point you should have about 1-1/4 cups of delicious stuff(ing).

  4. Depending on the vegetables moisture level, add cream cheese and/or breadcrumbs to make a thick (not runny) mixture. Add any additional seasonings and heat  long enough for everything to get acquainted.

  5. Cool the mixture slightly and and spoon it into the pockets of the breasts. Pack it gently but do not fill it to the point that the stuffing is coming out. If you have some left, spread it in the bottom of the baking pan you will be using. Give the pan a good spritz of cooking spray first.

  6. Choose how you want to finish the outside:  Wrap the breast with the bacon strips securing with toothpicks or kitchen twine if necessary. OR Spread the mayonnaise evenly on the tops of the breasts. Add any seasoning of you choice. 

  7. Bake at 375 degrees for approximately 25 -30 minutes. Watch carefully and check for an internal temp of 160 degrees. Remove from the oven and allow to cool for 5 minutes before serving.

Now for how I made this recipe my own:  Spinach Artichoke Dip is a staple at many parties…you may have even indulged in it over the holidays. It also makes a killer stuffing for  a chicken breast. Marinated artichoke hearts and fresh spinach are sauteed with a little garlic and olive oil. Once they are happily united some cream cheese and grated parmesan are added. To keep the stuffing in the chicken where it belongs, a touch of bread crumbs ( a small carb price to pay) is added as binder. The final touch is a thin coating of mayonnaise and a light sprinkle of parmesan. A dusting of paprika makes it pretty. It only takes 25 minutes or so in the oven and it is ready to be the star of the show. Porcini Laced Faro (from a box) and sauteed grape tomatoes round out the plate.
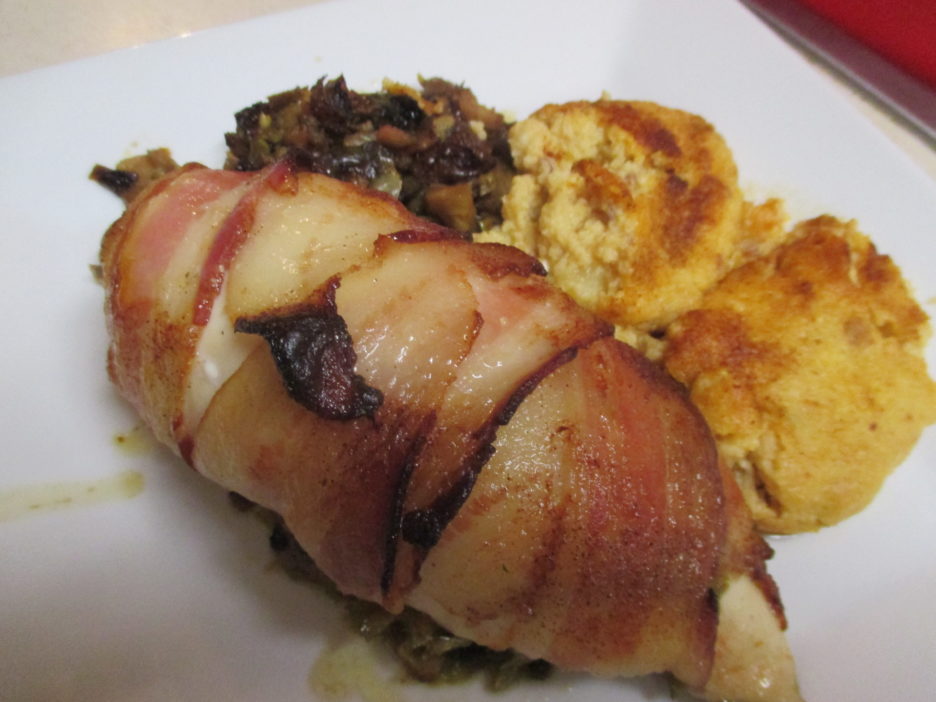
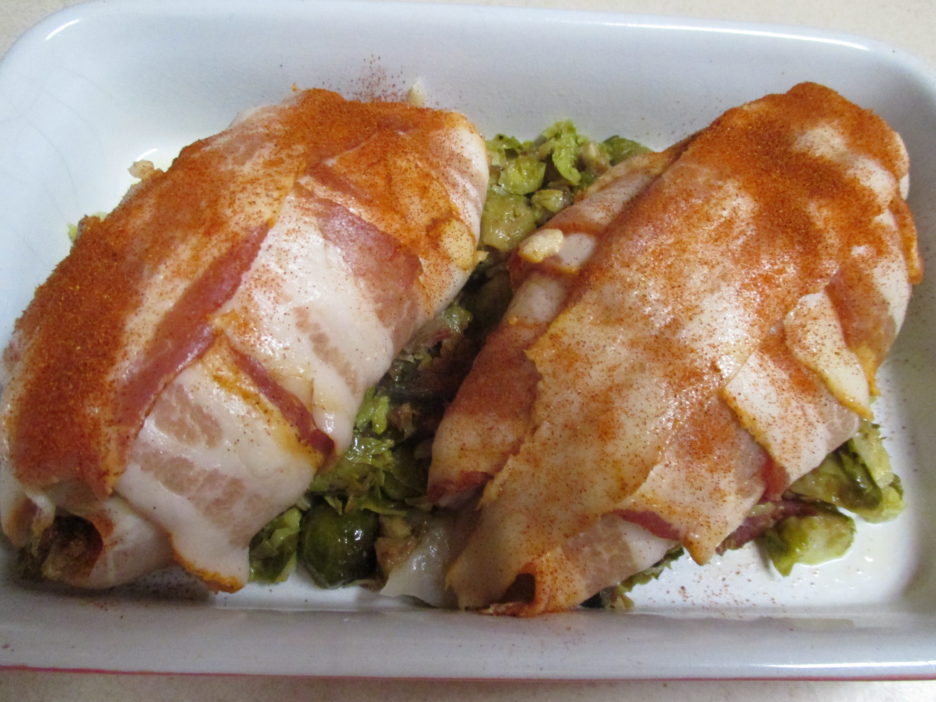
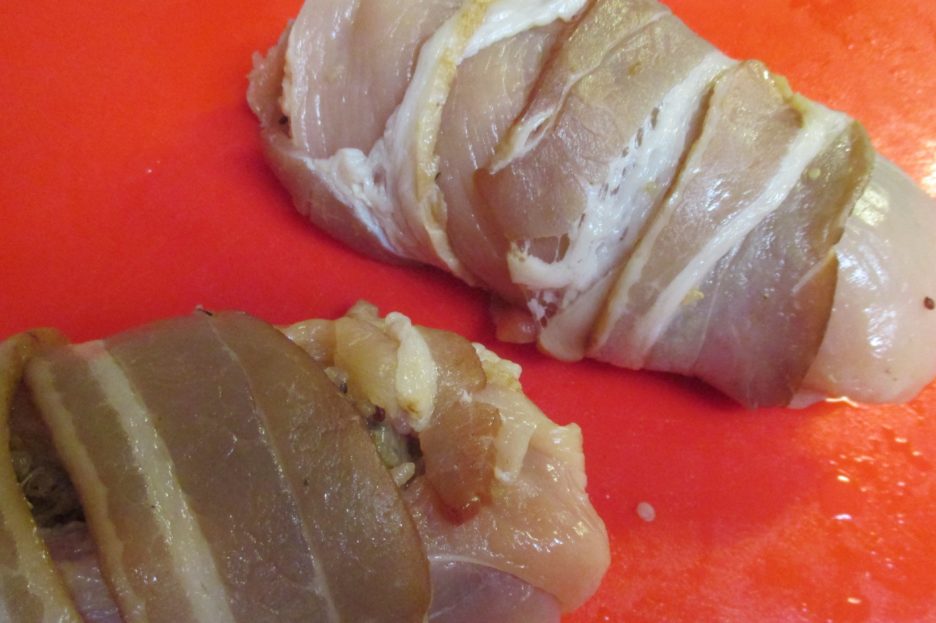
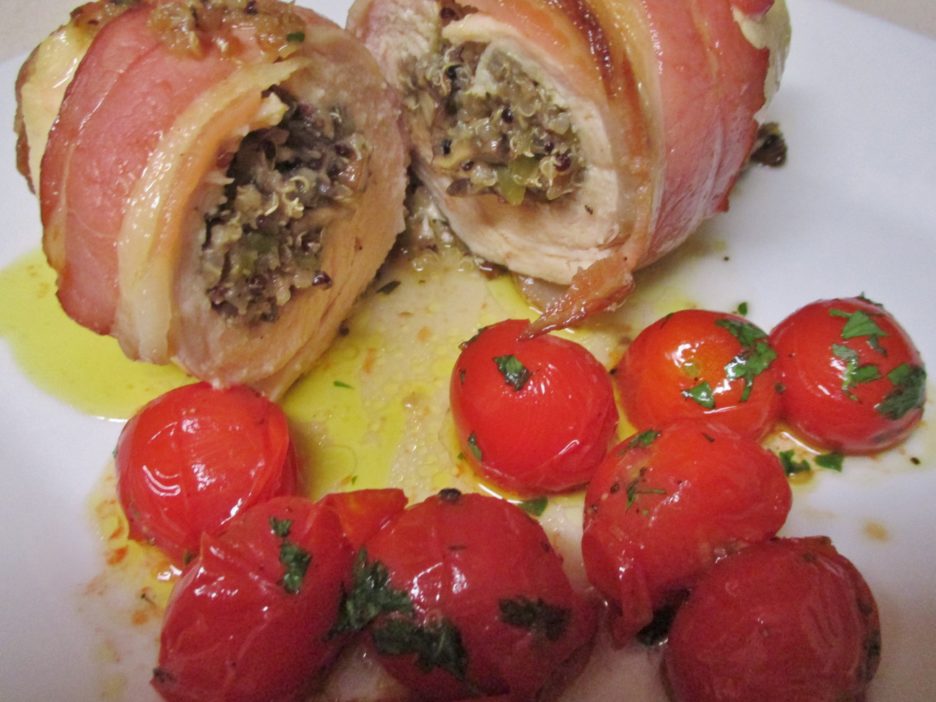
The chicken breast pocket can also be a new home for leftover vegetables. Brussels Sprouts roasted with bacon and onions was uncharacteristically left over from a previous dinner. Chopped up and packed inside a chicken breast made it’s second life almost as wonderful as its first. I enrobed this one in bacon that carried on the bacon that was in the stuffing, These are but two of a virtually endless set of possibilities. Use the master recipe and join the movement to stamp out dry chicken breasts. Share you creations and let’s start a new day of moist and tasty chicken breasts for all!!