In spite of occasional days of rain and cold, Spring is finally settling into the Midwest. Trees once bare are now laden with blossoms or sprouting leaves. The days are longer and on some days sitting out on the balcony is a downright pleasure. This all makes grilling out much more enjoyable. We are ardent year round grillers, but it is nice to be able to actually attend to it without having to put on a winter coat.
It was just such a recent (Meatless) Monday night that gave life to these vegetable stacks. The weather was perfect for a grill meal that needed a little attention but still allowed time to sip a glass of wine. It was also necessary to have time to admire the beauty of our park like courtyard complete with the sounds of children chasing balls and bubbles. A light breeze sent the blossom scents wafting through the air and made for an almost perfect evening.
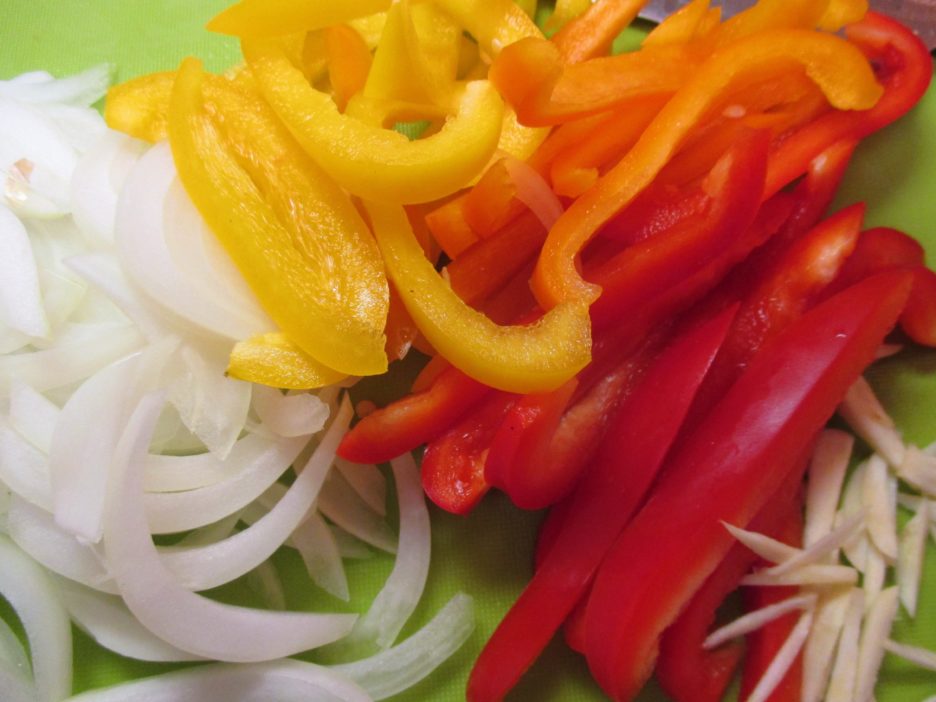
While this does qualify as a quick weeknight supper, there is a bit of earlier in the day prep involved. The vegetables need to be cleaned, cut, and marinated. I started with Portobello mushrooms.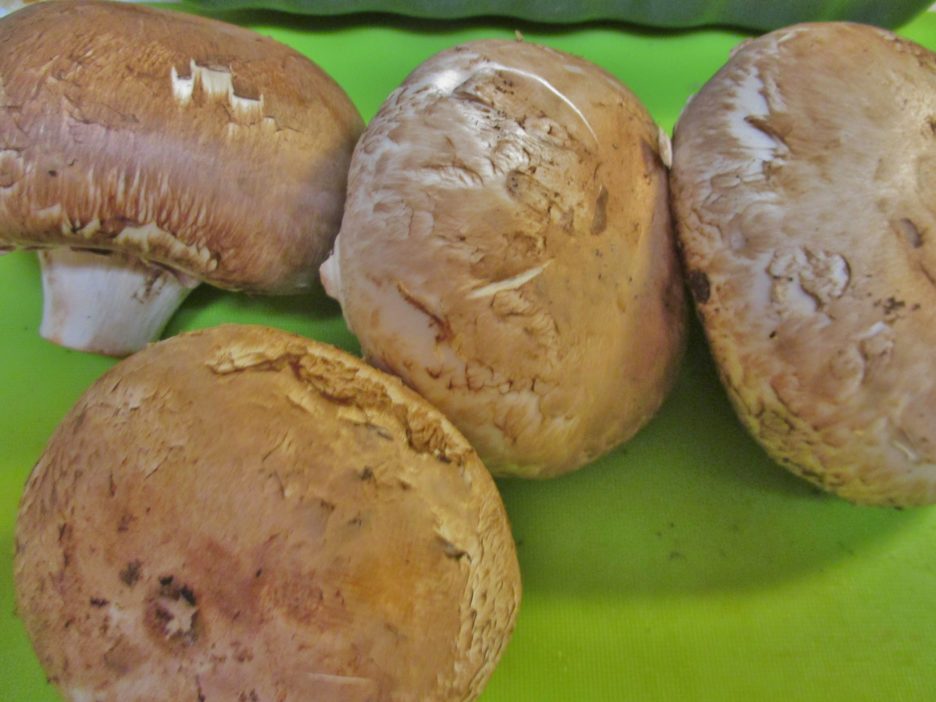 These were an interesting size, labeled “Mini” Portobello, they were more like “Giant” Crimini. Whatever the nomenclature, they were the perfect size to create a base for the veggie stacks once the were stripped of their gills and given a little wipe down. The rest of the veggies were cut in thick chunks to fit nicely in the caps. Everything got popped into zip top bags and marinated in a Balsamic Vinaigrette. Any marinade of your choosing will be perfect.
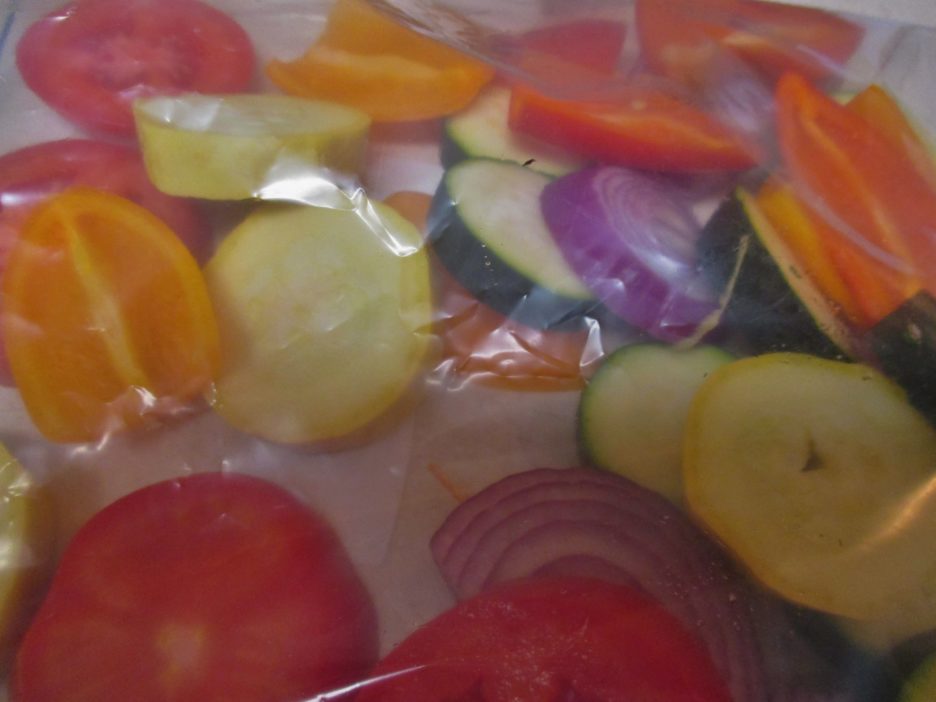
When the time came to grill , I reached for my trusty Grill Mat. This is possibly one of the greatest inventions of the millennium. This mat allows you to grill the gooiest marinated food, the smallest pieces of anything edible, and anything that is likely to stick, come apart, or fall through. While possessing all the above attributes, what I find the most amazing is that food still comes out tasting smokey and for lack of a better word, grilled.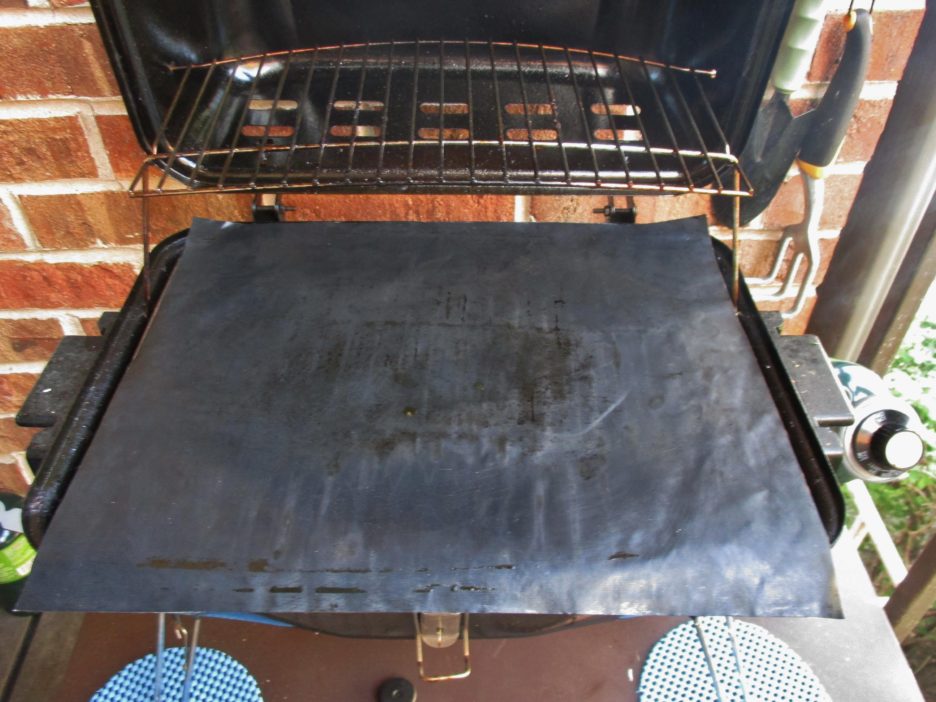 There is an infomercial that offers these, but I know that mine came from a Groupon offer (thank you Loren) that is unfortunately no longer available. If you don’t have these mats, I would strongly recommend a grill pan.
I started with the mushrooms which take the longest time. Once they were almost done I moved them to the top rack. They finished cooking and the mushroom drippings found their way onto the vegetables below. This was a very good thing. Put the veggies on the grill in order from the longest cooking time to the shortest.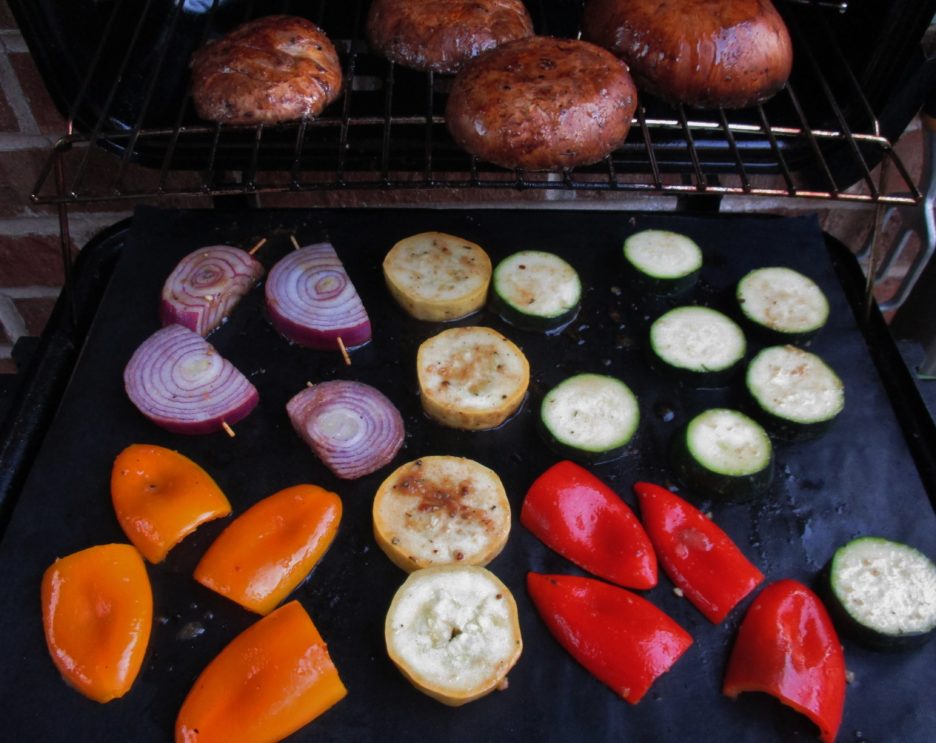 This is where the time to sip wine and tend to the grill come into the picture. The veggies seem to require almost constant moving, turning, and otherwise attending too, but on a beautiful spring evening it’s a perfect excuse to spend time outside. You may notice that the onions are sporting the latest in toothpick accessories. This isn’t just for show, the picks help keep the onions together, the better for them to be a stable layer in the stack. Just remember to take them out before assembling.
Once everything was perfect, I took them inside and began the assembly. While this was happening, I put the tomatoes on the grill. Opt for Roma Tomatoes or any other firm fleshy variety. These will hold together and keep their tomato integrity.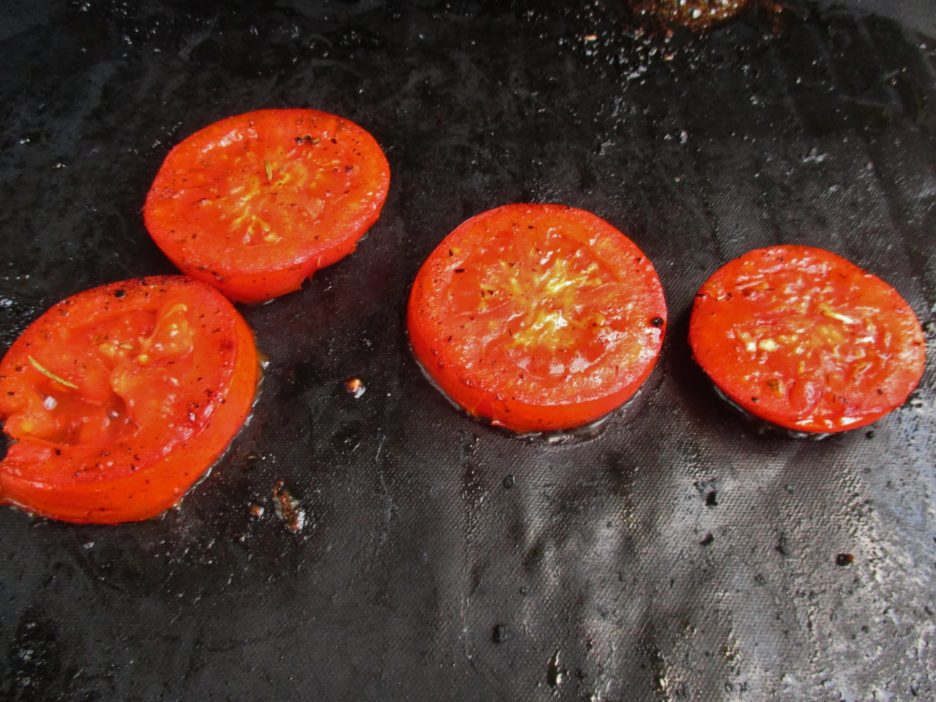 Toothpicks again came to the rescue again. Once the stacks were assembled complete with their lovely mozzarella hats, I used the picks to give them and me an extra level of security.
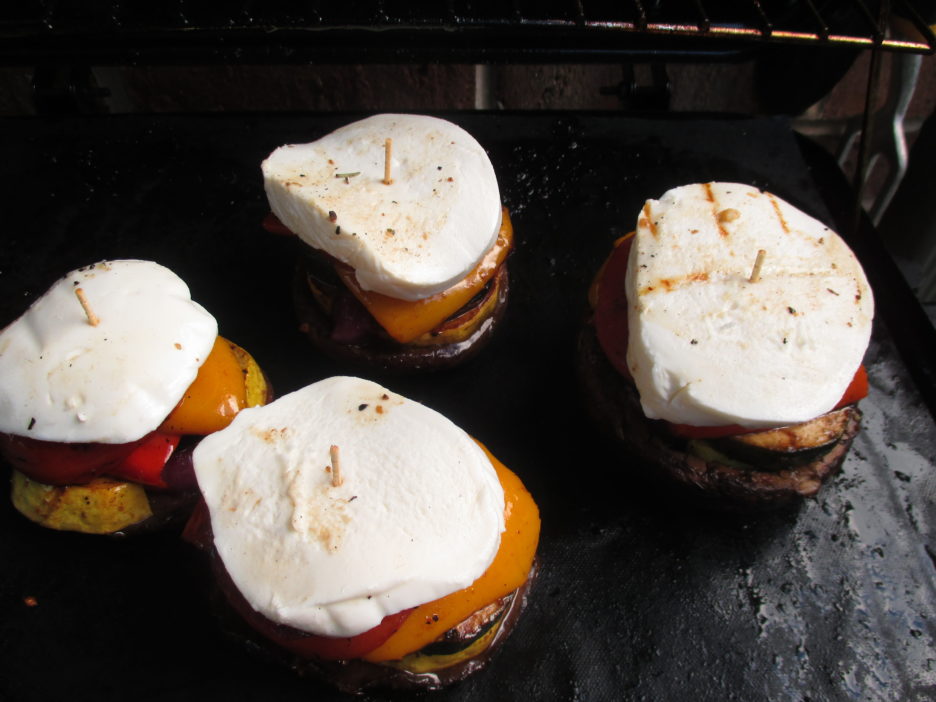 It was worth the effort and use of wood, not a single stack was lost. They were beautiful and ever so tasty.
Instructions
Remove the stems from the mushrooms. Use a spoon to scrape the gills out of each mushroom. Wipe them with a damp paper towel and place them in a gallon zip top bag.
Place the remaining vegetables in another zip top bag. Try to lay them flat.
Divide the Balsamic dressing between the two bags. Seal the bags and turn them a couple of times to distribute the dressing. Refrigerate for at least 4 hours.
On a grill set at high heat and using a grill mat or pan, cook the mushrooms, turning as needed until they are somewhat soft. If you have a second rack on your grill move them to it top side up.
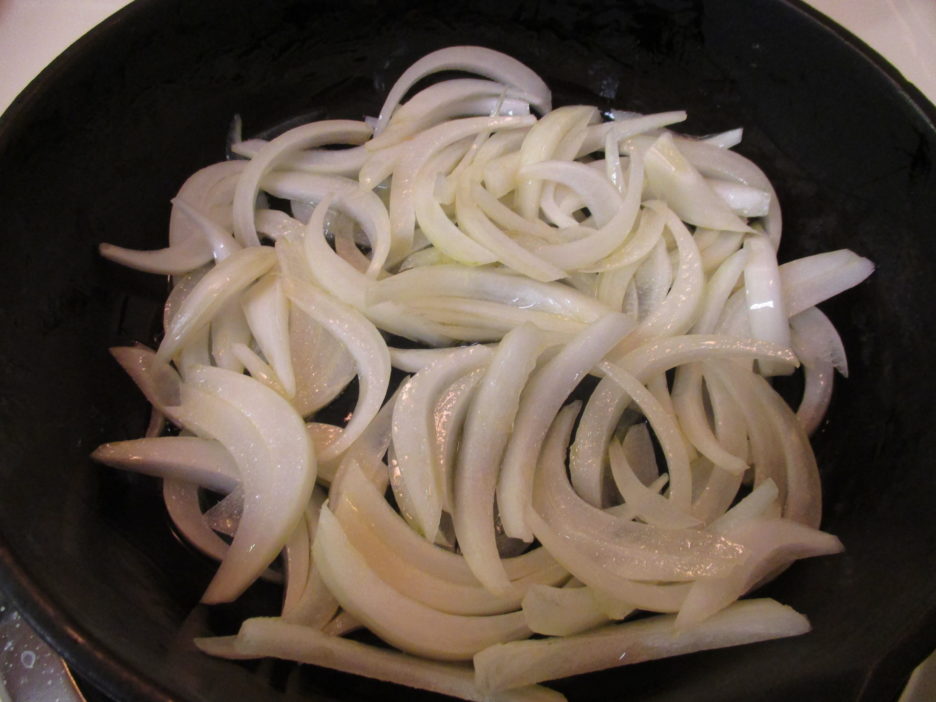
Add the vegetables to the grill. Start with the onions. It is helpful to use toothpicks to hold the slices together.
Once the onions begin to brown, add the squashes. Continue to cook the vegetables turning occasionally until they are beginning to soften and are browning.
Remove all the vegetables and the mushrooms from the grill. Add the tomatoes. These will cook while you assemble the stacks. Enlist a lovely/handsome assistant to keep an eye on them while you do this.
Assemble the stack as follows: Mushroom, onion slice (don't forget to remove the toothpicks), zucchini slice, pepper chunks, and yellow squash slice. You will have some squash slices left over, do with them as you wish, but they do fill out the plate nicely.
Remove the tomatoes from the grill, and add them to the stack. Top each stack with a slice of the mozzarella.
Anchor each stack with a toothpick. Trust me, don't skip this step. Return the stacks to the grill and cook, covered until the cheese begins to melt.
When everything looks beautiful, bring the stacks in and remove the toothpicks. Serve with a nice salad and the remaining squash slices.
As always, feel free to use any vegetables that you like. Think of the possibilities when the Farmer’s Markets really get rolling. A light and delicious dinner will be stacked in your favor.
Like this:
Like Loading...


 I wanted them to caramelize a bit before the peppers and garlic joined them. Once everyone was happily co-mingling, I added the red pepper flakes and ground fennel. A quick note on ground fennel; it is not necessary. Crushed fennel seeds will work. You could go even more rustic and use the seeds whole, just give them a rub between your hands to release the fragrance (and a beautiful one it is).
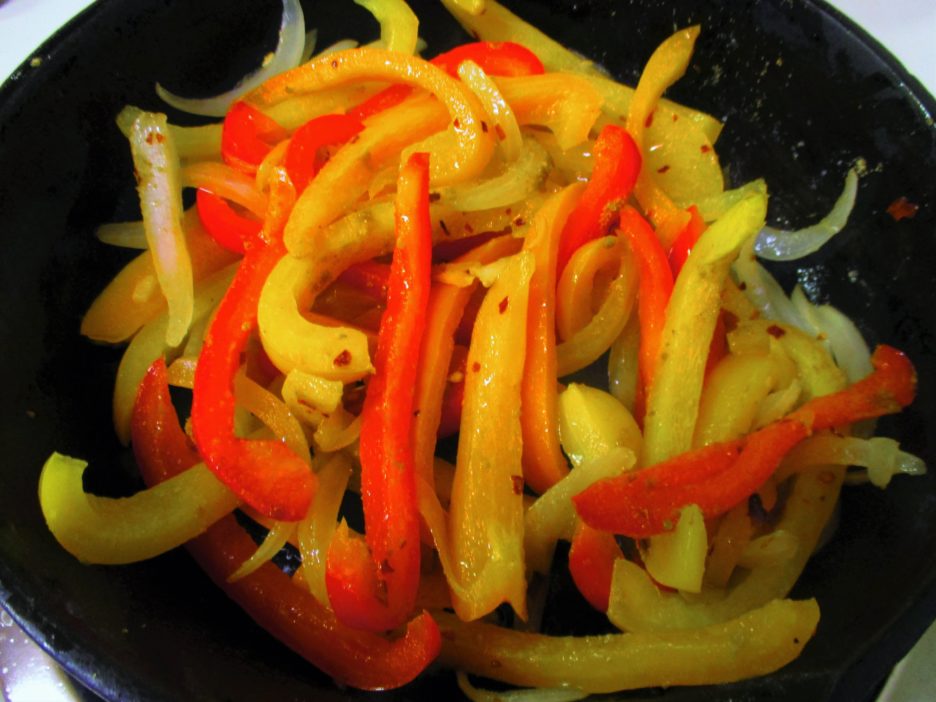 Every frittata needs eggs and I used 5. Yes, four would have worked, but I was feeling a bit generous and hungry so five it was. I beat them well and added some fat free half & half along with grated Romano cheese and Italian Herb Blend. The eggs waited stove side with some sliced tomatoes and fresh cilegine that would become the final toppings.
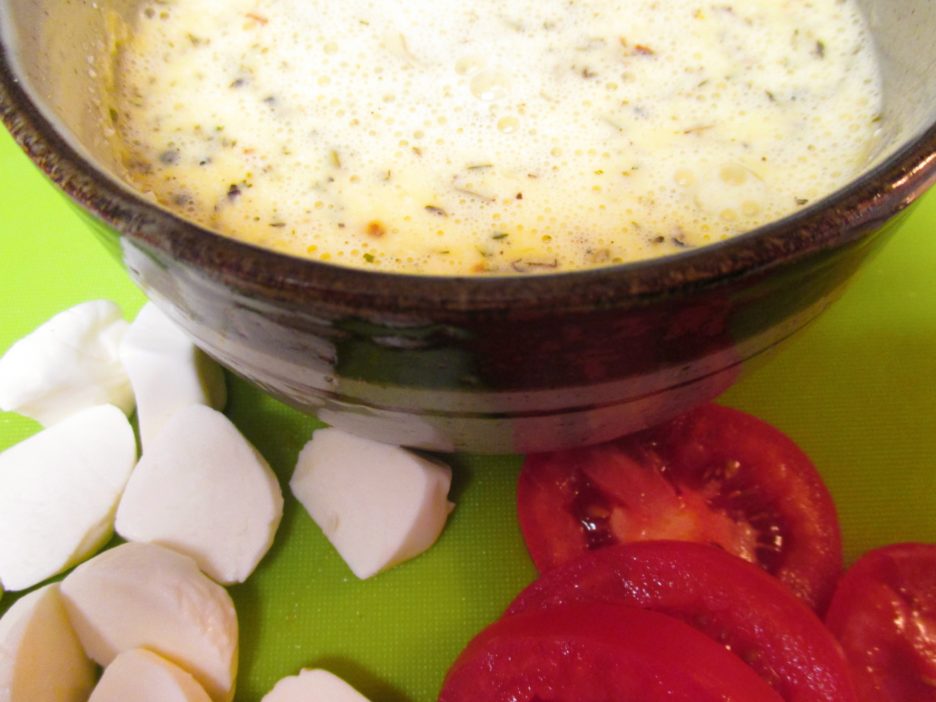
 A little more Italian herb blend and a drizzle of olive oil and under the broiler it went. This step doesn’t take long and should be closely monitored as beautifully golden can become horribly charred in a matter of seconds. I was vigilant and the frittata came out perfectly browned.
 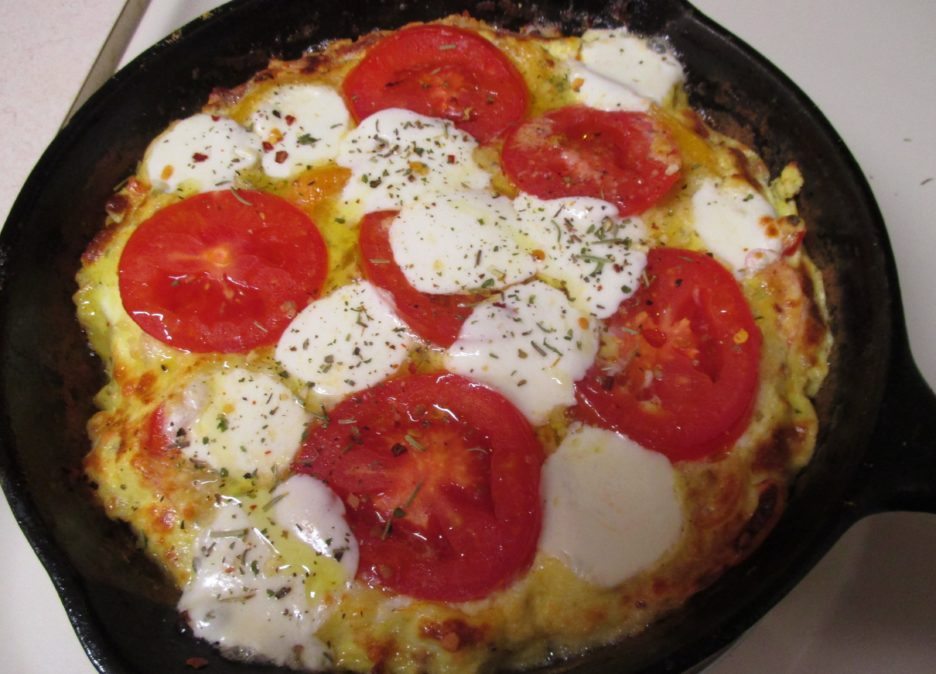 It rested for 5 minutes and could sit even longer if needed. We were hungry, so we went with the 5 minutes. This was wonderful on its own, but as with any good Italian meal, a little crusty bread and a salad would be great.
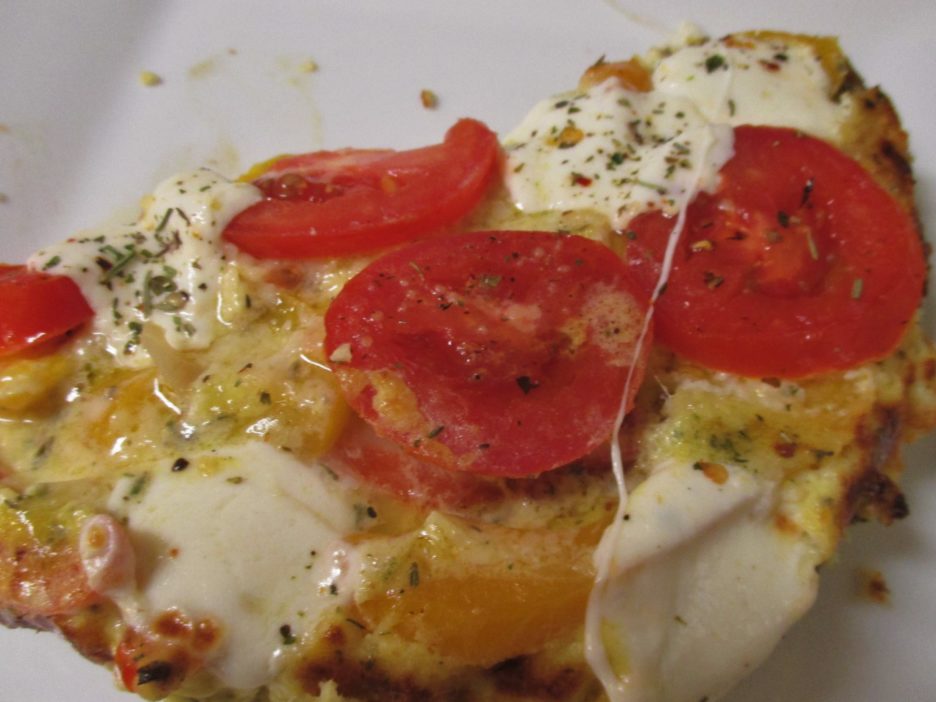


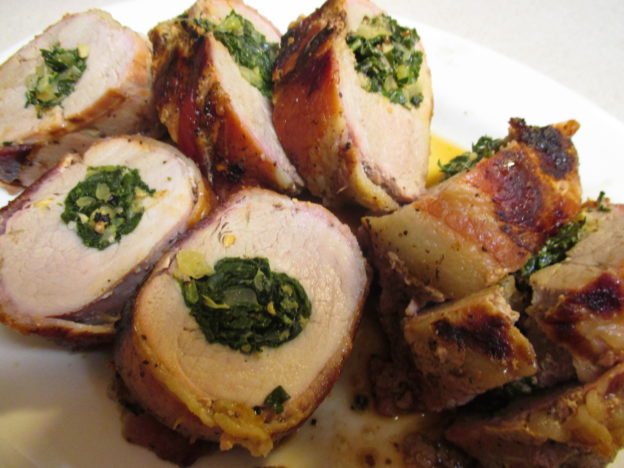

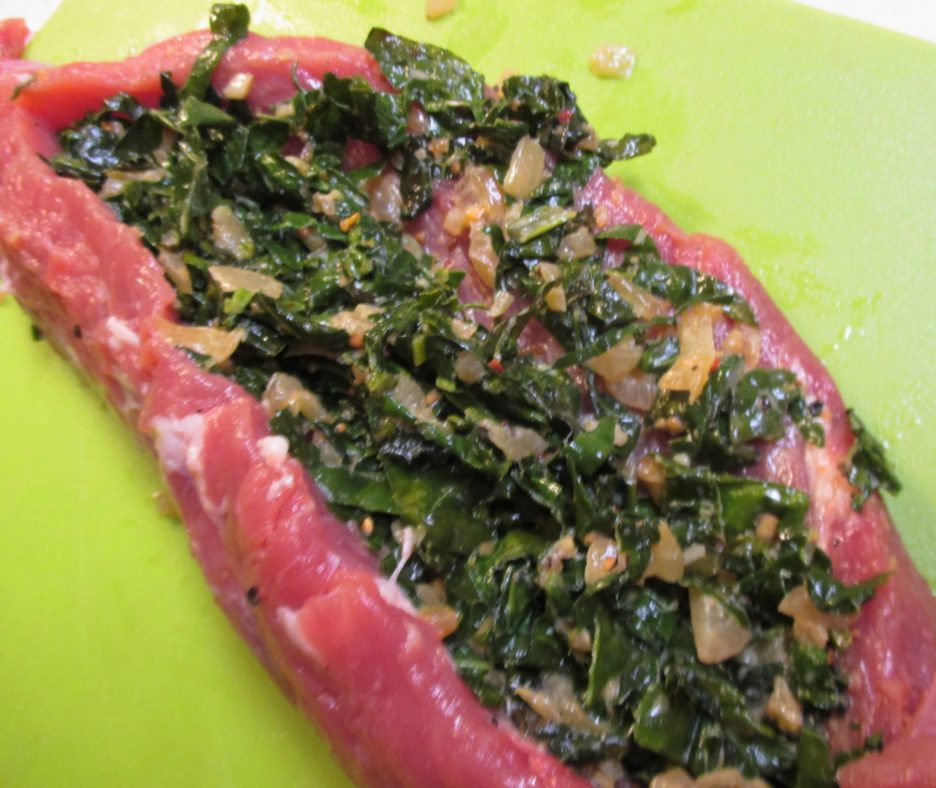 How to securely enclose this lovely filling? There is always butcher’s twine, but since the little torpedo was going on the grill, something that could provide a bit of protection seemed like a better choice. Enter Thick Cut Peppered Bacon. I precooked it a little before inrobing the tenderloin. It rendered a bit of the fat and ensured both of the porks would be ready at the same time. Again, butcher’s twine could have and probably should have come into service. Instead I used toothpicks, eight to be exact. Knowing the exact number is actually pretty important; it prevents someone getting an unexpected surprise.
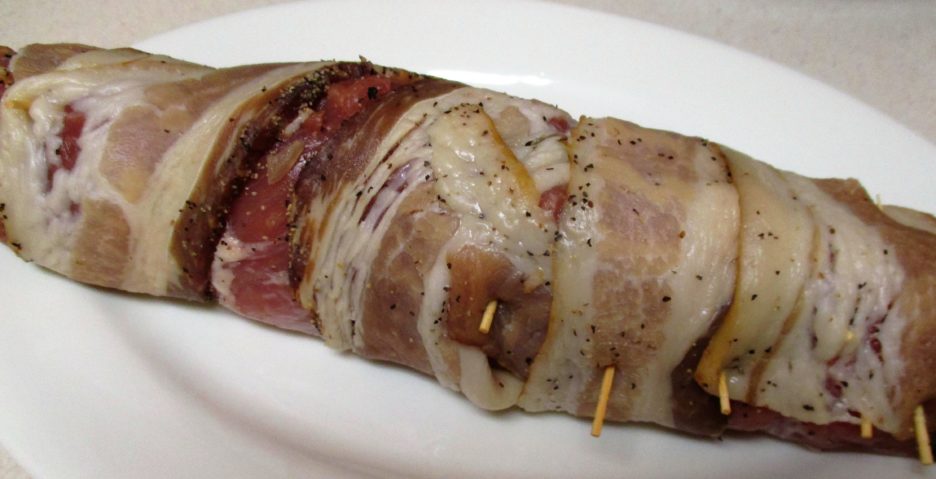 Off to the grill it went. The wonderful thing about Pork Tenderloin is that it cooks very quickly making it a perfect weeknight meal. This was average size, weighing in at around a pound and it was ready in about 25 minutes. It rested for a few minutes while the rest of the dinner came together (in this case, steamed broccoli).
 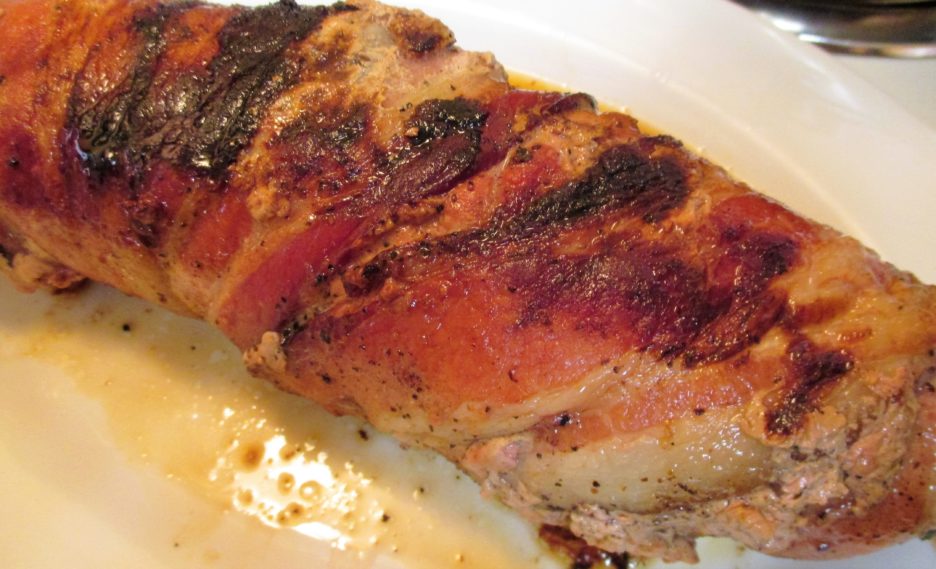 Not to brag, but the slices looked beautiful. The filling created a perfect green bullseye on each slice.
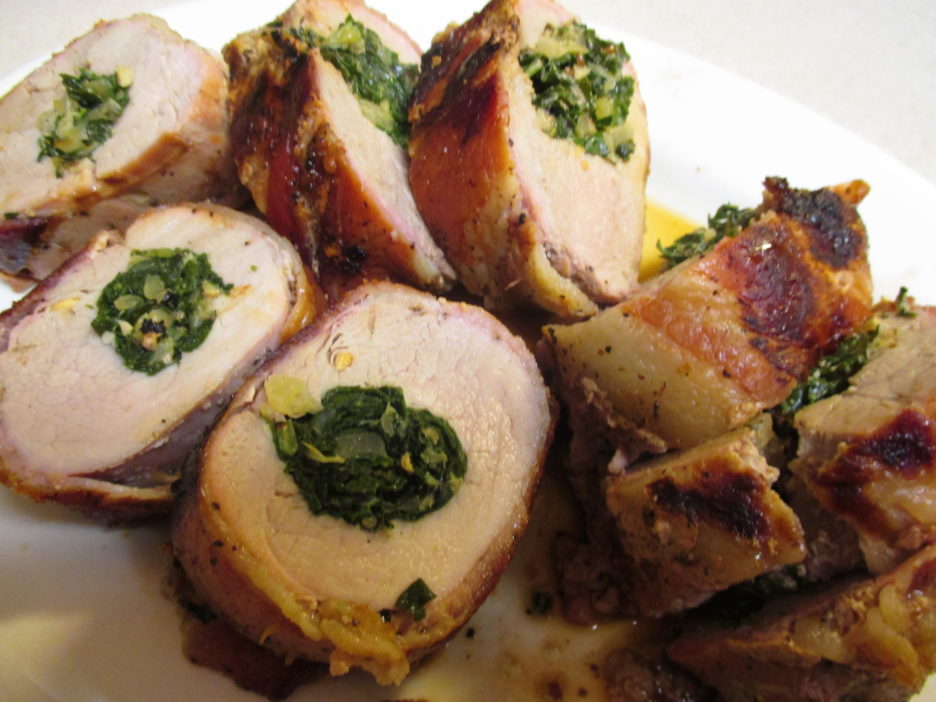


 As with any good fritatta, it is at its best when layers of flavor come together. Mama D’s Trinity (Garlic-Onions-Olive Oil) was joined by the chopped jalapeno. They cooked to golden loveliness before I added the zucchini.
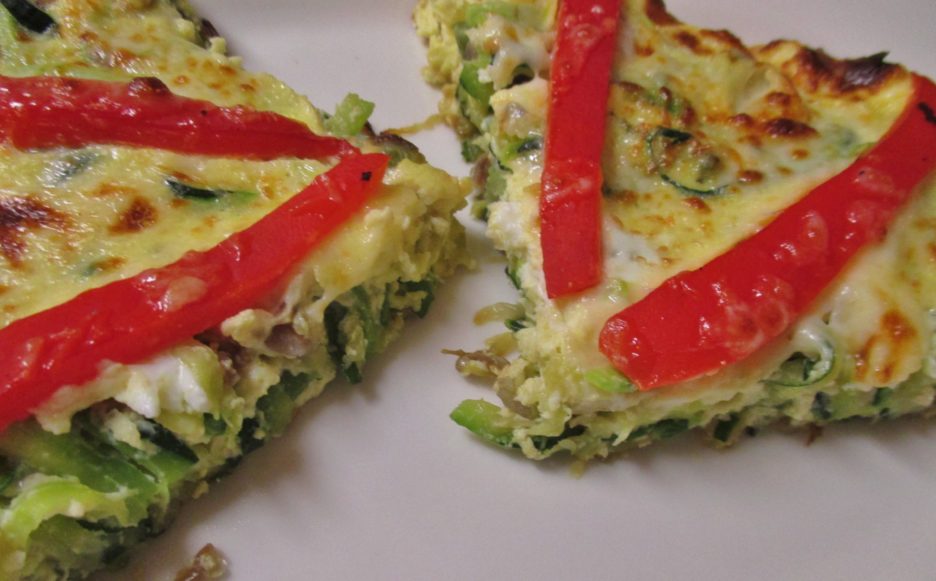
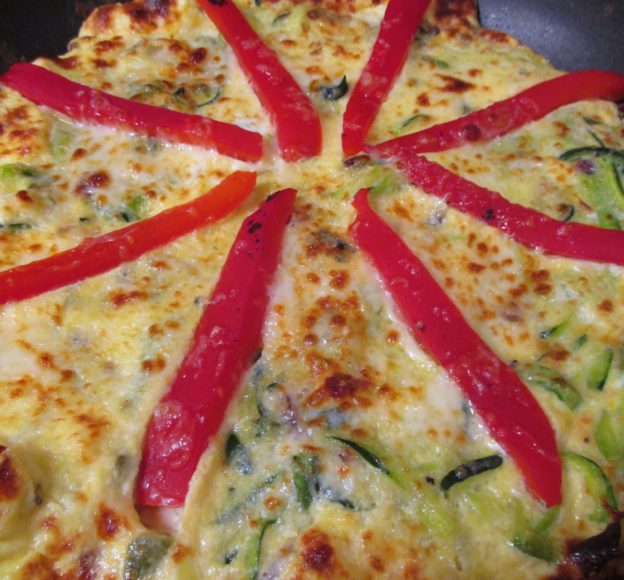
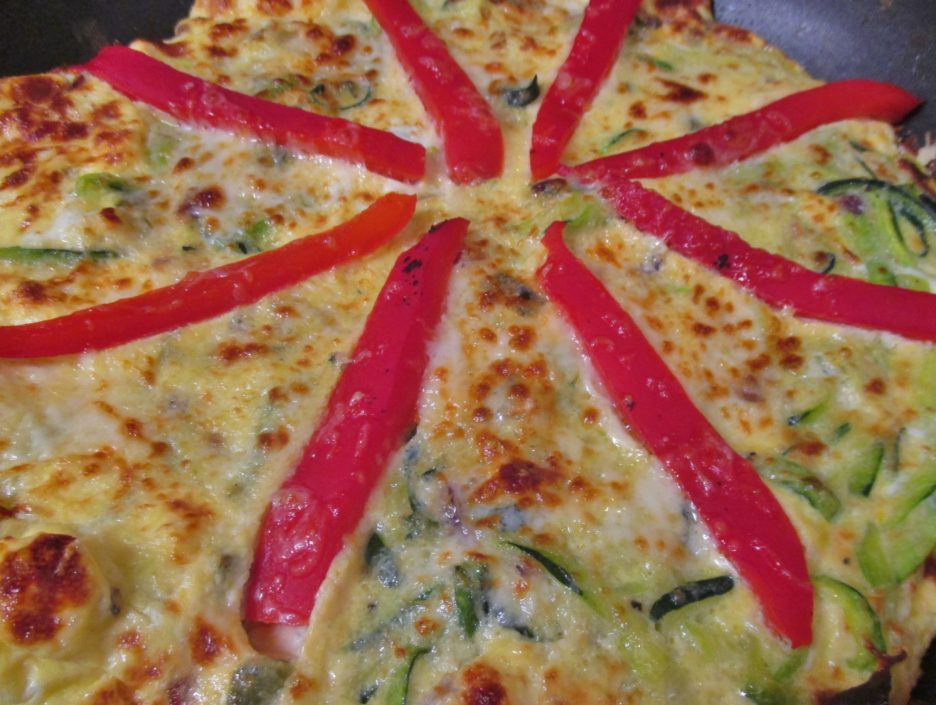
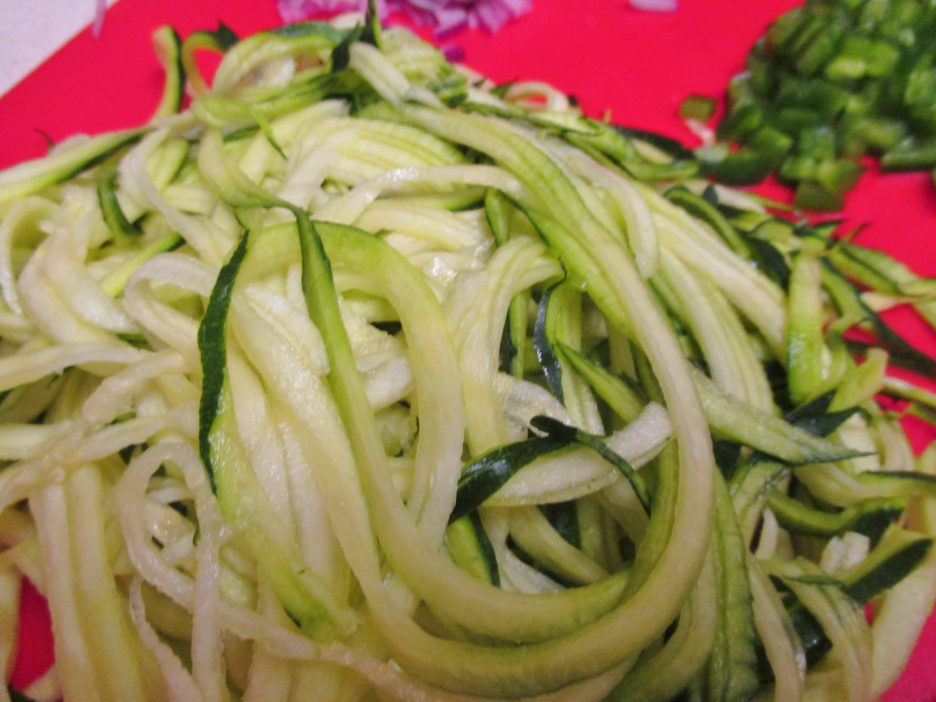
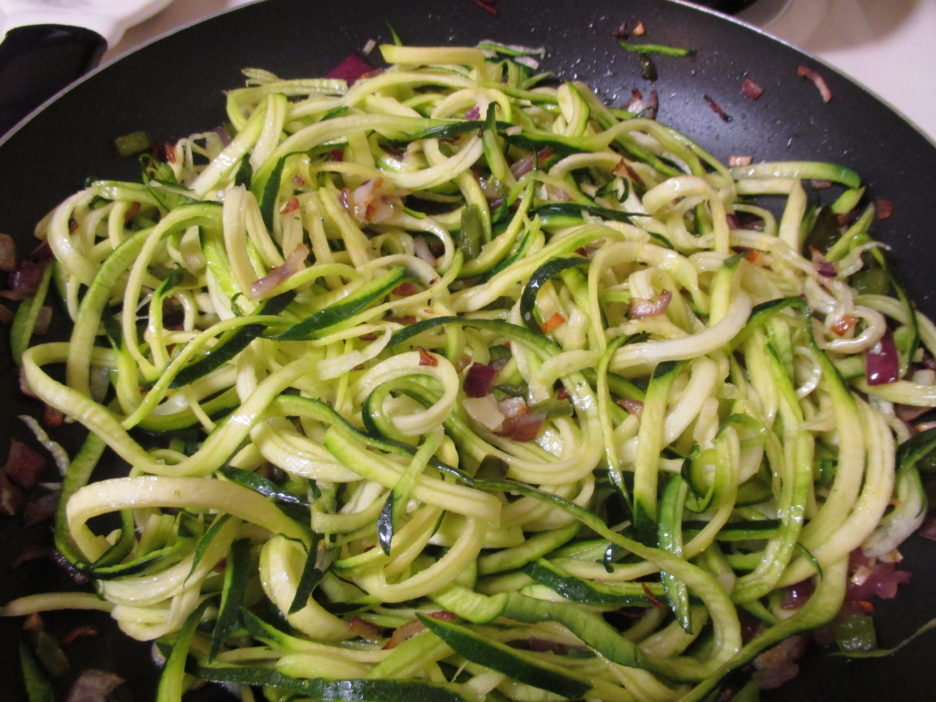 The zucchini took mere minutes to cook to “al dente” creating a bed of veggie delight ready for their egg bath. The eggs were gently cooked to the point of almost being set. everyone has their own technique for cooking a frittata. I’m of the shake, lift, and be patient school. All of this paid off, and the eggs cooked to almost set perfection. As a crowning touch, I added some shredded mozzarella and roasted red pepper strips before dispatching it to the broiler.
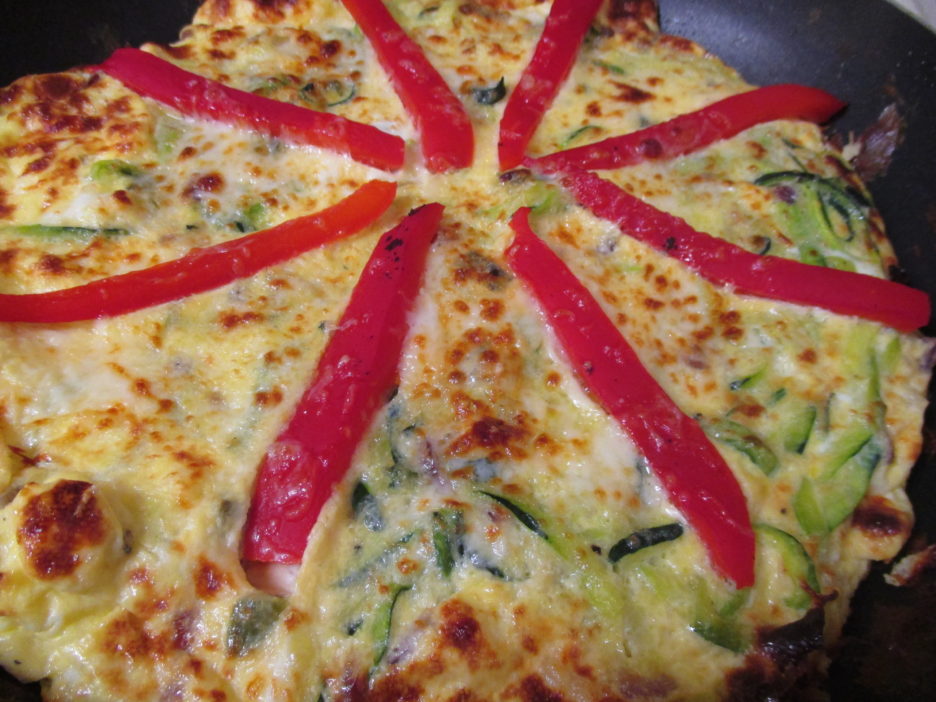 The magic happened and the frittata came out golden and bubbly. This was the perfect size for two (we’re talking Mama D size servings here), but it could easily serve three or maybe four if you added some crusty bread, a nice salad and a killer dessert.