Springing Ahead with Quinoa

According to the calendar, Spring will be here in two weeks. According to what I see out my window… it may be here in name only. There is nearly two feet of snow in my yard, I have to put on a jacket to get the mail, and don’t even get me started on the pot holes and giant snow banks.

fat squirrelFor those of us in the Midwest this has been the Winter of Our Hibernation. As with many hibernating animals I have put on an extra layer of fat to sustain me through these frigid times. What was comfort from the cold is now displeasure in the mirror.

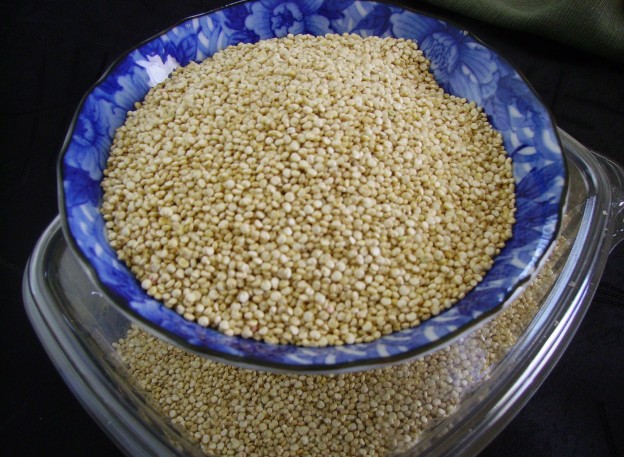
Comfort food gives us comfort, and I’ve taken more than my share of it lately. Now the time has come to look at  lighter and healthier food. First on the menu board is Quinoa  

This “super food” has been the darling of the food world for some time. It is rich in fiber and vitamins, and has essential amino acids that make it a complete protein. It cooks in the same manner and time as rice, but is a lot more interesting both in taste and appearance. The little spirals which are actually the germ make an interesting presentation especially in the red and black varieties.IMG_1416-1024x768colored quinoa

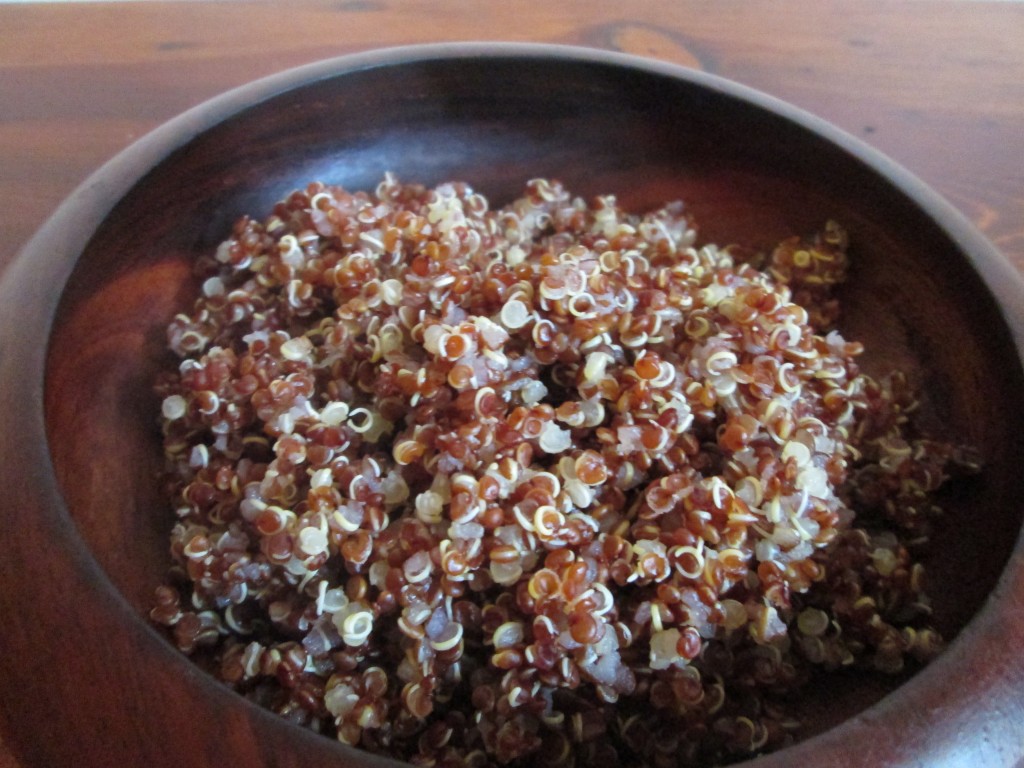
It makes a great side dish embellished or not, It can be eaten as a hot cereal for breakfast with dried fruit and a sprinkling of nuts. I haven’t found a vegetable that it doesn’t like, making  wonderful salads that put the  pasta variety to shame. I think Quinoa with a plethora of veggies and a light dressing is a great lunch or light supper.DIGITAL CAMERA
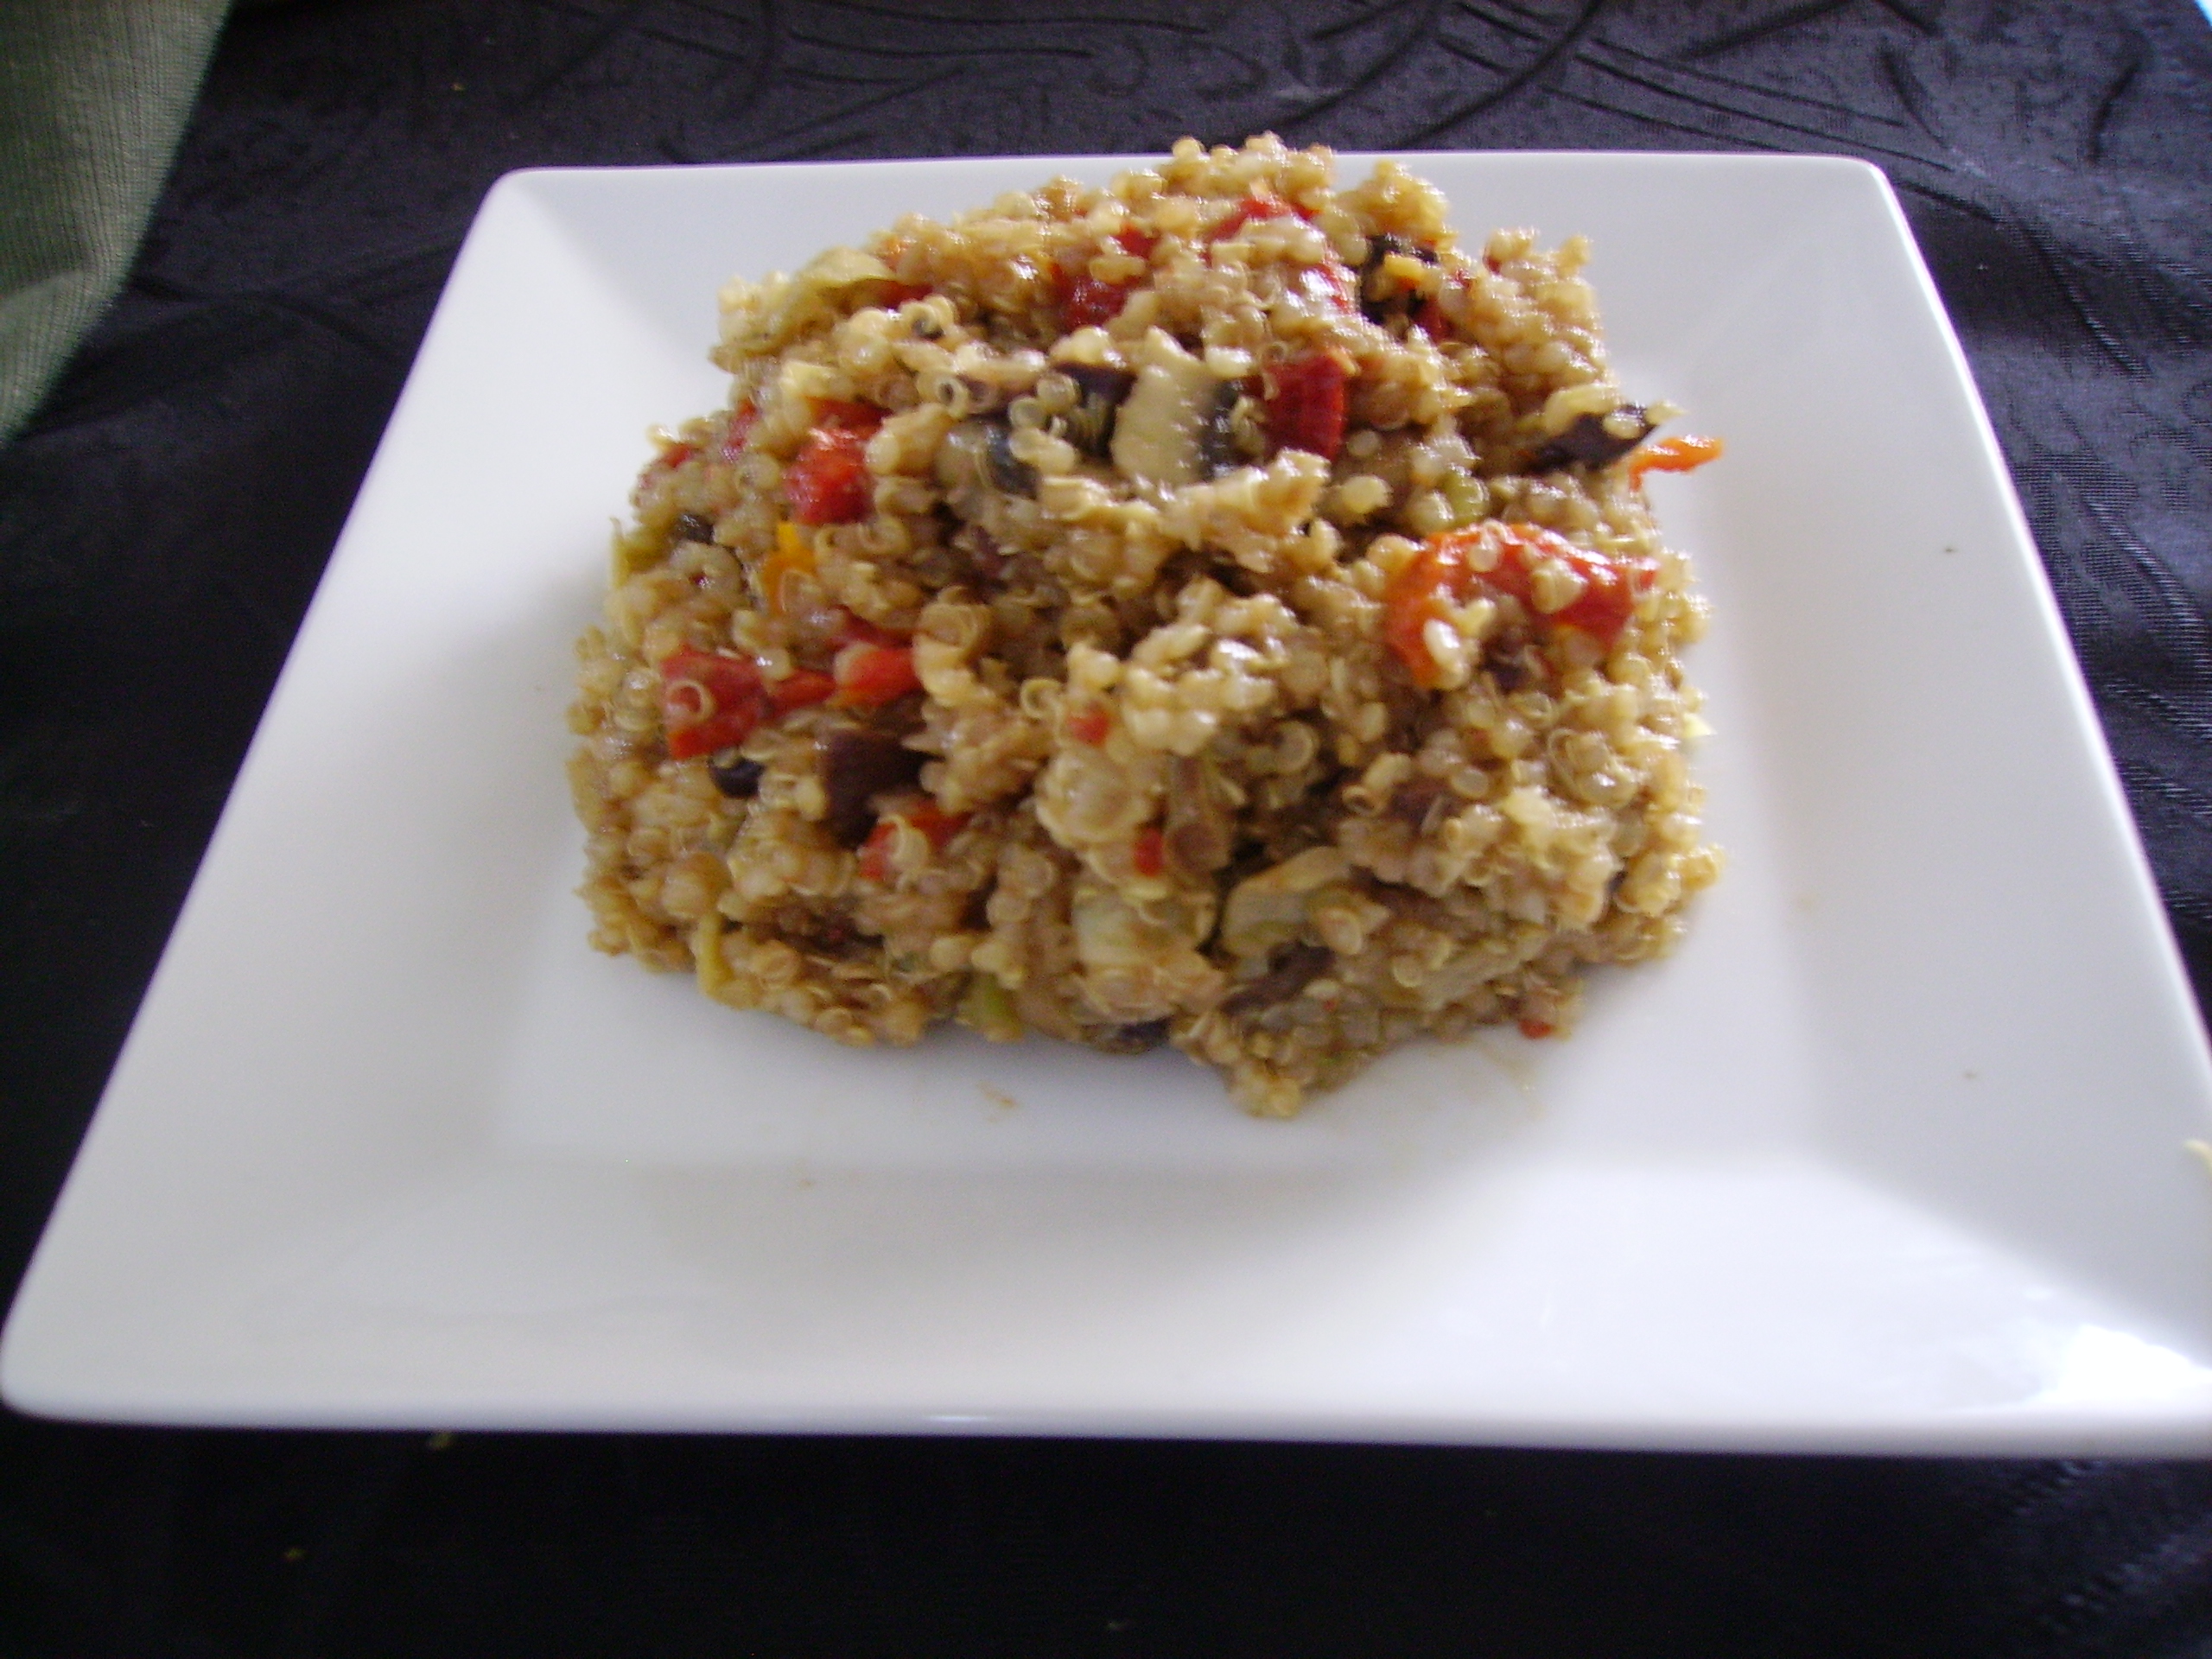
This is an Italian inspired salad. The quinoa is joined by sun-dried tomatoes, artichoke hearts, roasted red peppers, mushrooms and olives, Dressed with olive oil and balsamic vinegar, it is an antipasto tray that eats like a mealDIGITAL CAMERA


Italian Quinoa Salad
Print Recipe
This protein rich, meatless salad can be a one dish meal for four or a side dish for 6.
Servings
4
Servings
4
Italian Quinoa Salad
Print Recipe
This protein rich, meatless salad can be a one dish meal for four or a side dish for 6.
Servings
4
Servings
4
Ingredients
Salad
Dressing
Servings:
Instructions
  1. Heat the 1 tablespoon of olive oil in a medium skillet. Add the onion and cook for 3 minutes. Add the Cubanelle and mushrooms. cook another 3 minutes. Add the garlic and cook 2 minutes more. Remove from heat and allow to cool.
  2. Put the cooked quinoa in a large mixing bowl. Add the roasted peppers, artichoke hearts, sun-dried tomatoes and olives and toss to combine.
  3. Add the cooled onion mixture to the bowl and toss once again.
  4. In a small jar with a lid add all of the dressing ingredients (except salt and pepper). Close tightly and shake until the ingredients are emulsified.
  5. Pour the dressing over the quinoa and vegetables and toss to coat. Cover and refrigerate for several hours. Remove from refrigerator 15 minutes before serving. Taste and add salt and pepper as needed.
Share this Recipe
Powered byWP Ultimate Recipe

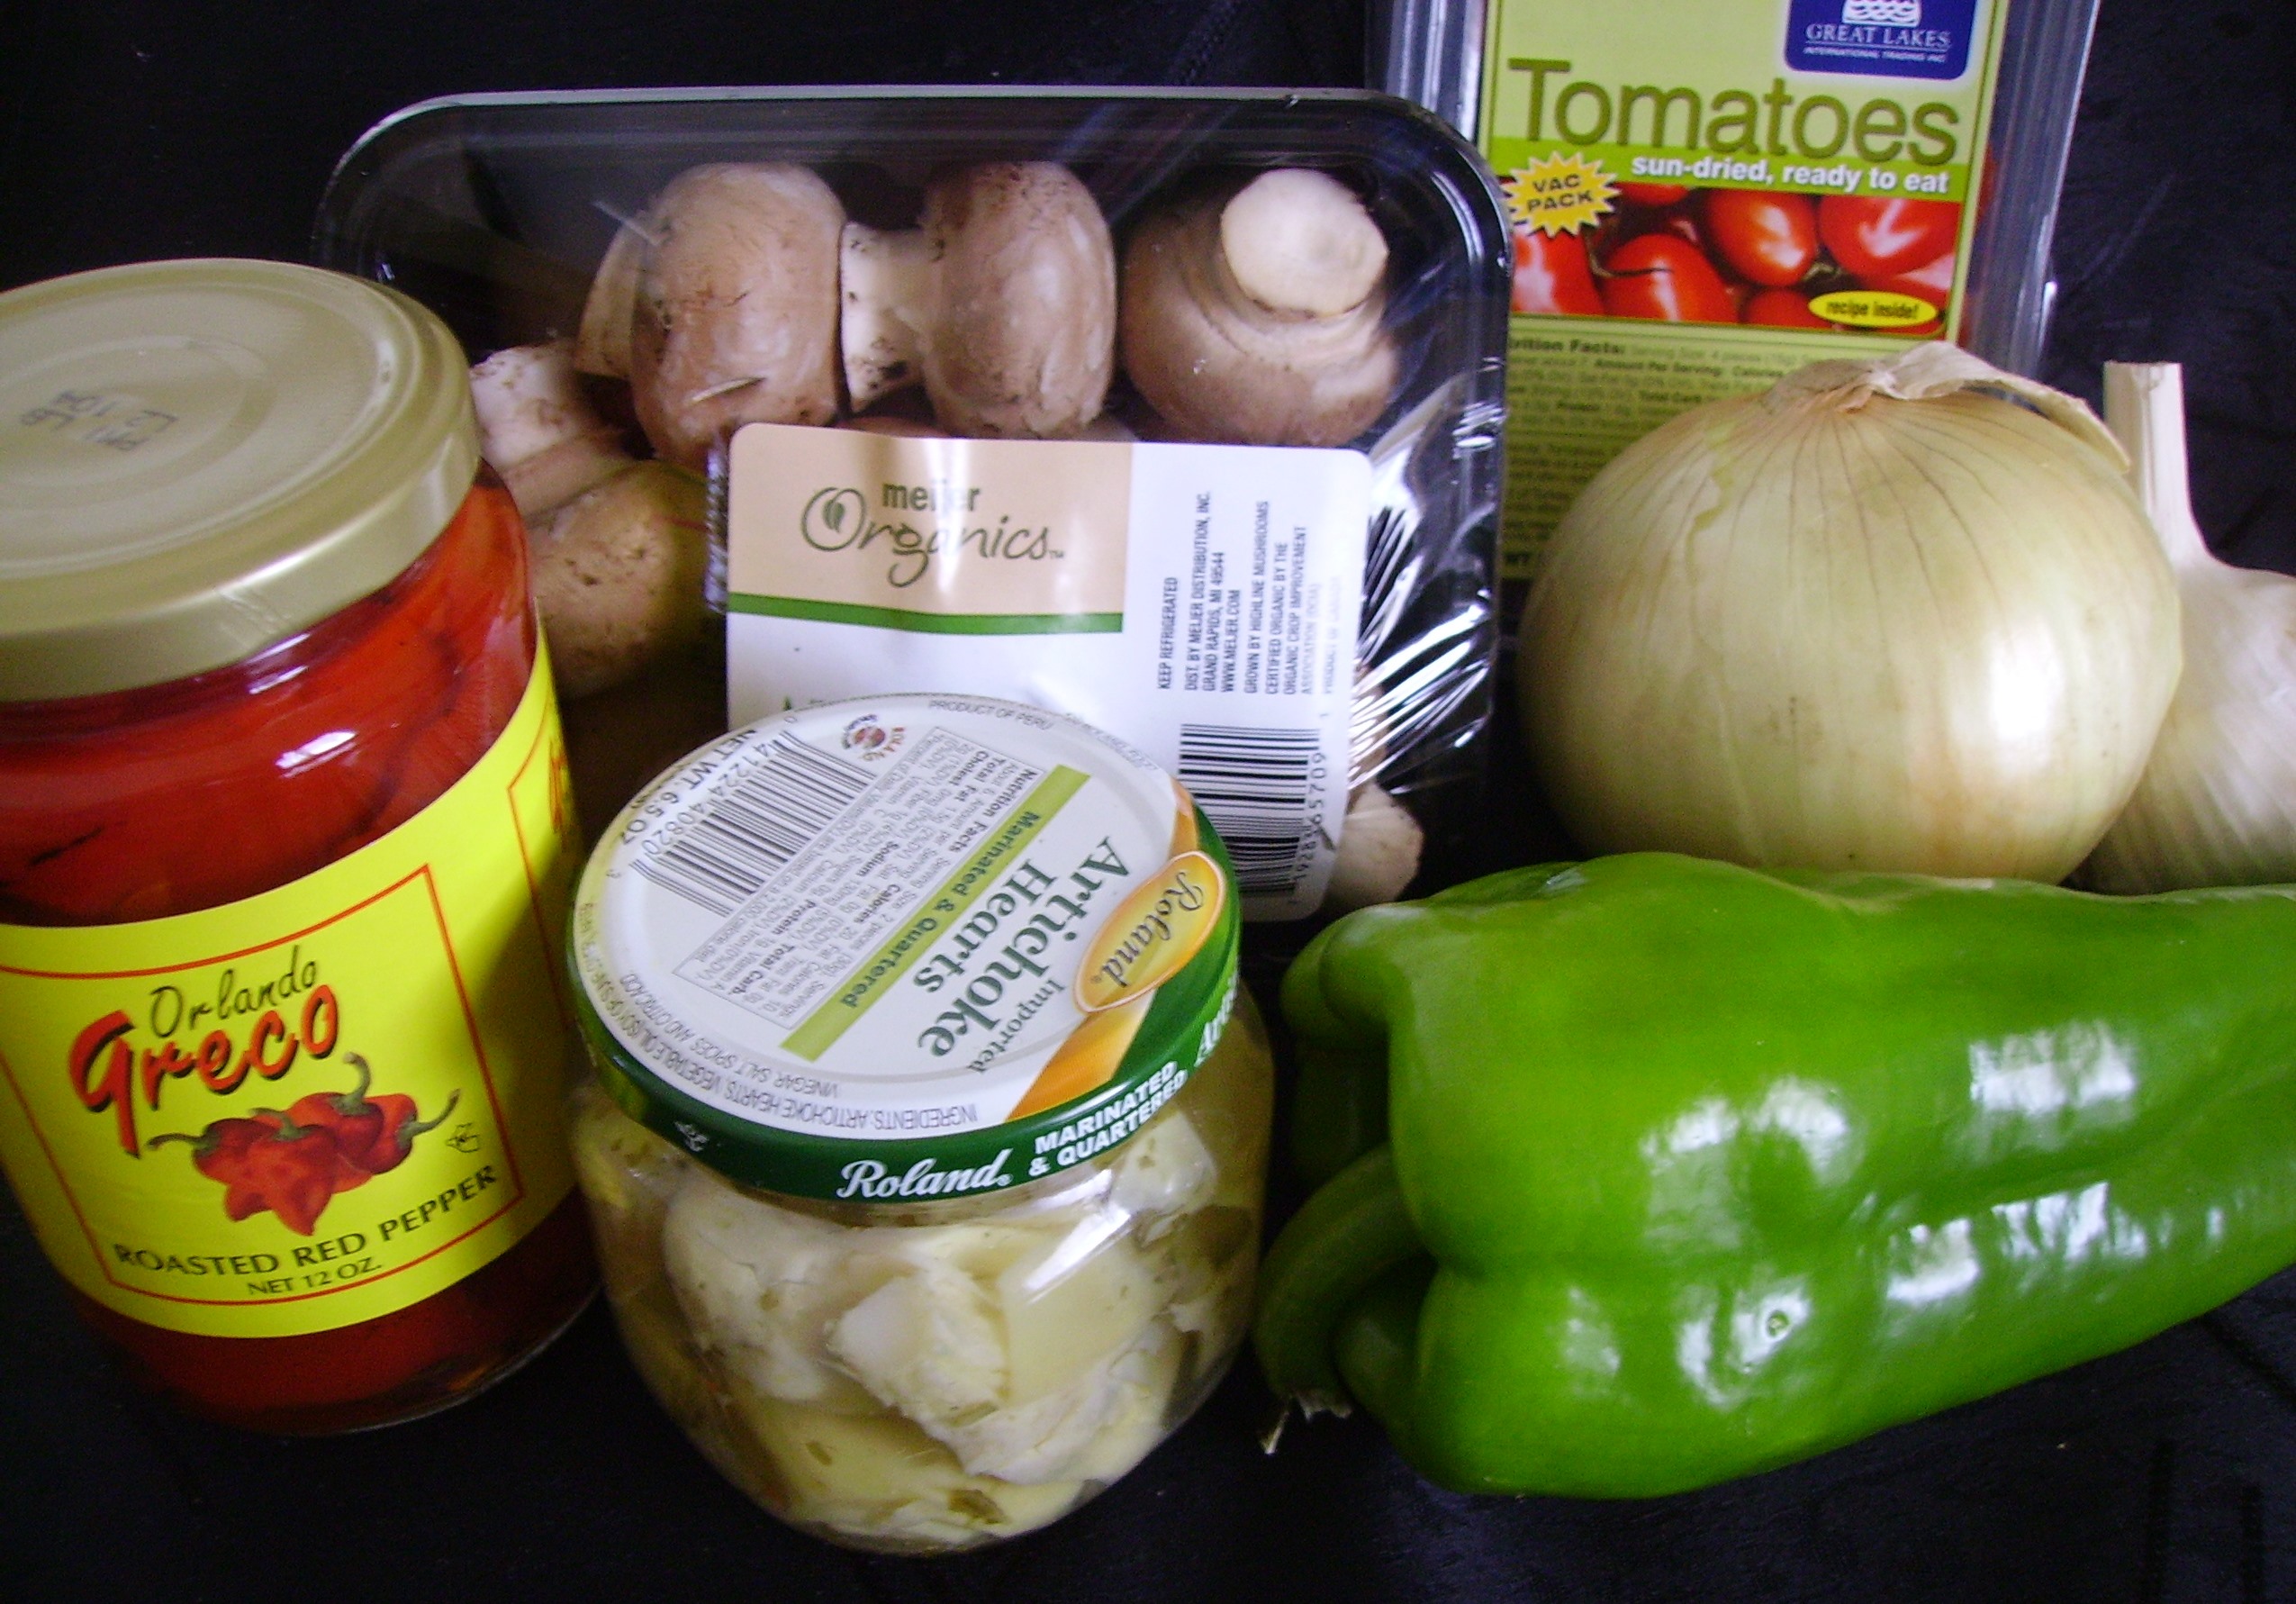
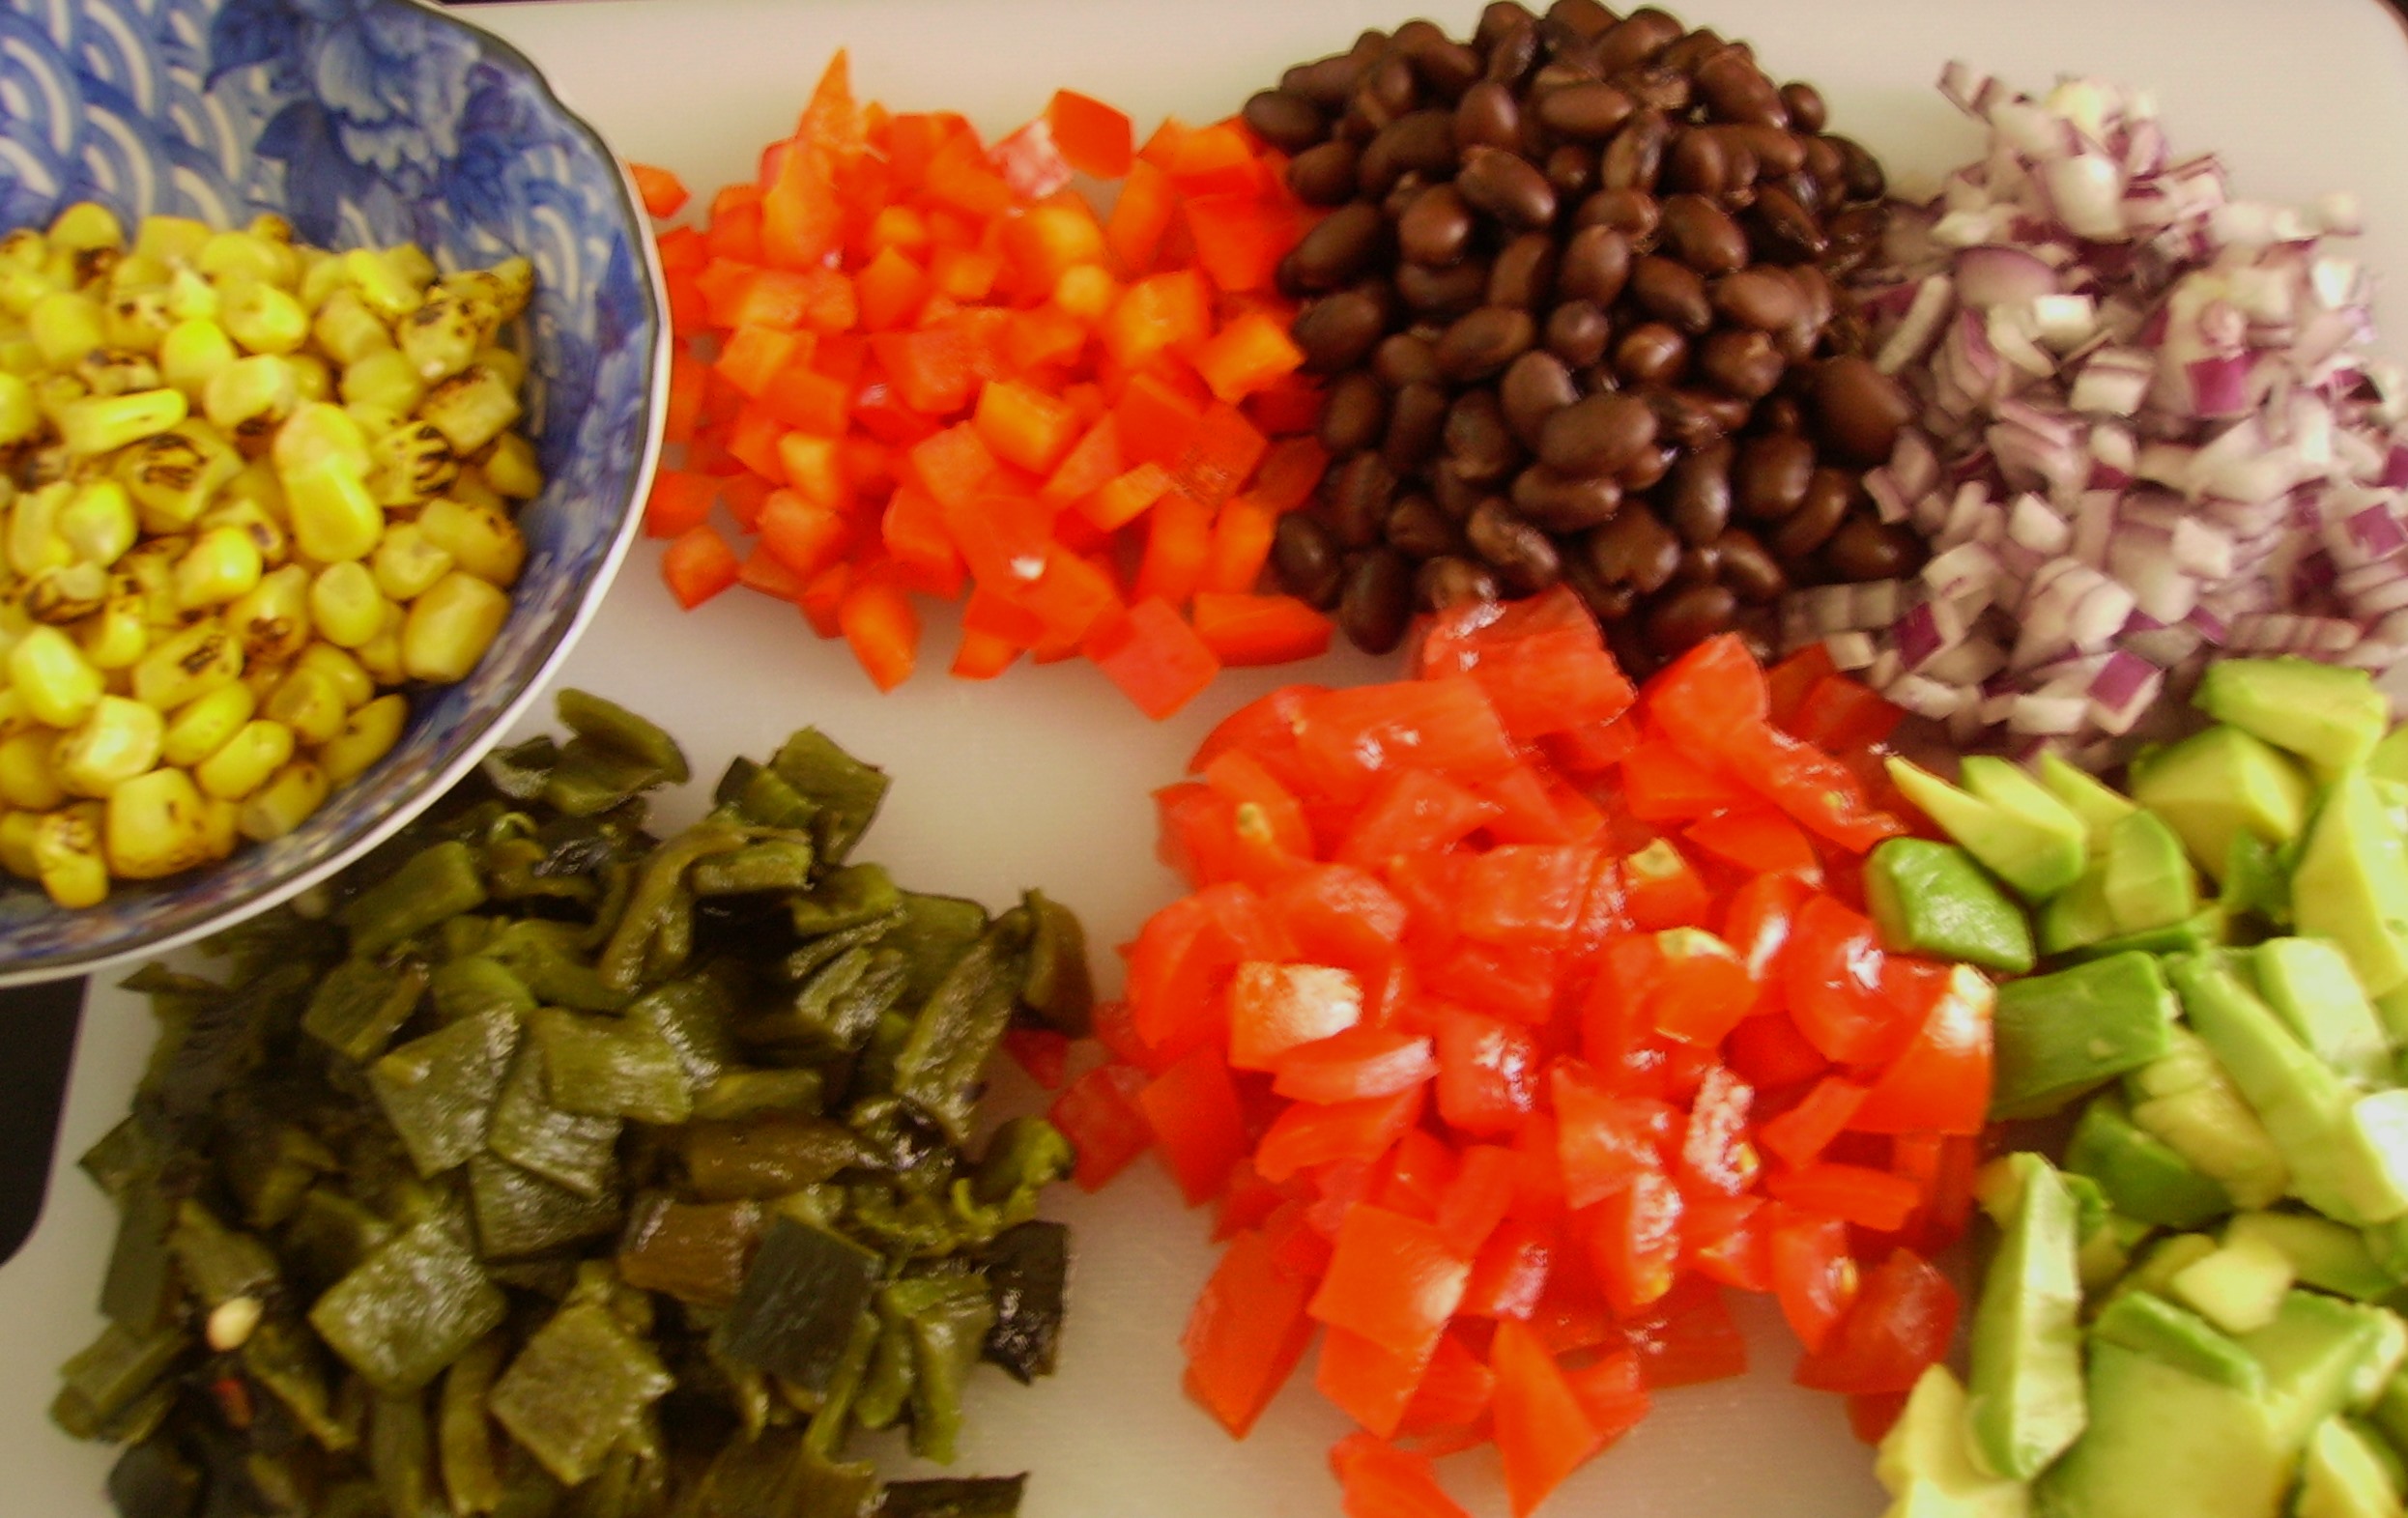
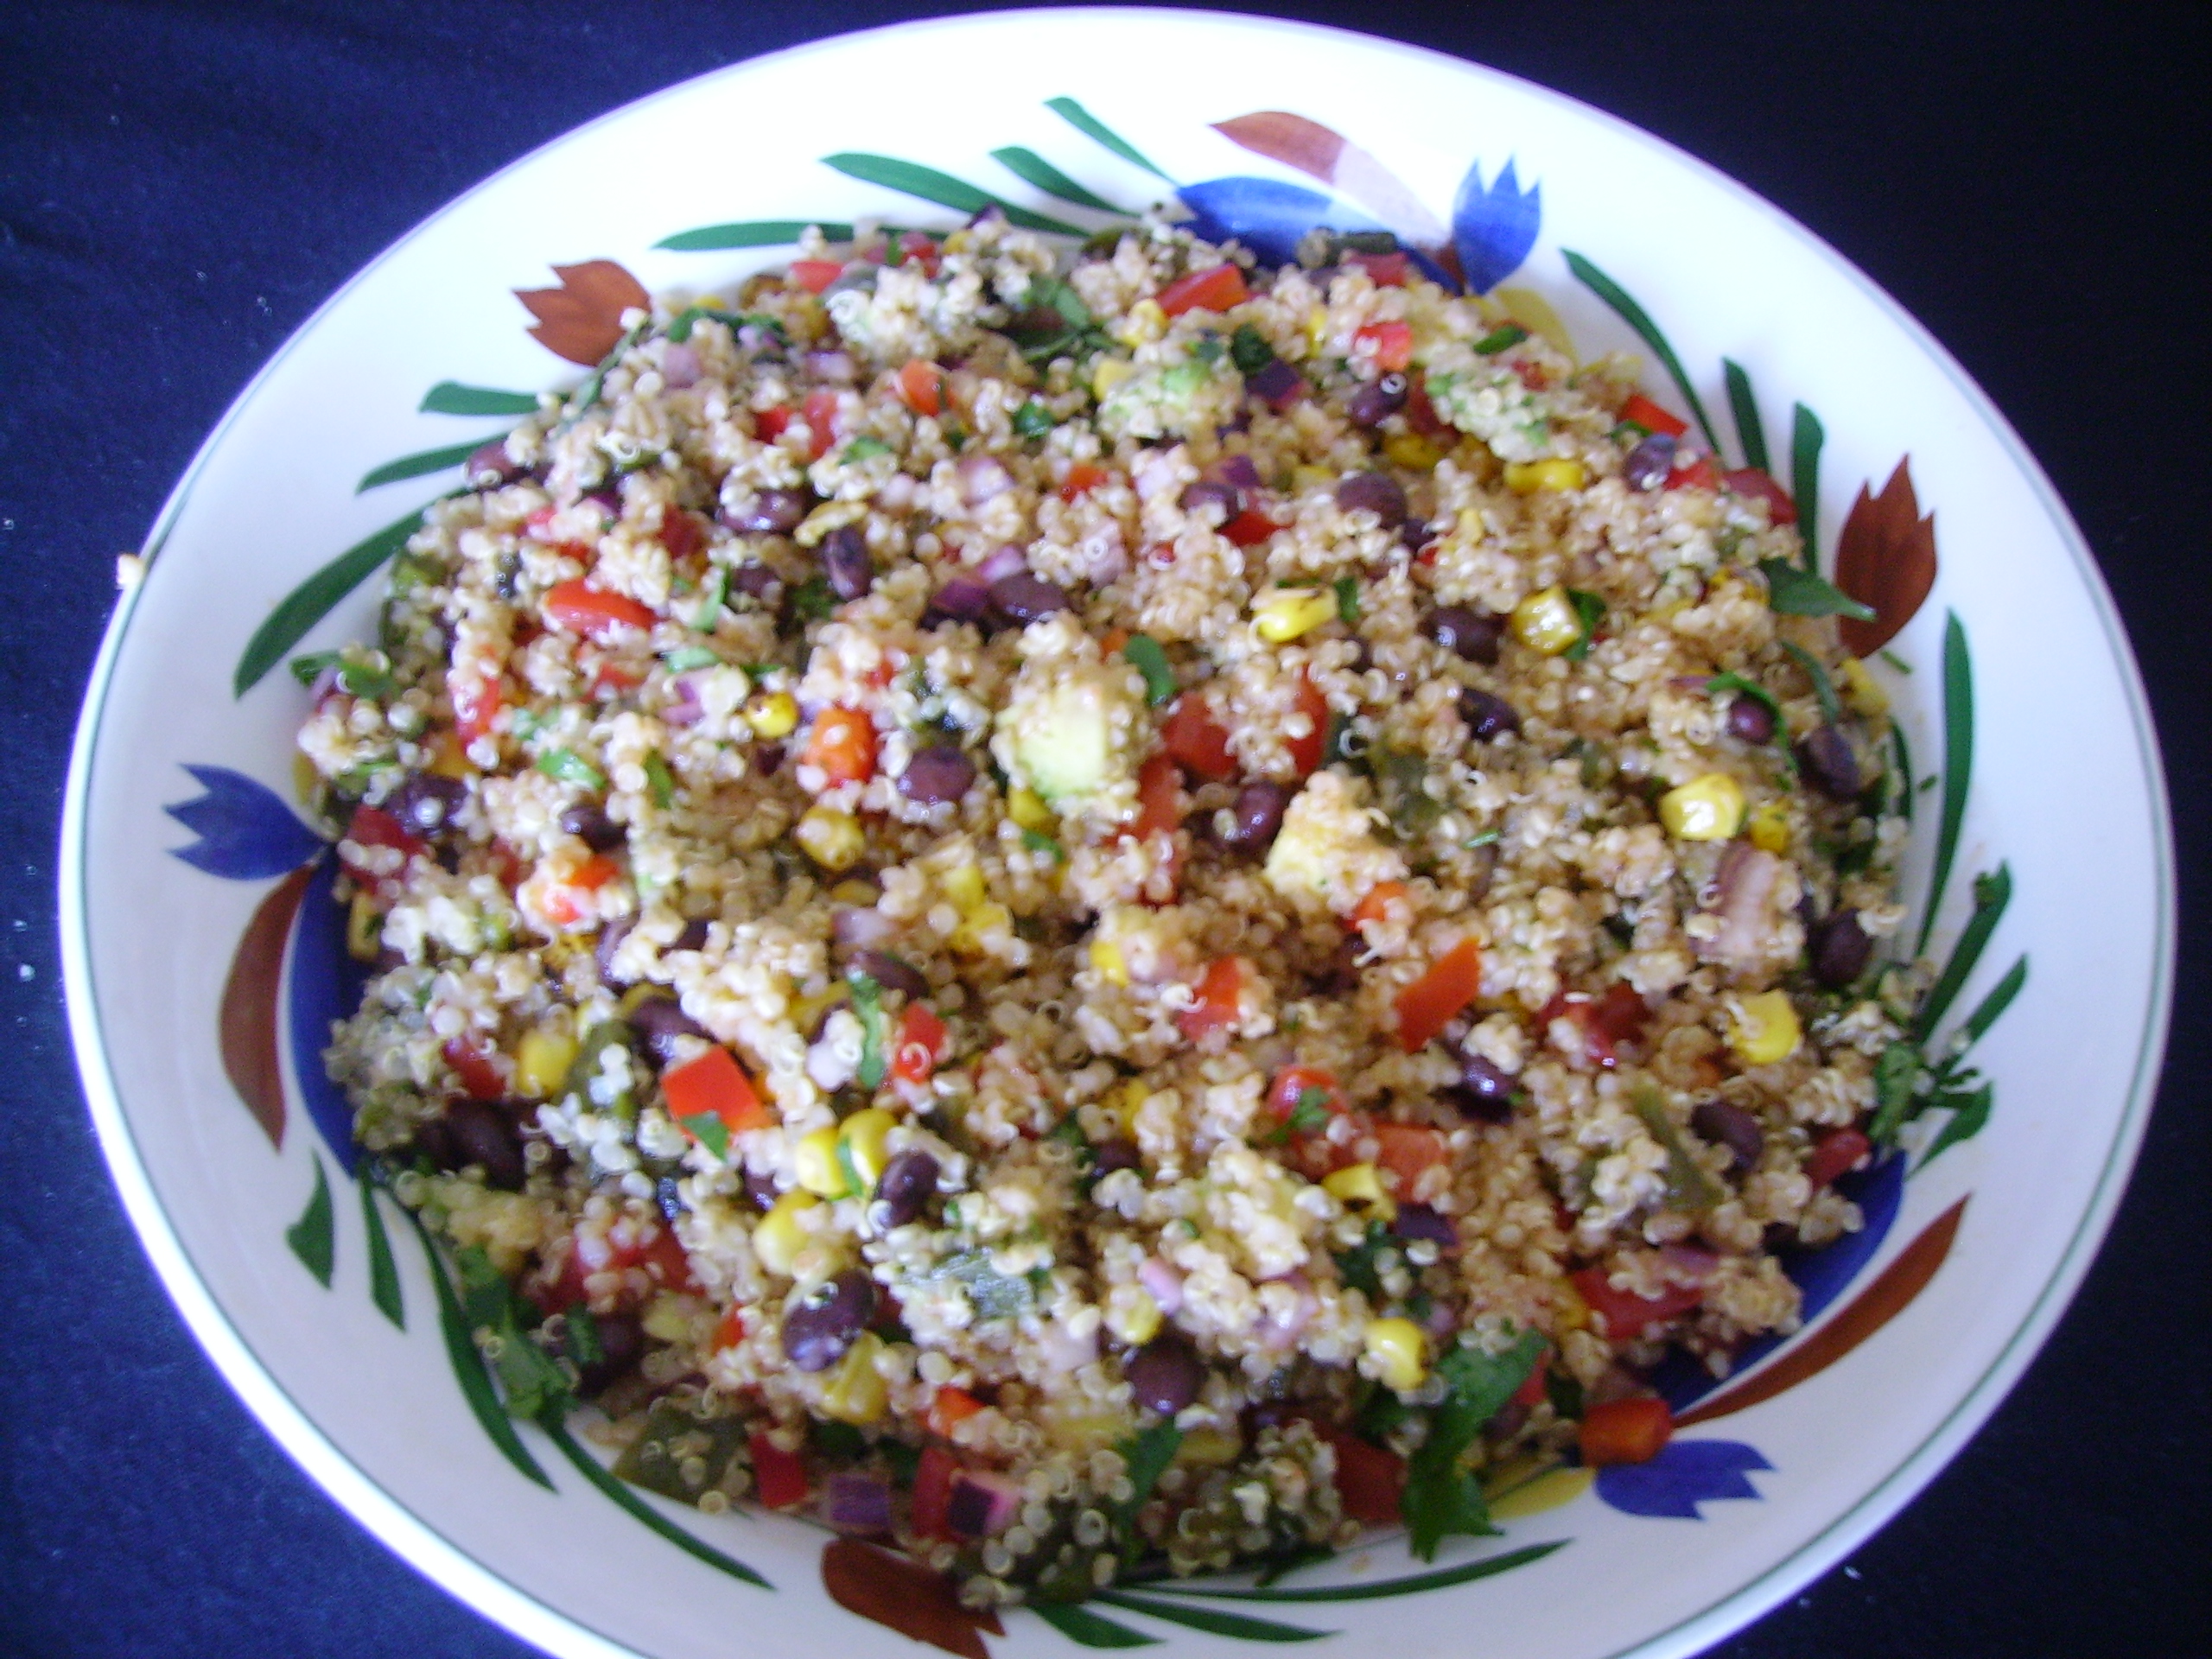
Southwestern flavors also have an affinity with quinoa. This is possibly my favorite Quinoa salad. Roasted poblano peppers and corn, black beans, red bell peppers, onions and tomatoes are combined with cilantro, avocado and a garlic lime dressing. 

DIGITAL CAMERA

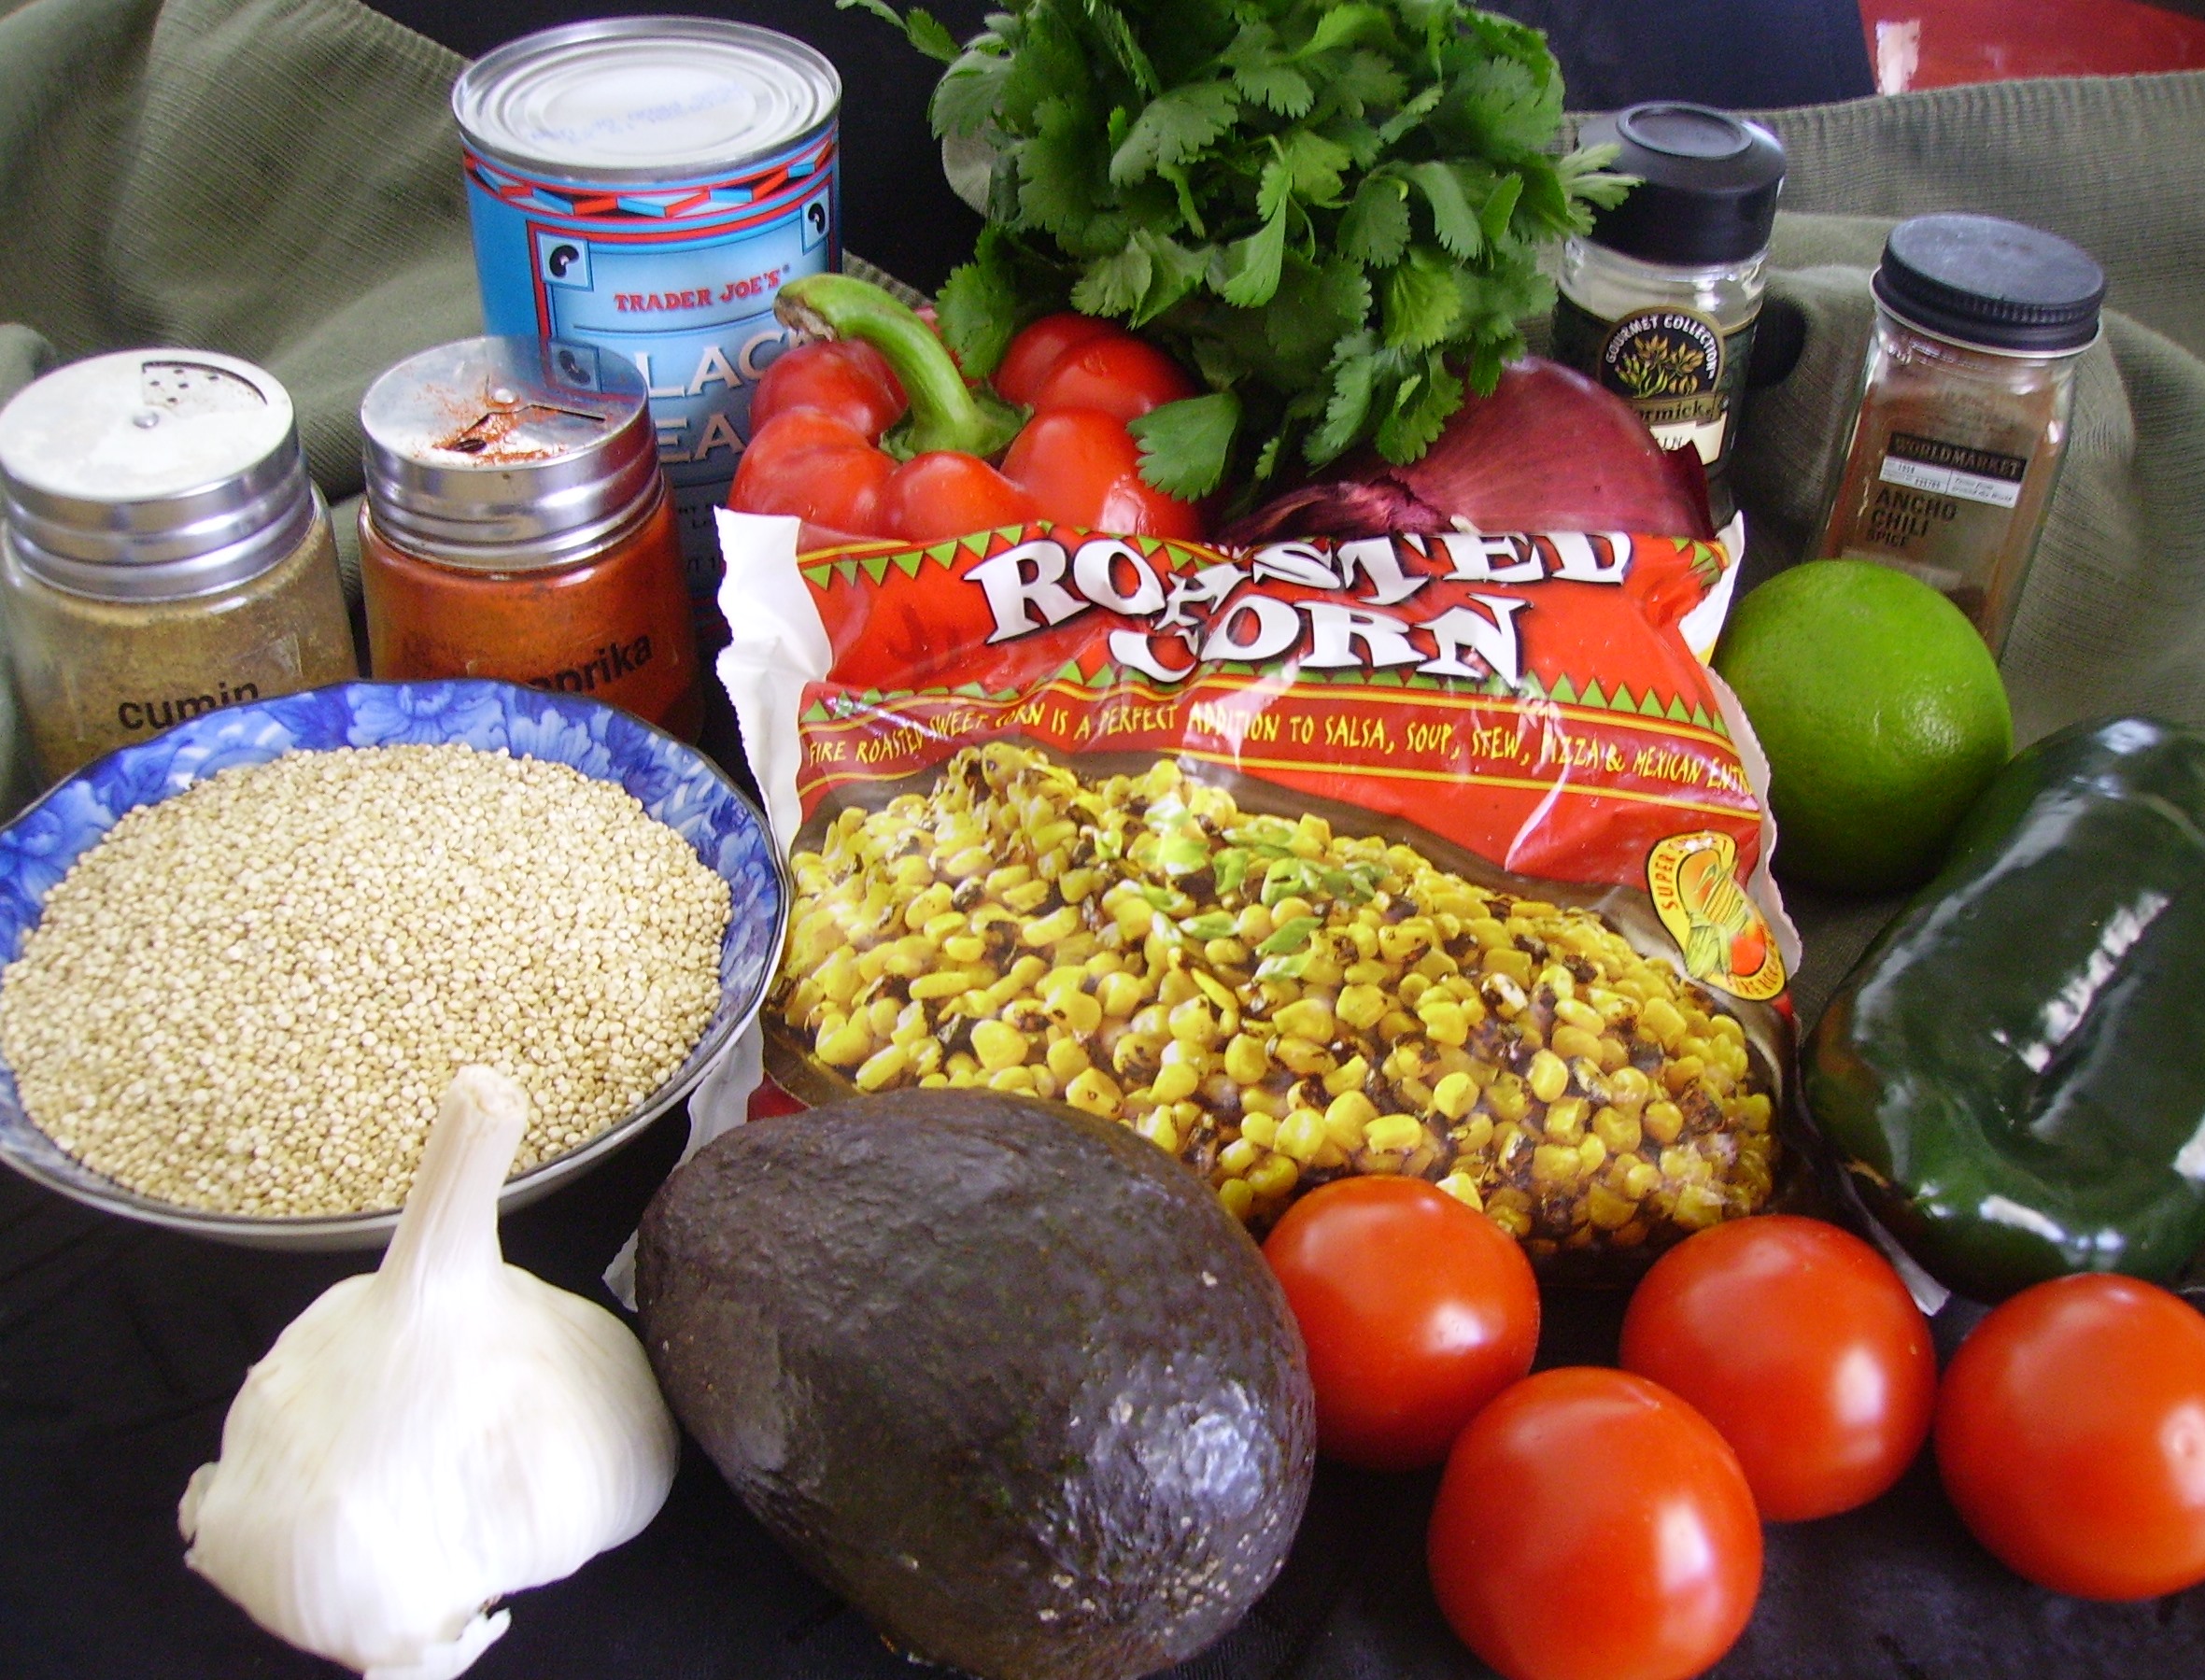
The Southwestern flavors coupled with the nutty chewiness of the quinoa make a one dish meal the is good and good for you. The veggies are chopped in small dice that compliment the quinoa and make for easy eating.

DIGITAL CAMERA

The dressing starts with canola oil that gently heats with minced garlic and cumin seeds. Lime zest, ancho chili powder, smoked paprika, and a touch of Agave Nectar combine with lime juice and ground cumin to create a flavor burst that brings the whole thing together.DIGITAL CAMERA


Southwestern Quinoa Salad
Print Recipe
The nutrition of quinoa and the flavors of the southwest come together in a healthy and flavorful meatless main dish salad. It's also great as a side dish.
Servings
4
Servings
4
Southwestern Quinoa Salad
Print Recipe
The nutrition of quinoa and the flavors of the southwest come together in a healthy and flavorful meatless main dish salad. It's also great as a side dish.
Servings
4
Servings
4
Ingredients
Dressing
Servings:
Instructions
  1. To roast Poblanos: Place poblanos under the broiler for 10 minutes or so, turning as the skin blisters. It should be blistered on all sides. Remove the peppers to a shallow bowl and cover with plastic wrap. Allow to sit for 5-8 minutes. At this point the skin should come off easily. Remove the stem and seeds and chop.
  2. Put the quinoa, bell peppers, poblano, onion, corn and black beans in a large mixing bowl. Toss to combine.
  3. Add the avocado and cilantro to the bowl and toss gently to combine.
  4. Pour the canola oil into a small fry pan. Add the garlic and the cumin seeds and heat over low heat until the garlic stats to sizzle. Remove from heat (do not let the garlic brown) and set aside to cool before adding to the dressing jar.
  5. Combine all of the dressing ingredients in a jar with a lid. Cover tightly and shake until ingredients emulsify.
  6. Pour the dressing over the ingredients in the bowl and toss gently to combine.
  7. Cover the salad and chill for several hours. Remove from refrigerator 15 minutes before serving. This serves 4 as a main dish and 6 or more as a side dish.
Share this Recipe
Powered byWP Ultimate Recipe

DIGITAL CAMERA

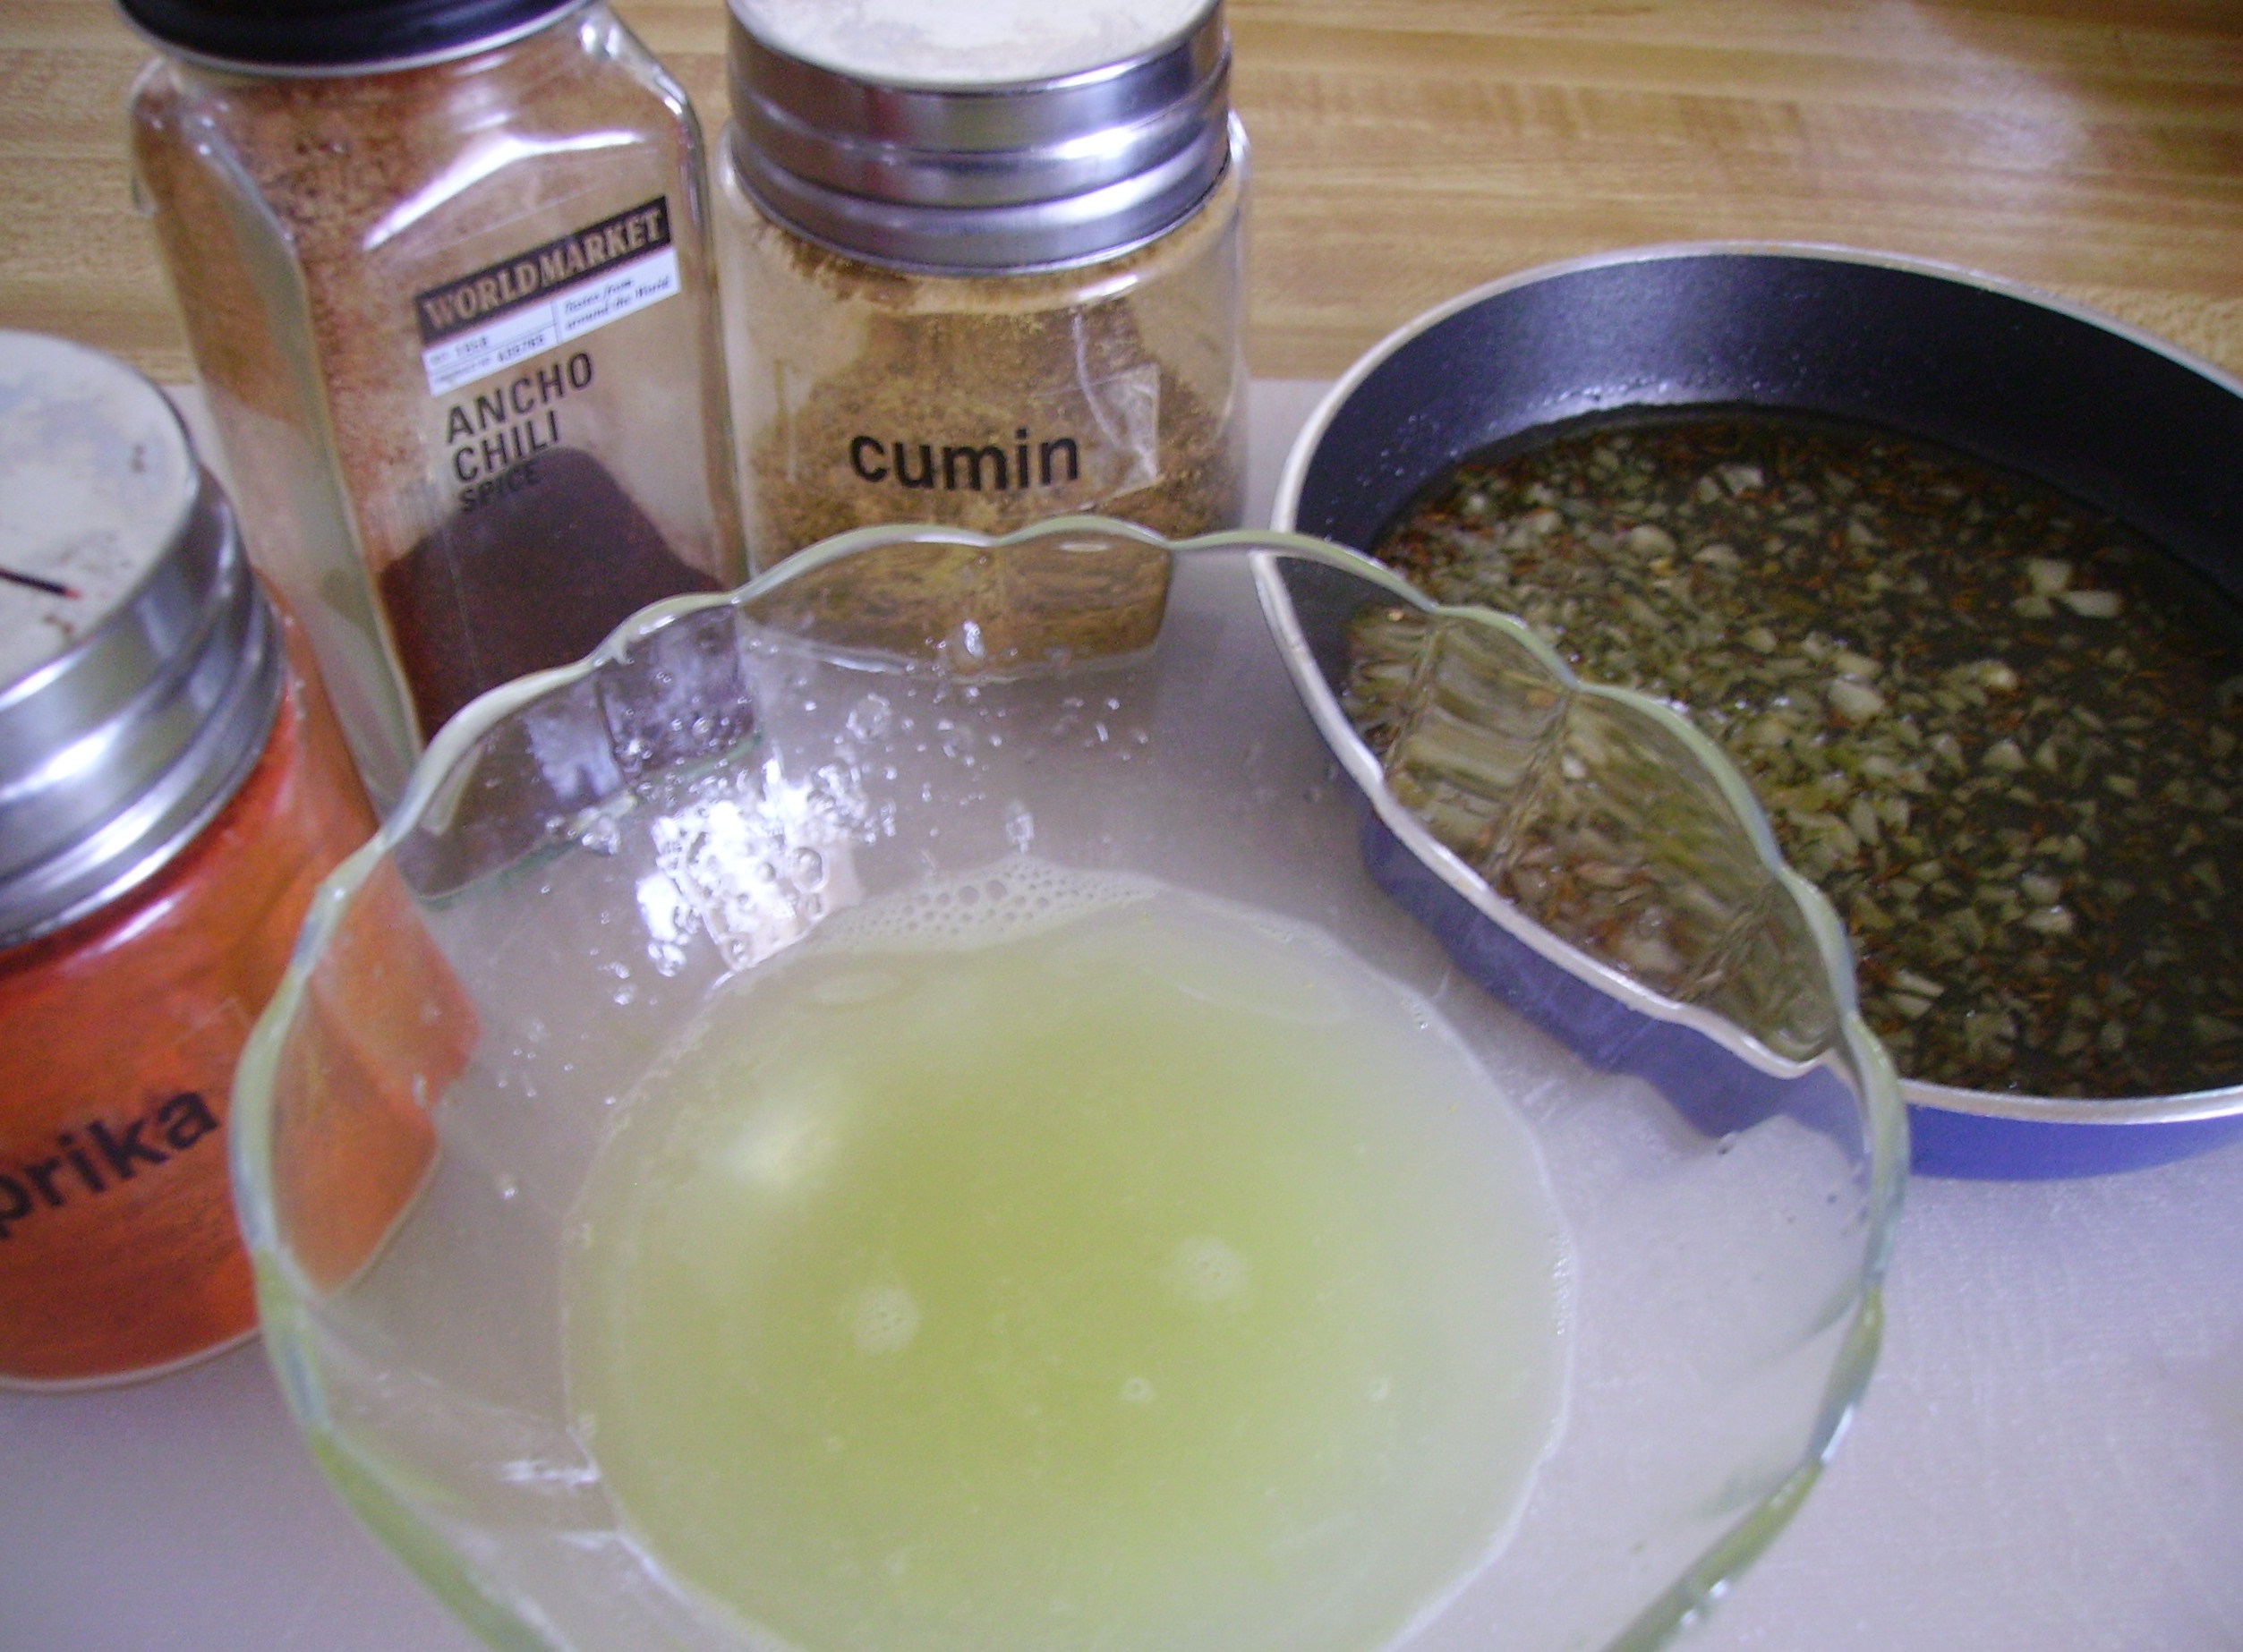
NOTE: To make 3 cups of cooked quinoa; Rinse 1 cup of quinoa under cold water for 2 minutes and allow to drain. Combine with 2 cups of water in a saucepan. Add a pinch of salt. Bring to a boil. reduce heat and cover. Simmer for about 15 minutes. Quinoa should be al dente. Drain off any water that might be left in the pan.DIGITAL CAMERA

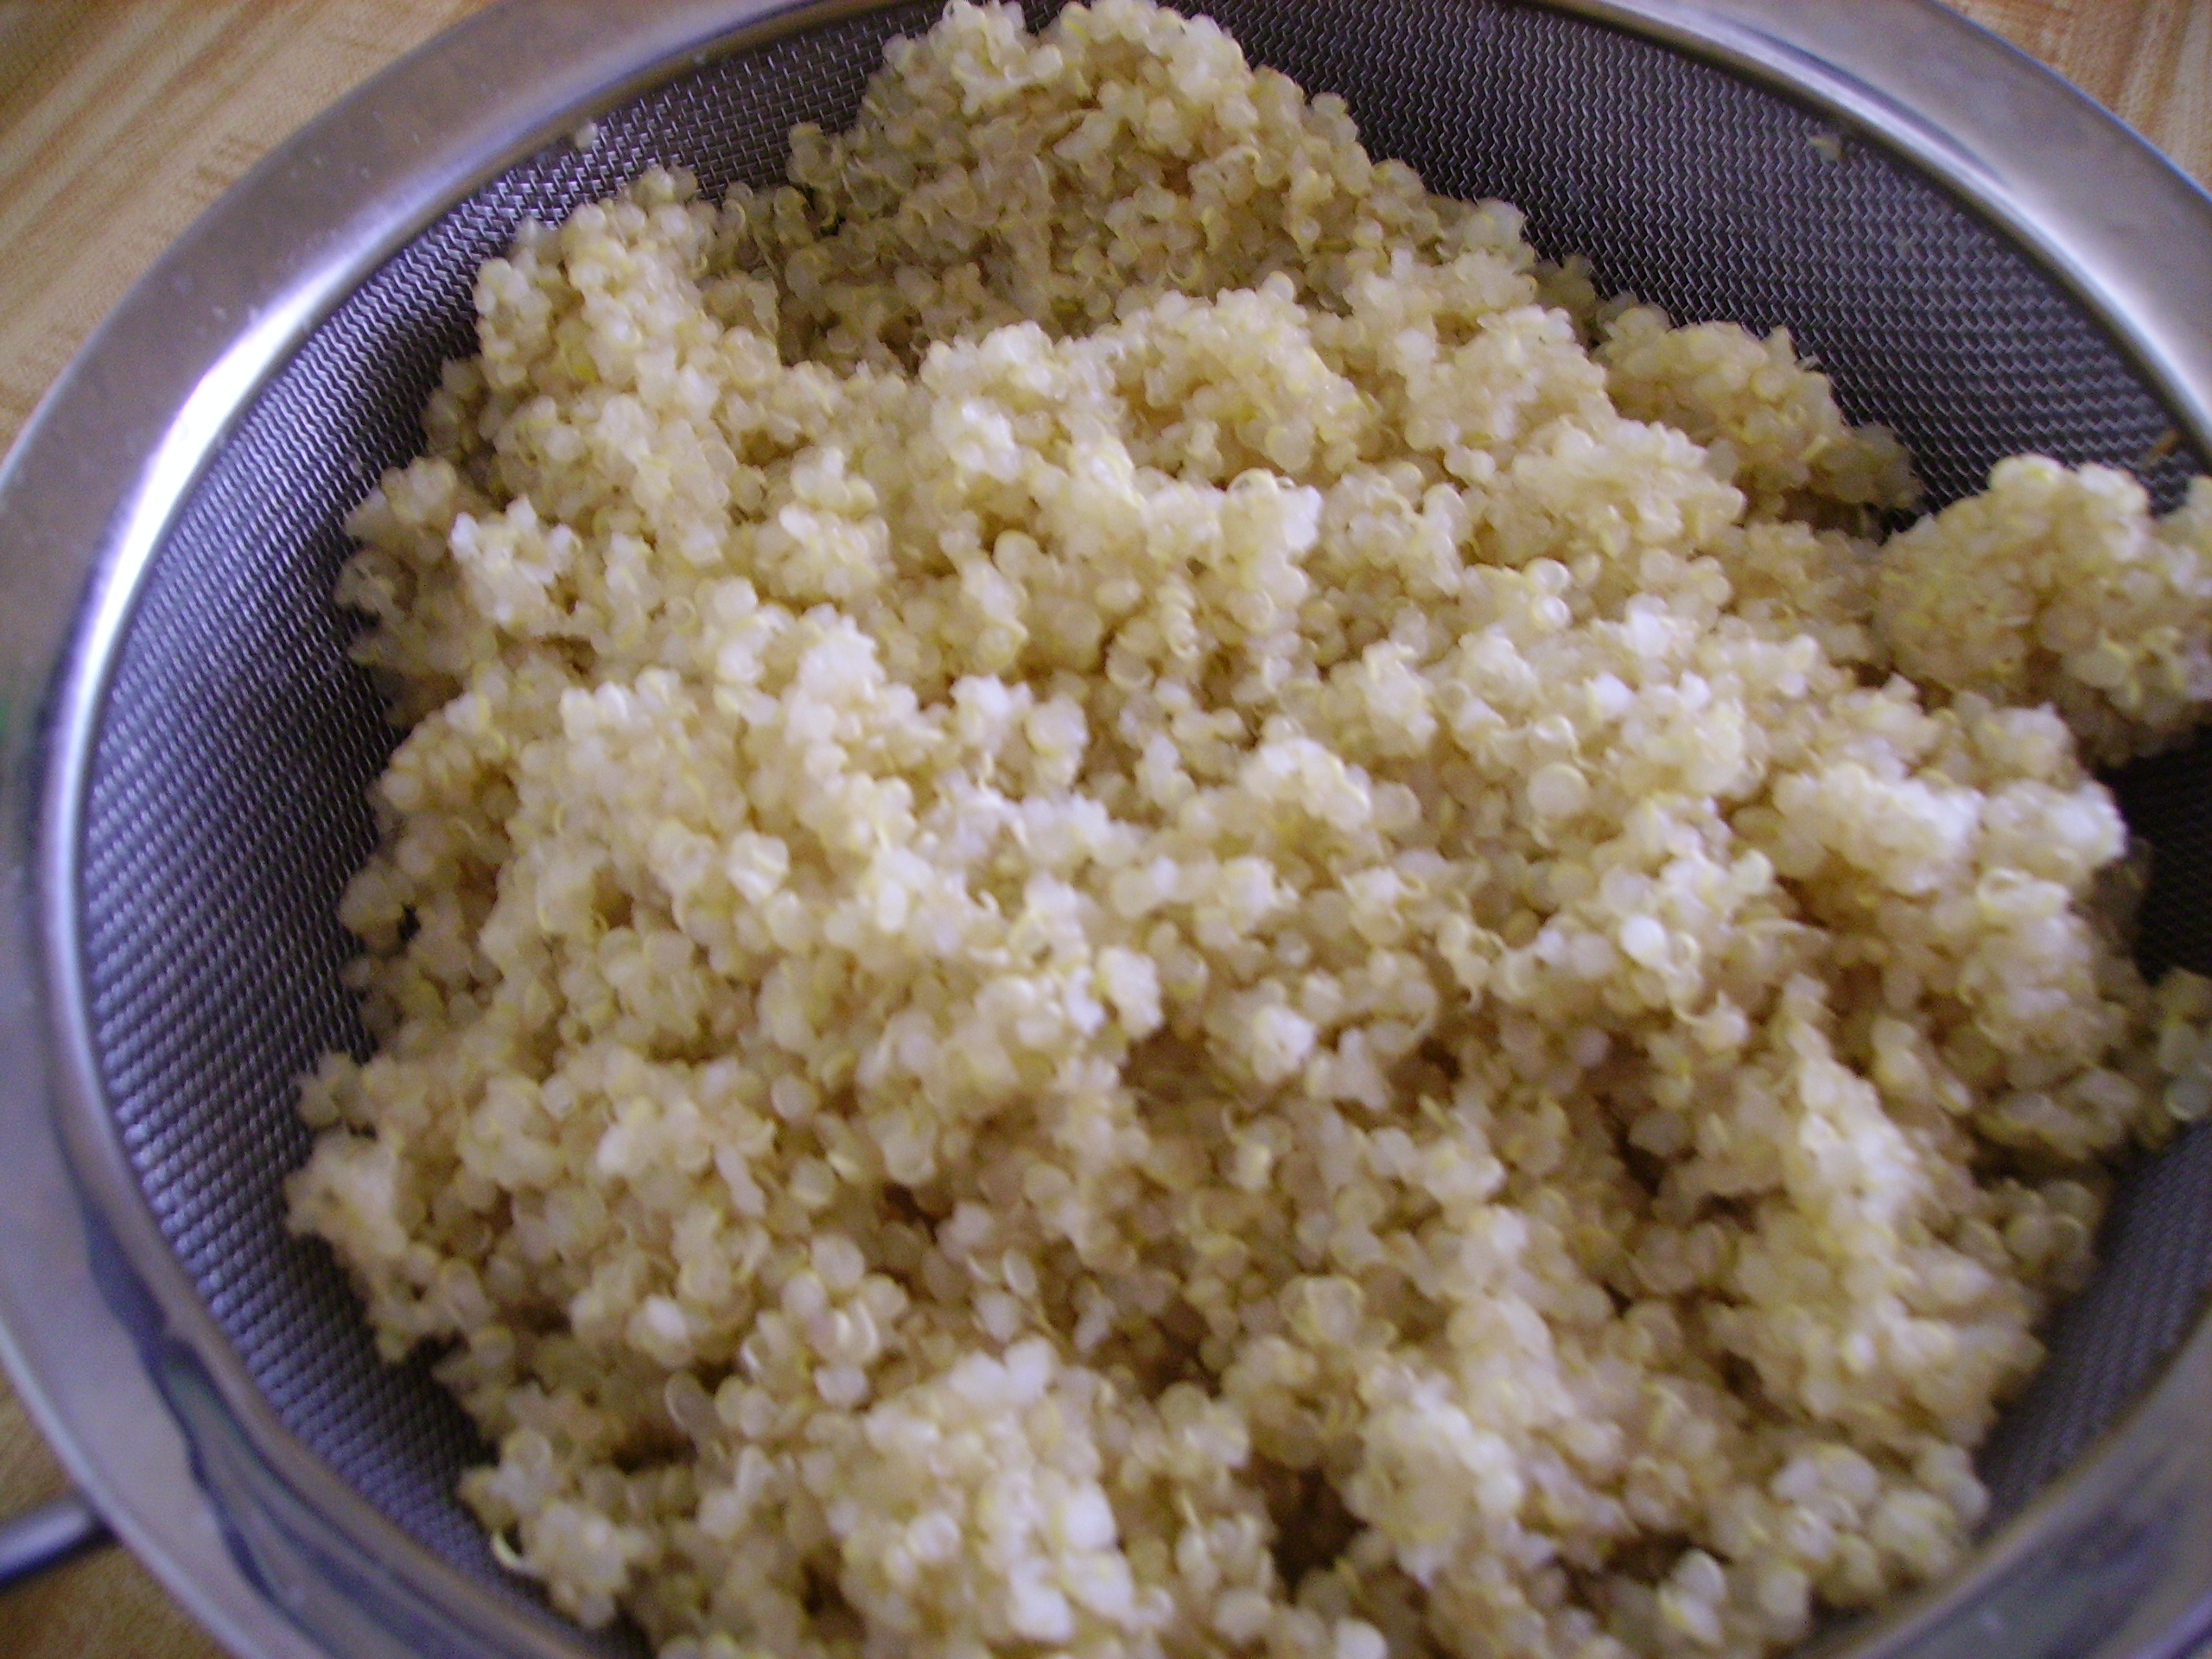
Make either of these salads at least a few hours ahead so that the flavors have chance to get acquainted. They can mellow in the refrigerator, but let them sit out for about 15 minutes before serving. The color and texture are interesting and the flavor is incredible.

I’m taking the first steps to lighter and healthier food. Just like Winter is the season for comfort, Spring is the season for light and bright in the air and in the kitchen.

Love, Mama D


It Takes a Village To Make Lasagna in the Round

I often look to memories to create many of my recipes. Childhood recollections and early cooking adventures have been inspiring me lately. As much as I love looking back and reinventing, sometimes it’s nice to be anchored in the present. The here and now is replete with inspiration in the person of the wonderful cooks who share their own cooking adventures on the internet.

MarieThis recipe took a village of great cooks to come to fruition. Marie, the Proud Italian Cook shared the idea for a Round Lasagna on her website. Marie, with her unique Italian recipes and beautiful photos has been an inspiration to me. She’s also been very generous with her advice and encouragement about the finer points of food blogging. Thanks, Marie, and I hope I’ve done your idea justice.ina-garten-0207-xlg

I chose to use homemade ricotta for the main filling. I love the consistency and flavor of homemade compared to store-bought. I’ve always used Ina Garten’s recipe. It’s easy, virtually foolproof, and easily adapts to variation. For this recipe I heated the milk with several smashed garlic cloves and used Champagne Vinegar to create the curds and whey.

Lidia-Bastianich-ChefHomemade ricotta almost insisted on homemade pasta to cradle it’s decadent creaminess. I’ve recently started using a different pasta dough recipe. Any pasta dough starts as flour eggs and olive oil, but Lidia Bastianich’s recipe has given me the best results. Her recipe uses a processor, but I opt to do it all by hand. From flour “nest” to elastic dough ball, I’m up to my wrists in pasta dough.

The lasagna that I decided to make had some traditional elements, like the Ricotta Spinach filling but there were a few ideas that were off the traditional lasagna path. The middle layer was bacon and leeks.DIGITAL CAMERA I’ve been having a serious romance with this combination lately. From potatoes to pasta to eggs …must be the season of the leek.DIGITAL CAMERA

Another twist on tradition was to make the bechamel with a touch of tomato sauce. I also used a roasted garlic, tomato and basil cheese. The result was pink, creamy deliciousness.

Blushing Bechamel
Print Recipe
A colorful take on a classic Bechamel . Tomato sauce, onions, and garlic are added to the traditional cheese sauce. Great for lasagna or any casserole that needs a gentle blush of color.
Blushing Bechamel
Print Recipe
A colorful take on a classic Bechamel . Tomato sauce, onions, and garlic are added to the traditional cheese sauce. Great for lasagna or any casserole that needs a gentle blush of color.
Ingredients
Servings:
Instructions
  1. Melt butter in a large saucepan over medium heat. Add the onions and garlic and cook until the onion begins to soften and the garlic is fragrant 3 - 4 minutes. Add the flour and stir to combine. Continue to cook, stirring frequently for another minute or so.
  2. Slowly add the milk, stirring constantly to keep things smooth. Add the tomato sauce and continue to stir. Bring to a boil. Reduce the heat to low and simmer for 5 minutes.
  3. Turn the heat off and slowly add the cheese, stirring until each addition melts. If you make this ahead of time, cover the surface with wax paper so that a crust doesn't form.
Share this Recipe
Powered byWP Ultimate Recipe

The Ricotta Filling combined baby spinach, garlic, and Romano cheese with the homemade ricotta and eggs. Pretty traditional as fillings go, but the perfect counterpoint to the other ingredients

DIGITAL CAMERA

Ricotta and Spinach Lasagna Filling
Print Recipe
Ricotta and Spinach Lasagna Filling
Print Recipe
Ingredients
Servings:
Instructions
  1. Heat the olive oil in a medium fry pan. Add the garlic and cook for 2 minutes. Add the spinach and cook until the spinach is wilted 3 - 4 minutes or so. Remove from heat and allow to cool.
  2. Spoon the ricotta into a medium mixing bowl. Lightly beat the eggs and stir into the ricotta. Add the cheese and pepper and stir again.
  3. Add the spinach and garlic mixture to the bowl and stir to combine well. Taste and add salt if needed.
  4. Use in lasagna, as ravioli filling or to stuff shells or manicotti.
Share this Recipe
Powered byWP Ultimate Recipe

I used a Chicken Sausage the was laced with Sun-dried tomatoes and mozzarella. The echoing of the cheese flavors was completely intentional. So, the ingredients were ready, the spring-form pan was oiled…let the show begin.

DIGITAL CAMERA

When I assembled the lasagna, I used a combination of cheeses which was actually based on what I had in the house. they included  Asiago, Manchego, Romano, and Fresh Mozzarella. They all joined the Garlic, Basil & Tomato Cheese to create a cheese extravaganza that actually worked.

Marie, the Proud Italian Cook shared guidelines for assembly that were invaluable. Those tips made the assembly come off without a hitch.  I created three layers. Two layers (top & bottom )of the Ricotta Spinach Filling topped with sausage and cheese. The Bacon and Leek mixture was the middle layer. Cheese and Sauce crowned the casserole that was destined to spend just over an hour in the oven.

DIGITAL CAMERA

The results were fantastic. The cheeses melted into the sauce, bubbling up and over the sides creating a beautiful browned crust. I allowed the pie to rest as Marie advised. I must say it looked and smelled so good that it was hard to wait, but I did and it was worth it because it un-molded and sliced beautifully. Oh, and it really tasted good, too.DIGITAL CAMERAThis was such a fun way to make lasagna. My family was impressed with the presentation and over the moon about how it tasted. My culinary minded son even took a picture of it.

To the wonderful cooks who inspired me and to my family who encouraged me. Thank you. Love, Mama D


Memories of Good Cakes… and a Memorable Marble Poundcake

Scan_Pic0018When it comes to baking the possible Undisputed Queen of the Oven is Cake. Cookies and breads, muffins and pies, all are wonderful in their own right, but cake is something bigger. Baking a cake is kitchen chemistry at it’s finest. Cakes have been around since man discovered flour, Check out this brief but entertaining  History of Cake for more information.

When I was growing up cake was always the star of the dessert table at special occasions. Birthday cakes were always homemade, and often cakes were made for no special reason at all. Cake was the go to dessert in the fifties and I’m sure long before I was licking beaters and sneaking a finger full of frosting, cake was every wife and mother’s testament to good baking.Scan_Pic0020

My mother had her go to cakes; the ones that she could probably make in her sleep but that always earned her high praise. The two I remember the most are Carrot Cake and Banana Cake. Her Carrot Cake was a straight forward take on the popular recipe. It was a one bowl wonder that included walnuts, carrots of course, and cinnamon. No raisins or pineapple. not even cream cheese frosting. This was the essence of carrot cake resting atop a  fluted milk-glass cake stand. Baked in a tube pan, it sliced into moist and  tender wedges.Scan_Pic0022

Her Banana Cake was also a study in less is more, so much more. It was a “2 Egg Sour Milk Cake” with the special addition of ripe mashed bananas, baked in a 13 X 9 inch pan that featured her never duplicated Buttercream Frosting. I say it’s never been duplicated because I’ve never been able to make it properly, even with the recipe right in front of me. It turned out so abysmally that I stopped trying about twenty years ago. I have however, made a promise to myself that I will master this “Dough Frosting” and when I do, I’ll share it right here.

Scan_Pic0021

Neither of these cakes is appearing in this post. Due to the copious amount of “family recipes” that I’ve amassed over the years and filed away in no apparent order. I just found them this morning. Speaking of family recipes, I found this Little Book of Good Cakes  in my husband’s Grandmother’s wooden recipe box. It was a free booklet given away with IGA cake flour. Unfortunately, it isn’t dated and other than someone who has one to sell, I didn’t find any more information on it. My guess is it dates from 1950 or earlier. It covers almost everything  you’d find in a modern (high priced) cake cookbook in fourteen pages, with some darn good recipes to boot.

Scan_Pic0023

There is a cake recipe in this post. It’s been my “go to” cake for over thirty years. It is partly homemade since it uses Cake Mix and Instant Pudding. Yes it’s that workhorse home-baked treat from the seventies, The Pudding Pound Cake (aka Bundt Cake). I think Duncan Hines may have created the recipe. If not, they were responsible for furthering its popularity. It’s an easy sell. Simple to make, fancy looking, and possessing endless variations, it is comfortable on a party table or on a chipped cake plate as Wednesday night dessert.

It has traditionally been made in a bundt pan. The fluted tube pan that became the darling of baking in the sixties. Traditionally I’ve made this cake in a bundt pan. Sadly, my bundt pan in all its Avocado Green glory went to the Teflon graveyard several months ago and I haven’t replaced it yet. This Marble Pound Cake had to be baked in loaf pans. Ironically the cake mix package recipe called for two loaf pans…Could it be  a sign of the times?

The ingredients are simple. Cake mix, pudding mix, eggs, water and oil.DIGITAL CAMERA

 The ingredients are beaten until they become light and fluffy. This only takes a few minutes, but more than the 2 minutes that the recipe suggests.

DIGITAL CAMERAOne cup of the batter is removed   and combined with the chocolate packet in a small bowl.  DIGITAL CAMERA

The batter is divided between the two prepared loaf pans and swirled to create the marble effect. Then it’s off to the oven to bake for about 45 minutes.DIGITAL CAMERAOnce baked and cooled they are ready to glaze. Taking a page from my mother’s minimalist tendencies, I chose to leave them “au natural”. This cake is however, wonderful with a chocolate glaze that sensuously drips down the sides of the cake and impresses one and all when it is in the classic bundt shape.DIGITAL CAMERA


This recipe is fancy enough for company and easy and inexpensive enough for no occasion in particular. It is also open to infinite variations by changing the cake mix or the pudding mix or if you feeling exceptionally randy, adding nuts or chips or …

Marble Pound Cake
Print Recipe
A classic recipe for "bundt cake". Easy to make and adapt for limitless variations. oh, and it's really tasty.
Servings
12 Servings
Servings
12 Servings
Marble Pound Cake
Print Recipe
A classic recipe for "bundt cake". Easy to make and adapt for limitless variations. oh, and it's really tasty.
Servings
12 Servings
Servings
12 Servings
Ingredients
Servings: Servings
Instructions
  1. Pre-heat oven to 350 degrees. Combine the mixes, oil, water, and eggs in a large mixing bowl. Reserve the chocolate cake mix packet for later.
  2. Using a hand mixer, combine the ingredients at low speed until just blended.
  3. With mixer on medium high, blend for 2 - 3 minutes until the mixture is light and fluffy and all the lumps are gone.
  4. Remove one cup of the batter and put in a small bowl. Add the contents of the chocolate packet and stir to completely incorporate.
  5. Prepare pan(s). Spray evenly with cooking spray. Sprinkle approximately 1 tablespoon of flour into each pan and tilt and shake to lightly cover the bottom and sides. Tap out any excess.
  6. Divide the vanilla batter between the two pans. If using the bundt pan pour all of the vanilla batter into the pan and shake and tap to distribute evenly.
  7. Spoon the chocolate batter on top of the vanilla batter. Divide the batter if using two loaf pans or use all of it in the bundt pan.
  8. Using a butter knife, swirl the two batters together, Using vertical and horizontal movements and reaching to the bottom of the pan(s).
  9. Bake for 45 - 50 minutes for loaf pans or 50- 60 minutes for bundt pan. Cake is done when a toothpick inserted in the center comes out clean.
  10. Remove from oven and cool in pans on wire rack for 5 minutes. Remove from pans and cool completed on rack.
Share this Recipe
Powered byWP Ultimate Recipe

 Happy Baking, Mama D

Memories of the Wine Country and a Quick Pasta Dish

Note: This is a post from 9 years ago. I brought it up because I made the recipe this week and as it is almost Mothers Day, this dish reminds me of my sons. As the pictures show they were young, They are grown up now with homes and sons of their own ( about the ages they were in these pictures). When I made this I felt that I had to share it with them, photographically speaking. So as any good mother would I sent them a picture. They remembered it all, the trips, the good times, and the dish. A perfect Mother’s Day gift, in my opinion.

Another Note: I must give credit for this recipe to one of my favorite cookbooks, The Frugal Gourmet by Jeff Smith. His recipes featured on the television show of the same name were always tasty, easy, and yes, frugal.

Finally: Happy Mother’s Day to all the women who proudly share the title and job description of Mother. Hope you enjoy this post and your special day.

We were fortunate to live in Northern California for almost 20 years. We took advantage of all the things that the area offered, Trips into San Francisco, camping in the Redwoods, exploring tide pools and of course the Wine Country. All of this, and there was no snow to shovel…Why we came back to the Midwest is complicated. Suffice to say we had our reasons and we have not regretted it.

My sons were born and raised in California. We had no family around so our adventures were always immediate family affairs and that included trips to the Wine Country. Scan_Pic0013Sonoma County was about an hour and a half away. It was a great day trip destination. Back in the 80’s Sonoma was pretty rural. There were a few big wineries and lots of small ones. The small wineries were more like family run farms with the crop being grapes. That actually makes them vineyards, and Sonoma still has some of the best.Scan_Pic0017

Every few months we would take a day trip up to Wine Country. We always did this on the cheap. Back then tastings were free and a bottle of wine was under $10.00 (if we splurged and bought one).  We would visit 3 or 4 wineries and have a picnic lunch overlooking the vineyards.  Lunch was often salami, cheese and crackers; some fruit and cookies for dessert (parent and child friendly and easy to carry in a cooler).

Our sons always found something to do on these trips. They were very adaptable and quickly learned to make their own adventures. Sometimes we even joined in their fun. The time we rented a canoe and paddled the Russian River was memorable for all of usScan_Pic0012

Left to their own devices they always seemed to find something to do. Being treated toScan_Pic0011 some fresh grape juice, skipping stones, playing with the wine maker’s children or playing with the requisite “Vineyard Dog” that seemed to hold court at every winery. Looking back, they mostly remember the adventures and not the waiting for Mom and Dad to finish their wine. At least that’s the way I prefer to remember it; they may have a slightly different take.

The trip home was quiet. The boys would sleep and I would most likely doze off, Jeff, ever the good husband and father got us back across the bridge in one piece (He also took these amazing pictures of the Wine Country). Once home everyone was hungry and getting supper on the table was job number one. That’s how Salami and Zucchini Pasta came to be. It was quick, hearty and everyone liked it. The salami was left over from lunch and the zucchini was usually in the fridge. Pasta, olive oil and garlic…I’m Italian, of course it was in the house.

The most recent time that I made this dish we had been out running “errands” that included picking up our wine at Cooper’s Hawk Winery, so the wine tasting component was there. I used salami that I received in a gift basket from my son. It was made with Chianti so it seemed to fit right in with my the wine tasting memories. Still being Italian, the rest of the ingredients were, once again, already in the house.

DIGITAL CAMERA

The salami and zucchini get cut into match sticks, the garlic gets minced and it all goes into the pan with the olive oil.DIGITAL CAMERA

While the pasta is cooking the cream gets added to the pan, simmering to velvety thickness. DIGITAL CAMERAThis coats the pasta, salami and veggies, resulting in a rich and tasty supper. A little freshly ground pepper and some Romano cheese are all that it needs. We may be far from the Wine Country, but this pasta dish always brings back memories. It also is still a favorite and fast way to create a delicious ending to any busy day. 


Linguine with Salami and Zucchini
Print Recipe
A quick and easy pasta dish that you can whip up after a day in the (Wine) country or a long day of work.
Servings
4
Servings
4
Linguine with Salami and Zucchini
Print Recipe
A quick and easy pasta dish that you can whip up after a day in the (Wine) country or a long day of work.
Servings
4
Servings
4
Ingredients
Servings:
Instructions
  1. Cook linguine in salted boiling water until Al Dente. While the pasta is cooking, heat a large frying pan and add the salami, zucchini, and garlic. Cook, stirring frequently until the zucchini is soft and the salami is slightly frizzled. 7 minutes or so
  2. Add the cream and capers and bring to a hard simmer, stirring frequently. This will prevent scorching. Continue to simmer and stir until slightly reduced. 5 - 8 minutes.
  3. Reserve 1-2 ladles of the pasta water then drain the pasta. Add the drained pasta to the fry pan. Toss to combine the pasta and sauce. Cook for about 3 minutes until the sauce comes together. Add in some of the reserved pasta water if the sauce seems tight.
  4. Add pepper to taste and serve topped with the grated cheese.
Share this Recipe
Powered byWP Ultimate Recipe

The past holds so much for us. It got us to where we are now and in some small way it colors where we will go next. Reflecting on the memories leads to rediscovering good things, like pictures of happy times and pasta that still tastes like love. Mama D