3 Nights on the Grill, 3 Marinades, a Tip, and a Hack

Memorial Day Weekend is here. While the most important part of this time is to remember those who have fought and are fighting to keep our country safe, it is the unofficial start of Summer.That means it is officially grilling season in Mama D’s Kitchen of Love.

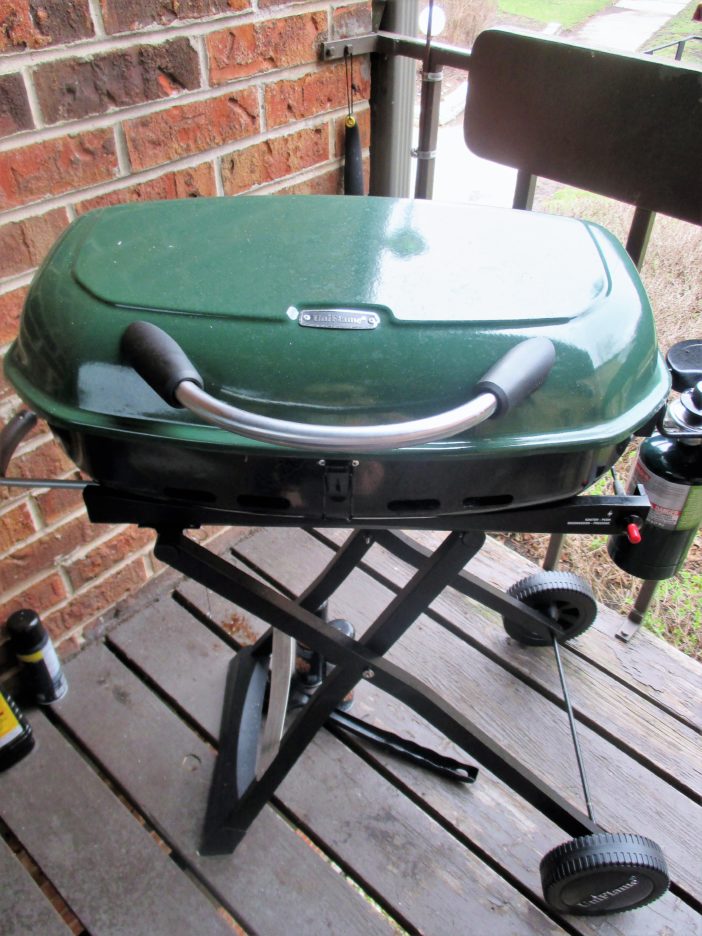
We do grill almost year around, but it is so much nicer when you don’t have to put on a winter coat to do it. Our little grill is still performing wonderfully and the adaptations we have made to size and heat are now second nature. We continue to discover new things that cook beautifully on the grill, as this post will show. We’ve done a one dish meal, grilled chicken (and an array of other proteins), and even a single ingredient for a recipe. This last being easy on a small grill that can be ready in 5 minutes.
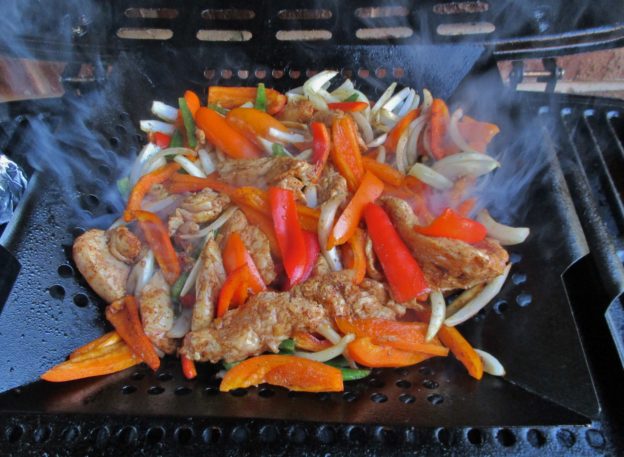
Now for that One (Grill) Basket Meal. I was inspired by a plethora of Sheet Pan Fajita Recipes. So, I decided to move my ingredients from the oven to the grill. This will work with any fajita recipe with just a bit of adaptation. My protein of choice was chicken breast. A Bag-o-Bits was in the freezer and this seemed like the perfect use for it. Marinating helps flavor the meat and amends the too long in the freezer time. This marinade would work for any protein that you want to give a citrusy southwestern flavor to.
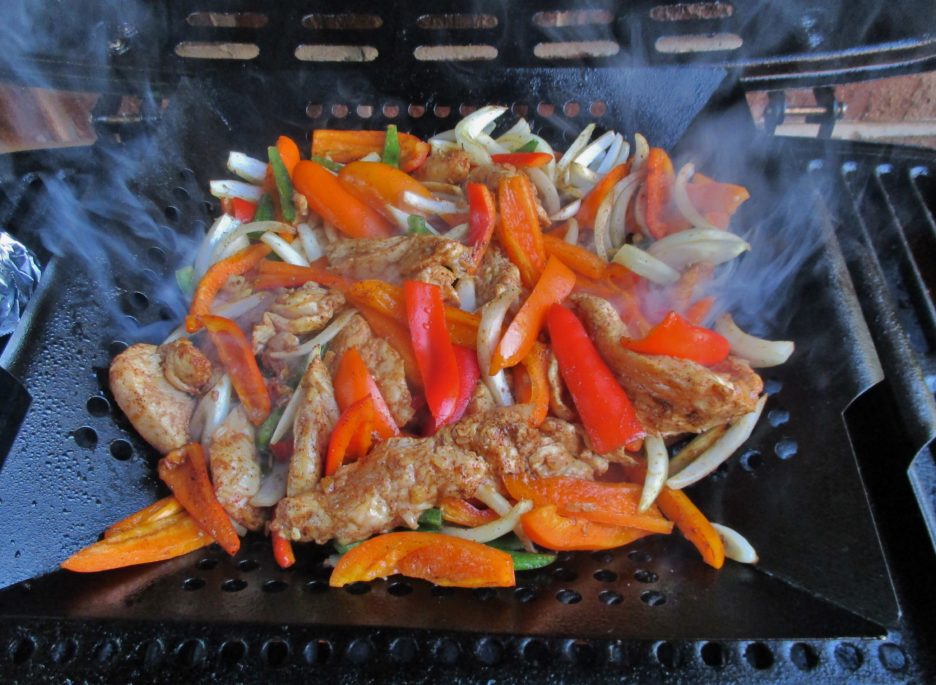
Grilled Fajita Marinade

This is a basic recipe that will work for chicken, beef, or pork. The ingredient amounts suit me, make any adjustments to suit yourself.

Author: binner216@comcast.net
Ingredients
  • 1/4 Cup Fresh Lime Juice
  • 2 Tbsp. Canola Oil
  • 2 Tsp. Dried Minced Onion
  • 2 Tsp. Dried Minced Garlic
  • 1 Tsp. Ground Cumin
  • 1/2 Tsp. Ground Coriander
  • 1 Tsp. Ancho Chili Powder
  • 1/2 Tsp. Agave Syrup
  • 1/2 Tsp. Salt
Instructions
  1. Mix all of the ingredients together. Pour over 1 pound of your protein of choice. A zip top bag works well for this. Toss to coat all the protein. Allow to marinate in the refrigerator 4-6 hours.

  2. Remove protein from marinade. Throw the marinade away. Grill your protein to your liking.

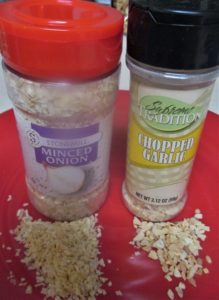
This brings me to a hint that I want to share. I used (and will continue to use) dried onions and garlic in this marinade. Time saving was my first reason to use them. Yes, it doesn’t take much time to chop up onions and garlic, but it takes even less time to toss in their dried counterparts. I think they also impart more flavor, especially in long marinating. These are not new ingredients; they have been around forever, If you have relegated them to the back of the spice cabinet, throw them away and buy new jars. As with any spice they lose flavor as they age. They are relatively inexpensive so this is not a big waste.
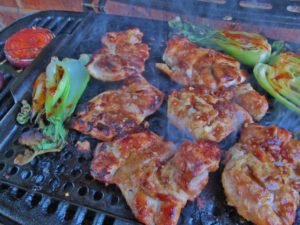
 

I had a craving for something Asian inspired. Boneless chicken thighs are my favorite poultry for the grill. They cook quickly and have enough fat to remain tender and juicy. This marinade started with orange juice and combined a host of aromatic flavors to create a marinade that would also work with pork. I opted for all fresh ingredients and gave them a quick whirl in my mini processor. Once the thighs had absorbed the flavors they were joined by Baby Bok Choy and thick Red Onion slices.
Asian Marinade for Chicken or Pork

this marinade will give your protein of choice a decidedly Asian flavor. If you like things on the spicy side add a teaspoon of Sambal.

Author: binner216@comcast.net
Ingredients
  • 1/4 Cup Fresh Orange Juice
  • 1/4 Cup Reduced Sodium Soy Sauce
  • 1 Small Finger Ginger Root
  • 2-3 Cloves Garlic
  • 1 Tsp. Sesame Oil
  • 2 Tbsp. Red Onion
  • 1/2 Tsp. Agave Syrup Optional, to taste
Instructions
  1. Place all ingredients in a mini processor. Pulse until the ingredients are coarsely chopped.

  2. Place the chicken or pork in a zip top bag. Pour the marinade in and seal. Knead the bag a few times to coat the protein. Marinate in the refrigerator     4 -6 hours. Remove the protein from the marinade and grill. Discard the remaining marinade.

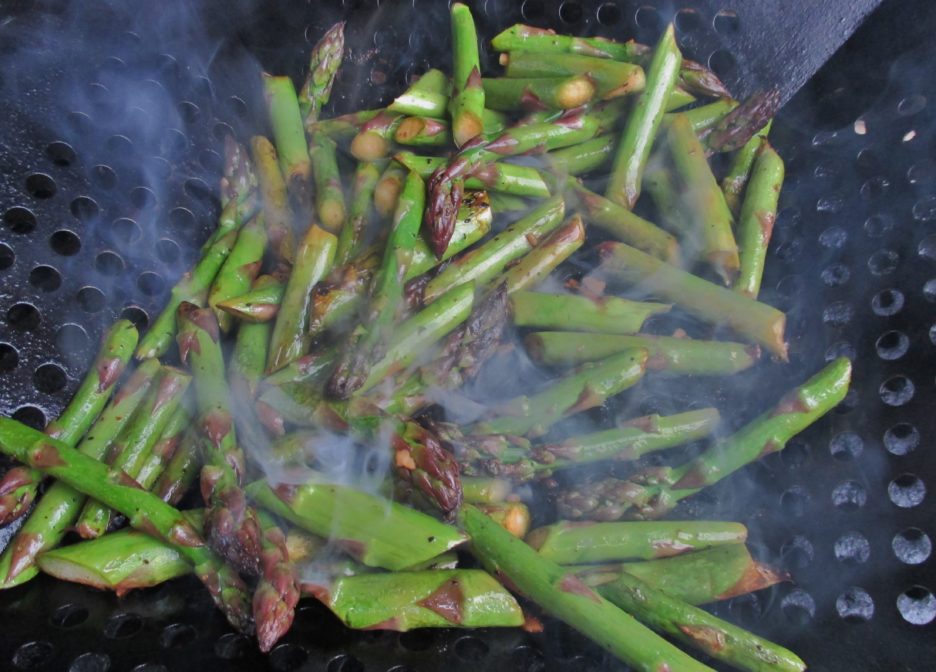
While we are grilling almost every evening, there are still some things that don’t work. Number one on that list would be pasta. Preparation is best left on the stove. That being said, there are lots of grilling possibilities for what goes in and on the pasta. I made a not so heavy Carbonara recently that featured asparagus. Most vegetables have an affinity for the grill and asparagus is one of my favorites. I usually marinate it in olive oil, balsamic, and Italian herbs and grill the lovely spears until they have that perfect amount of char. The only difference was the spears were sliced into more pasta friendly pieces. (Pencil asparagus would work well whole in this dish.)
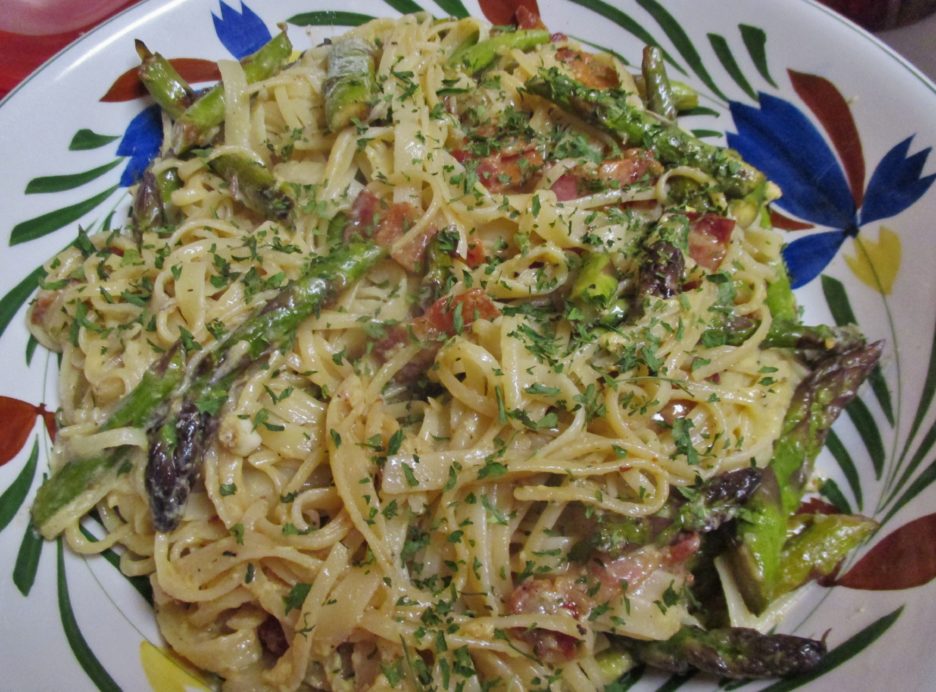
I have a confession to make. Sometimes I use bottled Balsamic Vinaigrette. This was one of those times.  I found one that is relatively additive free (at Aldi no less). I added a bit more olive oil and dried garlic and called it a marinade. I have another confession. I do this more often than not with most vegetables that I grill. It saves time and that is always a plus in the summer. So I am considering this to be my third marinade. I guess it could qualify as a hint or a hack depending on your interpretation. Whatever you want to consider it, find a Balsamic or other vinaigrette that you can live with and  enhance it to your liking.
While the asparagus grilled, I made the rest of the sauce. Pancetta, garlic, and red pepper flakes cooked up in a large skillet. Pasta cooked to “al dente” at the same time. I found an interesting technique for the eggs. They were beaten together with the romano cheese and tempered with a some pasta water. Amazingly, no scrambled eggs (yes, that has happened to me once or twice) and a sauce that was creamy without any cream. That little hack is a keeper.

As we enjoy the beginning of summer and the continuation of grilling season, I hope these marinades, hints, and hacks are helpful.


Porcini Pasta Revisited

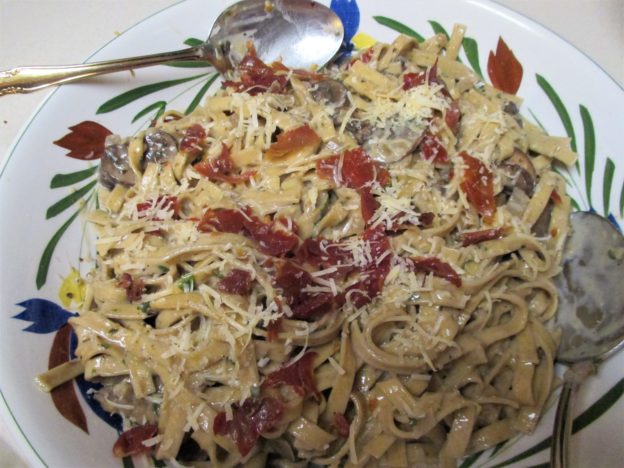
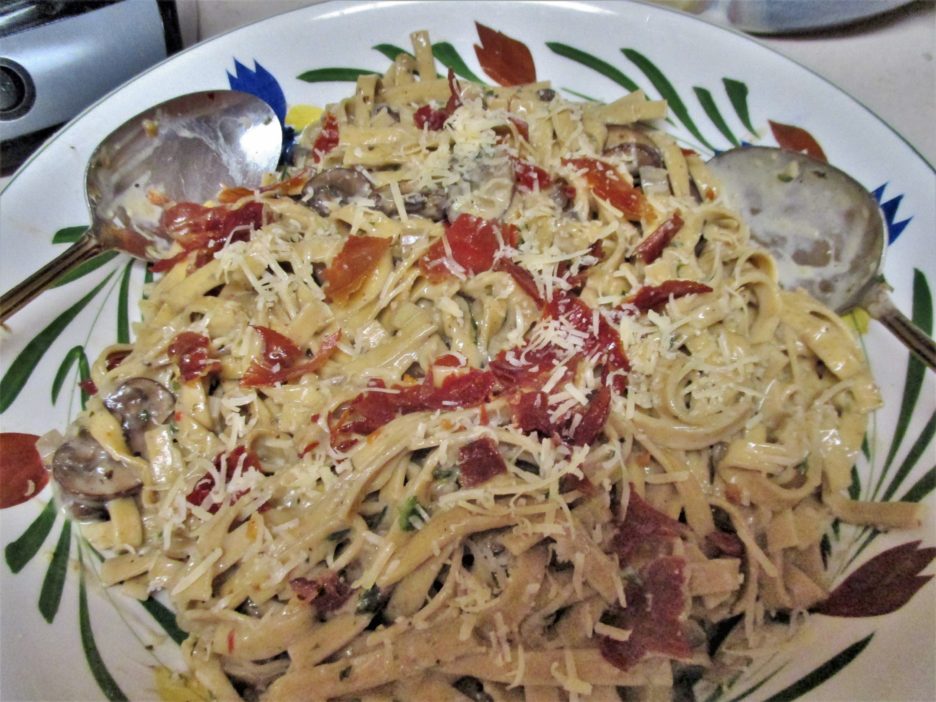
When something is wonderfully delicious, it earns the right to be made again. It also earns the right to be tweaked a little to make it even more wonderfully delicious. Porcini Pasta is just that kind of recipe. I first made it as a side dish to enhance grilled steak. It stole the show so to speak. It was definitely tasty enough to move into the spotlight as a main dish. I dressed it up with a little cheese and served it to non-meat eating guests. Again it was a home run. Could the third time be even more of a charm? So here’s what I came up with.

It was one of those days that seemed busy from the minute my feet hit the floor. Errands, laundry, and a bit of grandboy sitting and before I knew it, dinner (or plans for it) was looming on the horizon. Time to take stock of what was interesting in the pantry. Porcini pasta was sitting in an unassuming corner and not too far away was a jar (yes, I do succumb sometimes) of Alfredo Sauce. A brief foray into the refrigerator yielded  crimini mushrooms and some prosciutto. I also found a chunk of Aged Asiago Cheese. I sensed that this could be the start of a wonderful friendship.

I gave some thought to how I was going to use the prosciutto. I decide to see if I could fry it to create crispy bits much like bacon. The thin slices frizzled up beautifully and crumbled into wonderful salty flakes that would serve as both a surprise crunch in the sauce and a garnish.

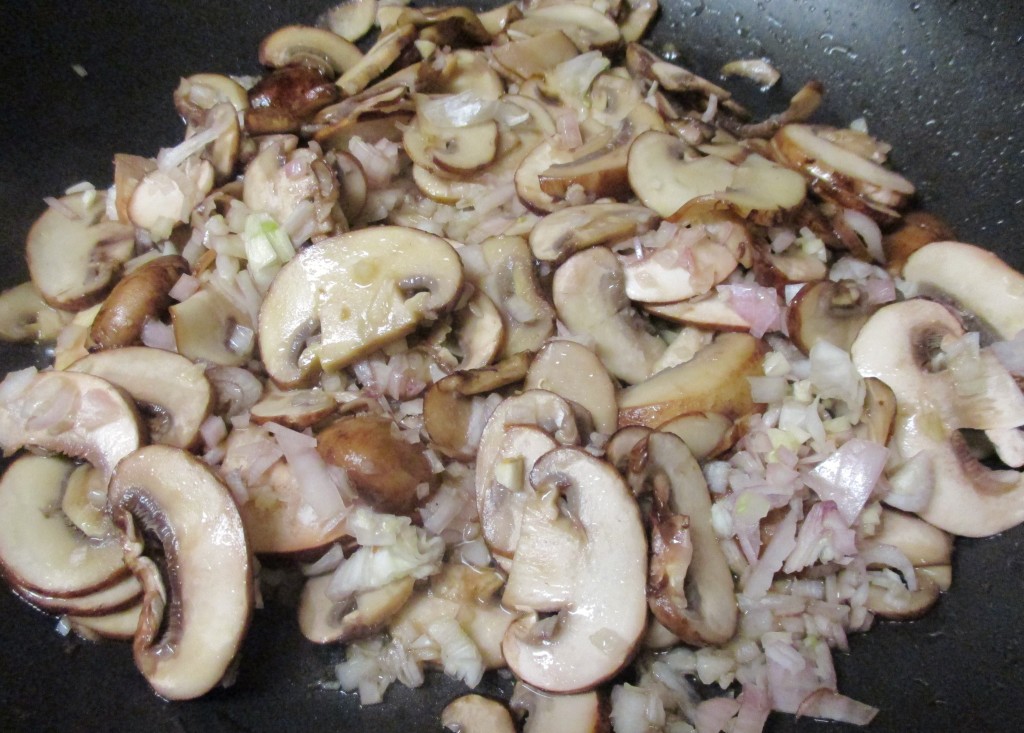
Using my original recipe as a guide, I sliced the mushrooms and chopped up shallots and garlic. These cooked in the drippings  from the prosciutto and some olive oil until they were lightly caramelized.

While the water for the pasta boiled, I thinned the Alfredo sauce with some chicken broth and let it simmer with the mushroom mixture. I added a good amount of the grated Asiago and a generous amount of freshly ground pepper. I cooked the pasta until it was barely al dente, drained it and added it to the sauce along with half of my prosciutto flakes. Things got happy for a few more minutes and dinner was ready to plate. All it needed was a sprinkling of a little more cheese and a flurry of prosciutto flakes.

Porcini Pasta Revisited

The original side dish recipe has graduated to an easy Weeknight Supper.

Servings: 3
Ingredients
  • 8 Ounces Porcini Pasta
  • 3 Ounces Prosciutto
  • 8 Ounces Crimini Mushrooms Sliced
  • 1/2 Cup Chopped Shallots
  • 3 Cloves Garlic Chopped
  • 1 Tbsp. Olive Oil
  • 1-1/3 Cups Alfredo Sauce
  • 1/2 Cup Chicken Broth More or less as needed
  • 1 Cup Grated Asiago Cheese Divided
  • 3/4 Tsp. Freshly Ground Pepper
Instructions
  1. Bring a large pot of pasta to a boil. While the water heats prepare the sauce.

  2. Heat a large skillet over medium heat. Add the olive oil and heat. Add the prosciutto and cook until it is crispy. remove from the pan and drain on a paper towel.

  3. Add the mushrooms, onions, and garlic to the drippings in the pan. Cook stirring occasionally until everything is lightly golden brown.

  4. Add the Alfredo sauce and the chicken broth and cook over low heat for 5 minutes or so.

  5. Cook the pasta until it is just barely "al dente."

  6. Add 3/4 of the cheese and half of the prosciutto to the sauce along with the pepper. Drain the pasta and add it to the sauce. toss to coat and allow to cook for a few minutes more.

  7. Pour into a serving bowl and top with the remaining cheese and prosciutto.     Serve

If my truth be told, I hardly ever make anything the same way twice, not that there’s anything wrong with that. I am always looking for ways to make things better or to incorporate ingredients that I have on hand. That’s how Mamam D’s Kitchen of Love rolls. 


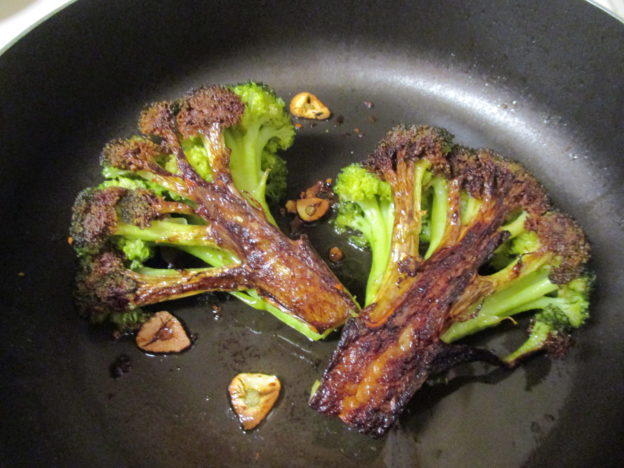
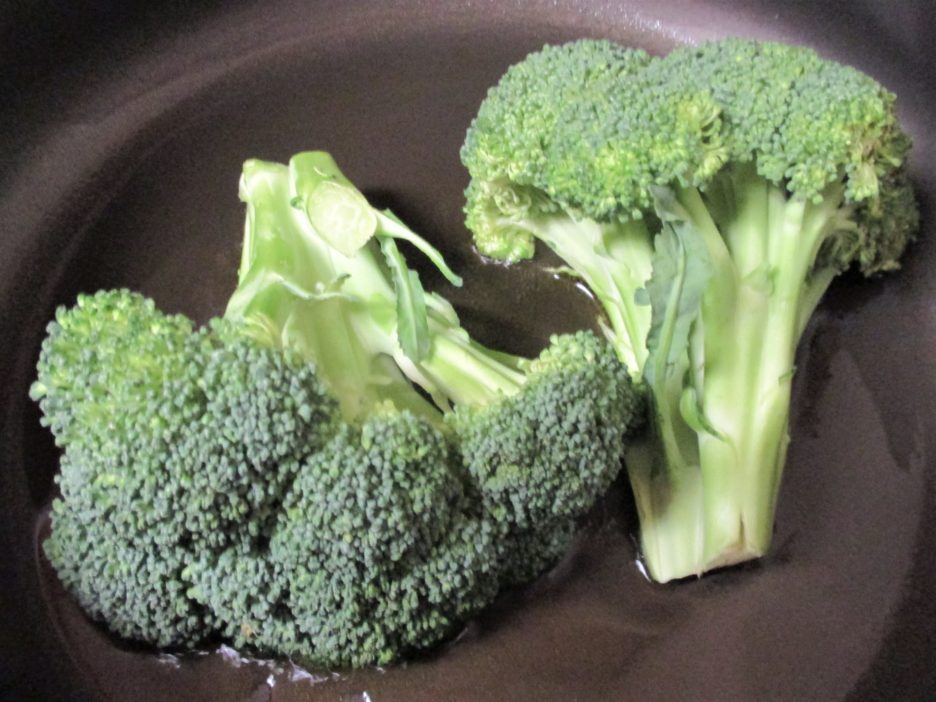
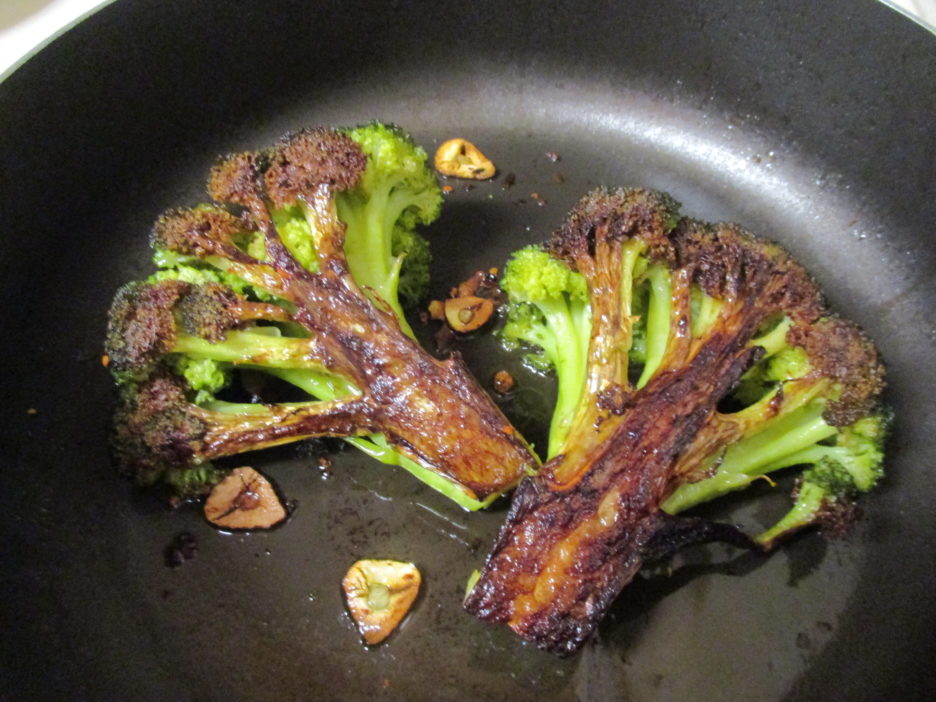
Caramelized Broccoli and Other Vegetables

I have a new favorite way to cook broccoli and I can’t take credit for it. First, let me say that Broccoli is probably my favorite vegetable side. I like the taste, and the nutrient profile makes it an excellent choice for adding some green to a plate. It is easy to cook and lends itself to many styles and flavors. It is available year round without too much of an out of season mediocrity factor. It is also usually a good value. What’s not to love?

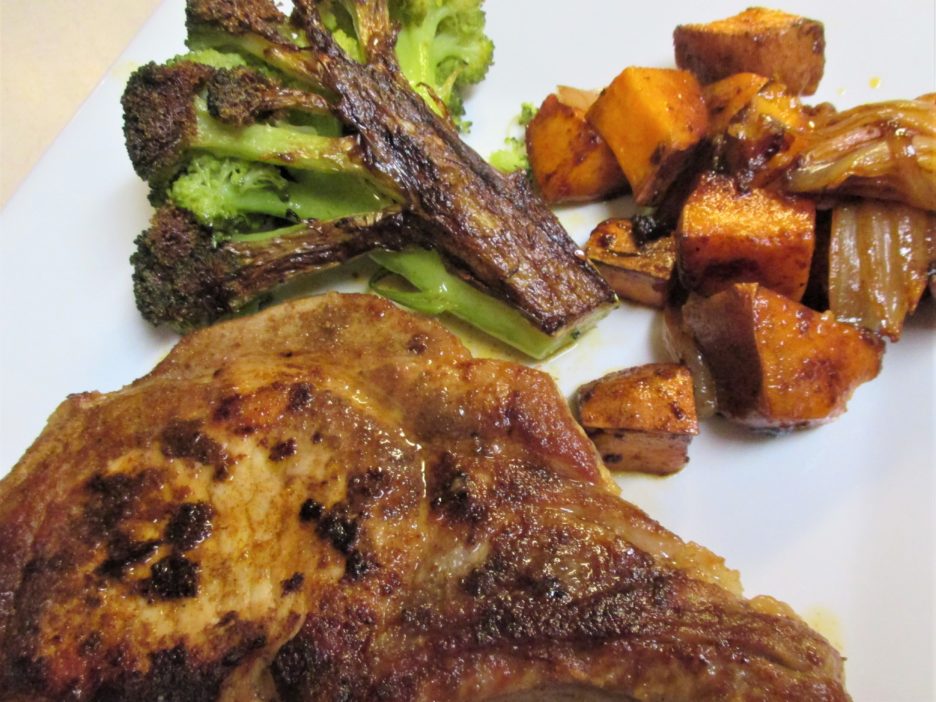
All of these factors result in Broccoli gracing our plates several times a week. That means I am always thinking about different ways to prepare it. I admit that I search Google, Pinterest, etc. quite often for ideas and I am sure that I am not alone. That’s when I found what I believe to be the best way to cook broccoli, ever, Caramelized Broccoli

The recipe came up many times in my search and while I can’t be certain, I think it originated with Chef David Gingrass, a well-known Bay Area chef. In one article he said it would make a Broccoli lover out of a hater. If you are a broccoli lover like me you then become obsessed.  It is easy to prepare, but takes a bit more time and effort than putting it in a steamer. This is a small price to pay for the fantastically delicious results.

Now, even though I have made this recipe a number of times, I can’t quite leave it alone. If you can caramelize broccoli, what other vegetables would benefit from this technique? The short answer is lots. And so the experimentation begins…

The requirement of any vegetable is that it can be cut into a good-sized slab creating at least one flat surface. It also needs to be fairly dense since it is going to be under pretty intense heat. While the experimentation continues, here are two vegetables that were wonderful.

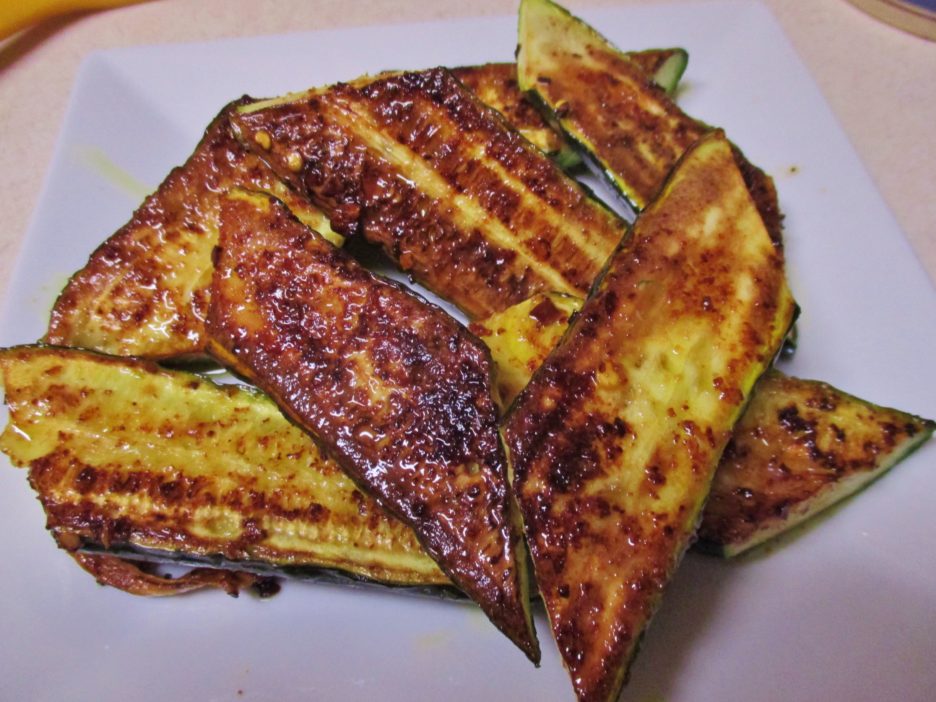
Zucchini was my first test. Halving it lengthwise and creating chunky fingers was the perfect shape, The garlic, red pepper flakes, and lemon juice were an ideal complement to the creamy texture that the caramelizing created. To carry the experimentation further, I will be trying yellow squash and perhaps eggplant.

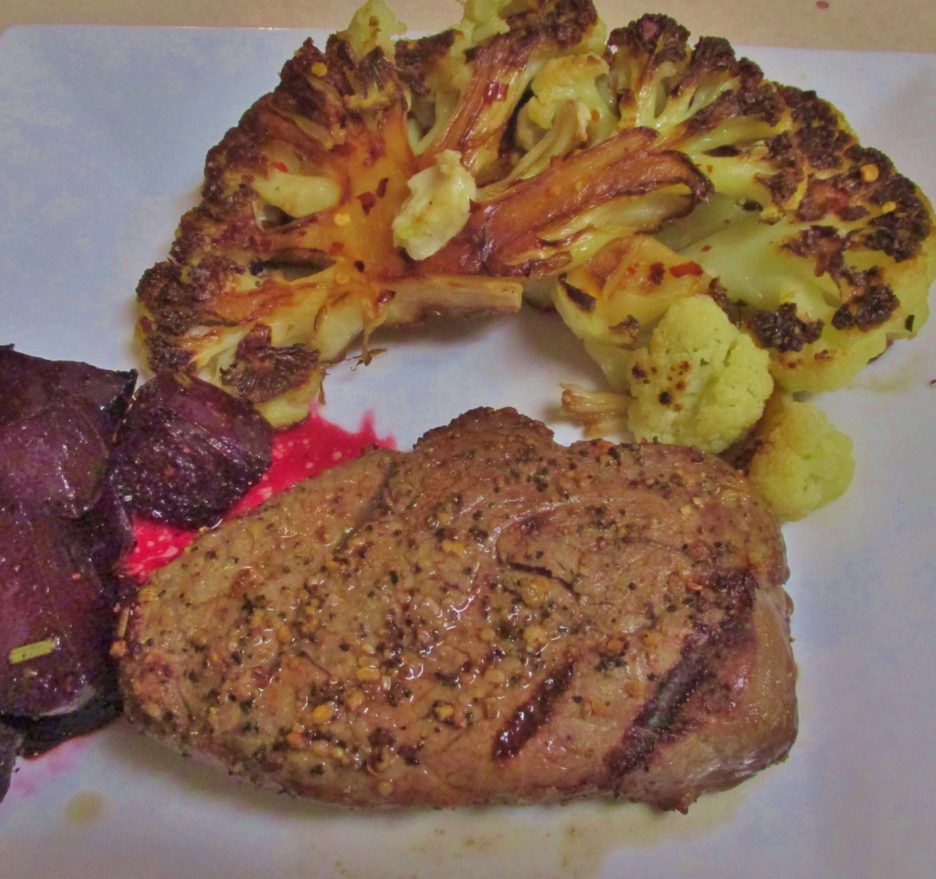
The next experiment was Cauliflower. This was certainly not a huge leap as it is closely related to broccoli. Cut into thick steaks, it too, was a delectable addition to a dinner plate. In this case it joined Steak and Roasted Beets.

I’ve just conducted a mini brainstorming session and have added Carrots, Leeks, Sweet Potatoes, and Delicata Squash to my list of possibilities. I’m sure this is only the beginning.

I think that this calls for a “Master Recipe” of sorts. So, without further ado, here we go:

Caramelized Vegetables

A master recipe to create golden, sweet, and tender vegetables. Cooking times will vary by vegetable. You are looking for golden brown and tender.

Servings: 4
Ingredients
  • 1 Pound Vegetable "Planks"
  • 2 Tbsp. Olive OIl Divided
  • 1 - 2 Tbsp. Water
  • 2 Cloves Garlic Sliced
  • 1/2 Tsp. Red Pepper Flakes
  • 1 - 2 Tbsp. Lemon Juice
Instructions
  1. Cut firm, dense vegetables into flat slices about 3/4" thick.

  2. Heat 1 Tablespoon of the olive oil in a deep skillet that has a lid. The heat should be medium high.

  3. Lay the vegetables in the skillet cut side down. Cover and cook for 5-8 minutes (depending on the vegetable) until they are golden brown.

  4. Add the water cover again and cook until water evaporates, and vegetables are barely tender, 3 - 6 minutes.

  5. Add remaining Oil, the Garlic and Pepper Flakes. Cook until the vegetables are tender and the garlic is golden. 3 -5 minutes.

  6. Remove to a plate and drizzle with the Lemon Juice and serve.

This technique would make even the most vegetable resistant eater into a fan. Here’s hoping that you will give it a try. I know that I will continue to experiment with other vegetables and maybe even other flavors. It is easy and oh so delicious.


Chicken Breasts…the Right Stuff(ed)

As we began the Holiday Season, I shared a post about stuffed chicken breasts. Little did I know that when the new year began, that I would still be singing their praises. Not to sound like I am repeating myself, but I have come up with yet two more ideas for filling a chicken breast and both of them are delicious and easy.
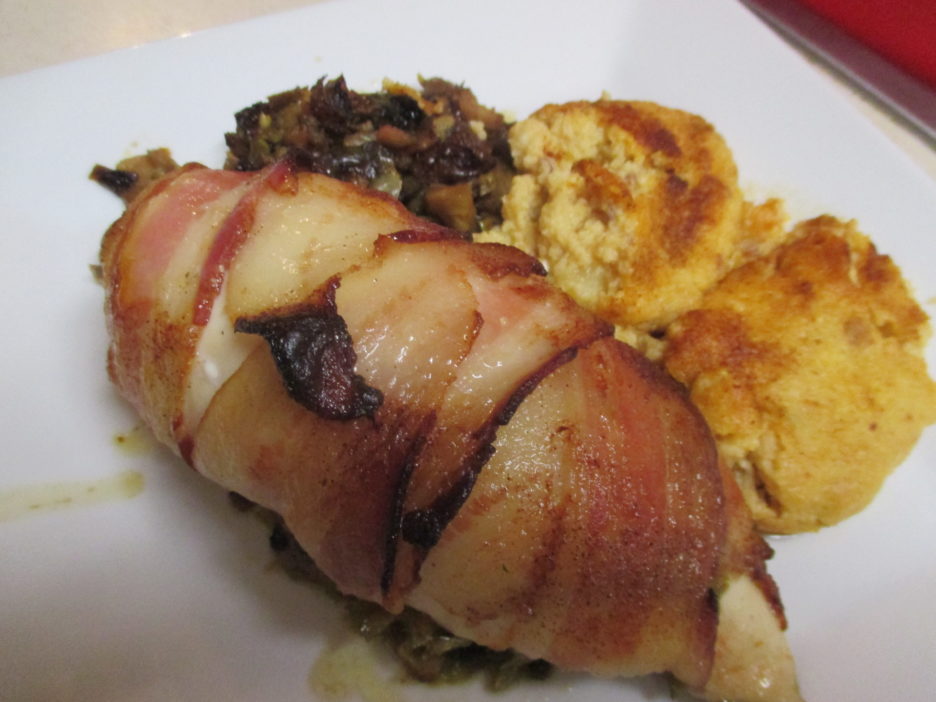
Why am I suddenly obsessed with stuffing chicken breasts? First off they are a lean and inexpensive protein. In and of themselves they are pretty bland and very boring, but that is what makes them so wonderfully versatile. They are quick cooking which is always a plus for weeknight suppers and can embrace any cuisine from comfort to gourmet.

Another reason to stuff a chicken breast is to keep it moist and tender, especially when it is heading into the oven. I’m sure that we have all choked our way through a dry and tough chicken breast at one event or another. Stuffing works from the inside to keep everything moist. To create a little extra moistness insurance, wrapping or coating it with something fat based helps as well.

There are two ways to stuff a chicken breast. The more gourmet method is to butterfly a good-sized breast and then pound it into a nice evenly flat canvas that can then be stuffed, rolled, and tied.

A simpler approach is to cut a deep pocket into the breast and fill it to the rim with something yummy. That is where we are heading today. The fillings of choice are more carb friendly for those that care about that sort of thing. They are vegetable forward with just the right amount of richness to create a palate pleasing sensation.

This can be considered a master recipe. I wrote it for two servings because that’s how many I cook for most of the time. It can easily be doubled, tripled or quadrupled if that’s what you need. A little simple math will give you the amount of ingredients you need. This stuffing will generously stuff the breasts with a little left over to create a comfy bed in the baking pan. Without further ado I give you Stuffed In the Side Pocket Chicken Breasts.

Stuffed In The Side Pocket Chicken Breasts

A master recipe for creating moist and delicious baked chicken breasts.

Servings: 2
Ingredients
  • 2 6-8 Ounce Boneless Skinless Chicken Breasts
  • 1/2 Tbsp. Olive Oil
  • 1 Clove Garlic Chopped
  • 1/3 Cup Chopped Onion Any type will work
  • 2 Cups Raw Vegetables, chopped Pick the ones you love.
  • 1 Ounce Cream Cheese Optional
  • 1 Tbsp. Bread Crumbs As needed, optional.
  • 4 Strips Bacon For wrapping the breast
  • 1 Tbsp. Mayonnaise To coat breast if not using bacon
  • Paprika
Instructions
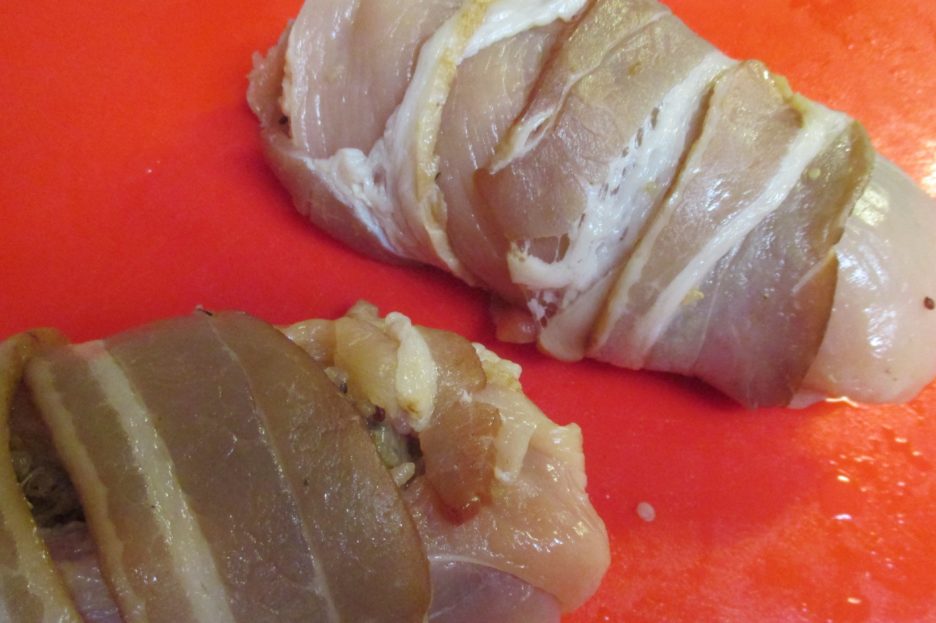
  1. Using a sharp knife and going slowly, cut a pocket in the thickest side of the breast. Do not pass go or cut all the way through. Set Aside

  2. In a medium skillet, heat the olive oil over high heat. Reduce slightly and add the onions and garlic. Cook stirring occasionally until the mixture is soft and fragrant,

  3. Add the vegetables that you have chosen and continue to cook for 7-10 minutes stirring often. The vegetables need to be soft and slightly caramelized. At this point you should have about 1-1/4 cups of delicious stuff(ing).

  4. Depending on the vegetables moisture level, add cream cheese and/or breadcrumbs to make a thick (not runny) mixture. Add any additional seasonings and heat  long enough for everything to get acquainted.

  5. Cool the mixture slightly and and spoon it into the pockets of the breasts. Pack it gently but do not fill it to the point that the stuffing is coming out. If you have some left, spread it in the bottom of the baking pan you will be using. Give the pan a good spritz of cooking spray first.

  6. Choose how you want to finish the outside:  Wrap the breast with the bacon strips securing with toothpicks or kitchen twine if necessary. OR Spread the mayonnaise evenly on the tops of the breasts. Add any seasoning of you choice. 

  7. Bake at 375 degrees for approximately 25 -30 minutes. Watch carefully and check for an internal temp of 160 degrees. Remove from the oven and allow to cool for 5 minutes before serving.

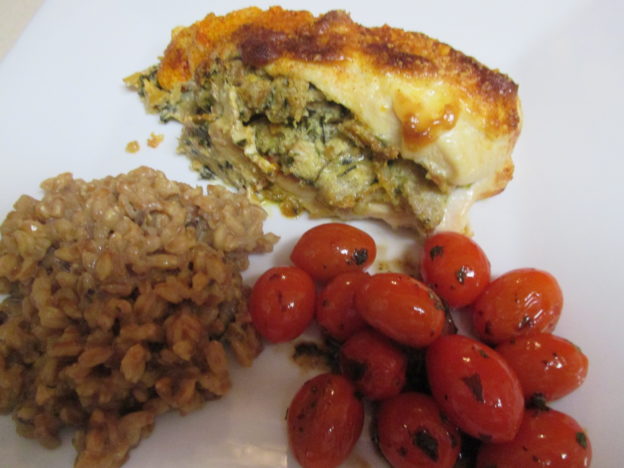
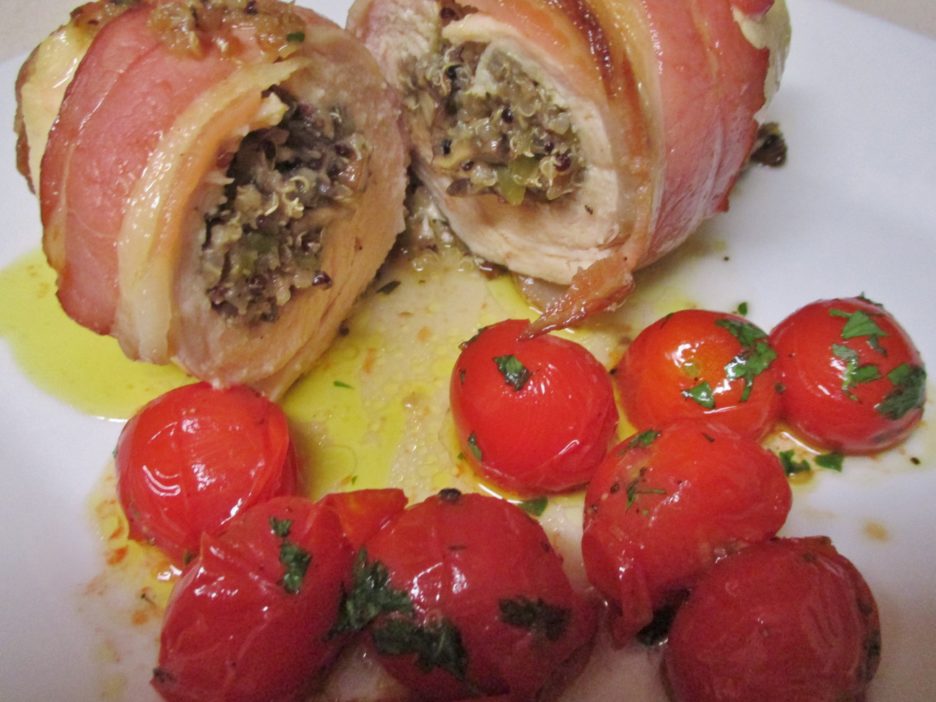
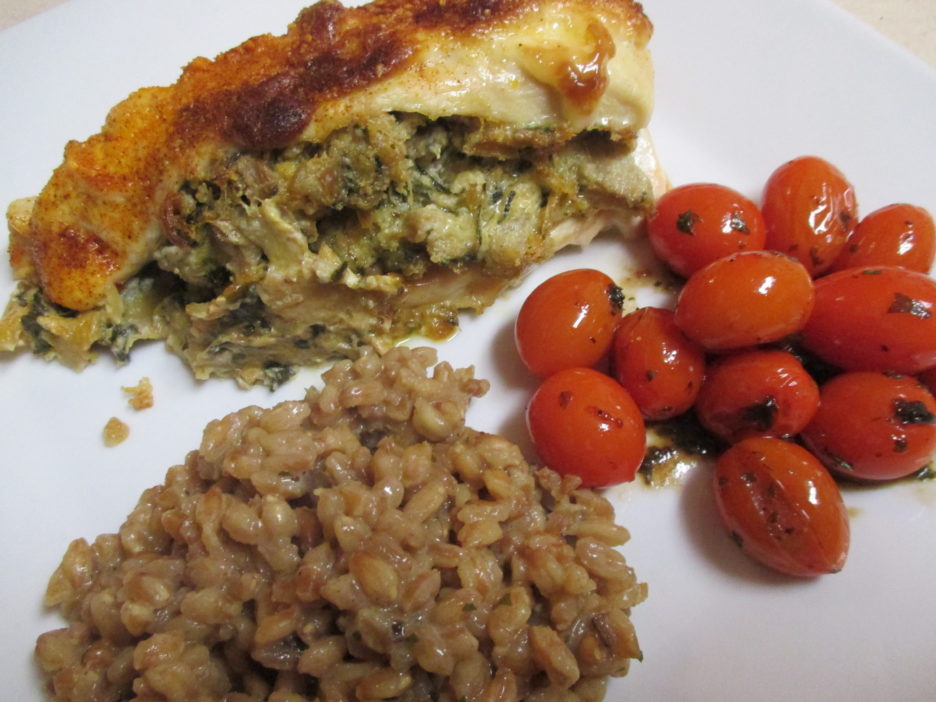
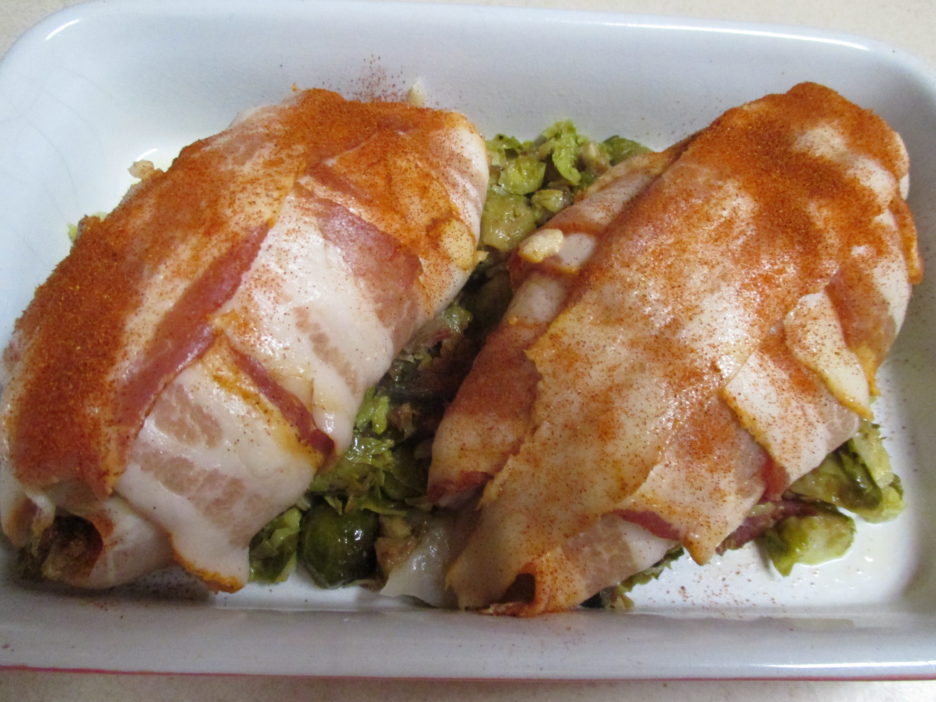
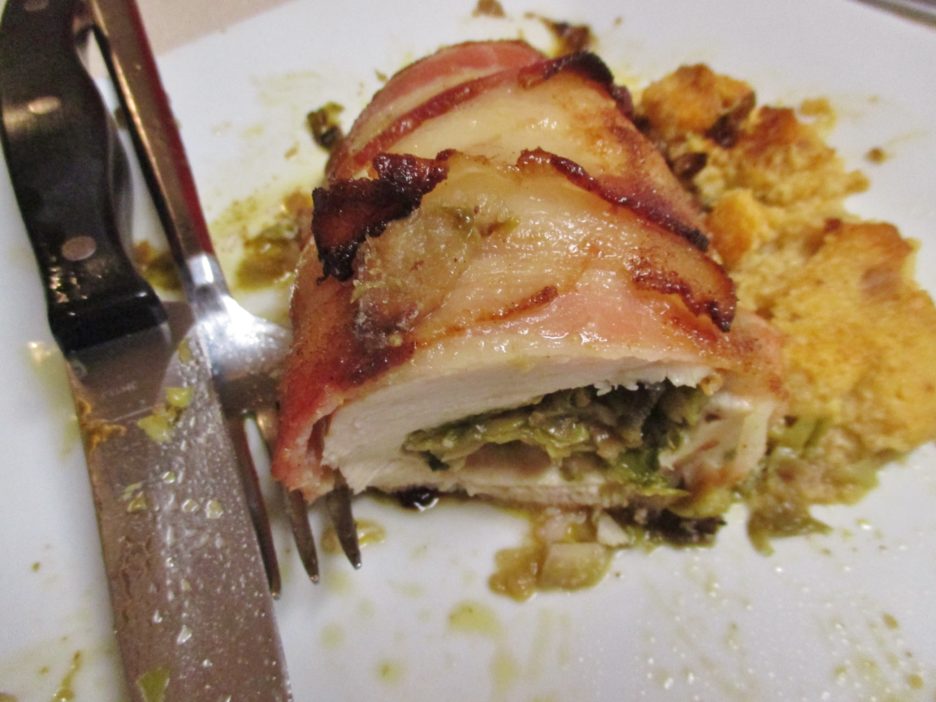
Now for how I made this recipe my own:  Spinach Artichoke Dip is a staple at many parties…you may have even indulged in it over the holidays. It also makes a killer stuffing for  a chicken breast. Marinated artichoke hearts and fresh spinach are sauteed with a little garlic and olive oil. Once they are happily united some cream cheese and grated parmesan are added. To keep the stuffing in the chicken where it belongs, a touch of bread crumbs ( a small carb price to pay) is added as binder. The final touch is a thin coating of mayonnaise and a light sprinkle of parmesan. A dusting of paprika makes it pretty. It only takes 25 minutes or so in the oven and it is ready to be the star of the show. Porcini Laced Faro (from a box) and sauteed grape tomatoes round out the plate.The chicken breast pocket can also be a new home for leftover vegetables. Brussels Sprouts roasted with bacon and onions was uncharacteristically left over from a previous dinner. Chopped up and packed inside a chicken breast made it’s second life almost as wonderful as its first. I enrobed this one in bacon that carried on the bacon that was in the stuffing, These are but two of a virtually endless set of possibilities. Use the master recipe and join the movement to stamp out dry chicken breasts. Share you creations and let’s start a new day of moist and tasty chicken breasts for all!!

Christmas Love: Chocolate Chip Cookies

‘Tis the season to be Fa La La….as an old friend liked to say. ‘Tis the season to be baking as well, and the oven is already fired up and the cookie sheets are parchment lined. Every year my cookie list gets a little bit shorter which requires the recipe selection to be totally on point. Biscotti have to appear, as do Peanut Butter Blossoms. I have to save space for one or two new recipes which leaves only 2 more spaces (yes, I am limiting things to 6 recipes this year) for old standbys.

As long as I can remember baking, Chocolate Chip Cookies have been part of the holidays. My mother always made the original Toll House Cookie recipe. Legend (or truth) has it, that it originated at The Toll House Inn in Whitman, Massachusetts. Ruth Gains Wakefield is credited with creating it back in 1938 and it is a tried and true recipe that has stood the test of time.

It is a basic cookie dough that combines butter, white, and brown sugar with chocolate chips and quite often, nuts. It is wonderful just as it was written, but oh what delights can result from tweaking the recipe here and there. The variations I am sharing today are perfect examples.

Imagine, if you will, that basic cookie dough laced with candied cherries and orange peel, studded with toasted pecans and mini chocolate chips. Then imagine the addition of warm spices like cinnamon and freshly grated nutmeg. Notes of fruitcake, but in the best way possible and a delightful chewiness that made my first grandson dub these his favorite cookie ever. 

Chocolate Chip Fruit Drop Cookies
Print Recipe
Servings
6 Dozen
Servings
6 Dozen
Chocolate Chip Fruit Drop Cookies
Print Recipe
Servings
6 Dozen
Servings
6 Dozen
Ingredients
Servings: Dozen
Instructions
  1. Whisk together the flour, soda, salt and spices. Set aside.
  2. In a large bowl, cream the butter until fluffy. Add the sugars and beat until light and fluffy.
  3. Add eggs one at a time, beating after each addition. Add the vanilla and continue to beat until well combined.
  4. Add in the flour mixture a little at a time blending gently but well.
  5. Stir in the candied fruits, nuts, and chips.
  6. Drop by tablespoon on to a parchment lined baking sheet. Bake at 325 degrees for 10 minutes or until the edges just begin to brown.
  7. Remove from oven and allow to cool on baking sheet for 5 minutes. Transfer to wire racks to cool completely. Store airtight.
Share this Recipe
Powered byWP Ultimate Recipe

Variations are endless. Try pistachios and dried tart cherries or almonds and dried cranberries. There are so many varieties of chocolate chips now that simply swapping bittersweet or milk chocolate can create something magical.

You can even use White Chocolate Chips. Debbie Downer Alert: I realize that these ar not real white chocolate, but only a blend of milk, fat, and sugar marketed to imitate white chocolate. They worked well in this recipe, but if one wants to be totally a purist, a good quality real white chocolate bar could be chopped up and substituted. That being said, chopped chocolate would not lend itself to the “Pearl” analogy in the name of this recipe, but maybe you could call them “gems.”

In spite of the truth in labeling issue, these cookies were delicious. Cocoa gave them a rich chocolate flavor that was heightened by the addition of a bit of espresso powder, always a good idea when making anything chocolate.

Chocolate and Pearls Cookies
Print Recipe
Servings
4 Dozen
Servings
4 Dozen
Chocolate and Pearls Cookies
Print Recipe
Servings
4 Dozen
Servings
4 Dozen
Ingredients
Servings: Dozen
Instructions
  1. Combine the flour, cocoa, espresso powder, baking soda and salt. whisk together to blend thoroughly.
  2. Cream butter in a large bowl. Add the sugars and beat until the mixture is light and fluffy.
  3. Add the eggs one at a time, beating after each addition. add the vanilla and beat to blend.
  4. Gradually add the dry ingredients (a third at a time). gently blend. Fold in the chips.
  5. Spoon by scant tablespoons onto parchment lined baking sheets.
  6. bake at 350 degrees 8 - 10 minutes until the edges just begin to brown. Remove from oven and allow to cool on the baking sheet for 3 minutes.
  7. Remove to cooling racks and allow to cool completely. Store in an air tight container.
Share this Recipe
Powered byWP Ultimate Recipe

Another wonderful thing about the chocolate chip family of doughs, they freeze beautifully. Good to know if your baking time is limited to small windows at random hours. Whatever your baking plans this holiday season, I hope that you include something with chocolate chips and other wonderful ingredients that bring out your own Fa La La.