A Cozy Nest and a Pot of Something Wonderful (Chicken & Poblano Chili)

Winter is here. There is snow on the ground and ice on the streets. It’s the time of the year when those of us who live in the Midwest turn our thoughts to curling up on the couch with a good book and a loving partner. Weekends at home give us time to fall in love with our new surroundings. The small apartment that seemed almost claustrophobic is becoming a cozy nest  as we add a picture here and a shelf there. Slowly the treasures we kept are finding new places and as I look around from my place on that couch it looks like home.

Nothing makes a cozy nest smell better than a big pot of something wonderful simmering on the stove. If you’ve been following along with my adventures, you know that soups (click here for some of my favorites), stews, and chili come out of my kitchen regularly. On a recent cold and snowy weekend I made some chili that was the perfect accompaniment to quality time spent inside.

i-peppers-anchochili
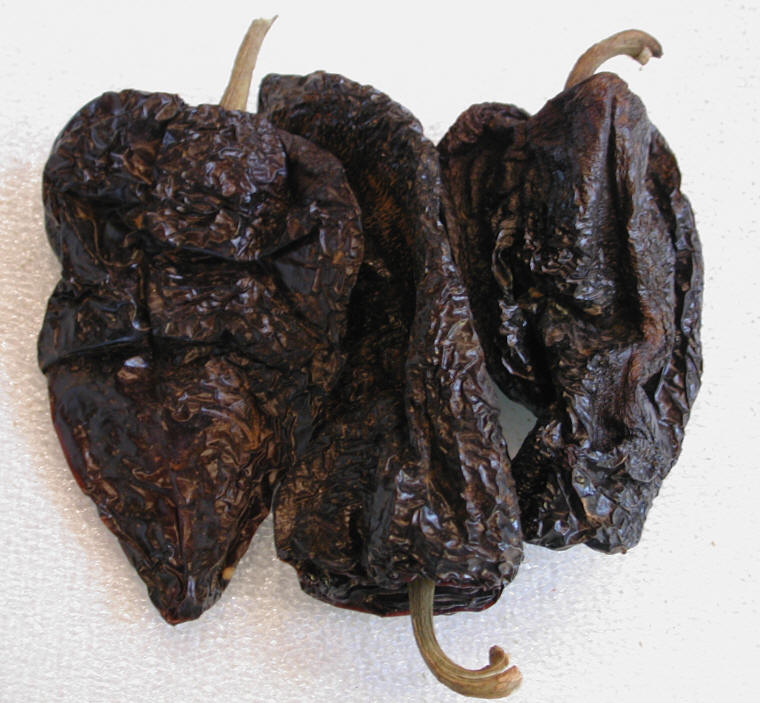
I started with some dried chilies, Ancho and Guajillo to be exact.guajillo chili 
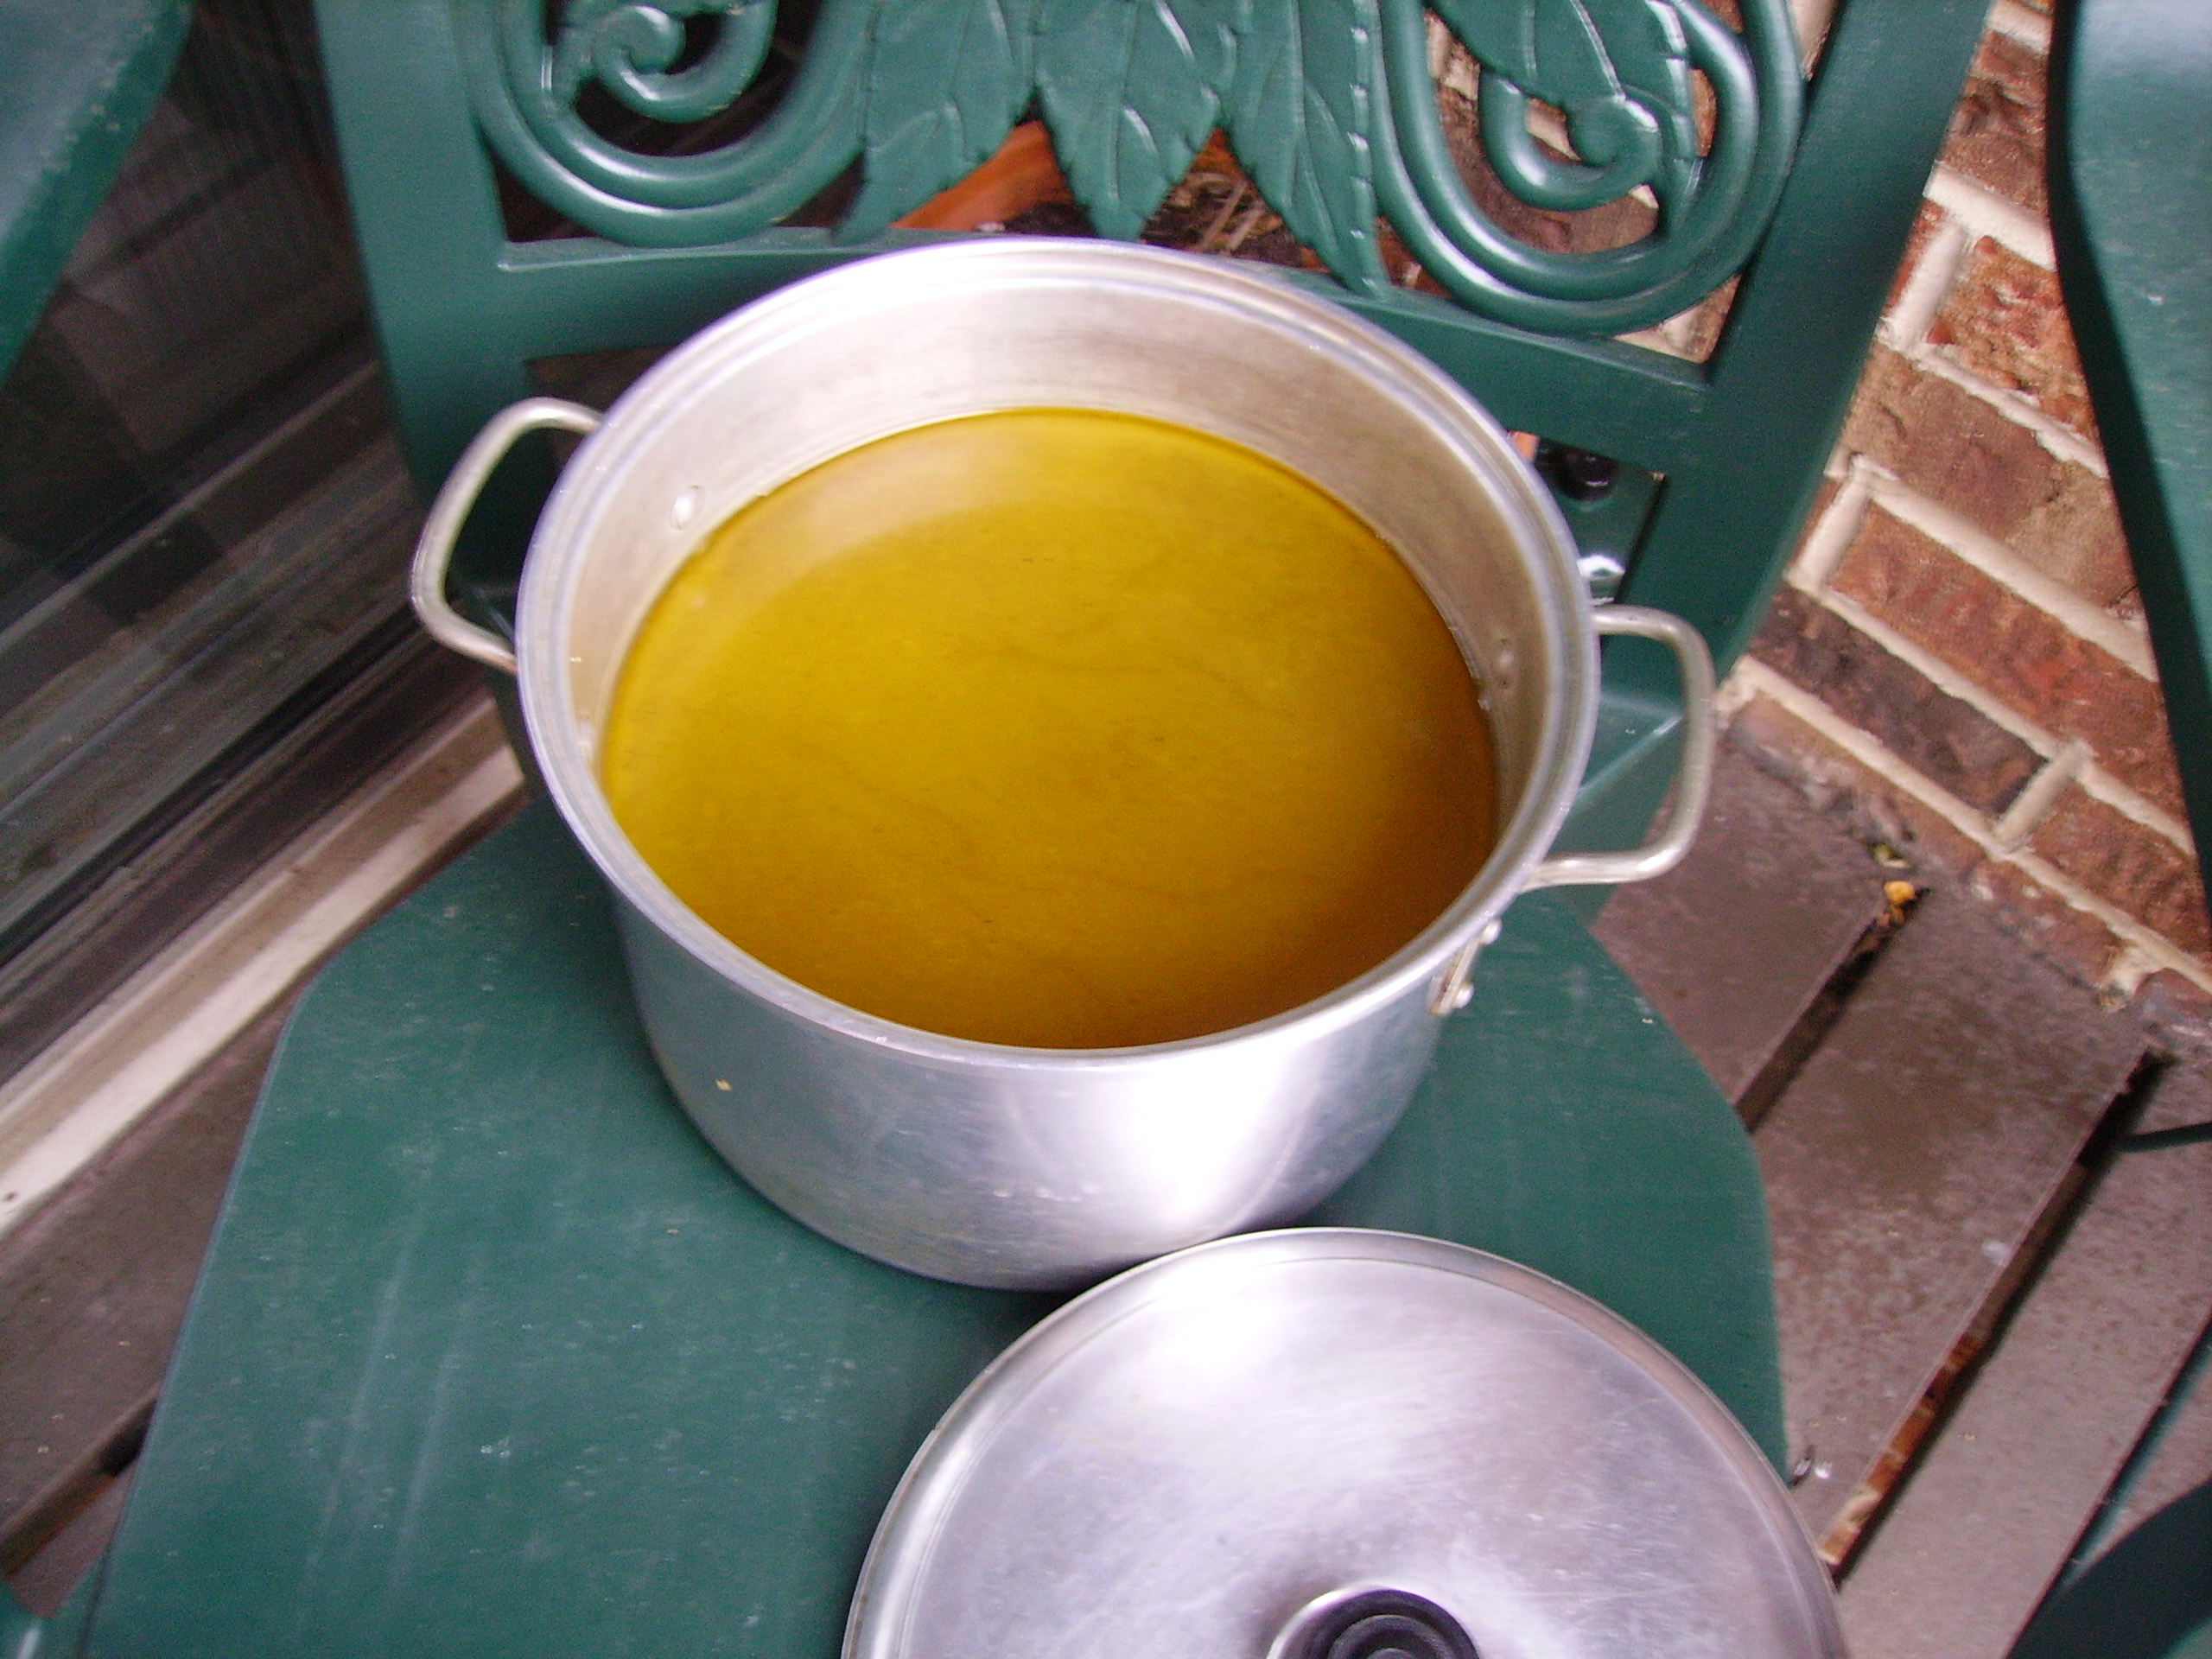
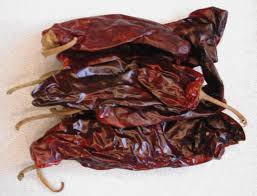
Anchos begin their life as Poblano chilies. These are quite mild and became the repeating theme in this dish. Guajillo start out as Mirasol peppers. These are smokey and sweet with just a touch of heat. This wrinkled and leathery duo were the base for my chili. Before they could become the deep red sauce that held the other ingredients together they had to toast and soak, then whirl in the blender to finally be strained through a sieve. The beautiful sauce only needed a touch of agave and a pinch of salt to become the perfect base.DIGITAL CAMERA
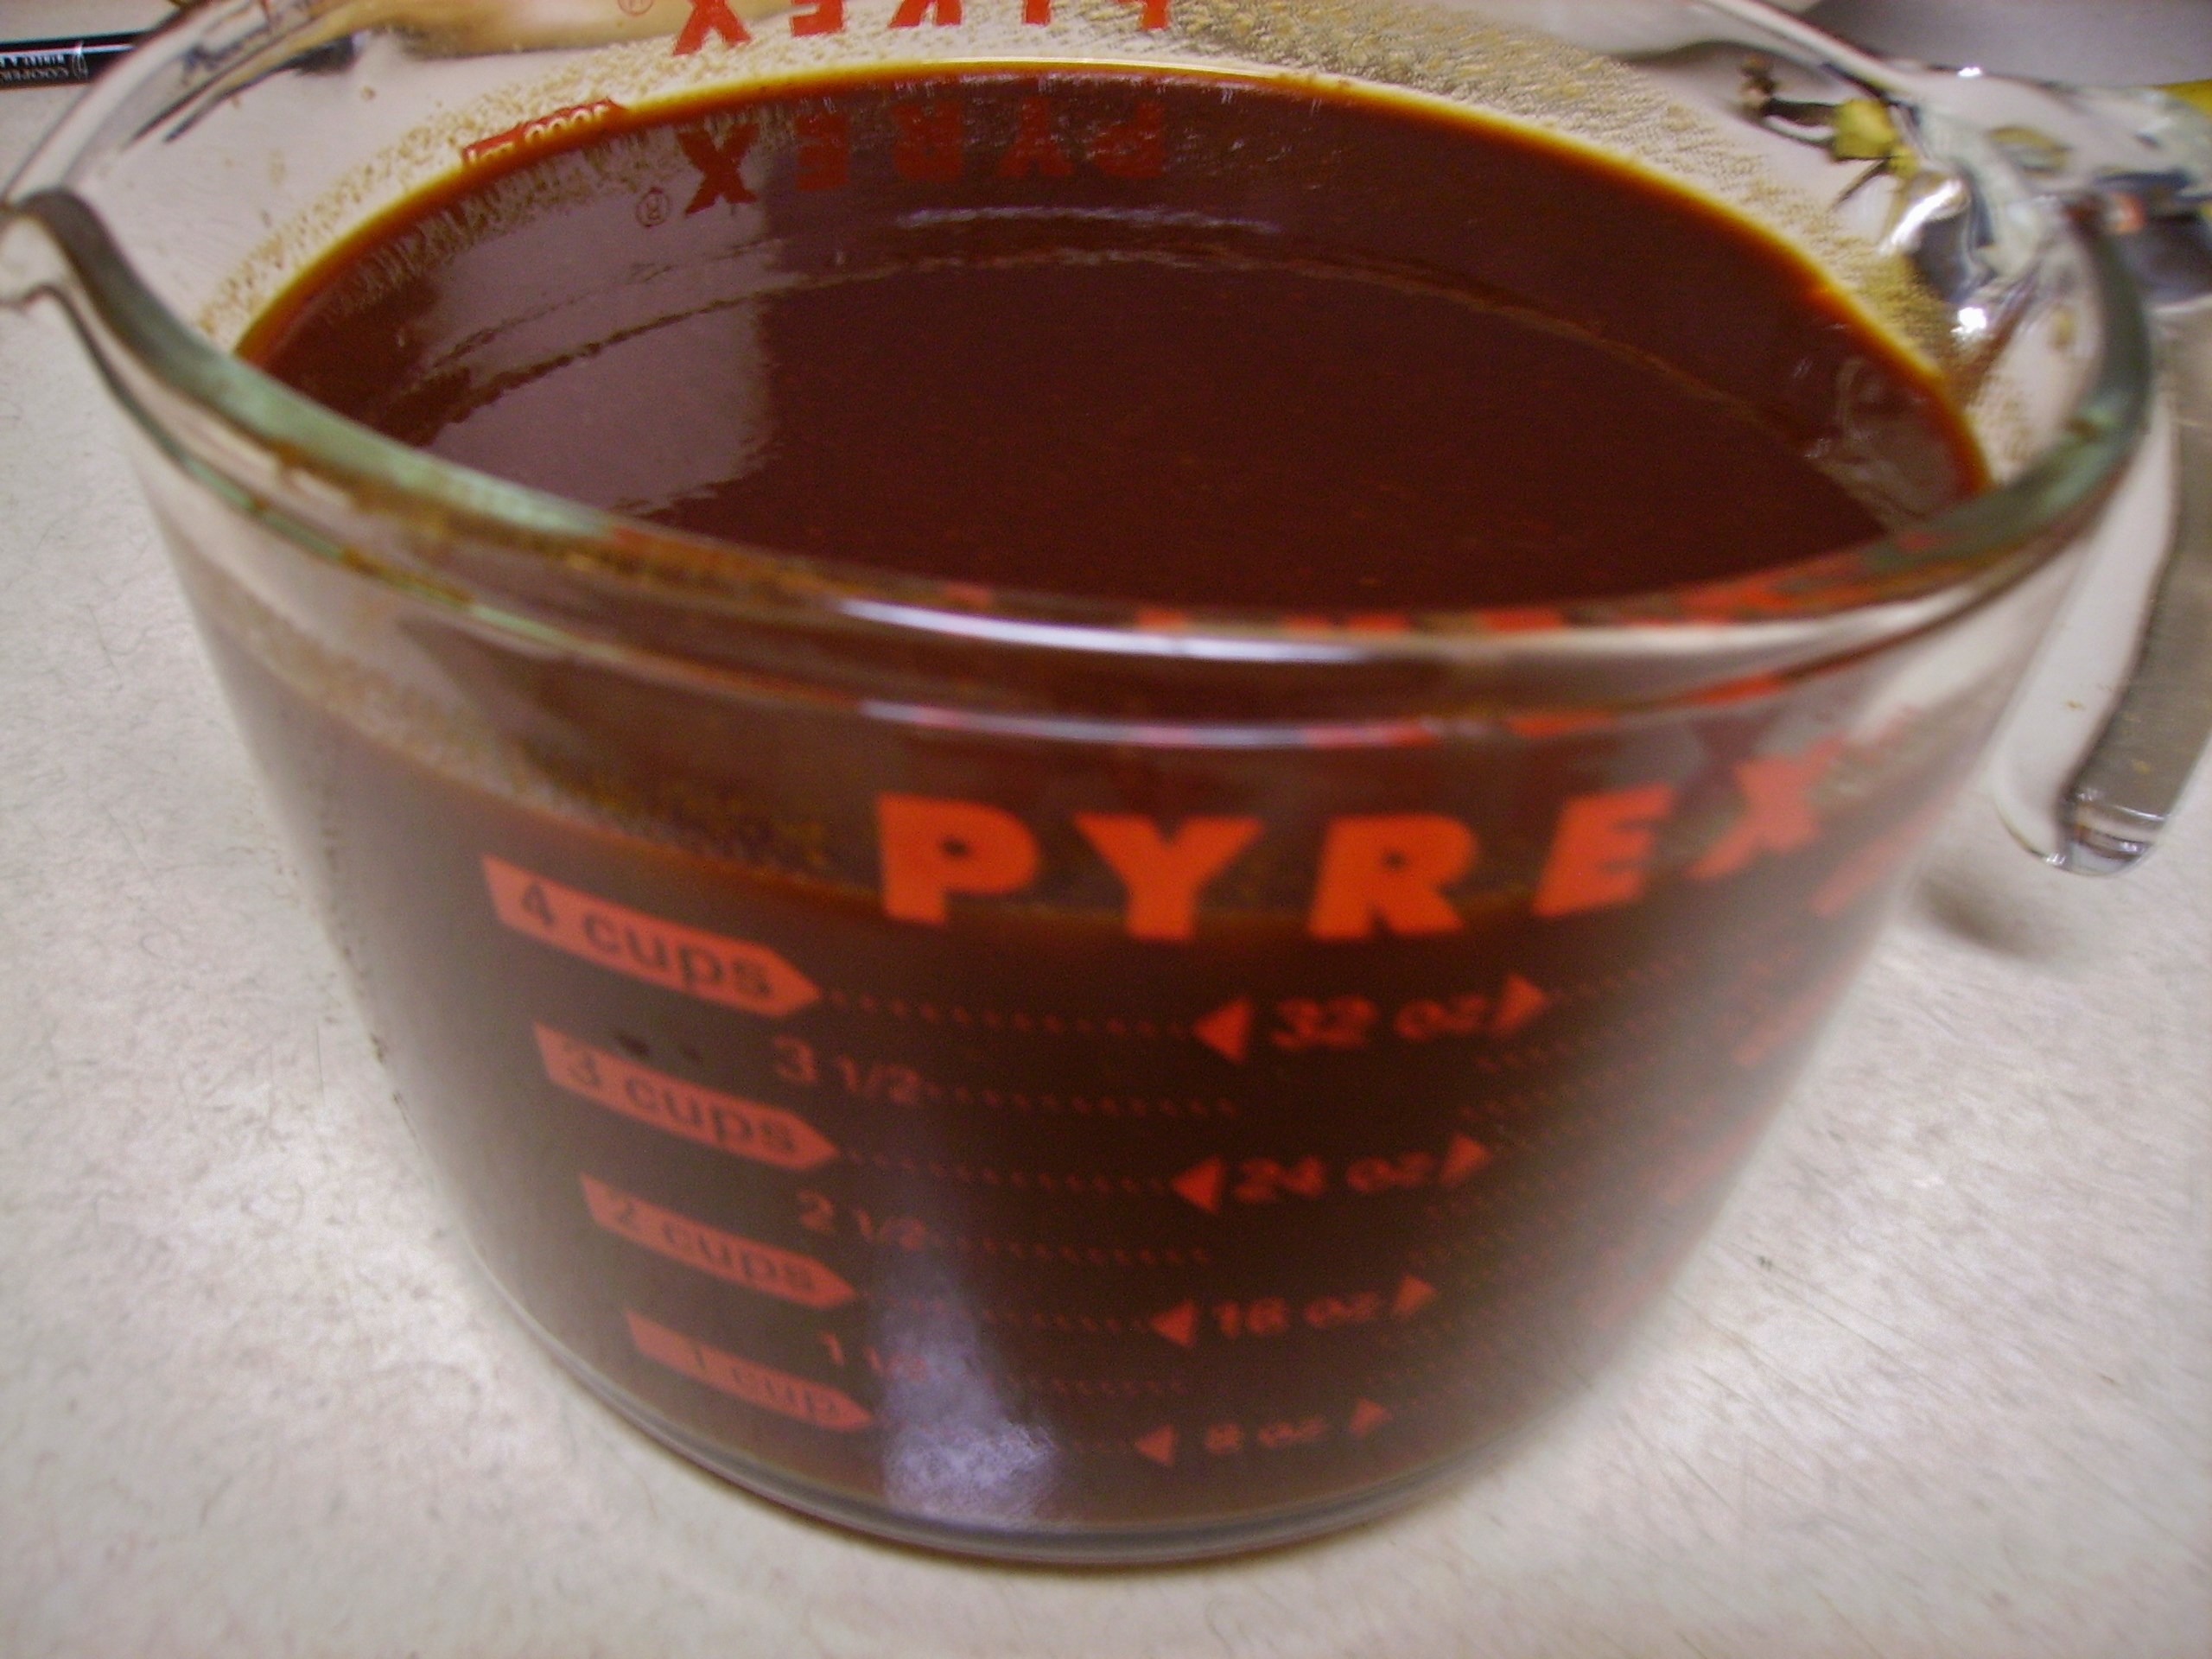
Poblano peppers made several more appearances. Fresh peppers were roasted and left raw as well for a wider flavor profile. I also used Ancho Chili Powder along with the essential heavy dose of Cumin.

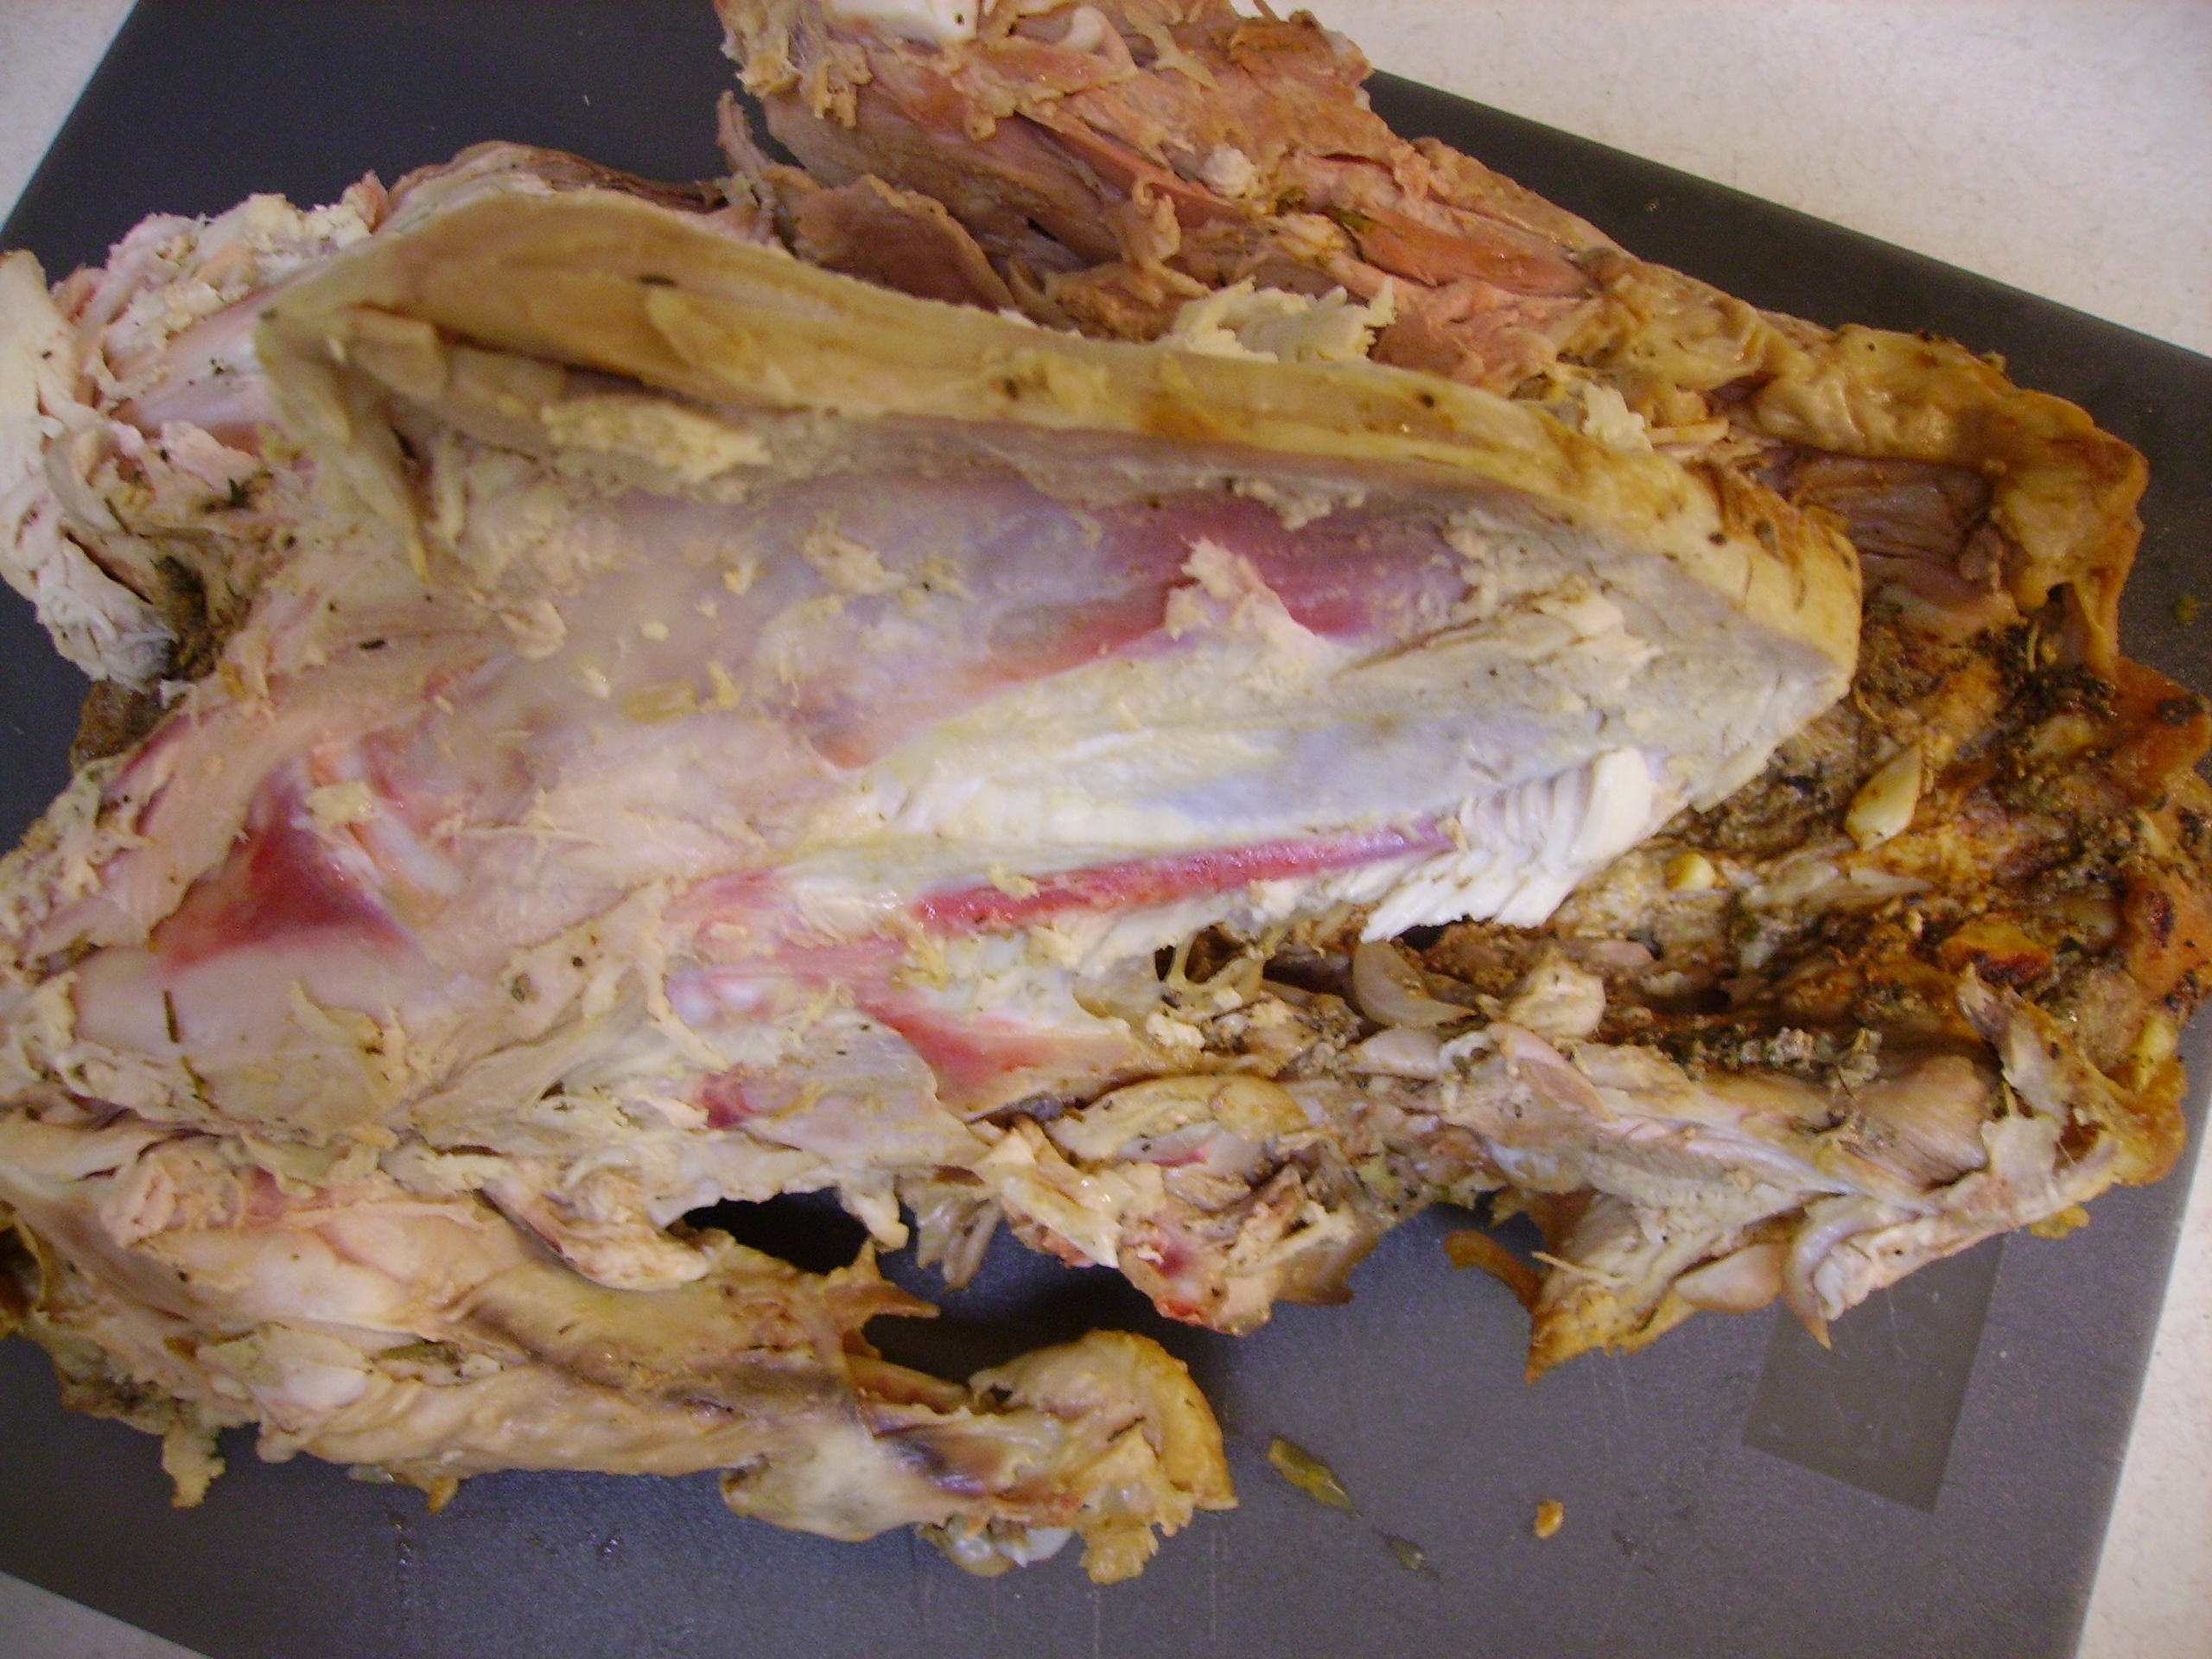
I used “chicken bits” for the main protein. This is what I call the trimmings from chicken thighs and breasts that I accumulate in the freezer and save for just his kind of occasion.DIGITAL CAMERA
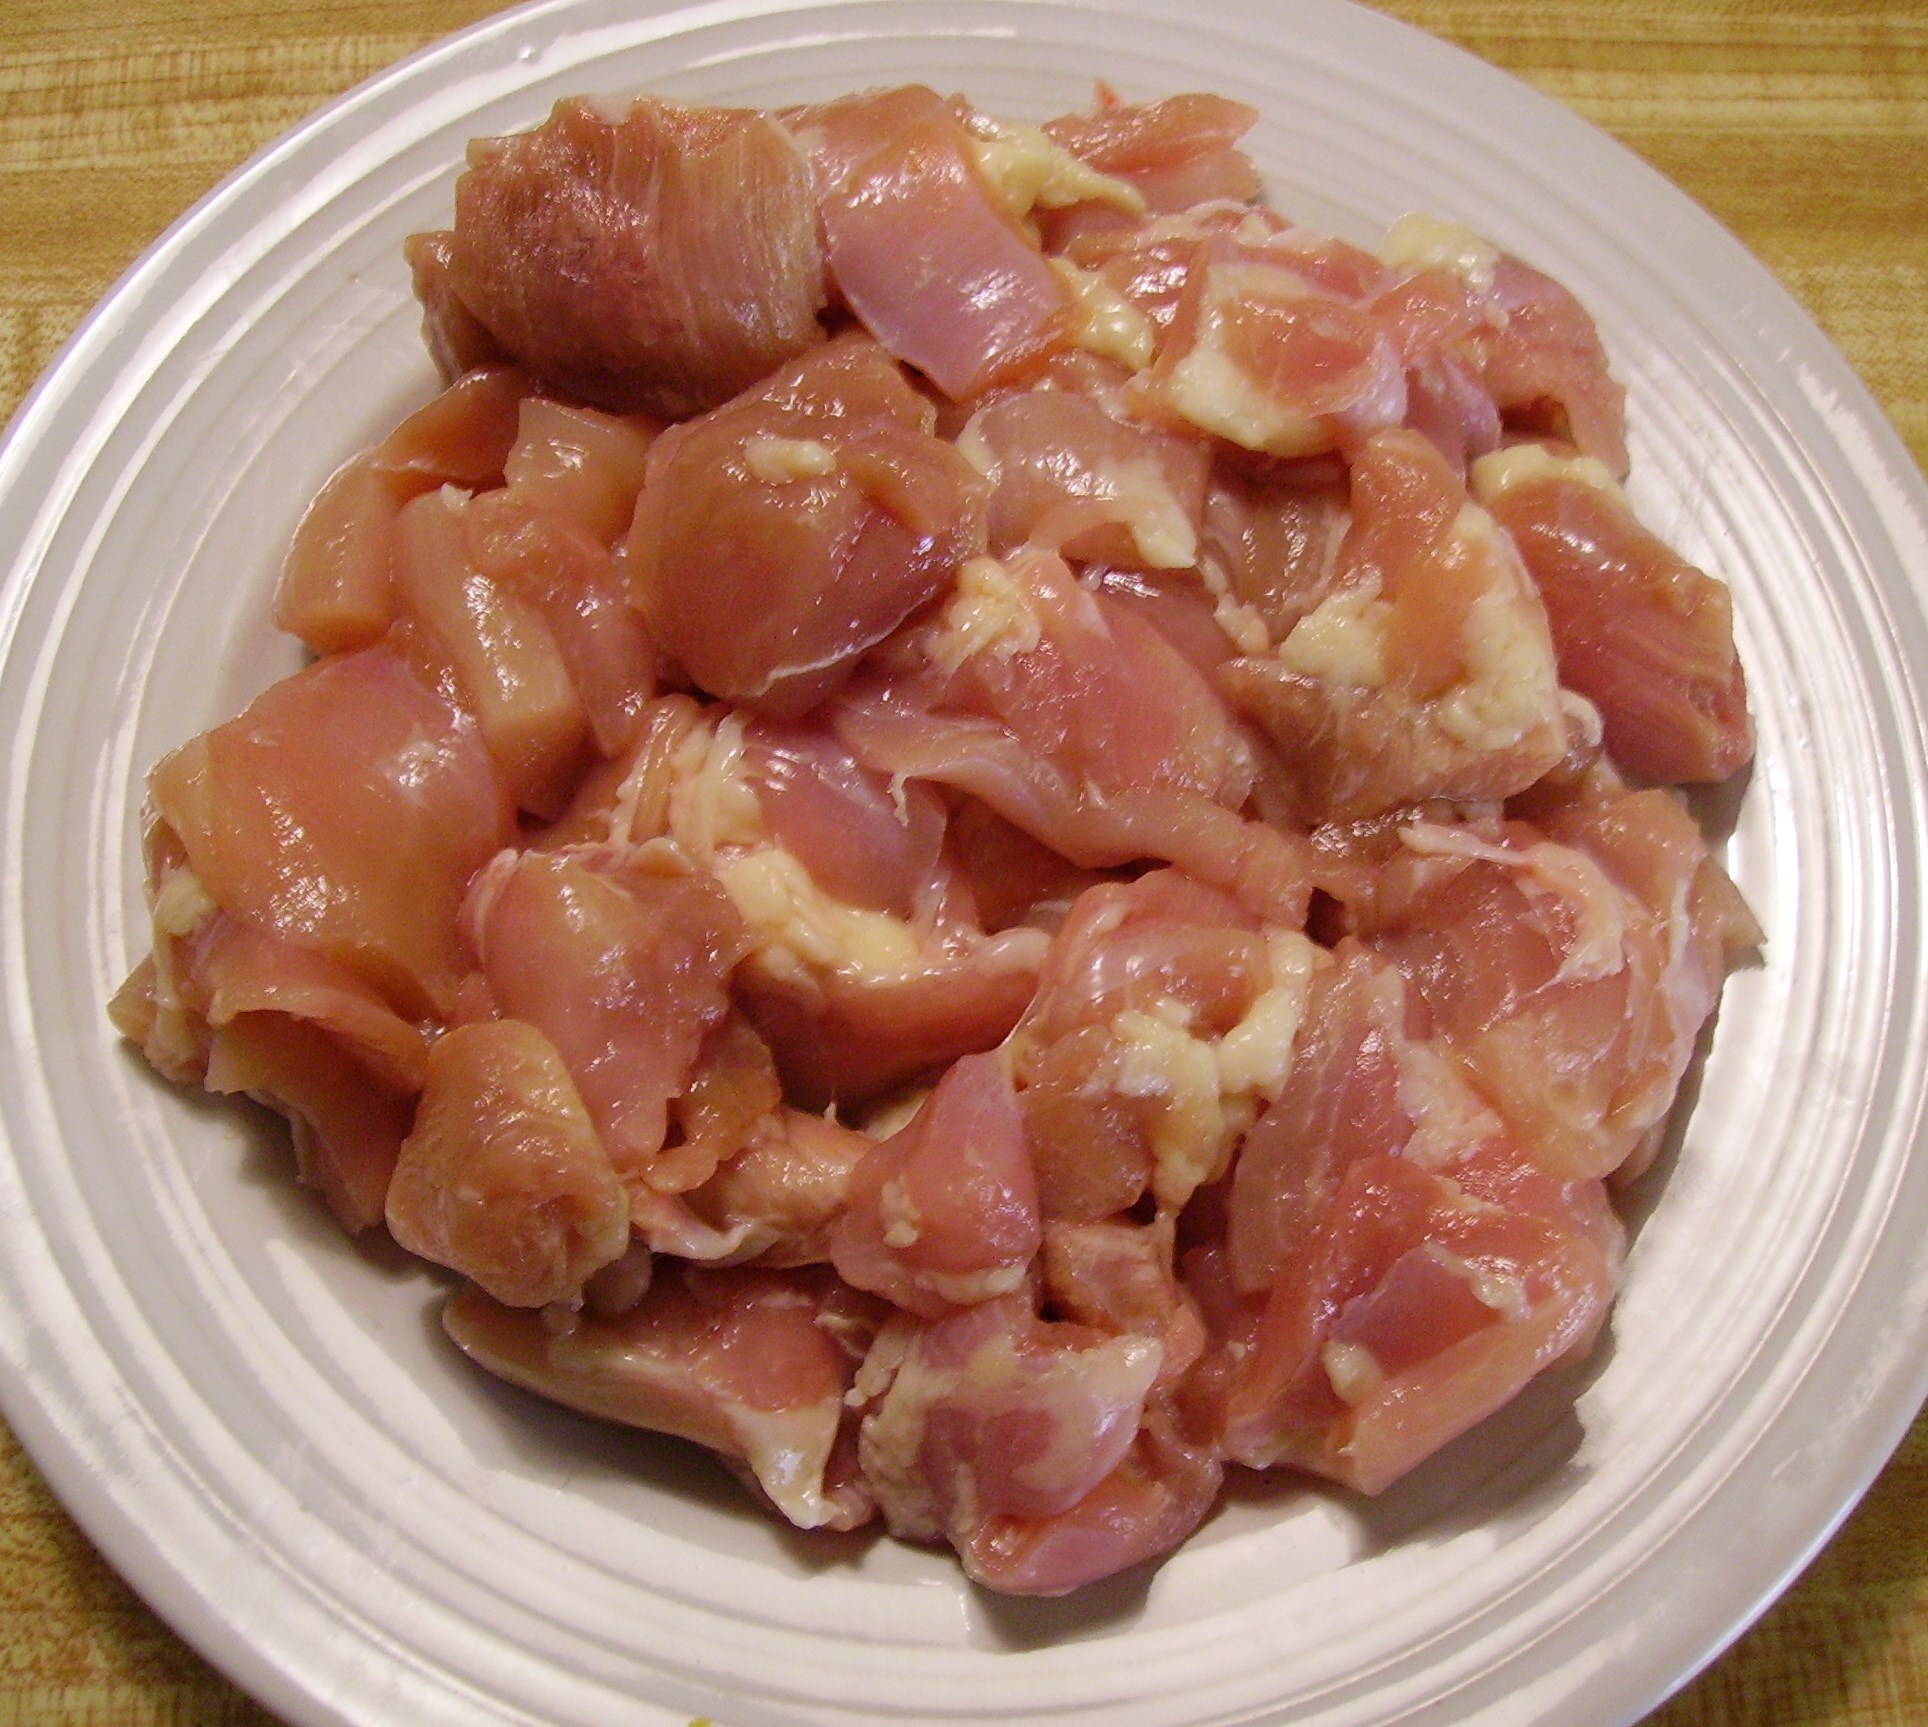
I used a bit of bacon as I do in most chili that I make. Chopped finely and cooked off in the pot, it got things rolling. I drained the grease, but left the brown bits. I added a little olive oil and added the chicken to brown slightly.DIGITAL CAMERA
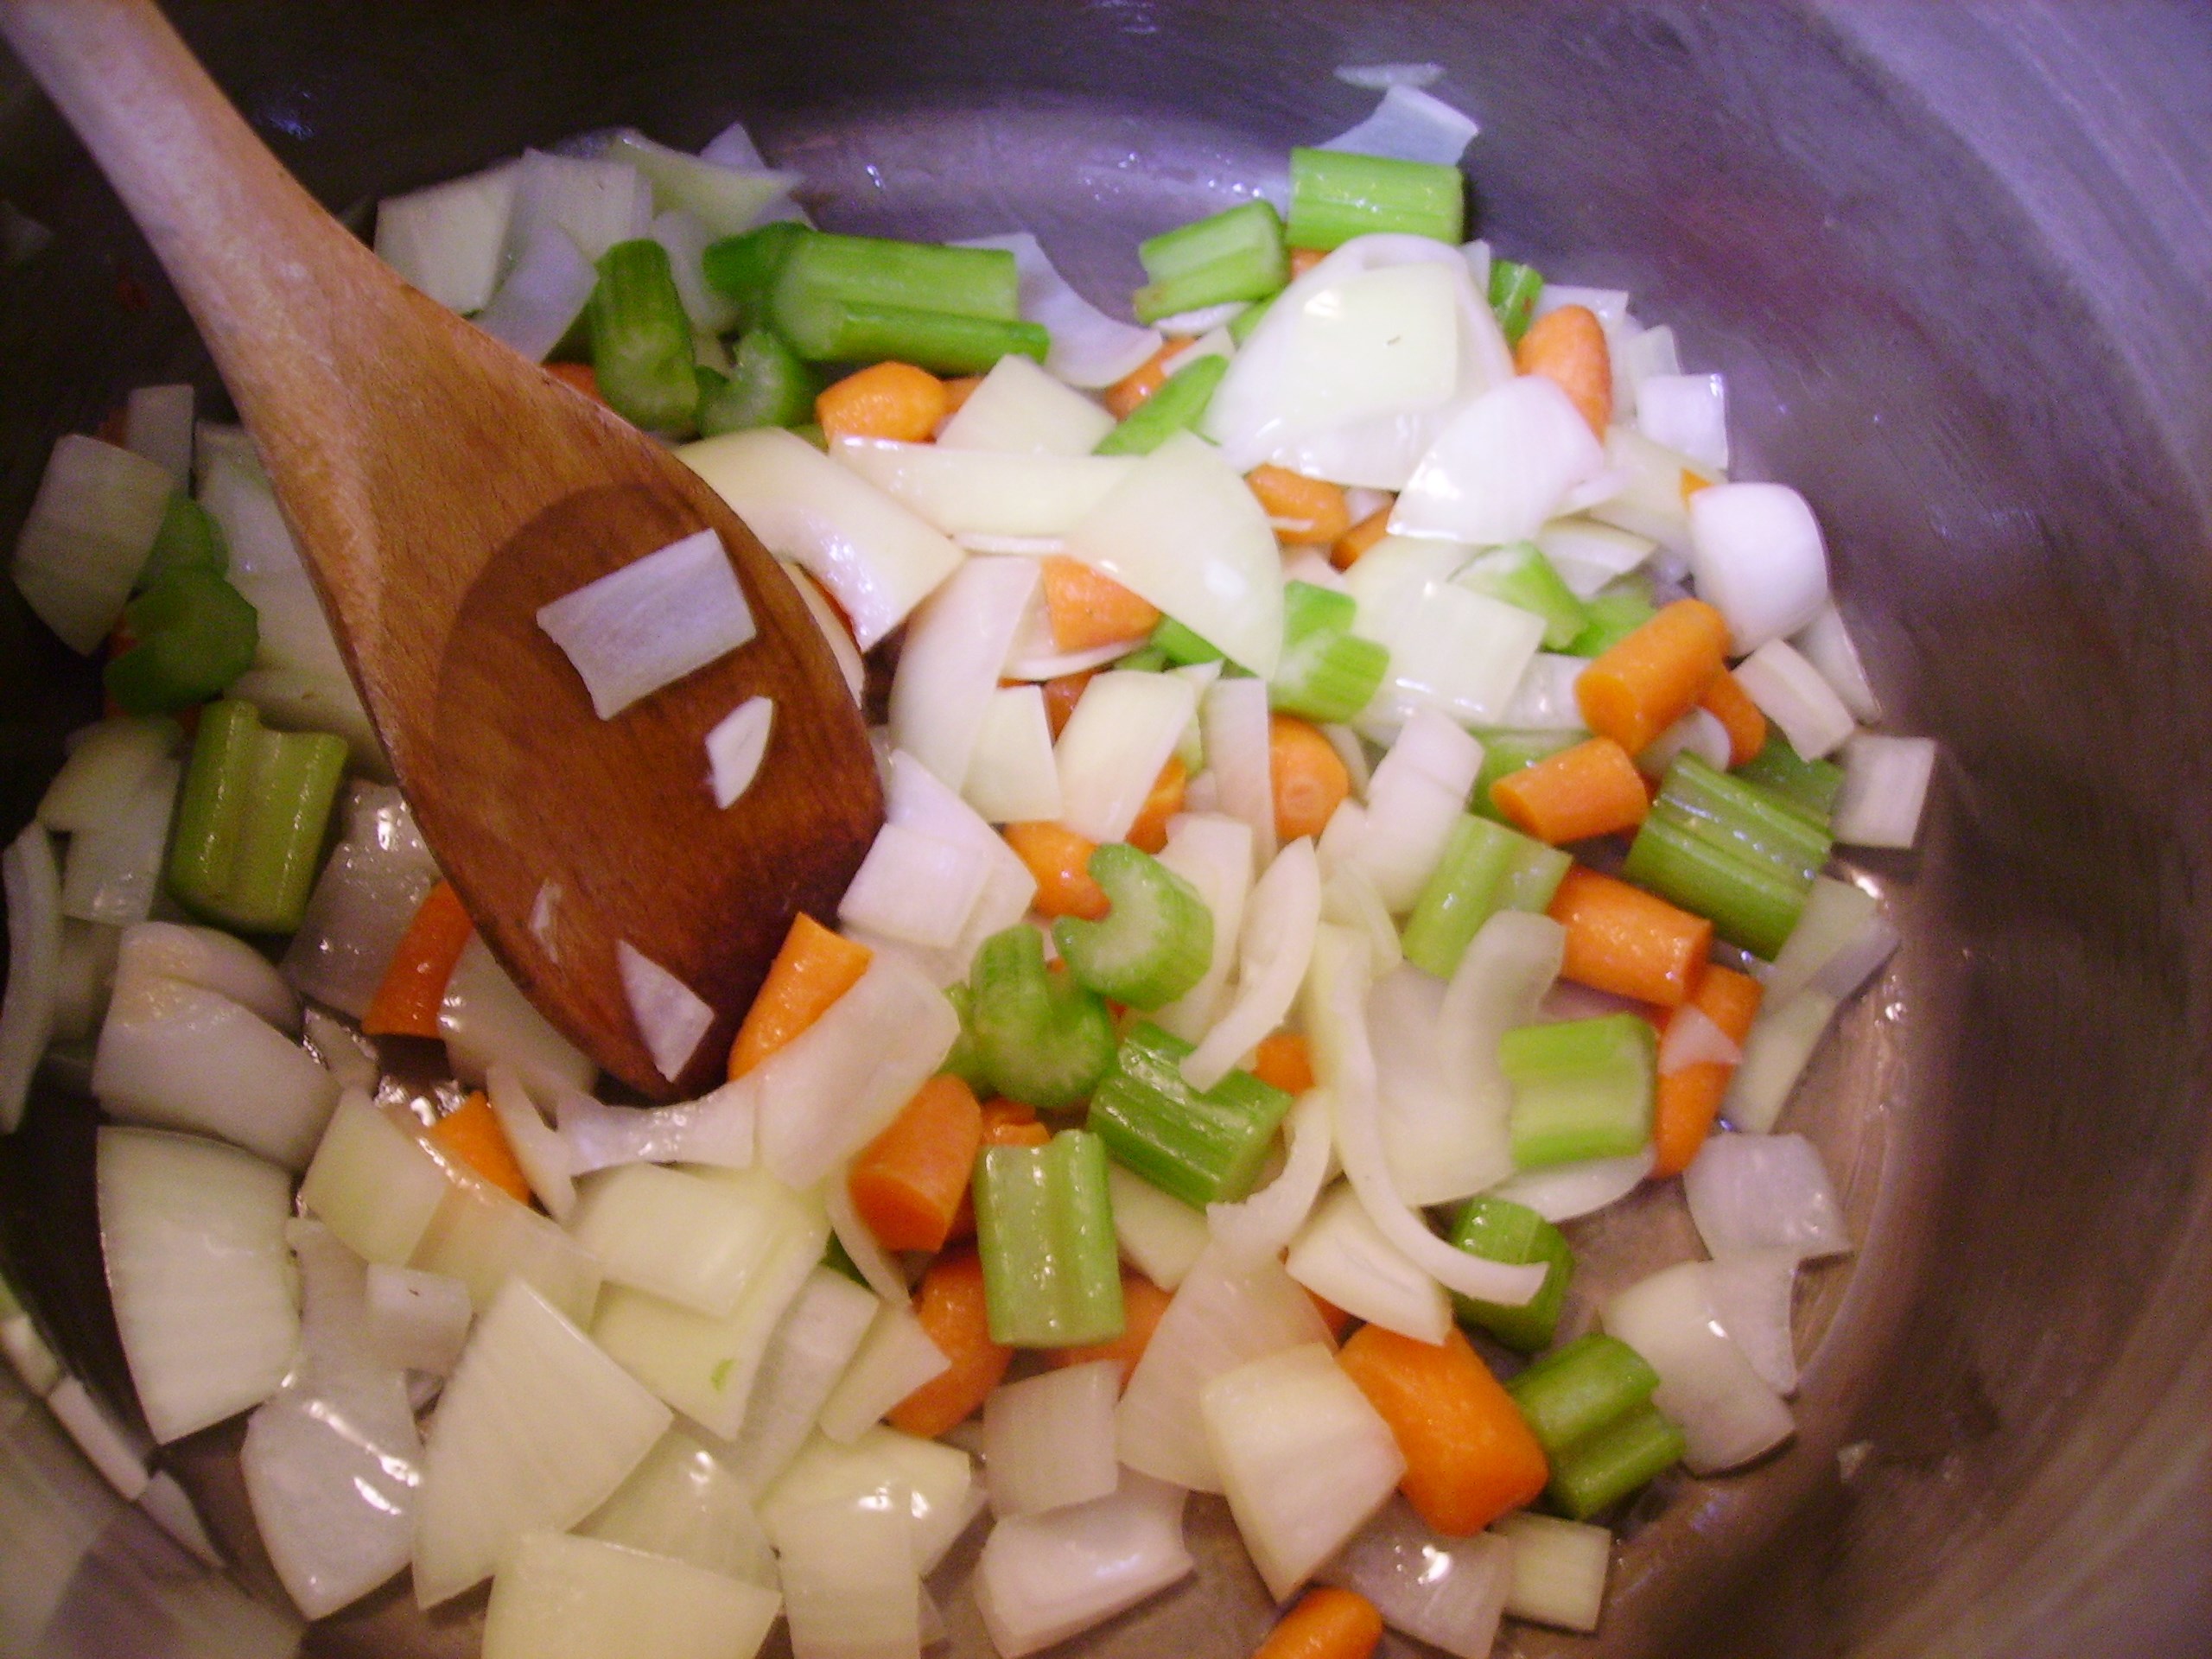
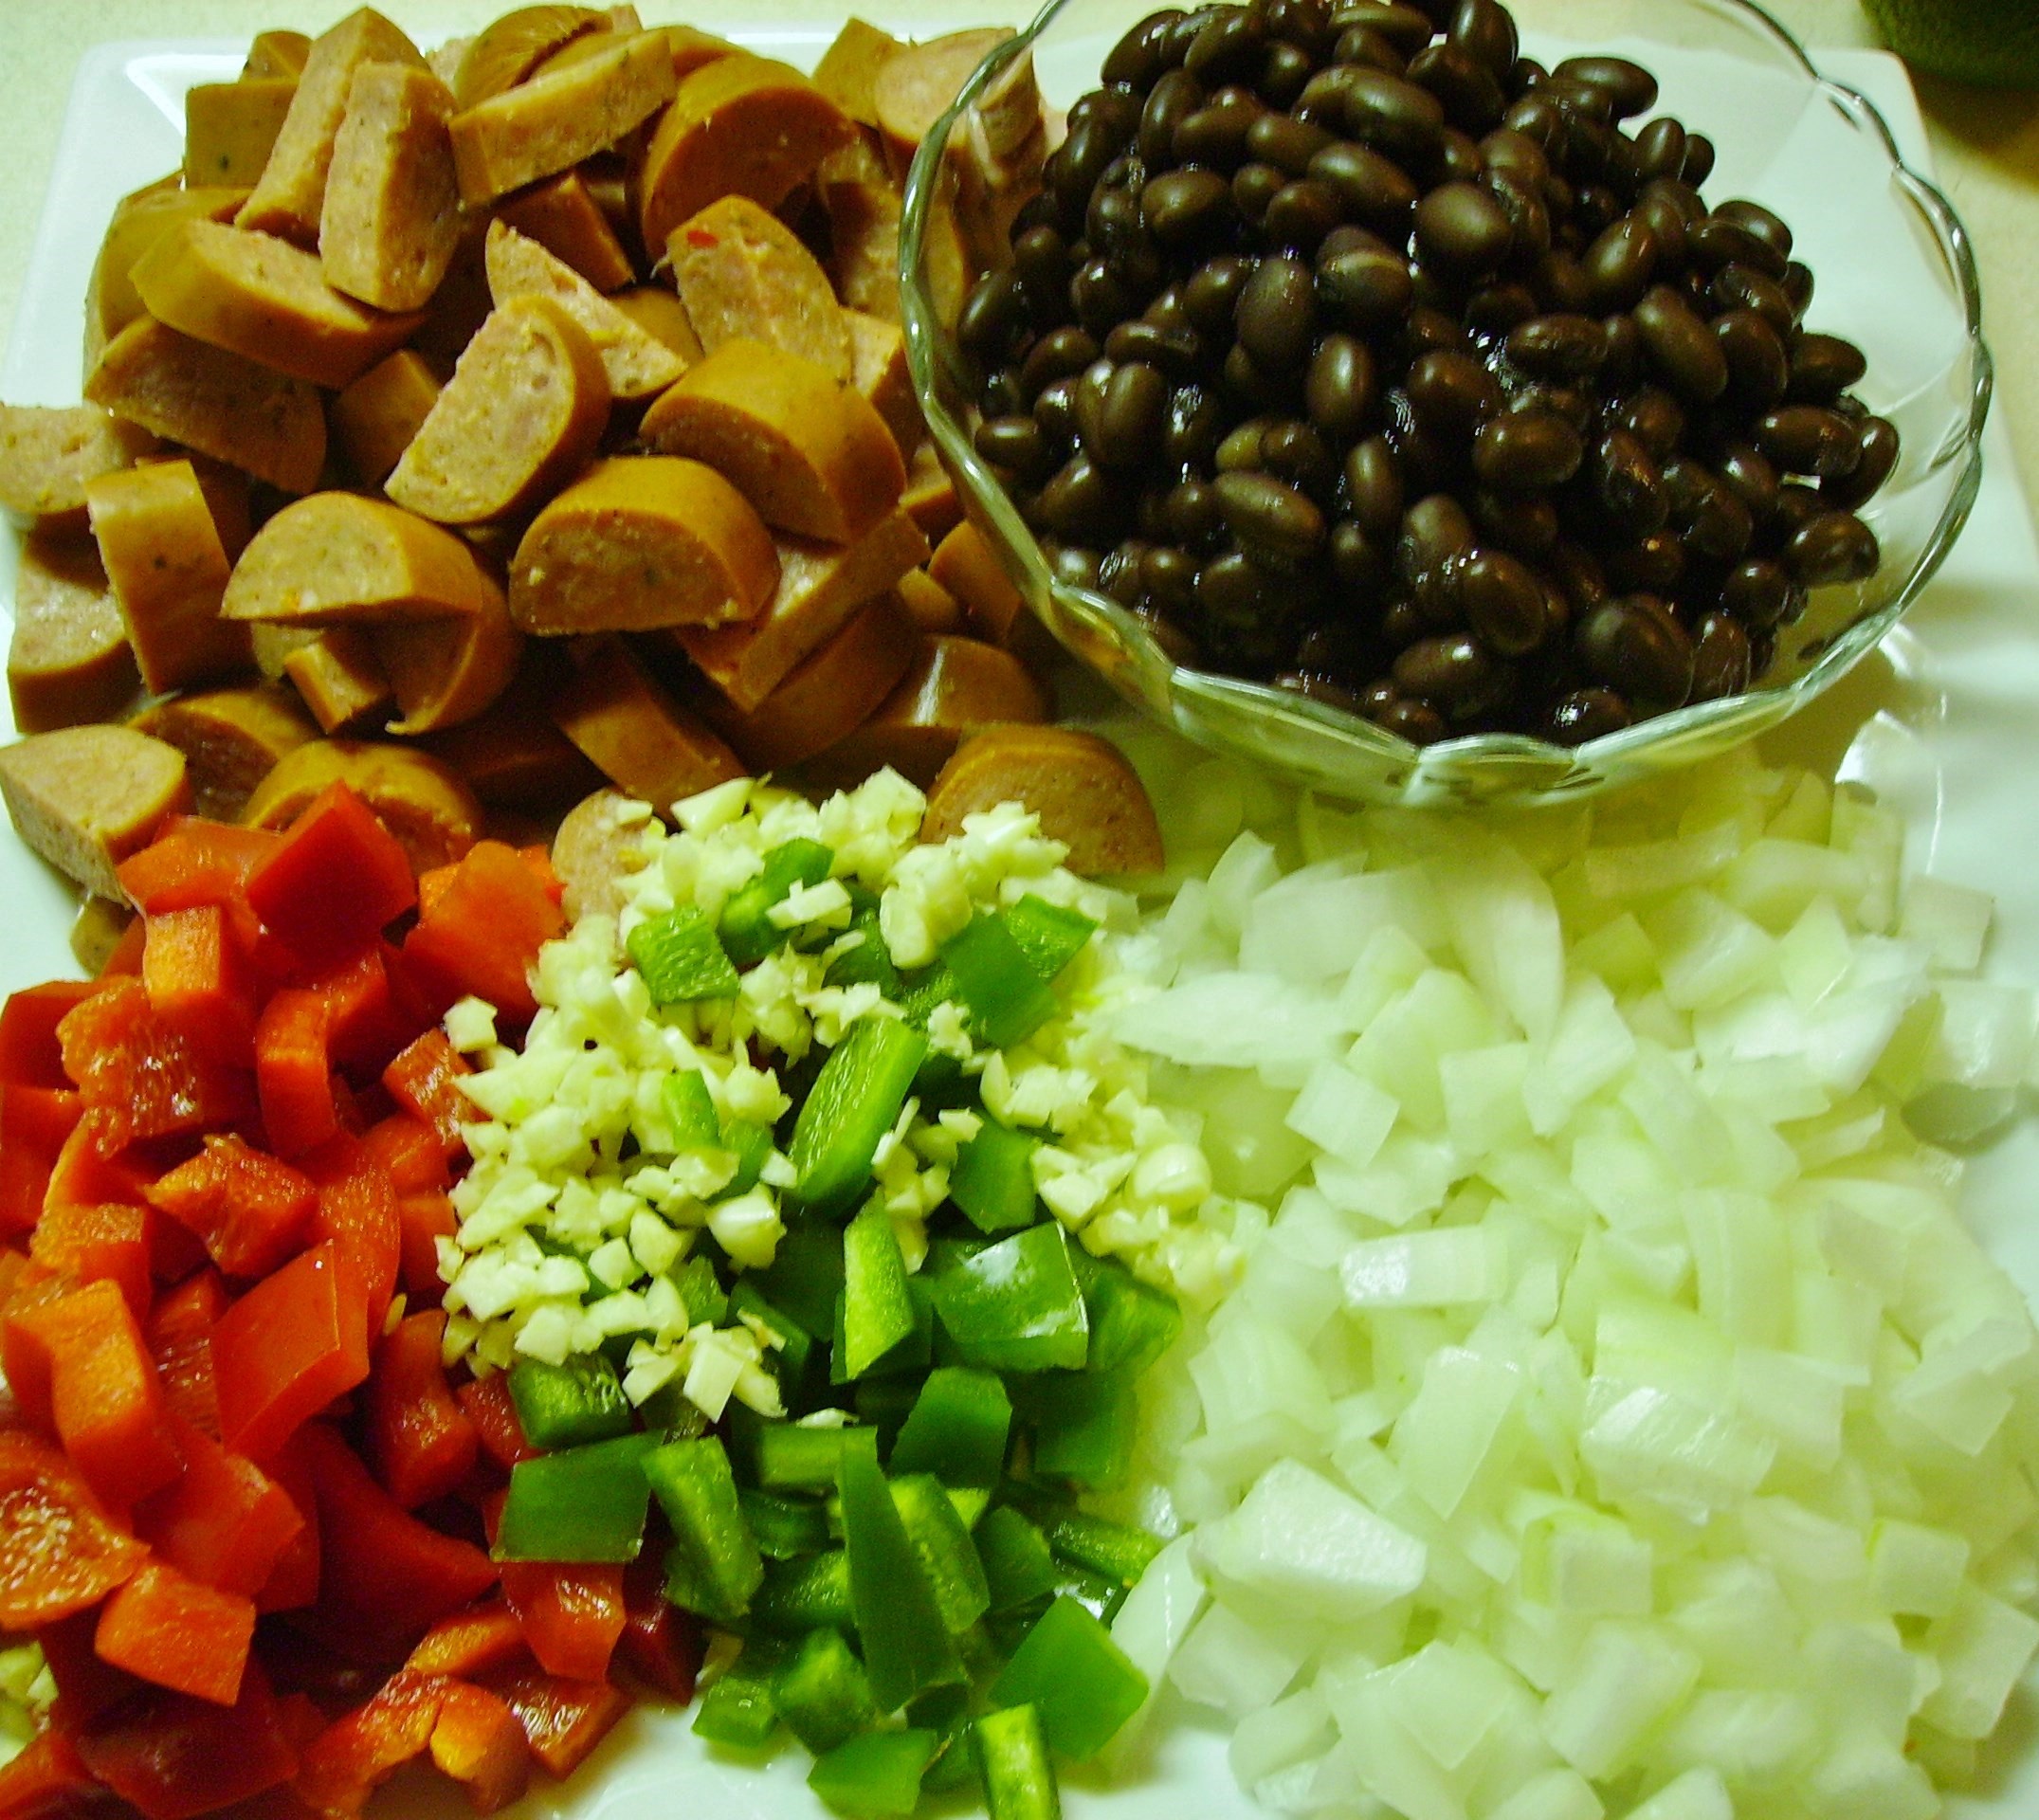
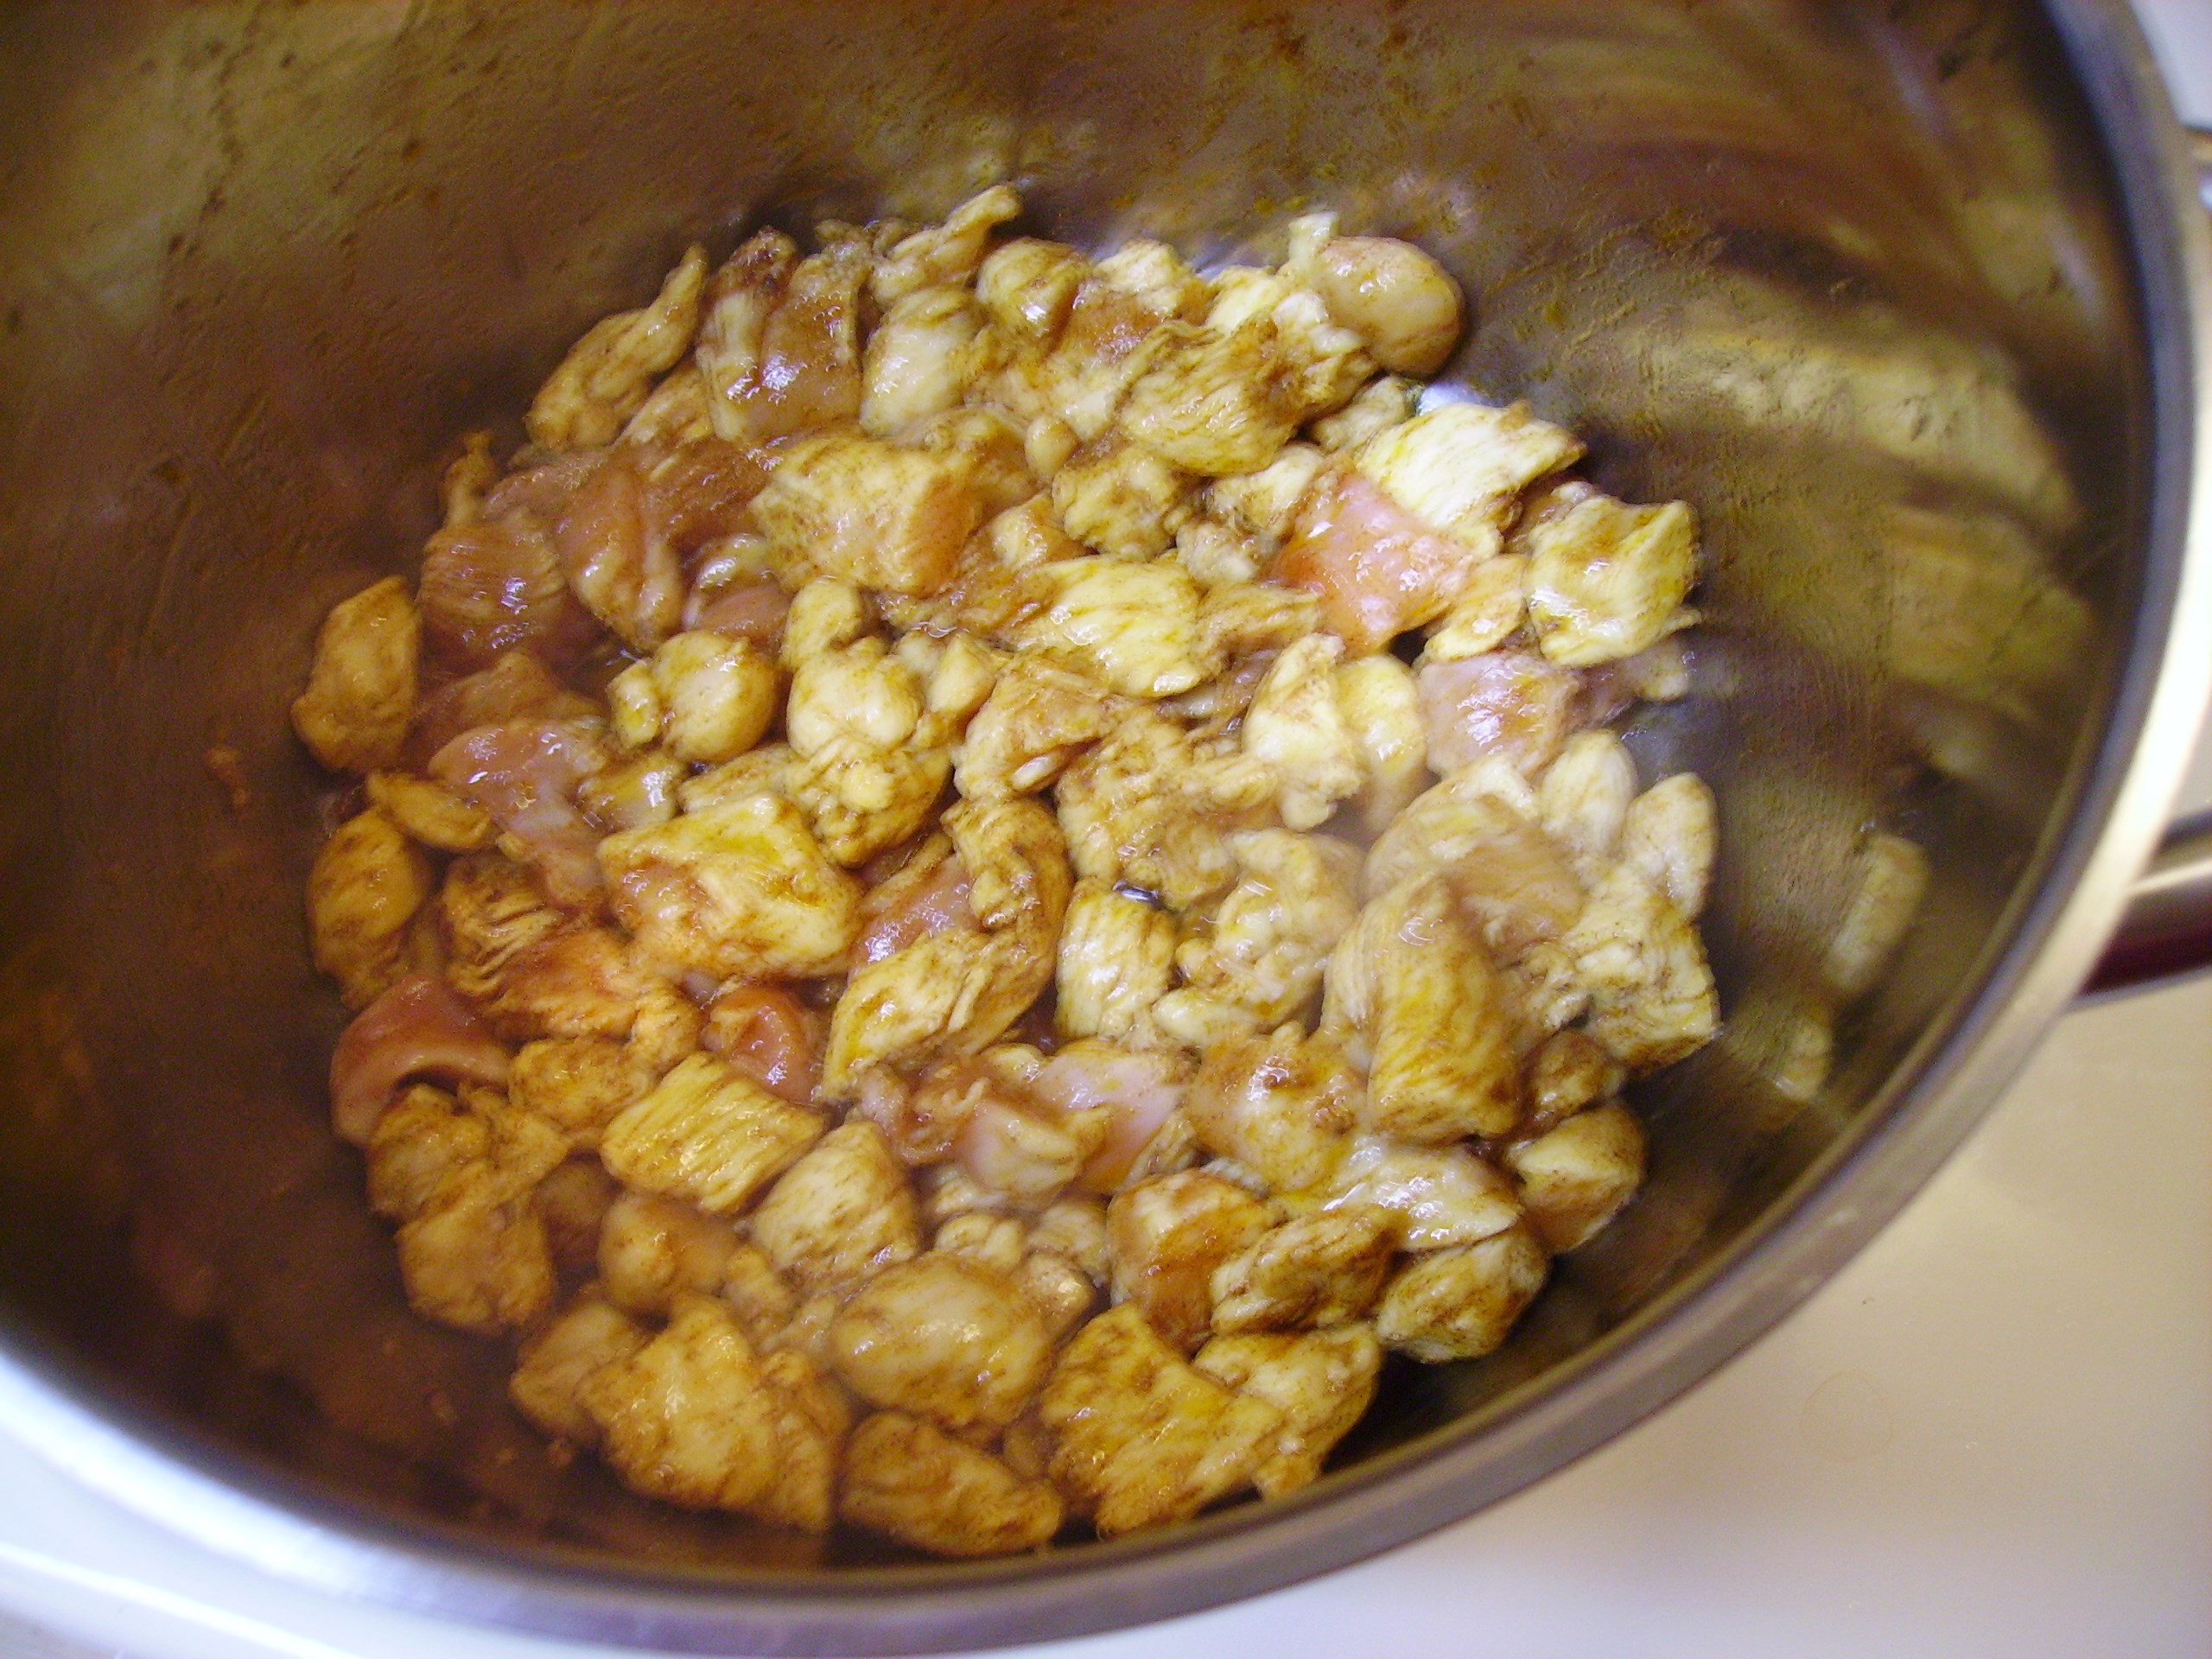
There had to be plenty of yellow onion and garlic along with the poblanos and jalapenos. Ground cumin and ancho chili powder cooked along with the veggies to deepen their flavor. The browned chicken and reserved bacon went back into the pot. I added a little chicken stock and more than a little hoppy beer to kick things up just a little. I added a can of fire roasted tomatoes that I had partially drained as well.

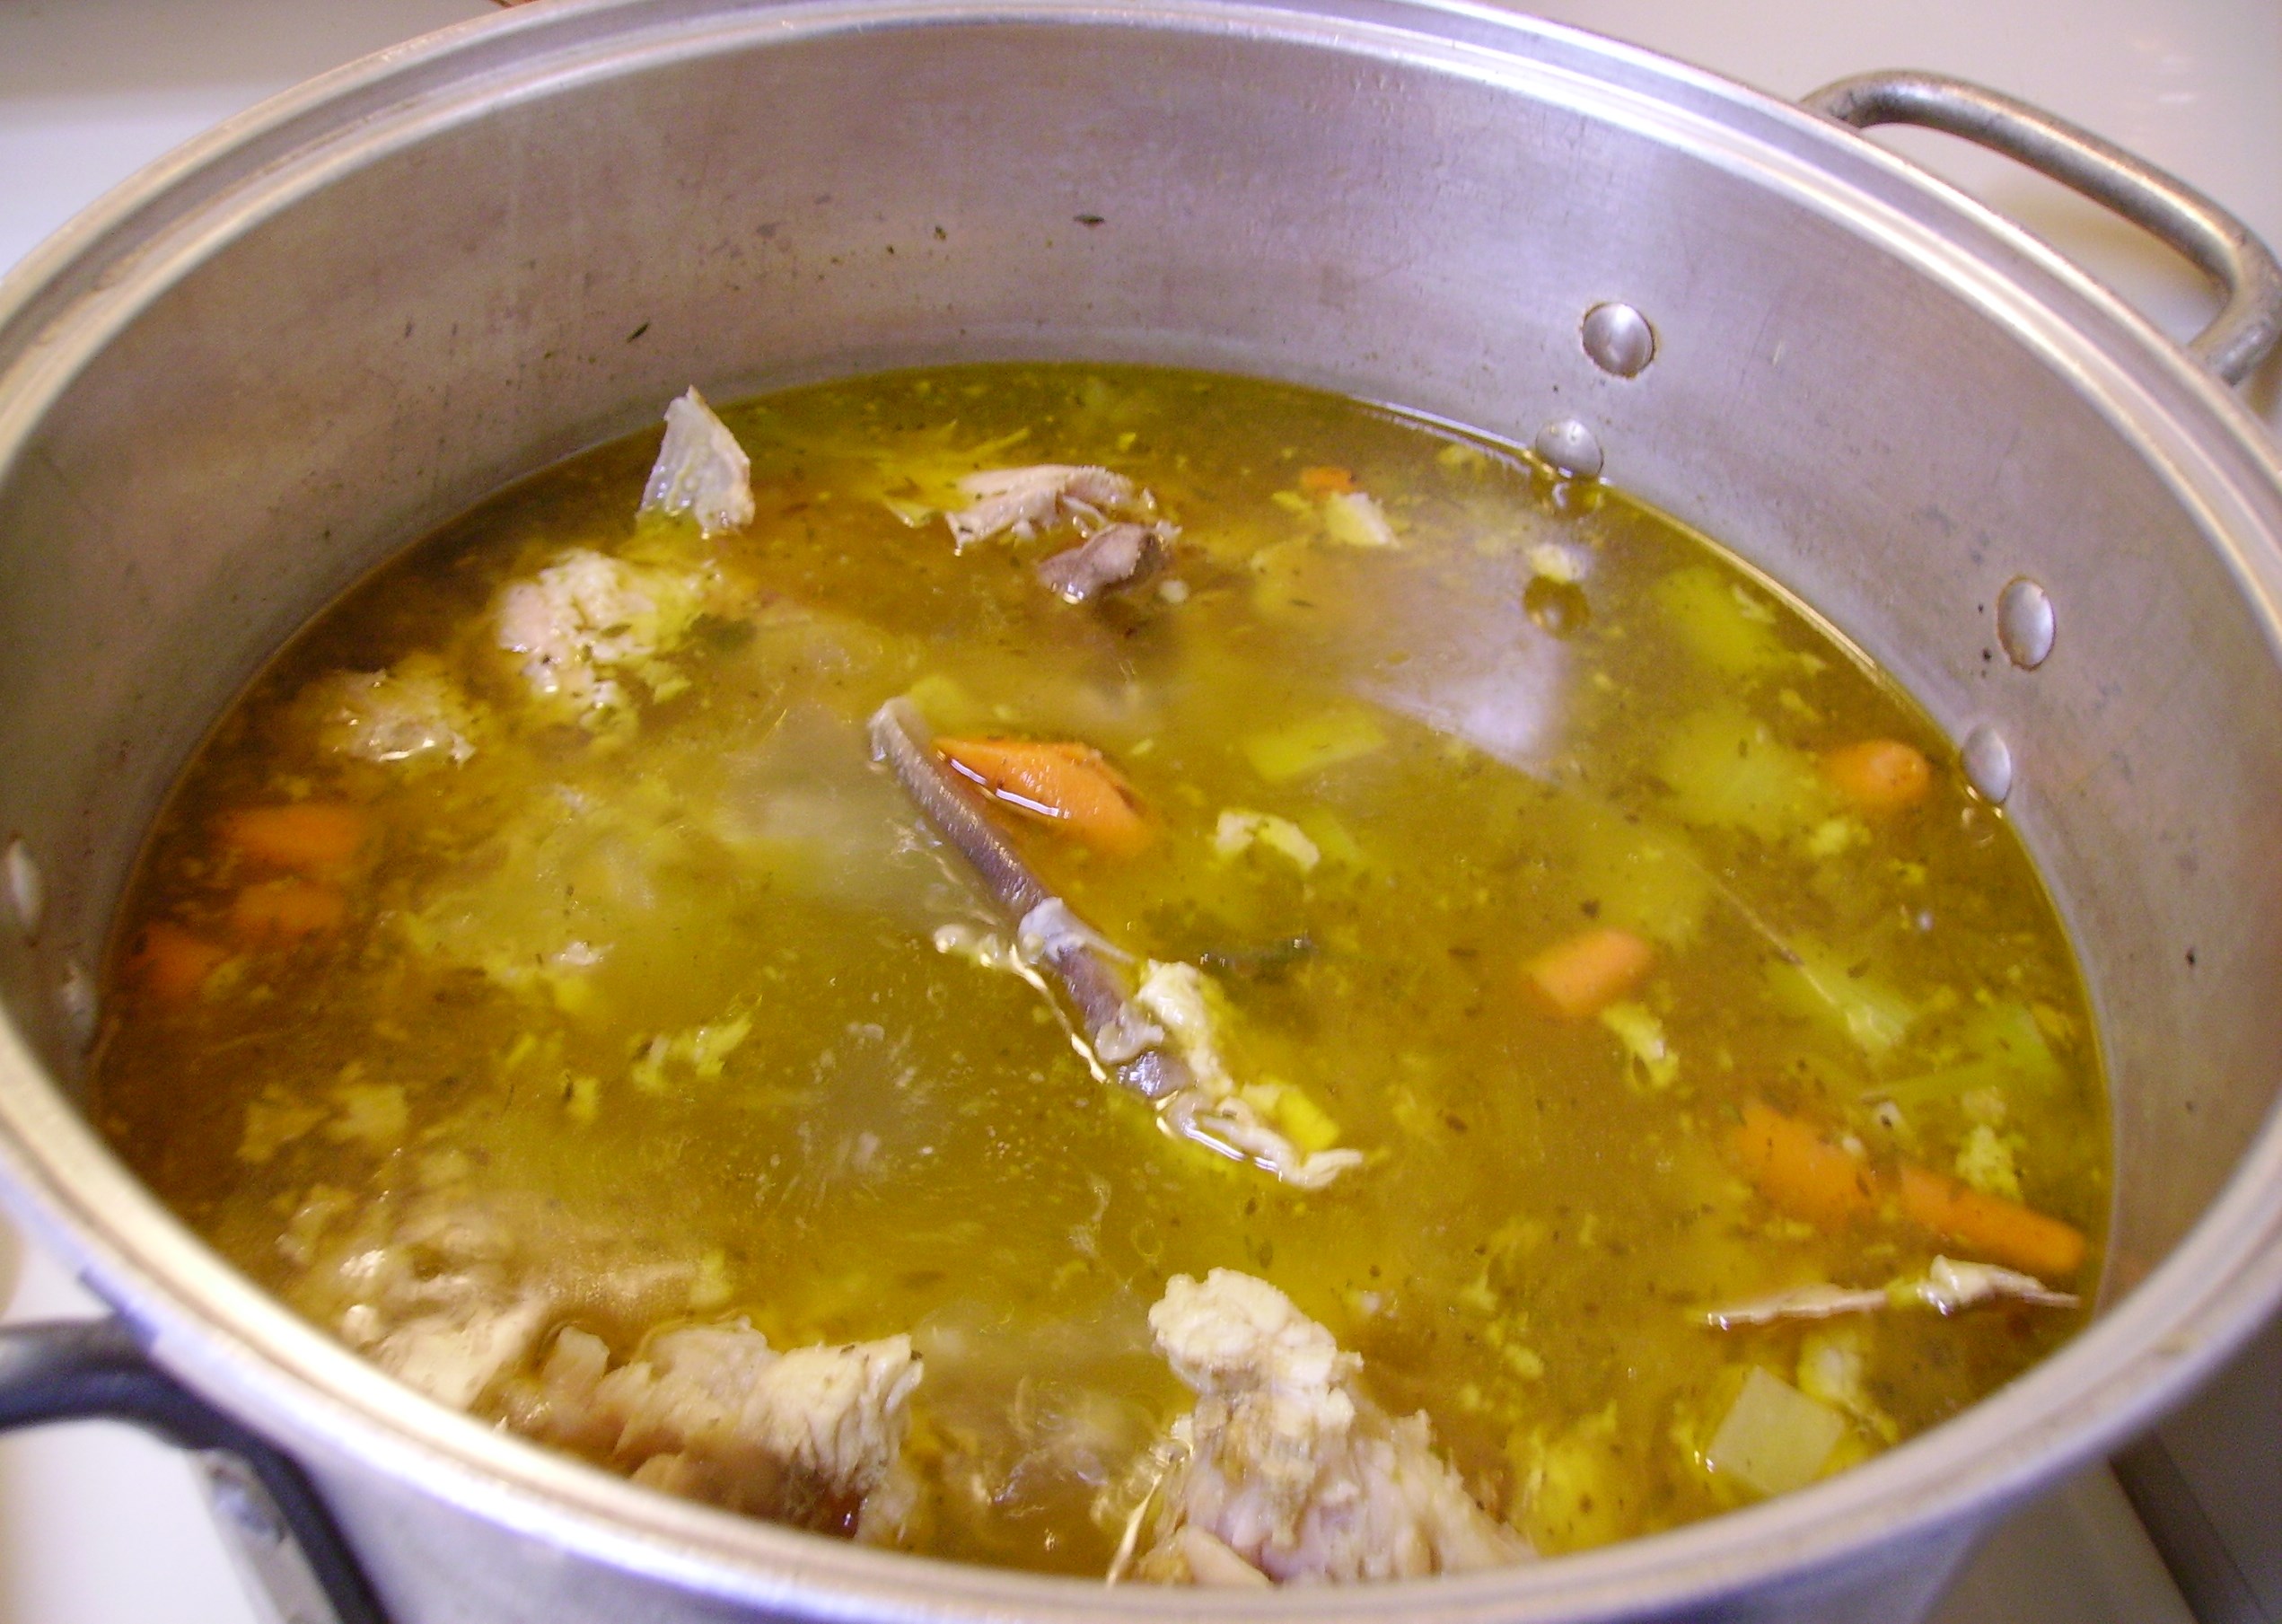
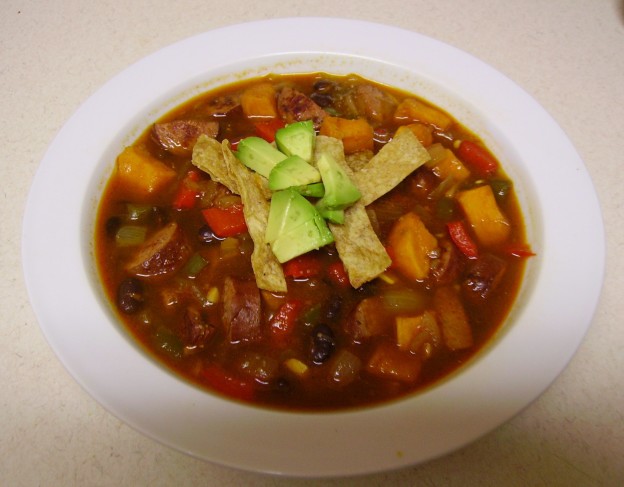
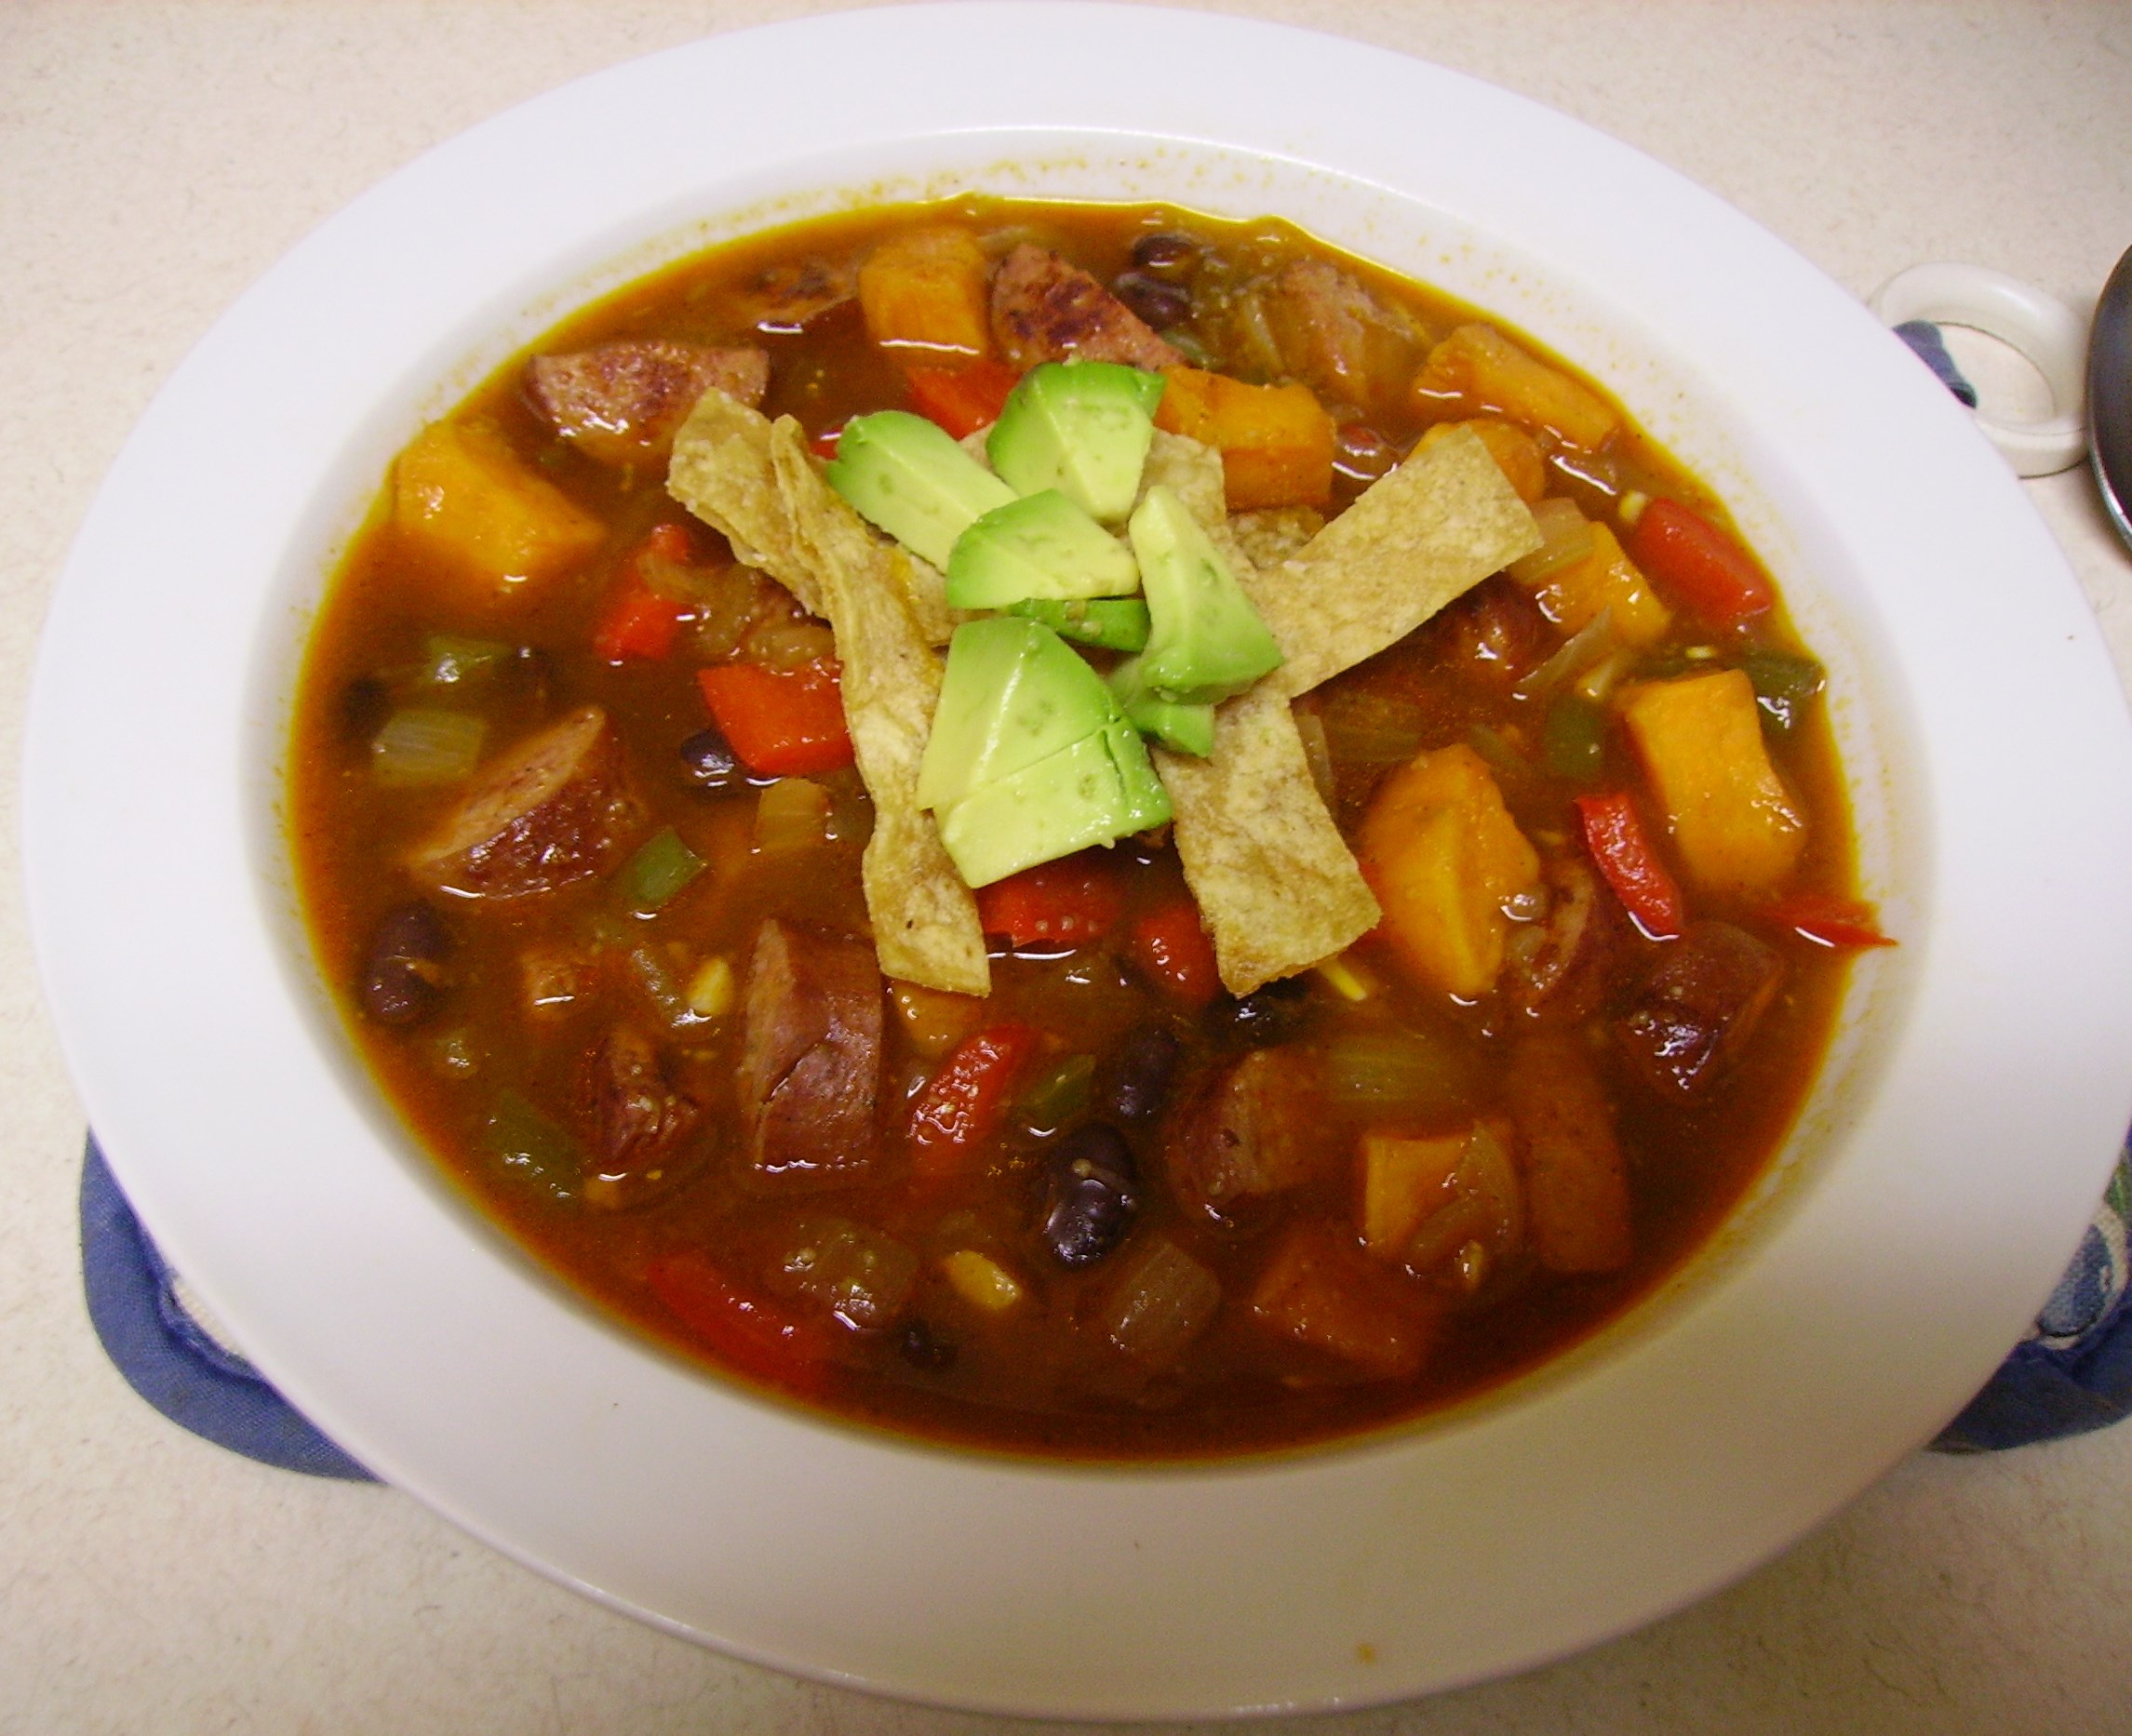
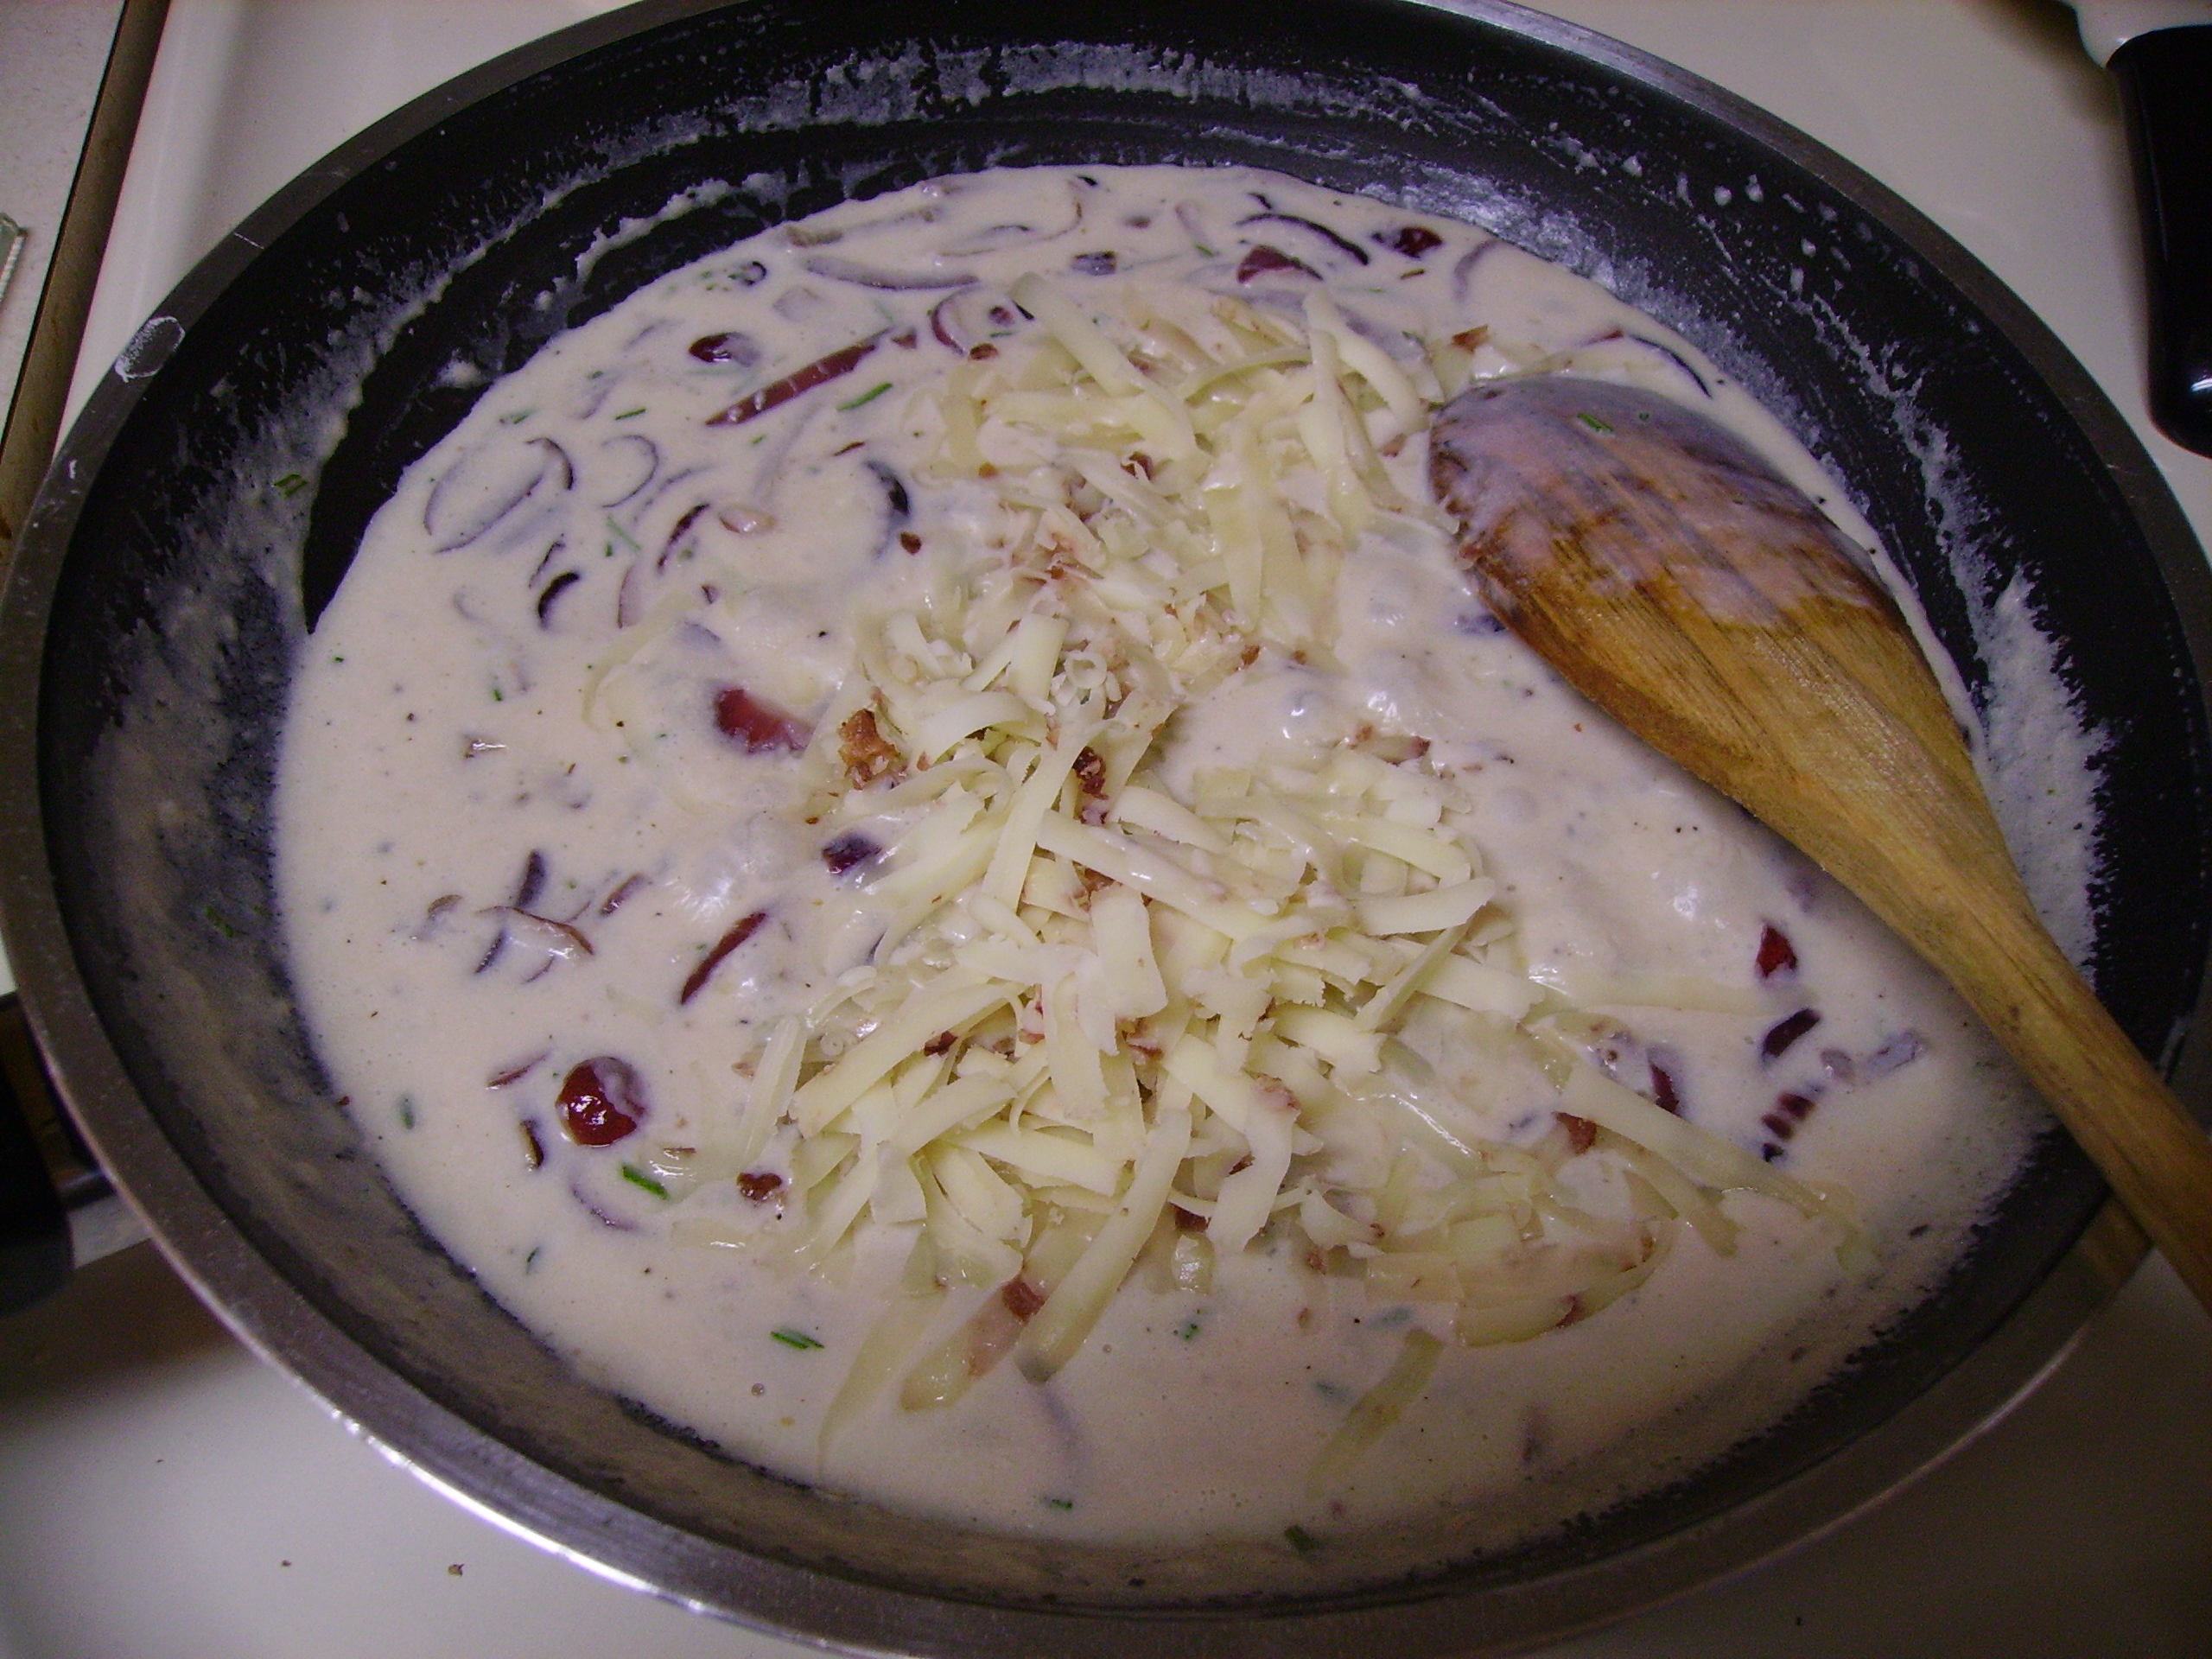
Everything simmered for a good 45 minutes, then I added a can of pinto beans that were drained and rinsed. Another 15 – 20 minutes and it was ready to eat…but not really.DIGITAL CAMERA The flavor was good, but as with many soups it’s even better in a day or two. So it camped out in the refrigerator for two days. There’s a double bonus here. It tasted great and was as easy to get on the table as heating it up and spooning it into bowls. I topped it with a little smoked gouda cheese. DIGITAL CAMERA
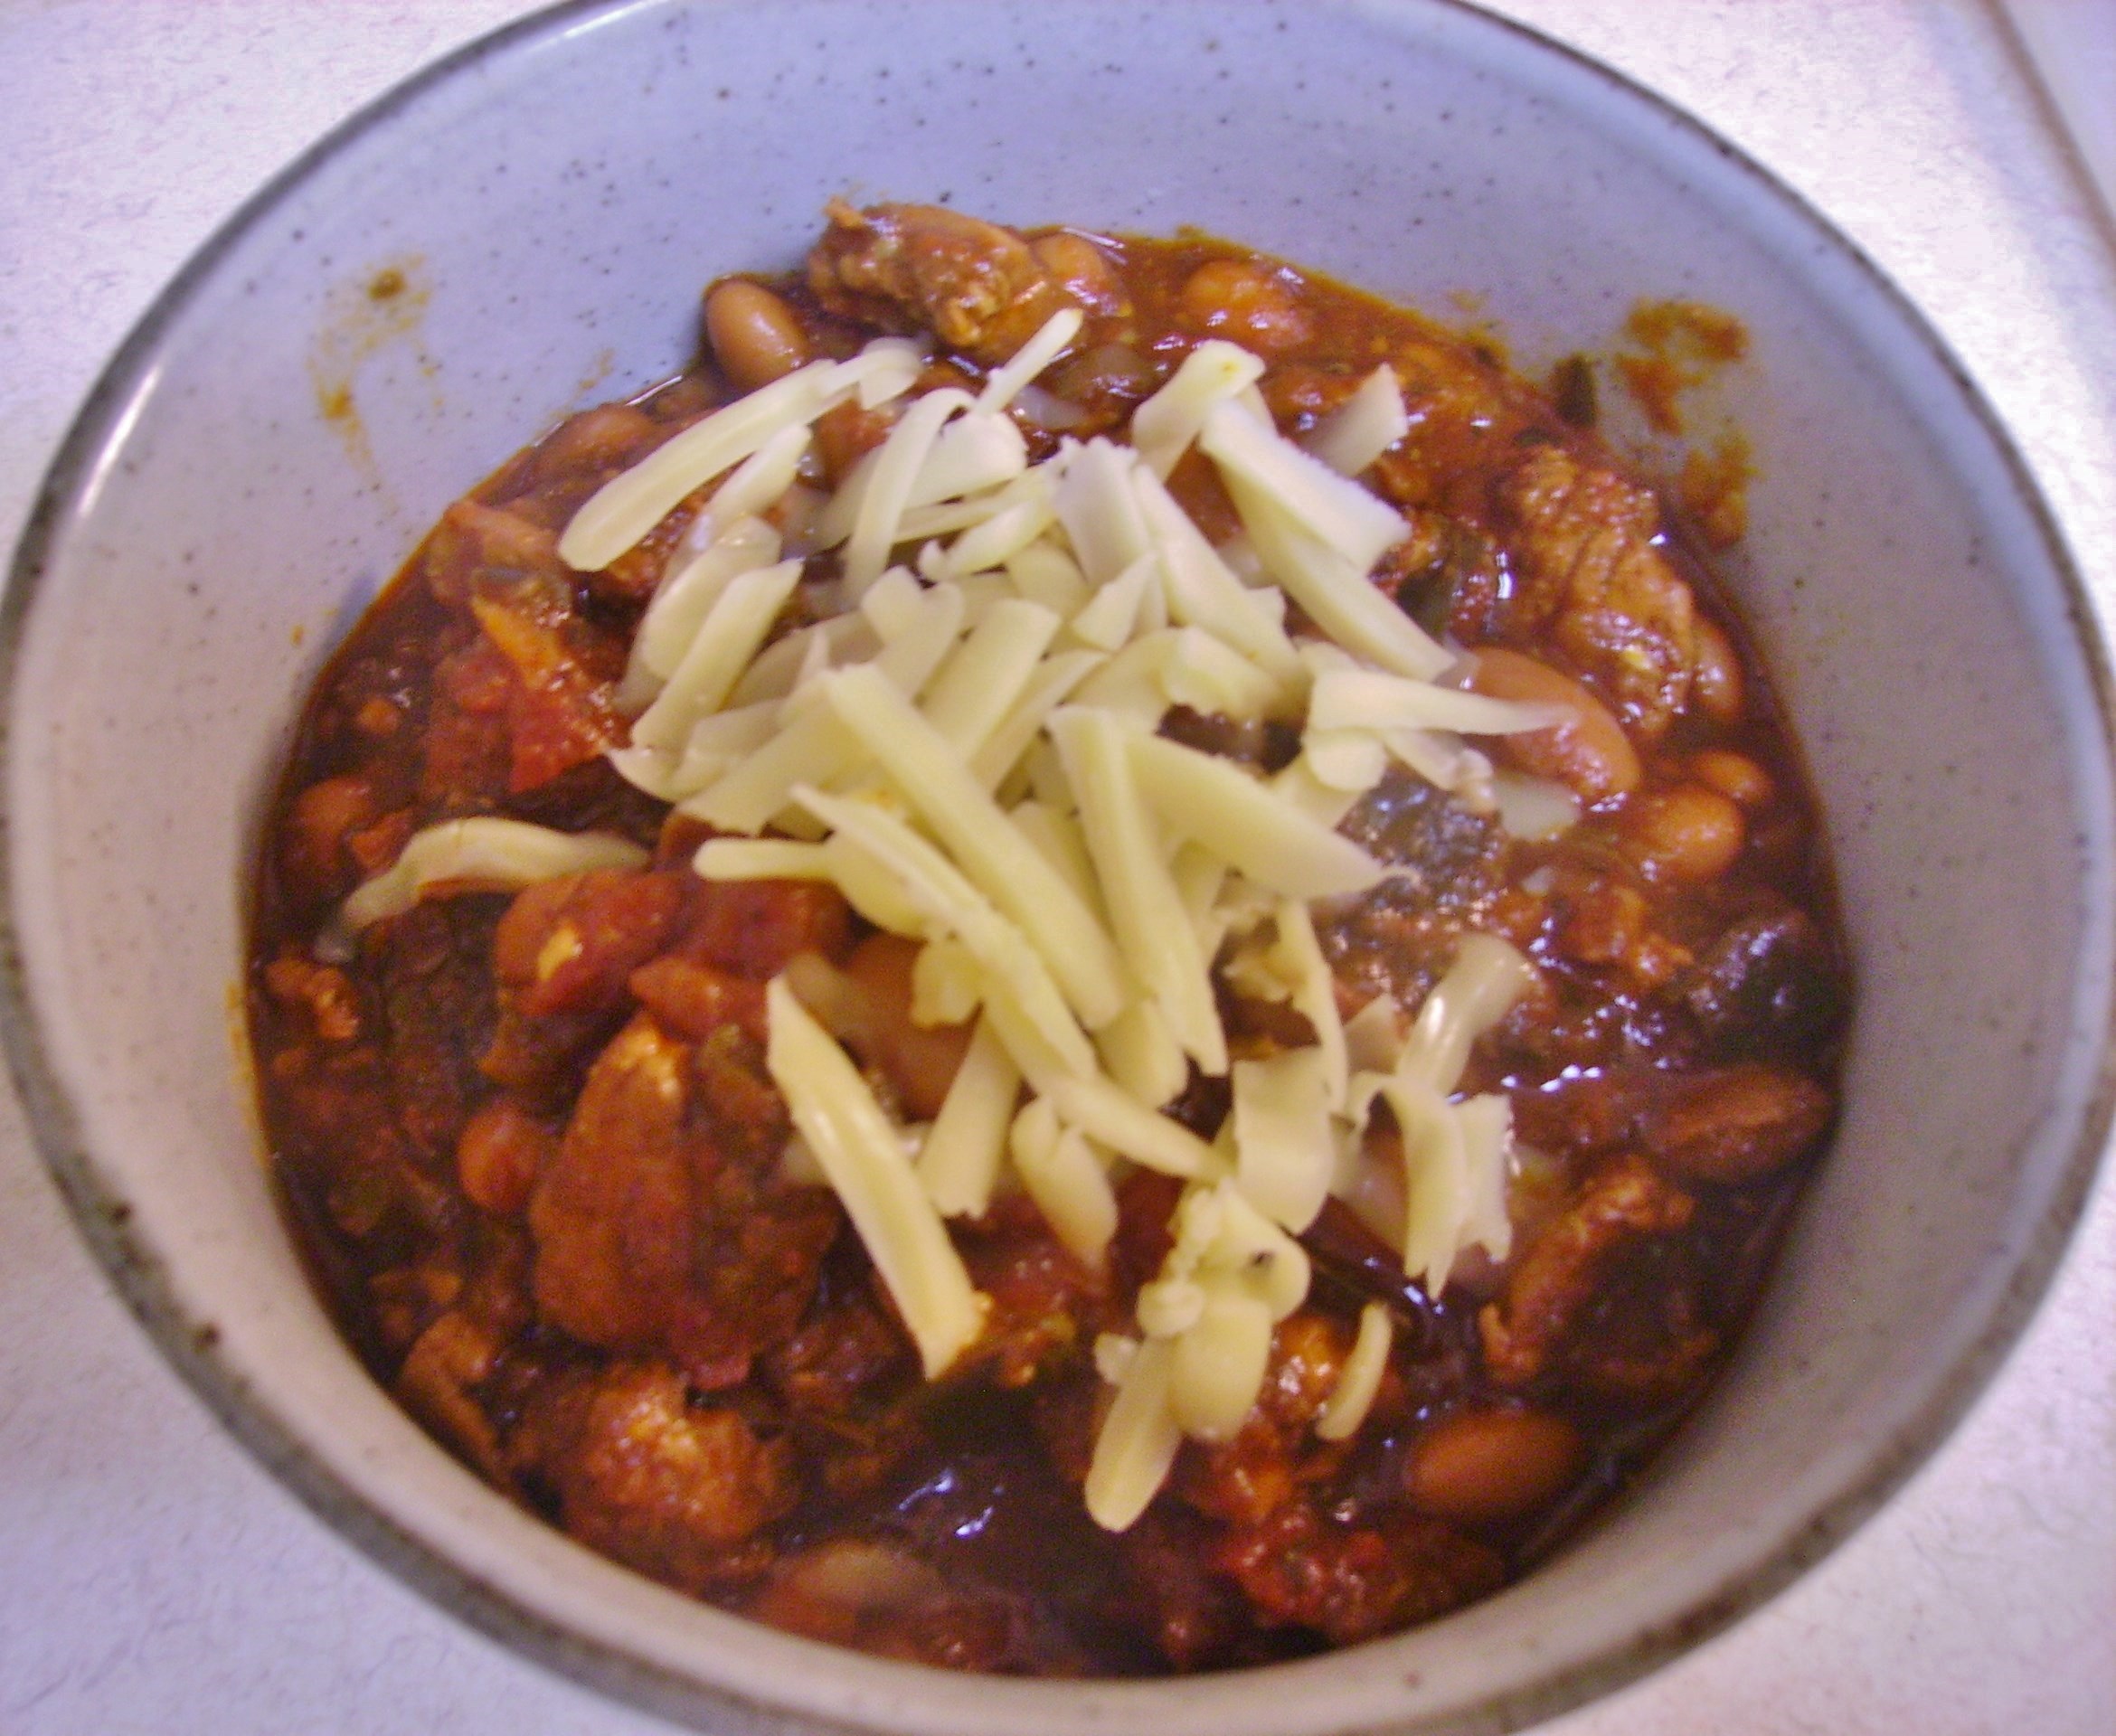
The smokiness of the cheese complimented the smokey undertones of the chili. It takes a bit of time to make this. The recipe is long, but it is fairly easy. It’s the perfect way to spend a Saturday afternoon and the resulting pot of wonderful is worth the effort.

Chicken and Poblano Chili
Print Recipe
This takes time, but it is worth the effort. Use different chilies to adjust the heat. It would be great with pork and black beans or what ever ingredients you love.
Servings
4
Servings
4
Chicken and Poblano Chili
Print Recipe
This takes time, but it is worth the effort. Use different chilies to adjust the heat. It would be great with pork and black beans or what ever ingredients you love.
Servings
4
Servings
4
Ingredients
Sauce
Chili
Servings:
Instructions
To Make The Sauce
  1. Use kitchen shears to cut open the peppers. Remove the stem and the seeds. Place the peppers in a large roasting pan. Place in a 300 degree oven and roast for a few minutes. This is to warm the peppers slightly and begin to release their oils.
  2. Heat the water to a simmer. Remove the pan from the heat and add the chilies. To keep the chilies submerged in the water, place another pot into the chili pot and weight it down. Allow the chilies to soak for at least 20 minutes.
  3. Check to see if the chilies are soft. If they aren't let them soak a few more minutes. Once they are soft, remove them to a strainer and allow to cool.
  4. Working in batches, blend or process the chilies with fresh water. (1 cup chilies to 2 cups water) the mixture should be fairly smooth, but there will be bits of skin.
  5. When all of the chilies have been processed, pour the mixture through a fine sieve. Use a spoon to press as much of the liquid chili through the sieve. Discard the pulp in the sieve.
  6. Add a pinch of salt and a bit of agave syrup to taste. This makes a good 4 cups of sauce. Use in the chili recipe. Freeze the extra.
Chili
  1. Heat a large soup pot over medium high heat. Add the chopped bacon and cook until the bacon is browned. Remove the bacon and drain on a paper towel. Pour off the drippings, leaving any browned bits. Add the olive oil to the pot.
  2. Add the chicken bits to the pan and cook until lightly browned. Cook in batches if necessary. Remove the chicken with a slotted spoon and set aside. Leave the drippings in the pan. Work on roasting the poblano peppers while the chicken cooks.
  3. Use a broiler to roast 2 of the Poblano peppers. Place the peppers on the broiler rack and position the rack about 3 inches from the heat source. Broil turning frequently until the peppers are blistered and blackened all over. This may take up to 10 minutes depending on your broiler
  4. Place the roasted peppers in a bowl and cover tightly with plastic wrap. Allow to sit for 5 - 8 minutes. The skin should come off easily. Remove the stems and seeds and chop and set aside
  5. Chop the remaining poblano pepper and add it along with the onions, garlic, and jalapeno to the soup pot. Cook for about 5 minutes until the peppers and onion are softened and the garlic is fragrant.
  6. Add the cumin and chili powder to the pan and cook for 3 minutes more. Return the chicken and bacon to the pot and stir to combine. Add the beer to the pot stirring to loosen any brown bits. Cook for a minute or so.
  7. Add the chili sauce, drained tomatoes, roasted poblanos, and the chicken stock. Bring just to a boil. Reduce the heat to low and simmer for 45 minutes.
  8. Add the pinto beans and continue to cook 15 minutes more. This can be served immediately, but it is better after a day or two in the refrigerator.
Share this Recipe
Powered byWP Ultimate Recipe

I added a salad of grape tomatoes, cilantro, and avocado that was lightly dressed with a lime vinaigrette. Warm corn tortillas rounded out the meal.DIGITAL CAMERA

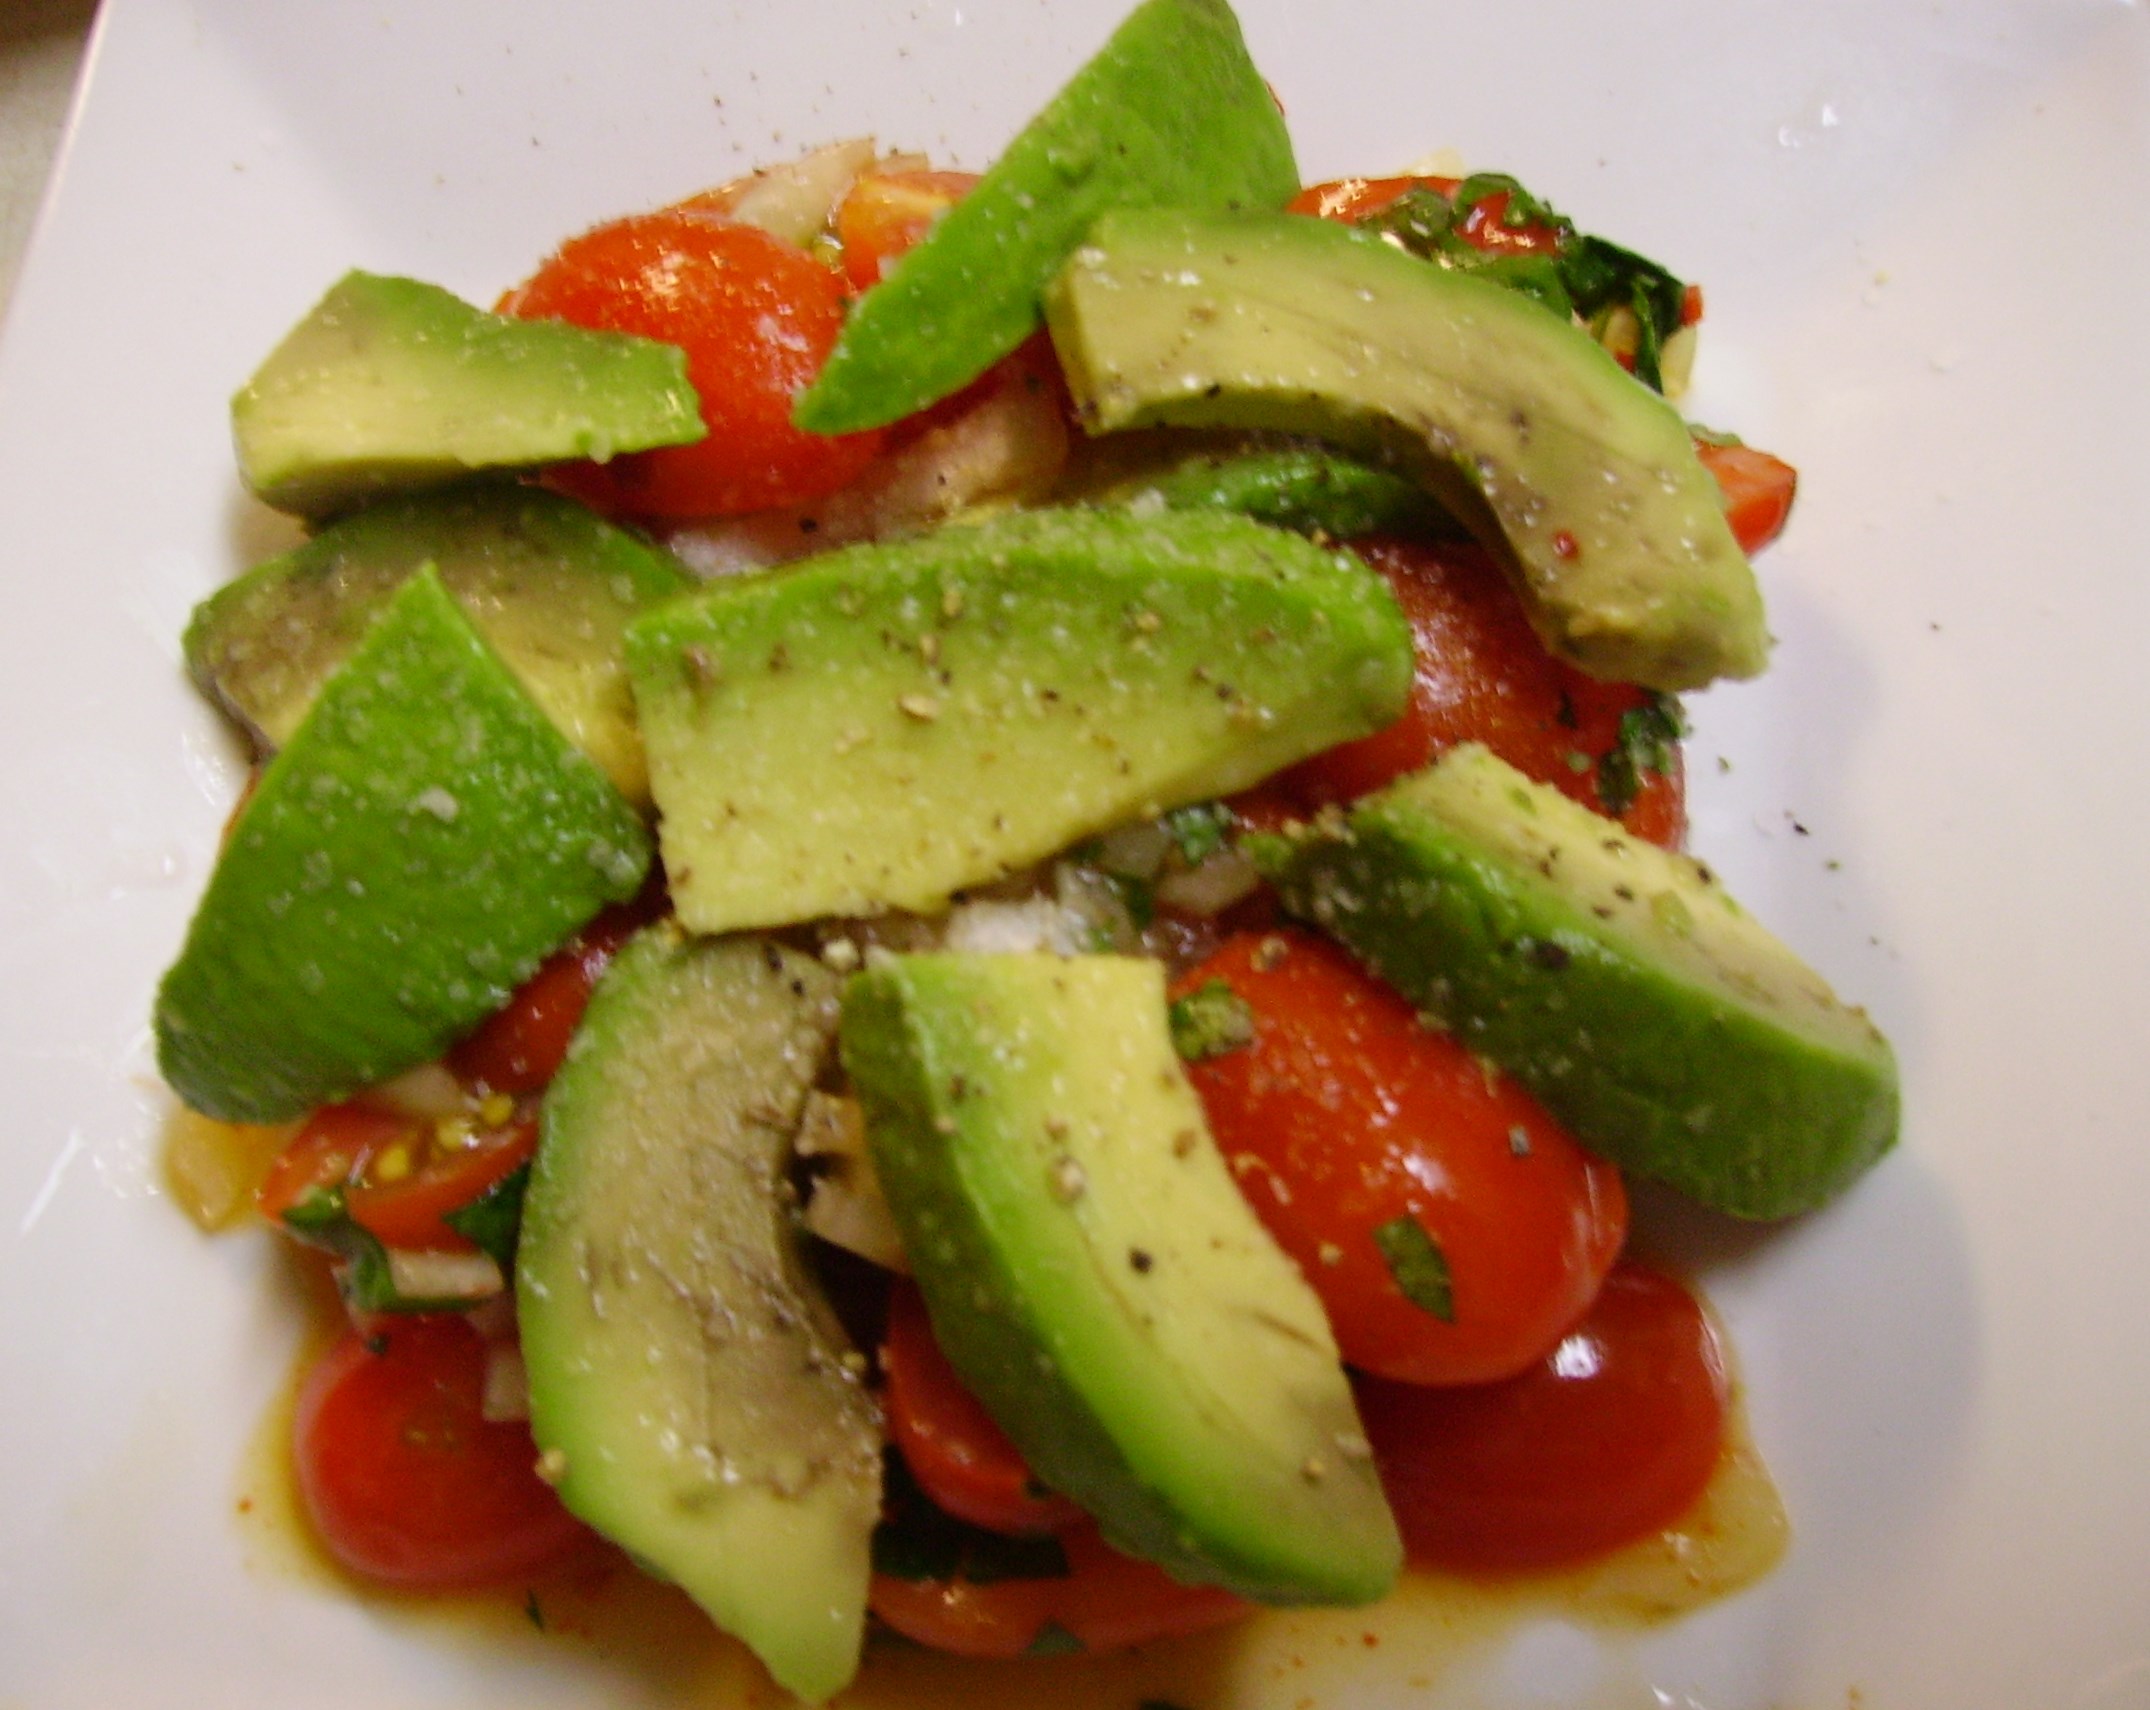
Winter is sure to hang around for at least another month or two. Take the time to make your own pot of wonderful.

Turkey, The Gift That Keeps On Giving

Back around Thanksgiving, the bus company that I work for gave me (and every other employee) a frozen turkey. This kind gesture is a throwback to another era when employees were given a token of appreciation at the holidays for the work they did. That turkey or ham might have meant that a family could have a real holiday dinner. Today we are more jaded and some of us are better off so that a small turkey seems like small potatoes (sorry, odd analogy) to some. Still, it is 12 pounds more  turkey than I have ever received from any other company I’ve worked for.

The gift turkey had resided in my rather small freezer since then and the time had come to allow it to do more than take up space. So, not long ago, I thawed it and prepared it to give my family the gift of roast turkey. I prepared it simply stuffing it with lemons and onions fresh thyme and garlic. I rubbed it inside, outside and under the skin with smoked paprika herb butter. It emerged golden brown and yielded moist meat that our family enjoyed casually in shifts. This was definitely not a traditional turkey dinner. Twice Baked Potatoes and Broccoli Slaw were the only accompaniments. More than a little “picking” took place and I personally enjoyed my share standing next to the stove.

The thing about turkey is there is a lot of it. Even a small bird offers many meals. While we have enjoyed the sandwiches, pot pie, and continued “picking,” the carcass, those skeletal remains, is perhaps the best gift of all. A bit of meat, some skin, and of course those bones wherein the flavor lies are waiting to transform on the stove.DIGITAL CAMERA That’s why Mama D made turkey stock. I’ve shared recipes for chicken and vegetable stock before and the process for turkey stock isn’t all that different except maybe for needing a bigger pot. A mirepoix is sweat in a soup pot.DIGITAL CAMERA Then water, heat, and time work their magic and stock is born.DIGITAL CAMERAWhile the straining process isn’t pretty, it is necessary as is a cool down, to allow the fat to rise leaving golden goodness. To accomplish this, I used my large “walk out” refrigerator.DIGITAL CAMERAThe resulting stock was divided into manageable portions, and the next layer of the gift of turkey began.

One gift that I particularly enjoyed was a wonderful Turkey Sausage Soup. I was in the mood for something with a little spicy Southwestern feel, so I started with some spicy smoked turkey sausageDIGITAL CAMERA and added a bit of jalapeno and the requisite onions and garlic. Black beans and red bell peppers further enhanced the flavor profile. For a little twist on ingredients, I added some roasted sweet potato. I roasted it and added it to the soup near the end of cooking so that it would keep more of its flavor and texture.DIGITAL CAMERAI relied on a good bit of cumin and a modest amount of ancho chili powder to season the soup. This would be great with any chili powder that you like and you can make it as spicy (or not) as you want. That’s the beauty of soup. some aromatic vegetables, good stock and your imagination result in a pot of goodness that warms the body, soul, and heart. DIGITAL CAMERA I finished the soup with lime juice and topped it with a few home-baked tortilla strips (Cut corn tortillas in strips and lay on a baking sheet coat lightly with olive oil cooking spray and sprinkle with salt. Bake 7 minutes at 325 degrees, turn, repeat the spray and salt routine and bake for 7 minutes more.) and some avocado. This was good lovin’ in a bowl that was even better the next day.

Spicy Turkey Sausage Soup
Print Recipe
Servings
4
Servings
4
Spicy Turkey Sausage Soup
Print Recipe
Servings
4
Servings
4
Ingredients
Servings:
Instructions
  1. Spray a small baking pan with cooking spray and add the sweet potato cubes. Spray the cubes lightly with cooking spray and roast in a pre-heated 375 degree oven for 15 - 20 minutes, until the cubes are lightly browned and tender. Set aside.
  2. While the potatoes are cooking, cut the sausage in half lengthwise then slice into 1/2 inch half moons. Heat a large soup pot over medium high heat. Add the olive oil and swirl to cover the bottom of the pan.
  3. Add the sausage moons and toss to coat. Cook for 7 minutes or so until the sausage begins to brown. Transfer to a plate using a slotted spoon leaving the drippings in the pan.
  4. Add the onions to the pan and stir to coat with the drippings. Cook for 5 minutes until the onion begins to soften and brown.
  5. Add the peppers and garlic to the pan and cook, stirring occasionally for another 5 minutes or so. The peppers should begin to soften and the garlic should be fragrant. Use a very small amount of the stock if things get too dry.
  6. Return the sausage to the pan. Add the cumin and chili powder. Cook and stir for 2 - 3 minutes. Pour in the stock. Bring just to a boil. Reduce the heat to medium and simmer for 30 minutes or so.
  7. Add the reserved sweet potato and the drained beans to the pot and cook over low heat another 10 minutes. Squeeze the juice of the lime into the soup. Stir and taste to adjust the seasonings.
  8. Ladle into four soup bowls. Top with a few tortilla chips and some avocado cubes and serve.
Share this Recipe
Powered byWP Ultimate Recipe

The turkey will live on to bestow more gifts of love since there are several more bags of stock in the freezer. I don’t know what they will turn into, but I will think of that kind gesture of the gift of turkey when I use them.


A New Year, a New Grill and a New Panzanella Salad

When one reaches a certain age, the excitement over Christmas presents diminishes somewhat. It truly becomes a situation of it being better to give than to receive. That’s where we are. We lavished (as much as two people on fixed incomes can) gifts on our children and grandchildren, and enjoyed the glow of their happiness.

We have wonderful children who are raising wonderful children of their own. They were both thoughtful and generous in the gifts that they gave us. One son gave us a dinner at a small cafe in the city because he knows that we love going into Chicago and discovering out-of-the-way places to eat. The other son knew that one of the things we’ve missed most with our smaller home is grilling out. If you’ve been following my adventures over the last year or so, you know that grilling is our cooking method of choice much of the time. So imagine our delight at receiving a small grill from him for Christmas.DIGITAL CAMERA

While this grill is small, it gives us a platform to resume our favored cooking method. It meets the guidelines for the complex we live in and has ample space to grill enough food to feed two people very well. We’ve used this more than a few times since we’ve received it. Steaks and turkey tenderloin have turned out well, even though my husband, Jeff is virtually cooking in the dark. (note to self…buy a lantern or some kind of outdoor light source).

DIGITAL CAMERAOur latest team effort was some wonderful pork steak. I created aDIGITAL CAMERA smoky rub and Jeff worked his magic on the grill. In what turned out to be a genius touch, I topped each steak with Apple Cinnamon Goat Cheese. It added another dimension to the pork steak and complimented the smokey rich meat beautifully. This is most likely a seasonal item at Trader Joe’s that will be gone by the time I get back there, but there’s always next year.

As we get a better feel for what the grill is capable of, we’ll expand our grilling repertoire to include side dishes. For now, the oven has been a marvelous platform for healthy sides. A recent salad that tweaked the summer favorite, Panzanella is the perfect case in point. We’ve been having a serious love affair with roasted brussels sprouts. We often roast them to golden goodness with bacon, but a new year and a return to healthier choices caused me to choose red onions and colored bell peppers instead. DIGITAL CAMERAThey didn’t miss the bacon, and honestly, neither did we. Panzanella is after all, bread salad, so bread had to join the fun. I opted for some sour dough that had seen fresher days.DIGITAL CAMERA Cubed and lightly coated with olive oil spray it was helped along by a quick toast in the oven, to get ready to absorb the bounty to come. DIGITAL CAMERAA simple vinaigrette with white balsamic and lemon juice was a perfect partner.DIGITAL CAMERA Some mini heirloom tomatoes were tossed in to give it a touch of the traditional panzanella.DIGITAL CAMERA The result was a side that perfectly complimented the grilled pork.DIGITAL CAMERAThis turned out so well that I plan to create other panzanella salads this winter. There are lots of veggies and many varieties of bread out there that would undoubtedly love to get together in a salad bowl. 

Roasted Brussels Sprout Panzanella
Print Recipe
Panzanella salad in the winter? Absolutely! Roast your favorite veggies and toss them with your favorite bread and dressing. Who needs summer?
Servings
4
Servings
4
Roasted Brussels Sprout Panzanella
Print Recipe
Panzanella salad in the winter? Absolutely! Roast your favorite veggies and toss them with your favorite bread and dressing. Who needs summer?
Servings
4
Servings
4
Ingredients
Dressing
Salad
Servings:
Instructions
  1. Whisk the dressing ingredients together in a small bowl or shake in a jar with a tight fitting lid. Set aside
  2. Place the bread cubes in a baking pan. Spray lightly with olive oil cooking spray and toss to coat evenly. Bake at 350 degrees for 10 - 15 minutes until the cubes are dry, crisp and just barely browned. Place in a large serving bowl.
  3. Combine the Brussels sprouts, red onion, and bell pepper in a large roasting pan. Add the tablespoon of olive oil and the salt and pepper. Toss to coat evenly.
  4. Roast at 350 degrees for 35 - 40 minutes. The veggies should be tender and lightly browned. Pour the vegetables and any liquid over the bread cubes and toss to combine.
  5. Pour the dressing over the mixture in the serving bowl and toss to coat.
  6. Add the tomato halves and toss once more. Allow to sit at room temperature for at least 30 minutes. Toss again and serve at room temperature.
Share this Recipe
Powered byWP Ultimate Recipe

Try this basic recipe and come up with your own bread salad. One can’t live by bread alone, but it does make life more delicious.


Reflections on Christmas Present

While the magical glow of Christmas is still in the air, the knowledge that the holiday season is slowly winding down and a new year is on the horizon is creeping into my mind. This is a time of reflection. It’s more than what worked and what may have seen its last Christmas appearance though that will be given some thought. It’s the deeper emotional experience of the holiday season. This was a year that just by the nature of the changes that life has given us was cause for a deeper feeling of joy and gratitude.

DIGITAL CAMERAIt was a year of family getting bigger and home getting smaller.Scan_Pic0061 Job descriptions changed along with our address. While many changes were joyous, others were startling, causing major adjustment to thought and life style. As my mother always said, “Everything happens for the best” and in Mama D’s Kitchen and life that has proven true. I’m grateful for every change because it brought new insight into what really matters. Love and family are the most important things. What ever needs to be done to enhance that is one’s life path.

This year the holidays seemed to get here at warp speed. The baking happened, but at such a rapid pace that picture-taking became an afterthought. One newcomer (or I should say two) was added because it could be made in 10 minutes or so. It yielded a generous amount of goodness that was welcomed far and wide. “Bark” is a  decadent confection that features virtually anything mixed into melted chocolate. The mixture chills for an hour or so and is then broken into pieces. My maiden voyage included two versions taken from Kraft Recipes. One featured white chocolate with dried fruits and pistachio nuts that lived up to its name, Jewel. The other blended white and semisweet chocolate with pretzels and peanuts creating a sweet and salty treat. Check out these recipes and get your own inspiration This was so easy and yummy that I see many more variations in my future.DIGITAL CAMERAWhile I don’t have many pictures of the cookies I made, I do have a Holiday recipe that I came up with that is worth sharing. It uses the flavors of the season and pairs beautifully with the heartier holiday fare that comes along at this time of year. Sweet Potato and Butternut Squash are joined by Cheddar Cranberry Cheese. This cheese is a seasonal item at both Trader Joe’s and Aldi. It may be carried at some Delis as well. It was wonderful on the Christmas Eve cheese tray and was fabulous in this gratin.

DIGITAL CAMERASo, these three stars were joined by red onions, rosemary, and thyme.DIGITAL CAMERA

The onions were sautéed in butter and as a last-minute thought some dried cranberries came along for the ride. The herbs went in and everything took a “milk bath” as the sauce came together. I used a combination of 2% milk and fat-free half and half, but  cream would be wonderfully naughty.DIGITAL CAMERAI added plenty of grated cheeseDIGITAL CAMERAand when everything was beautifully co-mingling I poured it over the squash and sweets.DIGITAL CAMERAIt baked in the oven under a foil cover for about 35 minutes or so. Then a final layer of cheese was added.DIGITAL CAMERAA few more minutes in the oven and  the gratin transformed into golden brown deliciousness.DIGITAL CAMERA

This would be a wonderful side dish for any Fall or Winter holiday meal. It could even be a wonderful main dish for two on a cold Winter’s night… and it was.

Sweet Potato and Butternut Squash Gratin
Print Recipe
The perfect holiday side dish that can also be a vegetarian main dish.
Servings
4
Servings
4
Sweet Potato and Butternut Squash Gratin
Print Recipe
The perfect holiday side dish that can also be a vegetarian main dish.
Servings
4
Servings
4
Ingredients
Servings:
Instructions
  1. Slice the squash and sweet potatoes in similar sized slices. Layer in a Gratin dish that has been coated with cooking spray. Set aside.
  2. In a medium fry pan melt the butter over medium heat. Add the sliced onions and cook stirring occasionally until the onions soften and just begin to brown.
  3. Add the dried cranberries and the herb leaves and cook for 2 - 3 minutes. Stir in the Wondra flour and continue stirring and cooking for another 2 minutes. Do not let the roux brown.
  4. Stir the milk in slowly and continue to stir until it is smoothly incorporated. Continue cooking, stirring frequently until the sauce has thickened. Remove from the heat.
  5. Immediately add 3/4 cup of the grated cheese and stir until the cheese melts and the sauce is smooth. Pour over the squash and potatoes, spreading to evenly cover the top.
  6. Cover with foil and bake in a pre-heated 350 degree oven for 35 minutes or so. Check that the potatoes and squash are tender.
  7. Sprinkle the remaining cheese evenly over the top and return to the oven uncovered. Bake another 10 minutes or so. The top should be golden brown and the sauce should be bubbling.
  8. Remove from the oven and allow to rest for at least 5 minutes before serving.
Share this Recipe
Powered byWP Ultimate Recipe

The holiday season is slowly winding down. I’m always a little sad to see it end. This year I’m planning on keeping the warm feelings and abiding love in my heart for as long as I can. Christmas is after all, a state of mind. I hope your hearts stay filled with the Christmas spirit, too.


Memories of Christmas Baking and Chex & Chocolate

One of the best parts of the holiday season for me is baking. When I was young, I remember baking with my mother. It was my favorite thing to do with her and while she baked throughout the year, she pulled out all the stops at Christmas. She would bake dozens of cookies that would be stored in colorful tins until it was their turn to grace our holiday table.

My mother would put all three leaves in the table, cover it with a damask Christmas tablecloth that she covered with a thin plastic sheet. This was deemed necessary as the table would remain open and set for at least two weeks. It was always ready when friends and family dropped in, which seemed to be almost daily. They would graze the table as they chatted and shared the spirit of the season. One of the jobs I loved was covering the remaining treats on the table with paper napkins. This was the standard way of preserving “leftovers.” Truthfully, by the end of the day there weren’t that many “leftovers” to cover and I was always assured of a bedtime snack.

Times have changed. My baked treasures stay secure in tins and sealed bags until the time they make their appearance on a cookie tray to share with friends and family. No matter how they are stored, they are a symbol of the love and spirit of giving that the Christmas season is all about.

I’ve begun my holiday baking in my new small kitchen. I’m getting very comfortable in it and I have embraced the notion that recipes can be made one at a time and that it is very efficient to clean up from one adventure before starting another. My most recent adventure was a sweet and subtly salty snack mix that has been a staple for 25 years. It’s called Chex & Chocolate and it is addictivley tasty and worth the prep time.

DIGITAL CAMERAI like to use a combination of cereals that always includes Crispix. Until its demise, I used Multi- Bran Chex which gave a small whisper of healthy. I now use Wheat Chex and if  I’m feeling particularly randy another unsweetened Chex cereal. This year Rice Chex joined in the celebration.

DIGITAL CAMERACoconut and peanuts combine with the cereal in a very large bowl. No matter the size of the bowl, there are always a few morsels that try to escape.DIGITAL CAMERA Butter, brown sugar, and corn syrup cook into a beautiful toffee that is poured over the cereal and nuts. DIGITAL CAMERAThe trays of yumminess are popped in a slow oven where over the course of the next hour they will magically bond and blend into a golden crunchy delight.DIGITAL CAMERA Once cooled and gently separated, they are embellished with red and green M & M’s. The result is now somewhere in the neighborhood of 14 cups of delicious. More than enough to share, it makes a wonderful gift.DIGITAL CAMERA

Chex and Chocolate
Print Recipe
Servings
14 Cups
Servings
14 Cups
Chex and Chocolate
Print Recipe
Servings
14 Cups
Servings
14 Cups
Ingredients
Servings: Cups
Instructions
  1. Preheat the oven to 250 degrees. Combine the cereals, coconut and peanuts in a large bowl.
  2. Line 2 large rimmed baking sheets with foil. Lightly coat the foil with cooking spray. Set aside.
  3. In a medium saucepan over medium heat combine the butter, brown sugar, and corn syrup. Heat to boiling stirring constantly.Without stirring, boil for 5 minutes.
  4. Remove from the heat. Stir in baking soda and vanilla. Continue to stir until the mixture becomes fluffy and light. Pour the mixture over the cereal and stir gently to coat evenly.
  5. Divide the mixture between the 2 prepared baking sheets, spreading out evenly.
  6. Place in oven and bake for 1 hour. Stir and switch the baking sheet positions every 15 minutes.
  7. Remove from the oven and allow to cool. Stir every 10 minutes and gently break apart any large clumps.
  8. When mixture is completely cool, stir in the M & M's. Store in airtight containers.
Share this Recipe
Powered byWP Ultimate Recipe

It keeps well in sealed containers ( do not leave this out on the table covered with a napkin). Be careful of the container you choose. When my sons were young, I used plastic cereal containers  that at any other time of the year would actually hold breakfast cereal. I stopped doing that after I came down to the dining room one morning to find that the boys and their sleep-over friends had poured milk over large bowls of the mix and were eating it with spoons. I made “Cool Mom” points for having M & M’s in the cereal, but lost some “Street Cred” with moms who had to deal with bouncing boys on a sugar high. It would, however make an awesome breakfast cereal…just saying.

Christmas is about love and sharing. This recipe is made for that. More than enough to share with those you hold dear at Christmas and all year-long.