Memories of Relish Trays…and Marinated Vegetables.

When I was a little girl, I loved to go out to dinner with my parents. I got to get dressed up, there was always a Kiddie Cocktail, and while my parents enjoyed their martinis, I’d have the relish tray to myself. I was mainly interested in the olives, carrots, and pickled peppers, but the celery, green onions and radishes all contributed to an edible still life on a metal tray that made me feel like a grown-up. That is, until my mother scolded me for eating the black olives off my fingers.IMG_2813
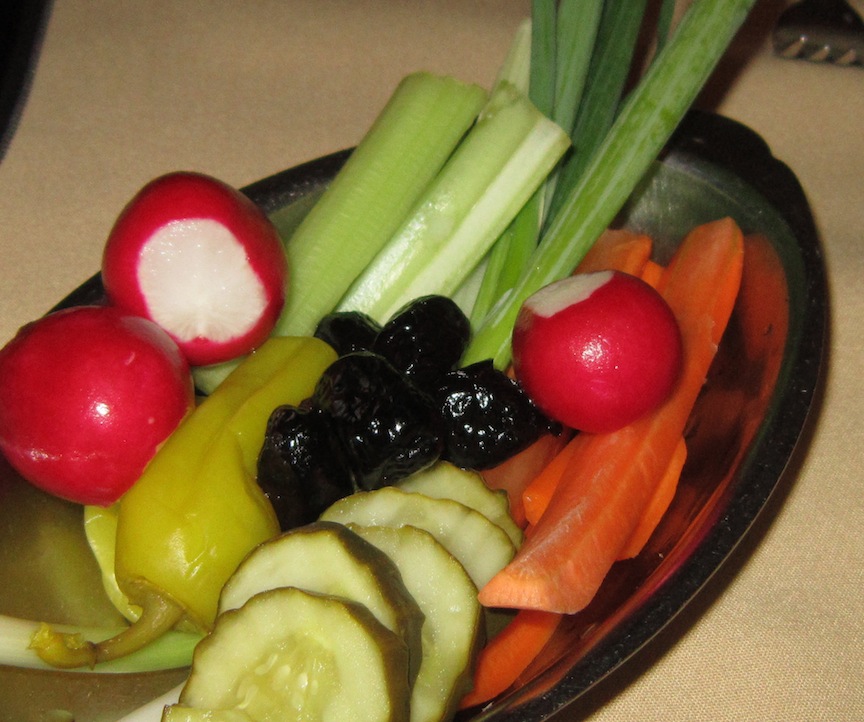
Relish trays appeared at every family gathering that I remember. All my aunts had a cut glass relish tray. Every tray was different and every aunt filled it differently. This is my mother’s plate. It is one of many treasures from her kitchen that I still lovingly use.DIGITAL CAMERAradishrose
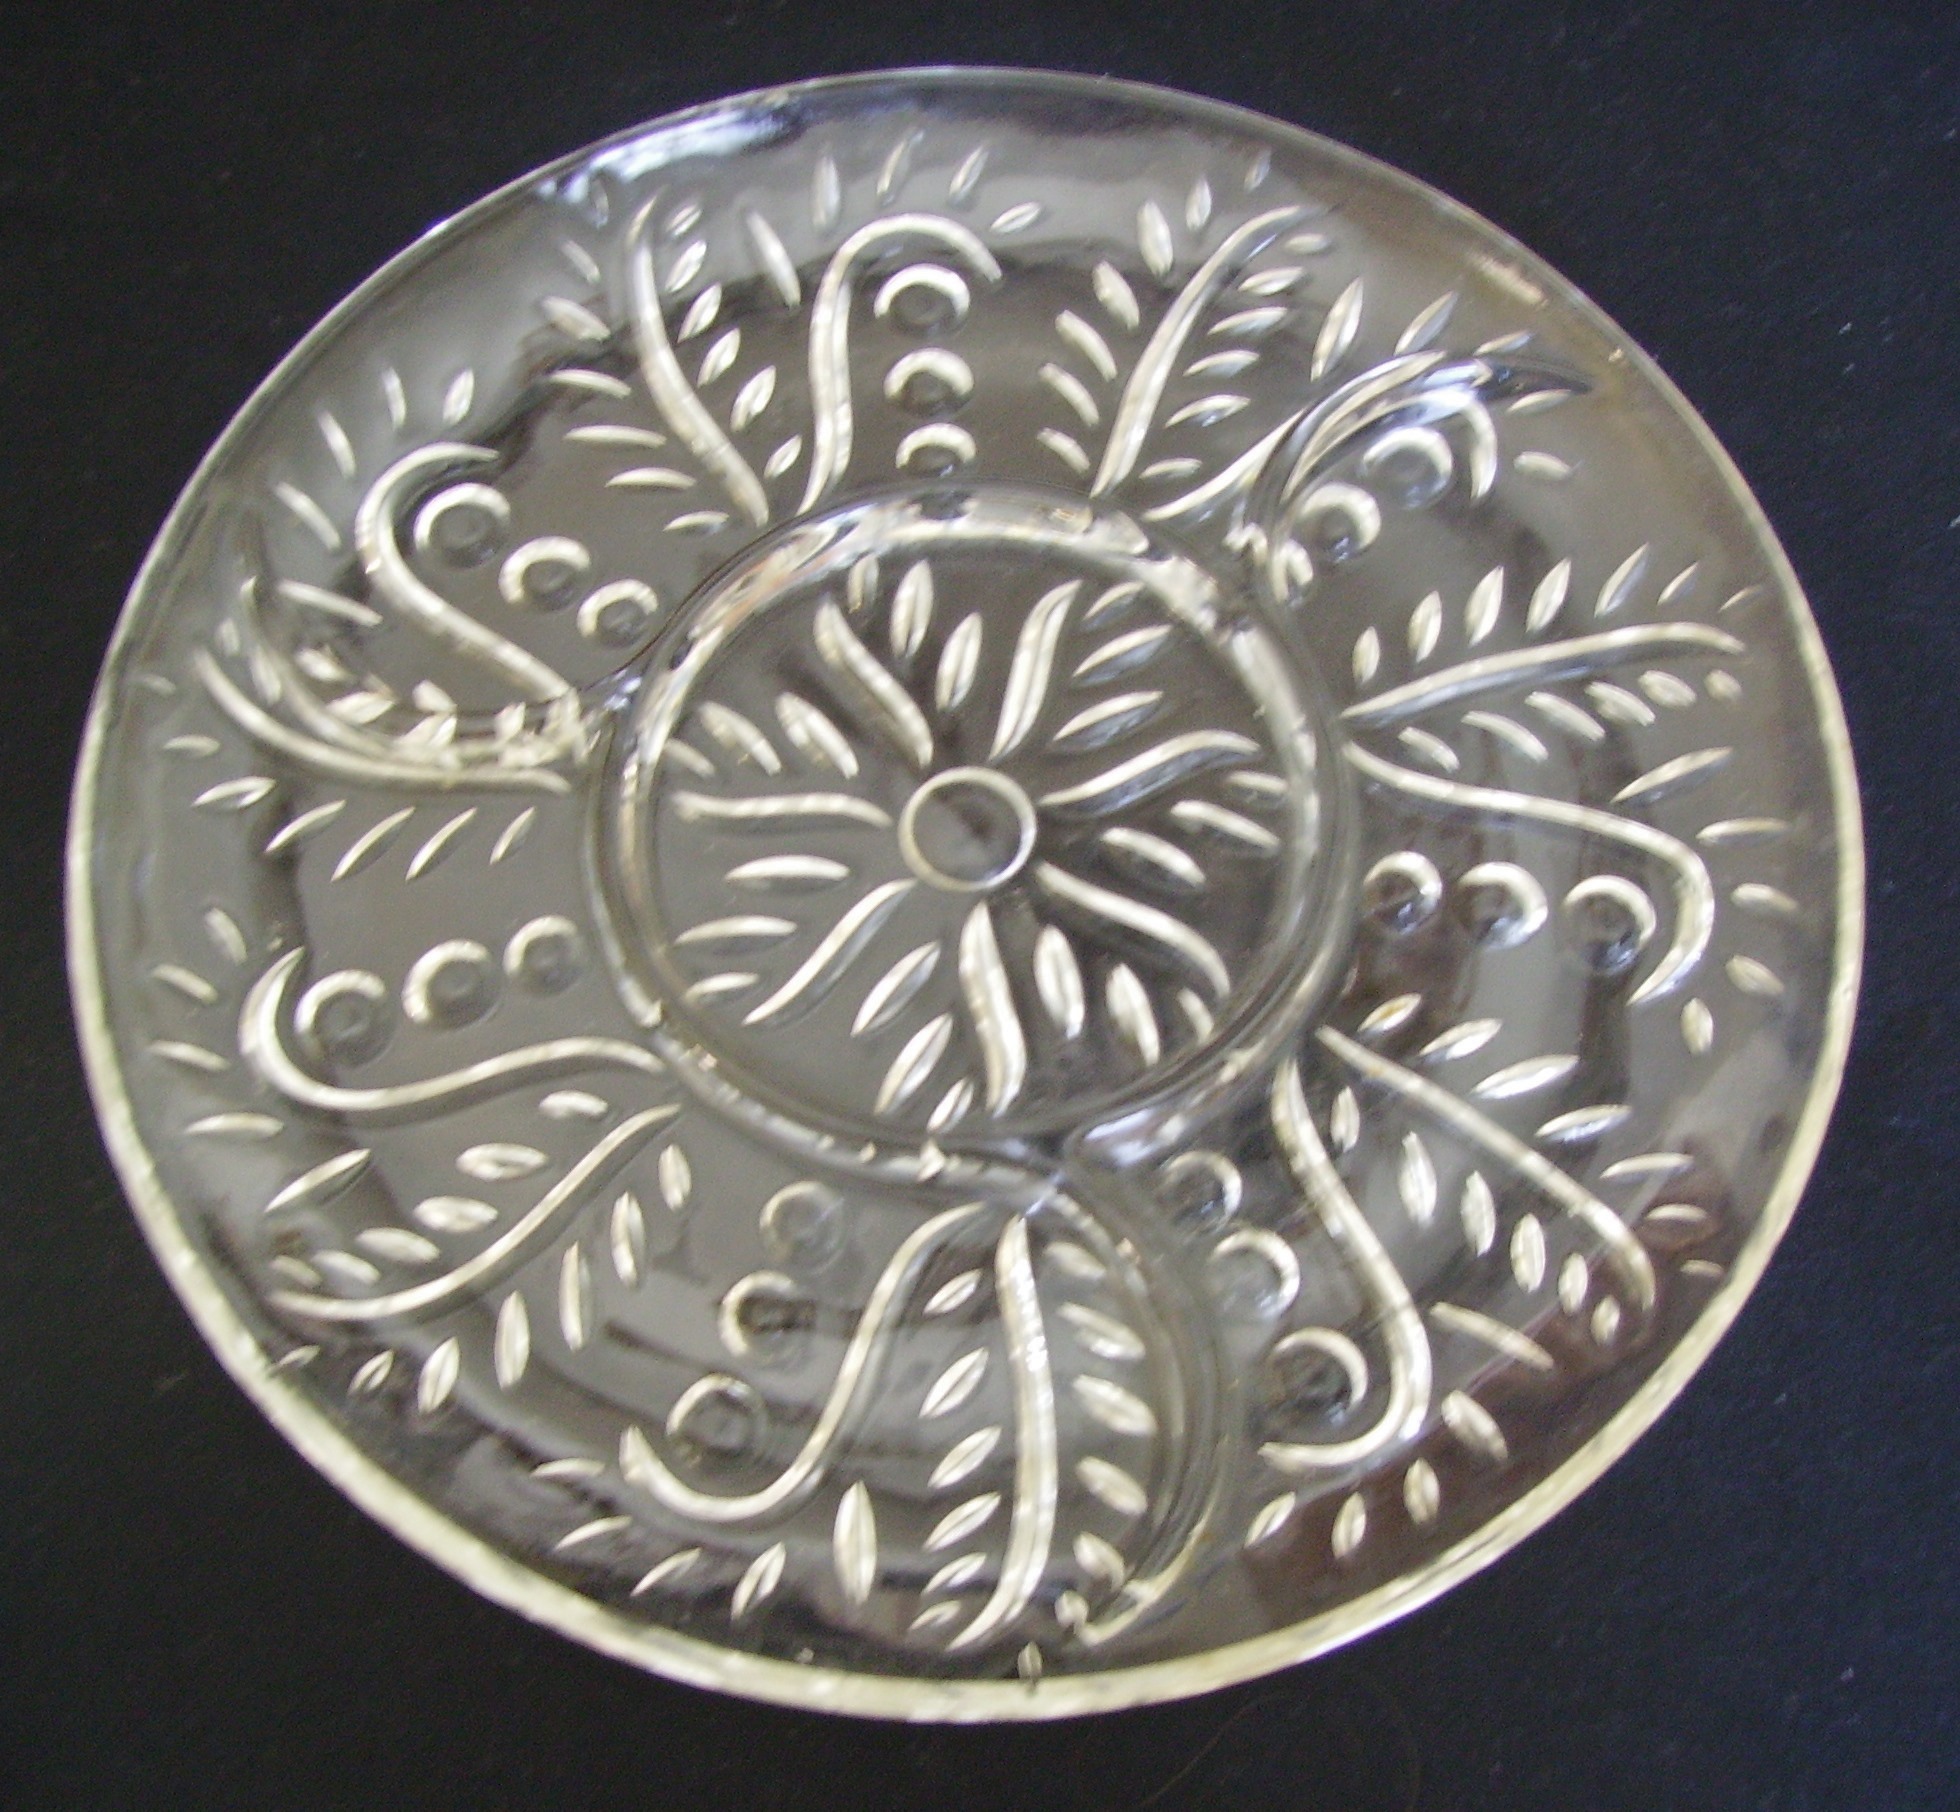
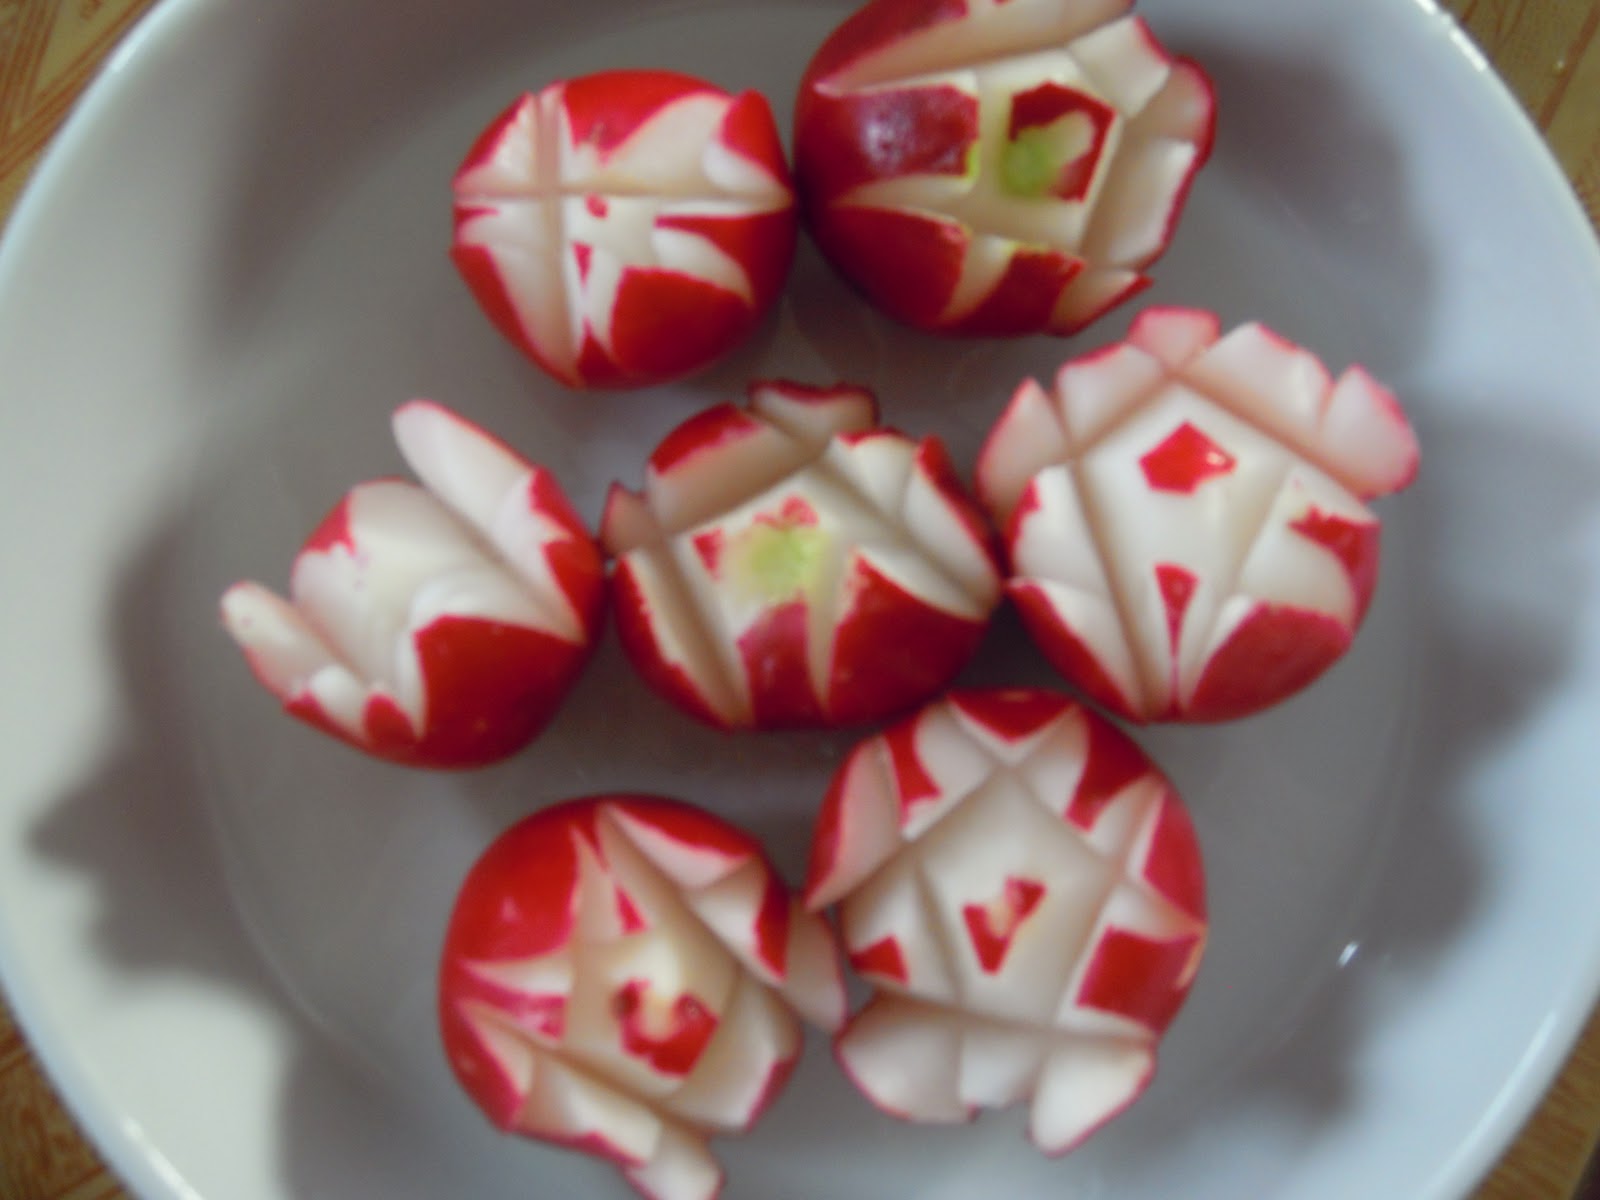
There were always green onions on the tray with salt, and pepper near by. Green and black olives, pits and all, were mounded or used as a garnish. Then there was the ubiquitous radish rose. These weren’t the exquisite beauties that now qualify as food porn, but the “rustic” four quick cuts variety that “bloomed” in cold water. This was probably my first knife skill. I was given a dull paring knife and I’m sure my mother held her breath the entire time. $(KGrHqVHJE4FGBKnjsr)BRjlt7OJU!~~60_12

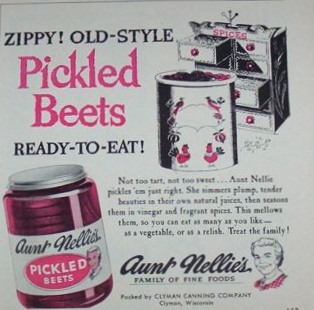
Occasionally a marinated vegetable or two would show up on the plate. If it was my mother’s tray there would be Aunt Nellie’s Pickled Beets. This was her required element and no other brand would do. Back then I thought that Aunt Nellie was as real as Betty Crocker. Her picture was on the jar and in the ads, so she had to be a real person.

I have a relish tray at most gatherings and because I am a huge fan of “vinegary” sweet & sour flavors, there are marinated vegetables. If a veggie is a little less than perfect or not really in season, marinating can elevate them to tastier heights. Each vegetable has it’s own preparation and flavor profile. The recipes that follow are only suggestions and are therefore open to anyone’s interpretation or variation. Another note. These are not pickled or processed. Once made, they must live in the refrigerator until they are eaten which should happen within a week.DIGITAL CAMERA

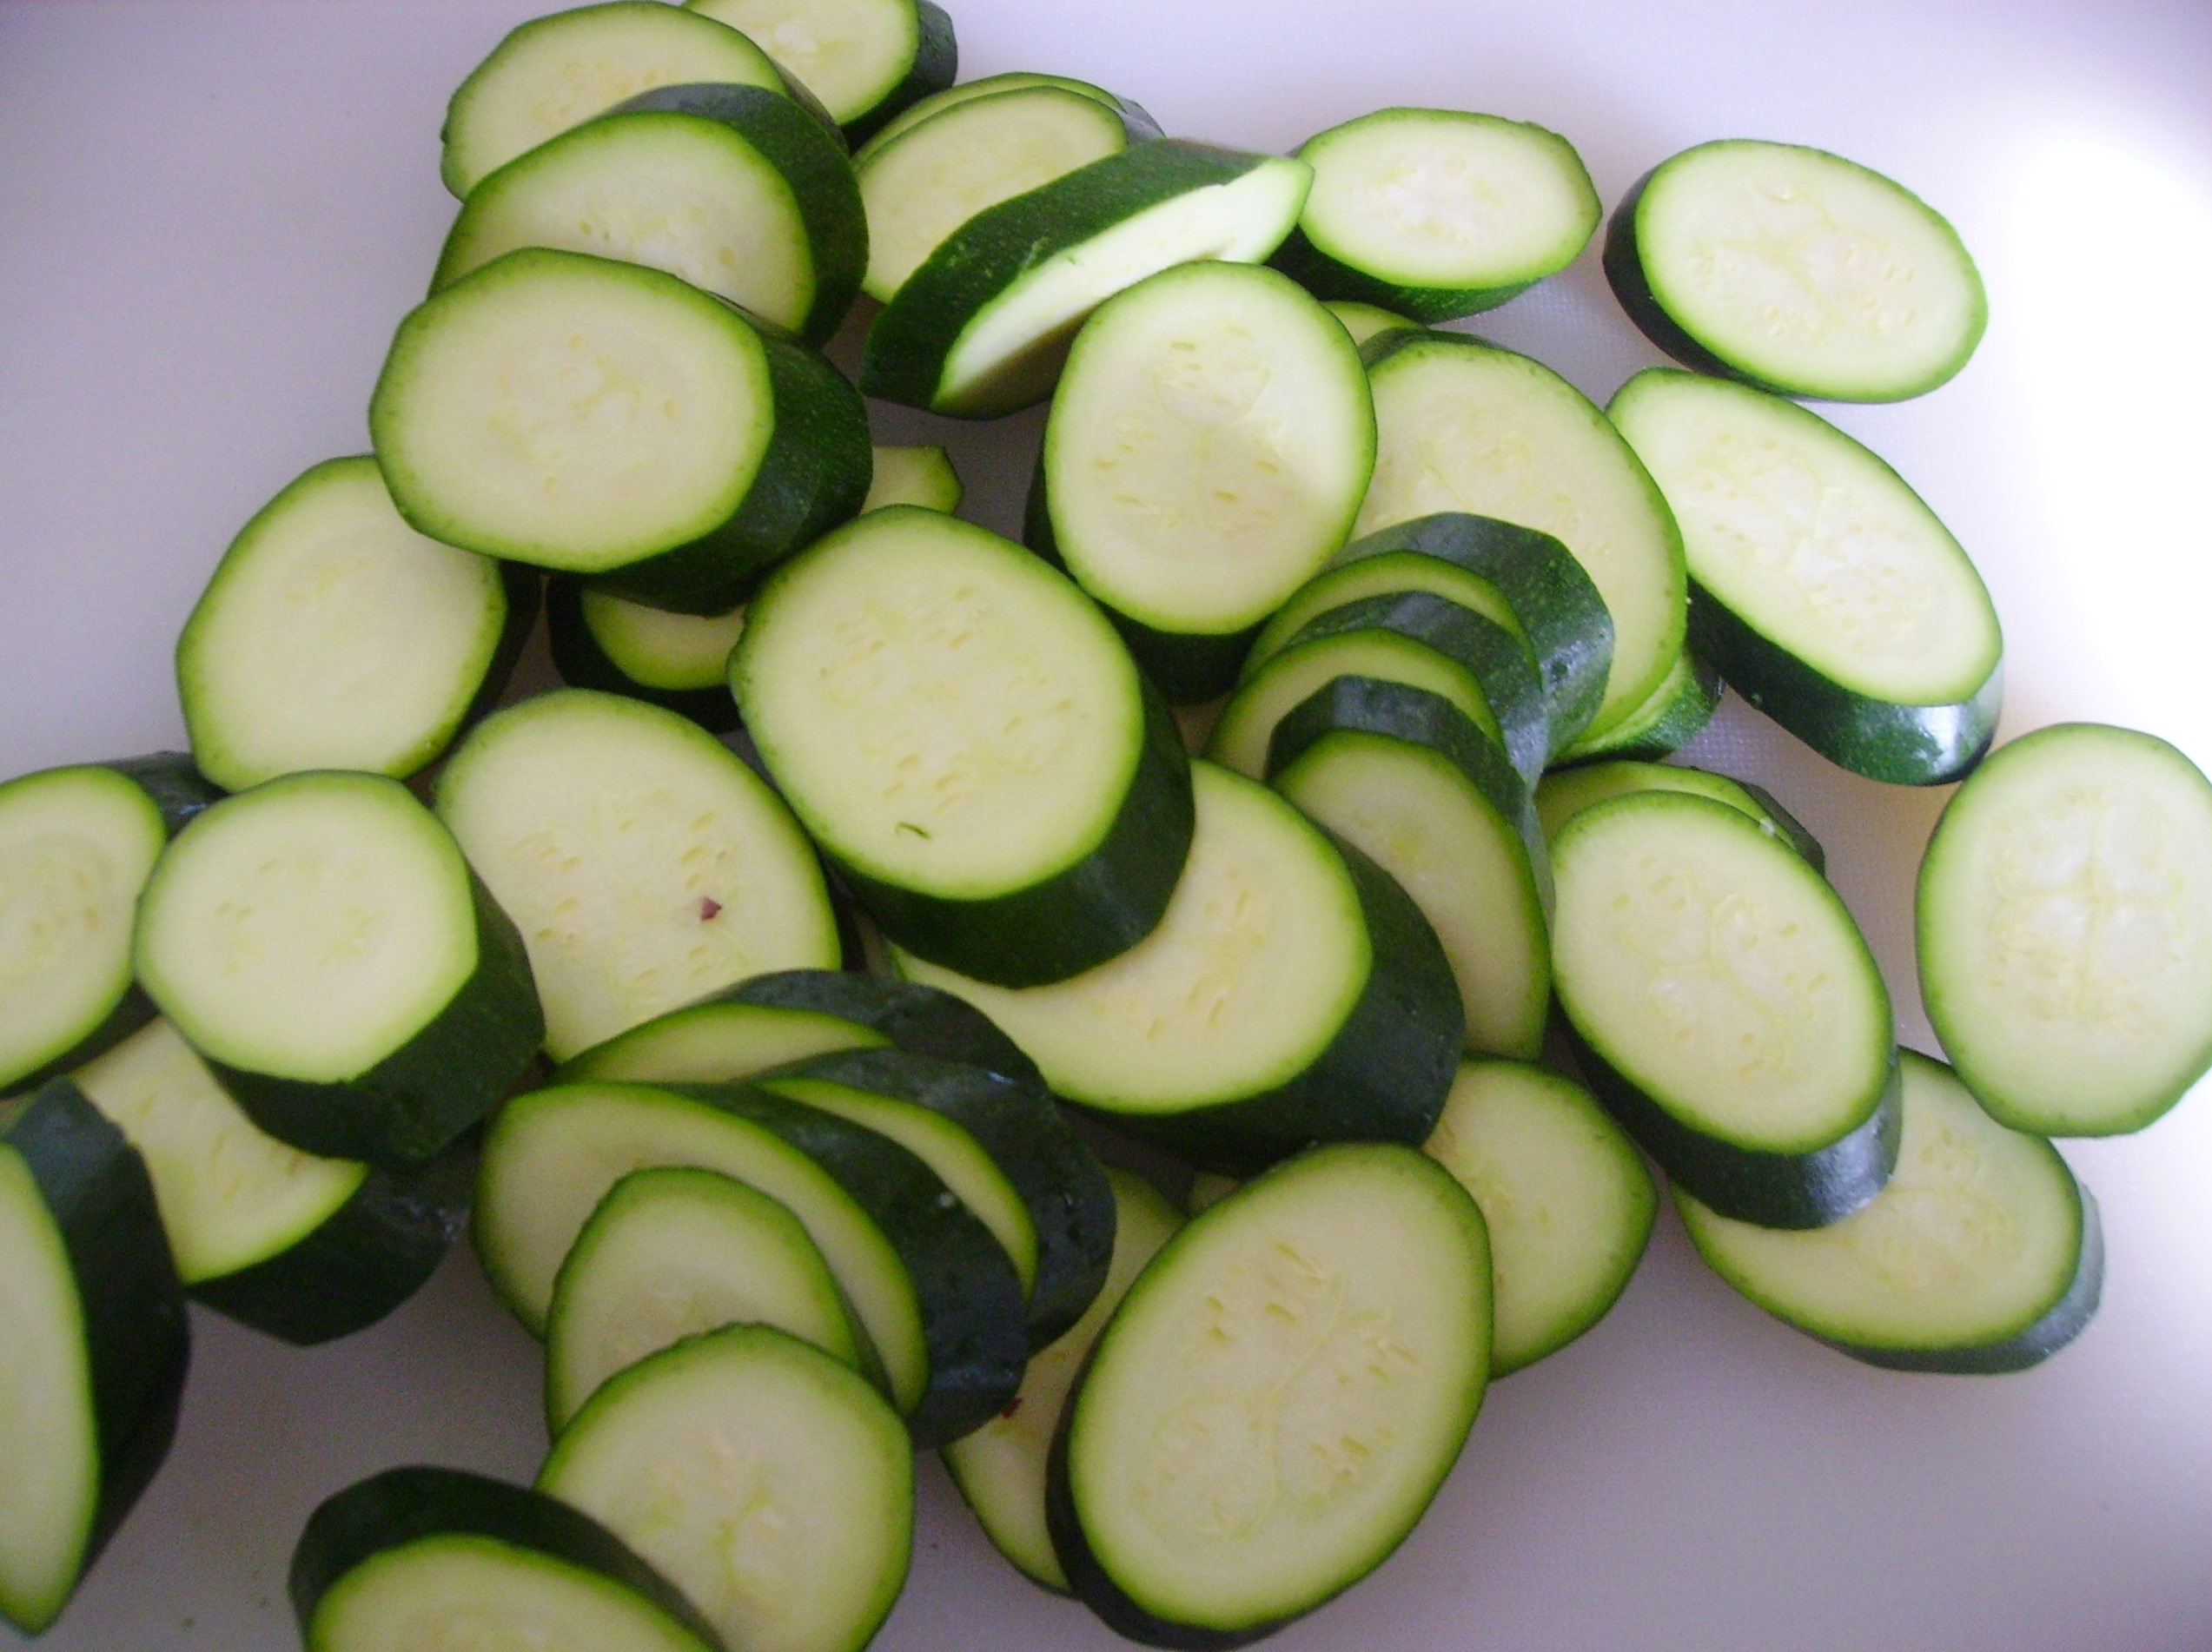
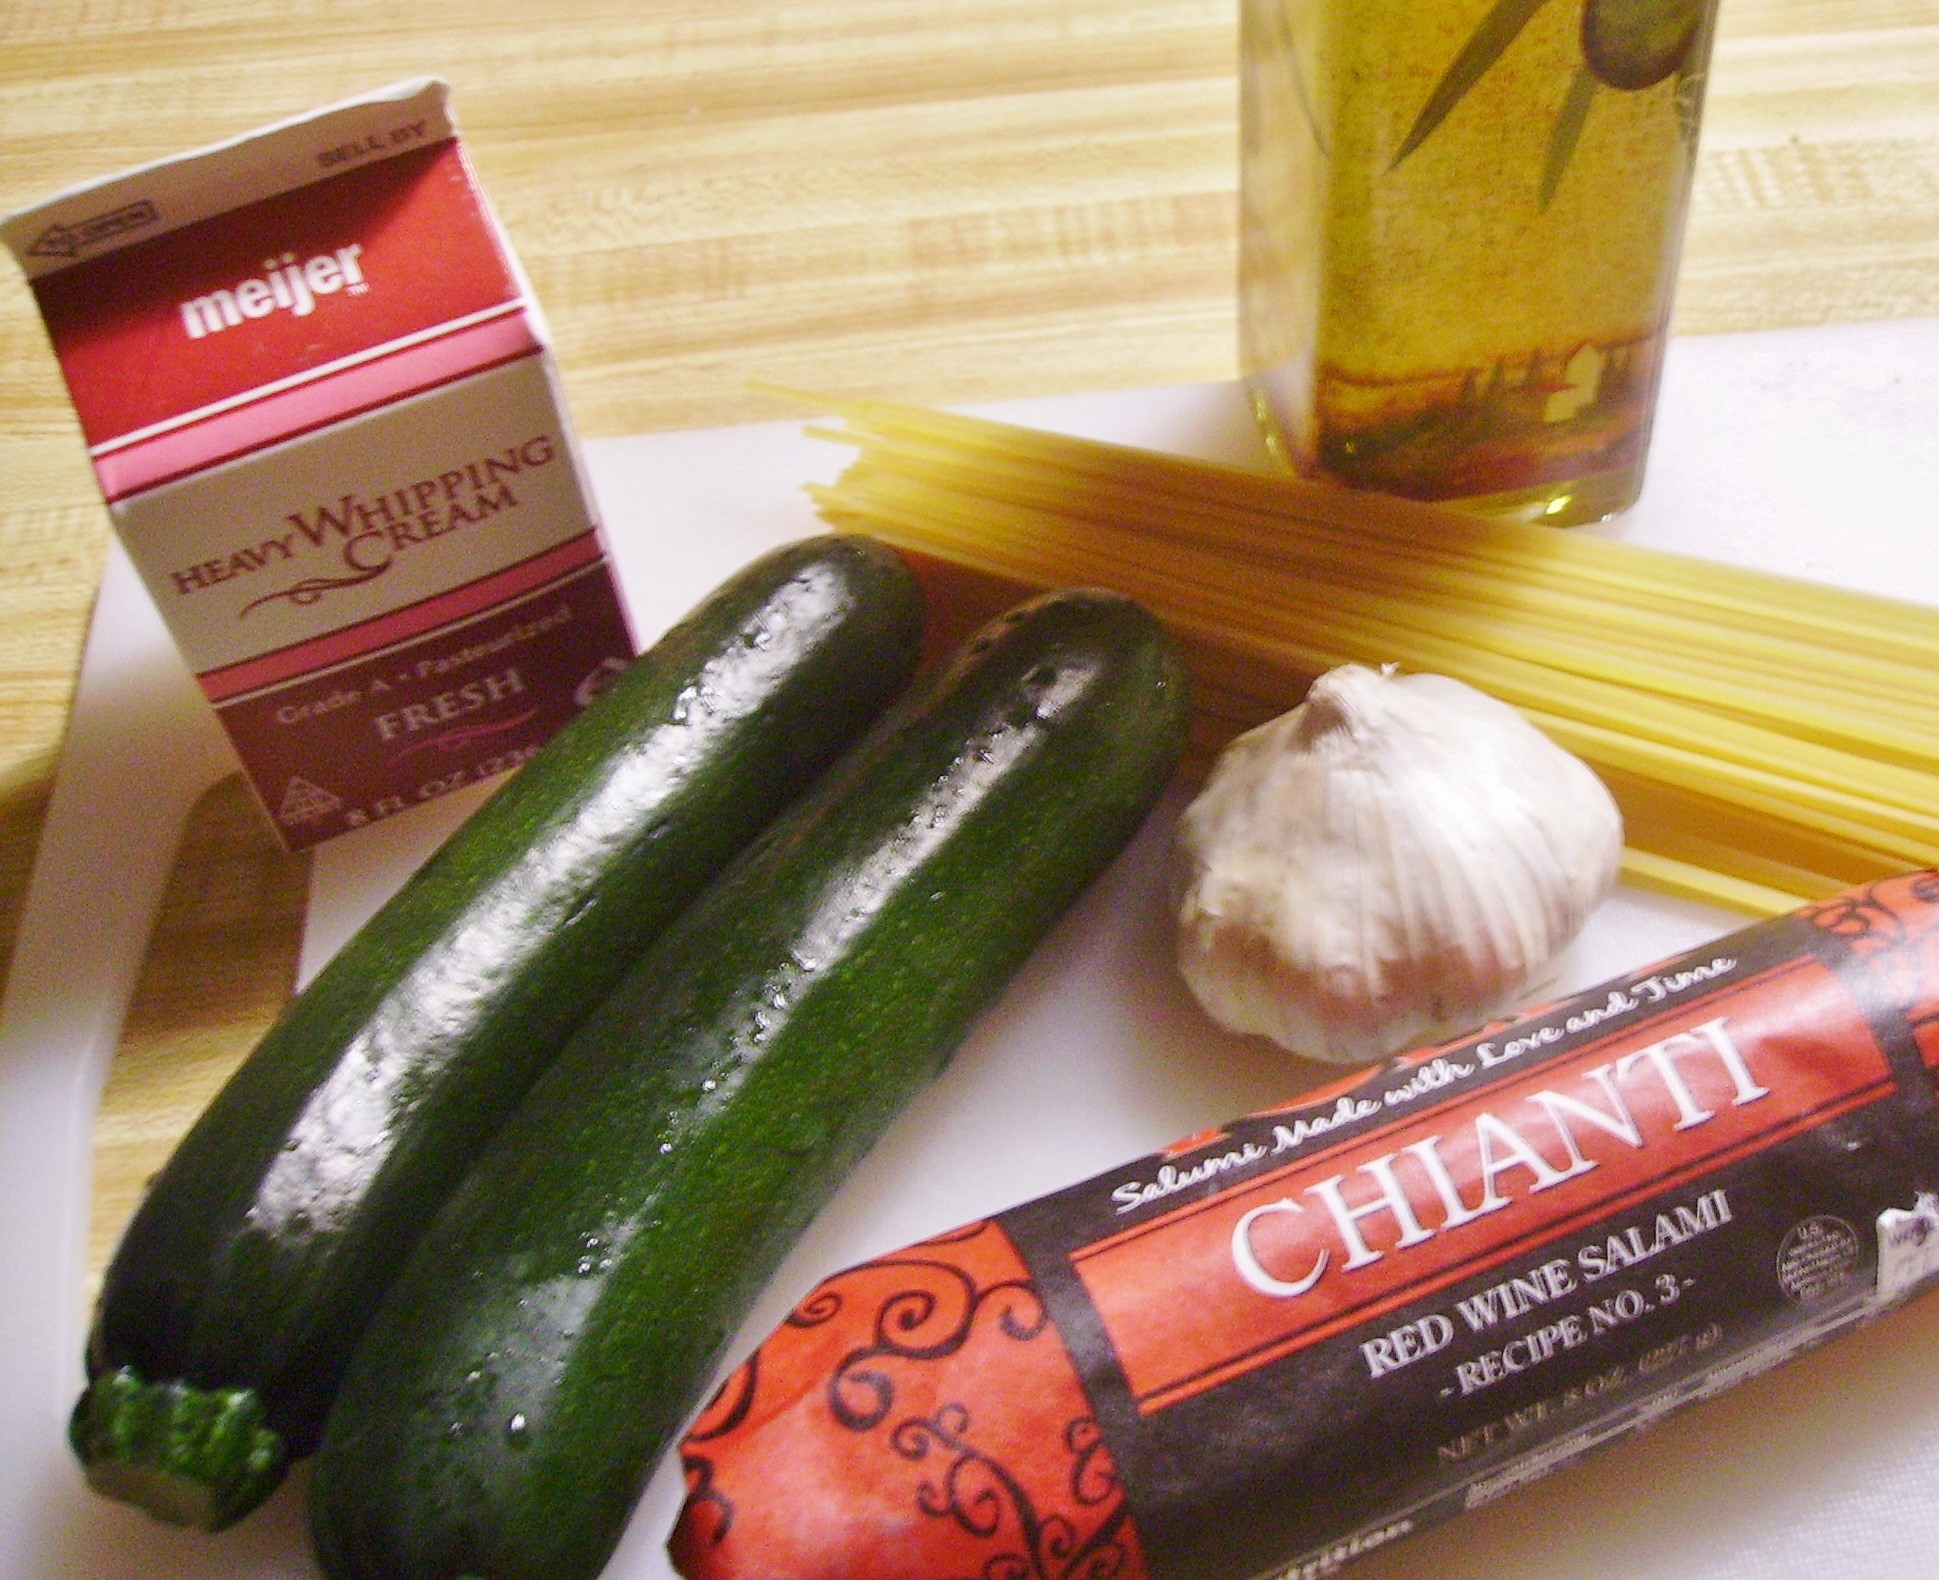
Lets start the party with Marinated Zucchini. Sliced zucchini is salt brined for an hour or two to remove some of the water so that more of the marinating liquid is absorbed. Red onions, garlic, and red pepper flakes, and lemon zest enhance the White Balsamic Vinegar and Olive Oil Dressing.

Marinated Zucchini
Print Recipe
Marinated Zucchini
Print Recipe
Ingredients
Servings:
Instructions
  1. Layer zucchini slices in a colander. Sprinkle each layer liberally with salt. Let sit for 1 to 2 hours to draw out some of the liquid. Rinse and pat dry. Put in a large non reactive bowl.
  2. Add the onion and garlic to the bowl and toss to combine. Mix the remaining ingredients together and pour over the vegetables. Toss to combine.
  3. Pack into a clean wide mouth jar or pour into a quart size zip top bag. Refrigerate at least overnight and up to three days. Serve as part of a relish tray, on a salad, or as a side dish.
Share this Recipe
Powered byWP Ultimate Recipe

DIGITAL CAMERA
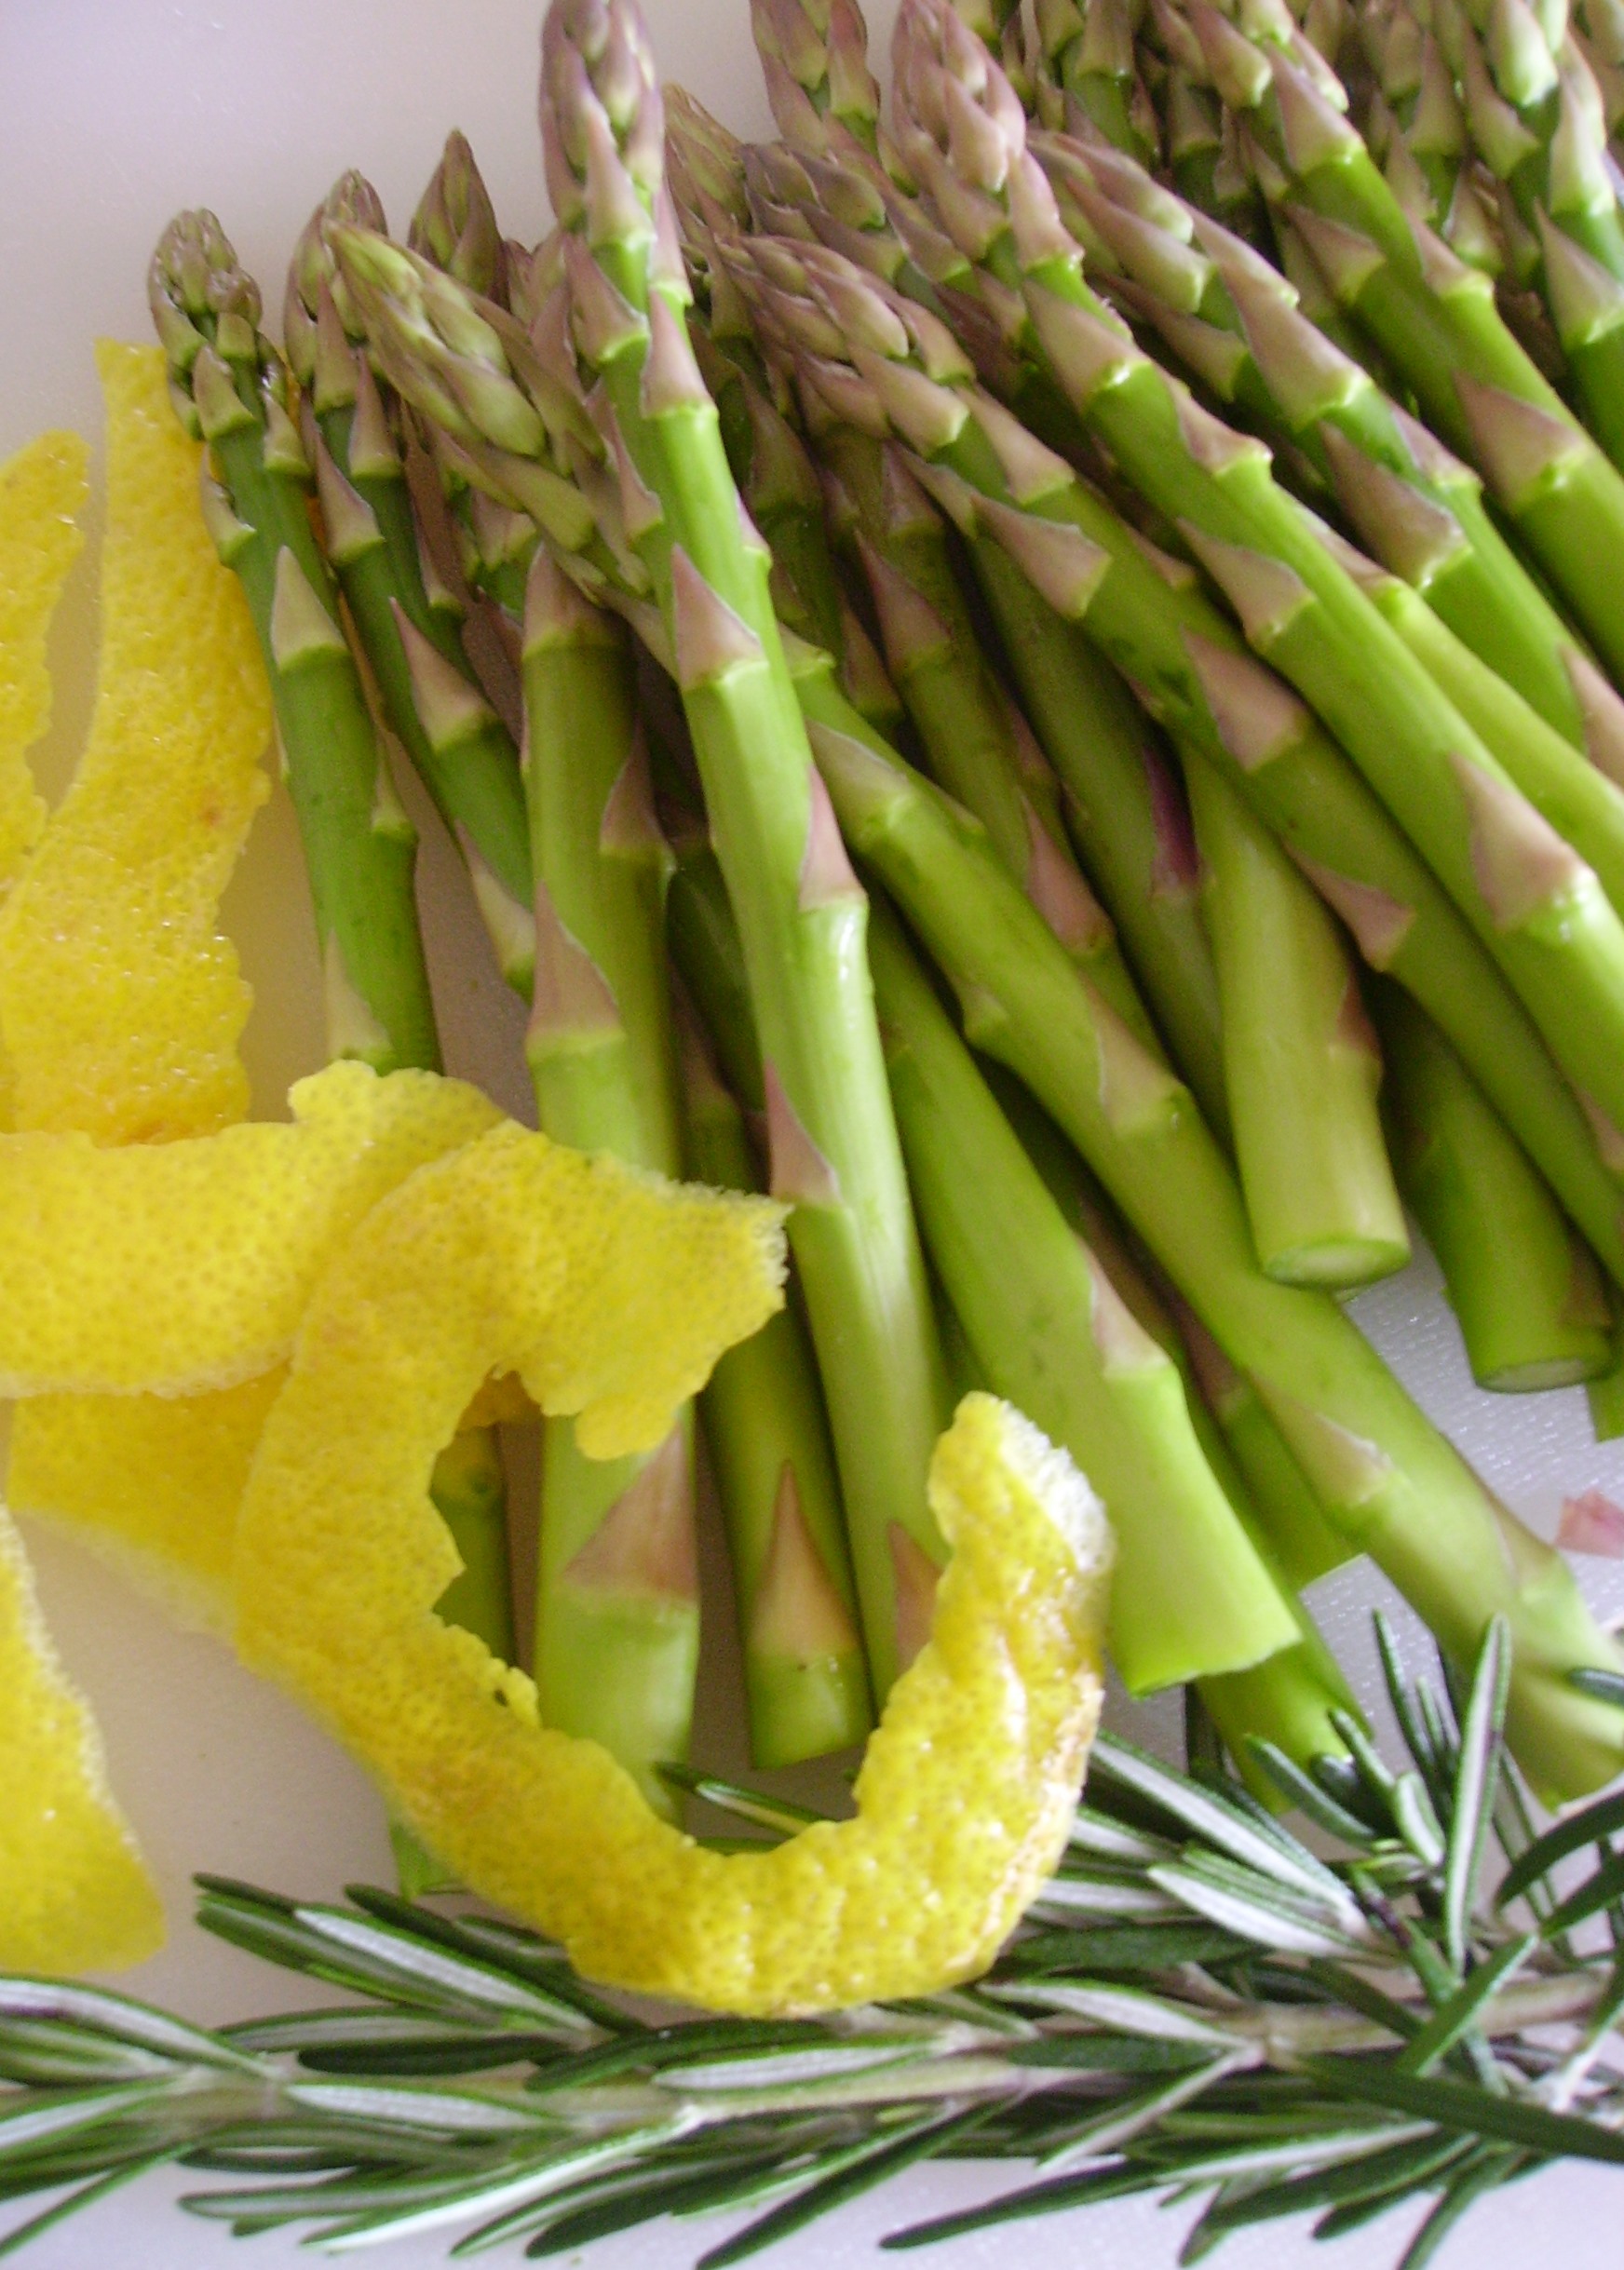
Asparagus is another outstanding marinating candidate. Well trimmed spears are blanched and shocked before being bathed in a lemon and dry vermouth vinegrette. Garlic, rosemary, lemon zest, and peppercorns round out the flavors.

Marinated Asparagus
Print Recipe
Marinated Asparagus
Print Recipe
Ingredients
Servings:
Instructions
  1. Bring a large pot of salted water to a boil. Add the asparagus and boil for two minutes. Remove from pan and immediately put into a bowl of ice water. Drain and allow to dry on papaer towels.
  2. Place the asparagus, lemon zest, rosemary, and peppercorns into a zip top bag.
  3. Mix the remaining ingredients together and pour over the ingredients in the bag. Seal tightly and turn several times to distribute the dressing.
  4. Refrigerate at least overnight and up to two days. Serve as part of a relish tray, in a salad or as a side dish.
Share this Recipe
Powered byWP Ultimate Recipe

DIGITAL CAMERA
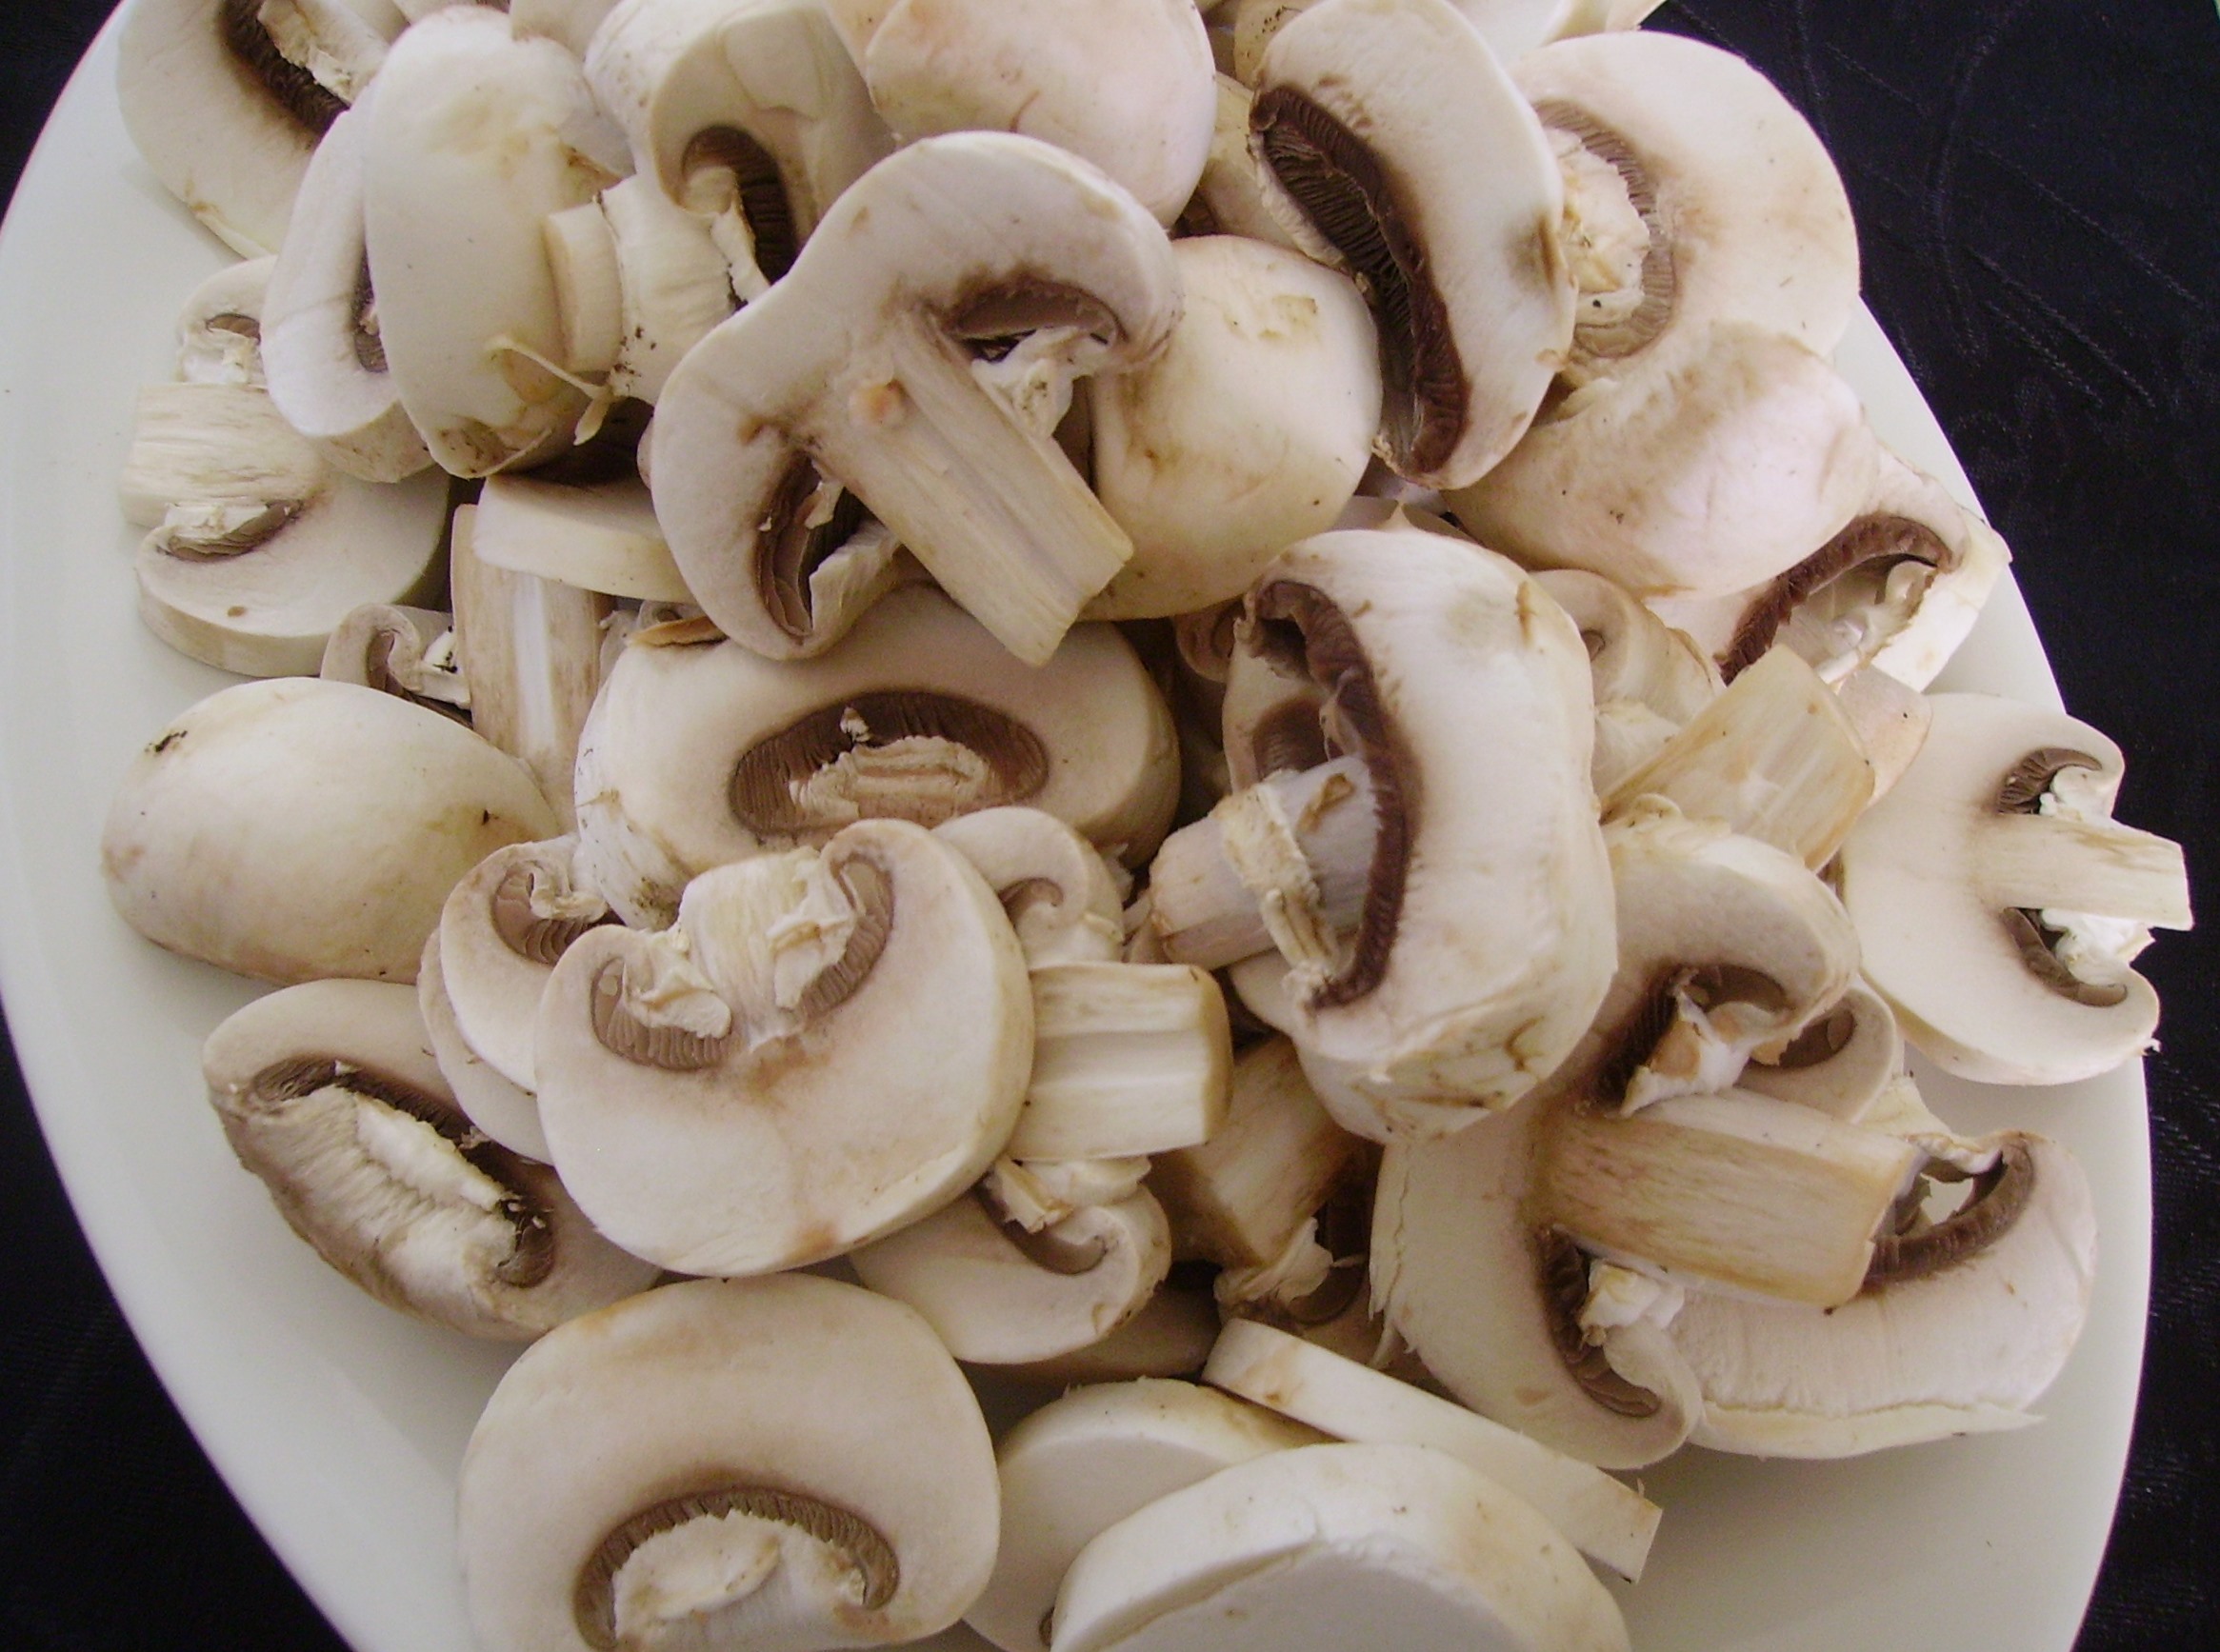
Mushrooms marinate beautifully. This works equally well with White Button or Crimini Mushrooms. I like Tarragon with mushrooms, but you could leave it out if you’re not a fan. I saute the onions and garlic first then add the other ingredients. Cooking the mushrooms until the liquid reduces slightly will insure the best flavor.

Marinated Mushrooms
Print Recipe
Marinated Mushrooms
Print Recipe
Ingredients
Servings:
Instructions
  1. Wipe the mushrooms clean with a damp cloth. Slice 1/4 inch thick. Set aside.
  2. Heat olive oil in a large skillet and add the onion and garlic. Saute until the onion is softened and the garlic is fragrant, 3-4 minutes.
  3. Add the vinegar, brown sugar, lemon pepper and tarragon. Simmer mixture for a few minutes. Add the mushrooms and continue to cook 7-10 minutes, stirring frequently. The liquid should reduce and thicken slightly.
  4. Put in a glass jar or zip top bag and refrigerate overnight or for up to 3 days. Serve as part of a relish tray, on a salad, or as a side dish.
Share this Recipe
Powered byWP Ultimate Recipe

DIGITAL CAMERA
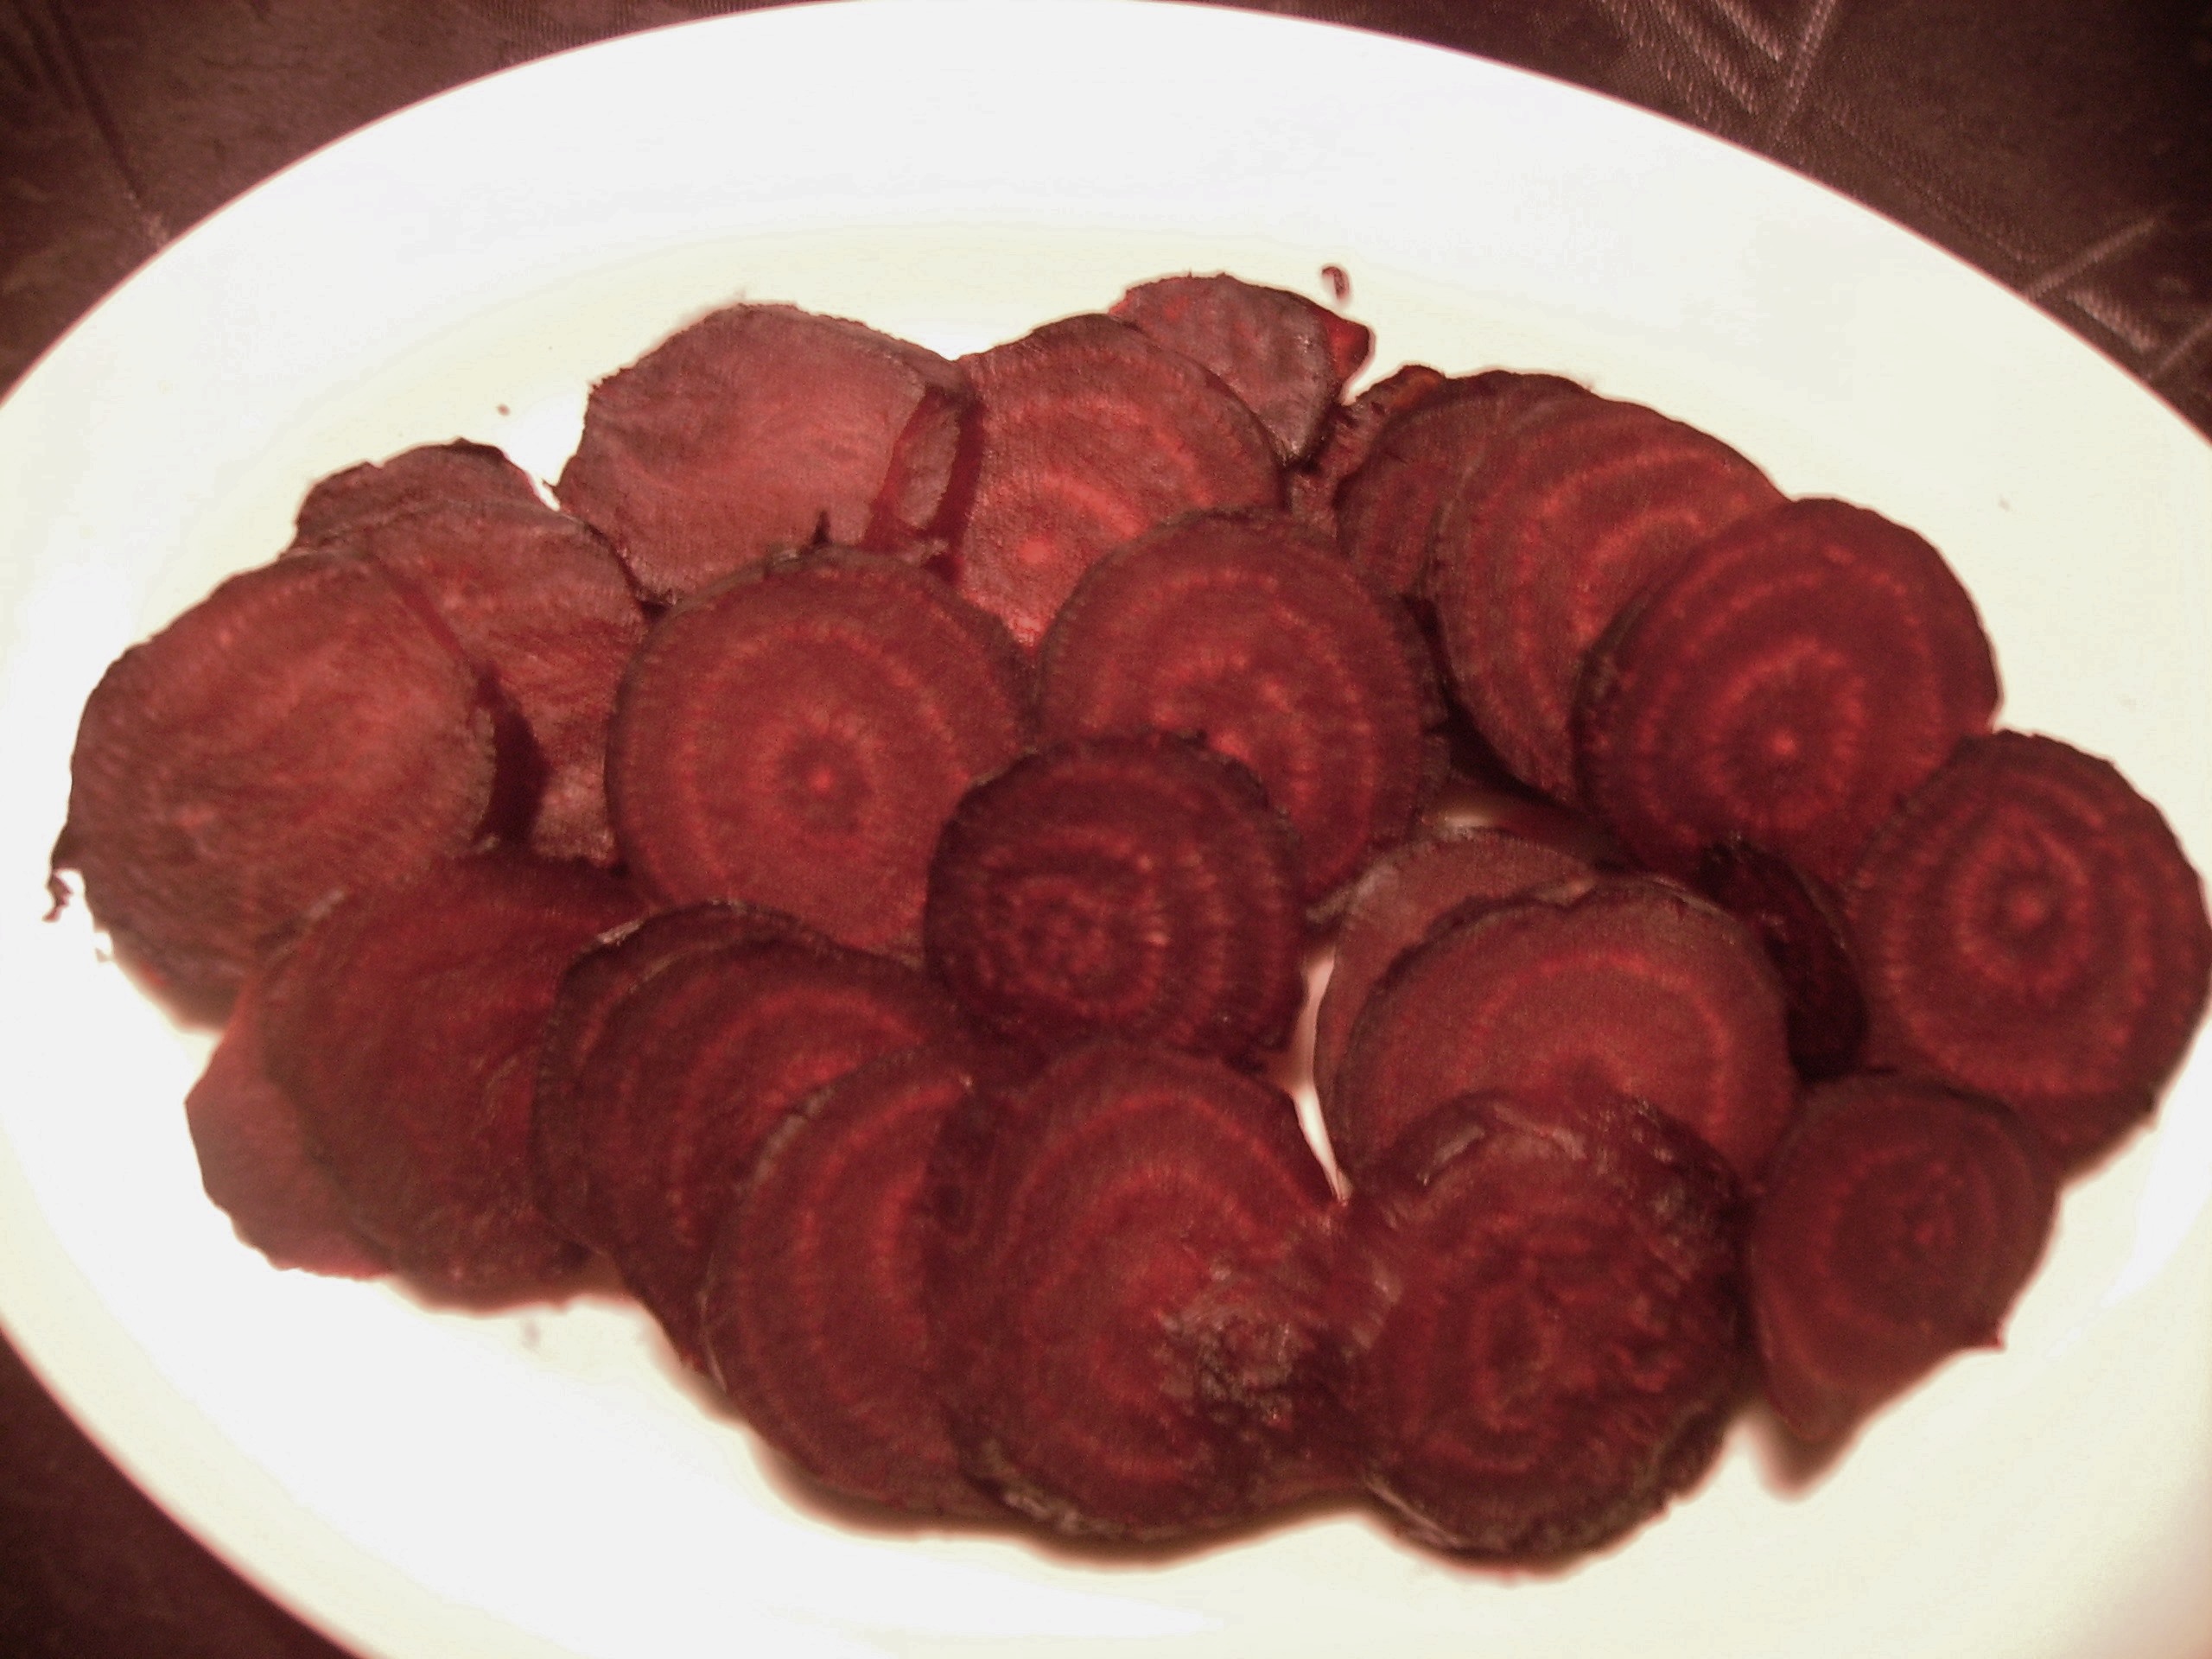
Last but not least are Mama D’s Pickled Beets. Unlike Aunt Nellie’s, these beets are roasted before being joined by a mixture of cider vinegar, cinnamon, cloves, coriander and mustard seed. Light brown sugar adds the necessary sweetness.

Mama D's Pickled Beets
Print Recipe
Mama D's Pickled Beets
Print Recipe
Ingredients
Servings:
Instructions
  1. Preheat oven to 400 degrees Wash the beets well and dry. Lay on a sheet of foil that has been lightly coated with non-stick spray. Roast in oven for 45 minutes to an hour. The beets should feel tender when pierced with a knife. Remove from oven and allow to cool enough to be handled.
  2. Peel the beets and slice 1/4 inch thick. Place in glass jar or zip top bag and set aside. You can prepare the liquid while the beets are roasting.
  3. Combine the remaining ingredients in a small saucepan. Bring to a boil over medium heat. Reduce heat and simmer for 5 minutes or so. Remove from heat and allow to steep for 30 minutes or so.
  4. Strain the liquid and pour it over the beets. Seal the jar or bag and marinate in refrigerator at least overnight and up to 3 days. Serve as part of a relish tray, in a salad, or as a side dish.
Share this Recipe
Powered byWP Ultimate Recipe

Think of including one or two of these recipes for your next party. You’ll get to play the homemade card while saving money by not using “store bought”. Relish trays may be dated, but they are a delicious expression of a kitchen of love. Mama D

Pulled Chicken, Cookbook Memories and Bacon Cornbread

In case anyone is keeping score Winter seems to be winning by a snow mound, a really big snow mound…at the end of my driveway. With so much time spent indoors, I find myself strolling down memory lane. Memories can make us more enlightened to what we’re doing in the present. I also have lots of time to surf the internet.

I found the Pulled Chicken recipe that I used for inspiration online. I get a lot of ideas from what I see there. I don’t think that I’m alone in relying on the internet. It’s easy, quick and full of possibilities. I bet you’ve gone there too, in search of the perfect recipe (maybe even on my website).

Every time I head down to the computer, I walk past a shelf filled with cookbooks. Occasionally I stop and think, I know there’s a recipe for what I’m looking for somewhere up there, but I’ve become such a creature of the quick fix, Google  search, that I head downstairs and scroll through far more recipes than is necessary.

I’ve come to realize that by seeking this “quick fix” I’m leaving an incredible resource literally sitting on the shelf. I’ve always loved looking through cook books. I have been known to read them cover to cover like a novel. What happened? The ease and incredible volume of what is available at the touch of a keystroke has made me lazy. If looking through family recipe boxes has given me a new voice, then perhaps reading a cookbook now and again could give it more resonance.Scan_Pic0026

Laziness sent me back to my cookbook library. I thought that corn bread would go well with the Pulled Chicken. I just needed a basic Corn Bread recipe and I honestly didn’t want to go downstairs again and scroll through hundreds of options. There on the shelf by the stairs were my  Doubleday Cook Books.DIGITAL CAMERA I found the recipe in about a minute and was pulling the ingredients out of the pantry in less than that. The recipe was very basic, (Flour, cornmeal, leavening, liquid, and fat). Left to my own resources,  I decided to make Cornbread with Bacon using Buttermilk for liquid  and Bacon Drippings for fat.Scan_Pic0029

Before the internet became my darling, I referred to the Doubleday Cookbook for many cooking questions. It’s been my reference of choice since my sister-in-law gave it to me in 1980. She swore by it, and knew I would love it, too. She was right. The fact that the binding is cracked and a few pages are falling out attests to how often I’ve turned to it.

It’s easy to use, filled with “how to” illustrations from boning a fish to rolling croissants . The recipes cover everything from brown stock and white sauce to how to prepare Squirrel. The two volumes weigh in at almost 1500 pages. Authored by Jean Anderson in 1975, it won numerous awards. She revised it in 1985 to incorporate the changing American palate and interest in nutrition. Sadly, both versions are out of print now, though there are copies available on Amazon anEBay.

Now, about that Pulled Chicken…the idea intrigued me. A lighter, healthier answer to Pulled Pork and another use for the boneless skinless chicken thighs that needed to come out of the freezer. When I make Pulled Pork, I use my Slow Cooker. The inspiration recipe used a Slow Cooker, so I decided to use one, too. DIGITAL CAMERA

It started as boneless skinless chicken thighs and a tomato based barbecue sauce, Onions and garlic had to be part of the entourage because Mama D puts onions and garlic in most everything.DIGITAL CAMERA

The Sauce included a varied cast of characters. Smoked Paprika led the parade and helped create the vivid red sauce. My husband has, for lack of a better word, a delicate palate, so my spice choices were on the mild side. I barely did more than say cayenne over the bowl. I think pumping up the heat and spice in this would be excellent, so if you think heat is neat, be my guest. I used a mustardy “Carolina” type barbecue sauce from Trader Joe’s, but you could use any BBQ sauce home or store made. Three Kings Spice Blend comes from Caboose Spice & Company . It’s sweet, spicy, smokey, and not too salty. 

DIGITAL CAMERAAs Slow Cooker recipes go, this one was ready in a relativelyDIGITAL CAMERA short time. It was ready in less than 5 hours. A couple of forks and a few minutes later it was a mound of tender, juicy, and fragrant shreds of chicken.

The chicken went back into the pot to let the sauce get acquainted with every surface. I had my Bacon Cornbread ready and because it tasted so delicious, I smothered a generous hunk of the bread with Pulled chicken, and to get back to this being a healthier alternative, I topped it with some Mustard Coleslaw.DIGITAL CAMERA


My ideas didn’t end there. I’ve included an extra mini recipe for Poutine. This is Canada’s gift to our cholesterol level. Usually french fries, brown gravy, and cheese curds my version includes Pulled Chicken and lots of toppings.

Mama D's Pulled Chicken
Print Recipe
Servings
6
Servings
6
Mama D's Pulled Chicken
Print Recipe
Servings
6
Servings
6
Ingredients
Servings:
Instructions
  1. Trim chicken thighs of as much visible fat as possible. Layer in a 5 - 6 quart Slow Cooker coated lightly with non-stick cooking spray, placing the onions and garlic in between the layers.
  2. Mix the remaining ingredients together in a small bowl until well combined. Pour over the chicken, onion, and garlic. Move things around so that the chicken is evenly covered with the sauce.
  3. Cook on the low heat setting for 4 - 5 hours. The chicken should be very tender and just starting to fall apart. Remove the chicken to a heat resistant cutting board. Allow to cool for 10 minutes.
  4. Using two forks, shred the chicken into uniform pieces. Return the chicken and any accumulated juice to the slow cooker. Raise heat to high and tilt the cover slightly. Cook an additional 20 - 30 minutes,until the sauce has thicken slightly and everything is hot.
  5. Serve the Pulled Chicken in sandwiches, tacos, or quesadillas. It's also great sitting atop rice, pasta or corn bread. You can even eat it all by itself.
  6. Mama D's Poutine: Top oven baked french fries with Pulled Chicken. Garnish with any or all of the following: Shredded cheddar cheese, blue cheese crumbles, bacon bits, sliced green onions, ranch dressing.
Share this Recipe
Powered byWP Ultimate Recipe

The pulled chicken is a keeper. I’m grateful that the I found the inspiration recipe online and that I can share my inspiration with you. I’m even happier that I have become re-acquainted with my cook book shelf. Winter is not going anywhere any time soon. I think I may curl up with a glass of wine and a good (cook) book.

Love, Mama D

Memories of Good Cakes… and a Memorable Marble Poundcake

Scan_Pic0018When it comes to baking the possible Undisputed Queen of the Oven is Cake. Cookies and breads, muffins and pies, all are wonderful in their own right, but cake is something bigger. Baking a cake is kitchen chemistry at it’s finest. Cakes have been around since man discovered flour, Check out this brief but entertaining  History of Cake for more information.

When I was growing up cake was always the star of the dessert table at special occasions. Birthday cakes were always homemade, and often cakes were made for no special reason at all. Cake was the go to dessert in the fifties and I’m sure long before I was licking beaters and sneaking a finger full of frosting, cake was every wife and mother’s testament to good baking.Scan_Pic0020

My mother had her go to cakes; the ones that she could probably make in her sleep but that always earned her high praise. The two I remember the most are Carrot Cake and Banana Cake. Her Carrot Cake was a straight forward take on the popular recipe. It was a one bowl wonder that included walnuts, carrots of course, and cinnamon. No raisins or pineapple. not even cream cheese frosting. This was the essence of carrot cake resting atop a  fluted milk-glass cake stand. Baked in a tube pan, it sliced into moist and  tender wedges.Scan_Pic0022

Her Banana Cake was also a study in less is more, so much more. It was a “2 Egg Sour Milk Cake” with the special addition of ripe mashed bananas, baked in a 13 X 9 inch pan that featured her never duplicated Buttercream Frosting. I say it’s never been duplicated because I’ve never been able to make it properly, even with the recipe right in front of me. It turned out so abysmally that I stopped trying about twenty years ago. I have however, made a promise to myself that I will master this “Dough Frosting” and when I do, I’ll share it right here.

Scan_Pic0021

Neither of these cakes is appearing in this post. Due to the copious amount of “family recipes” that I’ve amassed over the years and filed away in no apparent order. I just found them this morning. Speaking of family recipes, I found this Little Book of Good Cakes  in my husband’s Grandmother’s wooden recipe box. It was a free booklet given away with IGA cake flour. Unfortunately, it isn’t dated and other than someone who has one to sell, I didn’t find any more information on it. My guess is it dates from 1950 or earlier. It covers almost everything  you’d find in a modern (high priced) cake cookbook in fourteen pages, with some darn good recipes to boot.

Scan_Pic0023

There is a cake recipe in this post. It’s been my “go to” cake for over thirty years. It is partly homemade since it uses Cake Mix and Instant Pudding. Yes it’s that workhorse home-baked treat from the seventies, The Pudding Pound Cake (aka Bundt Cake). I think Duncan Hines may have created the recipe. If not, they were responsible for furthering its popularity. It’s an easy sell. Simple to make, fancy looking, and possessing endless variations, it is comfortable on a party table or on a chipped cake plate as Wednesday night dessert.

It has traditionally been made in a bundt pan. The fluted tube pan that became the darling of baking in the sixties. Traditionally I’ve made this cake in a bundt pan. Sadly, my bundt pan in all its Avocado Green glory went to the Teflon graveyard several months ago and I haven’t replaced it yet. This Marble Pound Cake had to be baked in loaf pans. Ironically the cake mix package recipe called for two loaf pans…Could it be  a sign of the times?

The ingredients are simple. Cake mix, pudding mix, eggs, water and oil.DIGITAL CAMERA

 The ingredients are beaten until they become light and fluffy. This only takes a few minutes, but more than the 2 minutes that the recipe suggests.

DIGITAL CAMERAOne cup of the batter is removed   and combined with the chocolate packet in a small bowl.  DIGITAL CAMERA

The batter is divided between the two prepared loaf pans and swirled to create the marble effect. Then it’s off to the oven to bake for about 45 minutes.DIGITAL CAMERAOnce baked and cooled they are ready to glaze. Taking a page from my mother’s minimalist tendencies, I chose to leave them “au natural”. This cake is however, wonderful with a chocolate glaze that sensuously drips down the sides of the cake and impresses one and all when it is in the classic bundt shape.DIGITAL CAMERA


This recipe is fancy enough for company and easy and inexpensive enough for no occasion in particular. It is also open to infinite variations by changing the cake mix or the pudding mix or if you feeling exceptionally randy, adding nuts or chips or …

Marble Pound Cake
Print Recipe
A classic recipe for "bundt cake". Easy to make and adapt for limitless variations. oh, and it's really tasty.
Servings
12 Servings
Servings
12 Servings
Marble Pound Cake
Print Recipe
A classic recipe for "bundt cake". Easy to make and adapt for limitless variations. oh, and it's really tasty.
Servings
12 Servings
Servings
12 Servings
Ingredients
Servings: Servings
Instructions
  1. Pre-heat oven to 350 degrees. Combine the mixes, oil, water, and eggs in a large mixing bowl. Reserve the chocolate cake mix packet for later.
  2. Using a hand mixer, combine the ingredients at low speed until just blended.
  3. With mixer on medium high, blend for 2 - 3 minutes until the mixture is light and fluffy and all the lumps are gone.
  4. Remove one cup of the batter and put in a small bowl. Add the contents of the chocolate packet and stir to completely incorporate.
  5. Prepare pan(s). Spray evenly with cooking spray. Sprinkle approximately 1 tablespoon of flour into each pan and tilt and shake to lightly cover the bottom and sides. Tap out any excess.
  6. Divide the vanilla batter between the two pans. If using the bundt pan pour all of the vanilla batter into the pan and shake and tap to distribute evenly.
  7. Spoon the chocolate batter on top of the vanilla batter. Divide the batter if using two loaf pans or use all of it in the bundt pan.
  8. Using a butter knife, swirl the two batters together, Using vertical and horizontal movements and reaching to the bottom of the pan(s).
  9. Bake for 45 - 50 minutes for loaf pans or 50- 60 minutes for bundt pan. Cake is done when a toothpick inserted in the center comes out clean.
  10. Remove from oven and cool in pans on wire rack for 5 minutes. Remove from pans and cool completed on rack.
Share this Recipe
Powered byWP Ultimate Recipe

 Happy Baking, Mama D

Summer Memories in Winter’s Chill and Balsamic Marinated Chicken

DIGITAL CAMERAWinter…Mother Nature’s sick joke. As most Midwesterners and from what ! hear on the news, 75 – 80 percent of the rest of the country know, Mother Nature has some kind of crazy bug up her bustle. Insane low temperatures, more snow than anyone knows what to do with, and winds that blow that snow around like a demonic snow globe, creating wind chill factors in the negative 30 degree range (Is that a real number?)

Do you remember Summer? You know that time of year when it took 20 seconds to get ready to go outside; basically shorts, a tee-shirt and flip-flops. Once outside you were treated to flowers in brilliant Technicolor bloom, green grass soft and fragrant and sunshine that actually meant something. Summer is more than 125  days away. Winter seems to have hunkered down and shows no signs of going anywhere.DIGITAL CAMERA

I for one am settling in with warm weather memories, especially the Herbs of Summer. I remember those days when I would stroll out on the deck and snip glorious handfuls of basil, chives, rosemary and thyme. Their heady aroma released as they were plucked from a plants that seemed to have an endless supply.DIGITAL CAMERA

The basil and chives are gone now. They never make it past Indian Summer. The thyme and the rosemary are made of hardier stuff. Last year they held on to a bit of green all winter long and showed up in lots of dishes. This year winter hasn’t been as kind to these plants (or anything else for that matter). but I’ve kept them in their pots because they often come back in the Spring. Today I wanted to use some of these herbs in the Balsamic Marinade for my Baked Chicken.

I pulled on my boots, put on my coat, grabbed some gloves and a hat (it took 5 minutes at least) and ventured out to the deck. My rosemary and thyme were dry and brown, but when I gently brushed them there was still the essence of their glorious aroma as the leaves fell off. So I snipped some sprigs, gathered up the fallen leaves and brought them in the house. Washed and dried they gave off a subtle memory of their Summer glory that was still more intense than their dried brothers. They became a part of the marinade.DIGITAL CAMERA

I used a Fig and Orange Balsamic in this recipe but I think that any fruit balsamic would work well. The other main ingredients beside my thyme and rosemary were garlic, olive oil, and McCormick Italian Herb Grinder.DIGITAL CAMERA A few words about this product. It is a blend of many traditional Italian herbs including rosemary, red pepper flakes, peppercorns, garlic, onion, parsley, and sea salt. The salt by the way is subtle. The grinder can be adjusted for fine, coarse or in between dispensing. It packs more punch than regular Italian Seasoning, adding a nice touch to everything from eggs to pasta sauce.DIGITAL CAMERA

This is a Baked Chicken recipe, but when Summer is here or when you feel like braving the elements and firing up the grill, it would be delicious cooked outside.  The chicken can marinate for a few hours or even overnight. I divided the marinade in half. One part for the chicken and the other half for the glaze that would enhance the finished product. DIGITAL CAMERA

It baked at 375 degrees for about 25 minutes. The glaze was the reserved marinade, carmelized shallots, some chicken stock, and a touch of honey. Served with Roasted Fingerling Potatoes and Green Beans with Bacon and Onion, it was a wonderful dinner that I got to share with my husband for a change (gotta love a snow day).

Balsamic Baked Chicken
Print Recipe
Quick and easy recipe for chicken that can be cooked in the oven or on the grill
Servings
2
Servings
2
Balsamic Baked Chicken
Print Recipe
Quick and easy recipe for chicken that can be cooked in the oven or on the grill
Servings
2
Servings
2
Ingredients
Servings:
Instructions
  1. Mix the vinegar, one tablespoon of olive oil, garlic, Italian herb blend, and dried herbs in a small bowl. Put the chicken breasts in a zip top bag and add half of the marinade. Seal the bag and refrigerate for 4 hours or overnight. Reserve the rest of the marinade for the glaze.
  2. When you are ready to cook the chicken. Heat the oven to 375 degrees. Place the breasts in a cooking sprayed shallow pan. Bake until cooked through 25 - 30 miutes.
  3. If you are grilling the chicken. Heat the grill and spray lightly with cooking spray. Add the chicken and grill over medium heat turning once until cooked through 20- 25 minutes.
  4. While the chicken is cooking, prepare the glaze. Heat the remaining olive oil in a small pan. Add the shallots and cook until golden brown, 10 minutes or so. Add the reserved marinade, chicken stock and honey. Heat to boiling. Reduce heat to medium and simmer until mixture is thick and reduced by about 1/3.
  5. Transfer the cooked chicken to the plates and drizzle with some of the glaze. Extra glaze can go in a bowl to be passed at the table.
Share this Recipe
Powered byWP Ultimate Recipe


Memories of the Wine Country and a Quick Pasta Dish

Note: This is a post from 9 years ago. I brought it up because I made the recipe this week and as it is almost Mothers Day, this dish reminds me of my sons. As the pictures show they were young, They are grown up now with homes and sons of their own ( about the ages they were in these pictures). When I made this I felt that I had to share it with them, photographically speaking. So as any good mother would I sent them a picture. They remembered it all, the trips, the good times, and the dish. A perfect Mother’s Day gift, in my opinion.

Another Note: I must give credit for this recipe to one of my favorite cookbooks, The Frugal Gourmet by Jeff Smith. His recipes featured on the television show of the same name were always tasty, easy, and yes, frugal.

Finally: Happy Mother’s Day to all the women who proudly share the title and job description of Mother. Hope you enjoy this post and your special day.

We were fortunate to live in Northern California for almost 20 years. We took advantage of all the things that the area offered, Trips into San Francisco, camping in the Redwoods, exploring tide pools and of course the Wine Country. All of this, and there was no snow to shovel…Why we came back to the Midwest is complicated. Suffice to say we had our reasons and we have not regretted it.

My sons were born and raised in California. We had no family around so our adventures were always immediate family affairs and that included trips to the Wine Country. Scan_Pic0013Sonoma County was about an hour and a half away. It was a great day trip destination. Back in the 80’s Sonoma was pretty rural. There were a few big wineries and lots of small ones. The small wineries were more like family run farms with the crop being grapes. That actually makes them vineyards, and Sonoma still has some of the best.Scan_Pic0017

Every few months we would take a day trip up to Wine Country. We always did this on the cheap. Back then tastings were free and a bottle of wine was under $10.00 (if we splurged and bought one).  We would visit 3 or 4 wineries and have a picnic lunch overlooking the vineyards.  Lunch was often salami, cheese and crackers; some fruit and cookies for dessert (parent and child friendly and easy to carry in a cooler).

Our sons always found something to do on these trips. They were very adaptable and quickly learned to make their own adventures. Sometimes we even joined in their fun. The time we rented a canoe and paddled the Russian River was memorable for all of usScan_Pic0012

Left to their own devices they always seemed to find something to do. Being treated toScan_Pic0011 some fresh grape juice, skipping stones, playing with the wine maker’s children or playing with the requisite “Vineyard Dog” that seemed to hold court at every winery. Looking back, they mostly remember the adventures and not the waiting for Mom and Dad to finish their wine. At least that’s the way I prefer to remember it; they may have a slightly different take.

The trip home was quiet. The boys would sleep and I would most likely doze off, Jeff, ever the good husband and father got us back across the bridge in one piece (He also took these amazing pictures of the Wine Country). Once home everyone was hungry and getting supper on the table was job number one. That’s how Salami and Zucchini Pasta came to be. It was quick, hearty and everyone liked it. The salami was left over from lunch and the zucchini was usually in the fridge. Pasta, olive oil and garlic…I’m Italian, of course it was in the house.

The most recent time that I made this dish we had been out running “errands” that included picking up our wine at Cooper’s Hawk Winery, so the wine tasting component was there. I used salami that I received in a gift basket from my son. It was made with Chianti so it seemed to fit right in with my the wine tasting memories. Still being Italian, the rest of the ingredients were, once again, already in the house.

DIGITAL CAMERA

The salami and zucchini get cut into match sticks, the garlic gets minced and it all goes into the pan with the olive oil.DIGITAL CAMERA

While the pasta is cooking the cream gets added to the pan, simmering to velvety thickness. DIGITAL CAMERAThis coats the pasta, salami and veggies, resulting in a rich and tasty supper. A little freshly ground pepper and some Romano cheese are all that it needs. We may be far from the Wine Country, but this pasta dish always brings back memories. It also is still a favorite and fast way to create a delicious ending to any busy day. 


Linguine with Salami and Zucchini
Print Recipe
A quick and easy pasta dish that you can whip up after a day in the (Wine) country or a long day of work.
Servings
4
Servings
4
Linguine with Salami and Zucchini
Print Recipe
A quick and easy pasta dish that you can whip up after a day in the (Wine) country or a long day of work.
Servings
4
Servings
4
Ingredients
Servings:
Instructions
  1. Cook linguine in salted boiling water until Al Dente. While the pasta is cooking, heat a large frying pan and add the salami, zucchini, and garlic. Cook, stirring frequently until the zucchini is soft and the salami is slightly frizzled. 7 minutes or so
  2. Add the cream and capers and bring to a hard simmer, stirring frequently. This will prevent scorching. Continue to simmer and stir until slightly reduced. 5 - 8 minutes.
  3. Reserve 1-2 ladles of the pasta water then drain the pasta. Add the drained pasta to the fry pan. Toss to combine the pasta and sauce. Cook for about 3 minutes until the sauce comes together. Add in some of the reserved pasta water if the sauce seems tight.
  4. Add pepper to taste and serve topped with the grated cheese.
Share this Recipe
Powered byWP Ultimate Recipe

The past holds so much for us. It got us to where we are now and in some small way it colors where we will go next. Reflecting on the memories leads to rediscovering good things, like pictures of happy times and pasta that still tastes like love. Mama D