Memories of Farmer’s Markets and Grilled Vegetables

DIGITAL CAMERAHere in the Midwest, early Spring is a time for taking special joy in a crocus or daffodil peeking out from the slowly thawing earth. It’s a time for thinking about what flowers, herbs and vegetables will grace the garden. Farmer’s Markets haven’t started yet since the local farmers would be hard pressed to have anything to sell. Even the grocery store has limited choices. Fruit from Chile, vegetables from Mexico and the end of hard shell squash leave little to stir up inspiration. Only asparagus and artichokes hint that Spring is coming.San Francisco 2014 015

Other parts of the country experience Spring differently. Take Northern California for example. There are always flowers blooming. Iris, poppies, jasmine and roses grace front and back yards. Walking around the neighborhoods, you smell the subtle fragrance of the sweet greenness that is Bay Area Spring.

Farmer’s Markets are always going on. The moderate climate (yes, I chose to leave) allows markets to occur year around. While they have a more limited selection (for them) at this time of year, the choices were mind-boggling to my Midwestern sensibilities. 

Rainbow chard that really looked the part. DIGITAL CAMERA
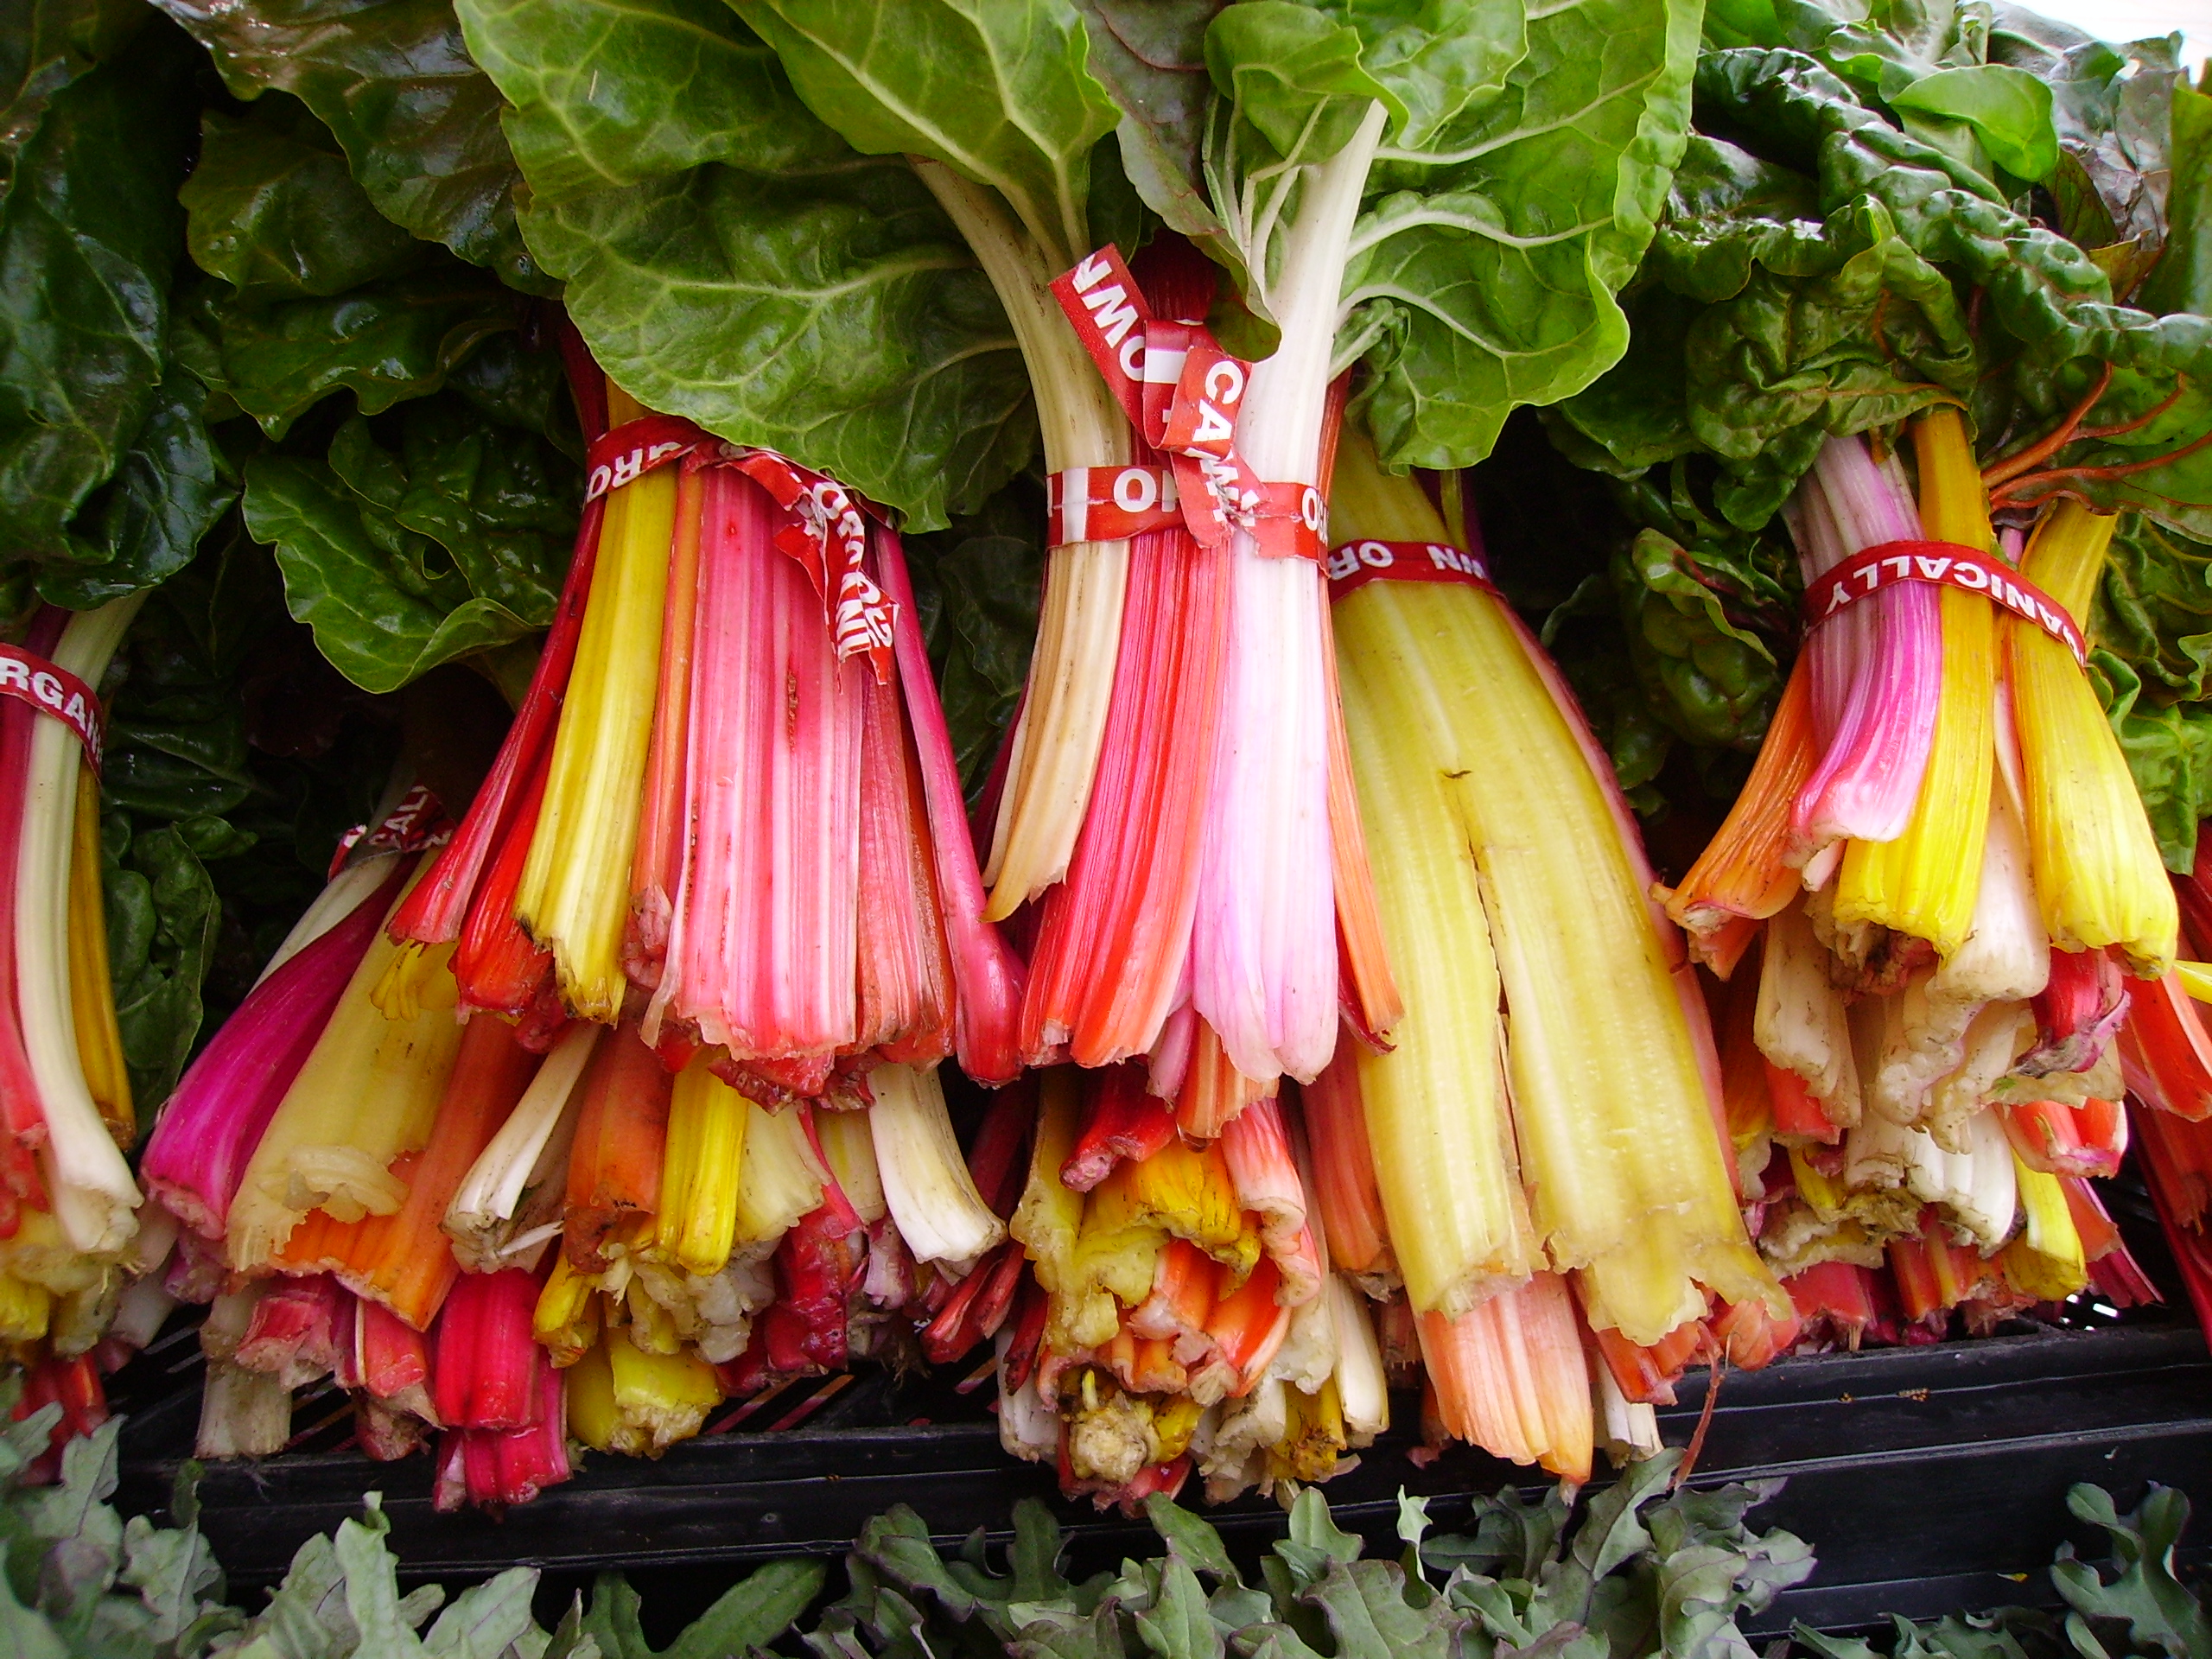
Strawberries that were plump and red and full of flavor. strawberries
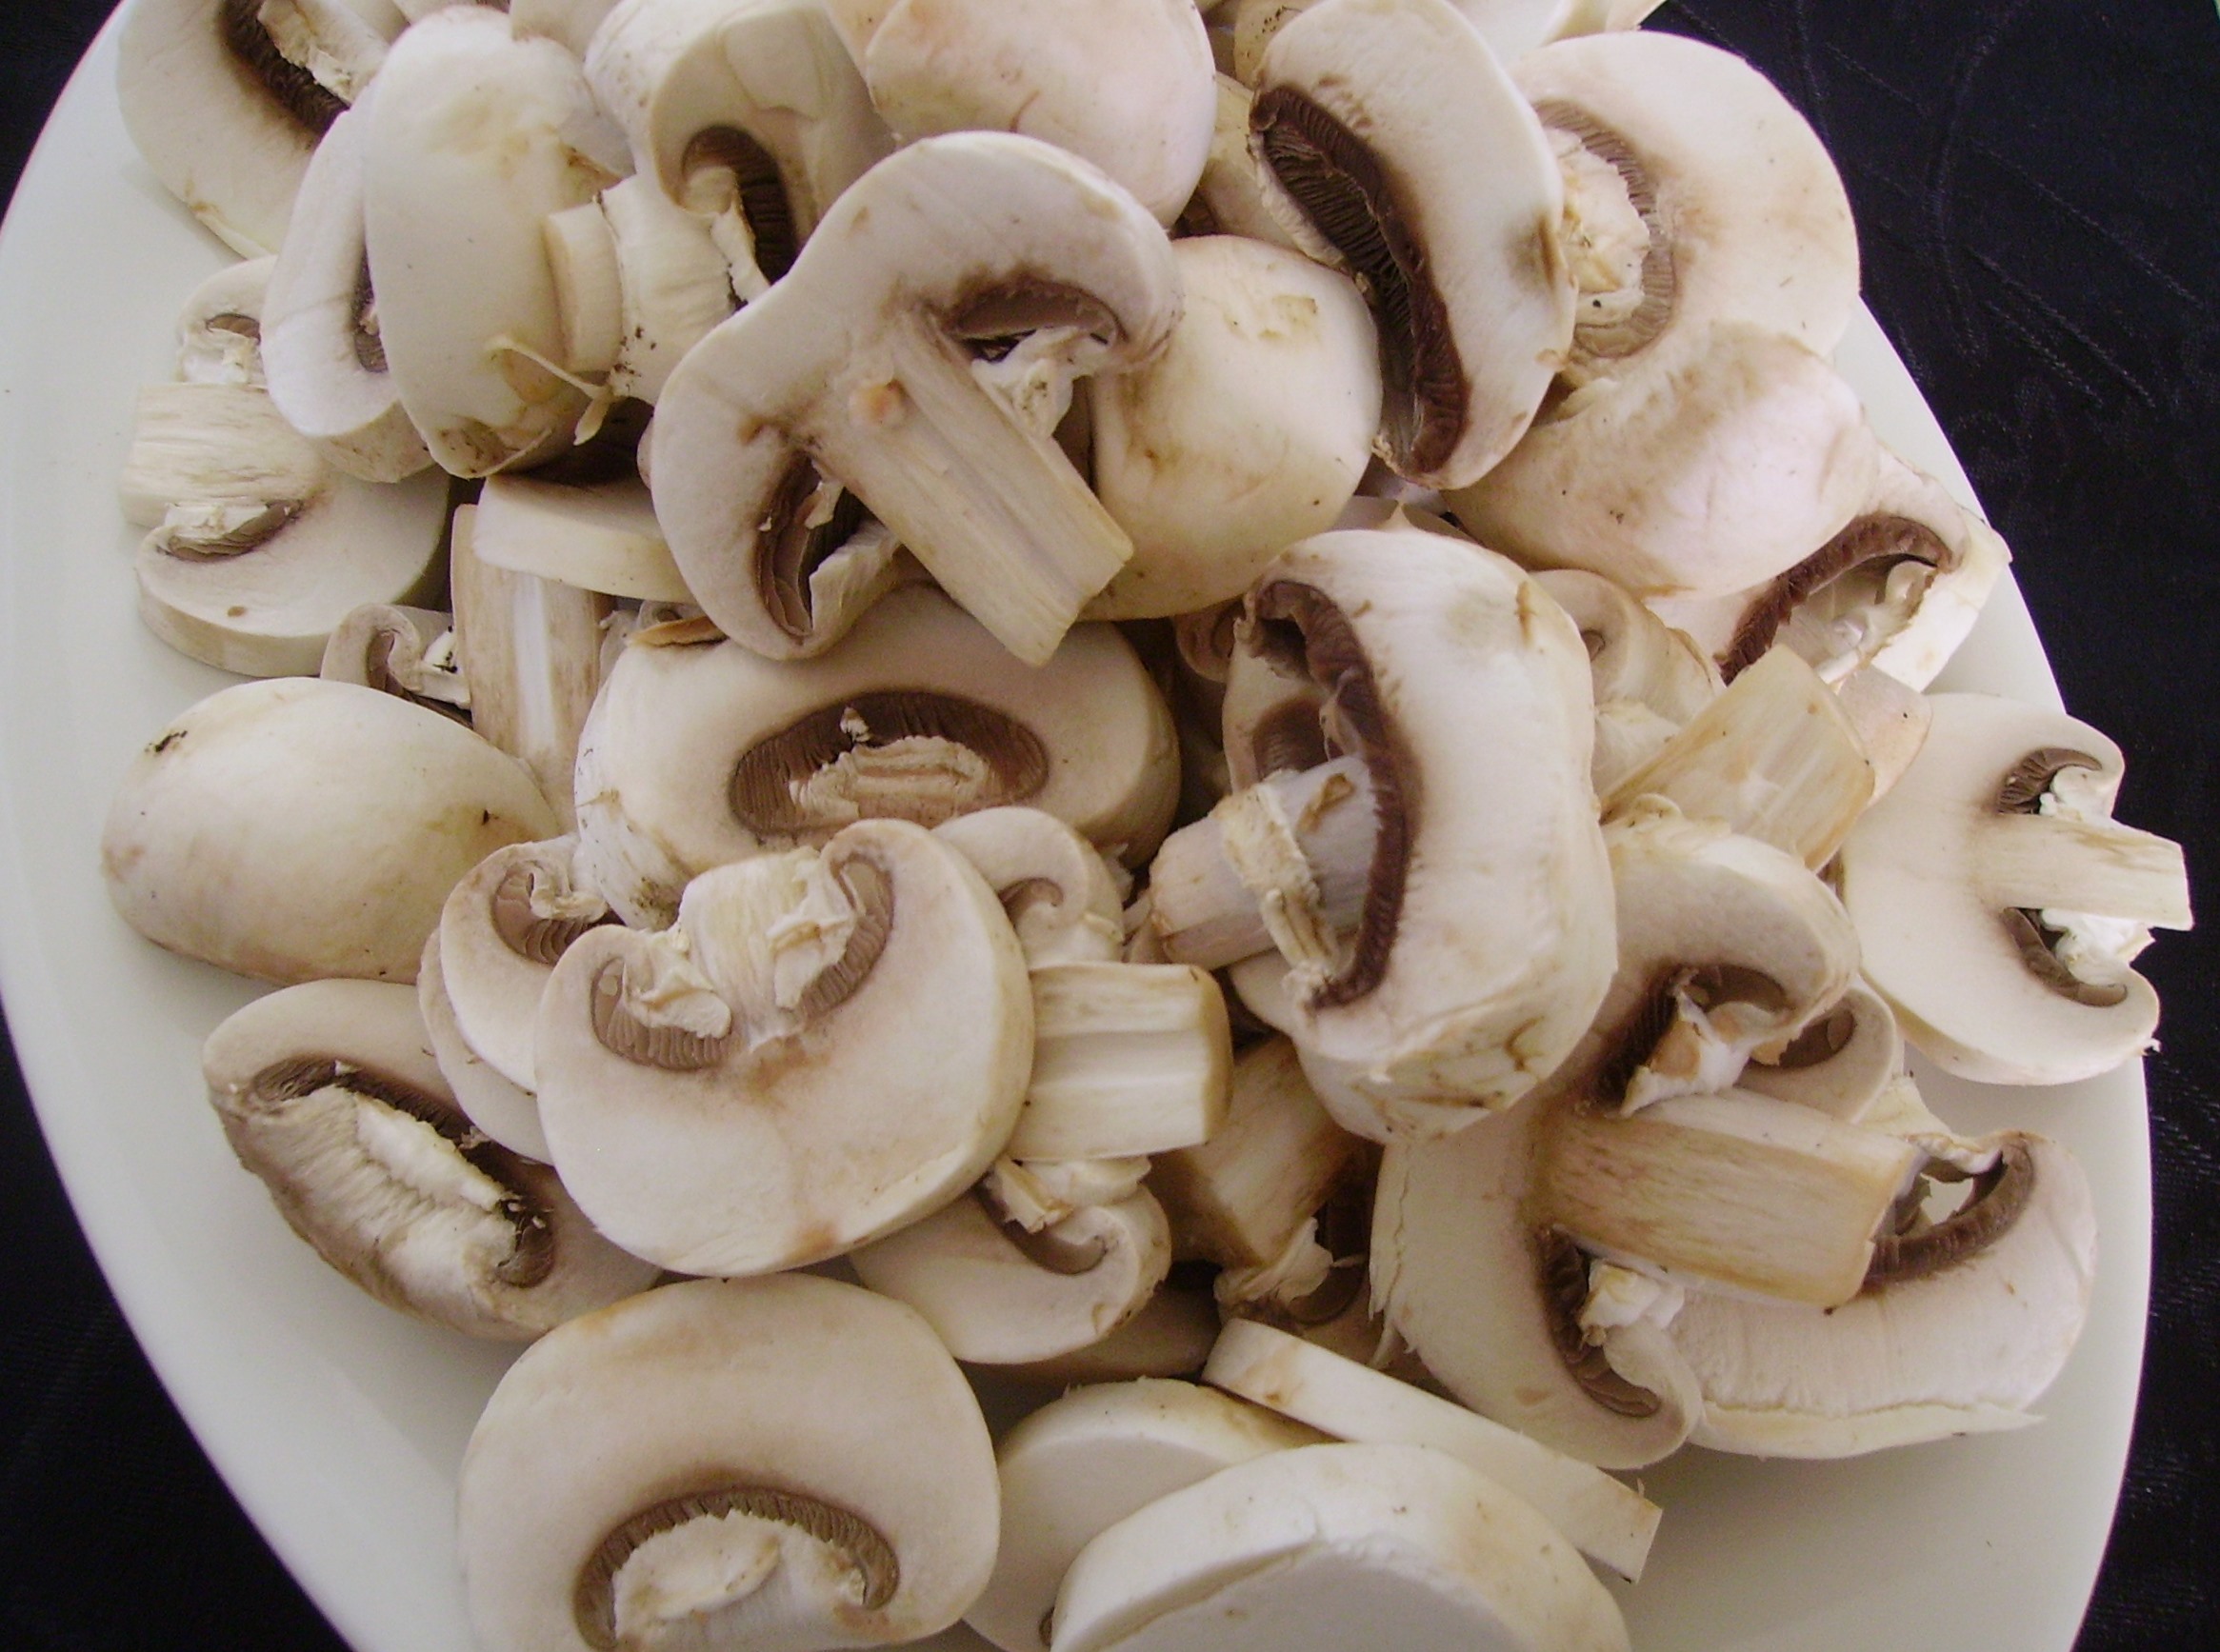
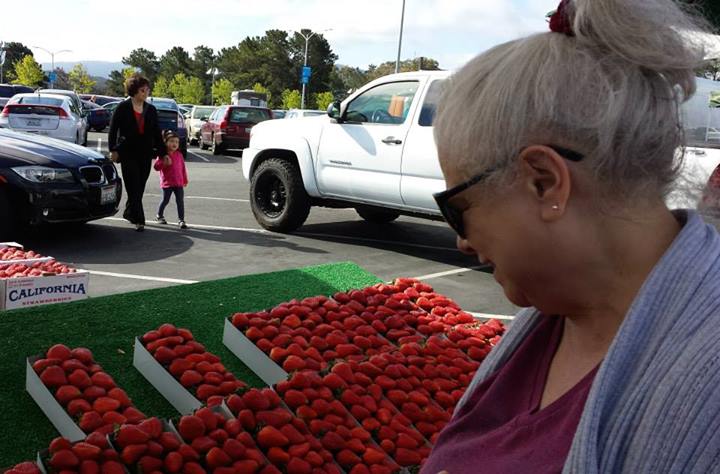
Then there were the mushrooms… I couldn’t begin to identify half of them, but boy, were they pretty.San Francisco 2014 029

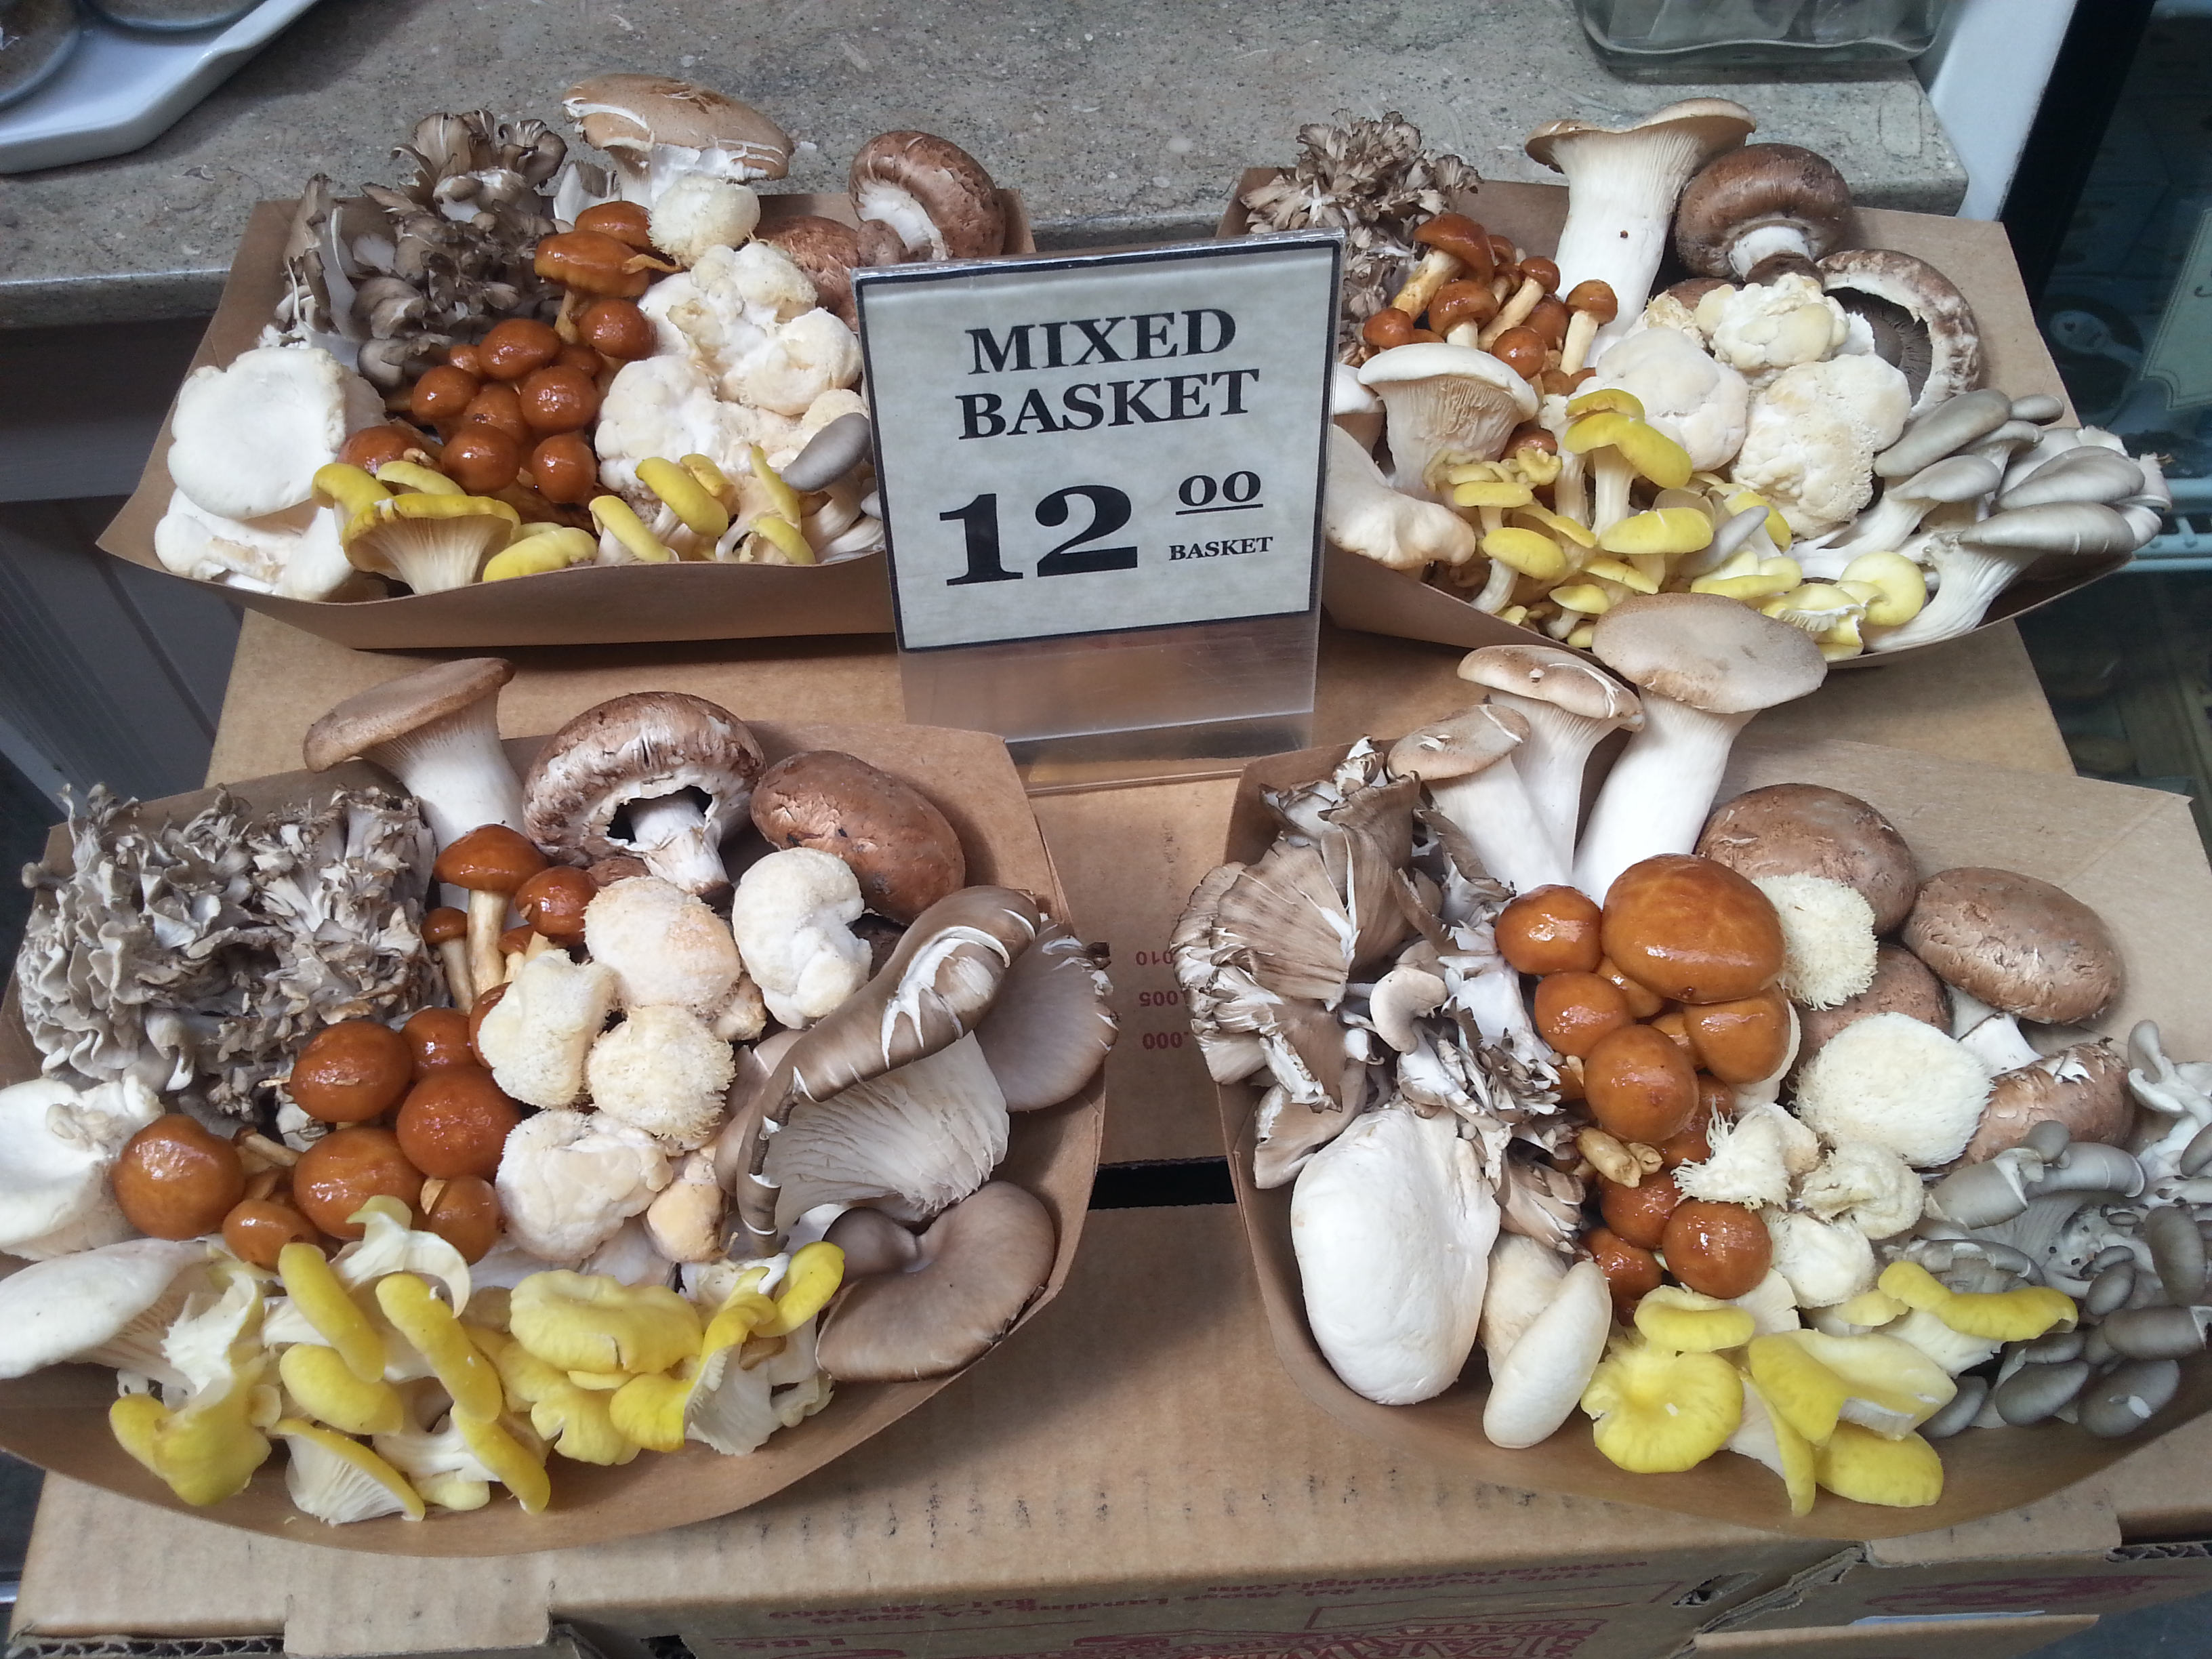
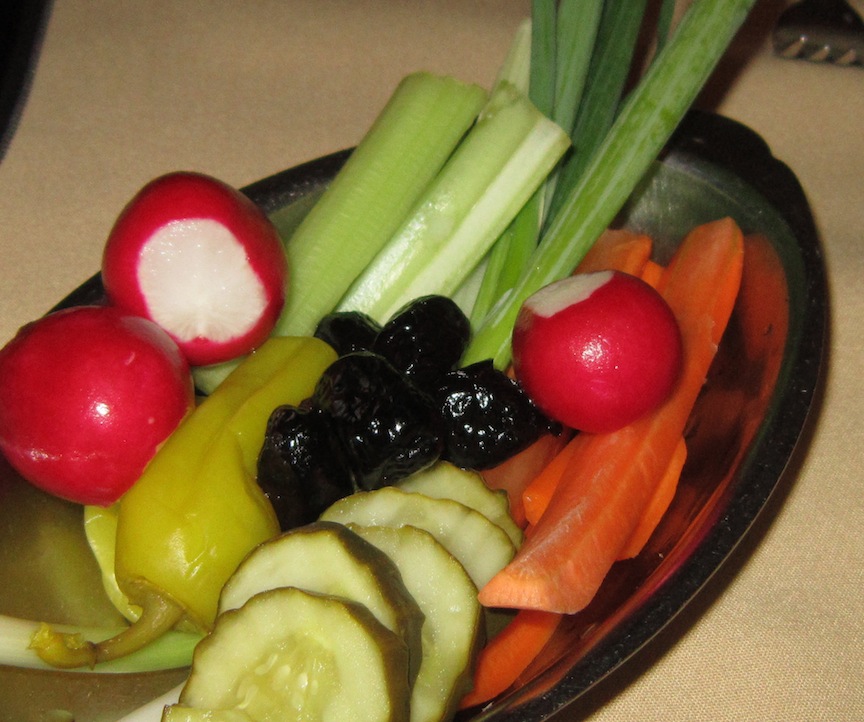
While the Ferry Building Farmer’s Market (inside and outside) was a visual banquet, the Market held at  College of San Mateo though less fancy, was still inspiring. We went to buy fresh fruits and vegetables for a Mama D prepared dinner and we had plenty of choices.

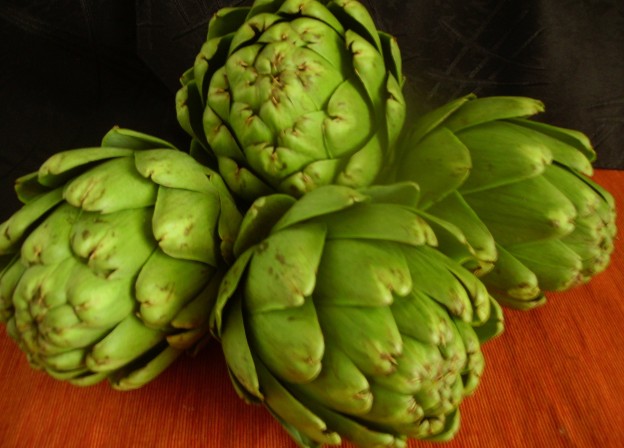
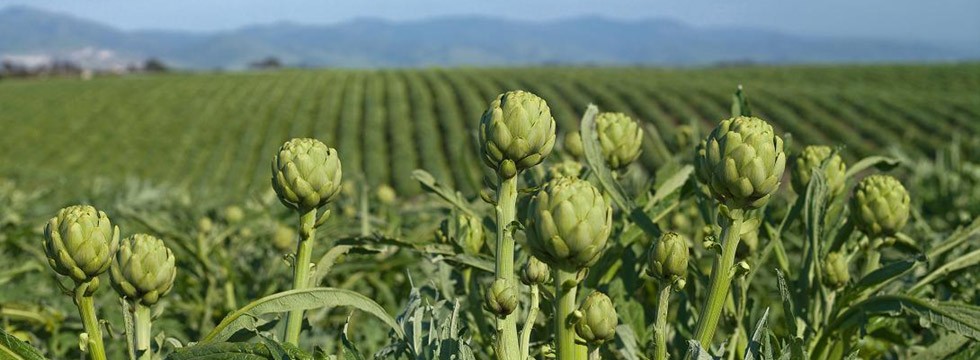
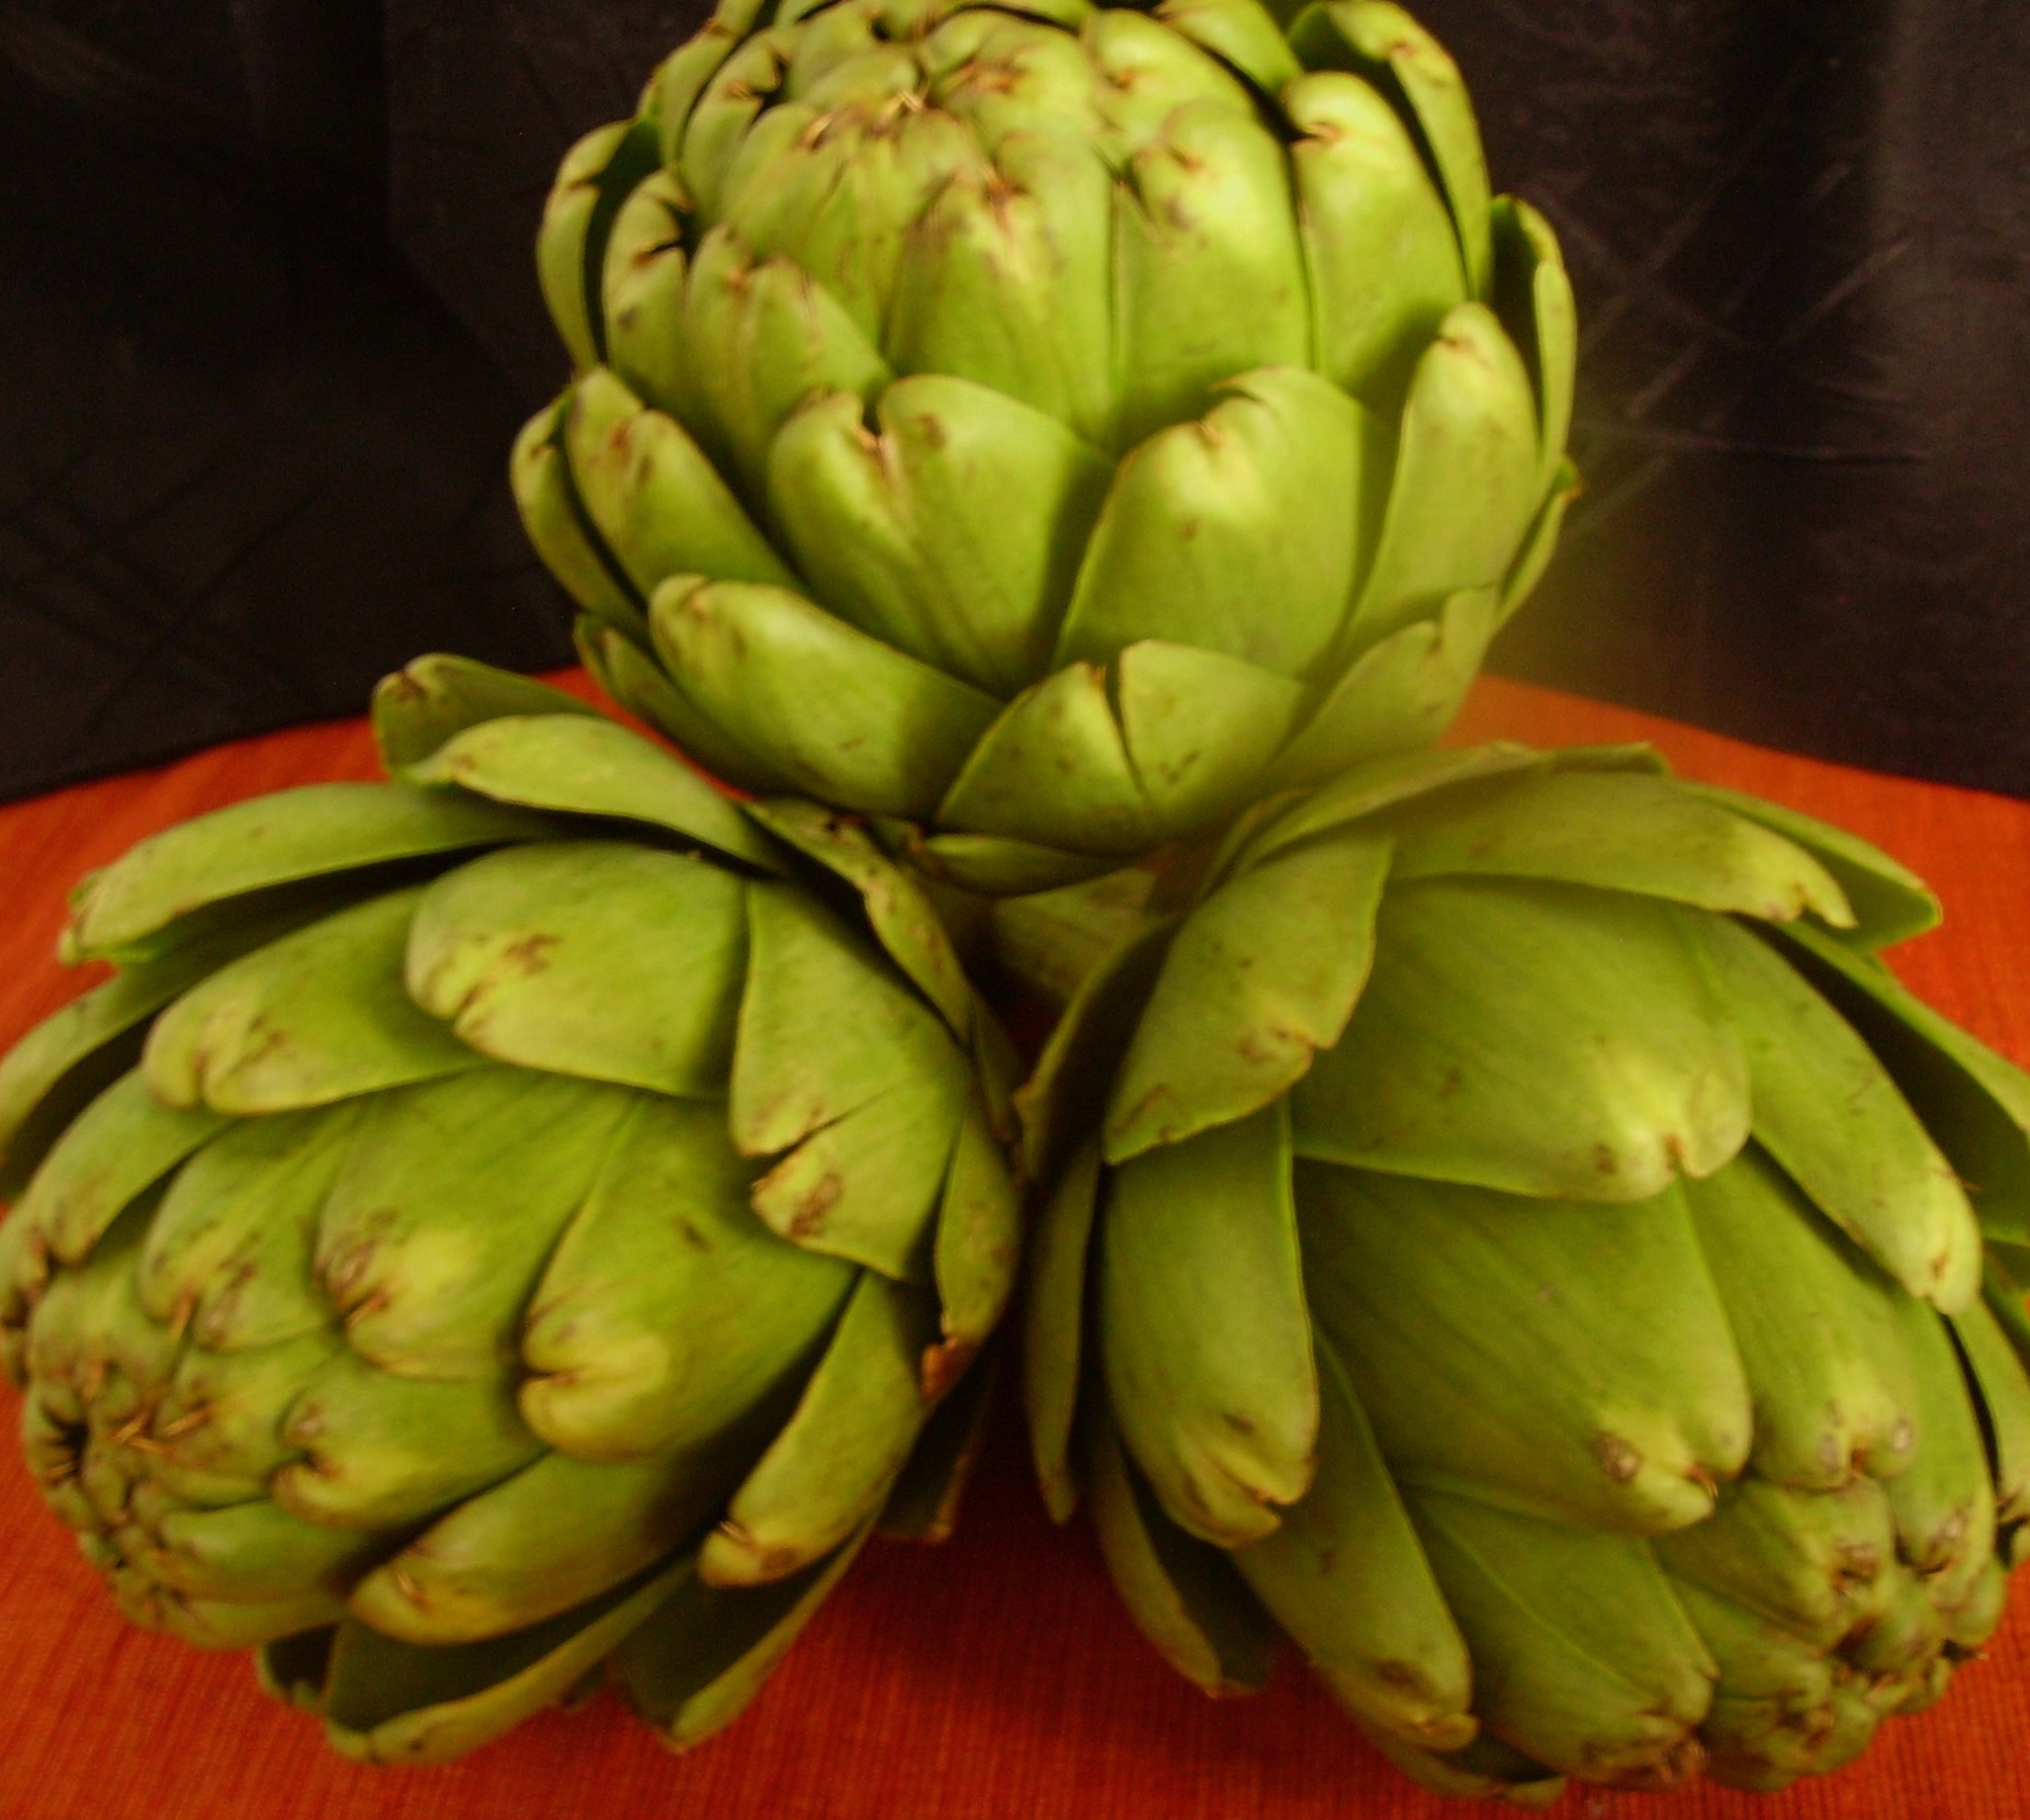
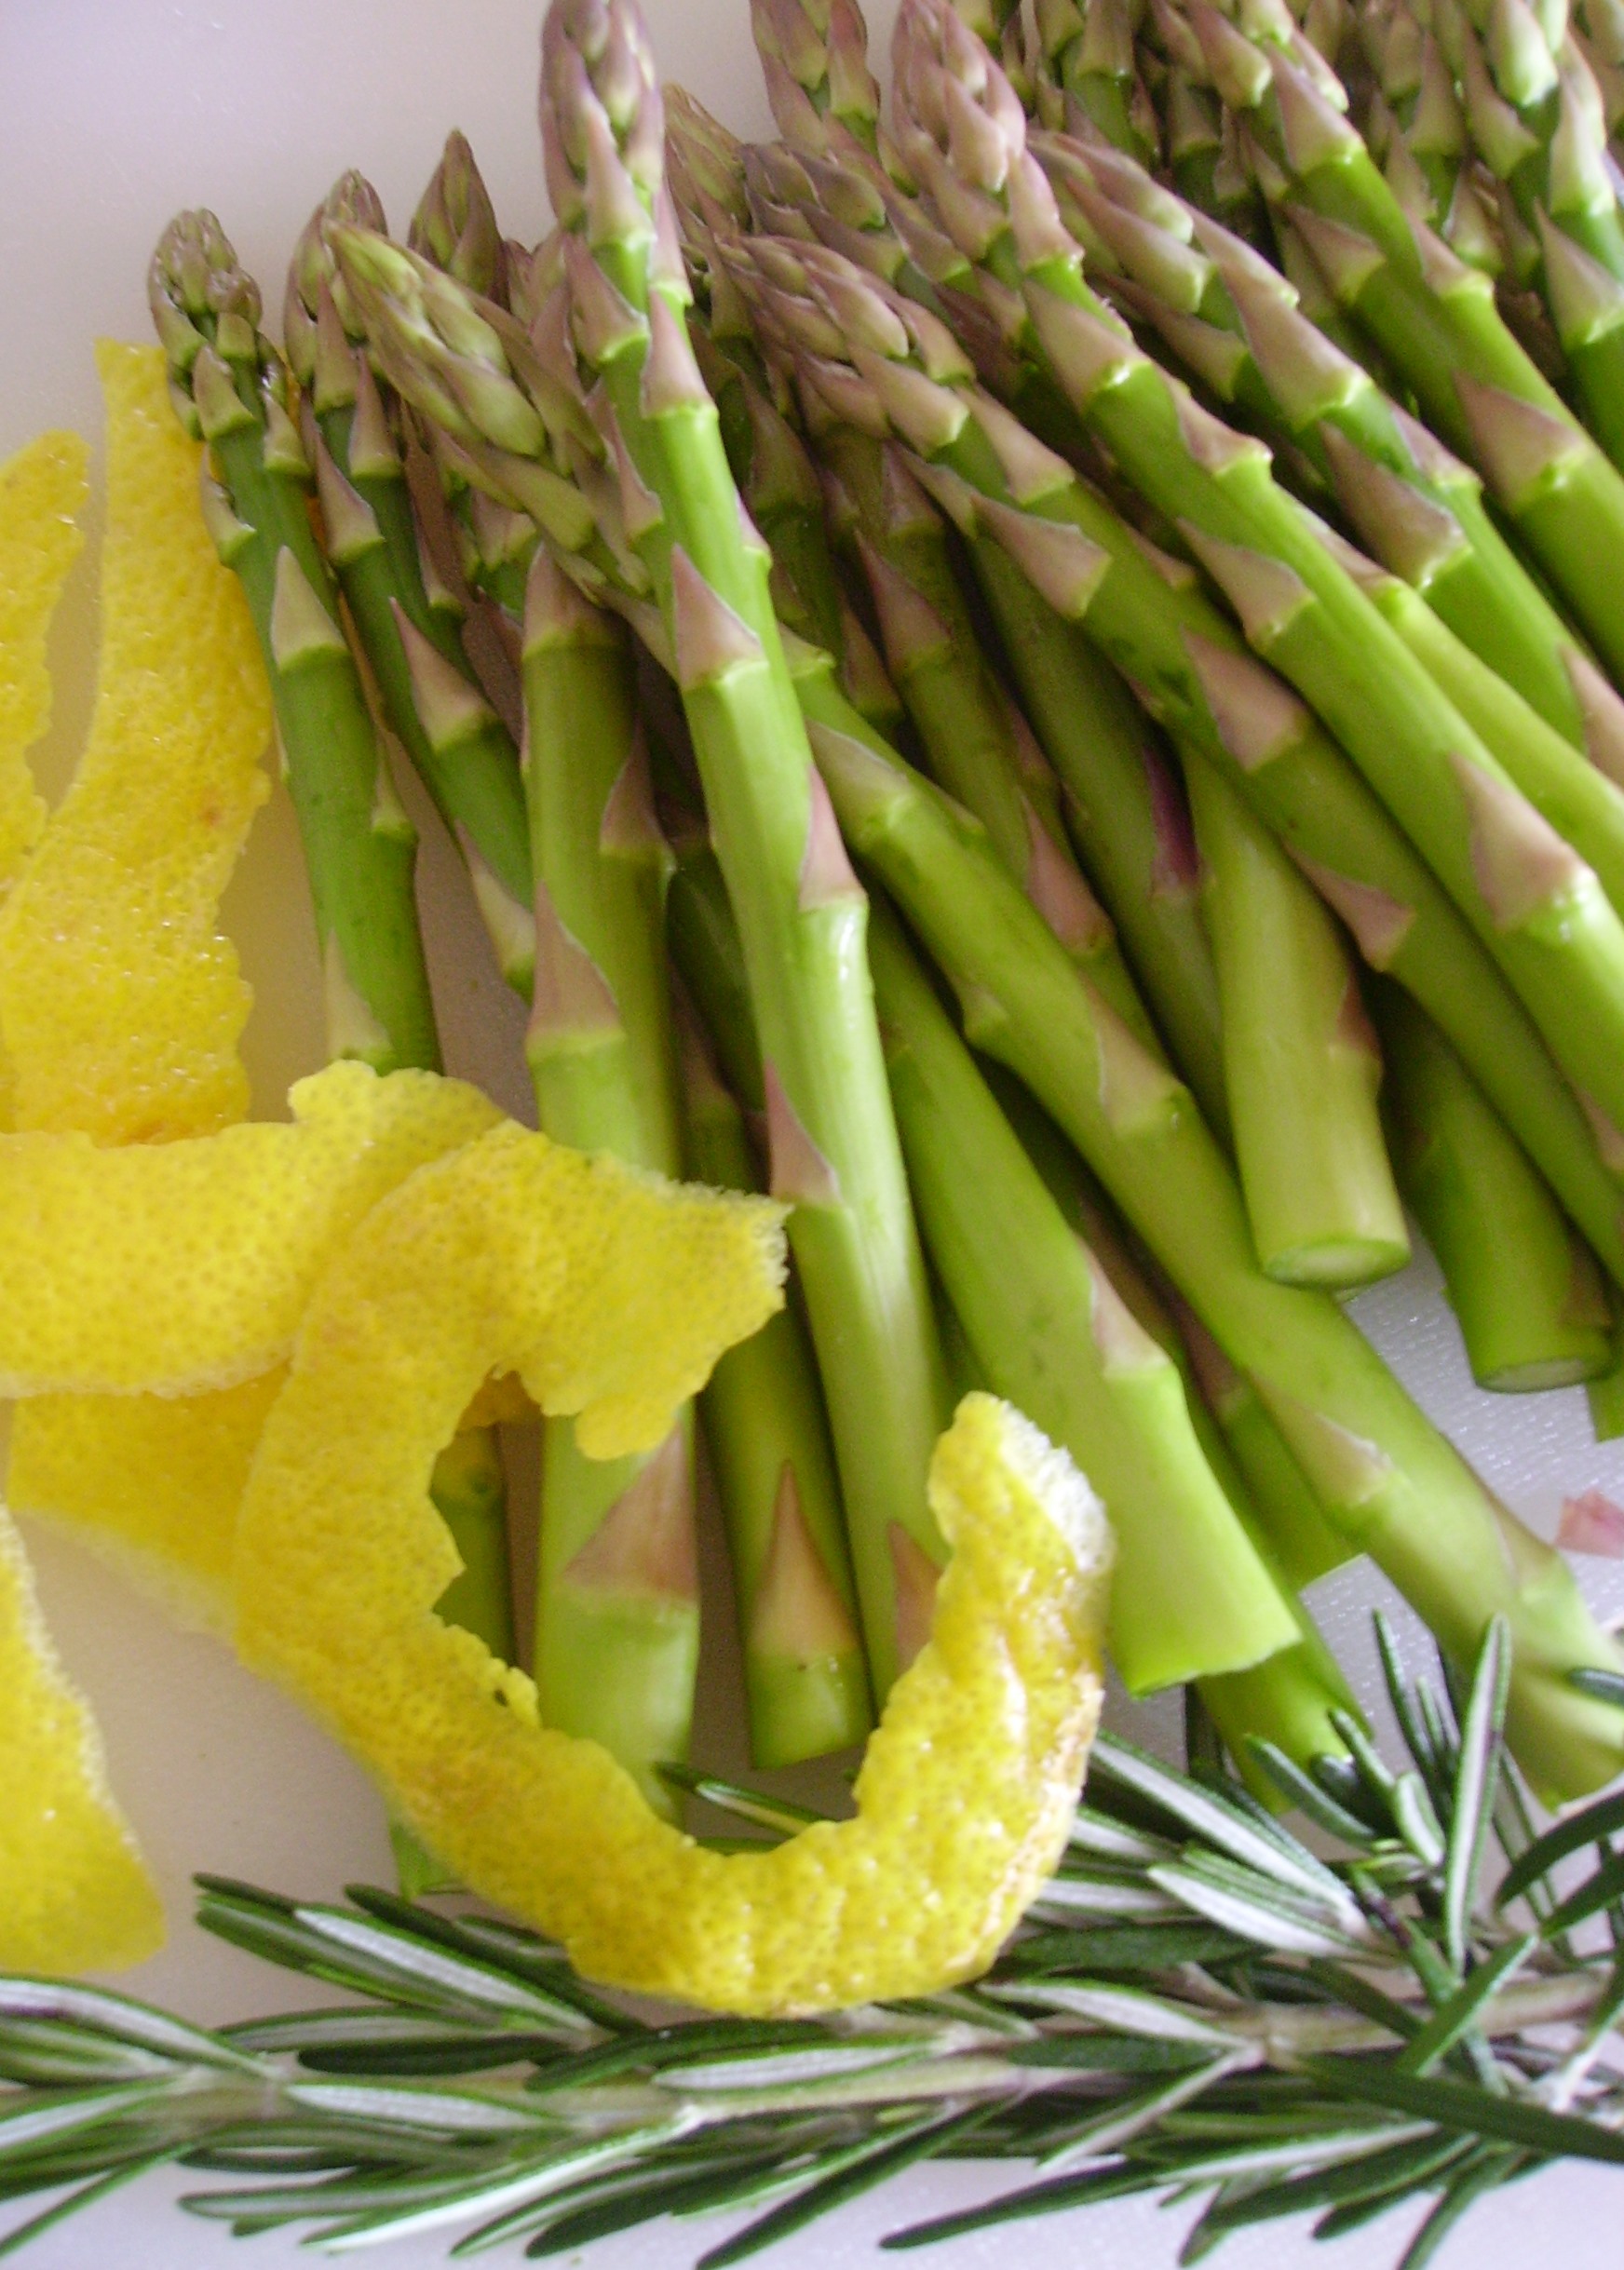
Imagine being able to choose the size of asparagus you want. This particular vendor had small, medium, and elephantine. For our purposes, we chose the medium. Big enough to grill but still turn out tender crisp. DIGITAL CAMERA
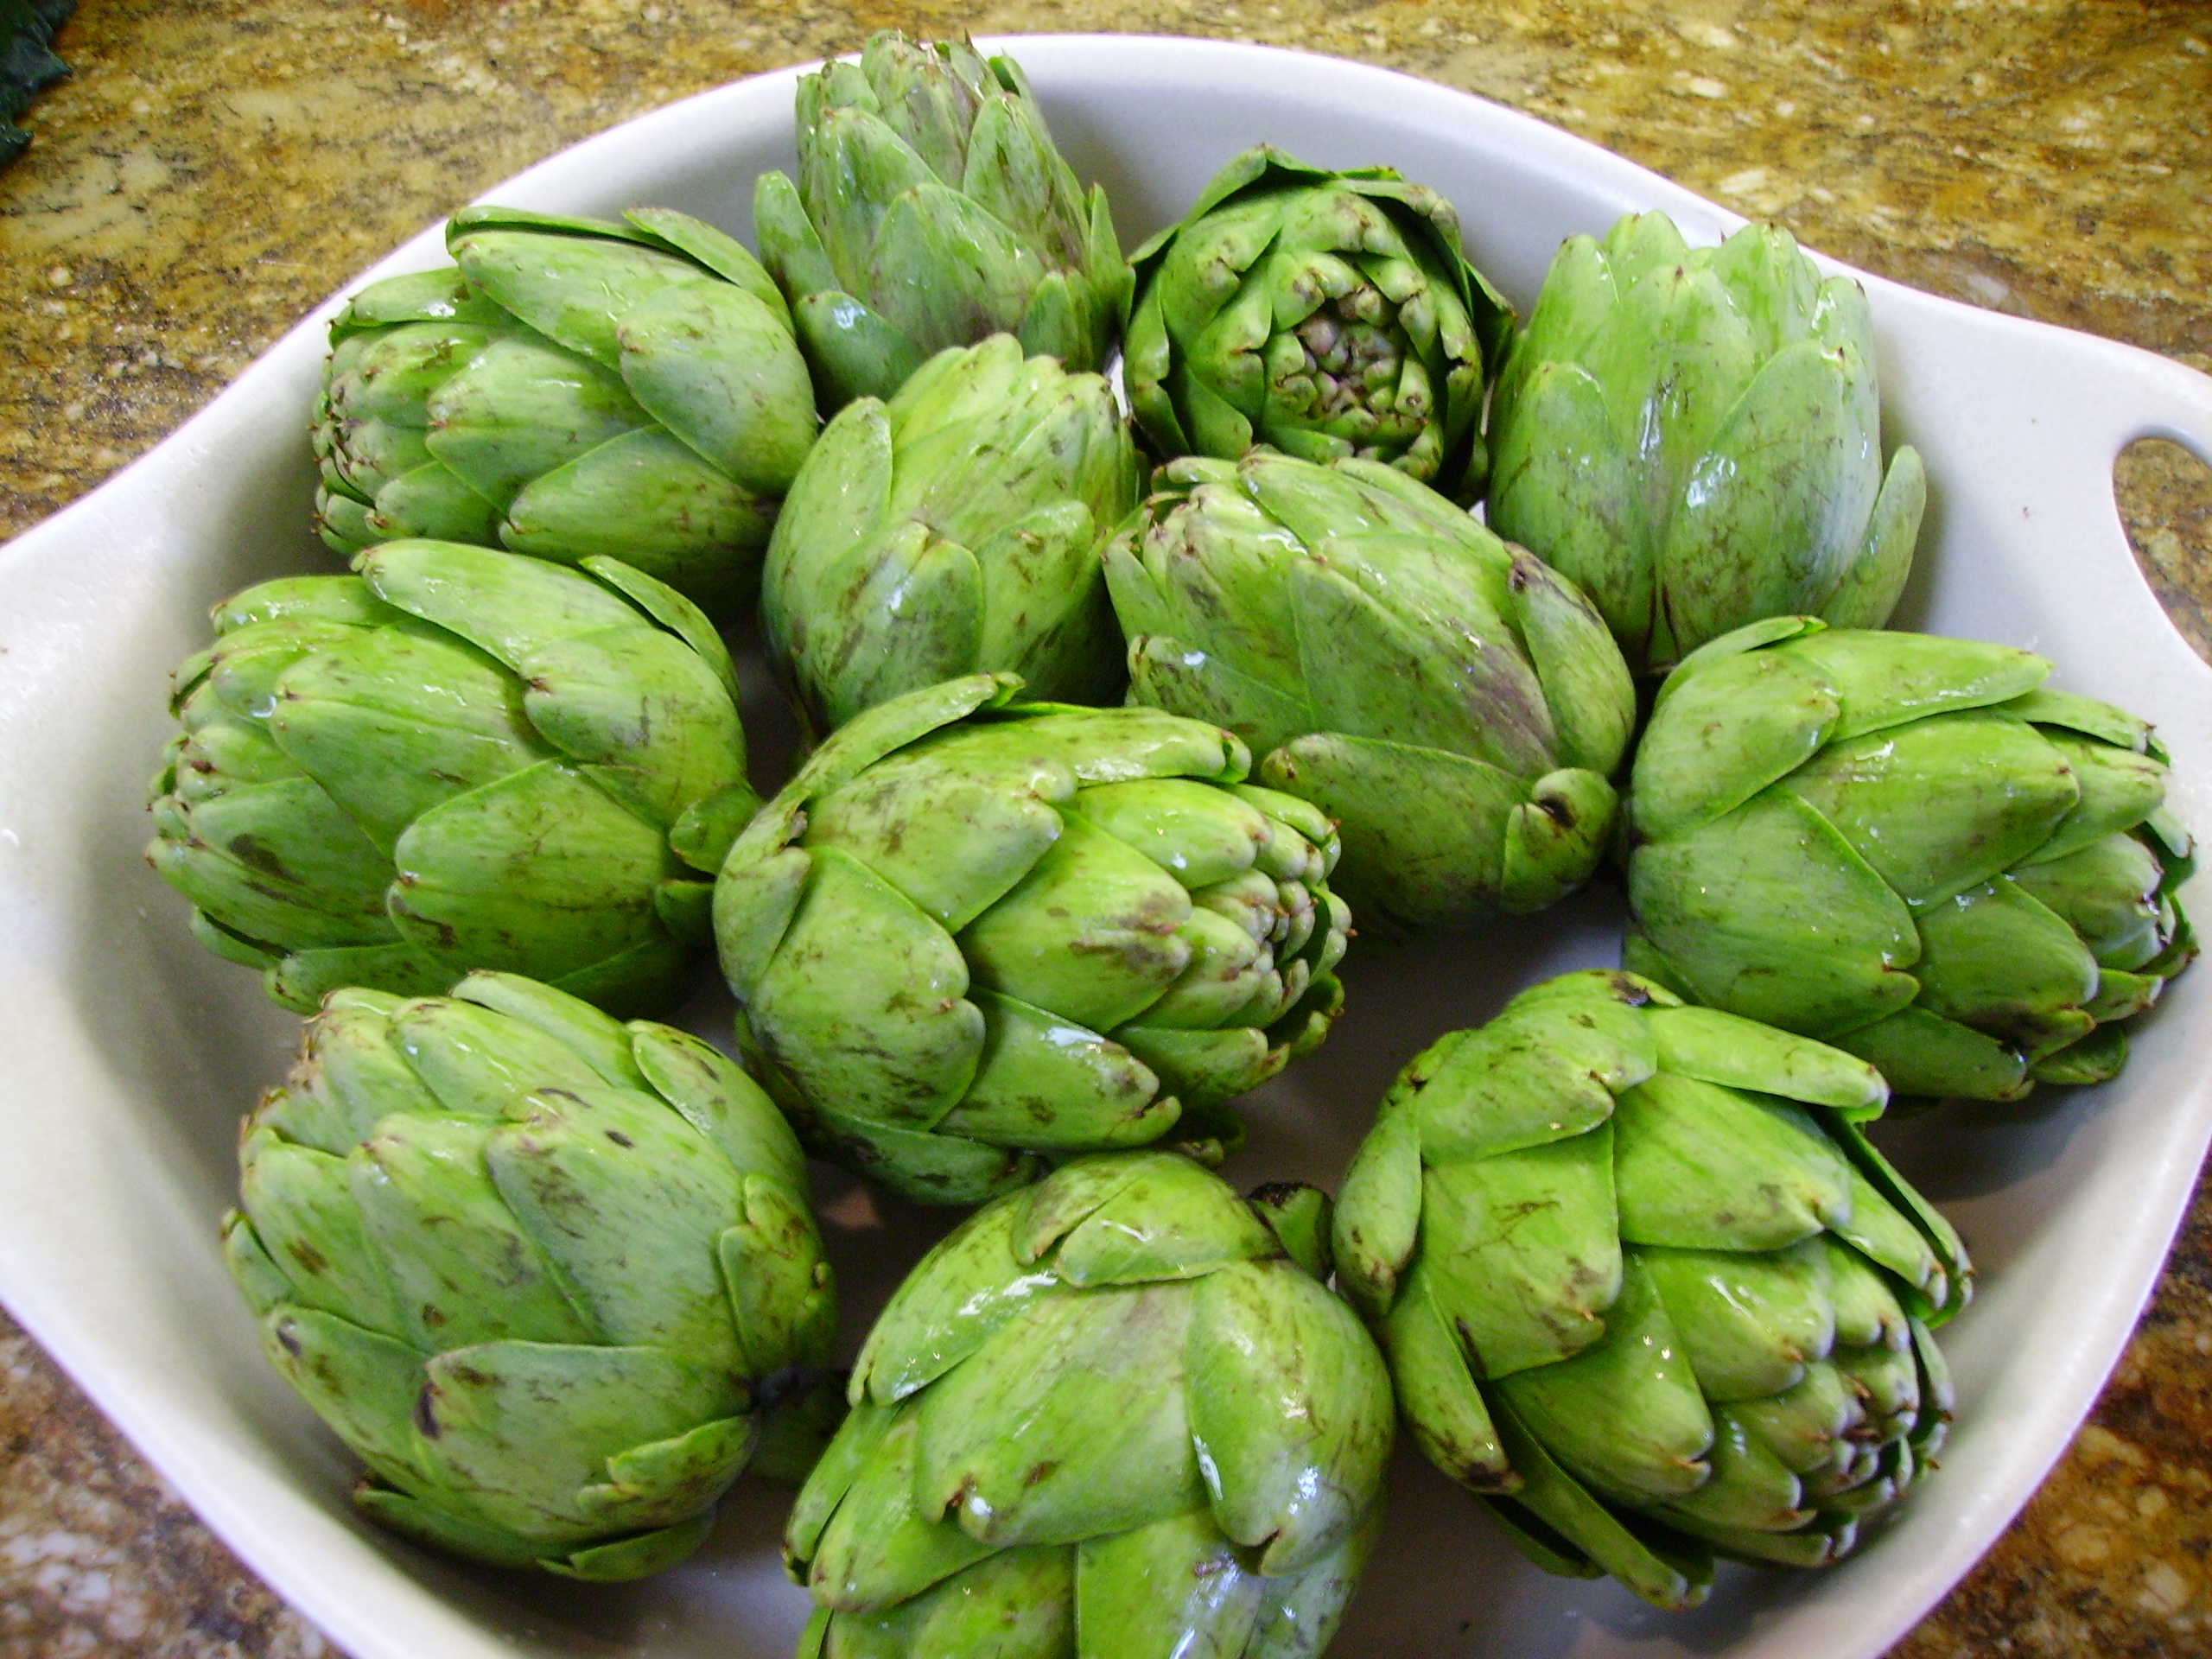
The fresh picked artichokes also had small, medium, and mammoth representatives. We opted for the small size as they would be the best on the grill. Grill worthiness determined the bundles of Baby Bok Choy as well.

DIGITAL CAMERA
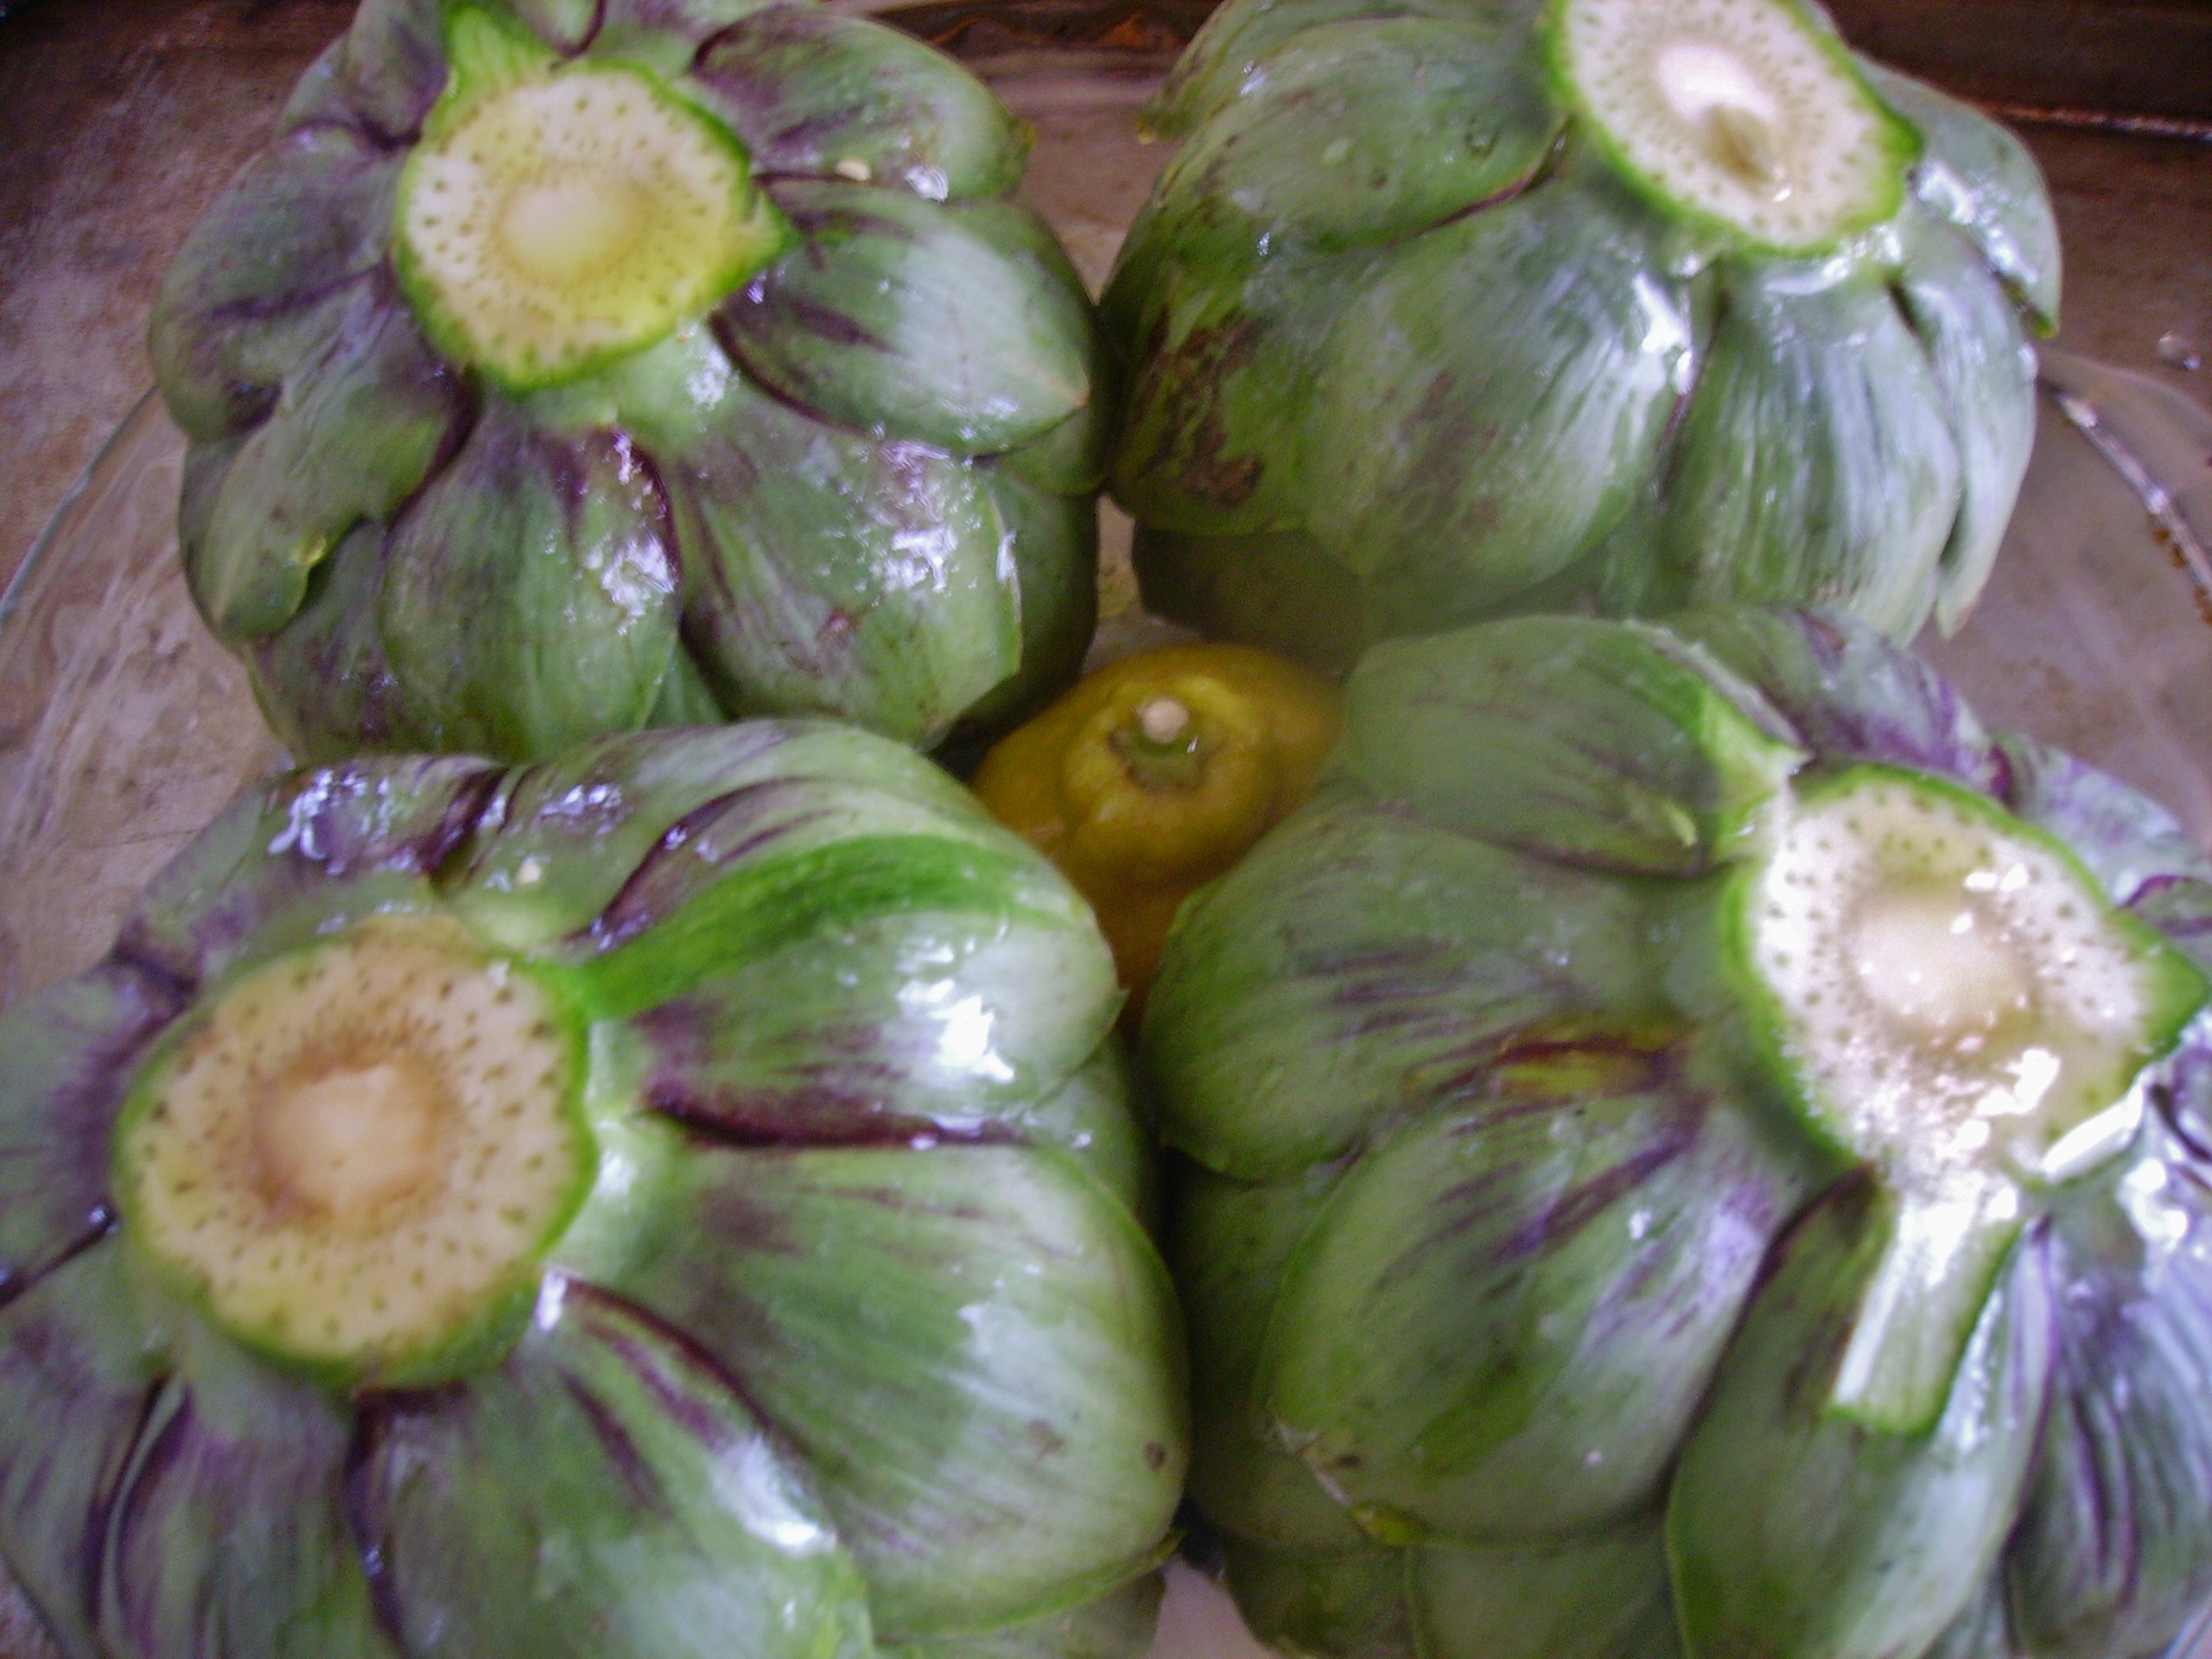
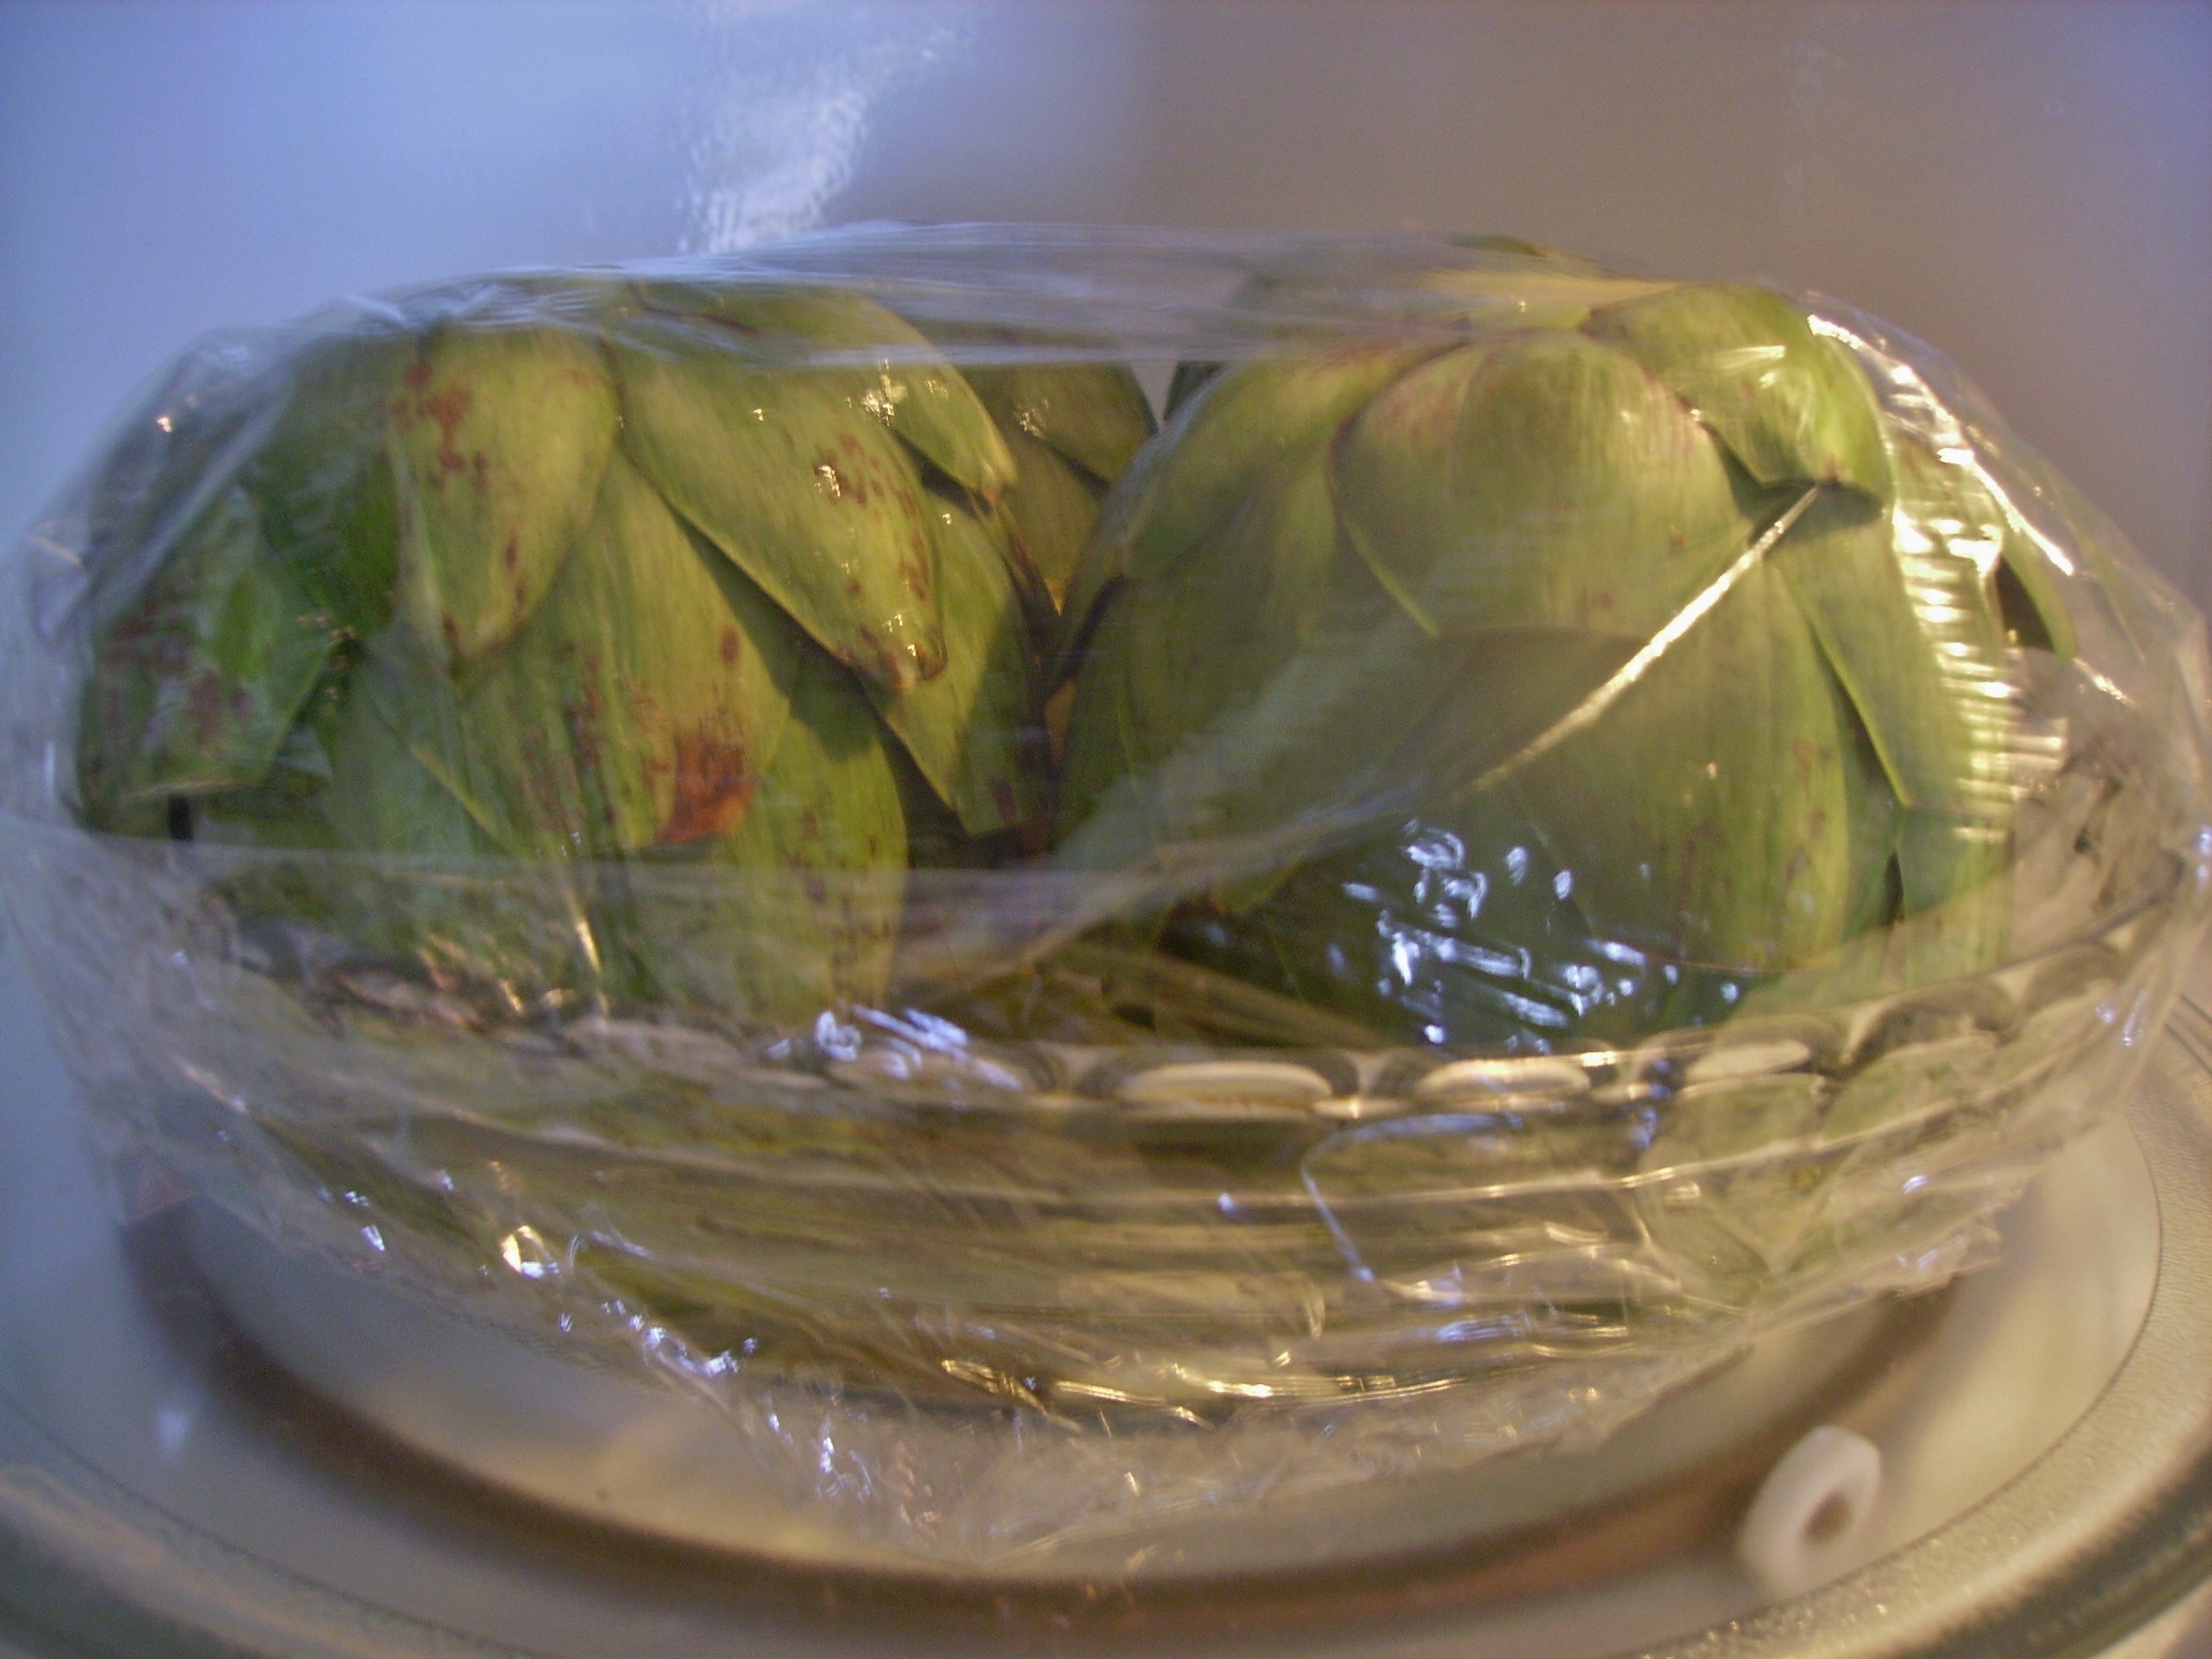
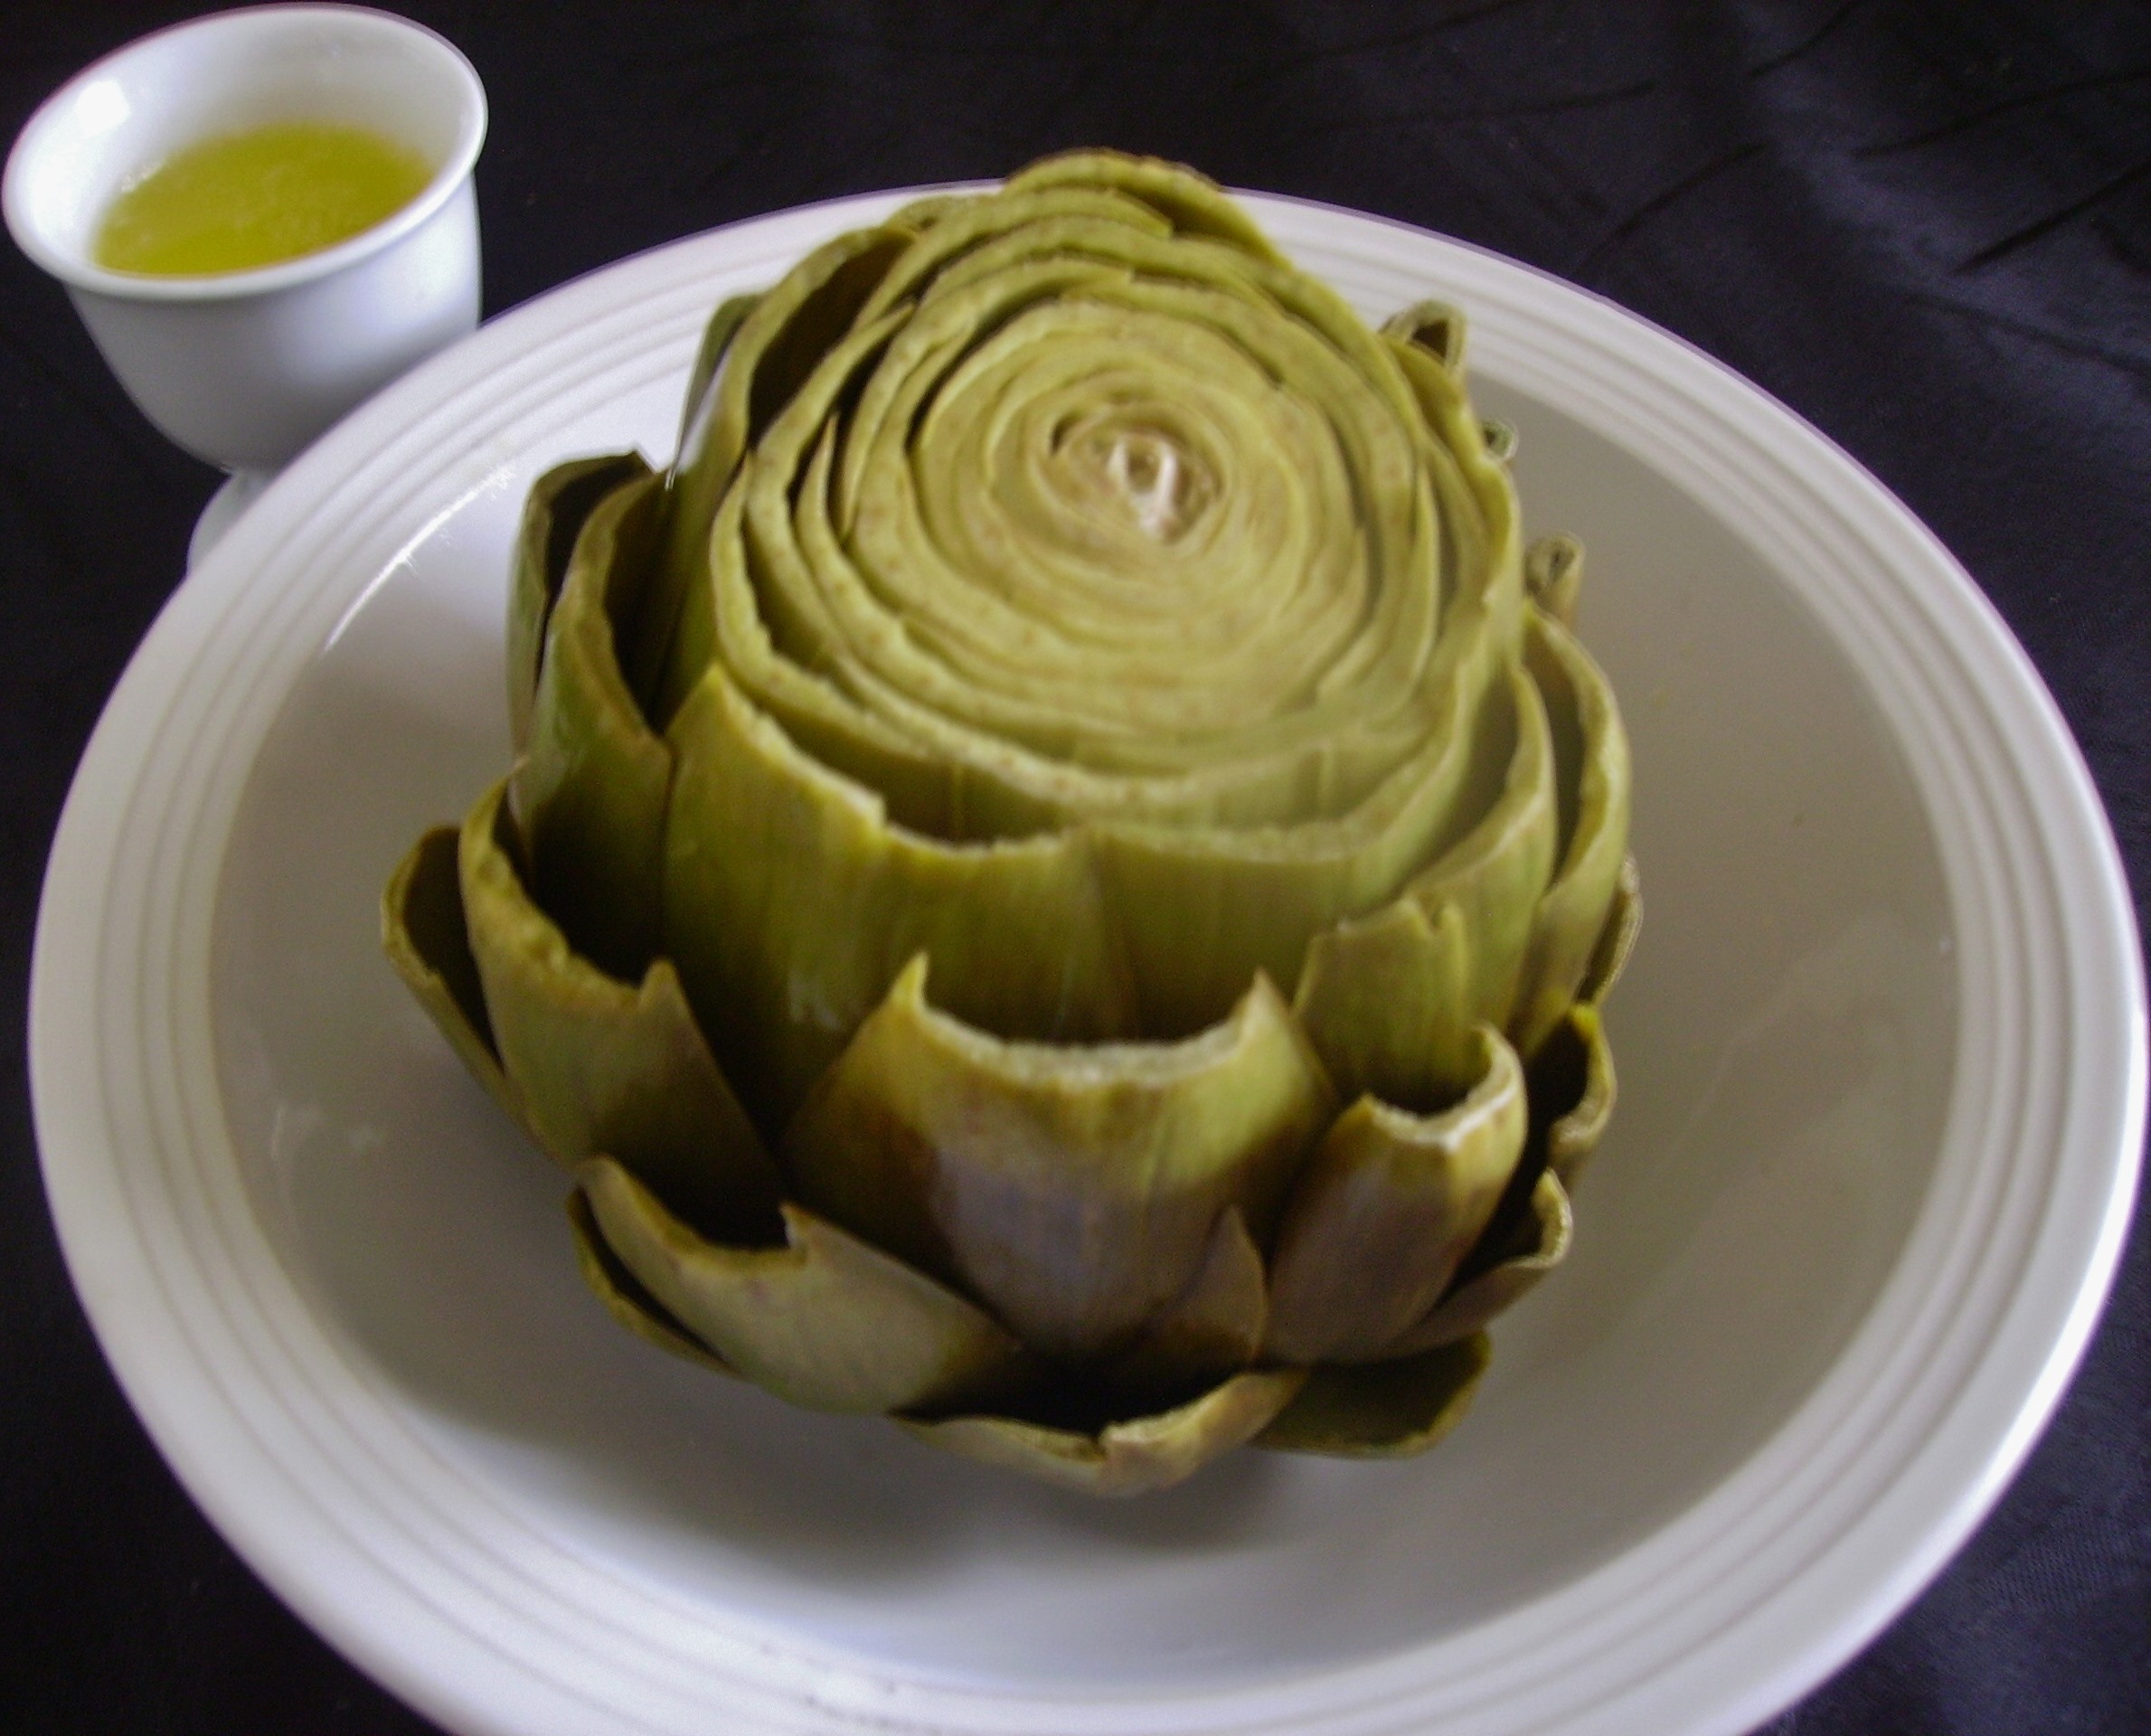
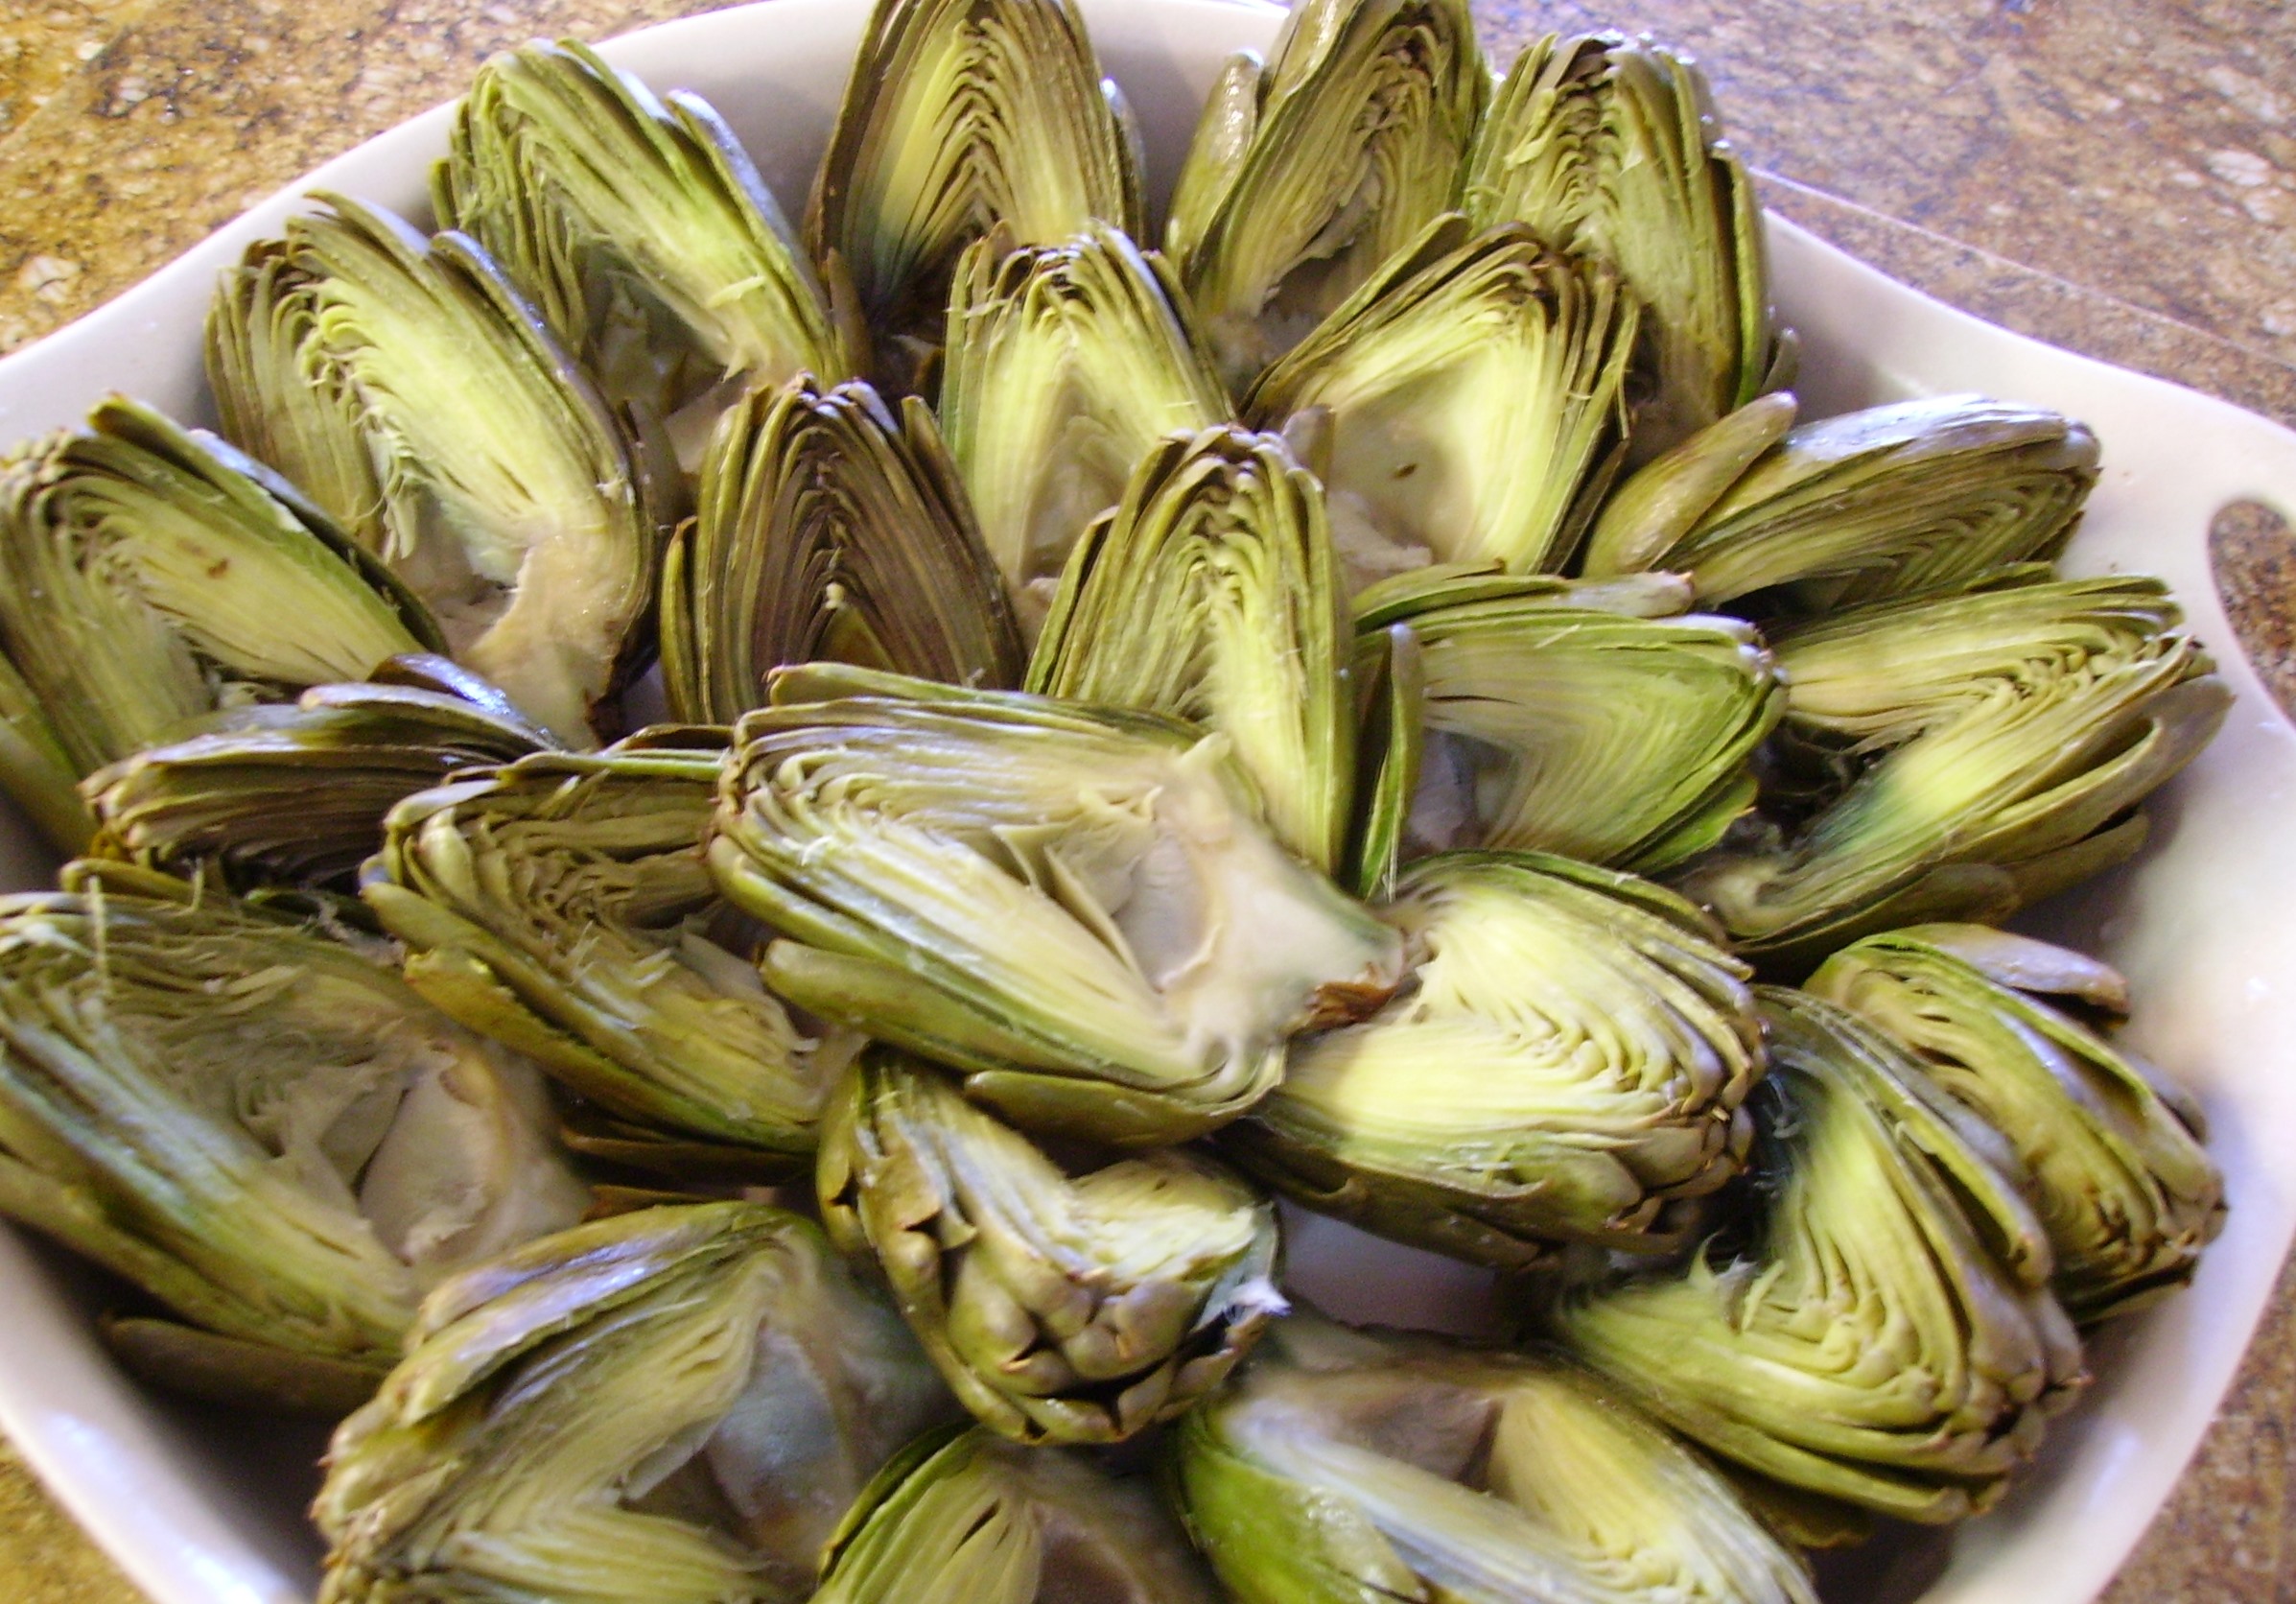
Once we got our bounty home, we cleaned and prepped them. The artichokes were cut in half and par-cooked in the microwave using Mama D’s Artichoke Recipe. Artichokes require a good bit of cooking to be tender and succulent especially if there is a grill in their future. This also allowed me to remove the choke before putting them on the grill. Their garlic, lemon, and olive oil precooking bath gave them some seasoning so all they needed was a brush of olive oil before they finished cooking on the grill.

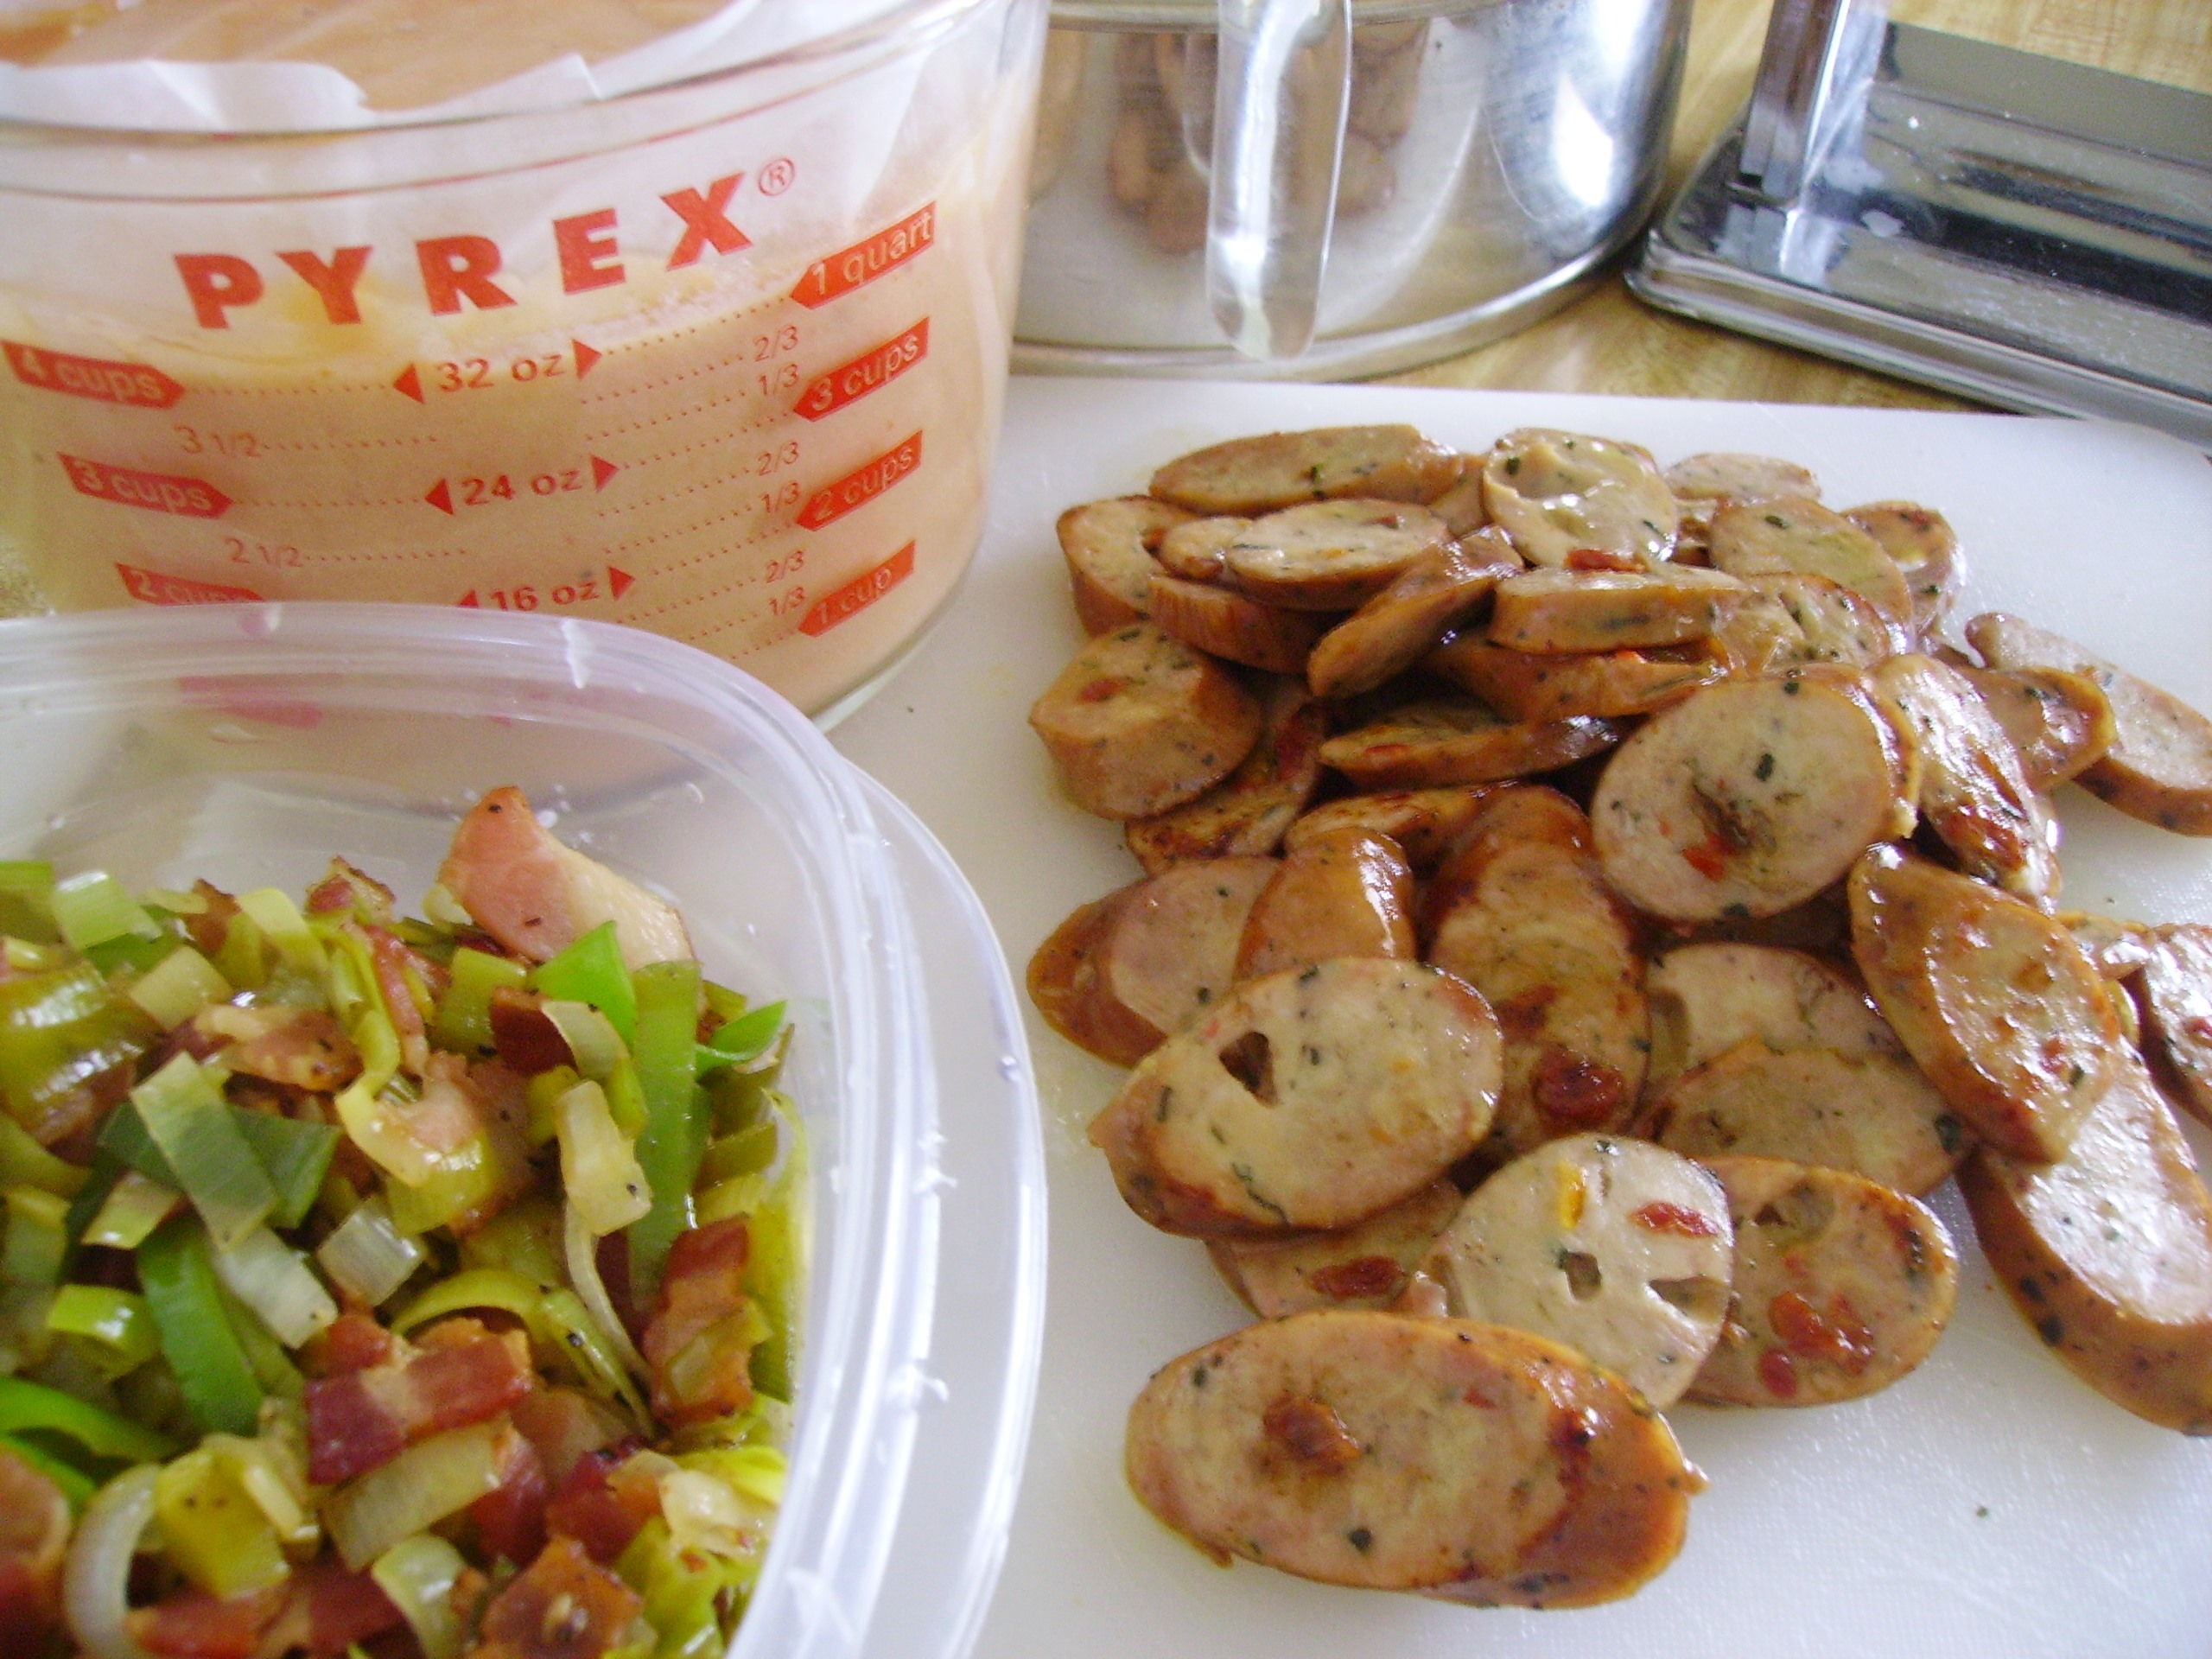
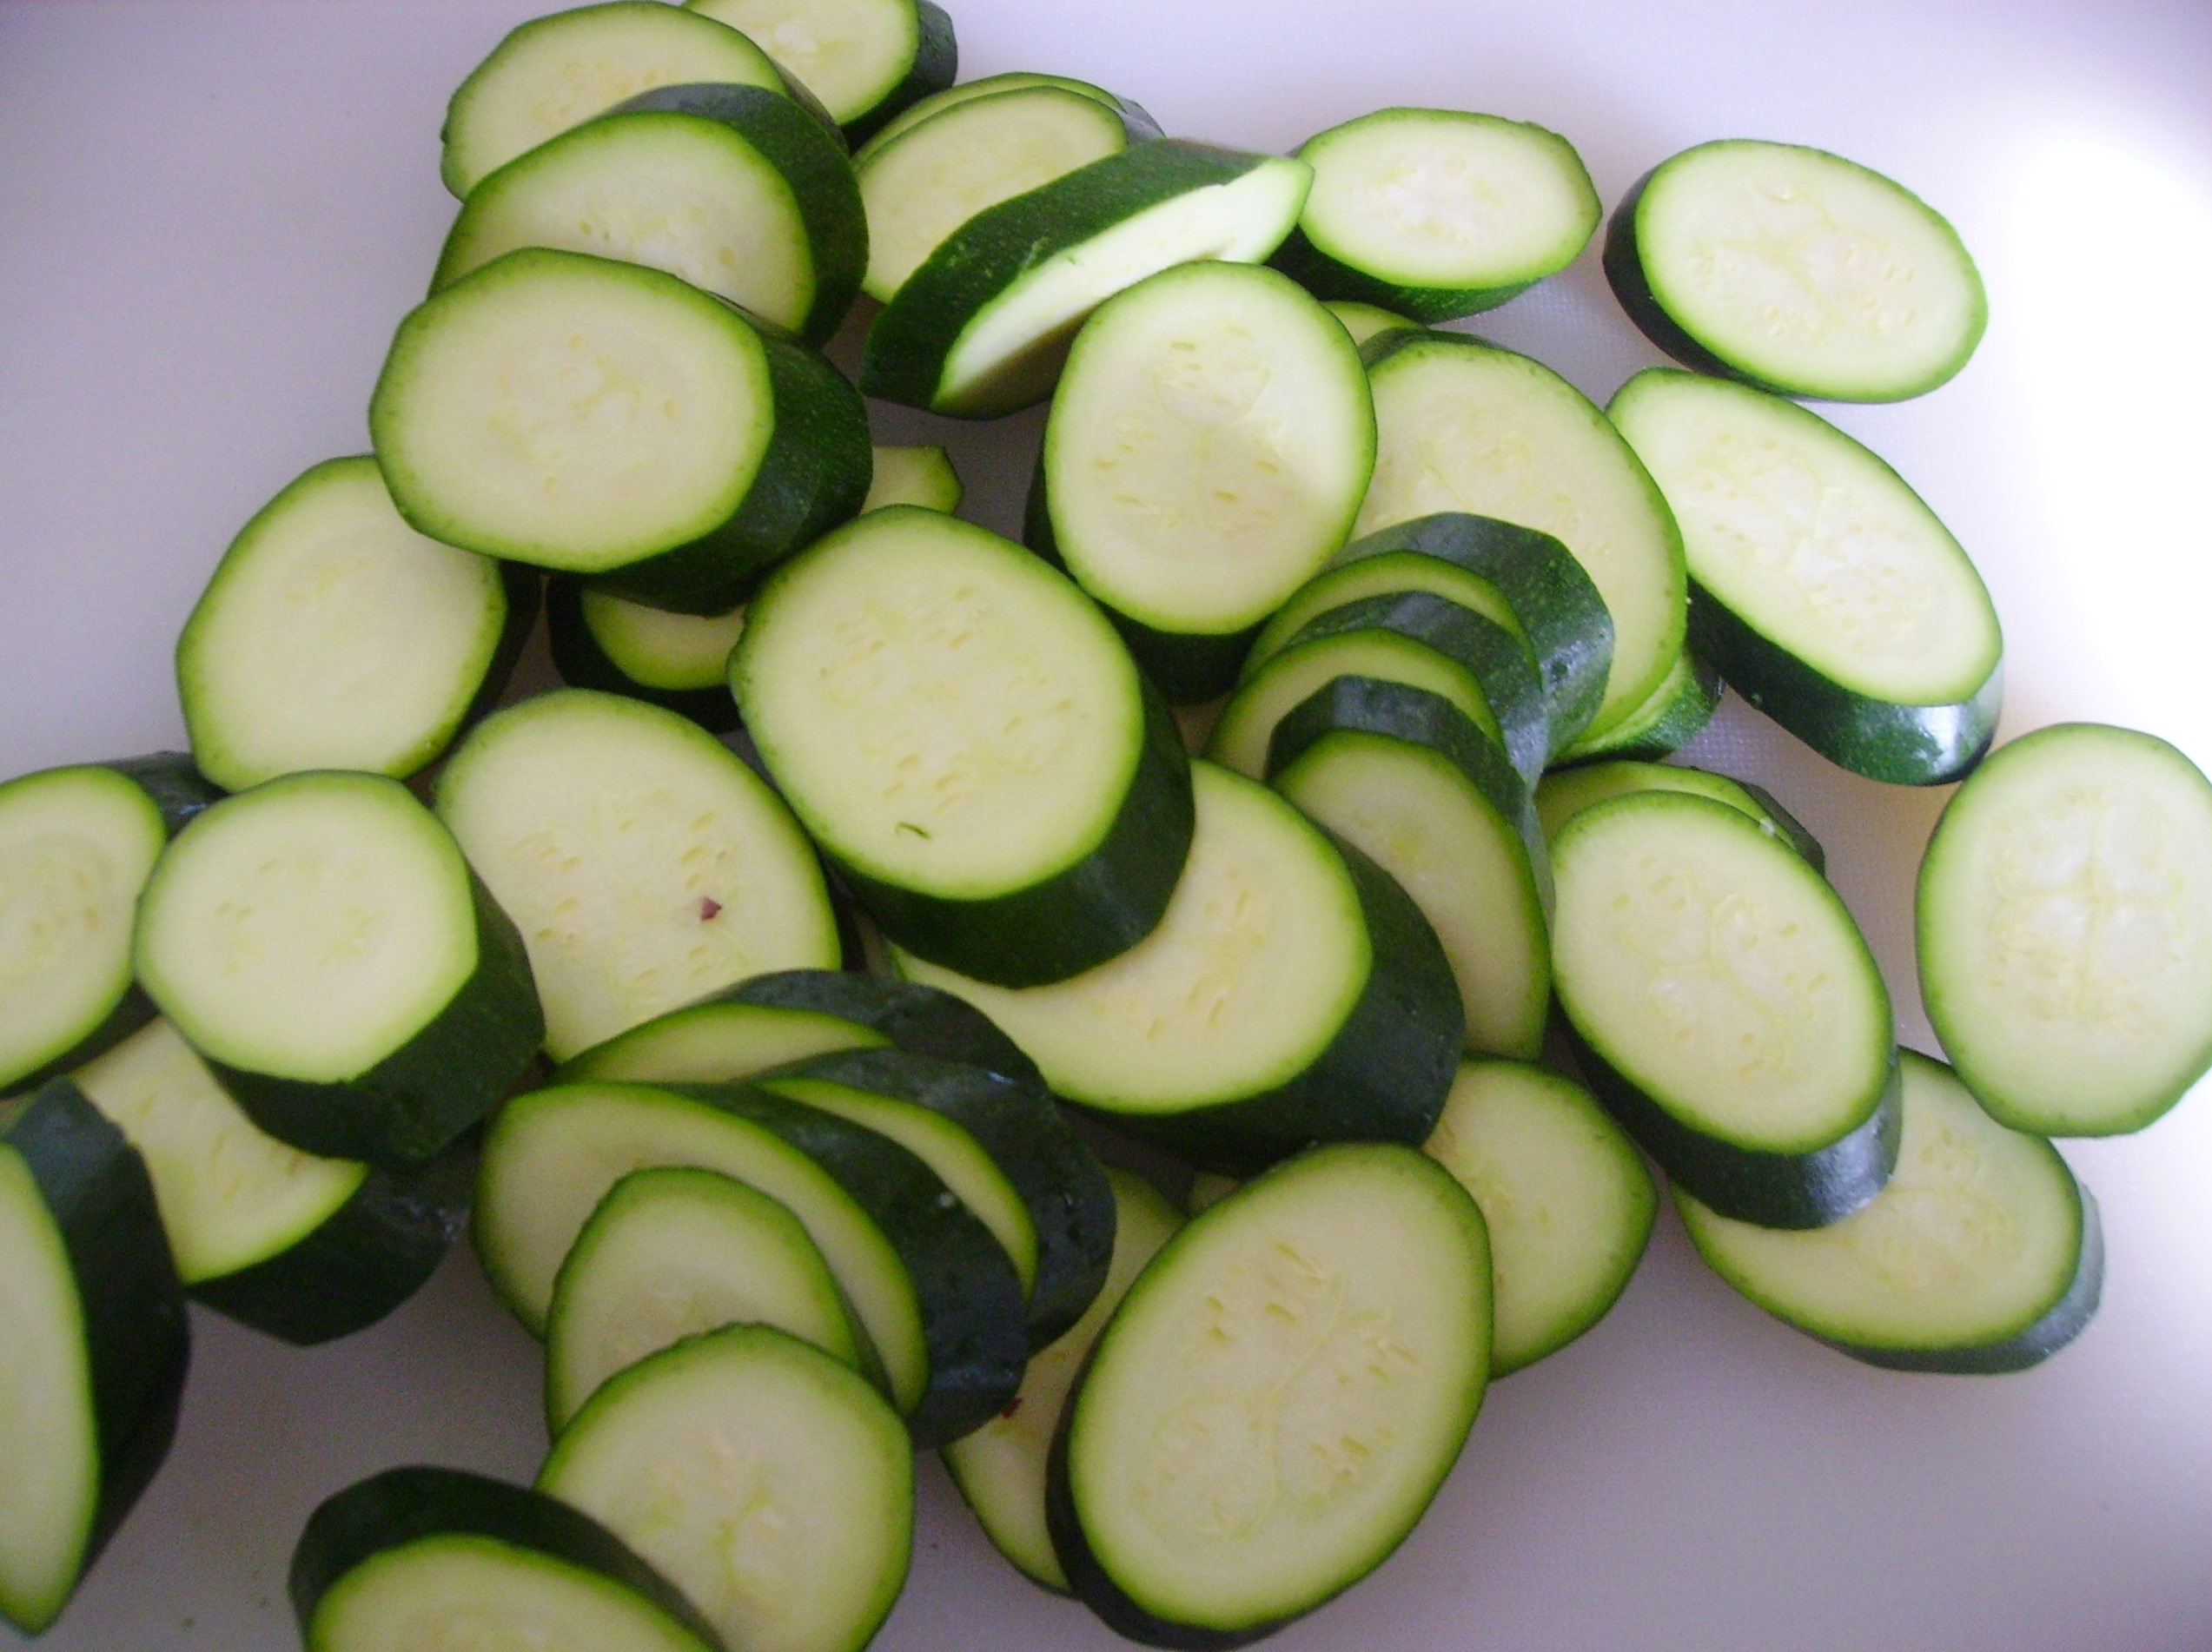
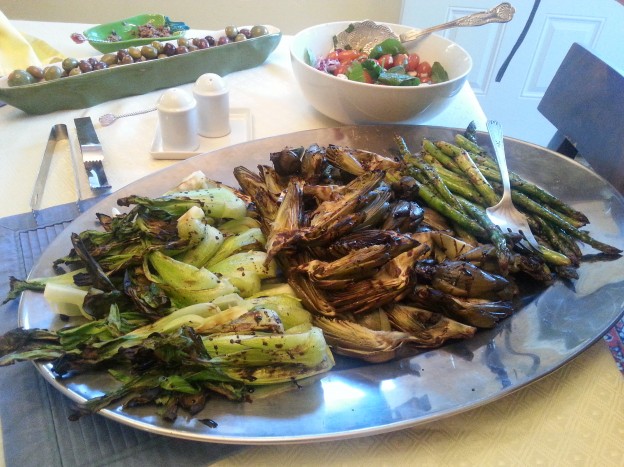
The Artichokes were joined on the grill by the Bok Choy, Asparagus and some wonderful Chicken Sausage from Trader Joe’s. The Bok Choy jumped on the fire with a brush of olive oil and some salt and pepper. You could marinate them if you are so inclined. I always marinate my asparagus before I put it on the grill. It’s a blend of olive oil, lemon and balsamic that would be delightful on the Bok Choy or any vegetable you are putting on the grill.  From asparagus to zucchini, a little marinating and a little grill love make them beautiful, tasty, and healthy. San Francisco 2014 139
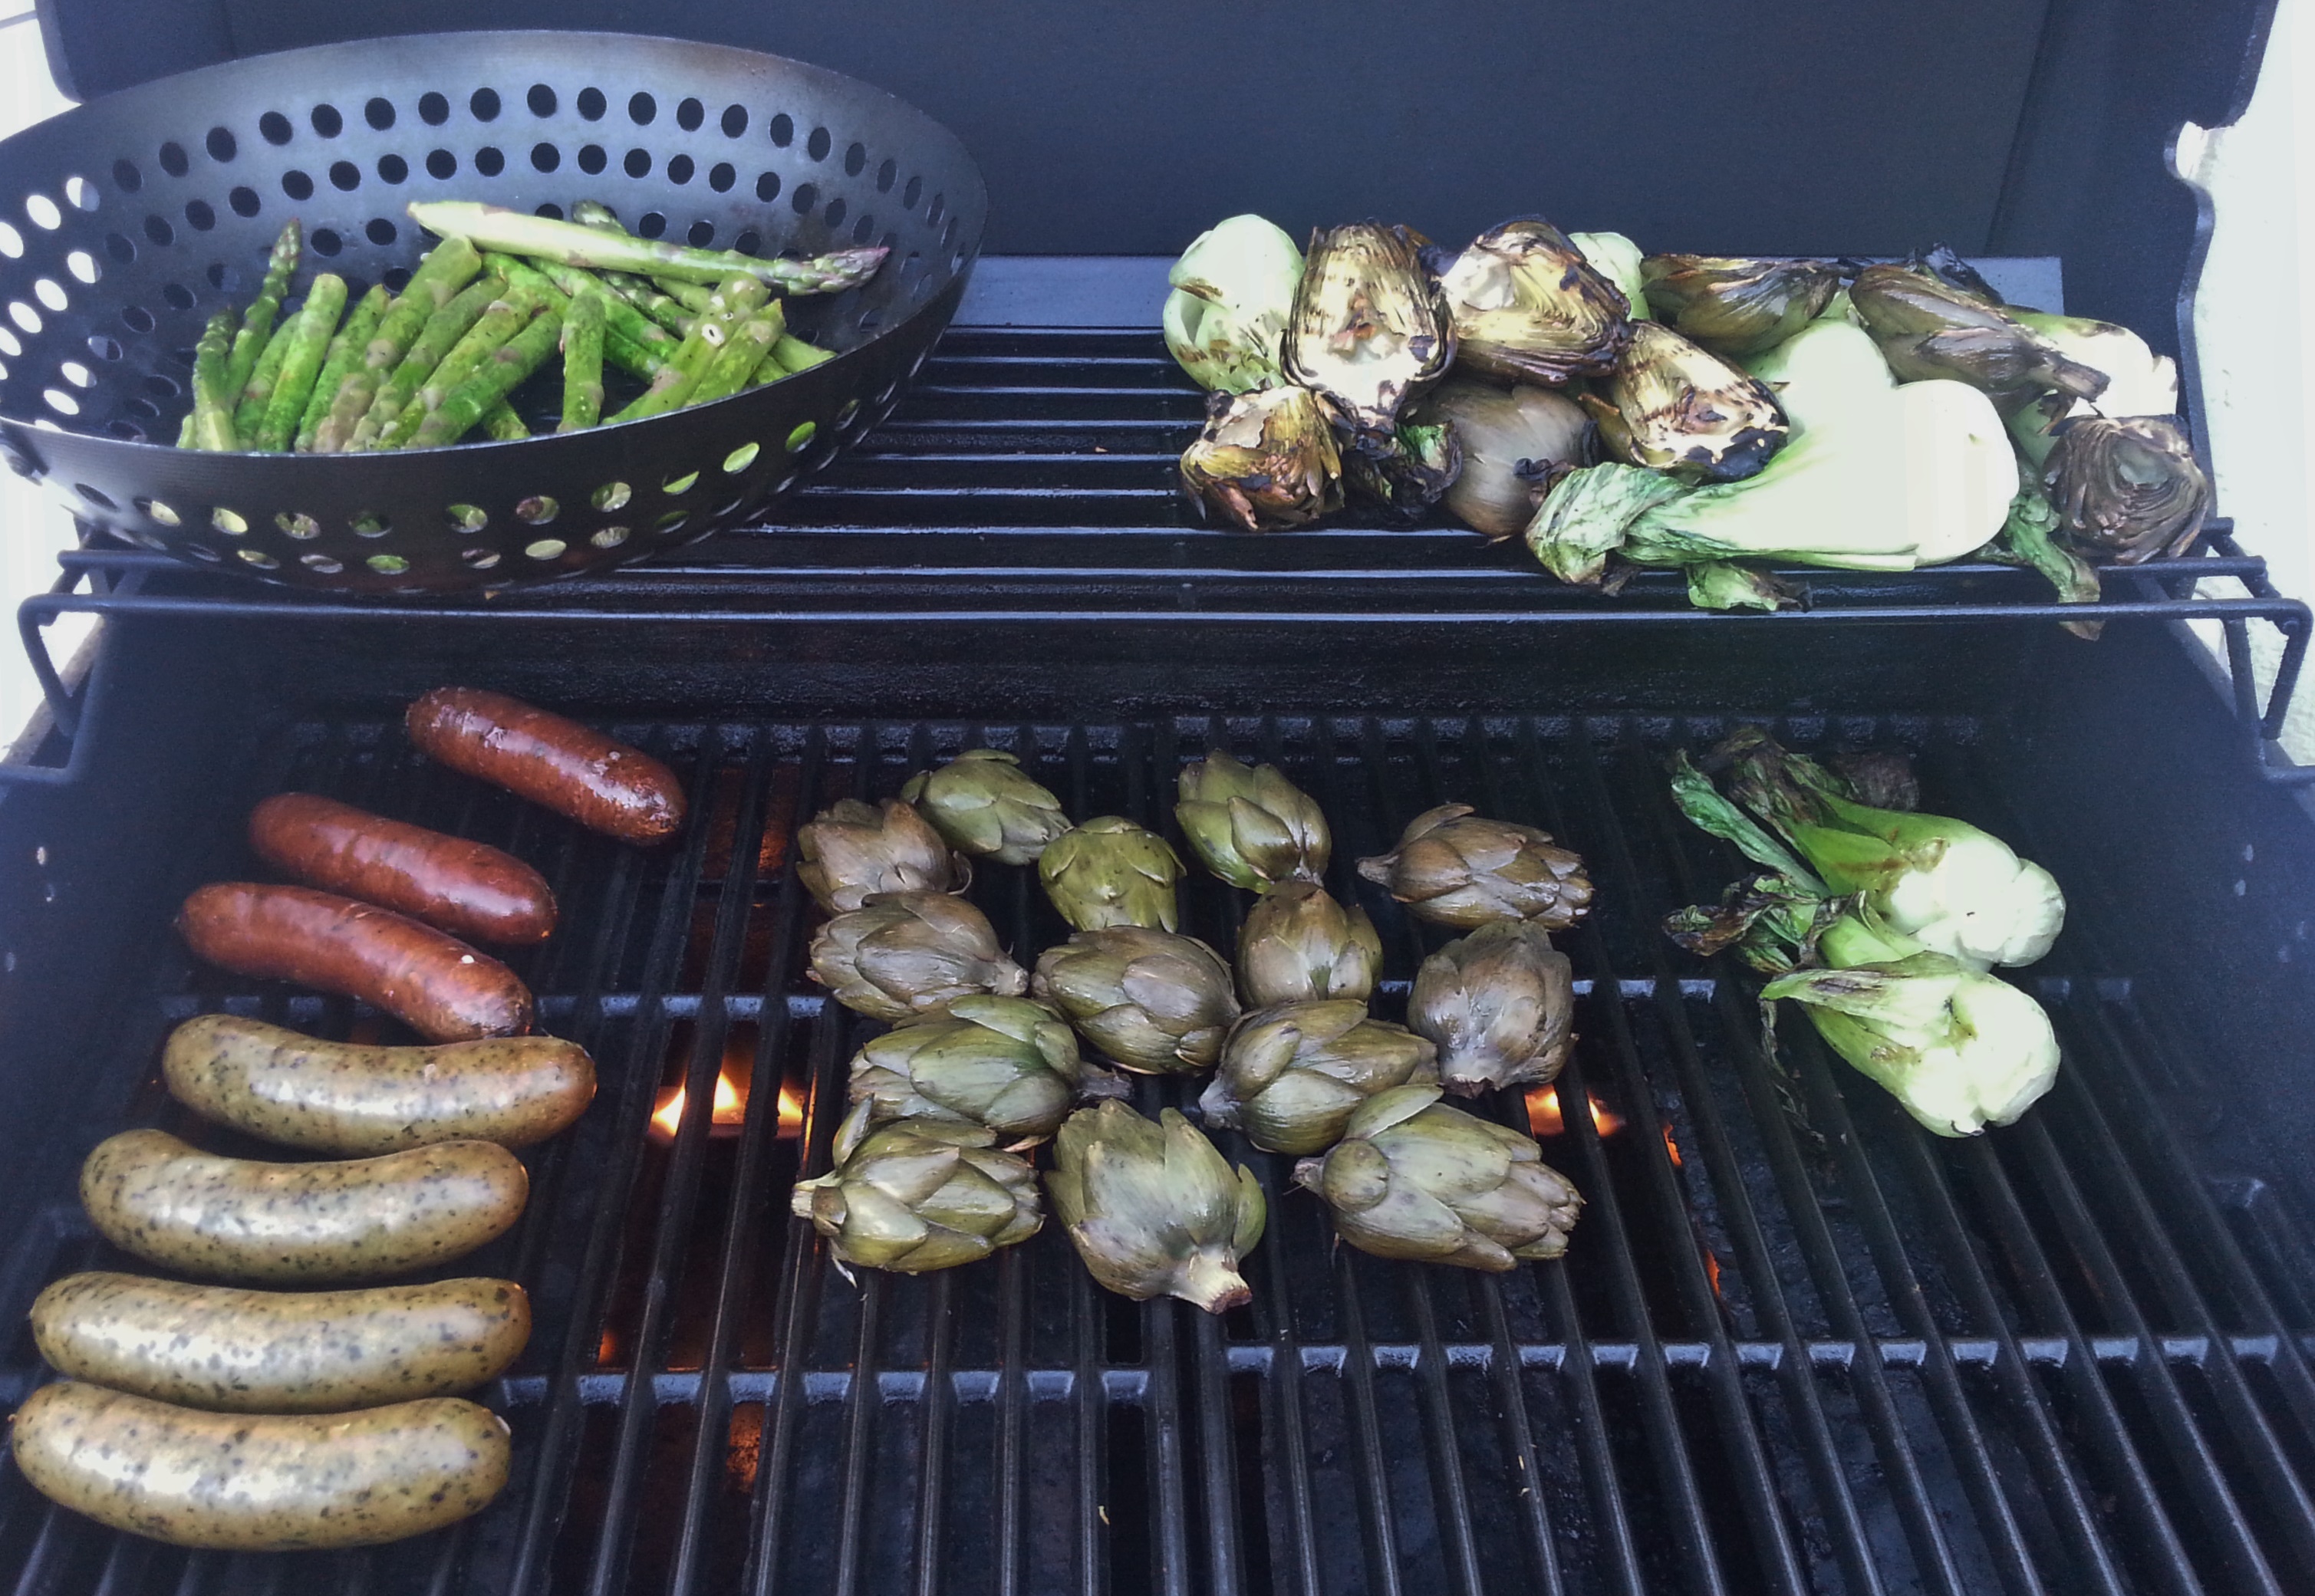
One caution…Bring your wine or whatever you’re drinking out to the grill with you. The oil anointed veggies can go up in flames in a heartbeat.

Marinade for Grilled Vegetables
Print Recipe
This makes enough marinade for 2-3 pounds of vegetables. The herbs and spices you invite are strictly up to you. It would also make a great salad dressing or dipping oil for the grilled vegetables.
Marinade for Grilled Vegetables
Print Recipe
This makes enough marinade for 2-3 pounds of vegetables. The herbs and spices you invite are strictly up to you. It would also make a great salad dressing or dipping oil for the grilled vegetables.
Ingredients
Servings:
Instructions
  1. Combine all of the ingredients in a jar with a tight fitting lid. Shake vigorously until well blended.
  2. Place cleaned and trimmed vegetables in a zip top bag. Pour the marinade into the bag and seal completely. Marinate for at least 4 hour or overnight. Turn the bag several times to distribute the marinade evenly.
  3. When ready to grill, remove the veggies from the marinade shaking off the excess. Large vegetables can go directly on the grill. Asparagus and other slender items should go on a grill rack or wok. Save the marinade.
  4. Grill until tender crisp, basting occasionally with the reserved marinade. Cooking time will vary with the vegetable.
  5. Remove the grilled vegetables to a large platter. Drizzle with a little more of the marinade and/or a Balsamic reduction. Serve.
Share this Recipe
Powered byWP Ultimate Recipe

DIGITAL CAMERA
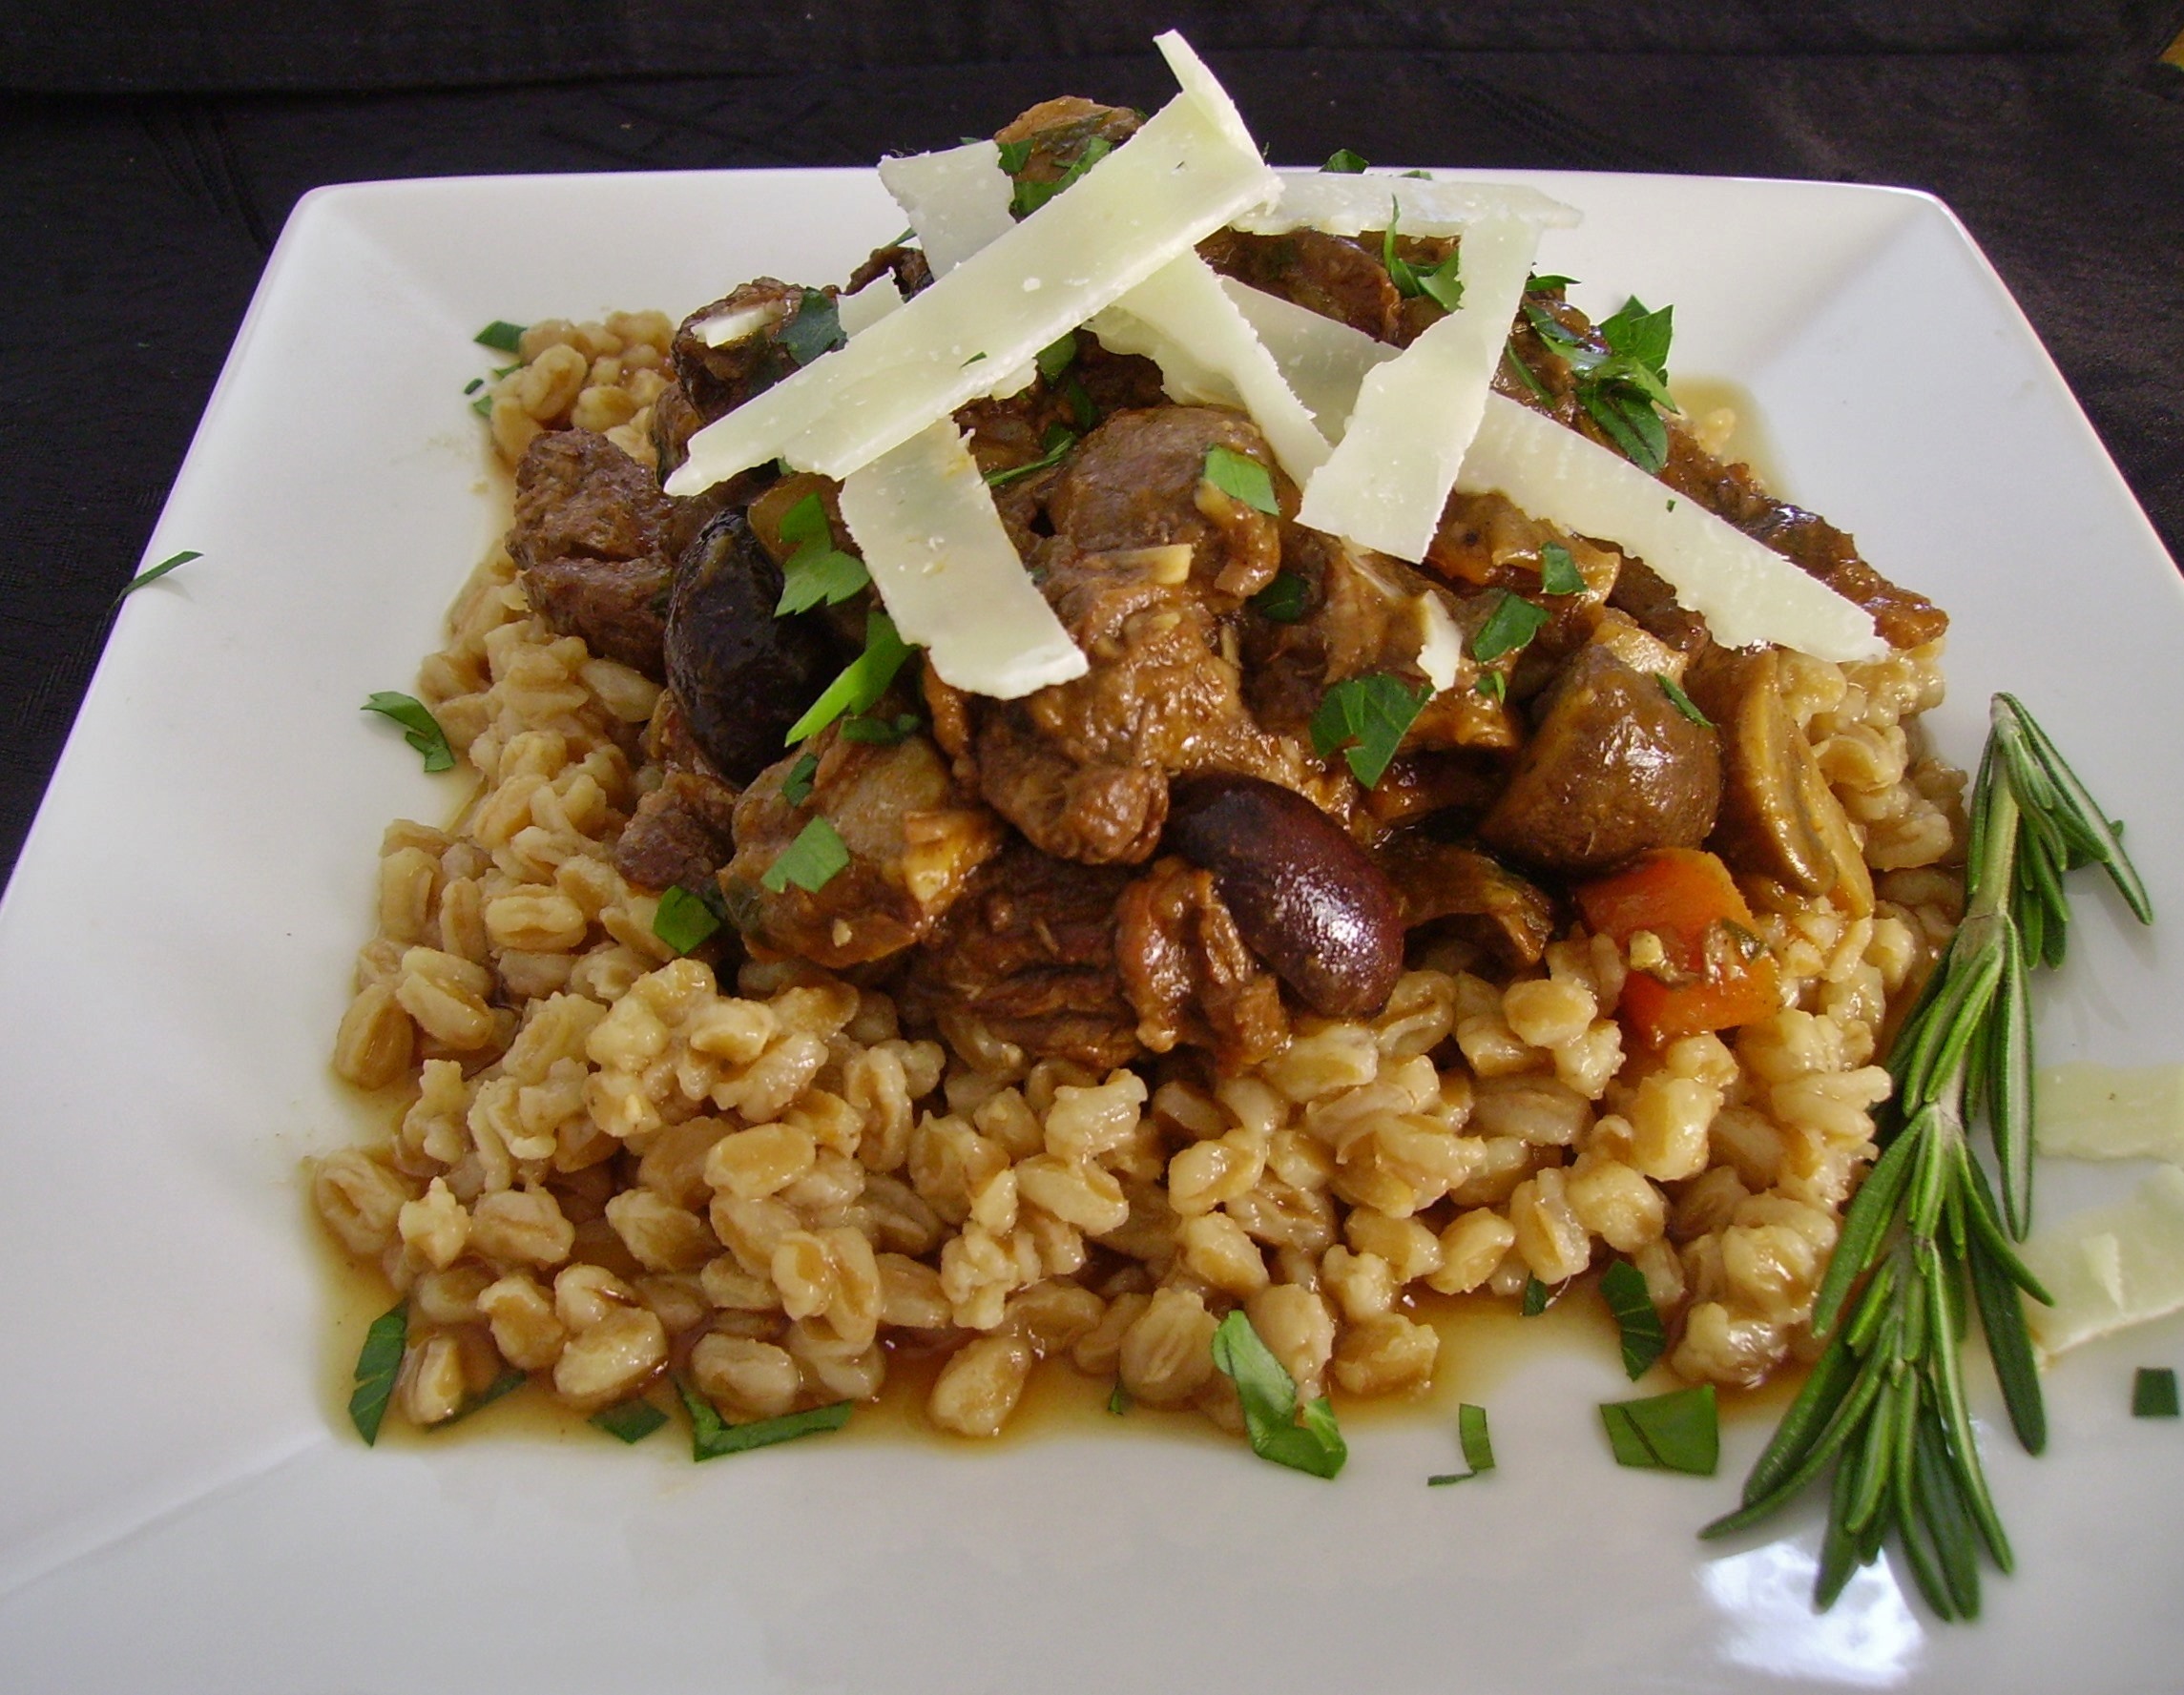
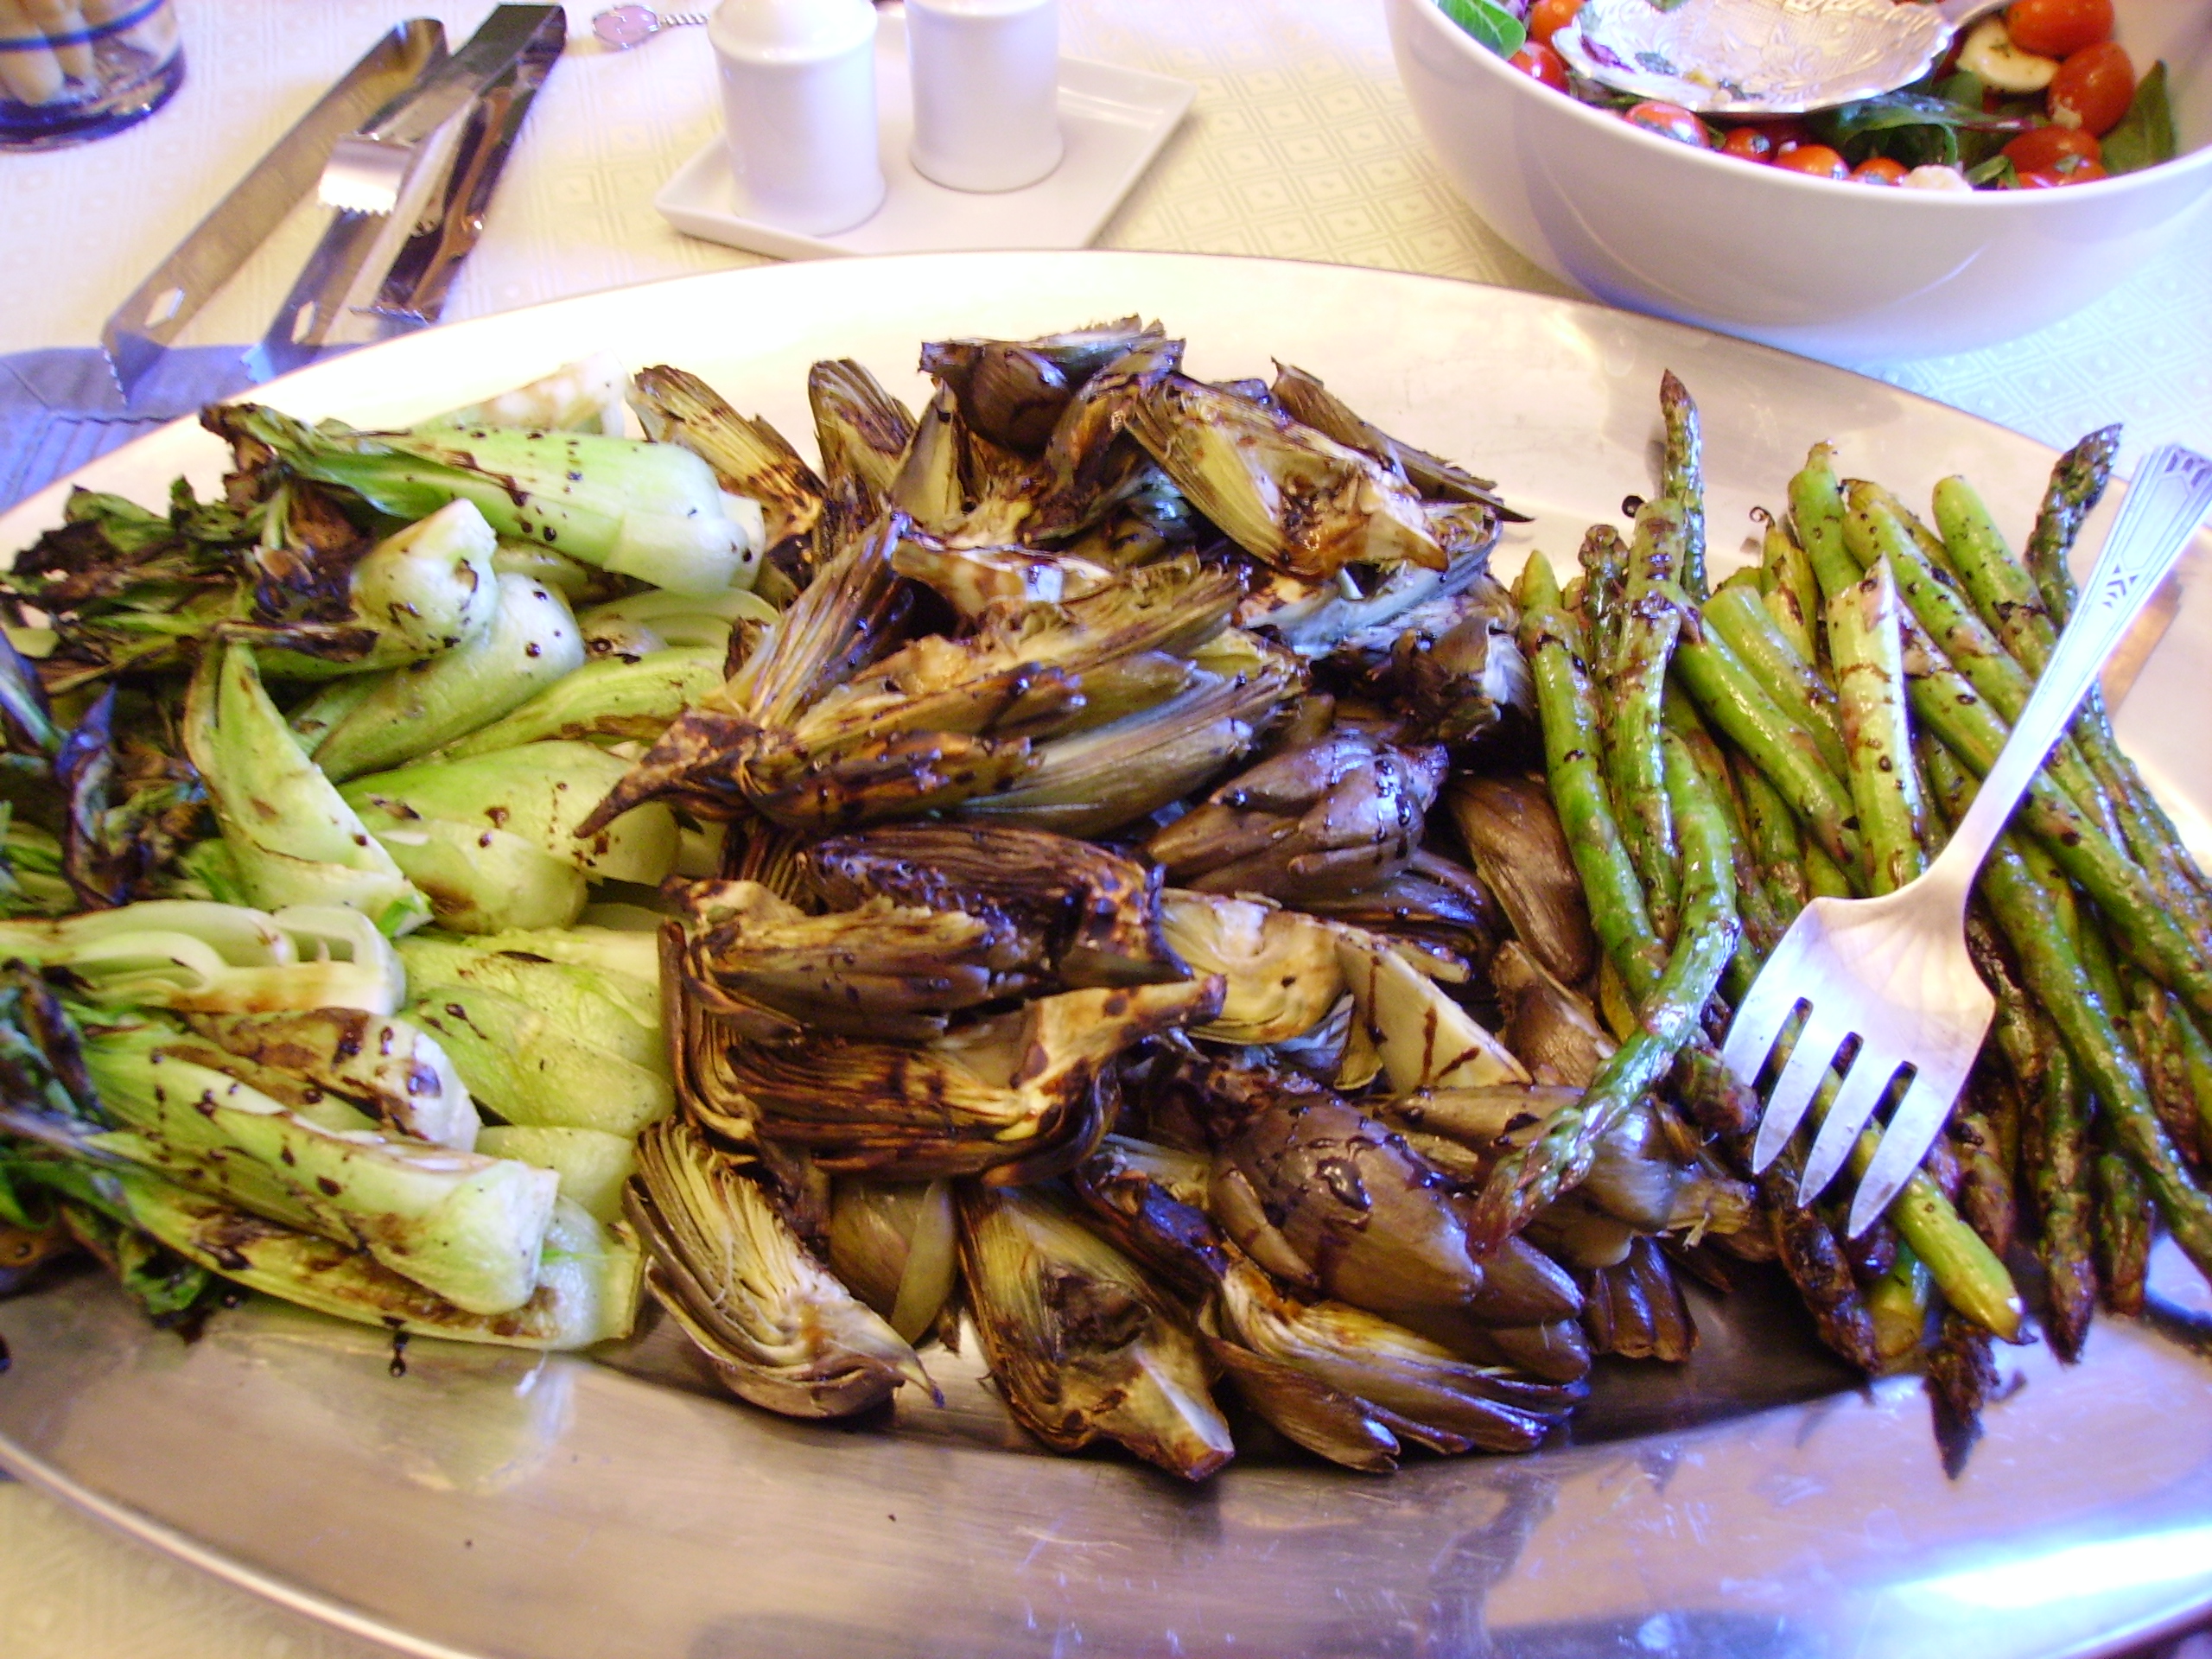
A drizzle of Balsamic Reduction was the perfect crowning touch.

I’ve got more California adventures to share. They’ll be appearing here, as well as on Pinterest and Face Book . I have to thank my wonderful friends who opened their homes and kitchens to me. Time spent with good friends in a beautiful setting with delicious food and more than a little wine is possibly the best way to spend a vacation. Thank you one and all.                            Love, Mama D


Memories of Highway One and Artichokes

One of my fondest memories of living in Northern California is traveling on Highway One. it was a relatively short trip over the Santa Cruz Mountains to arrive in the town of Half Moon Bay. There you hit Highway 1. Two lanes in many places with breathtaking views, this road runs off and on along the coast of California. Head north, and you’d wind up in San Francisco with all its iconic city sights. but if you turned left and headed south, an entirely different adventure awaited.highway one sign

Highway 1 heading south would take you to ruggedly beautiful beaches that were the perfect place for family adventures…Scan_Pic0032There were walls of rock that were fun to climb…Scan_Pic0033 There was plenty of sand and not a lot of people…Scan_Pic0041and for the young and brave of heart, surf to frolic in.Scan_Pic0028

The coast is also the gateway to some amazing farmland. If the jaw-dropping coastline gets boring (if that is possible), the other side of the road offers interesting  agricultural views. From cattle to Christmas trees, Brussels spouts to artichokes, the variety is astounding. I can remember the first time i saw an artichoke field. Seeing the beautiful green globes perched atop their ruffled thrones made me love them even more.artichoke field 1

The Central California Coast is artichoke country. In fact, virtually all artichokes come from here. The area is ideally suited to this beautifully edible thistle. Cool summers and mild winters make for happy artichokes. Castroville the self proclaimed “Artichoke Center of the World”, is home to nearly 2/3 of all artichokes. There’s even an Artichoke Festival held there. The season by the way, has just begun and will run through June. With luck the quality and price in stores will be better.

DIGITAL CAMERAArtichokes are an amazingly delicious vegetable. They also hold romantic memories for me. One of the first meals I shared with my husband when we were dating included artichokes that we dipped in butter. That is still my favorite way to prepare and eat artichokes. My children grew up eating artichokes. So did my grandson. In fact, they are on almost every “special dinner” menu. in our family.

I’ve found the easiest way to prepare them for eating whole is in the microwave. Cut the stems off even with the bottom so they will sit up when served and cut about 1/2 inch off the tops Use a scissors to snip off the pointy tips of the leaves. Wash then well and they are ready to cook.DIGITAL CAMERA

Place the artichokes in a microwave safe shallow dish (pie or quiche pans work well). Put water in the pan about a half an inch up on the artichoke. DIGITAL CAMERASqueeze half a lemon over the artichokes to flavor and preserve the color.DIGITAL CAMERA Add 3 smashed garlic cloves, the squeezed lemon, and drizzle it all with a little olive oil. Cover with plastic wrap and microwave for 18 minutes or until the bottoms feel soft,DIGITAL CAMERA

Simple and Delicious Artichokes
Print Recipe
This recipe is the essence of artichoke. These are wonderful warm or at room temperature.
Simple and Delicious Artichokes
Print Recipe
This recipe is the essence of artichoke. These are wonderful warm or at room temperature.
Ingredients
Servings:
Instructions
  1. Cut stems off artichokes even with the bottom. Slice 1/2 -3/4 inch off the top of the artichoke. Snip sharp ends off the leaves. Wash well and drain.
  2. Place the prepared artichokes top side down in a microwave safe shallow pan. Add enough water to come up about 1/2 inch on the artichokes.
  3. Squeeze the lemon half over the artichoke bottoms then place it in the center of the artichokes. Drizzle with the olive oil. Cover it all with plastic wrap
  4. Microwave on high for 15 minutes. Without removing the plastic, press on the bottom of the artichokes. They should yield easily to your touch. If they don't microwave another 3 - 5 minutes.
  5. Remove from microwave and carefully remove the plastic wrap. Allow to cool for at least 5 minutes. Place upright in individual bowls. Serve with your favorite dipping sauce.
Share this Recipe
 
Powered byWP Ultimate Recipe

Eating an artichoke is a process. Every leaf has a tender bit on the end waiting to be Scraped off with your teeth. Dipping it in butter or the sauce of your choice adds another level of flavor. The coolest thing about the artichoke is that the tender bit on the leaves get bigger and better as you get closer to the heart. Oh, and the heart is so worth the wait. Protected by its choke, once exposed is pure heaven on the tongue.

Artichoke season is short, but you can enjoy artichokes year round. The hearts come in cans, jars, and frozen. While not quite the experience of eating them whole, they are very versatile. Everyone loves Spinach and Artichoke dip. It’s become an institution. I’ve taken those two flavors and come up with a soup that is satisfying and healthy. Simple ingredients combine to make a satisfying soup.DIGITAL CAMERA

Spinach and Artichoke Soup with Chicken Sausage
Print Recipe
Servings
4
Servings
4
Spinach and Artichoke Soup with Chicken Sausage
Print Recipe
Servings
4
Servings
4
Ingredients
Stock Base
Soup
Servings:
Instructions
  1. For the Stock: Heat the olive oil in a large soup pot over medium heat. Add the leeks and garlic and cook stirring frequently for 5 minutes or so. Add the stock to the pan and raise heat to high. Bring to a boil, reduce the heat to simmer, Cover and cook 15 minutes. Remove from heat and allow to cool for a few minutes. Using an immersion blender puree until smooth. Add the Italian herb blend stir and set aside.
  2. While the stock cooks, prepare the soup ingredients. Heat the olive oil in a medium fry pan. add the chicken in a single layer and cook 2 minutes or until lightly browned on one side. Turn and brown other side. Remove the sausage from the pan and set aside.
  3. Add the onions and red pepper to the drippings in the pan. Cook about 5 minutes until the vegetables begin to soften. Add the garlic and spinach to the pan and cook another 3 minutes or so. Remove from heat and set aside.
  4. To Broil the Artichoke Heats: Pre-heat broiler.Spray a rimmed baking sheet with the non-stick spray. Lay the artichoke hearts on the tray making sure they are not touching. Spray lightly with the cooking spray and sprinkle with the Italian herb blend. Broil for 5 minutes. Turn the artichokes spray the other side lightly and sprinkle with a little more herb blend and broil another 5 minutes. Remove from broiler and allow to cool. Slice in half length-wise. Set Aside.
  5. Once all of the ingredients are prepared, return the pan of stock to the heat. Bring stock back up to temperature and add the onion spinach mixture, the sausage, and the artichoke hearts. simmer everything for 10-15 minutes to allow flavors to blend.
  6. Serve with shaved Parmesan or Romano cheese.
Share this Recipe
Powered byWP Ultimate Recipe

A perfect supper that is much lower in fat than the decadent dip it’s based on.DIGITAL CAMERA
The time is right for giving artichokes a try. I know that once you try them they will be part of your spring vegetable parade every year. Love, Mama D

It Takes a Village To Make Lasagna in the Round

I often look to memories to create many of my recipes. Childhood recollections and early cooking adventures have been inspiring me lately. As much as I love looking back and reinventing, sometimes it’s nice to be anchored in the present. The here and now is replete with inspiration in the person of the wonderful cooks who share their own cooking adventures on the internet.

MarieThis recipe took a village of great cooks to come to fruition. Marie, the Proud Italian Cook shared the idea for a Round Lasagna on her website. Marie, with her unique Italian recipes and beautiful photos has been an inspiration to me. She’s also been very generous with her advice and encouragement about the finer points of food blogging. Thanks, Marie, and I hope I’ve done your idea justice.ina-garten-0207-xlg

I chose to use homemade ricotta for the main filling. I love the consistency and flavor of homemade compared to store-bought. I’ve always used Ina Garten’s recipe. It’s easy, virtually foolproof, and easily adapts to variation. For this recipe I heated the milk with several smashed garlic cloves and used Champagne Vinegar to create the curds and whey.

Lidia-Bastianich-ChefHomemade ricotta almost insisted on homemade pasta to cradle it’s decadent creaminess. I’ve recently started using a different pasta dough recipe. Any pasta dough starts as flour eggs and olive oil, but Lidia Bastianich’s recipe has given me the best results. Her recipe uses a processor, but I opt to do it all by hand. From flour “nest” to elastic dough ball, I’m up to my wrists in pasta dough.

The lasagna that I decided to make had some traditional elements, like the Ricotta Spinach filling but there were a few ideas that were off the traditional lasagna path. The middle layer was bacon and leeks.DIGITAL CAMERA I’ve been having a serious romance with this combination lately. From potatoes to pasta to eggs …must be the season of the leek.DIGITAL CAMERA

Another twist on tradition was to make the bechamel with a touch of tomato sauce. I also used a roasted garlic, tomato and basil cheese. The result was pink, creamy deliciousness.

Blushing Bechamel
Print Recipe
A colorful take on a classic Bechamel . Tomato sauce, onions, and garlic are added to the traditional cheese sauce. Great for lasagna or any casserole that needs a gentle blush of color.
Blushing Bechamel
Print Recipe
A colorful take on a classic Bechamel . Tomato sauce, onions, and garlic are added to the traditional cheese sauce. Great for lasagna or any casserole that needs a gentle blush of color.
Ingredients
Servings:
Instructions
  1. Melt butter in a large saucepan over medium heat. Add the onions and garlic and cook until the onion begins to soften and the garlic is fragrant 3 - 4 minutes. Add the flour and stir to combine. Continue to cook, stirring frequently for another minute or so.
  2. Slowly add the milk, stirring constantly to keep things smooth. Add the tomato sauce and continue to stir. Bring to a boil. Reduce the heat to low and simmer for 5 minutes.
  3. Turn the heat off and slowly add the cheese, stirring until each addition melts. If you make this ahead of time, cover the surface with wax paper so that a crust doesn't form.
Share this Recipe
Powered byWP Ultimate Recipe

The Ricotta Filling combined baby spinach, garlic, and Romano cheese with the homemade ricotta and eggs. Pretty traditional as fillings go, but the perfect counterpoint to the other ingredients

DIGITAL CAMERA

Ricotta and Spinach Lasagna Filling
Print Recipe
Ricotta and Spinach Lasagna Filling
Print Recipe
Ingredients
Servings:
Instructions
  1. Heat the olive oil in a medium fry pan. Add the garlic and cook for 2 minutes. Add the spinach and cook until the spinach is wilted 3 - 4 minutes or so. Remove from heat and allow to cool.
  2. Spoon the ricotta into a medium mixing bowl. Lightly beat the eggs and stir into the ricotta. Add the cheese and pepper and stir again.
  3. Add the spinach and garlic mixture to the bowl and stir to combine well. Taste and add salt if needed.
  4. Use in lasagna, as ravioli filling or to stuff shells or manicotti.
Share this Recipe
Powered byWP Ultimate Recipe

I used a Chicken Sausage the was laced with Sun-dried tomatoes and mozzarella. The echoing of the cheese flavors was completely intentional. So, the ingredients were ready, the spring-form pan was oiled…let the show begin.

DIGITAL CAMERA

When I assembled the lasagna, I used a combination of cheeses which was actually based on what I had in the house. they included  Asiago, Manchego, Romano, and Fresh Mozzarella. They all joined the Garlic, Basil & Tomato Cheese to create a cheese extravaganza that actually worked.

Marie, the Proud Italian Cook shared guidelines for assembly that were invaluable. Those tips made the assembly come off without a hitch.  I created three layers. Two layers (top & bottom )of the Ricotta Spinach Filling topped with sausage and cheese. The Bacon and Leek mixture was the middle layer. Cheese and Sauce crowned the casserole that was destined to spend just over an hour in the oven.

DIGITAL CAMERA

The results were fantastic. The cheeses melted into the sauce, bubbling up and over the sides creating a beautiful browned crust. I allowed the pie to rest as Marie advised. I must say it looked and smelled so good that it was hard to wait, but I did and it was worth it because it un-molded and sliced beautifully. Oh, and it really tasted good, too.DIGITAL CAMERAThis was such a fun way to make lasagna. My family was impressed with the presentation and over the moon about how it tasted. My culinary minded son even took a picture of it.

To the wonderful cooks who inspired me and to my family who encouraged me. Thank you. Love, Mama D


Memories of Relish Trays…and Marinated Vegetables.

When I was a little girl, I loved to go out to dinner with my parents. I got to get dressed up, there was always a Kiddie Cocktail, and while my parents enjoyed their martinis, I’d have the relish tray to myself. I was mainly interested in the olives, carrots, and pickled peppers, but the celery, green onions and radishes all contributed to an edible still life on a metal tray that made me feel like a grown-up. That is, until my mother scolded me for eating the black olives off my fingers.IMG_2813Relish trays appeared at every family gathering that I remember. All my aunts had a cut glass relish tray. Every tray was different and every aunt filled it differently. This is my mother’s plate. It is one of many treasures from her kitchen that I still lovingly use.DIGITAL CAMERAradishroseThere were always green onions on the tray with salt, and pepper near by. Green and black olives, pits and all, were mounded or used as a garnish. Then there was the ubiquitous radish rose. These weren’t the exquisite beauties that now qualify as food porn, but the “rustic” four quick cuts variety that “bloomed” in cold water. This was probably my first knife skill. I was given a dull paring knife and I’m sure my mother held her breath the entire time. $(KGrHqVHJE4FGBKnjsr)BRjlt7OJU!~~60_12

Occasionally a marinated vegetable or two would show up on the plate. If it was my mother’s tray there would be Aunt Nellie’s Pickled Beets. This was her required element and no other brand would do. Back then I thought that Aunt Nellie was as real as Betty Crocker. Her picture was on the jar and in the ads, so she had to be a real person.

I have a relish tray at most gatherings and because I am a huge fan of “vinegary” sweet & sour flavors, there are marinated vegetables. If a veggie is a little less than perfect or not really in season, marinating can elevate them to tastier heights. Each vegetable has it’s own preparation and flavor profile. The recipes that follow are only suggestions and are therefore open to anyone’s interpretation or variation. Another note. These are not pickled or processed. Once made, they must live in the refrigerator until they are eaten which should happen within a week.DIGITAL CAMERA

Lets start the party with Marinated Zucchini. Sliced zucchini is salt brined for an hour or two to remove some of the water so that more of the marinating liquid is absorbed. Red onions, garlic, and red pepper flakes, and lemon zest enhance the White Balsamic Vinegar and Olive Oil Dressing.

Marinated Zucchini
Print Recipe
Marinated Zucchini
Print Recipe
Ingredients
Servings:
Instructions
  1. Layer zucchini slices in a colander. Sprinkle each layer liberally with salt. Let sit for 1 to 2 hours to draw out some of the liquid. Rinse and pat dry. Put in a large non reactive bowl.
  2. Add the onion and garlic to the bowl and toss to combine. Mix the remaining ingredients together and pour over the vegetables. Toss to combine.
  3. Pack into a clean wide mouth jar or pour into a quart size zip top bag. Refrigerate at least overnight and up to three days. Serve as part of a relish tray, on a salad, or as a side dish.
Share this Recipe
Powered byWP Ultimate Recipe

DIGITAL CAMERAAsparagus is another outstanding marinating candidate. Well trimmed spears are blanched and shocked before being bathed in a lemon and dry vermouth vinegrette. Garlic, rosemary, lemon zest, and peppercorns round out the flavors.

Marinated Asparagus
Print Recipe
Marinated Asparagus
Print Recipe
Ingredients
Servings:
Instructions
  1. Bring a large pot of salted water to a boil. Add the asparagus and boil for two minutes. Remove from pan and immediately put into a bowl of ice water. Drain and allow to dry on papaer towels.
  2. Place the asparagus, lemon zest, rosemary, and peppercorns into a zip top bag.
  3. Mix the remaining ingredients together and pour over the ingredients in the bag. Seal tightly and turn several times to distribute the dressing.
  4. Refrigerate at least overnight and up to two days. Serve as part of a relish tray, in a salad or as a side dish.
Share this Recipe
Powered byWP Ultimate Recipe

DIGITAL CAMERAMushrooms marinate beautifully. This works equally well with White Button or Crimini Mushrooms. I like Tarragon with mushrooms, but you could leave it out if you’re not a fan. I saute the onions and garlic first then add the other ingredients. Cooking the mushrooms until the liquid reduces slightly will insure the best flavor.

Marinated Mushrooms
Print Recipe
Marinated Mushrooms
Print Recipe
Ingredients
Servings:
Instructions
  1. Wipe the mushrooms clean with a damp cloth. Slice 1/4 inch thick. Set aside.
  2. Heat olive oil in a large skillet and add the onion and garlic. Saute until the onion is softened and the garlic is fragrant, 3-4 minutes.
  3. Add the vinegar, brown sugar, lemon pepper and tarragon. Simmer mixture for a few minutes. Add the mushrooms and continue to cook 7-10 minutes, stirring frequently. The liquid should reduce and thicken slightly.
  4. Put in a glass jar or zip top bag and refrigerate overnight or for up to 3 days. Serve as part of a relish tray, on a salad, or as a side dish.
Share this Recipe
Powered byWP Ultimate Recipe

DIGITAL CAMERALast but not least are Mama D’s Pickled Beets. Unlike Aunt Nellie’s, these beets are roasted before being joined by a mixture of cider vinegar, cinnamon, cloves, coriander and mustard seed. Light brown sugar adds the necessary sweetness.

Mama D's Pickled Beets
Print Recipe
Mama D's Pickled Beets
Print Recipe
Ingredients
Servings:
Instructions
  1. Preheat oven to 400 degrees Wash the beets well and dry. Lay on a sheet of foil that has been lightly coated with non-stick spray. Roast in oven for 45 minutes to an hour. The beets should feel tender when pierced with a knife. Remove from oven and allow to cool enough to be handled.
  2. Peel the beets and slice 1/4 inch thick. Place in glass jar or zip top bag and set aside. You can prepare the liquid while the beets are roasting.
  3. Combine the remaining ingredients in a small saucepan. Bring to a boil over medium heat. Reduce heat and simmer for 5 minutes or so. Remove from heat and allow to steep for 30 minutes or so.
  4. Strain the liquid and pour it over the beets. Seal the jar or bag and marinate in refrigerator at least overnight and up to 3 days. Serve as part of a relish tray, in a salad, or as a side dish.
Share this Recipe
Powered byWP Ultimate Recipe

Think of including one or two of these recipes for your next party. You’ll get to play the homemade card while saving money by not using “store bought”. Relish trays may be dated, but they are a delicious expression of a kitchen of love. Mama D

Memories of Julia…Italian Beef Stew

Beef Stew, a quintessential Winter dish, has as many variations as there are cooks. It is a comfort food that can be simple and satisfying or elegant and complex. The process is time-consuming, but the results are worth it.

I have so many memories of my mother’s cooking, but there isn’t a single one of stew. Chicken Cacciatore came closest, but that’s technically braising. My first adventure or memory for that matter, of stew was making Beef Bourguignon after watching Julia Child. I’ve made this recipe for years, but I wanted something different, so I went about putting an Italian spin on things.

Could I be breaking new ground here? Of course not. Stew goes back to ancient times, including the Romans. I did find a traditional recipe for “Peposo” a dish from Florence featuring chunks of beef, lots of black pepper, and red wine. It was invented back in the 14th century by tile makers who put these ingredients into terra-cotta pots and cooked it by the heat of the furnace. My beef stew incorporates Peposo’s ingredients and oh, so much more.DIGITAL CAMERAMy wine of choice was Sangiovese, considered by many to be the King of Italian wine grapes. It’s the principle wine in Chianti. Usually fruity but with noticeable acidity and tannins, It can hold its own in this stew as well as on the table.DIGITAL CAMERA

The beef was Chuck Eye Roast. This is lean and tender as chuck cuts go. The muscles are fairly large and can be cut up without too much difficulty. Read that as those pesky membranes are few and loose enough to be dispatched quickly. Cutting the meat yourself will save you money  and allow you to cut the pieces the size you want. I like to eat my stew with a spoon and/or fork so I opted for one and a half-inch pieces.DIGITAL CAMERA

I used bacon because I like the smokieness of it, but pancetta would work well and probably be more Italian. The bacon provided the fat to brown the meat, done in batches so that they would brown instead of steam.DIGITAL CAMERA

DIGITAL CAMERAThen came the Sofritto. My understanding of Soffrito is that while traditionally it’s the same flavor base as its French cousin, Mirepoix, it can be any combination of aromatics, and since I’m not a fan of celery, I chose to use onions, garlic, and carrots. I chopped up a good size sprig of fresh rosemary, added some fennel seeds and red pepper flakes and rounded out the aromatics with bay leaf and lemon zest.DIGITAL CAMERA

All of this went into the dutch oven now beautifully coated with brown bits. A little tomato paste and more than a little wine to de-glaze the pan and I was well on my way to creating stewing magic.DIGITAL CAMERAThe beef goes back in  along with some beef stock, water and a little more wine if you dare. Bring it up to a simmer, cover it  and pop it in a low oven (325 degrees.) In order to get the meat tender and not over cook the vegetables, let the beef cook for about an hour.DIGITAL CAMERA

When the time was right, I added the vegetables that take the longest to cook. In this case, it was yellow onions, carrots and lots of sliced garlic. I opted to add the cremini mushrooms a little bit later since they cook more quickly.DIGITAL CAMERA

The stew cooked for about two and a half hours. When it came out of the oven, the meat was tender, the vegetables were cooked, but still identifiable, and the sauce was slightly thickened and smelled like heaven. (there are worse things you could  imagine heaven smelling like).

It was now time to guild the lily. I added some sliced Kalamata olives, parsley, and fresh lemon juice. The olives added an interesting taste and texture. The acidity of the lemon juice did wonders for refining the richness of the sauce, and the parsley was pretty. DIGITAL CAMERA

It’s always nice to have some kind of starch to serve with the stew. The sauce is wonderful and it would be a shame to leave it in the bottom of the bowl. I decided to use Farro.

DIGITAL CAMERAThis Italian super grain has a slightly chewy texture and a nutty barley like taste. It cooked quickly and stood up perfectly to the hearty richness of the stew. DIGITAL CAMERA Rosemary, lemon

Some shavings of Pecorino Romano and a dusting of parsley and it was ready to serve. It was wonderful the first time, but the second day it was amazing.

Italian Beef Stew
Print Recipe
An Italian-ized version of classic Beef Stew. Make it your own with wine, vegetable, and aromatics choices.
Servings
8
Servings
8
Italian Beef Stew
Print Recipe
An Italian-ized version of classic Beef Stew. Make it your own with wine, vegetable, and aromatics choices.
Servings
8
Servings
8
Ingredients
Servings:
Instructions
  1. Before you begin cooking, put your cooking vessel in the oven. Adjust the rack so that the covered pot will fit and slide in and out easily. Preheat the oven to 325 degrees.
  2. Heat a 5 -6 quart dutch oven. Add the bacon pieces and cook until the bacon is brown, but not crisp. Remove the bacon and drain on paper towels. Leave the drippings in the pan and add 1 tablespoon of the olive oil.
  3. Cut the meat in 1-1/2 inch to 2 inch pieces. Dry on paper towels for at least 10 minutes (this helps the meat brown). Season the meat with salt and pepper just before browning.
  4. Brown the meat in batches turning to brown all sides. Put the browned meat into a bowl. If the pot is becoming dry, add additional olive oil. Set the bowl of browned meat aside.
  5. Add the chopped onions, garlic, and carrots to the pot and begin to cook over medium low heat. Add the bay leaf, rosemary, fennel seeds, red pepper flakes, lemon zest and tomato paste. Cook, stirring often for 3 or 4 minutes. Return the bacon to the pot.
  6. Add the cup of red wine and stir to loosen the browned bits and de-glaze the pan. Continue to cook for a few minutes until things are smelling beautiful. Add the beef stock and water, (and a little more wine if you want). Bring the mixture to a boil.
  7. Add the beef and any accumulated juices to the pot. Cook until the mixture returns to a simmer. Once it is gently simmering, cover it and place in the oven. Cook covered for one hour.
  8. Remove the pot from the oven and add the onion wedges and sliced garlic. Mix gently, cover and return to the oven for another 30 minutes.
  9. Remove the pan from the oven and add the mushrooms. Stir to gently combine. Cover and return to the oven.
  10. Check the meat after 45 minutes or so. The meat should be fork tender, but not falling apart. When the meat is perfect, remove the pot from the oven.
  11. Add the lemon juice and olives. Stir to incorporate. Taste the sauce and add salt and pepper to taste. Transfer to a serving bowl or ladle into individual dishes. Sprinkle with the parsley.
  12. This can be served as is with crusty bread or on top of your starch of choice; pasta, polenta, farro, etc.
Share this Recipe
Powered byWP Ultimate Recipe

This was worth the time it took to prepare. I’m afraid Julia’s Beouf  will have to move over, Mama D’s Manzo is joining the club.